More Sydewinder Episodes
More Street Regal Episodes
Detroit Muscle Featured Projects
Detroit Muscle Builds
Want more content like this?
Join the PowerNation Email NewsletterParts Used In This Episode
Lincoln Electric
Lincoln Electric is the Official Welding Supplier to Detroit Muscle
Matco Tools
MATCO Tools are the Official Tool Supplier to Detroit Muscle
The Industrial Depot
Tools, Hardware, and Shop Supplies
Episode Transcript
(Narrator)>> Today on Detroit Muscle we work on the rear of our '85 Buick "Project Street Regal", adding a custom fabricated spoiler. We also take a trip to Arrington Performance and see what they have going on in the world of Gen Three Hemi. Plus we have a little surprise! ♪ ♪
(Tommy)>> Hey y'all, welcome to Detroit Muscle. Today we've got some fab work planned jazzing up the back side of this old Buick cause it's a bit bland. You could almost call it vanilla. So now it's time to add some flavor.
(Marc)>> And if the word Hemi pegs your meter you're gonna want to stick around because later on we're heading over to Arrington Performance to see some friends of ours. They've got a bunch of Hemis there but they've got one Mopar in particular that we've got special interest in. You'll see what I'm talking about.
(Tommy)>> The way we we're planning to spice things up is by making us a rear spoiler. Now there's not a whole lot of options out there if you're wanting to buy something. There are a couple of companies that make a reproduction spoiler that would come on a Grand National but we're looking for more. We want aggressive and tasteful, but not gaudy. The first thing we need to do is make that base plate. We'll start out by measuring our trunk lid. We don't want the base plate to go from edge to edge. So we'll put our plate at 58 inches. ♪ ♪ You guys have seen us use this thing before. Bam, we have our first plate! Now we can set our panel back on the trunk and a quick measure to center it up. We want to make sure it isn't sitting sideways. We'll trace the bottom of the base plate following the curvature of the trunk lid. ♪ ♪ Then it's over to the ole band saw to cut it out. [ saw cutting metal ] ♪ ♪
(Tommy)>> This old thing fits pretty nice here on the curve of the trunk and I'm wanting to match that same curve here on the leading edge, but that's just preference. You could leave this thing with that straight line. Now to do that I'm gonna make a couple of marks across here at two inches, and then pull me a line all the way across it. ♪ ♪ Now to draw this curved line I'm gonna use this back edge as my guide, and you want to make sure that there's no sharp spot on it because it can cut your hand. And then you want to use your hand as kind of a jig to hold the marker. Just lay the marker right on top of your indicated spot, get your fingers comfortable, and then just pull in one fluid motion from one end to the other. We've got our base plate all made and the next thing that we need to do is actually attach it to our trunk lid. And the reason I want to do that is I don't have to worry about it wiggling around whenever we're gonna add that next piece. Now with that you could use some tech screws and just kinda just zip it to the trunk lid, but we want it to look a lot better than that. So we've got a different plan. What we're wanting to use is some of these blinded rivet nuts. It's a glorified pop rivet with threads on the inside, and I've got a couple of reasons why. If you wanted to use a nut and bolt trying to get your hand inside of here to put the nut on it, well it can be rather difficult. And the next reason is since this thing's got the inner structure you'd have to hack it up to make an access hole to put the nut on it. We don't want to fool with all that. I'll tape the plate down in place and measure for my six holes. ♪ ♪ Then we can center punch our cross hairs, drill our pilot holes with an eighth inch bit... ♪ ♪ [ drill spinning ] ...and then drill our lid to 25-64ths. To install one of these inserts it takes a pretty hefty gun. All you do is thread it onto it, squish the handle, and it will compress it. Give you a piece like this. Little ribbed spots bite into the surface or the hole that you just put it in, and it's very important the diameter of the whole you just drilled matches the diameter of this insert. We used these all the time, and they're silly easy to install. Not to mention they've give you a much more professional look. ♪ ♪ [ drill spinning ]
(Tommy)>> Last thing on this top plate we need to enlarge our holes for a quarter inch fastener and we can bolt it down. One piece down, one piece to go.
(Narrator)>> Stay tuned, Tommy adds the finishing touches to our rear spoiler!
(Tommy)>> Hey guys, welcome back. Next thing we're gonna be doing is taking this flat piece of aluminum and building our wing out of it. That's gonna be a little bit more complicated than this piece and this is why. The deck lid has got a curve to it. The back of the deck lid is curved as well, and we want this thing leaning back. We'll keep everything simple but first thing we need to do is mark center on both. ♪ ♪ Now we just need to line up these two center marks and kind of kick it back to the angle we're looking for.
(Marc)>> We need to take a couple of measurements here. One on each side to make sure that this thing is parallel with the deck lid cause you don't want it higher on one side and lower on the other. That's three-eighths. That's dang close. A sixteenth of an inch up on this side, stop.
Alright that looks good. Well now we need to make a mark all the way across, but we're not gonna be able to do that right with the sharpie up against that base because there's a big gap here. It'll only mark there in the middle. So we need to get up off of there and we're gonna do that with this piece of wood right here, and we'll just use that and that'll keep it steady all the way across. We'll just, here you go. ♪ ♪ There you go!
(Tommy)>> With our line drawn we can trim this part down. [ saw cutting metal ] ♪ ♪
(Tommy)>> Alright let's see how well this thing fits. Line it up here in the center and move it around. Oh yeah, that's not too bad. Looks like Marc's fancy pencil work paid off. Let's tape this thing into place and then we can add some style. We're using just standard ole masking tape. Be sure to press it down firmly to help it stick better. ♪ ♪ To jazz this up I'm gonna map out a little recess. When building something like this you can get as creative as you want to. ♪ ♪ That'll work! ♪ ♪ Not really a fan of this square corner. So what I want to do is kind of roll it off a bit. Now earlier we trimmed off this bottom piece and I'm gonna use that to give me that nice line. So what I'm gonna do is measure down about a half of an inch, line this up to the corner we marked on there to this mark on the edge. Then I can use this to transfer it on that side so everything matches. Nice thing about laying it out this way. If you don't like it you can simply wipe it off and try something different. ♪ ♪ While I'm here I don't like this either. So it's got to go. When fabbing parts you get to know your band saw real well. [ saw cutting metal ]
(Tommy)>> Now we can smooth out the edges on our trusty belt sander. [ sander spinning ]
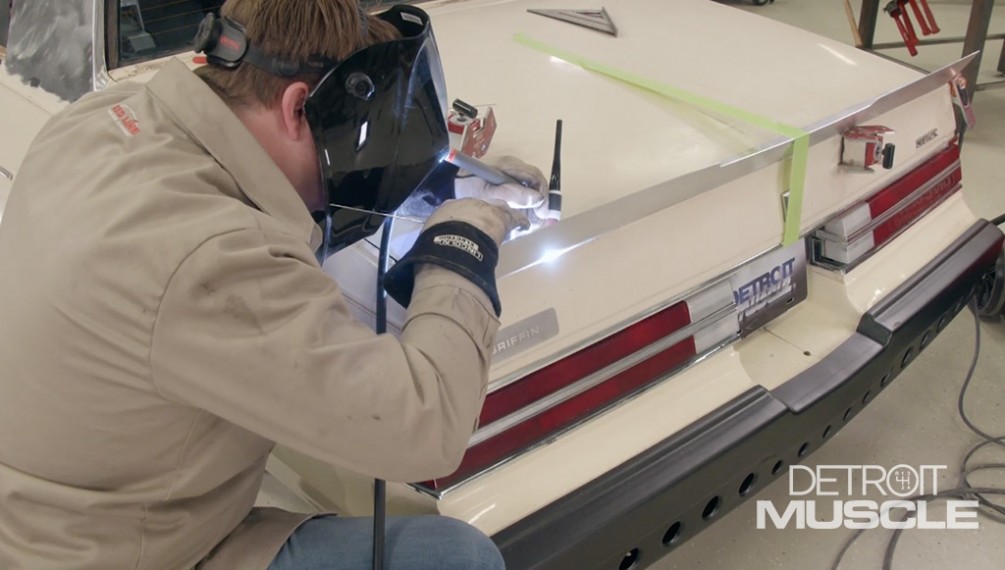
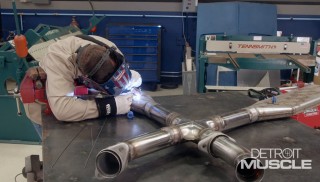
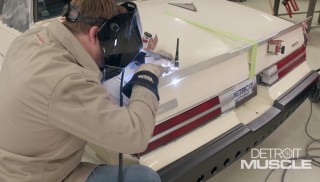
(Tommy)>> We've got our rear wing all shaped up and it's starting to turn out pretty cool. The next thing we're gonna do is tack weld our two pieces together, and then I'll take this off, take it over to the table, and finish welding it up. We don't want this to move around when we take it off. So we're going to space out our tacks about eight inches or so apart. Since Marc wasn't busy I got him to help with the fit while we tack it up. A couple more tacks and we can move to the table. To weld this we're using our precision tig from Lincoln Electric. A tip for you. When welding long parts like this spoiler pay attention to how much heat you put in it cause you don't want it to twist or warp on you. Check this out. When we got started the back side of this Buick had a generic appearance. So we had to do something. With a little bit of fab and some time we now have that aggressive look that we was going for. ♪ ♪
(Marc)>> Now we all know if you've got something that moves and shouldn't you need duct tape. And if you've got something that doesn't move and should well you need WD 40, and sometimes you even need a hammer. Now a lot of times you'll just grab the thing that's closet, like a wrench say, but if you are smart enough to grab a hammer make sure you grab the right one. There are a lot of different hammers that do different jobs. So you've got to make sure you have the right hammer for the right job. So today we're gonna go over them. We're gonna start over here on the softer side. We've got a rubber mallet and a brass hammer. Now a rubber mallet's good for something that you don't want to mar up or scratch, like a painted surface or something that maybe it's chrome or polished aluminum. And then if you want to put maybe say a gear onto a gear onto a crank shaft or a timing set that's where you'd use the brass hammer because it focuses your swing a little more intense here on the hammer head instead of distributing it over a large area like the rubber mallet. The next type of hammer we're gonna talk about is the dead blow. This is a very common hammer in the shop because it's not actually made of metal. It's made of a hard plastic but it does flex. The handle flexes and the hammer head itself flexes, and instead of it being solid metal it actually has metal shot inside. And when you swing it that metal shot moves towards the front of the hammer and that helps move whatever object it is you're trying to move. Now we've got all different sizes here on up to about 58 ounces, and we even have this unique dead blow here that has a longer reach and this is for driving pistons down into a cylinder block. The next type of hammer we're gonna talk about is the ball peen hammer and I know most of you have seen these. They're very common in the shop, especially for metal working, and they call them a ball peen because they have this ball on one end, and of course the other side has a regular hammer head. But these do have a steel head, and they come in a bunch of different sizes depending on what job you're trying to do. But there's one type of ball peen that's kinda unique and that is this, which is kind of a hybrid between a dead blow and a ball peen. They actually call it a dead blow ball peen. It does have a more flexible handle and it's got the shot built into the head as well as the steel ends. But if you really need to get something moving of course you're gonna grab the old sledge hammer. We've got a four pound shop hammer here, which is actually a sledge, and then we have this guy here, which is called a club hammer. What's unique about these, other than them being heavy, is that the handles are reinforced. So if over strike, which is common when you're swinging real hard it keeps the handle from breaking and injuring the user. Now if you just want to get something moving that none of those hammers will do of course you've got your 16 pound sledge right her. This thing will move just about anything but it takes quite a bit of muscle to get it moving.
(Narrator)>> Don't go away. We take a road trip to check out a leader in Gen-three Hemi performance and the Hellcat conversion.
(Tommy)>> Hey guys, glad you made your way back to Detroit Muscle. While we're up here in Detroit we decided to swing by and see a good friend of ours, Mike Copeland. He's been doing some pretty big things.
(Marc)>> And he's been doing it for a long time too. Now he may be a familiar face to you and we're gonna go check out his shop. You may recognize some things he's got going on inside. Arrington Performance has been in the Mopar world for over 50 years. Now days they focus strictly on the gen three Hemi. Whether it's parts or accessories, they carry or manufacture anything and everything for the five-seven, six-one, and six-four platforms. If you're need is performance or you want to make power that challenges the OE system Arrington Performance has the resources and technical support to help you solve those problems.
(Tommy)>> Hey Mike, what you got going on?
(Mike)>> Hey guys, how are you?
(Tommy)>> Doing great man, doing great.
(Mike)>> Welcome to Arrington.
(Tommy)>> Well thanks for having us. Looks like you've got a jewel sitting here.
(Mike)>> Yeah well half a jewel anyway to look at it. This is a display engine that we use at different venues to kind of showcase the difference between a production six-four and an Arrington built six-four. So this is a standard cylinder head as they're made and then what would be on your car if you were to go buy one at Chrysler. This is one after we're done with it. The c-n-c porting, the different valve springs, retainers. It's got studs. In this case it's all of the best stuff. The good head gaskets, multi-layer steel. Going down you see the forged piston, forged rod, everything's balanced. It's all done. It's what's the difference, right, between stock and what we build.
(Tommy)>> Well can we see what you've got going on?
(Mike)>> Absolutely, let's do it. ♪ ♪ Arrington manufactures a number of parts, throttle bodies being one of them. Michael's putting those together right now and getting some ready to ship.
(Marc)>> Now this is cast aluminum right?
(Mike)>> Yeah, we do a cast aluminum version, and then we also do a billet version. So the other ones are billet.
(Marc)>> Oh I see here, that's nice!
(Mike)>> All full c-n-c machined out of 60-61 aluminum.
(Marc)>> And then you build them right here on this table?
(Mike)>> Yeah, Michael sits here and does the tedious work to go through every one of them. Put every fastener in. Make sure all the shaft bearings are in and lined up. And then when he's all done assembling it then he'll put them through an electronic test. We validate that they operate from wide open to completely closed throttle. We monitor the voltage it takes to do that and make sure that they meet or exceed o-e-m specifications.
(Marc)>> Very nice!
(Mike)>> So you guys saw the engines up front when you came in. So those are all short blocks all pre-assembled and ready to go. So when a customer orders one they'll either order just a short block, they'll order short block with a cam, or they'll order a long block, or a complete engine. So then they're brought back here and Matt is the guy that typically assembles the rest of those components into the engine and makes them to the level that the customer wants it with all the parts. It takes us, from the time that you see that short block there and it comes back here it'll be within two days to a couple of weeks if we had to wait for a specific part, and these things are ready to go into the crate and ship to the customer.
(Tommy)>> That's pretty quick turnaround.
(Mike)>> It has to be, right? I mean nobody wants their car down. Everybody wants to drive them.
(Marc)>> So you know what we want to see now right?
(Mike)>> Yeah why don't we go down to the shop and make some noise?
(Marc)>> Alright, let's do it.
(Narrator)>> Coming up Arrington Performance gives us a sneak peek at one of their new Hellcat projects!
(Mike)>> You guys are probably a little surprised to see cars besides Mopars in here.
(Marc)>> Yeah.
(Tommy)>> Just a little bit.
(Mike)>> Diversified Creations and Arrington share a shop. We share resources. A lot to unique things here. As an example the Corvette that we race at Texas and some of the other mile races. This is traditional kind of Corvette, and it shows up here, and gets an engine built, and a bunch of other updates. On the classic side in the Mopar world we even get a lot like this right. You probably would expect it would be a gen three Hemi but it's not. A real 440, has a supercharger on it, fuel injected, built by another shop, had some challenges, here to get all that corrected.
(Marc)>> And AMC's too!
(Mike)>> Yeah love the AMC's. So this is a 401 car. It has a 700-R-four in it. So they can actually get out and drive it and enjoy it. This car came from Arizona. That one's from Nebraska. We get them shipped in from all over the country to get work done.
(Marc)>> Cool!
(Mike)>> As I said cars get shipped in from all over. Some more complete than others. You guys might recognize this one. It came in from Tennessee.
(Marc)>> It looks a lot like our car.
(Mike)>> Yeah it's got some nice shiny paint on it. Great car! When you build a Hellcat, when you do a Hellcat swap into anything they're a lot more complicated than most people would believe. So you need to try and prepare everything up front to get it before you start putting it in. you can see guys doing the fuel system now. Darrell over here's doing the dashboard and getting wiring put in it. Trying to get all these components ready to load into the car. When Mopar designed the Hellcat everybody was, I think, shocked that they came out with 700 horsepower. People really don't understand what it takes to make 700 horsepower in a daily driver dependable car that you can drive across the country, and they did a lot of unique things in the design of that. When you do a Hellcat swap you can either ignore all of those things and give up a lot of that dependability, a lot of that drivability, and take frankly a lot of risks with some of the things or you can incorporate that things, take advantage of what the OE developed. Whether it's pulse width modulated fuel system controls, or it's intercooler temperature monitoring. If you don't incorporate all things into your build when you do it you will have a number of issues that you'll likely never solve. We've worked with Aeromotive, who builds fuel systems, and we've invented a new fuel pump module that you'll soon see available, and that system goes into an original tank. You cut a hole in the top, it mounts down. It still feeds fuel out through the original opening in the tank, and it is capable to be controlled by the fuel system control module. It's pulse width modulation capable. So now when you put your Hellcat together, stock engines run about 12 pounds of boost. We're at 58 p-s-i at idle and at low speed and when you step into that throttle and you put 12 pounds of boost on it now we have 70 p-s-i of fuel pressure available.
(Marc)>> All that modern power and technology is great, but your typical Hellcat swap classic Mopar owner wants all the modern luxuries as well. It can be tricky to integrate all of those creature comforts but the crew at Arrington has found several solutions to make things like air conditioning possible, and they're gonna install some on ours.
(Darrell)>> Alright well what we're gonna do now is we're gonna go ahead and install our Vintage air system. These have been absolutely wonderful for us. We use them on all of our conversion kits. Very little modification. They've got nice diagrams tell you where to drill your holes and stuff in the firewall to be able to do your mountings.
(Mike)>> Well we've made some great progress on your car but let me show you what it's gonna be when yours is done. This is a '69 Charger, of course obviously black. This is the Hellcat, eight speed automatic car. Almost identical to what you guys are building and what we're helping you with. Same suspension, everything else. We debuted this one at SEMA this past year.
(Tommy)>> You guys did a killer job that's for sure.
(Marc)>> Yeah it looks good. So our car will look just like this when we get it back then, huh?
(Mike)>> Well maybe missing a few parts. Yours will be nice and cool without the air for driving around when we give it back.
(Marc)>> Awesome!
(Mike)>> So how about you guys get out of here and let us get back to work.
(Tommy)>> Alright.
(Marc)>> Be glad to.
Show Full Transcript
(Tommy)>> Hey y'all, welcome to Detroit Muscle. Today we've got some fab work planned jazzing up the back side of this old Buick cause it's a bit bland. You could almost call it vanilla. So now it's time to add some flavor.
(Marc)>> And if the word Hemi pegs your meter you're gonna want to stick around because later on we're heading over to Arrington Performance to see some friends of ours. They've got a bunch of Hemis there but they've got one Mopar in particular that we've got special interest in. You'll see what I'm talking about.
(Tommy)>> The way we we're planning to spice things up is by making us a rear spoiler. Now there's not a whole lot of options out there if you're wanting to buy something. There are a couple of companies that make a reproduction spoiler that would come on a Grand National but we're looking for more. We want aggressive and tasteful, but not gaudy. The first thing we need to do is make that base plate. We'll start out by measuring our trunk lid. We don't want the base plate to go from edge to edge. So we'll put our plate at 58 inches. ♪ ♪ You guys have seen us use this thing before. Bam, we have our first plate! Now we can set our panel back on the trunk and a quick measure to center it up. We want to make sure it isn't sitting sideways. We'll trace the bottom of the base plate following the curvature of the trunk lid. ♪ ♪ Then it's over to the ole band saw to cut it out. [ saw cutting metal ] ♪ ♪
(Tommy)>> This old thing fits pretty nice here on the curve of the trunk and I'm wanting to match that same curve here on the leading edge, but that's just preference. You could leave this thing with that straight line. Now to do that I'm gonna make a couple of marks across here at two inches, and then pull me a line all the way across it. ♪ ♪ Now to draw this curved line I'm gonna use this back edge as my guide, and you want to make sure that there's no sharp spot on it because it can cut your hand. And then you want to use your hand as kind of a jig to hold the marker. Just lay the marker right on top of your indicated spot, get your fingers comfortable, and then just pull in one fluid motion from one end to the other. We've got our base plate all made and the next thing that we need to do is actually attach it to our trunk lid. And the reason I want to do that is I don't have to worry about it wiggling around whenever we're gonna add that next piece. Now with that you could use some tech screws and just kinda just zip it to the trunk lid, but we want it to look a lot better than that. So we've got a different plan. What we're wanting to use is some of these blinded rivet nuts. It's a glorified pop rivet with threads on the inside, and I've got a couple of reasons why. If you wanted to use a nut and bolt trying to get your hand inside of here to put the nut on it, well it can be rather difficult. And the next reason is since this thing's got the inner structure you'd have to hack it up to make an access hole to put the nut on it. We don't want to fool with all that. I'll tape the plate down in place and measure for my six holes. ♪ ♪ Then we can center punch our cross hairs, drill our pilot holes with an eighth inch bit... ♪ ♪ [ drill spinning ] ...and then drill our lid to 25-64ths. To install one of these inserts it takes a pretty hefty gun. All you do is thread it onto it, squish the handle, and it will compress it. Give you a piece like this. Little ribbed spots bite into the surface or the hole that you just put it in, and it's very important the diameter of the whole you just drilled matches the diameter of this insert. We used these all the time, and they're silly easy to install. Not to mention they've give you a much more professional look. ♪ ♪ [ drill spinning ]
(Tommy)>> Last thing on this top plate we need to enlarge our holes for a quarter inch fastener and we can bolt it down. One piece down, one piece to go.
(Narrator)>> Stay tuned, Tommy adds the finishing touches to our rear spoiler!
(Tommy)>> Hey guys, welcome back. Next thing we're gonna be doing is taking this flat piece of aluminum and building our wing out of it. That's gonna be a little bit more complicated than this piece and this is why. The deck lid has got a curve to it. The back of the deck lid is curved as well, and we want this thing leaning back. We'll keep everything simple but first thing we need to do is mark center on both. ♪ ♪ Now we just need to line up these two center marks and kind of kick it back to the angle we're looking for.
(Marc)>> We need to take a couple of measurements here. One on each side to make sure that this thing is parallel with the deck lid cause you don't want it higher on one side and lower on the other. That's three-eighths. That's dang close. A sixteenth of an inch up on this side, stop.
Alright that looks good. Well now we need to make a mark all the way across, but we're not gonna be able to do that right with the sharpie up against that base because there's a big gap here. It'll only mark there in the middle. So we need to get up off of there and we're gonna do that with this piece of wood right here, and we'll just use that and that'll keep it steady all the way across. We'll just, here you go. ♪ ♪ There you go!
(Tommy)>> With our line drawn we can trim this part down. [ saw cutting metal ] ♪ ♪
(Tommy)>> Alright let's see how well this thing fits. Line it up here in the center and move it around. Oh yeah, that's not too bad. Looks like Marc's fancy pencil work paid off. Let's tape this thing into place and then we can add some style. We're using just standard ole masking tape. Be sure to press it down firmly to help it stick better. ♪ ♪ To jazz this up I'm gonna map out a little recess. When building something like this you can get as creative as you want to. ♪ ♪ That'll work! ♪ ♪ Not really a fan of this square corner. So what I want to do is kind of roll it off a bit. Now earlier we trimmed off this bottom piece and I'm gonna use that to give me that nice line. So what I'm gonna do is measure down about a half of an inch, line this up to the corner we marked on there to this mark on the edge. Then I can use this to transfer it on that side so everything matches. Nice thing about laying it out this way. If you don't like it you can simply wipe it off and try something different. ♪ ♪ While I'm here I don't like this either. So it's got to go. When fabbing parts you get to know your band saw real well. [ saw cutting metal ]
(Tommy)>> Now we can smooth out the edges on our trusty belt sander. [ sander spinning ]
(Tommy)>> We've got our rear wing all shaped up and it's starting to turn out pretty cool. The next thing we're gonna do is tack weld our two pieces together, and then I'll take this off, take it over to the table, and finish welding it up. We don't want this to move around when we take it off. So we're going to space out our tacks about eight inches or so apart. Since Marc wasn't busy I got him to help with the fit while we tack it up. A couple more tacks and we can move to the table. To weld this we're using our precision tig from Lincoln Electric. A tip for you. When welding long parts like this spoiler pay attention to how much heat you put in it cause you don't want it to twist or warp on you. Check this out. When we got started the back side of this Buick had a generic appearance. So we had to do something. With a little bit of fab and some time we now have that aggressive look that we was going for. ♪ ♪
(Marc)>> Now we all know if you've got something that moves and shouldn't you need duct tape. And if you've got something that doesn't move and should well you need WD 40, and sometimes you even need a hammer. Now a lot of times you'll just grab the thing that's closet, like a wrench say, but if you are smart enough to grab a hammer make sure you grab the right one. There are a lot of different hammers that do different jobs. So you've got to make sure you have the right hammer for the right job. So today we're gonna go over them. We're gonna start over here on the softer side. We've got a rubber mallet and a brass hammer. Now a rubber mallet's good for something that you don't want to mar up or scratch, like a painted surface or something that maybe it's chrome or polished aluminum. And then if you want to put maybe say a gear onto a gear onto a crank shaft or a timing set that's where you'd use the brass hammer because it focuses your swing a little more intense here on the hammer head instead of distributing it over a large area like the rubber mallet. The next type of hammer we're gonna talk about is the dead blow. This is a very common hammer in the shop because it's not actually made of metal. It's made of a hard plastic but it does flex. The handle flexes and the hammer head itself flexes, and instead of it being solid metal it actually has metal shot inside. And when you swing it that metal shot moves towards the front of the hammer and that helps move whatever object it is you're trying to move. Now we've got all different sizes here on up to about 58 ounces, and we even have this unique dead blow here that has a longer reach and this is for driving pistons down into a cylinder block. The next type of hammer we're gonna talk about is the ball peen hammer and I know most of you have seen these. They're very common in the shop, especially for metal working, and they call them a ball peen because they have this ball on one end, and of course the other side has a regular hammer head. But these do have a steel head, and they come in a bunch of different sizes depending on what job you're trying to do. But there's one type of ball peen that's kinda unique and that is this, which is kind of a hybrid between a dead blow and a ball peen. They actually call it a dead blow ball peen. It does have a more flexible handle and it's got the shot built into the head as well as the steel ends. But if you really need to get something moving of course you're gonna grab the old sledge hammer. We've got a four pound shop hammer here, which is actually a sledge, and then we have this guy here, which is called a club hammer. What's unique about these, other than them being heavy, is that the handles are reinforced. So if over strike, which is common when you're swinging real hard it keeps the handle from breaking and injuring the user. Now if you just want to get something moving that none of those hammers will do of course you've got your 16 pound sledge right her. This thing will move just about anything but it takes quite a bit of muscle to get it moving.
(Narrator)>> Don't go away. We take a road trip to check out a leader in Gen-three Hemi performance and the Hellcat conversion.
(Tommy)>> Hey guys, glad you made your way back to Detroit Muscle. While we're up here in Detroit we decided to swing by and see a good friend of ours, Mike Copeland. He's been doing some pretty big things.
(Marc)>> And he's been doing it for a long time too. Now he may be a familiar face to you and we're gonna go check out his shop. You may recognize some things he's got going on inside. Arrington Performance has been in the Mopar world for over 50 years. Now days they focus strictly on the gen three Hemi. Whether it's parts or accessories, they carry or manufacture anything and everything for the five-seven, six-one, and six-four platforms. If you're need is performance or you want to make power that challenges the OE system Arrington Performance has the resources and technical support to help you solve those problems.
(Tommy)>> Hey Mike, what you got going on?
(Mike)>> Hey guys, how are you?
(Tommy)>> Doing great man, doing great.
(Mike)>> Welcome to Arrington.
(Tommy)>> Well thanks for having us. Looks like you've got a jewel sitting here.
(Mike)>> Yeah well half a jewel anyway to look at it. This is a display engine that we use at different venues to kind of showcase the difference between a production six-four and an Arrington built six-four. So this is a standard cylinder head as they're made and then what would be on your car if you were to go buy one at Chrysler. This is one after we're done with it. The c-n-c porting, the different valve springs, retainers. It's got studs. In this case it's all of the best stuff. The good head gaskets, multi-layer steel. Going down you see the forged piston, forged rod, everything's balanced. It's all done. It's what's the difference, right, between stock and what we build.
(Tommy)>> Well can we see what you've got going on?
(Mike)>> Absolutely, let's do it. ♪ ♪ Arrington manufactures a number of parts, throttle bodies being one of them. Michael's putting those together right now and getting some ready to ship.
(Marc)>> Now this is cast aluminum right?
(Mike)>> Yeah, we do a cast aluminum version, and then we also do a billet version. So the other ones are billet.
(Marc)>> Oh I see here, that's nice!
(Mike)>> All full c-n-c machined out of 60-61 aluminum.
(Marc)>> And then you build them right here on this table?
(Mike)>> Yeah, Michael sits here and does the tedious work to go through every one of them. Put every fastener in. Make sure all the shaft bearings are in and lined up. And then when he's all done assembling it then he'll put them through an electronic test. We validate that they operate from wide open to completely closed throttle. We monitor the voltage it takes to do that and make sure that they meet or exceed o-e-m specifications.
(Marc)>> Very nice!
(Mike)>> So you guys saw the engines up front when you came in. So those are all short blocks all pre-assembled and ready to go. So when a customer orders one they'll either order just a short block, they'll order short block with a cam, or they'll order a long block, or a complete engine. So then they're brought back here and Matt is the guy that typically assembles the rest of those components into the engine and makes them to the level that the customer wants it with all the parts. It takes us, from the time that you see that short block there and it comes back here it'll be within two days to a couple of weeks if we had to wait for a specific part, and these things are ready to go into the crate and ship to the customer.
(Tommy)>> That's pretty quick turnaround.
(Mike)>> It has to be, right? I mean nobody wants their car down. Everybody wants to drive them.
(Marc)>> So you know what we want to see now right?
(Mike)>> Yeah why don't we go down to the shop and make some noise?
(Marc)>> Alright, let's do it.
(Narrator)>> Coming up Arrington Performance gives us a sneak peek at one of their new Hellcat projects!
(Mike)>> You guys are probably a little surprised to see cars besides Mopars in here.
(Marc)>> Yeah.
(Tommy)>> Just a little bit.
(Mike)>> Diversified Creations and Arrington share a shop. We share resources. A lot to unique things here. As an example the Corvette that we race at Texas and some of the other mile races. This is traditional kind of Corvette, and it shows up here, and gets an engine built, and a bunch of other updates. On the classic side in the Mopar world we even get a lot like this right. You probably would expect it would be a gen three Hemi but it's not. A real 440, has a supercharger on it, fuel injected, built by another shop, had some challenges, here to get all that corrected.
(Marc)>> And AMC's too!
(Mike)>> Yeah love the AMC's. So this is a 401 car. It has a 700-R-four in it. So they can actually get out and drive it and enjoy it. This car came from Arizona. That one's from Nebraska. We get them shipped in from all over the country to get work done.
(Marc)>> Cool!
(Mike)>> As I said cars get shipped in from all over. Some more complete than others. You guys might recognize this one. It came in from Tennessee.
(Marc)>> It looks a lot like our car.
(Mike)>> Yeah it's got some nice shiny paint on it. Great car! When you build a Hellcat, when you do a Hellcat swap into anything they're a lot more complicated than most people would believe. So you need to try and prepare everything up front to get it before you start putting it in. you can see guys doing the fuel system now. Darrell over here's doing the dashboard and getting wiring put in it. Trying to get all these components ready to load into the car. When Mopar designed the Hellcat everybody was, I think, shocked that they came out with 700 horsepower. People really don't understand what it takes to make 700 horsepower in a daily driver dependable car that you can drive across the country, and they did a lot of unique things in the design of that. When you do a Hellcat swap you can either ignore all of those things and give up a lot of that dependability, a lot of that drivability, and take frankly a lot of risks with some of the things or you can incorporate that things, take advantage of what the OE developed. Whether it's pulse width modulated fuel system controls, or it's intercooler temperature monitoring. If you don't incorporate all things into your build when you do it you will have a number of issues that you'll likely never solve. We've worked with Aeromotive, who builds fuel systems, and we've invented a new fuel pump module that you'll soon see available, and that system goes into an original tank. You cut a hole in the top, it mounts down. It still feeds fuel out through the original opening in the tank, and it is capable to be controlled by the fuel system control module. It's pulse width modulation capable. So now when you put your Hellcat together, stock engines run about 12 pounds of boost. We're at 58 p-s-i at idle and at low speed and when you step into that throttle and you put 12 pounds of boost on it now we have 70 p-s-i of fuel pressure available.
(Marc)>> All that modern power and technology is great, but your typical Hellcat swap classic Mopar owner wants all the modern luxuries as well. It can be tricky to integrate all of those creature comforts but the crew at Arrington has found several solutions to make things like air conditioning possible, and they're gonna install some on ours.
(Darrell)>> Alright well what we're gonna do now is we're gonna go ahead and install our Vintage air system. These have been absolutely wonderful for us. We use them on all of our conversion kits. Very little modification. They've got nice diagrams tell you where to drill your holes and stuff in the firewall to be able to do your mountings.
(Mike)>> Well we've made some great progress on your car but let me show you what it's gonna be when yours is done. This is a '69 Charger, of course obviously black. This is the Hellcat, eight speed automatic car. Almost identical to what you guys are building and what we're helping you with. Same suspension, everything else. We debuted this one at SEMA this past year.
(Tommy)>> You guys did a killer job that's for sure.
(Marc)>> Yeah it looks good. So our car will look just like this when we get it back then, huh?
(Mike)>> Well maybe missing a few parts. Yours will be nice and cool without the air for driving around when we give it back.
(Marc)>> Awesome!
(Mike)>> So how about you guys get out of here and let us get back to work.
(Tommy)>> Alright.
(Marc)>> Be glad to.
