More Street Regal Episodes
Detroit Muscle Featured Projects
Detroit Muscle Builds
Want more content like this?
Join the PowerNation Email NewsletterParts Used In This Episode
Classic Industries
78 - 81 Camaro Rally Wheel Bezel
Classic Industries
78 - 81 Rally Wheel Center Hub Cap
Classic Industries
Buick Grand National/GNX Front Bumper
Classic Industries
GM Wheel Trim Ring 14x7
Dustless Blasting
Dustless Blasting DB500 Mobile S
Lincoln Electric
Lincoln Electric is the Official Welding Supplier to Detroit Muscle
Matco Tools
MATCO Tools are the Official Tool Supplier to Detroit Muscle
The Industrial Depot
Tools, Hardware, Shop Supplies
Episode Transcript
(Narrator)>> Today on Detroit Muscle Tommy and Marc fabricate a new bumper for our '85 Buick, "Project Street Regal", giving it a more aggressive appearance to go with the theme of our car. Plus we give you some tips on how to update old original wheels to make them look factory new. ♪ ♪
(Marc)>> Hey folks welcome to Detroit Muscle. Now we've got the ball rolling again on our Buick Regal project here, and with a full custom chassis underneath with modern suspension, mini tubs, and LS powertrain this thing is gonna be a handler. Problem is it still looks like your grandma's Buick. So we need to make it look the part as well.
(Tommy)>> Now we're gonna have to address the appearance on this thing, like getting rid of some of the bright work that's on it. We're toying with the idea of losing the vinyl top, and you know this color, we're definitely gonna have to do something in that department, but today our main course is gonna be kind of tidying up a trademark of the 1980's and that is big chrome bumpers.
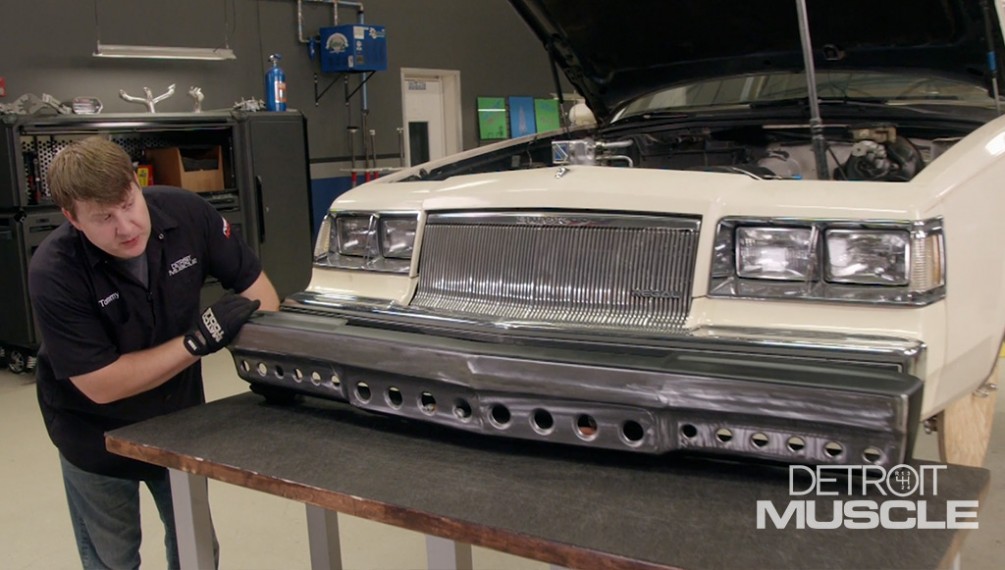
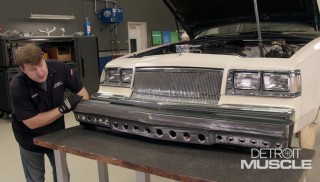
(Marc)>> Now way back in 1985 somebody's grandmamma drove this car home from the dealership, and she was real happy with all that chrome. Not to mention these bumperettes here, impact strips which are showing their age now, which all of that stuff kinda screams luxury and we're going more for performance look. Now we've got it just mocked up for now because we want to make some changes. We want to get rid of all this rubber, and black plastic, and the bumperettes, but instead of just grinding and welding on this chrome bumper we've got a better solution.
(Tommy)>> That would be this piece right here that we got from Classic Industries. It's a reproduction bumper for a Grand National because if you remember they came with painted bumpers. Now we don't have to send it out and have the chrome stripped off of it. Now what we're planning to do is fill in this little recess here that's for the license plate and over here on our turn signal holes. We're also wanting to add some dimples to give it more of a fabricated look, but the first thing that we need to do is kinda figure out how we're gonna cut this thing up. We're just eyeballing this because it just has to be larger than the pocket of the turn signal. On the bottom here we wanted to line it up with the body line. [ saw cutting metal ]
(Tommy)>> We're use our trusty big ole cutoff wheel for the long cuts... [ saw cutting metal ] ♪ ♪
(Tommy)>> ...and switch to the smaller one for the finer cuts. [ saw cutting metal ] ♪ ♪
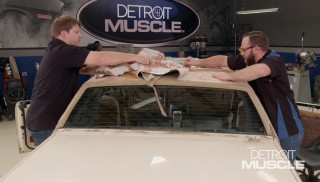
(Tommy)>> Now we need to make us a template using our old piece and some cardboard. ♪ ♪ This is kind of like back when I was in kindergarten. Enjoying myself, and no I wasn't one of the kids that eat paste. Well maybe a little bit. Oh yeah, that's gonna work.
(Marc)>> You tired of throwing sparks on that Mustang?
(Tommy)>> Hey man, heavier cars bring more for scrap.
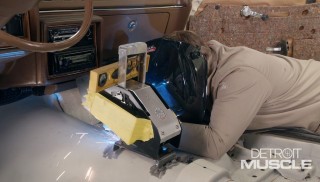
(Marc)>> You know that would look better if that was made out of metal. Give me that, I'll take it from here. Well I've got this piece of eighth inch cold rolled steel that I'm gonna use to make this patch panel. The problem is I'm gonna have to make a bend in it. Now it's gonna be difficult for us to do because we don't have a tool here in this shop that'll bend something that thick. So we're gonna have to improvise and make something our self. So the difficult part about this is that I have to duplicate this radius here, and what I've found is this piece of tubing here is actually a slightly tighter radius, which will be ideal to bend our metal around. So what I'm gonna do is I'm gonna make a break out of the table and use this piece of tubing attached to the edge of it to be the lower jaw of the break. Then what I'm gonna do for the upper jaw is use this piece of tubing here, sandwich the metal in between, clamp it in place, and make our bend. I want to make sure this is flush with the top of the table. So I'm gonna use these magnets. Then I can burn it in with the Lincoln Electric Power Mig. [ welder crackling ] ♪ ♪
(Marc)>> Well my tool's ready but before I make the bend there's one more thing I want to do. I want to make a cut here next to where my template is because I don't want to bend anymore metal than I have too. But instead of just ripping this thing all the way down, which would sacrifice this piece, I'm gonna notch it out down here. Besides I need as much weight and leverage down there as possible. ♪ ♪ The band saw is ideal for this because it makes nice clean cuts. [ saw cutting metal ] ♪ ♪ [ saw cutting metal ] ♪ ♪
(Marc)>> Then we'll sandwich the metal in our improvised break, make sure it's square with the edge of the table, clamp it down tight, and make that bend. ♪ ♪ Alright, that might do it. ♪ ♪ Well that tool worked out just fine and it made it a lot easier. Now our bend's done, that's the hardest part. Just need to get it cut out now, weld it in place, and we can move on to the other side.
(Narrator)>> Coming up, Tommy puts the finishing touches on our custom Buick bumper making it fit the theme of our build.
(Marc)>> Hey folks welcome back. While you were gone I got that piece cut out, welded in, and got all those welds ground down nice and smooth. Did the same on the other side, and while I was at it filled all these holes that were here for that impact strip to mount to. I'm gonna hand it off to Tommy here and I'm gonna go get some fresh air.
(Tommy)>> What we're gonna do now is remove this little recess here in the middle of the bumper. It isn't gonna be all that complicated. We're gonna use the steps that Marc showed you earlier. First thing we need to do is make some marks and throw some sparks. We're gonna use the same method that we used earlier, following the body lines on the bumper. [ saw cutting metal ]
(Tommy)>> Now we're ready to start working on our insert panel. Now to do this we're not gonna be making a cardboard template. What we are gonna do is take our piece, start trimming it down using some measurements, but the first thing we need to do is mark center. This is important because there's a peak here in the center and we want to keep that straight. We'll transfer that center mark to our filler piece, mark where the other cuts need to be made, and head to the band saw. A quick test fit, we can tack it in. [ welder crackling ]
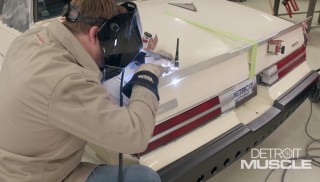
(Tommy)>> With the rest of the filler pieces made we'll check their fitment, tack those in, and then weld it up solid. [ welder crackling ] ♪ ♪
(Tommy)>> On these welds we're gonna use a blending disc, mow them down, polish it out. ♪ ♪ We've got our bumper all welded up, ground down, and it turned out pretty slick. Now the next thing we're gonna do is add us some dimpled holes, or lightning holes as some people call them. The first step to that process is laying out your pattern. We're gonna use this masking tape as our canvas. ♪ ♪ The next thing we're gonna do is draw us a line right through here to help lay out our holes for our dimples, and to do that I'm gonna use the upper side of the bumper as a guide. ♪ ♪ Our dimple dyes work great as a template to mark where we want our most inner hole and outer hole. Then we can use the straight edge to mark the tops of the holes. Now we need to draw some circles, and to do that we're gonna use one of these pattern makers. Our hole is gonna be an inch and seven-sixteenths. So now all we have to do with the marks that we made, draw on our surface. Now we're wanting to space our holes an inch and an eighth apart. So I'm gonna use an inch and an eighth hole, make a mark, and move on. ♪ ♪ We'll center punch where we need to drill, make our pilot holes. [ drill spinning ]
(Tommy)>> Then we can use a step bit to finish them off. This process is relatively simple. What we're gonna be using is a set of dyes to make our dimple holes, and depending on how you stack them onto your panel is gonna determine you flare them up or flare them down. We want ours to recess in. We'll just put that piece on the top, line this one up on the bottom, and then put it under here and smash them together. ♪ ♪ You want to apply just enough pressure to completely compress the dyes together. Not so much that you distort or mar the bumper. ♪ ♪ That gaudy chrome bumper's what we started with. This is what we've got now. Those few hours we spent gave this Buick and attitude adjustment that it desperately needed.
(Narrator)>> Don't go away. Tommy and Marc will give us tips on how to take old rusty wheels and make them look showroom new.
(Tommy)>> Hey y'all, welcome back. You know there's no denying that a certain type of wheel on your ride can influence its personality. If you've got a car that's got a whole bunch of aftermarket goodies on it you're probably running an aftermarket set of wheels, but if you're going for the original look well you may be in the market for a set of steel wheels. We picked these up at a swap meet a while back. They come off of a second gen Camaro or Nova, and I know they don't look like much right now but with some parts and a little bit of labor they'll look like a million bucks. Now before you go to spend your hard earned money on a set like this there's a few things you want to take a look at. First thing look at this lip all the way round the rim. This normally gets banged up by the curb. This one's in pretty good shape, so we can move on. The next thing that you need to do is verify your bolt pattern. It's pretty simple. All you need is a tape measure. What you want to do is measure across this hub holes from hole to hole skipping one. Measure from the outer edge of one to the center of the other. What we've got here is four and three quarter, exactly what we're supposed to have. Another thing that's a good idea is to lay the wheel on a nice flat surface. Look around here to see if this lip has been bent up or down. That will indicate it's hit a pot hole or been dropped on something hard. This one's in pretty good shape. So let's move on to the others. Kind of like this right here, but we can fix that with a couple of quick slaps with a hammer. To make this repair the first thing you need to do is use a marker and indicate the bend. Mark in the center of the bend and then a couple of marks on the outside. ♪ ♪ Now all we need to do is slide this over to the edge and massage it a bit with a hammer. [ hammer banging metal ] ♪ ♪
(Tommy)>> That ought to do it. The final thing that we need to do is prep and clean these things for paint, and to do that you could use sand paper or even a wire brush but it's not gonna get into all these nooks and crannies. A far more efficient way to do it is to media blast them. Let's go check Marc out.
Here you go boss man.
(Marc)>> Ah thank you Tom. Now a lot of times you'll see us put stuff like this in our blast cabinet or we'll load it up in the truck and take it out to the sand blaster, but that can be time consuming and a hassle. Now we've got something that comes to you instead of you having to go to it. It's called the DB-500-S from Dustless Blasting. It's a self-contained mobile paint stripping and cleaning system. It's all set up. Let me show you how it works. The startup process is easy. Just turn the unit on, fire up the diesel generator, open a couple of valves, and you're ready to blast. We'll just clamp our wheel in this jig and pull the trigger. What's cool about this system is that it doesn't create a huge dust cloud like traditional sand blasting. It mixes water with the media, which makes for a faster and more aggressive stripping while using less material. This machine will blast anywhere from 30 to 150 p-s-i depending on what you're blasting. We're at 150 on these heavy steel wheels, but I know what you're thinking. Water makes things rust right? Well you don't have to worry about that because there's a chemical in the water that actually prevents rust. Check it out! Wow that looks really good. Now I just need to get the other three done and get them back in to Tommy. Y'all don't go anywhere.
(Narrator)>> Stay tuned, we take our old outdated wheels to the next level.
(Tommy)>> Hey guys, welcome back. We've got our wheels all cleaned up and we're ready to start the painting process. Now to do that we're not gonna be using some big fancy paint gun. We're gonna be using some aerosols from Duplicolor. The first step to this process is gonna be applying some self-etching primer. ♪ ♪ Now whenever you're painting something odd shaped like this wheel you don't really have to have 100 percent coverage on that first coat, but make sure that you do cover everything on coat two. We're planning to do about three coats, and once this is dry we'll flip it over so we can do the back side, but while it is drying we're gonna go ahead and do these back here. [ aersol can spraying ]
We've let our primer dry and we're ready to start spraying on our paint. What we're gonna be using is a Duplicolor wheel coatings in black and silver, but the black's just gonna go around here and on the inside of the wheel. And then after all that dries we'll come back and spray on this silver on the face of the wheel. So let's go ahead and get started. ♪ ♪ This wheel paint isn't your run of the mill rattle can. It's specially formulated for wheels to protect against fading, chipping, heat, weather, and corrosion. It's great for our steel wheels, but also works on aluminum. [ aerosol can spraying ]
Here you go man. You might want to watch the paint. It might be a little tacky.
(Marc)>> I appreciate it. It can't be any tackier than the way you dress. Anyway we got these wheels all painted up nice but they're still missing the shiny stuff, but thankfully we knew where to go. We went to Classic Industries for the stuff that you see here. Now this is just enough to do that one wheel but we've got enough to do all four. We've got these little inserts here for the holes, center caps that are chrome and they've got the little bow tie on there as well, and the o-e style beauty ring. These are polished stainless. We know they're gonna fit and look nice. It shouldn't be too hard to get this stuff installed. It all just snaps in. We'll start with these. ♪ ♪ Will you look at that? Add some rubber and these things will look as nice as they did the day they rolled off the showroom floor. A little bit of work and some shiny new parts, and you can make your ride look cool and you don't even need big fancy wheels to do it. ♪ ♪ You know a lot of times here in the shop you'll see us make new threads with a tap or even restore existing threads but that's female threads. We don't really talk about male threads because a lot of times it's easier to just replace a bolt or a stud rather than restore it, but there's times when if you're restoring a vehicle, you've got a hard to find bolt, something rare or something that came original on the car, or if you just don't have time to run to the store or you can't find the bolt. Well you want to restore those threads I'm gonna show you how to do that today a couple of different ways. I've got a couple of different bolts here that are damaged in different ways here on the threads. On this one the threads are smashed flat. Like you either hit them with a hammer, or got them caught in a vice, or rounded them off with a pair of pliers, but this one over here's a little more common. This one's cross threaded. Now I know that looks pretty bad but I think we can fix them both up. Well there's a couple of different tools that you can use to fix those, and the first one we're gonna talk about is this thread file, or a thread restoring file. Now you may recognize this in your dad or papa's tool box. You maybe didn't know what it was but what's cool about this, this tool has eight different sizes of thread pitch on it. Everything from 11 up to 24, which is really fine. Now we need 14 for this particular bolt that we have, and as you see this bolt just sits right in there. It'll cut those flat spots off these threads. [ grinding metal ] ♪ ♪
(Marc)>> Alright, let's give that a try. Yep, works just right. Now it takes a little bit of elbow grease but it does the trick. Now as for this cross threaded bolt well we're gonna need a different tool for that. This is just your run of the mill dye out of a tap and dye set, and it's wider here on this side, and it tightens up as it comes through onto this side. Now that's what cuts the threads, those teeth down inside there. We're just gonna install it and T-handle here. Get it tightened down into place. We can run our bolt through this way. ♪ ♪ [ ratchet twisting ] ♪ ♪
(Marc)>> Alright, looks like we lost a couple of threads there at the end but that's okay. If you're trying to salvage a bolt you can usually withstand that. See if this nut goes on there. Nice and easy!
Working in tight spaces can be challenging, like in your engine bay. Instead of busting your knuckles you might want to try out this 16 volt cordless ratchet. This is from Matco's Infinium line and even though it's only a quarter inch drive it packs a punch with 35 foot pounds of torque, and it's easy to fit in small spaces with its one inch diameter head. It's variable speed and has a built in l-e-d light to make it easier to see what you're doing. The kit includes two batteries, a charger, and a nylon carrying case. Well that's all the time we have for today folks. So until next time see more tech like you saw today at Powernation TV dot com.
Show Full Transcript
(Marc)>> Hey folks welcome to Detroit Muscle. Now we've got the ball rolling again on our Buick Regal project here, and with a full custom chassis underneath with modern suspension, mini tubs, and LS powertrain this thing is gonna be a handler. Problem is it still looks like your grandma's Buick. So we need to make it look the part as well.
(Tommy)>> Now we're gonna have to address the appearance on this thing, like getting rid of some of the bright work that's on it. We're toying with the idea of losing the vinyl top, and you know this color, we're definitely gonna have to do something in that department, but today our main course is gonna be kind of tidying up a trademark of the 1980's and that is big chrome bumpers.
(Marc)>> Now way back in 1985 somebody's grandmamma drove this car home from the dealership, and she was real happy with all that chrome. Not to mention these bumperettes here, impact strips which are showing their age now, which all of that stuff kinda screams luxury and we're going more for performance look. Now we've got it just mocked up for now because we want to make some changes. We want to get rid of all this rubber, and black plastic, and the bumperettes, but instead of just grinding and welding on this chrome bumper we've got a better solution.
(Tommy)>> That would be this piece right here that we got from Classic Industries. It's a reproduction bumper for a Grand National because if you remember they came with painted bumpers. Now we don't have to send it out and have the chrome stripped off of it. Now what we're planning to do is fill in this little recess here that's for the license plate and over here on our turn signal holes. We're also wanting to add some dimples to give it more of a fabricated look, but the first thing that we need to do is kinda figure out how we're gonna cut this thing up. We're just eyeballing this because it just has to be larger than the pocket of the turn signal. On the bottom here we wanted to line it up with the body line. [ saw cutting metal ]
(Tommy)>> We're use our trusty big ole cutoff wheel for the long cuts... [ saw cutting metal ] ♪ ♪
(Tommy)>> ...and switch to the smaller one for the finer cuts. [ saw cutting metal ] ♪ ♪
(Tommy)>> Now we need to make us a template using our old piece and some cardboard. ♪ ♪ This is kind of like back when I was in kindergarten. Enjoying myself, and no I wasn't one of the kids that eat paste. Well maybe a little bit. Oh yeah, that's gonna work.
(Marc)>> You tired of throwing sparks on that Mustang?
(Tommy)>> Hey man, heavier cars bring more for scrap.
(Marc)>> You know that would look better if that was made out of metal. Give me that, I'll take it from here. Well I've got this piece of eighth inch cold rolled steel that I'm gonna use to make this patch panel. The problem is I'm gonna have to make a bend in it. Now it's gonna be difficult for us to do because we don't have a tool here in this shop that'll bend something that thick. So we're gonna have to improvise and make something our self. So the difficult part about this is that I have to duplicate this radius here, and what I've found is this piece of tubing here is actually a slightly tighter radius, which will be ideal to bend our metal around. So what I'm gonna do is I'm gonna make a break out of the table and use this piece of tubing attached to the edge of it to be the lower jaw of the break. Then what I'm gonna do for the upper jaw is use this piece of tubing here, sandwich the metal in between, clamp it in place, and make our bend. I want to make sure this is flush with the top of the table. So I'm gonna use these magnets. Then I can burn it in with the Lincoln Electric Power Mig. [ welder crackling ] ♪ ♪
(Marc)>> Well my tool's ready but before I make the bend there's one more thing I want to do. I want to make a cut here next to where my template is because I don't want to bend anymore metal than I have too. But instead of just ripping this thing all the way down, which would sacrifice this piece, I'm gonna notch it out down here. Besides I need as much weight and leverage down there as possible. ♪ ♪ The band saw is ideal for this because it makes nice clean cuts. [ saw cutting metal ] ♪ ♪ [ saw cutting metal ] ♪ ♪
(Marc)>> Then we'll sandwich the metal in our improvised break, make sure it's square with the edge of the table, clamp it down tight, and make that bend. ♪ ♪ Alright, that might do it. ♪ ♪ Well that tool worked out just fine and it made it a lot easier. Now our bend's done, that's the hardest part. Just need to get it cut out now, weld it in place, and we can move on to the other side.
(Narrator)>> Coming up, Tommy puts the finishing touches on our custom Buick bumper making it fit the theme of our build.
(Marc)>> Hey folks welcome back. While you were gone I got that piece cut out, welded in, and got all those welds ground down nice and smooth. Did the same on the other side, and while I was at it filled all these holes that were here for that impact strip to mount to. I'm gonna hand it off to Tommy here and I'm gonna go get some fresh air.
(Tommy)>> What we're gonna do now is remove this little recess here in the middle of the bumper. It isn't gonna be all that complicated. We're gonna use the steps that Marc showed you earlier. First thing we need to do is make some marks and throw some sparks. We're gonna use the same method that we used earlier, following the body lines on the bumper. [ saw cutting metal ]
(Tommy)>> Now we're ready to start working on our insert panel. Now to do this we're not gonna be making a cardboard template. What we are gonna do is take our piece, start trimming it down using some measurements, but the first thing we need to do is mark center. This is important because there's a peak here in the center and we want to keep that straight. We'll transfer that center mark to our filler piece, mark where the other cuts need to be made, and head to the band saw. A quick test fit, we can tack it in. [ welder crackling ]
(Tommy)>> With the rest of the filler pieces made we'll check their fitment, tack those in, and then weld it up solid. [ welder crackling ] ♪ ♪
(Tommy)>> On these welds we're gonna use a blending disc, mow them down, polish it out. ♪ ♪ We've got our bumper all welded up, ground down, and it turned out pretty slick. Now the next thing we're gonna do is add us some dimpled holes, or lightning holes as some people call them. The first step to that process is laying out your pattern. We're gonna use this masking tape as our canvas. ♪ ♪ The next thing we're gonna do is draw us a line right through here to help lay out our holes for our dimples, and to do that I'm gonna use the upper side of the bumper as a guide. ♪ ♪ Our dimple dyes work great as a template to mark where we want our most inner hole and outer hole. Then we can use the straight edge to mark the tops of the holes. Now we need to draw some circles, and to do that we're gonna use one of these pattern makers. Our hole is gonna be an inch and seven-sixteenths. So now all we have to do with the marks that we made, draw on our surface. Now we're wanting to space our holes an inch and an eighth apart. So I'm gonna use an inch and an eighth hole, make a mark, and move on. ♪ ♪ We'll center punch where we need to drill, make our pilot holes. [ drill spinning ]
(Tommy)>> Then we can use a step bit to finish them off. This process is relatively simple. What we're gonna be using is a set of dyes to make our dimple holes, and depending on how you stack them onto your panel is gonna determine you flare them up or flare them down. We want ours to recess in. We'll just put that piece on the top, line this one up on the bottom, and then put it under here and smash them together. ♪ ♪ You want to apply just enough pressure to completely compress the dyes together. Not so much that you distort or mar the bumper. ♪ ♪ That gaudy chrome bumper's what we started with. This is what we've got now. Those few hours we spent gave this Buick and attitude adjustment that it desperately needed.
(Narrator)>> Don't go away. Tommy and Marc will give us tips on how to take old rusty wheels and make them look showroom new.
(Tommy)>> Hey y'all, welcome back. You know there's no denying that a certain type of wheel on your ride can influence its personality. If you've got a car that's got a whole bunch of aftermarket goodies on it you're probably running an aftermarket set of wheels, but if you're going for the original look well you may be in the market for a set of steel wheels. We picked these up at a swap meet a while back. They come off of a second gen Camaro or Nova, and I know they don't look like much right now but with some parts and a little bit of labor they'll look like a million bucks. Now before you go to spend your hard earned money on a set like this there's a few things you want to take a look at. First thing look at this lip all the way round the rim. This normally gets banged up by the curb. This one's in pretty good shape, so we can move on. The next thing that you need to do is verify your bolt pattern. It's pretty simple. All you need is a tape measure. What you want to do is measure across this hub holes from hole to hole skipping one. Measure from the outer edge of one to the center of the other. What we've got here is four and three quarter, exactly what we're supposed to have. Another thing that's a good idea is to lay the wheel on a nice flat surface. Look around here to see if this lip has been bent up or down. That will indicate it's hit a pot hole or been dropped on something hard. This one's in pretty good shape. So let's move on to the others. Kind of like this right here, but we can fix that with a couple of quick slaps with a hammer. To make this repair the first thing you need to do is use a marker and indicate the bend. Mark in the center of the bend and then a couple of marks on the outside. ♪ ♪ Now all we need to do is slide this over to the edge and massage it a bit with a hammer. [ hammer banging metal ] ♪ ♪
(Tommy)>> That ought to do it. The final thing that we need to do is prep and clean these things for paint, and to do that you could use sand paper or even a wire brush but it's not gonna get into all these nooks and crannies. A far more efficient way to do it is to media blast them. Let's go check Marc out.
Here you go boss man.
(Marc)>> Ah thank you Tom. Now a lot of times you'll see us put stuff like this in our blast cabinet or we'll load it up in the truck and take it out to the sand blaster, but that can be time consuming and a hassle. Now we've got something that comes to you instead of you having to go to it. It's called the DB-500-S from Dustless Blasting. It's a self-contained mobile paint stripping and cleaning system. It's all set up. Let me show you how it works. The startup process is easy. Just turn the unit on, fire up the diesel generator, open a couple of valves, and you're ready to blast. We'll just clamp our wheel in this jig and pull the trigger. What's cool about this system is that it doesn't create a huge dust cloud like traditional sand blasting. It mixes water with the media, which makes for a faster and more aggressive stripping while using less material. This machine will blast anywhere from 30 to 150 p-s-i depending on what you're blasting. We're at 150 on these heavy steel wheels, but I know what you're thinking. Water makes things rust right? Well you don't have to worry about that because there's a chemical in the water that actually prevents rust. Check it out! Wow that looks really good. Now I just need to get the other three done and get them back in to Tommy. Y'all don't go anywhere.
(Narrator)>> Stay tuned, we take our old outdated wheels to the next level.
(Tommy)>> Hey guys, welcome back. We've got our wheels all cleaned up and we're ready to start the painting process. Now to do that we're not gonna be using some big fancy paint gun. We're gonna be using some aerosols from Duplicolor. The first step to this process is gonna be applying some self-etching primer. ♪ ♪ Now whenever you're painting something odd shaped like this wheel you don't really have to have 100 percent coverage on that first coat, but make sure that you do cover everything on coat two. We're planning to do about three coats, and once this is dry we'll flip it over so we can do the back side, but while it is drying we're gonna go ahead and do these back here. [ aersol can spraying ]
We've let our primer dry and we're ready to start spraying on our paint. What we're gonna be using is a Duplicolor wheel coatings in black and silver, but the black's just gonna go around here and on the inside of the wheel. And then after all that dries we'll come back and spray on this silver on the face of the wheel. So let's go ahead and get started. ♪ ♪ This wheel paint isn't your run of the mill rattle can. It's specially formulated for wheels to protect against fading, chipping, heat, weather, and corrosion. It's great for our steel wheels, but also works on aluminum. [ aerosol can spraying ]
Here you go man. You might want to watch the paint. It might be a little tacky.
(Marc)>> I appreciate it. It can't be any tackier than the way you dress. Anyway we got these wheels all painted up nice but they're still missing the shiny stuff, but thankfully we knew where to go. We went to Classic Industries for the stuff that you see here. Now this is just enough to do that one wheel but we've got enough to do all four. We've got these little inserts here for the holes, center caps that are chrome and they've got the little bow tie on there as well, and the o-e style beauty ring. These are polished stainless. We know they're gonna fit and look nice. It shouldn't be too hard to get this stuff installed. It all just snaps in. We'll start with these. ♪ ♪ Will you look at that? Add some rubber and these things will look as nice as they did the day they rolled off the showroom floor. A little bit of work and some shiny new parts, and you can make your ride look cool and you don't even need big fancy wheels to do it. ♪ ♪ You know a lot of times here in the shop you'll see us make new threads with a tap or even restore existing threads but that's female threads. We don't really talk about male threads because a lot of times it's easier to just replace a bolt or a stud rather than restore it, but there's times when if you're restoring a vehicle, you've got a hard to find bolt, something rare or something that came original on the car, or if you just don't have time to run to the store or you can't find the bolt. Well you want to restore those threads I'm gonna show you how to do that today a couple of different ways. I've got a couple of different bolts here that are damaged in different ways here on the threads. On this one the threads are smashed flat. Like you either hit them with a hammer, or got them caught in a vice, or rounded them off with a pair of pliers, but this one over here's a little more common. This one's cross threaded. Now I know that looks pretty bad but I think we can fix them both up. Well there's a couple of different tools that you can use to fix those, and the first one we're gonna talk about is this thread file, or a thread restoring file. Now you may recognize this in your dad or papa's tool box. You maybe didn't know what it was but what's cool about this, this tool has eight different sizes of thread pitch on it. Everything from 11 up to 24, which is really fine. Now we need 14 for this particular bolt that we have, and as you see this bolt just sits right in there. It'll cut those flat spots off these threads. [ grinding metal ] ♪ ♪
(Marc)>> Alright, let's give that a try. Yep, works just right. Now it takes a little bit of elbow grease but it does the trick. Now as for this cross threaded bolt well we're gonna need a different tool for that. This is just your run of the mill dye out of a tap and dye set, and it's wider here on this side, and it tightens up as it comes through onto this side. Now that's what cuts the threads, those teeth down inside there. We're just gonna install it and T-handle here. Get it tightened down into place. We can run our bolt through this way. ♪ ♪ [ ratchet twisting ] ♪ ♪
(Marc)>> Alright, looks like we lost a couple of threads there at the end but that's okay. If you're trying to salvage a bolt you can usually withstand that. See if this nut goes on there. Nice and easy!
Working in tight spaces can be challenging, like in your engine bay. Instead of busting your knuckles you might want to try out this 16 volt cordless ratchet. This is from Matco's Infinium line and even though it's only a quarter inch drive it packs a punch with 35 foot pounds of torque, and it's easy to fit in small spaces with its one inch diameter head. It's variable speed and has a built in l-e-d light to make it easier to see what you're doing. The kit includes two batteries, a charger, and a nylon carrying case. Well that's all the time we have for today folks. So until next time see more tech like you saw today at Powernation TV dot com.
