More Sydewinder Episodes
Detroit Muscle Featured Projects
Detroit Muscle Builds
Want more content like this?
Join the PowerNation Email NewsletterParts Used In This Episode
Forgeline
Forgeline Heritage Series LS3C Custom Wheels
Lincoln Electric
Lincoln Electric is the Official Welding Supplier to Detroit Muscle
Lincoln Electric
Lincoln Electric is the Official Welding Supplier to Detroit Muscle
Matco Tools
MATCO Tools are the Official Tool Supplier to Detroit Muscle
Scott Rod Fabrications
Fox Body Spoiler Wing - Custom
The Industrial Depot
Tools, Hardware, and Shop Supplies
Episode Transcript
(Narrator)>> Today on Detroit Muscle Marc makes some alterations to the front of "Project Sydewinder" making sure our new wheels and tires are going to fit. Plus we add some more body modifications to our '85 Buick "Project Street Regal", giving it some much needed style. ♪ ♪
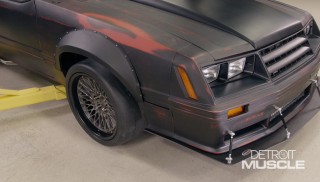
(Marc)>> Hey everybody, welcome to Detroit Muscle. Today we're working on our two '80's projects. I've got my sights set on our '81 Mustang Cobra "Project Sydewinder". Most recently we dressed up the front end with some new lights and some aero, but we've worked this thing over for a while top to bottom, inside and out, and even under the hood. One thing we haven't touched though is the rear. So I've got some flare for that. Speaking of flare we've got these huge wheel openings here because we added these fender flares a while back. So we've got some wheels and tires to fill those up. We're gonna be unveiling those, getting them on the car today. Trust me you want to see them. We may have to do a bit of trimming but hey, it's part of the fun right?
(Tommy)>> That's it. Now Marc's Mustang is getting dangerously close to hitting the highway and me with my Buick, well I've got a long road to hoe, but a little later on we're gonna address a few body mods that this thing needs. One's gonna be an upgrade, one's gonna be a repair.
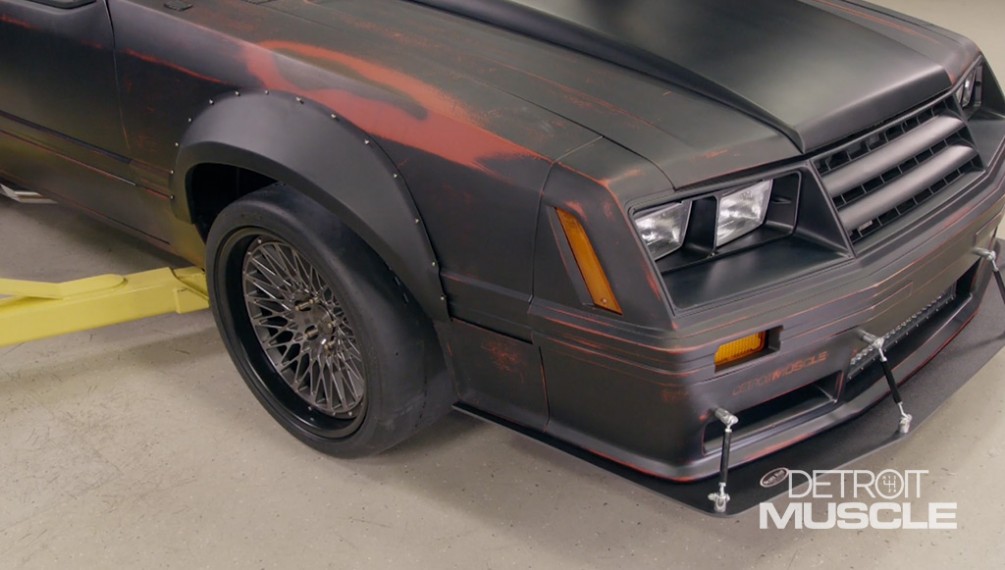
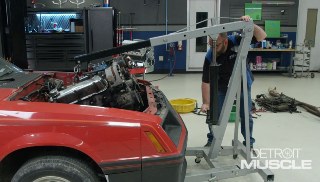
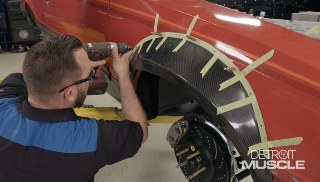
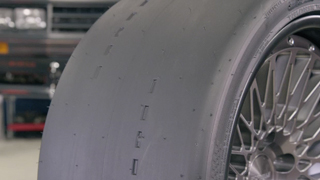
(Marc)>> Being a kid in the '80's and being into cars there were three vehicles I was really into. Big Foot, Lamborghini Countach, and the Saleen Mustangs. It's safe to say I'll never be able to afford two of those, but I've had several Mustangs in my time and my favorites are still those four eyed Saleens, and a lot of those had a mesh style wheel on them. So I used that for my inspiration for wheels for "Sydewinder". These are the LSThree-C's from Forgeline. They've taken that iconic mesh design and modernized it with a concave center profile to create a wheel with elegant looks, timeless character, and plenty of room for brake fitment. It's a custom made to order three piece wheel that's produced from forged 60-61 TSix aluminum centers and heat treated rim shells. They're assembled with stainless steel ARP fasteners and fully customizable in size, fitment, and finish. We went with a square setup, and ours measure 18 by 10 with a six inch back space. We chose the dark transparent smoke face so you can see all of that nice machine work, as well as satin black inner and outer lips. And since we've gone through all this work to make our Mustang track capable, and to compliment these high end wheels, we needed a set of tires that were up to the task as well. So we went with the Hoosier R-seven. This is a DOT compliant "R" compound tire built specifically for auto cross and open track use. It has a soft, sticky compound for maximum traction, and a "W" speed rating of 168 miles per hour. We went with a set of 285/30 18's. A massive size for our Fox body, especially on the front. These are gonna help our Cobra steer and brake at its maximum potential out on the track. All of this stuff is made in the USA, from the tires, to the wheels, to those ARP bolts that hold the wheels together. You better believe we like that. Just need to get them on the car now. I'll put the wheel on the car, get the lug nuts started by hand, and tighten them down. Alright let's see if this thing clears. Good that way, when I go back that way it hits. It hits this fender extension. Actually the fender itself. Now I'm gonna have to make a cut. So I'll make a mark and cut it, and then we'll drop it down on the ground so this wheel and tire's at ride height, and then we'll check it. Here we're gonna use the tire as a guide when making our mark. Now we can trim the fender. [ saw buzzing ]
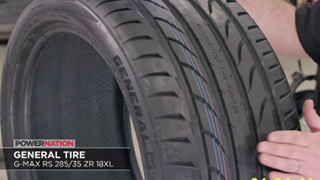
(Marc)>> Using our body saw allows us to fit in tight areas and make quick work of the fender. ♪ ♪ Let's get it on the ground. ♪ ♪ With our car on the ground we can turn the wheels at ride height, making sure nothing else touches or hits the tire. ♪ ♪ Alright plenty of room. Well I know what you're thinking. We just put those race tires on our car and this is a street car. How are we gonna drive it on the street? Well we've got a solution for that. We're actually gonna install these GMax RS' from General Tire. This is their newest ultra-high performance street tire. It'll provide the most grip in both wet and dry conditions, and it'll handle everything that our Mustang will throw at it on the street. But those are gonna have to wait until later, after we get our Mustang tested out on the track. We'll just dismount those "R" compounds, get the street tires on, and hit the roads. We still have more to do. I've got to get that left front fender trimmed, get the other three wheels and tires on, and I've got something special planned out back.
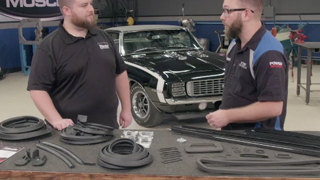
If you've got a survivor or you're doing a full restoration like this beautiful '69 Camaro you're gonna need seals and weather stripping. The problem is you go into the catalog and order all that stuff piece by piece you may not get everything you need, and not only that you're not sure about the quality. Well a solution to those problems is Steele Rubber Products, and we've got Danny here from Steele to talk about their products, including the parts here for that '69 Camaro. What makes your stuff different?
(Danny)>> So all of our parts are designed from original. So they're gonna fit and perform just like they did from the factory, but we use more modern, higher quality materials for the rubber, for the brass cores so it last a really long time.
(Marc)>> And you sell all of this stuff as kits right?
(Danny)>> Yeah, so we have kits for your window felts, or if you're doing a paint kit all the trim, bumpers, and weather stripping, and all that is going to be in our year, make, model specific catalogs.
(Marc)>> Cool, and if you need something custom or you need something universal they've got stuff for that as well. Just go to their website, Steele Rubber dot com.
(Narrator)>> Stay with us. Marc adds an upgrade to the rear of "Project Sydewinder" giving it flare and performance.
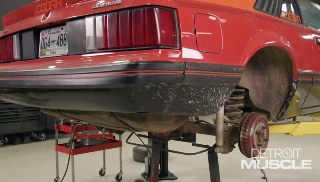
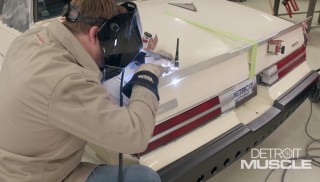
(Marc)>> Hey folks welcome back. We're working on our '81 Mustang Cobra, "Project Sydewinder". We got the wheels and tires on it, and I went ahead and trimmed up that left front fender. That way we can turn the steering wheel full lock left and right without any clearance issues even at ride height. But before we roll this thing off the lift for the final time there's one thing I want to address and that's the appearance of the rear here. It's basically stock. I mean other than this patina paint job we did a while back. We've even got the stock taillights here. Most people ditch those for the later model ones. Even has the stock spoiler. Now this is a rare option. So I want to keep it. This was only available in the '79 pace, '79 to '81 Cobras, and the '82 GT. After that it went away forever. So I wanted to preserve it. It's part of the personality of the car, but I want to dress it up a little bit and give it some function with this piece right here that we got from Scott Rod Fabrications. They made this specifically for our car. It's the same company that made that splitter and all those block off panels as well. Now we just need to get it bolted on. Oh yeah that's gonna look pretty good. Hey Tommy will you give me a hand please. We're gonna string a line of masking tape all the way across here where we need to drill our holes to mount that new wing to our spoiler. We're doing that for a few reasons. One, this is nice and bright, and that'll be easy to see where we make our marks. Another reason is because this tape is going to be a buffer. You go to drill those holes. If you do it too quick the head of the drill will scratch the paint. Instead you'll hit this first.
(Tommy)>> Also if you were working on a steel surface, whenever you go to dig into it those curly Q's coming out, they can scratch it as well, and that tape can be life saver.
(Marc)>> That end.
(Tommy)>> Sure thing, where do you want it?
(Marc)>> Just above that pocket.
(Tommy)>> You wanting to measure this thing out or are we gonna eyeball it?
(Marc)>> I think if it looks straight it is straight. All of our holes covered up by that tape?
(Tommy)>> Yeah.
(Marc)>> How far are you outside that pocket?
(Tommy)>> I'm right on the hole.
(Marc)>> Okay come my way about a sixteenth of an inch.
(Tommy)>> I'm flush with the edge of that hole.
(Marc)>> Okay back toward you then. Right, that looks good. Same amount of space up top too. So it curves around. Mark it. ♪ ♪ Alright.
(Tommy)>> You want to drill or you want me to?
(Marc)>> I'll do it. [ drill spinning ]
(Marc)>> We'll start by drilling our pilot hole using an eighth inch bit. [ drill spinning ]
(Marc)>> Followed by our 25-64ths for our actual holes. [ drill spinning ] ♪ ♪
(Tommy)>> We're gonna attach the spoiler on "Sydewinder" just like we did on "Street Regal", using these little threaded inserts. They're a cinch to install and they're perfect for an application like this. ♪ ♪ When installing threaded inserts you want to make sure it clamps to the material and doesn't move. If it does just give it a couple more squeezes with the gun. ♪ ♪
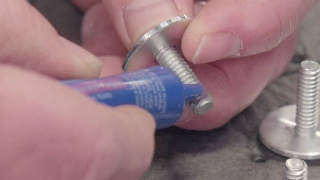
(Marc)>> Now it's time to get some thread locker on these bolts to mount our spoiler on. Now we've used blue and red Permatex thread locker here in the shop quite a bit, but you may not know that these have diameter recommendations. The blue for instance is good for quarter inch up through three quarter inch. We have quarter-20 bolts here so we could use that, but Permatex makes a low strength purple which is good up to quarter inch. We're gonna err on the low strength because these things have an allen head. It may be difficult to get off. We don't want to round that out and have to drill them out later. ♪ ♪ I'm gonna put the bolts in but now tighten them down. We want to make sure everything lines up and is gonna fit right. ♪ ♪ I like it! Nice and aggressive!
(Tommy)>> That's pretty snazzy.
(Marc)>> Then we can go back and finish securing the bolts. Whoa, that is impressive, and I can't wait to get old "Sydewinder" out on the track. ♪ ♪
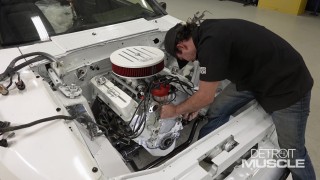
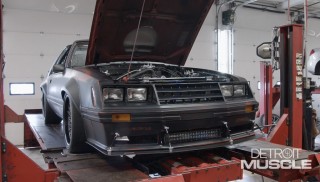
(Marc)>> Hey we're working on our '81 Cobra project and we're tidying up a bunch of stuff under the hood. You know, the stuff we normally don't show you like plumbing, wiring. Tommy's actually making the spark plug wires right now. There's one thing here that we need to address on this particular car and that's the vacuum. Now this is a great engine. They built it down in Engine Power. Over 600 horsepower, 427 Windsor. It's got that single plane intake on it and there's no vacuum source on it. Now we've got a vacuum advanced distributor and we need a vacuum reference for our fuel pressure regulator. So we need to tap into there, and I'm gonna show you how to do that now. Well the best place to do it is gonna be right above the runners here where there's a common vacuum source. Right here near where the carburetor mounts. I don't want to do it on this side because that's where our throttle linkage is. I don't want to interfere with that. This other side over here is where the fuel lines are gonna be. I don't want to interfere with that either. And back here well it's just hard to get to. So the best candidate is right here in the front. I'll remove the tape off of the intake and put a piece of tape on the front, and mark the spot where we want to drill. ♪ ♪ We want to put ours right here in the center. ♪ ♪ Then we can stuff some shop towels down into the runners to make sure to fill the holes completely. ♪ ♪ Then we'll make a bowl of a few more towels to line the plenum. We'll do this to keep any metal shavings from falling into our engine. Now those rags will do the trick but even still any shavings falling down in there are too close for comfort. So I want to prevent that at all, and I'm gonna do that with my bit and this grease right here. I'm just gonna dip my drill bit down in there and that grease goes down into all the grooves of the drill bit, and as I drill it'll pick up the shavings. Make sure that you cover the entire bit with grease. ♪ ♪ When drilling just keep it slow and steady because you don't want any metal to fly into the intake. ♪ ♪ Now we'll use our big bit to make the final hole. ♪ ♪ All we have to do is use our tap to thread our hole for the fitting. You'll need to use grease on this as well. ♪ ♪ Using tape makes quick work of any other metal shavings that may have fallen around the intake. Alright well I got my brass "T" now. I can screw this right in here, put my nipples on it, run my vacuum hoses.
(Narrator)>> Don't go away, "Project Street Regal" is going under the knife to give it a grand effect.
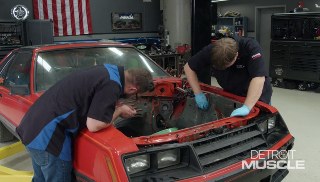
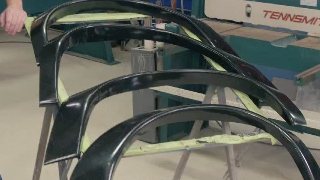
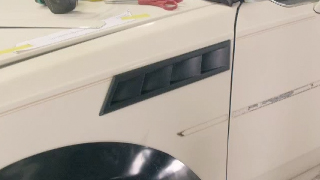
(Tommy)>> Hey y'all, glad you made your way back. Well we're steadily trying to remove the ma-ma effect off of our Buick here and we're making some pretty decent progress. We got the vinyl top off of it, a custom rear spoiler, and some fancy bumpers for each end. Now this car had a couple of performance brothers from back in the day. The Buick Grand National and the GNX, and I'm a big fan of both of those cars. So I want to take some of the body options that they had and add them onto our car. Now one of those modifications is relatively simple. The other one's gonna require some cutting. So what we're gonna do is install these pieces that we got from Original Parts Group. We've got a full set of fender flares and some side scoops. Now to install these it's pretty straight forward. They have a bolt on design. So let's go ahead and get these on and out of the way. We'll start out by removing the chrome trim pieces around the wheel openings and bottom of the quarter. Then we can put our flare into place and clamp it down. These things just screw right to the inner fender well lip, and just like that they're installed. We've got our flares on. Now it's time for us to install our louvres. Now to do this it's not really all that complicated but it does require us to cut a big ole hole here in the side of this fender. Now with the kit it comes with an instruction sheet that gives you a template of what you're gonna have to trim out. So let's go ahead and cut this out of here and we can get started. ♪ ♪ For placement on our template it's supposed to be three quarters of an inch down from this body line and this corner here is supposed to be two inches from this edge. We need to make some measurements and then we can tape it into place. Luckily for us the lower pinstripe is dead on three quarter. So we just need to mark the back. Now we can place our template on the fender and trace around it. To cut out my hole what I'm gonna do is I'm gonna use a drill. Make me a couple of holes here in all the corners, and then follow that up with my body saw and cut out that piece. Now whenever you're gonna cut something like this out you need to keep in mind your tooth count on your blade. You want to choose the correct blade for the material that you're working on. Now we're cutting steel and both of these are for cutting metal but the one here is 32 tooth count per inch. This one is a 14. This is really nice for cutting sheet metal because the teeth are so much closer together. With this one here that's far more course, if you were to try to use it you could actually damage the panel. After punching our holes it's time to let some metal chips fly. [ saw buzzing ]
(Tommy)>> Oh and like your kindergarten teacher told you, stay inside the lines. ♪ ♪ If you're installing these onto a painted car you want to come back and touch up this raw edge because you want to prevent it from rusting. Now with our car we've still got to do all the paint work and all that stuff. So we're just gonna stick this thing in there to see what it looks like. ♪ ♪ Oh yeah it looks pretty cool. Now I just need to do the other side.
(Narrator)>> Coming up we show you the cure for peek-a-boo rust.
(Tommy)>> Hey y'all, thanks for hanging with us. We've got our louvres and flares on, and this Buick's looking pretty killer. A while back we removed our vinyl top and sanded off all that goo, and up under that top is the seam where the quarter panel and the roof join, and they fill it in with some plastic or even lead depending on the age of your car. And whenever we took all that off I found a pretty common problem. That would be rust up under the filler. What happens is moisture gets under there. It starts to corrode and pushes the fill off. So all this has to come off to see how bad everything is. We've got to get this shinny stuff out of the way. We don't want to mess it up because we'll be using it later down the road. ♪ ♪ Grinding time! [ metal grinding ]
(Tommy)>> This is what I was talking about. You can see the evidence of some rust all the way back here, but from the visual that we've seen before we started grinding it was just right in this area. This is exactly why you've got to pull this stuff out, to see what's under there. [ metal grinding ]
(Tommy)>> Our 36 grit disc chews right through this old plastic. ♪ ♪ Don't get crazy here with your air tool, and keeping the r-p-m's down. We're just trying to get the filler off, not grind holes in the roof. A wire brush does a good job as well, really well in those nooks and crannies. [ grinder buzzing ]
(Tommy)>> Now with everything all cleaned up the next step we're gonna do is fully weld both of these joints. ♪ ♪ Keep in mind that you're welding near a big, flat panel, the roof. So spacing out your welds and letting it cool a bit is a good idea, and if you have to do it a couple of times it's no big deal. Now a quick massage with a grinder and we're ready to move on. With everything welded and prepped it's time to spread on some filler to smooth it out. On a joint like this I prefer to use the stronger aluminum reinforced filler. Once it's all mixed up it can be applied directly to our metal surface. When using filler make sure to squish it into the seam to minimize the chance of an air pocket. ♪ ♪ After it hardens sand with some 36 on a hand block. We'll wipe it a second time to get our desired shape and switch to some 80 grit for a smoother finish. ♪ ♪ Well that didn't take much effort at all and it put us one step closer to getting some shiny paint put on "Street Regal". If you guys have any questions about what you've see on today's show go Powernation TV dot com.
Show Full Transcript
(Marc)>> Hey everybody, welcome to Detroit Muscle. Today we're working on our two '80's projects. I've got my sights set on our '81 Mustang Cobra "Project Sydewinder". Most recently we dressed up the front end with some new lights and some aero, but we've worked this thing over for a while top to bottom, inside and out, and even under the hood. One thing we haven't touched though is the rear. So I've got some flare for that. Speaking of flare we've got these huge wheel openings here because we added these fender flares a while back. So we've got some wheels and tires to fill those up. We're gonna be unveiling those, getting them on the car today. Trust me you want to see them. We may have to do a bit of trimming but hey, it's part of the fun right?
(Tommy)>> That's it. Now Marc's Mustang is getting dangerously close to hitting the highway and me with my Buick, well I've got a long road to hoe, but a little later on we're gonna address a few body mods that this thing needs. One's gonna be an upgrade, one's gonna be a repair.
(Marc)>> Being a kid in the '80's and being into cars there were three vehicles I was really into. Big Foot, Lamborghini Countach, and the Saleen Mustangs. It's safe to say I'll never be able to afford two of those, but I've had several Mustangs in my time and my favorites are still those four eyed Saleens, and a lot of those had a mesh style wheel on them. So I used that for my inspiration for wheels for "Sydewinder". These are the LSThree-C's from Forgeline. They've taken that iconic mesh design and modernized it with a concave center profile to create a wheel with elegant looks, timeless character, and plenty of room for brake fitment. It's a custom made to order three piece wheel that's produced from forged 60-61 TSix aluminum centers and heat treated rim shells. They're assembled with stainless steel ARP fasteners and fully customizable in size, fitment, and finish. We went with a square setup, and ours measure 18 by 10 with a six inch back space. We chose the dark transparent smoke face so you can see all of that nice machine work, as well as satin black inner and outer lips. And since we've gone through all this work to make our Mustang track capable, and to compliment these high end wheels, we needed a set of tires that were up to the task as well. So we went with the Hoosier R-seven. This is a DOT compliant "R" compound tire built specifically for auto cross and open track use. It has a soft, sticky compound for maximum traction, and a "W" speed rating of 168 miles per hour. We went with a set of 285/30 18's. A massive size for our Fox body, especially on the front. These are gonna help our Cobra steer and brake at its maximum potential out on the track. All of this stuff is made in the USA, from the tires, to the wheels, to those ARP bolts that hold the wheels together. You better believe we like that. Just need to get them on the car now. I'll put the wheel on the car, get the lug nuts started by hand, and tighten them down. Alright let's see if this thing clears. Good that way, when I go back that way it hits. It hits this fender extension. Actually the fender itself. Now I'm gonna have to make a cut. So I'll make a mark and cut it, and then we'll drop it down on the ground so this wheel and tire's at ride height, and then we'll check it. Here we're gonna use the tire as a guide when making our mark. Now we can trim the fender. [ saw buzzing ]
(Marc)>> Using our body saw allows us to fit in tight areas and make quick work of the fender. ♪ ♪ Let's get it on the ground. ♪ ♪ With our car on the ground we can turn the wheels at ride height, making sure nothing else touches or hits the tire. ♪ ♪ Alright plenty of room. Well I know what you're thinking. We just put those race tires on our car and this is a street car. How are we gonna drive it on the street? Well we've got a solution for that. We're actually gonna install these GMax RS' from General Tire. This is their newest ultra-high performance street tire. It'll provide the most grip in both wet and dry conditions, and it'll handle everything that our Mustang will throw at it on the street. But those are gonna have to wait until later, after we get our Mustang tested out on the track. We'll just dismount those "R" compounds, get the street tires on, and hit the roads. We still have more to do. I've got to get that left front fender trimmed, get the other three wheels and tires on, and I've got something special planned out back.
If you've got a survivor or you're doing a full restoration like this beautiful '69 Camaro you're gonna need seals and weather stripping. The problem is you go into the catalog and order all that stuff piece by piece you may not get everything you need, and not only that you're not sure about the quality. Well a solution to those problems is Steele Rubber Products, and we've got Danny here from Steele to talk about their products, including the parts here for that '69 Camaro. What makes your stuff different?
(Danny)>> So all of our parts are designed from original. So they're gonna fit and perform just like they did from the factory, but we use more modern, higher quality materials for the rubber, for the brass cores so it last a really long time.
(Marc)>> And you sell all of this stuff as kits right?
(Danny)>> Yeah, so we have kits for your window felts, or if you're doing a paint kit all the trim, bumpers, and weather stripping, and all that is going to be in our year, make, model specific catalogs.
(Marc)>> Cool, and if you need something custom or you need something universal they've got stuff for that as well. Just go to their website, Steele Rubber dot com.
(Narrator)>> Stay with us. Marc adds an upgrade to the rear of "Project Sydewinder" giving it flare and performance.
(Marc)>> Hey folks welcome back. We're working on our '81 Mustang Cobra, "Project Sydewinder". We got the wheels and tires on it, and I went ahead and trimmed up that left front fender. That way we can turn the steering wheel full lock left and right without any clearance issues even at ride height. But before we roll this thing off the lift for the final time there's one thing I want to address and that's the appearance of the rear here. It's basically stock. I mean other than this patina paint job we did a while back. We've even got the stock taillights here. Most people ditch those for the later model ones. Even has the stock spoiler. Now this is a rare option. So I want to keep it. This was only available in the '79 pace, '79 to '81 Cobras, and the '82 GT. After that it went away forever. So I wanted to preserve it. It's part of the personality of the car, but I want to dress it up a little bit and give it some function with this piece right here that we got from Scott Rod Fabrications. They made this specifically for our car. It's the same company that made that splitter and all those block off panels as well. Now we just need to get it bolted on. Oh yeah that's gonna look pretty good. Hey Tommy will you give me a hand please. We're gonna string a line of masking tape all the way across here where we need to drill our holes to mount that new wing to our spoiler. We're doing that for a few reasons. One, this is nice and bright, and that'll be easy to see where we make our marks. Another reason is because this tape is going to be a buffer. You go to drill those holes. If you do it too quick the head of the drill will scratch the paint. Instead you'll hit this first.
(Tommy)>> Also if you were working on a steel surface, whenever you go to dig into it those curly Q's coming out, they can scratch it as well, and that tape can be life saver.
(Marc)>> That end.
(Tommy)>> Sure thing, where do you want it?
(Marc)>> Just above that pocket.
(Tommy)>> You wanting to measure this thing out or are we gonna eyeball it?
(Marc)>> I think if it looks straight it is straight. All of our holes covered up by that tape?
(Tommy)>> Yeah.
(Marc)>> How far are you outside that pocket?
(Tommy)>> I'm right on the hole.
(Marc)>> Okay come my way about a sixteenth of an inch.
(Tommy)>> I'm flush with the edge of that hole.
(Marc)>> Okay back toward you then. Right, that looks good. Same amount of space up top too. So it curves around. Mark it. ♪ ♪ Alright.
(Tommy)>> You want to drill or you want me to?
(Marc)>> I'll do it. [ drill spinning ]
(Marc)>> We'll start by drilling our pilot hole using an eighth inch bit. [ drill spinning ]
(Marc)>> Followed by our 25-64ths for our actual holes. [ drill spinning ] ♪ ♪
(Tommy)>> We're gonna attach the spoiler on "Sydewinder" just like we did on "Street Regal", using these little threaded inserts. They're a cinch to install and they're perfect for an application like this. ♪ ♪ When installing threaded inserts you want to make sure it clamps to the material and doesn't move. If it does just give it a couple more squeezes with the gun. ♪ ♪
(Marc)>> Now it's time to get some thread locker on these bolts to mount our spoiler on. Now we've used blue and red Permatex thread locker here in the shop quite a bit, but you may not know that these have diameter recommendations. The blue for instance is good for quarter inch up through three quarter inch. We have quarter-20 bolts here so we could use that, but Permatex makes a low strength purple which is good up to quarter inch. We're gonna err on the low strength because these things have an allen head. It may be difficult to get off. We don't want to round that out and have to drill them out later. ♪ ♪ I'm gonna put the bolts in but now tighten them down. We want to make sure everything lines up and is gonna fit right. ♪ ♪ I like it! Nice and aggressive!
(Tommy)>> That's pretty snazzy.
(Marc)>> Then we can go back and finish securing the bolts. Whoa, that is impressive, and I can't wait to get old "Sydewinder" out on the track. ♪ ♪
(Marc)>> Hey we're working on our '81 Cobra project and we're tidying up a bunch of stuff under the hood. You know, the stuff we normally don't show you like plumbing, wiring. Tommy's actually making the spark plug wires right now. There's one thing here that we need to address on this particular car and that's the vacuum. Now this is a great engine. They built it down in Engine Power. Over 600 horsepower, 427 Windsor. It's got that single plane intake on it and there's no vacuum source on it. Now we've got a vacuum advanced distributor and we need a vacuum reference for our fuel pressure regulator. So we need to tap into there, and I'm gonna show you how to do that now. Well the best place to do it is gonna be right above the runners here where there's a common vacuum source. Right here near where the carburetor mounts. I don't want to do it on this side because that's where our throttle linkage is. I don't want to interfere with that. This other side over here is where the fuel lines are gonna be. I don't want to interfere with that either. And back here well it's just hard to get to. So the best candidate is right here in the front. I'll remove the tape off of the intake and put a piece of tape on the front, and mark the spot where we want to drill. ♪ ♪ We want to put ours right here in the center. ♪ ♪ Then we can stuff some shop towels down into the runners to make sure to fill the holes completely. ♪ ♪ Then we'll make a bowl of a few more towels to line the plenum. We'll do this to keep any metal shavings from falling into our engine. Now those rags will do the trick but even still any shavings falling down in there are too close for comfort. So I want to prevent that at all, and I'm gonna do that with my bit and this grease right here. I'm just gonna dip my drill bit down in there and that grease goes down into all the grooves of the drill bit, and as I drill it'll pick up the shavings. Make sure that you cover the entire bit with grease. ♪ ♪ When drilling just keep it slow and steady because you don't want any metal to fly into the intake. ♪ ♪ Now we'll use our big bit to make the final hole. ♪ ♪ All we have to do is use our tap to thread our hole for the fitting. You'll need to use grease on this as well. ♪ ♪ Using tape makes quick work of any other metal shavings that may have fallen around the intake. Alright well I got my brass "T" now. I can screw this right in here, put my nipples on it, run my vacuum hoses.
(Narrator)>> Don't go away, "Project Street Regal" is going under the knife to give it a grand effect.
(Tommy)>> Hey y'all, glad you made your way back. Well we're steadily trying to remove the ma-ma effect off of our Buick here and we're making some pretty decent progress. We got the vinyl top off of it, a custom rear spoiler, and some fancy bumpers for each end. Now this car had a couple of performance brothers from back in the day. The Buick Grand National and the GNX, and I'm a big fan of both of those cars. So I want to take some of the body options that they had and add them onto our car. Now one of those modifications is relatively simple. The other one's gonna require some cutting. So what we're gonna do is install these pieces that we got from Original Parts Group. We've got a full set of fender flares and some side scoops. Now to install these it's pretty straight forward. They have a bolt on design. So let's go ahead and get these on and out of the way. We'll start out by removing the chrome trim pieces around the wheel openings and bottom of the quarter. Then we can put our flare into place and clamp it down. These things just screw right to the inner fender well lip, and just like that they're installed. We've got our flares on. Now it's time for us to install our louvres. Now to do this it's not really all that complicated but it does require us to cut a big ole hole here in the side of this fender. Now with the kit it comes with an instruction sheet that gives you a template of what you're gonna have to trim out. So let's go ahead and cut this out of here and we can get started. ♪ ♪ For placement on our template it's supposed to be three quarters of an inch down from this body line and this corner here is supposed to be two inches from this edge. We need to make some measurements and then we can tape it into place. Luckily for us the lower pinstripe is dead on three quarter. So we just need to mark the back. Now we can place our template on the fender and trace around it. To cut out my hole what I'm gonna do is I'm gonna use a drill. Make me a couple of holes here in all the corners, and then follow that up with my body saw and cut out that piece. Now whenever you're gonna cut something like this out you need to keep in mind your tooth count on your blade. You want to choose the correct blade for the material that you're working on. Now we're cutting steel and both of these are for cutting metal but the one here is 32 tooth count per inch. This one is a 14. This is really nice for cutting sheet metal because the teeth are so much closer together. With this one here that's far more course, if you were to try to use it you could actually damage the panel. After punching our holes it's time to let some metal chips fly. [ saw buzzing ]
(Tommy)>> Oh and like your kindergarten teacher told you, stay inside the lines. ♪ ♪ If you're installing these onto a painted car you want to come back and touch up this raw edge because you want to prevent it from rusting. Now with our car we've still got to do all the paint work and all that stuff. So we're just gonna stick this thing in there to see what it looks like. ♪ ♪ Oh yeah it looks pretty cool. Now I just need to do the other side.
(Narrator)>> Coming up we show you the cure for peek-a-boo rust.
(Tommy)>> Hey y'all, thanks for hanging with us. We've got our louvres and flares on, and this Buick's looking pretty killer. A while back we removed our vinyl top and sanded off all that goo, and up under that top is the seam where the quarter panel and the roof join, and they fill it in with some plastic or even lead depending on the age of your car. And whenever we took all that off I found a pretty common problem. That would be rust up under the filler. What happens is moisture gets under there. It starts to corrode and pushes the fill off. So all this has to come off to see how bad everything is. We've got to get this shinny stuff out of the way. We don't want to mess it up because we'll be using it later down the road. ♪ ♪ Grinding time! [ metal grinding ]
(Tommy)>> This is what I was talking about. You can see the evidence of some rust all the way back here, but from the visual that we've seen before we started grinding it was just right in this area. This is exactly why you've got to pull this stuff out, to see what's under there. [ metal grinding ]
(Tommy)>> Our 36 grit disc chews right through this old plastic. ♪ ♪ Don't get crazy here with your air tool, and keeping the r-p-m's down. We're just trying to get the filler off, not grind holes in the roof. A wire brush does a good job as well, really well in those nooks and crannies. [ grinder buzzing ]
(Tommy)>> Now with everything all cleaned up the next step we're gonna do is fully weld both of these joints. ♪ ♪ Keep in mind that you're welding near a big, flat panel, the roof. So spacing out your welds and letting it cool a bit is a good idea, and if you have to do it a couple of times it's no big deal. Now a quick massage with a grinder and we're ready to move on. With everything welded and prepped it's time to spread on some filler to smooth it out. On a joint like this I prefer to use the stronger aluminum reinforced filler. Once it's all mixed up it can be applied directly to our metal surface. When using filler make sure to squish it into the seam to minimize the chance of an air pocket. ♪ ♪ After it hardens sand with some 36 on a hand block. We'll wipe it a second time to get our desired shape and switch to some 80 grit for a smoother finish. ♪ ♪ Well that didn't take much effort at all and it put us one step closer to getting some shiny paint put on "Street Regal". If you guys have any questions about what you've see on today's show go Powernation TV dot com.
