More Street Regal Episodes
Detroit Muscle Featured Projects
Detroit Muscle Builds
Want more content like this?
Join the PowerNation Email NewsletterParts Used In This Episode
Earl's Performance Plumbing
Earls Fittings
Matco Tools
MATCO Tools are the Official Tool Supplier to PowerNation
The Industrial Depot
Tools, Hardware, Shop Supplies
Wilwood Engineering
Wilwood - C5, C6 Brake Kit
Episode Transcript
(Tommy)>> This week
on Detroit Muscle.
(Marc)>> We jump back on our Buick buttoning up our power steering components and we add a high performance brake kit.
(Tommy)>> We'll also give you some tips and tricks on how to make some artistic brake lines. [ MUSIC ] [ engine revving ] [ MUSIC ]
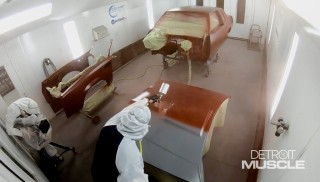
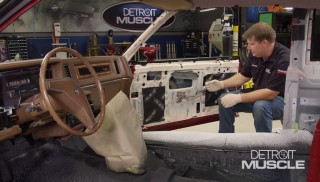
(Marc)>> Well we're finally making some serious progress on our Buick Regal project. This thing's been around for a while. It went away and came back a few times, but it's back to stay until it's completely done. Now you'll notice right off the bat it's gray. It's not beige anymore. That's because we've done a majority of the body work and got it in primer. As a matter of fact we've got some other panels over in the prep booth Tommy's working on, but that's for later. Today we've got some systems that need to get buttoned up on this car before we do paint it and send the chassis off to be primed while we're still in the mock up stages here. We've got to address the brake system. We haven't touched that yet. We've got to install a transmission cooler. We've got a couple of other little things including the power steering system, which I need to mount this remote reservoir, get the hoses made. I'm gonna do that now. First thing I need to do though is get these fittings into the steering rack. They're adapters to AN. Then I can make the hoses. [ MUSIC ] Well the next thing I'm gonna do is mount this power steering reservoir, but I went ahead and put the air intake in place so I knew where it was and I didn't want to interfere with it when I mounted this, and I have to mount this tube higher than the return on the pump itself. So the best place I can find is gonna be right here inside this inner fender. I have to grind down this little lip to make it smooth so the reservoir will mount flat against the inner fender. Then we can mark where we want the bracket to be. [ MUSIC ] Alright those are exactly three inches apart, and the one is half inch from the end. Using our measurements we can mark our holes, make sure it's level, and start drilling them out. [ MUSIC ] [ drill buzzing ]
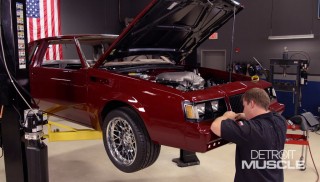
(Marc)>> I'm done with this. [ MUSIC ] Then we can bolt it up and start making our hoses. Yes sir! When making hoses you want to make sure you use the high pressure hose. We cut the end flush that way the fittings are nice and tight. [ MUSIC ] These hoses are under a lot of pressure. So you don't want them leaking or rupturing. [ MUSIC ] Yep! [ MUSIC ] Well I finished up the hoses, got those installed for the power steering system. So that's all done. I'm gonna move on to the brake system. Let's start with what's on the car. We've got a brake pedal assembly. We're gonna retain that. We're also going to retain this factory brake booster. The diaphragm's good. So we're just gonna build out from there, and we're gonna do that with all the stuff we've got here on the table that we got from Wilwood. We're gonna start in the front here. We've got this big brake kit for C-5 and C-6 Corvettes. This is a direct bolt on. It's perfect for us because our chassis came with C-5/C-6 spindles. So that's gonna be a nice and easy install. As for the rear this is kind of a universal kit for Ford nine inch equipped cars. So it's very popular for street rods and muscle cars. It's got big rotors and calipers just like the front, but the difference is this has got a parking brake assembly. So that's super nice and easy to install. As for the master we spec'ed this one out to go directly into our factory brake booster. So it's gonna be just perfect. We do need to plumb it up a little bit with this proportioning valve. I'm gonna get that assembled here and get this thing bench bled. We'll get this thing on the car. After getting our master cylinder bled and assembled we'll mount it to our brake booster. [ ratchet clicking ]
(Marc)>> Alright with that installed we can move on, install the rest of our brake system.
(Tommy)>> We'll show you what to check for when adding a custom brake kit.
(Marc)>> Plus we install our transmission cooler.
(Tommy)>> Well I finished up in the prep booth and I got Marc out of the way. So I went ahead and assembled our rotors. I got them torqued to spec and set with some thread locker. Now we just need to go ahead and finish putting all this good stuff on. Before you start slapping on all these cool parts you want to make sure to do some inspecting first, and all of them have something to do with making sure this rotor fits on the hub correctly. Now if you were using some used parts here often times there's rust and corrosion here on the surface. You want to clean that off to make sure that that rotor's nice and true on there. Another one is this knurl on the stud, sometimes whenever it pushes through it's a little bit too fat and it runs into the back side of the hole. Another thing is the radius of this stub sticking through. Make sure that that doesn't have any interference with this spot here. Let's see where we're at. Get it lined up. Well we're good to go. So now we can put the caliper on. I'm gonna slide on a couple of washers and screw on some of these lug nuts. That helps to prevent me from dropping this rotor. I hate to bounce it off the floor. Plus it'll also help with setup. It keeps that rotor nice and tight against the hub so it's nice and true. I'm gonna twist this thing around and give me a little more room. Now if we were assembling this for the last time we'd put thread locker on these bolts, but since we're still in the mock up stage and we've still got to paint everything we're just gonna put it together. Now I'm gonna use this top bolt to keep that thing from falling on the floor. Lock these other bolts in, slide my shim up from the bottom. I'll go ahead and get that one start. Putting that bolt in from the top keeps you from having to use three arms. Now I'll take this one back out, put the shim in from the top. [ MUSIC ] Now there's no real big need to really crank down on this stuff. Just get it good and snug cause we're still in setup. [ MUSIC ] This caliper has a few adjustments that you have to do properly if you want your brakes to work correctly. You can see that this caliper is too far this way by the gap being wider on this side versus that one. So we need to take a few of them shims out, move everything back that way. The next thing you need to do is make sure the placement of the pad on the rotor surface is correct. What you want is with that caliper pushed all the way down that the top of the pad and the top of the rotor are flush. We're good in that department. So all we've got to do is take out a couple of shims and we'll be good to go. [ MUSIC ] [ ratchet clicking ] [ MUSIC ]
(Tommy)>> And yeah that did the trick. Now we're almost off the subject of brakes but we've got a little bit more plumbing to do.
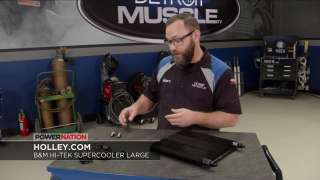
(Marc)>> Well one of the things we talked about doing today is going to be the transmission cooler and that's what we've got right here from B&M. We also got a bunch of fittings and hose from Earl's, including these special fittings right here that adapt to the transmission to AN-6. First things first I'm gonna get this transmission cooler mounted and we'll go from there. Let's see where this is gonna go. I like that! We're gonna use that hole, and that one, and drill one right here. [ drill buzzing ] [ MUSIC ]
(Marc)>> We need to mount this thing in front of where the condenser is gonna go so we can go right in front of the radiator support right here. Looks like we can just use some existing holes and bolt it right to the radiator support. [ MUSIC ] [ drill buzzing ]
(Marc)>> Because of the way this radiator support is stamped we need to use some spacers to make this cooler stand off a little bit so we can mount it flat. Alright now we just need to connect the lines. [ MUSIC ] Alright that's it for that. Now we can move on to something else.
(Tommy)>> We're pretty much ready to go ahead and install our starter on our old Buick here to finish mocking up the wiring. If you've got a starter that's giving you a fit maybe you need to check out Duralast Gold starters. Each one is engineered to deliver a torque output that meets or exceeds o-e-m specs, not to mention they're all built using new components that are triple tested to ensure quality and performance to meet the highest standards. So if you're in need of a starter and want to ensure the maximum life and performance you may want to check out Duralast Gold at Autozone.
(Marc)>> Tommy has some tips and tricks that'll have you sculpting brake lines like Michelangelo.
(Tommy)>> You know we went to some great lengths improving the performance and appearance on our old Buick and we're wanting to continue that with something as simple as the brake lines. Now normally what's on a vehicle are just mild steel, and you know them things can be a pain to paint and they've been known to rust. So what we're wanting to do is switch over to stainless steel. Now if you've ever worked with this kind of stuff you know that it can be a bit of a challenge but I've got a few tips for on doing this that may save you a little bit of effort. The first thing is tubing selection. We got this from Summit Racing. It comes in various sizes and in a 25 foot roll. The nice thing about this is it's double annealed and it has a wall thickness of .028. That makes it a lot easier to bend and flare. Now I know this stuff does come in a roll and some of you are probably thinking man, that's gonna be a pain to straighten out. Well they make a tool for that. That's this little jewel. It's easy to use. It just has five rollers that you have to feed the line through here and an adjustor at the top. Let me show you what I'm talking about. All you've gotta do is kinda straighten this out a little bit and feed it through. Crank your rollers down, and depending on how much arch is in your tubing is where you're gonna start out with your rollers. Crank it down a little more. Now that's what you're looking for. It can have a slight arch to it. You see what I mean? That's all you need. Once you've got your line all straightened out and you've got a rough estimate of how long of a piece you're gonna need you're ready to cut. What you're probably gonna wanna grab is one of these, a standard ole cutter. Maybe you're into things a bit more faster. So you're gonna grab a die grinder. Well technically with either one of these you don't want to use them because they'll both harden the tip of where you're gonna flare, and stainless is already prone to cracking. So just don't use those. What you would want to use is a standard ole hacksaw. [ saw grinding ]
(Tommy)>> Now once you cut this thing with a hacksaw often times it leaves a little burr on the end of it. All you need to repair that is a flat file. Also if you didn't cut this square and it's kinda at an angle you can fix it with it as well. That should do it. Now the next thing you ought to do is chamfer this tip just a bit. All I do is hold that in my thumb and kinda roll it around a bit. What that does is that helps prevent it from cracking when you flare it as well. You want to make sure to remove all the little shavings that fall in that tube. Just use some compressed air and blow out your tubing. I normally do that right before I install it on the car. Now whenever you're working with flares you'll run into a couple of different terms. You've got single and double flare, and then you also have 37 and 45 degree. What the 37 and 45 degree refers to is kinda how like a flower blooms. It's how far it opens up. Now I'll usually use 37 degrees single flare on stainless steel for a reason of that since stainless is so prone to cracking not having to open it up as far, the 37 degree works pretty well. With this 37 degree single flare we're gonna use a female tube nut, a support insert, and then slide this all into our flaring tool. [ MUSIC ] Now what you want is that tube just flush with the surface. Then cinch her down. Next is to put on your press device if you will. Just slide it in there and you can flare that thing, and you'll feel it bottom out. [ MUSIC ] Now let's see what we've got here. That's what you're looking for, a nice uniformed flare. Now the next one we're gonna talk about is hands down the most common when it comes to brake systems, and that would be a 45 degree inverted flare double flare. Now to do that with a piece of stainless steel well you're gonna need a pretty serious tool. We've got this one from Matco. It's a hydraulic style, and we use it all the time here in the shop, and when working with stainless it'll do the trick. This thing has a few dies that makes all the magic happen. First you've got your clamping die that holds your line. Second one mushrooms the tip of it, and then the third one, well that gives you your inverted flare. We'll slide in our first die. It's gonna mushroom that thing up. Pump it into it. Now with this one as you run it up you'll feel it start to get a little hard, and then all of sudden it will completely bottom out cause you can't pump it anymore. Then flip to your next one. [ MUSIC ] Basically the same way, and we're done. It's a double flare on a stainless steel. And for a double flare that's what you're looking for. Now the last thing we're gonna show you to do is how to bend tube correctly, and I'm not talking about over the top of your knee, and yeah I have done that but I'm gonna call that an emergency situation. Now with benders they make them in all different shapes and sizes, and for different diameter tubes. My favorite two would have to be this style here. This one gives you a nice tight radius and this one, well it's darn quick. This one is super simple. You just clamp her down and then bend it up. Do that again. They're super quick but they don't give you 100 percent accurate bends. These other ones, they definitely do. Now this one is a bit more cumbersome but it's a really nice bender. [ MUSIC ] Also they often times have a degree measurement on the side of them so that you can tell if you're doing 45, 15, 90, something like that. [ MUSIC ] This tool makes it look easy. Check out those 90 degree bends. I hope a few of these tips can help you guys out with your projects at the house, and I have to say with some hard work your brake lines can look like some artwork. I'm not talking abstract either. I'm talking happy trees.
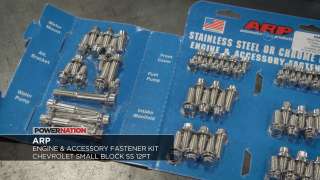
(Marc)>> If you're looking to dress up your small block Chevy with some shiny new parts and you probably want the bolts to match. So you may want to take a look at ARP's Engine and Accessory Fastener Kit. This stainless steel 12 point kit comes with all the bolts and washers you'll need to dress up your engine and its accessories. Stainless steel bolts are ideally suited for many automotive applications, and these come pre-packaged and labeled so you don't have to wonder which bolts go where. Not to mention they're made to be strong and durable with 170,000 p-s-i tensile strength. So if you're looking to take your engine to the next level check out ARP bolts.
(Tommy)>> We show you the correct way to measure for a driveshaft and take a look at Street Regal's progress.
(Marc)>> Well we've gotten quite a bit accomplished today but there's one more task I want to do before we blow this thing apart and send the chassis off to be powder coated and get the body painted, and that's gonna be measure for our driveshaft. There's a few things you want to make sure you take care of before you get this measurement. One is gonna be your driveline angle. It'll be the tilt of the engine and transmission, but then also get the rear end where it needs to be as far as pinion angle goes and then at ride height, but since we don't have our wheels and tires yet we can't get this thing on the four post. Second best thing is gonna be to put a couple of pole jacks under here, get it up at ride height, and get your measurement there. So that's what we're gonna do. [ MUSIC ] The starting point for our measurement is gonna be the end of the tail shaft housing here but that's where that seal rides. That machined surface there is where we need to measure from, and there's not enough area because that seal covers it. So we need to figure out the thickness of that metal seal first. That way we can add that to our measurement. [ MUSIC ] Looks like about .045. Well with that done now that makes it a lot easier because I can put my measuring tape right on the face of that seal and I can get my measurement for the length. Put that right on the face back to the center of the bore of the cap for the U-joint. Looks like 51 and 15/16th. Alright now we just need to add those numbers. Alright 15/16th is .9375. So we've got 51.9375. That's our measurement plus our .045, the thickness of our seal, and that's our length, 51.9825. Alright with that done we only need a few more pieces of information to get our driveshaft ordered. One is gonna be the spline count on our output shaft. Ours is 27. The other one is gonna be which U-joint we need for the rear, and this is a 13-50 style. If you don't know what yours is you can take a couple of measurements and that's gonna be the overall diameter of the U-joint, and then the diameter of the cap and that'll tell you which U-joint you have. The only other thing, and this is kinda important, is gonna be your power output level cause you want to make sure you have a driveshaft that's strong enough. You think they need that drive shaft length down to ten thousandths?
(Tommy)>> You've gotta get pretty close.
(Marc)>> We got a lot accomplished didn't we?
(Tommy)>> Absolutely but talking about today?
(Marc)>> No I mean since the beginning. This old Buick has come a long way since we started. To say that this thing looked like it could be your grandmother's ride wasn't too far of stretch. At first glance the me-maw colored paint might turn you off but we knew this ride had potential.
(Tommy)>> The first thing to do was go on a bit of a road trip to Street Rod Garage to get fitted for a new frame. They worked their magic and built one trick piece. Our frame now is a full custom setup with adjustable coil over suspension all the way around, some big ole fancy sway bars on the front and back, and a rack and pinion steering setup. These are just a few of the upgrades that our chassis has to take our Buick to the next level.
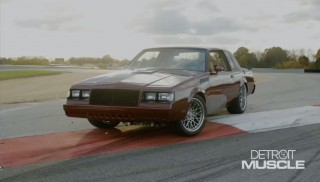
(Marc)>> We picked the 525 horsepower Chevrolet Performance Connect and Cruise. After getting it dropped on the chassis it was time to marry the body to the frame.
(Tommy)>> With so much performance on the bottom side of our Buick we had to make a few adjustments to the appearance to bring it up to speed. I've always been a big fan of the Grand National. So with a little bit of slicing and dicing we now have side scoops that the Buicks are known for. Then we had to address those big ole bulky bumpers. So some fab work was in order to doll them up. The tail end was begging for some attention as well. So with a couple of pieces of aluminum and a welder you could say we A-justed our back side appeal.
(Marc)>> And heck we didn't even talk about the mechanical stuff.
(Tommy)>> Yeah let's not get into all that, but I can say the next time y'all see this it'll be time for a color change.
(Marc)>> Change back to beige?
(Tommy)>> Probably, you know I like that color.
Show Full Transcript
(Marc)>> We jump back on our Buick buttoning up our power steering components and we add a high performance brake kit.
(Tommy)>> We'll also give you some tips and tricks on how to make some artistic brake lines. [ MUSIC ] [ engine revving ] [ MUSIC ]
(Marc)>> Well we're finally making some serious progress on our Buick Regal project. This thing's been around for a while. It went away and came back a few times, but it's back to stay until it's completely done. Now you'll notice right off the bat it's gray. It's not beige anymore. That's because we've done a majority of the body work and got it in primer. As a matter of fact we've got some other panels over in the prep booth Tommy's working on, but that's for later. Today we've got some systems that need to get buttoned up on this car before we do paint it and send the chassis off to be primed while we're still in the mock up stages here. We've got to address the brake system. We haven't touched that yet. We've got to install a transmission cooler. We've got a couple of other little things including the power steering system, which I need to mount this remote reservoir, get the hoses made. I'm gonna do that now. First thing I need to do though is get these fittings into the steering rack. They're adapters to AN. Then I can make the hoses. [ MUSIC ] Well the next thing I'm gonna do is mount this power steering reservoir, but I went ahead and put the air intake in place so I knew where it was and I didn't want to interfere with it when I mounted this, and I have to mount this tube higher than the return on the pump itself. So the best place I can find is gonna be right here inside this inner fender. I have to grind down this little lip to make it smooth so the reservoir will mount flat against the inner fender. Then we can mark where we want the bracket to be. [ MUSIC ] Alright those are exactly three inches apart, and the one is half inch from the end. Using our measurements we can mark our holes, make sure it's level, and start drilling them out. [ MUSIC ] [ drill buzzing ]
(Marc)>> I'm done with this. [ MUSIC ] Then we can bolt it up and start making our hoses. Yes sir! When making hoses you want to make sure you use the high pressure hose. We cut the end flush that way the fittings are nice and tight. [ MUSIC ] These hoses are under a lot of pressure. So you don't want them leaking or rupturing. [ MUSIC ] Yep! [ MUSIC ] Well I finished up the hoses, got those installed for the power steering system. So that's all done. I'm gonna move on to the brake system. Let's start with what's on the car. We've got a brake pedal assembly. We're gonna retain that. We're also going to retain this factory brake booster. The diaphragm's good. So we're just gonna build out from there, and we're gonna do that with all the stuff we've got here on the table that we got from Wilwood. We're gonna start in the front here. We've got this big brake kit for C-5 and C-6 Corvettes. This is a direct bolt on. It's perfect for us because our chassis came with C-5/C-6 spindles. So that's gonna be a nice and easy install. As for the rear this is kind of a universal kit for Ford nine inch equipped cars. So it's very popular for street rods and muscle cars. It's got big rotors and calipers just like the front, but the difference is this has got a parking brake assembly. So that's super nice and easy to install. As for the master we spec'ed this one out to go directly into our factory brake booster. So it's gonna be just perfect. We do need to plumb it up a little bit with this proportioning valve. I'm gonna get that assembled here and get this thing bench bled. We'll get this thing on the car. After getting our master cylinder bled and assembled we'll mount it to our brake booster. [ ratchet clicking ]
(Marc)>> Alright with that installed we can move on, install the rest of our brake system.
(Tommy)>> We'll show you what to check for when adding a custom brake kit.
(Marc)>> Plus we install our transmission cooler.
(Tommy)>> Well I finished up in the prep booth and I got Marc out of the way. So I went ahead and assembled our rotors. I got them torqued to spec and set with some thread locker. Now we just need to go ahead and finish putting all this good stuff on. Before you start slapping on all these cool parts you want to make sure to do some inspecting first, and all of them have something to do with making sure this rotor fits on the hub correctly. Now if you were using some used parts here often times there's rust and corrosion here on the surface. You want to clean that off to make sure that that rotor's nice and true on there. Another one is this knurl on the stud, sometimes whenever it pushes through it's a little bit too fat and it runs into the back side of the hole. Another thing is the radius of this stub sticking through. Make sure that that doesn't have any interference with this spot here. Let's see where we're at. Get it lined up. Well we're good to go. So now we can put the caliper on. I'm gonna slide on a couple of washers and screw on some of these lug nuts. That helps to prevent me from dropping this rotor. I hate to bounce it off the floor. Plus it'll also help with setup. It keeps that rotor nice and tight against the hub so it's nice and true. I'm gonna twist this thing around and give me a little more room. Now if we were assembling this for the last time we'd put thread locker on these bolts, but since we're still in the mock up stage and we've still got to paint everything we're just gonna put it together. Now I'm gonna use this top bolt to keep that thing from falling on the floor. Lock these other bolts in, slide my shim up from the bottom. I'll go ahead and get that one start. Putting that bolt in from the top keeps you from having to use three arms. Now I'll take this one back out, put the shim in from the top. [ MUSIC ] Now there's no real big need to really crank down on this stuff. Just get it good and snug cause we're still in setup. [ MUSIC ] This caliper has a few adjustments that you have to do properly if you want your brakes to work correctly. You can see that this caliper is too far this way by the gap being wider on this side versus that one. So we need to take a few of them shims out, move everything back that way. The next thing you need to do is make sure the placement of the pad on the rotor surface is correct. What you want is with that caliper pushed all the way down that the top of the pad and the top of the rotor are flush. We're good in that department. So all we've got to do is take out a couple of shims and we'll be good to go. [ MUSIC ] [ ratchet clicking ] [ MUSIC ]
(Tommy)>> And yeah that did the trick. Now we're almost off the subject of brakes but we've got a little bit more plumbing to do.
(Marc)>> Well one of the things we talked about doing today is going to be the transmission cooler and that's what we've got right here from B&M. We also got a bunch of fittings and hose from Earl's, including these special fittings right here that adapt to the transmission to AN-6. First things first I'm gonna get this transmission cooler mounted and we'll go from there. Let's see where this is gonna go. I like that! We're gonna use that hole, and that one, and drill one right here. [ drill buzzing ] [ MUSIC ]
(Marc)>> We need to mount this thing in front of where the condenser is gonna go so we can go right in front of the radiator support right here. Looks like we can just use some existing holes and bolt it right to the radiator support. [ MUSIC ] [ drill buzzing ]
(Marc)>> Because of the way this radiator support is stamped we need to use some spacers to make this cooler stand off a little bit so we can mount it flat. Alright now we just need to connect the lines. [ MUSIC ] Alright that's it for that. Now we can move on to something else.
(Tommy)>> We're pretty much ready to go ahead and install our starter on our old Buick here to finish mocking up the wiring. If you've got a starter that's giving you a fit maybe you need to check out Duralast Gold starters. Each one is engineered to deliver a torque output that meets or exceeds o-e-m specs, not to mention they're all built using new components that are triple tested to ensure quality and performance to meet the highest standards. So if you're in need of a starter and want to ensure the maximum life and performance you may want to check out Duralast Gold at Autozone.
(Marc)>> Tommy has some tips and tricks that'll have you sculpting brake lines like Michelangelo.
(Tommy)>> You know we went to some great lengths improving the performance and appearance on our old Buick and we're wanting to continue that with something as simple as the brake lines. Now normally what's on a vehicle are just mild steel, and you know them things can be a pain to paint and they've been known to rust. So what we're wanting to do is switch over to stainless steel. Now if you've ever worked with this kind of stuff you know that it can be a bit of a challenge but I've got a few tips for on doing this that may save you a little bit of effort. The first thing is tubing selection. We got this from Summit Racing. It comes in various sizes and in a 25 foot roll. The nice thing about this is it's double annealed and it has a wall thickness of .028. That makes it a lot easier to bend and flare. Now I know this stuff does come in a roll and some of you are probably thinking man, that's gonna be a pain to straighten out. Well they make a tool for that. That's this little jewel. It's easy to use. It just has five rollers that you have to feed the line through here and an adjustor at the top. Let me show you what I'm talking about. All you've gotta do is kinda straighten this out a little bit and feed it through. Crank your rollers down, and depending on how much arch is in your tubing is where you're gonna start out with your rollers. Crank it down a little more. Now that's what you're looking for. It can have a slight arch to it. You see what I mean? That's all you need. Once you've got your line all straightened out and you've got a rough estimate of how long of a piece you're gonna need you're ready to cut. What you're probably gonna wanna grab is one of these, a standard ole cutter. Maybe you're into things a bit more faster. So you're gonna grab a die grinder. Well technically with either one of these you don't want to use them because they'll both harden the tip of where you're gonna flare, and stainless is already prone to cracking. So just don't use those. What you would want to use is a standard ole hacksaw. [ saw grinding ]
(Tommy)>> Now once you cut this thing with a hacksaw often times it leaves a little burr on the end of it. All you need to repair that is a flat file. Also if you didn't cut this square and it's kinda at an angle you can fix it with it as well. That should do it. Now the next thing you ought to do is chamfer this tip just a bit. All I do is hold that in my thumb and kinda roll it around a bit. What that does is that helps prevent it from cracking when you flare it as well. You want to make sure to remove all the little shavings that fall in that tube. Just use some compressed air and blow out your tubing. I normally do that right before I install it on the car. Now whenever you're working with flares you'll run into a couple of different terms. You've got single and double flare, and then you also have 37 and 45 degree. What the 37 and 45 degree refers to is kinda how like a flower blooms. It's how far it opens up. Now I'll usually use 37 degrees single flare on stainless steel for a reason of that since stainless is so prone to cracking not having to open it up as far, the 37 degree works pretty well. With this 37 degree single flare we're gonna use a female tube nut, a support insert, and then slide this all into our flaring tool. [ MUSIC ] Now what you want is that tube just flush with the surface. Then cinch her down. Next is to put on your press device if you will. Just slide it in there and you can flare that thing, and you'll feel it bottom out. [ MUSIC ] Now let's see what we've got here. That's what you're looking for, a nice uniformed flare. Now the next one we're gonna talk about is hands down the most common when it comes to brake systems, and that would be a 45 degree inverted flare double flare. Now to do that with a piece of stainless steel well you're gonna need a pretty serious tool. We've got this one from Matco. It's a hydraulic style, and we use it all the time here in the shop, and when working with stainless it'll do the trick. This thing has a few dies that makes all the magic happen. First you've got your clamping die that holds your line. Second one mushrooms the tip of it, and then the third one, well that gives you your inverted flare. We'll slide in our first die. It's gonna mushroom that thing up. Pump it into it. Now with this one as you run it up you'll feel it start to get a little hard, and then all of sudden it will completely bottom out cause you can't pump it anymore. Then flip to your next one. [ MUSIC ] Basically the same way, and we're done. It's a double flare on a stainless steel. And for a double flare that's what you're looking for. Now the last thing we're gonna show you to do is how to bend tube correctly, and I'm not talking about over the top of your knee, and yeah I have done that but I'm gonna call that an emergency situation. Now with benders they make them in all different shapes and sizes, and for different diameter tubes. My favorite two would have to be this style here. This one gives you a nice tight radius and this one, well it's darn quick. This one is super simple. You just clamp her down and then bend it up. Do that again. They're super quick but they don't give you 100 percent accurate bends. These other ones, they definitely do. Now this one is a bit more cumbersome but it's a really nice bender. [ MUSIC ] Also they often times have a degree measurement on the side of them so that you can tell if you're doing 45, 15, 90, something like that. [ MUSIC ] This tool makes it look easy. Check out those 90 degree bends. I hope a few of these tips can help you guys out with your projects at the house, and I have to say with some hard work your brake lines can look like some artwork. I'm not talking abstract either. I'm talking happy trees.
(Marc)>> If you're looking to dress up your small block Chevy with some shiny new parts and you probably want the bolts to match. So you may want to take a look at ARP's Engine and Accessory Fastener Kit. This stainless steel 12 point kit comes with all the bolts and washers you'll need to dress up your engine and its accessories. Stainless steel bolts are ideally suited for many automotive applications, and these come pre-packaged and labeled so you don't have to wonder which bolts go where. Not to mention they're made to be strong and durable with 170,000 p-s-i tensile strength. So if you're looking to take your engine to the next level check out ARP bolts.
(Tommy)>> We show you the correct way to measure for a driveshaft and take a look at Street Regal's progress.
(Marc)>> Well we've gotten quite a bit accomplished today but there's one more task I want to do before we blow this thing apart and send the chassis off to be powder coated and get the body painted, and that's gonna be measure for our driveshaft. There's a few things you want to make sure you take care of before you get this measurement. One is gonna be your driveline angle. It'll be the tilt of the engine and transmission, but then also get the rear end where it needs to be as far as pinion angle goes and then at ride height, but since we don't have our wheels and tires yet we can't get this thing on the four post. Second best thing is gonna be to put a couple of pole jacks under here, get it up at ride height, and get your measurement there. So that's what we're gonna do. [ MUSIC ] The starting point for our measurement is gonna be the end of the tail shaft housing here but that's where that seal rides. That machined surface there is where we need to measure from, and there's not enough area because that seal covers it. So we need to figure out the thickness of that metal seal first. That way we can add that to our measurement. [ MUSIC ] Looks like about .045. Well with that done now that makes it a lot easier because I can put my measuring tape right on the face of that seal and I can get my measurement for the length. Put that right on the face back to the center of the bore of the cap for the U-joint. Looks like 51 and 15/16th. Alright now we just need to add those numbers. Alright 15/16th is .9375. So we've got 51.9375. That's our measurement plus our .045, the thickness of our seal, and that's our length, 51.9825. Alright with that done we only need a few more pieces of information to get our driveshaft ordered. One is gonna be the spline count on our output shaft. Ours is 27. The other one is gonna be which U-joint we need for the rear, and this is a 13-50 style. If you don't know what yours is you can take a couple of measurements and that's gonna be the overall diameter of the U-joint, and then the diameter of the cap and that'll tell you which U-joint you have. The only other thing, and this is kinda important, is gonna be your power output level cause you want to make sure you have a driveshaft that's strong enough. You think they need that drive shaft length down to ten thousandths?
(Tommy)>> You've gotta get pretty close.
(Marc)>> We got a lot accomplished didn't we?
(Tommy)>> Absolutely but talking about today?
(Marc)>> No I mean since the beginning. This old Buick has come a long way since we started. To say that this thing looked like it could be your grandmother's ride wasn't too far of stretch. At first glance the me-maw colored paint might turn you off but we knew this ride had potential.
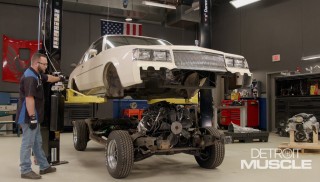
(Tommy)>> The first thing to do was go on a bit of a road trip to Street Rod Garage to get fitted for a new frame. They worked their magic and built one trick piece. Our frame now is a full custom setup with adjustable coil over suspension all the way around, some big ole fancy sway bars on the front and back, and a rack and pinion steering setup. These are just a few of the upgrades that our chassis has to take our Buick to the next level.
(Marc)>> We picked the 525 horsepower Chevrolet Performance Connect and Cruise. After getting it dropped on the chassis it was time to marry the body to the frame.
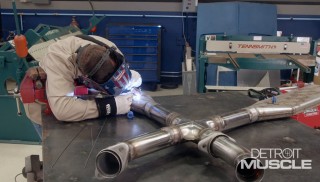
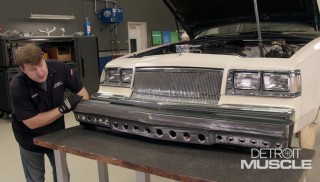
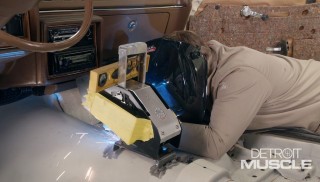
(Tommy)>> With so much performance on the bottom side of our Buick we had to make a few adjustments to the appearance to bring it up to speed. I've always been a big fan of the Grand National. So with a little bit of slicing and dicing we now have side scoops that the Buicks are known for. Then we had to address those big ole bulky bumpers. So some fab work was in order to doll them up. The tail end was begging for some attention as well. So with a couple of pieces of aluminum and a welder you could say we A-justed our back side appeal.
(Marc)>> And heck we didn't even talk about the mechanical stuff.
(Tommy)>> Yeah let's not get into all that, but I can say the next time y'all see this it'll be time for a color change.
(Marc)>> Change back to beige?
(Tommy)>> Probably, you know I like that color.
