Detroit Muscle Featured Projects
Detroit Muscle Builds
Want more content like this?
Join the PowerNation Email NewsletterEpisode Transcript
[ Tommy ] You're watching Powernation!
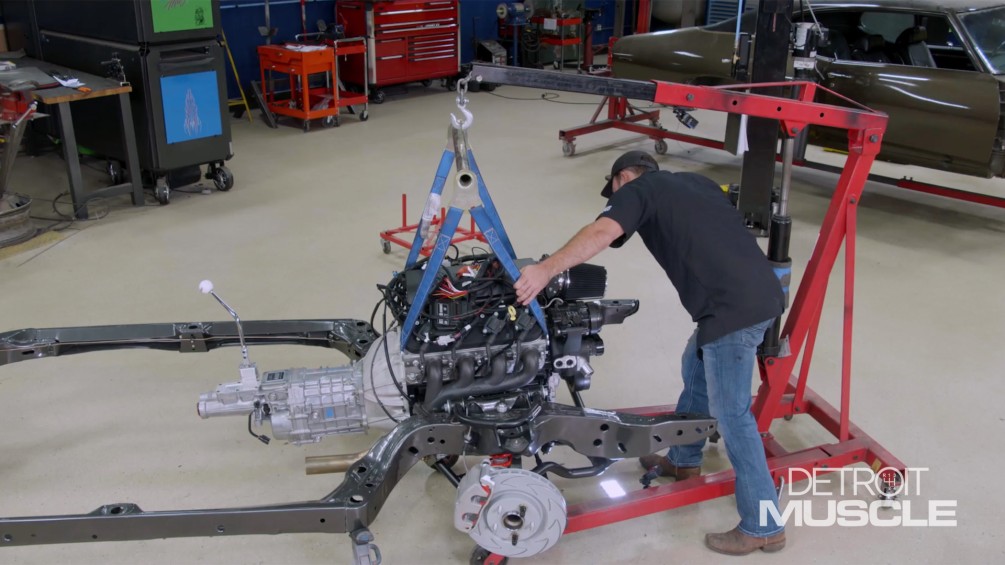
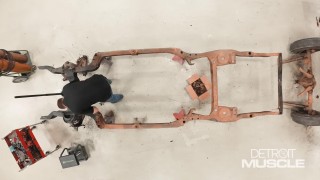
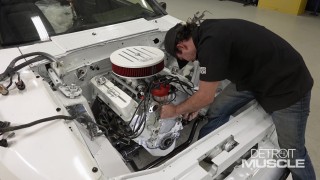
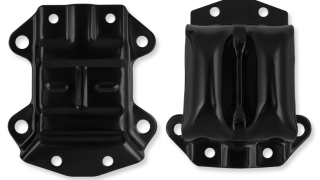
[ Peyton ] Today on Detroit Muscle we introduce this engine into its home. We're gonna be running some fuel lines and we'll take a trip up to the chrome platers. [ Music ] [ engines revving ] [ Music ] [ Tommy ] Hey y'all, welcome to Detroit Muscle. We've got some eye candy sitting here in our shop. If you'll notice this is our chassis that we've been working on out of that GTO project. It's got some trick suspension under it and I can't wait to sit behind the wheel of this old muscle car. We also have our LS power plant that's been kicking around in the shop. We've been toying with should it go in the GTO or should it go into that Nova. Well from where you're sitting today I bet you can guess which one it's gonna be. [ Peyton ] If you remember when we got our GTO it was just a roller surrounded by a box of parts, and to make this a numbers matching car we'd have to track down that original Pontiac power plant and my hope for that aren't very high. I figure why not throw a little bit of late model horsepower into it. All that's left is to get it in there. The engine mounts we'll be using are the Hooker Blackhearts that we got from Holley. They are an 11-gauge stamped clamshell with a polyurethane bushing. These are the heavy duty kit designed to bolt to the LS. We've already installed the frame side mounts. Now all that's left is to put these onto the motor. So I'm gonna grab a cherry picker and a cradle so I can work on it at eye level. Now there's a lot of different methods you can use when putting a motor into your vehicle and several different types of cradles. You can either do the old school fashion with a chain and two bolts or you can do something like this. Now this allows you to adjust front and back angle as you're putting the motor in, which is really helpful if the body is already on the chassis. Which you can see we have a bare chassis and our accessories are already on here, and they're nice and painted. So we want to use the one with these straps to keep from scaring up our new valve covers. [ Music ] Before I install the motor mounts I'm gonna apply a little bit of blue thread locker to the hardware. You don't want to be going down the road and these back out on you. Don't mistake this stuff for chap stick. [ Music ]
[ ratchet clicking ] We're ready to lower the motor down into the chassis and we're pretty well lined up but we'll make a few small adjustments as needed as we work our way down. [ Music ]
See how close we can get. Shift back just a hair. [ Music ]
Catching on something. [ Music ]
[ Music ] Perfect! [ Music ]
Well we're ready to install the transmission crossmember and we're gonna reuse the factory one that we had powder coated with the chassis. I just need to check fitment and see how well it's gonna work with our new transmission. [ Music ]
With the transmission crossmember in here I can see that I have a couple of options. If I want to reuse the factory mounting holes in the chassis I'm gonna have to trim out the crossmember because it contacts the transmission but if I slide it back a little bit I can use one hole on each side and I'll just have to drill some new ones. [ drill humming ] [ Music ]
[ Music ] With our transmission bushing in we can take a couple of measurements to make sure it's centered in the car as well as check in the incline of the motor cause we want it to sit about three degrees. Four and a quarter. 23 and three quarters. We need to go to the driver's side a quarter of an inch if we can. That's where it needs to live is right there. [ Music ] Go ahead and tighten these down. Hold it side to side. With our transmission centered in the car now we want to check the angle of our driveline. We want it to be somewhere from three to three point five degrees. We're sitting about three point three and that's right in the money spot. I'm glad this LS and 5-speed finally found a home, and no better place than in this GTO. I'm gonna get my mess picked up and then we'll be on to the next step. [ Tommy ] If you're looking to replace the fuel lines on your ride we've got some tips and tricks for you coming up next.
[ Tommy ] Hey guys, welcome back to the shop. As you can tell Peyton's made some pretty good progress getting our engine and transmission bolted into those frame rails and it sure is starting to make some good progress. Now the next thing that we're gonna do is tackle the fuel system. I need to run some lines from the front to the back and whenever you're doing something like this you know there are a couple of options but it all depends on where you're at and what you're trying to accomplish. One common product that you'll see people use and that is your standard rubber fuel line, but not all hose is created the same. If you're gonna use some of this you have to make sure it's for fuel and it's not just vacuum line because if you run fuel through vapor next thing you know this stuff is all soft and spongy and it's swelling up like it's about to have pups and that's just a problem or accident waiting to happen. Another issue with rubber fuel hose is as soon you put fuel through it the deterioration process has actually started to begin. This stuff doesn't have the lifespan of some of the other options. Now also you've got guys who like to use this because it's so easy. So with it being soft it's prone to being nicked, and cut, and damaged. So it's not nearly as durable as the steel stuff. So if you're gonna use this try and use it only in a temporary situation or in small, short doses. A step up from that stuff is the braided flexible hose. Now this stuff looks really nice and I know you've seen us use it before, and when you have it it usually requires these fancy aluminum ends. One of the drawbacks of this stuff also with the rubber hose is that it won't contain the fuel vapors. So if you end up having a hot rod that's sitting in your shop and you can smell gas it may not be the tank and it may not be the cap. It could be the line that you've plumbed. [ Music ] If you choose to go that route there's some tools that they suggest for you to use kinda like this adjustable wrench that we got from Summit Racing or some of these anodized wrenches. What you'll notice with these is they are size specific, and that also can be a little confusing sometimes if you're unfamiliar with them. You can pick up one of these little gauges and that sure does make things go a lot easier. If you're wondering what size it is you just fit in there. Another nice thing about these wrenches is they help to save the finish that is here on the side of your fitting. You'll notice sometimes that guys have used channel locks, vice grips, or something like that that's got teeth on it and these things will look like they're chewed up. That's what you don't want to do. So using these few pieces will help make these look really nice. What we're gonna be using is this. Some of the metal line that we got from Summit Racing because it's far more durable and doesn't have nearly the issues that the rubber hose does. However this does have a couple of drawbacks. It being metal it's far more complicated or difficult to bend and flex, and usually it requires a few more tools to get the job done correctly, but we're okay with that. Now with this stuff we're also gonna be running it a majority of the way here in the middle from our tank to our fuel injector rail, and we'll only end up using some of the rubber stuff probably about 12 inches or so. It's time for me to straighten this stuff out, make some bends, mount some lines. We've got our hard lines bent up and mounted to our chassis back behind us, and now it's time for us to connect this steel tube to our braided flexible line here. Now obviously we're gonna need some form of an adapter. You've got a couple of different options that you can go with. One is using this little insert with a tube nut, but the way you've gotta use that is you have to flare your lines and it's required to go at a 37 degree not 45 like we've showed you in the past. The process is exactly the same it's just a different die with a different angle. There is one thing that is a little bit different from what we've shown you before. Using these inserts you only flare this single flare. This insert works as the second part of it. You want to make sure to use the correct side of your die of course, 37. If you were to use 45 it won't seal properly. Then get my other side of this thing. Flip it around. [ Music ]
Now let's just move this along. All we're gonna be using is just the cone side cause again all we need is a single flare. [ Music ] Now if you'll look close on this thing you'll see that it doesn't have the folded over part. That's what would be the double flare. When you slide this thing up this sleeve helps to support that flare. For this thing to attach to this thing we need an adapter. All it is is a number six AN union, male on male. And then we can simply attach this one to it. It's that easy. Now there is another way you can put a fitting on here if you don't have the big fancy flare tool like what we've got here. What you use with it is referred to as a compression union. As you take this fitting apart there's this little brass part in here and that is what does all the sealing. Take the little nut and slide it on there, and then your ferrule slides on to here. Then with your fitting you put these together and then you just simply tighten it up. How this thing works, I'll unspin this to show you, is this little ferrule is compressed. It's squeezed between the two fittings, and it causes the big brass thing to bite into the tubing, and this is a one use only type setup. With these things you don't want to use them for brake lines or anything like that cause it's downright dangerous but for the pressures that we're under here this fitting would work just fine. Obviously we can't 100 percent complete our fuel system today because there's no fuel tank in the back, and to do that we've got to have that body sitting on top of the chassis. So all that is just gonna have to wait until another day but luckily we've made some pretty decent progress. Plop down and have a seat. Up next I'm gonna read you a story or something like that.
[ Tommy ] We're well on our way with our resurrection of our Pontiac GTO project. A while back I ordered several components from OPGI so that whenever we were finally ready and this thing's all black and shiny we could fall right into the assembly. One of those components that I ordered was one of these assembly manuals, and the reason for that I'm no expert when it comes to this particular car and I've built a lot of muscle cars over the years. Whenever I was sanding on that front bumper cover I realized there was a bunch of holes in stuff. Also when we picked this car up it came with a truckload of parts in random boxes. To assemble this car accurately you need some information. This catalog has all of that stuff. It shows you diagrams with brackets and bolts and exactly how the components went together per the factory. That can save you a tremendous amount of time whenever you're trying to figure out what does this part go to, or whenever you're assembling the front end of this car how to figure it out. Or we've got that subject matter that scares people to death, wiring. If you're needing the schematics it has that in case you're having to track down a problem that no one likes to deal with. There's just so much information in here it's actually pretty cool just to thumb through. We've got the spare tire, the jack location, and the orientation that you would assemble it. And let's see what else. You've got the front bumper. I actually find it fascinating flipping through going oh yeah, I'm gonna remember that. Hold on, I'm gonna have to come back here. Another thing I noticed in this book which is pretty cool. We've all heard of that GTO Judge. This thing has the exact dimensions of the graphic package. So if you're in the middle of a restoration with one of those or you're trying to build a tribute car these things will give you exactly the information you're looking for. And it may seem a little bit old school but it's a book and you don't have to worry about your screen going dark. We're pretty much ready to mount our body and then we can mount our fuel tank up under the car. Here's a little tip for you. I went to the Autozone Pro website and found this Duralast filter. What it's for is an '82 to '84 Corvette. So that means it is fuel injection capable. It has these little nipples right here that are designed to have a hose to slip onto it. It doesn't have those big metal lines and that kind of thing. You'll have to use a fuel injection clamp but what's great about it is you simply put these two together. Then we'll need one of these fittings that has a hose barb on it as well, which will screw onto our other feeing. That will be on the line, and the next thing you know you just slide that onto your fuel pump. It's that easy. Our pieces are going from '60s chrome to modern chrome. See how coming up next.
[ Music ]
[ Tommy ] Mister Steve I did not know you had this many options out here. [ Steve ] There's quite a few available finishes here. I understand you dropped off some parts for your GTO today. [ Tommy ] Yeah, we're wanting to go something a little bit odd, or not just your standard silver chrome if you will. [ Steve ] I know you've been really interested in black finishes. I know you've been talking black chrome, black chrome, black chrome. You know anything about black pearl? [ Tommy ] No. [ Steve ] Just a lighter shade of a black chrome. It has a little bit more reflective value. They really compliment each other real well. [ Tommy ] Take a look at this one. Is this the pearl? [ Steve ] That's the black pearl. [ Tommy ] That does look nice. [ Steve ] All these are really durable finishes. Chemistry was all developed here. Good looking stuff there. [ Tommy ] Sounds like you guys have it figured out. [ Steve ] You've got to keep improving, and it's all about making these projects into personal treasures. [ Tommy ] You mind if we take a stroll and see what you guys got cooking back there. [ Steve ] Yeah, you can see the process of how we're actually doing the application. I know you're a process guy and you're ready to put on a pair of gloves. [ Tommy ] Safety stuff for sure. I don't want to touch nothing. [ Steve ] I'd be glad to show you that. [ Tommy ] That'd be awesome! [ Steve ] Alright Tommy what we're gonna watch here is our trunk panel that is a bright nickel and a brushed finish be activated, and then we're gonna put a titanium topcoat on that. Just like chrome it's a transparent and it's gonna give us durability where this nickel will never tarnish. That way the enthusiast can wax it, wash it, rub on it and they're not gonna have to worry about tarnishing or oxidizing, which has been a problem with nickel plating brush and satin finishes for years. What Tim's doing right now is brushing off the part to get the fingerprints off of it where Tommy touched it one too many times. Now he's gonna go into the cleaner tank and he's gonna activate the part. This is a-c to d-c current. Just like a battery charger it's not gonna shock you, you just don't want to touch positive to negative. You're basically putting an electro-plated clear deposit on the part. In a way it's a weaker form of chrome. The issue with it for me, what took so long was trying to figure out how to dissolve titanium into that bath. Now we're looking at gold plating. Again a translucent finish. Part's been activated. This is a brushed nickel part. When it comes out it will be a brushed gold part. [ Music ] So that is 24 carat gold deposit, and now Tim's gonna rinse that off and he's gonna go over there and put the titanium topcoat on it the same way he put on our nickel trunk panel. Again just to give it durability and add to the life. Okay Tommy here we have Tim coming around with some shifter balls for mid-year Corvettes. He's entering the black chrome tank. Just like what we saw with gold and titanium and bright chrome this is a transparent and it is a deep black transparent deposit. Right now he is ramping up the voltage in order to cover the part. So the reason we have to be very conscious of the amount of time that we put on the parts is that everything here has to fit back together. There's nothing worse than getting a really great looking part and then it won't fit back together. Bumpers are normally about 90 minutes of nickel and then 90 seconds of chrome. These shifter balls have 30 minutes of nickel and then they just got 30 seconds of black chrome. We're looking at some various finishes here. We've got the jet black chrome. [ Tommy ] That's my favorite. [ Steve ] Beautiful mirror black finish. Got a lot of depth to it. Then you're looking at black pearl, which is just a lighter version of the black chrome. It gives you some contrast. You add satin and brush finishes in there. You can start creating depth with these cars. You can use these deposits and finishes to highlight different areas of your car. Under the hood, exterior, interior. It's all about personalizing this stuff. [ Tommy ] Everybody likes to accessorize. Sounds like you guys have a lot of options for sure. [ Steve ] The neat thing about the black pearl it flip flops around in the light. So you'll have a little bit different light look in sunlight, and then indirect light is gonna have a little bit darker look to it. Get out in the sun it's gonna lighten up some. [ Tommy ] Mad scientist stuff over here.
Show Full Transcript
[ Peyton ] Today on Detroit Muscle we introduce this engine into its home. We're gonna be running some fuel lines and we'll take a trip up to the chrome platers. [ Music ] [ engines revving ] [ Music ] [ Tommy ] Hey y'all, welcome to Detroit Muscle. We've got some eye candy sitting here in our shop. If you'll notice this is our chassis that we've been working on out of that GTO project. It's got some trick suspension under it and I can't wait to sit behind the wheel of this old muscle car. We also have our LS power plant that's been kicking around in the shop. We've been toying with should it go in the GTO or should it go into that Nova. Well from where you're sitting today I bet you can guess which one it's gonna be. [ Peyton ] If you remember when we got our GTO it was just a roller surrounded by a box of parts, and to make this a numbers matching car we'd have to track down that original Pontiac power plant and my hope for that aren't very high. I figure why not throw a little bit of late model horsepower into it. All that's left is to get it in there. The engine mounts we'll be using are the Hooker Blackhearts that we got from Holley. They are an 11-gauge stamped clamshell with a polyurethane bushing. These are the heavy duty kit designed to bolt to the LS. We've already installed the frame side mounts. Now all that's left is to put these onto the motor. So I'm gonna grab a cherry picker and a cradle so I can work on it at eye level. Now there's a lot of different methods you can use when putting a motor into your vehicle and several different types of cradles. You can either do the old school fashion with a chain and two bolts or you can do something like this. Now this allows you to adjust front and back angle as you're putting the motor in, which is really helpful if the body is already on the chassis. Which you can see we have a bare chassis and our accessories are already on here, and they're nice and painted. So we want to use the one with these straps to keep from scaring up our new valve covers. [ Music ] Before I install the motor mounts I'm gonna apply a little bit of blue thread locker to the hardware. You don't want to be going down the road and these back out on you. Don't mistake this stuff for chap stick. [ Music ]
[ ratchet clicking ] We're ready to lower the motor down into the chassis and we're pretty well lined up but we'll make a few small adjustments as needed as we work our way down. [ Music ]
See how close we can get. Shift back just a hair. [ Music ]
Catching on something. [ Music ]
[ Music ] Perfect! [ Music ]
Well we're ready to install the transmission crossmember and we're gonna reuse the factory one that we had powder coated with the chassis. I just need to check fitment and see how well it's gonna work with our new transmission. [ Music ]
With the transmission crossmember in here I can see that I have a couple of options. If I want to reuse the factory mounting holes in the chassis I'm gonna have to trim out the crossmember because it contacts the transmission but if I slide it back a little bit I can use one hole on each side and I'll just have to drill some new ones. [ drill humming ] [ Music ]
[ Music ] With our transmission bushing in we can take a couple of measurements to make sure it's centered in the car as well as check in the incline of the motor cause we want it to sit about three degrees. Four and a quarter. 23 and three quarters. We need to go to the driver's side a quarter of an inch if we can. That's where it needs to live is right there. [ Music ] Go ahead and tighten these down. Hold it side to side. With our transmission centered in the car now we want to check the angle of our driveline. We want it to be somewhere from three to three point five degrees. We're sitting about three point three and that's right in the money spot. I'm glad this LS and 5-speed finally found a home, and no better place than in this GTO. I'm gonna get my mess picked up and then we'll be on to the next step. [ Tommy ] If you're looking to replace the fuel lines on your ride we've got some tips and tricks for you coming up next.
[ Tommy ] Hey guys, welcome back to the shop. As you can tell Peyton's made some pretty good progress getting our engine and transmission bolted into those frame rails and it sure is starting to make some good progress. Now the next thing that we're gonna do is tackle the fuel system. I need to run some lines from the front to the back and whenever you're doing something like this you know there are a couple of options but it all depends on where you're at and what you're trying to accomplish. One common product that you'll see people use and that is your standard rubber fuel line, but not all hose is created the same. If you're gonna use some of this you have to make sure it's for fuel and it's not just vacuum line because if you run fuel through vapor next thing you know this stuff is all soft and spongy and it's swelling up like it's about to have pups and that's just a problem or accident waiting to happen. Another issue with rubber fuel hose is as soon you put fuel through it the deterioration process has actually started to begin. This stuff doesn't have the lifespan of some of the other options. Now also you've got guys who like to use this because it's so easy. So with it being soft it's prone to being nicked, and cut, and damaged. So it's not nearly as durable as the steel stuff. So if you're gonna use this try and use it only in a temporary situation or in small, short doses. A step up from that stuff is the braided flexible hose. Now this stuff looks really nice and I know you've seen us use it before, and when you have it it usually requires these fancy aluminum ends. One of the drawbacks of this stuff also with the rubber hose is that it won't contain the fuel vapors. So if you end up having a hot rod that's sitting in your shop and you can smell gas it may not be the tank and it may not be the cap. It could be the line that you've plumbed. [ Music ] If you choose to go that route there's some tools that they suggest for you to use kinda like this adjustable wrench that we got from Summit Racing or some of these anodized wrenches. What you'll notice with these is they are size specific, and that also can be a little confusing sometimes if you're unfamiliar with them. You can pick up one of these little gauges and that sure does make things go a lot easier. If you're wondering what size it is you just fit in there. Another nice thing about these wrenches is they help to save the finish that is here on the side of your fitting. You'll notice sometimes that guys have used channel locks, vice grips, or something like that that's got teeth on it and these things will look like they're chewed up. That's what you don't want to do. So using these few pieces will help make these look really nice. What we're gonna be using is this. Some of the metal line that we got from Summit Racing because it's far more durable and doesn't have nearly the issues that the rubber hose does. However this does have a couple of drawbacks. It being metal it's far more complicated or difficult to bend and flex, and usually it requires a few more tools to get the job done correctly, but we're okay with that. Now with this stuff we're also gonna be running it a majority of the way here in the middle from our tank to our fuel injector rail, and we'll only end up using some of the rubber stuff probably about 12 inches or so. It's time for me to straighten this stuff out, make some bends, mount some lines. We've got our hard lines bent up and mounted to our chassis back behind us, and now it's time for us to connect this steel tube to our braided flexible line here. Now obviously we're gonna need some form of an adapter. You've got a couple of different options that you can go with. One is using this little insert with a tube nut, but the way you've gotta use that is you have to flare your lines and it's required to go at a 37 degree not 45 like we've showed you in the past. The process is exactly the same it's just a different die with a different angle. There is one thing that is a little bit different from what we've shown you before. Using these inserts you only flare this single flare. This insert works as the second part of it. You want to make sure to use the correct side of your die of course, 37. If you were to use 45 it won't seal properly. Then get my other side of this thing. Flip it around. [ Music ]
Now let's just move this along. All we're gonna be using is just the cone side cause again all we need is a single flare. [ Music ] Now if you'll look close on this thing you'll see that it doesn't have the folded over part. That's what would be the double flare. When you slide this thing up this sleeve helps to support that flare. For this thing to attach to this thing we need an adapter. All it is is a number six AN union, male on male. And then we can simply attach this one to it. It's that easy. Now there is another way you can put a fitting on here if you don't have the big fancy flare tool like what we've got here. What you use with it is referred to as a compression union. As you take this fitting apart there's this little brass part in here and that is what does all the sealing. Take the little nut and slide it on there, and then your ferrule slides on to here. Then with your fitting you put these together and then you just simply tighten it up. How this thing works, I'll unspin this to show you, is this little ferrule is compressed. It's squeezed between the two fittings, and it causes the big brass thing to bite into the tubing, and this is a one use only type setup. With these things you don't want to use them for brake lines or anything like that cause it's downright dangerous but for the pressures that we're under here this fitting would work just fine. Obviously we can't 100 percent complete our fuel system today because there's no fuel tank in the back, and to do that we've got to have that body sitting on top of the chassis. So all that is just gonna have to wait until another day but luckily we've made some pretty decent progress. Plop down and have a seat. Up next I'm gonna read you a story or something like that.
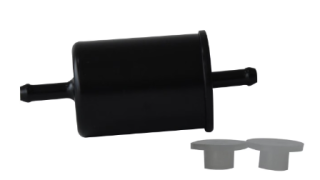
[ Tommy ] We're well on our way with our resurrection of our Pontiac GTO project. A while back I ordered several components from OPGI so that whenever we were finally ready and this thing's all black and shiny we could fall right into the assembly. One of those components that I ordered was one of these assembly manuals, and the reason for that I'm no expert when it comes to this particular car and I've built a lot of muscle cars over the years. Whenever I was sanding on that front bumper cover I realized there was a bunch of holes in stuff. Also when we picked this car up it came with a truckload of parts in random boxes. To assemble this car accurately you need some information. This catalog has all of that stuff. It shows you diagrams with brackets and bolts and exactly how the components went together per the factory. That can save you a tremendous amount of time whenever you're trying to figure out what does this part go to, or whenever you're assembling the front end of this car how to figure it out. Or we've got that subject matter that scares people to death, wiring. If you're needing the schematics it has that in case you're having to track down a problem that no one likes to deal with. There's just so much information in here it's actually pretty cool just to thumb through. We've got the spare tire, the jack location, and the orientation that you would assemble it. And let's see what else. You've got the front bumper. I actually find it fascinating flipping through going oh yeah, I'm gonna remember that. Hold on, I'm gonna have to come back here. Another thing I noticed in this book which is pretty cool. We've all heard of that GTO Judge. This thing has the exact dimensions of the graphic package. So if you're in the middle of a restoration with one of those or you're trying to build a tribute car these things will give you exactly the information you're looking for. And it may seem a little bit old school but it's a book and you don't have to worry about your screen going dark. We're pretty much ready to mount our body and then we can mount our fuel tank up under the car. Here's a little tip for you. I went to the Autozone Pro website and found this Duralast filter. What it's for is an '82 to '84 Corvette. So that means it is fuel injection capable. It has these little nipples right here that are designed to have a hose to slip onto it. It doesn't have those big metal lines and that kind of thing. You'll have to use a fuel injection clamp but what's great about it is you simply put these two together. Then we'll need one of these fittings that has a hose barb on it as well, which will screw onto our other feeing. That will be on the line, and the next thing you know you just slide that onto your fuel pump. It's that easy. Our pieces are going from '60s chrome to modern chrome. See how coming up next.
[ Music ]
[ Tommy ] Mister Steve I did not know you had this many options out here. [ Steve ] There's quite a few available finishes here. I understand you dropped off some parts for your GTO today. [ Tommy ] Yeah, we're wanting to go something a little bit odd, or not just your standard silver chrome if you will. [ Steve ] I know you've been really interested in black finishes. I know you've been talking black chrome, black chrome, black chrome. You know anything about black pearl? [ Tommy ] No. [ Steve ] Just a lighter shade of a black chrome. It has a little bit more reflective value. They really compliment each other real well. [ Tommy ] Take a look at this one. Is this the pearl? [ Steve ] That's the black pearl. [ Tommy ] That does look nice. [ Steve ] All these are really durable finishes. Chemistry was all developed here. Good looking stuff there. [ Tommy ] Sounds like you guys have it figured out. [ Steve ] You've got to keep improving, and it's all about making these projects into personal treasures. [ Tommy ] You mind if we take a stroll and see what you guys got cooking back there. [ Steve ] Yeah, you can see the process of how we're actually doing the application. I know you're a process guy and you're ready to put on a pair of gloves. [ Tommy ] Safety stuff for sure. I don't want to touch nothing. [ Steve ] I'd be glad to show you that. [ Tommy ] That'd be awesome! [ Steve ] Alright Tommy what we're gonna watch here is our trunk panel that is a bright nickel and a brushed finish be activated, and then we're gonna put a titanium topcoat on that. Just like chrome it's a transparent and it's gonna give us durability where this nickel will never tarnish. That way the enthusiast can wax it, wash it, rub on it and they're not gonna have to worry about tarnishing or oxidizing, which has been a problem with nickel plating brush and satin finishes for years. What Tim's doing right now is brushing off the part to get the fingerprints off of it where Tommy touched it one too many times. Now he's gonna go into the cleaner tank and he's gonna activate the part. This is a-c to d-c current. Just like a battery charger it's not gonna shock you, you just don't want to touch positive to negative. You're basically putting an electro-plated clear deposit on the part. In a way it's a weaker form of chrome. The issue with it for me, what took so long was trying to figure out how to dissolve titanium into that bath. Now we're looking at gold plating. Again a translucent finish. Part's been activated. This is a brushed nickel part. When it comes out it will be a brushed gold part. [ Music ] So that is 24 carat gold deposit, and now Tim's gonna rinse that off and he's gonna go over there and put the titanium topcoat on it the same way he put on our nickel trunk panel. Again just to give it durability and add to the life. Okay Tommy here we have Tim coming around with some shifter balls for mid-year Corvettes. He's entering the black chrome tank. Just like what we saw with gold and titanium and bright chrome this is a transparent and it is a deep black transparent deposit. Right now he is ramping up the voltage in order to cover the part. So the reason we have to be very conscious of the amount of time that we put on the parts is that everything here has to fit back together. There's nothing worse than getting a really great looking part and then it won't fit back together. Bumpers are normally about 90 minutes of nickel and then 90 seconds of chrome. These shifter balls have 30 minutes of nickel and then they just got 30 seconds of black chrome. We're looking at some various finishes here. We've got the jet black chrome. [ Tommy ] That's my favorite. [ Steve ] Beautiful mirror black finish. Got a lot of depth to it. Then you're looking at black pearl, which is just a lighter version of the black chrome. It gives you some contrast. You add satin and brush finishes in there. You can start creating depth with these cars. You can use these deposits and finishes to highlight different areas of your car. Under the hood, exterior, interior. It's all about personalizing this stuff. [ Tommy ] Everybody likes to accessorize. Sounds like you guys have a lot of options for sure. [ Steve ] The neat thing about the black pearl it flip flops around in the light. So you'll have a little bit different light look in sunlight, and then indirect light is gonna have a little bit darker look to it. Get out in the sun it's gonna lighten up some. [ Tommy ] Mad scientist stuff over here.
