More Street Regal Episodes
Detroit Muscle Featured Projects
Detroit Muscle Builds
Want more content like this?
Join the PowerNation Email NewsletterParts Used In This Episode
Matco Tools
MATCO Tools are the Official Tool Supplier to PowerNation
The Industrial Depot
Tools, Hardware, Shop Supplies
Episode Transcript
(Marc)>> You're watching Powernation!
(Marc)>> Today on Detroit Muscle we have some tips and tricks for wiring up your project.
(Tommy)>> And we'll show you an easy way to reduce heat and noise in your car.
(Marc)>> Plus we go on a bit of an expedition looking for some Detroit treasures. [ engines revving ]
(Marc)>> Hey everybody welcome to Detroit Muscle. When you're getting to the end of a project it can be very exciting but it can also be somewhat intimidating and time consuming because you get to the point where you're starting to do all those tedious processes, like recently we got our doors assembled, we put the glass and the hardware in, and even though it's not very exciting per se it is very important when you're building your car to do each thing in the right order, and to do it properly and take your time. So the next thing that we need to do on this is gonna be the wiring. Instead of just digging in and showing you how to terminate the specific ends on this car I'm actually gonna broaden it a little bit, take a step back, and talk about wiring in general because it's something we don't normally dig into here. Now there's a lot of tools to the trade, and some tools are better than others, and then there's a lot of different components that you can pick for a certain process. Then you have to actually make the termination. So we're gonna go through all of those today. When we're talking about automotive electrical systems there's one key component that you have to have, and that's the battery. Now most automotive electrical systems are 12 volts. Then once it leaves the battery it has to travel through a wire to get to the components, and depending on the demand of the system that decides the diameter of the wire. Here we've got three different diameters of power wire, and even though they're all for 12 volt they all have different amperage capabilities, like this one is for a battery cable. This is a zero gauge. That'll handle about 1,000 amps, or whatever your battery can put out. This wire right here, I would say this would handle about 150 amps. This is for like a charge wire for your alternator, and then we've got this one here that this would be for your smaller components like lighting and things like that, and this will only handle about 15 or 20 amps. Now you can't just sent that juice directly to your component. You have to have something in the middle that's a failsafe like a fuse or a circuit breaker. Of course fuses, if you blow'em you've got to replace'em. Circuit breaker is nice because if you draw more amps than its rate for it'll open up and then it'll reclose. Let's take a look at a few of these. Here's a 30 circuit breaker. This is where the power comes in from the battery and then the auxiliary power comes out on this side. Then you've got 175 amp mega fuse here, and this could power a car's entire electric system for lighting and things like that. Then your smaller circuits, well you've got all these fuses here. There's different shapes, and sizes, and styles, but what really matters is what their amperage rating is. This one's rated at 10 amps. This would be for like a smaller lighting circuit, and then this one here, this is a 30 amp fuse. This would be for like a fuel pump or a cooling fan. Now if you're installing an aftermarket component, like an electric fan, on a car that was equipped with one from the factory these little things are super handy. This is an inline fuse holder, and you can put that little 30 amp fuse that I showed you a few minutes ago right in there and voila! You've got a nice safe circuit, but there's one more thing you need if you're gonna power up that electric fan and that is a relay. What's great about a relay is it'll power a high amperage circuit, like for a fan, with a low amperage circuit. Let me show you how this works. You've got four wires on this relay. You've got two of the heavier wire and two of the thinner wire. One of the thing wires is gonna be your ground circuit and one is gonna be your trigger wire. The other two big wires that's gonna be your fused power coming from the battery into the relay and then this is your power that's gonna go out to your component like your cooling fan. All you need to do is with a low amperage circuit here send 12 volts to the relay and that'll connect the circuit between the red wire and the yellow wire and power up your fan. When you have a high amperage circuit, say like that cooling fan, you don't want to run that high amperage wire everywhere to your switch and things like that. So this way you can run a low amperage wire inside the car to your switch and that controls the relay and it keeps everything safe and tidy. Now we need to talk about terminals. You have to connect all these wires and components together and we're gonna do that with several different types of terminals. Ring terminals, spades, bullets, disconnect, butt connectors, and weather packs like you see on o-e-m style stuff. So I'm gonna show you some right and wrong ways to use these terminals and we're gonna do it with the butt connectors. Okay when we're talking about making connections on an automobile there's things that I'd like to take into consideration, make rules for myself. The first rule is gonna be minimize the number of connections. Second would be for those connections you do have to make get them done right because you only want to have to do them one time. Now when you're talking about that inline fuse like we were talking about a minute ago you've got to connect wires to it. There's just no way around it. Now you've got to do this in the best way possible, and there's several ways that you can do it. Some are better than others. You can use an old wire nut. This is really not for your car. Use this in your house, don't use it on your car. If it's a quick fix or an emergency that's fine. Another one I like to stay away from are these little guys right here. You can lay the wires in there and then when you close this up it makes the connection, but over time they come off and they're just not the best way to do a wiring job. Plus they look pretty sloppy. Then you've got your old trusty electrical tape, and you can use this in conjunction with those. I'm sure you've all seen it, but you don't want this to protect bare wires. This only goes over joints that you've made, or to clean up your wiring harness a little bit. So what I like to use are the butt connectors. Now there's like three different main types that you can use. I've got all three here. Let's call these good, better, and best, but what we've got here that I would call good would be the insulated butt, and you put your wire in there and then you clamp it down. The drawback is it's not protected for water and stuff to get down in there, and it's hard sometimes to crimp that insulation. The better would be this, which has got the heat shrink already installed. The problem with that is you can't really get solder down inside there, and secondly when you go to crimp this sometimes it can break through that heat shrink, and that allows moisture or for it to contact other wires as well. So what I like to use the best is just this bare butt connector here, and I'll show you how to use that. Well the first thing to do is to make sure you've got the end of your wire cut straight. Now we can strip it. [ MUSIC ] Now it's time for the butt connector. Once we get it crimped on then we can move on to the solder. You want to make sure you heat up the connector and not the wire or the solder. Once that's done we'll cut off a piece of heat shrink... [ MUSIC ] ...heat it up, seal it tight. Now there are other proper ways to do that but that's just the way that I like to do it, and you can apply those same principles to other terminals. Now hopefully you learned something and maybe took away some of the intimidation for doing wiring on your car. Now I need to go do some of these on our Buick.
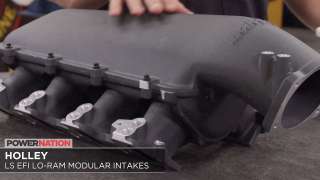
(Tommy)>> Holley's been in the LS swap and LS performance game for a while now, and their selection of components continues to grow like their modular Lo-Ram manifolds. There's several different options like this top feeD black one with dual injector ports. Or maybe your application needs to have a little lower profile and just a single set of ports. This one has a burst panel recess built into the lid. So if you're running a boosted application you can install an s-f-i approved panel to protect you and your car, and with these being modular you can swap out the top plate no matter your application. We'll show you a simple way to enhance the sound quality in your interior.
(Tommy)>> I sure hope you got that wiring done cause I don't want to do it.
(Marc)>> I don't blame you. I've just got a couple of loose ends and this thing will be all done.
(Tommy)>> Loose ends, you've been fighting loose ends for a while hadn't you?
(Marc)>> You talking about the car or the wiring?
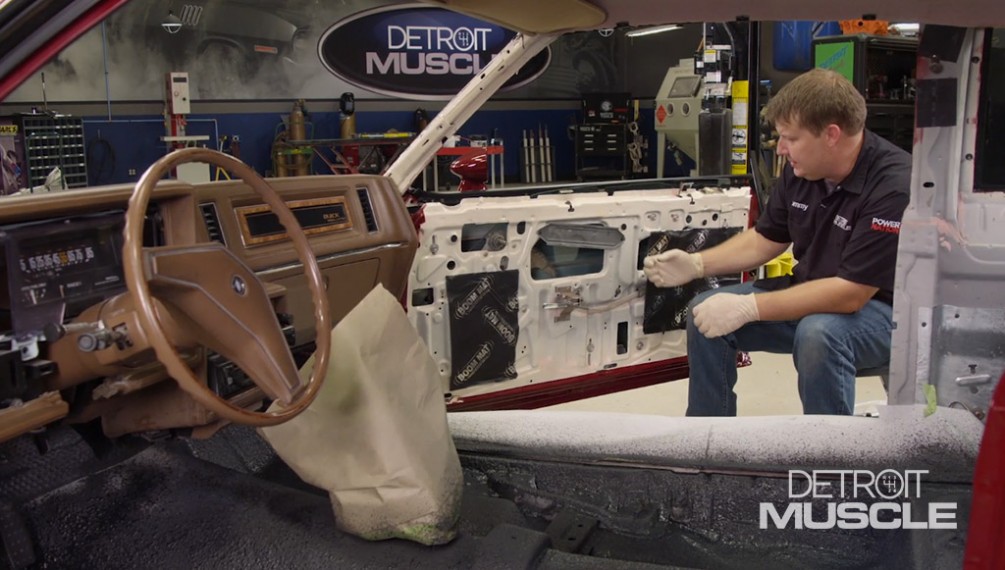
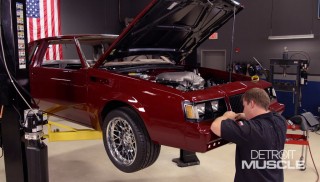
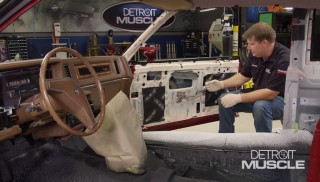
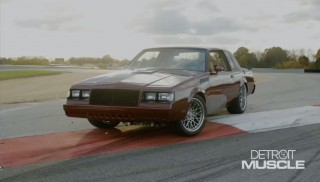
(Tommy)>> Over to the interior, on a different note we're getting dangerously close to having our Buick all finished up and the next big step is gonna be shipping it out to the upholstery shop. Now with this thing from the beginning I wanted it to perform well, look good, and be comfortable. So this next thing that we're gonna be doing is essential in that comfort department. We all know with older cars and hot rods they're plagued with a common problem of being hot, noisy, and rattling on the inside. Now a way to reduce those unwanted factors is by applying some additional thermal and sound control material. We've used this stuff on several of our projects and pretty simple to install. All you have to do is pull off the backing, smash it onto the panel, and you're good to go. Now this stuff drastically reduces road noise, and if you've got a stereo system and you like to listen to it cranked up to 11 that's gonna cut down on those vibrations. Then there are products that have to be applied using a spray gun. Now with the application of these it's a little bit more involved because you've got to have a few more tools, like a compressor and so on. Now with this particular product you just need to make sure that it's mixed thoroughly before you go to spraying, and the surface that you're applying it on is nice and clean. [ drill humming ] [ MUSIC ]
(Tommy)>> Before I go to spraying I like to mask off the stud or the hole where my seat's gonna mount, and also where the seatbelt mounts. Now spending a little bit of time here will save you a bit more time on the back side. If you do happen to get a little bit spray crazy and get out on the rocker or something you can clean that up with just warm water and a rag. [ MUSIC ] We've got everything cleaned up. I'm gonna mask off that shifter, grab an air hose, and then we can get to spraying. That should do it. We're gonna be applying two different materials. The first one is for sound control. You just want to lay it out nice and even, and then let it flash. The second one is a thermal coating. Now it's time to spray on our ceramic insulation. The application is basically the same. [ spray gun hissing ]
(Tommy)>> Now I like using this type of stuff here on the inside of the door panels for a couple of reasons. One of them, since it has a big void here or opening, this type of stuff you can put it over the top of it and it works really nice, and I've got a demonstration for you. [ metal knocking noise ]
(Tommy)>> That's what it sounds like now. [ MUSIC ] See it's that easy and check this out. [ metal knocking noise ]
(Tommy)>> This ole door sounds a whole lot more solid. Now we picked up both of these products at Summit Racing just in case they tickled your fancy and you'd like them for your ride. We've still got to let our floor coating dry, which is no big deal, and then our big bad Buick will be off to the upholstery shop.
(Marc)>> Coming up, we head out on an adventure looking for some automotive artifacts.
(Tommy)>> Well we just dropped off our Buick and it's in some pretty good hands, and basically for me and Marc we don't really have anything in the shop pressing that we've got to work on. So we're out here today on a bit of a treasure hunt.
(Marc)>> That's right, we've got 3,000 cars, trucks, vans, and r/v's at our disposal in this automotive graveyard. It's kind of a jungle I guess but I think we can probably work our way through it, find something cool. [ MUSIC ]
(Tommy)>> Marc I've been through here in years past and I know this would probably be a pretty sweet spot for you cause as you can see it's pretty Ford heavy. I'm not really a Ford guy but there's a couple back here in the back that the guy had mentioned to me, and that was one of them was an old trooper car, Fox body car. Can you tell them apart?
(Marc)>> Oh yeah, if all the parts are there I'll tell you what it is.
(Tommy)>> That's cool! Now these two beauties have been sitting here for a minute, easy to see. So what do you got to look at to tell?
(Marc)>> So one of these used to be a police car?
(Tommy)>> Yeah I don't know which one. All I was told it was a black, rusty, notch back.
(Marc)>> Okay well right off the bat I would say maybe this one because it's got the 10 hole wheels. The call them phone dials cause they've got 10 holes in them, but because it looks like it's got the original paint on it I would say probably this is our car here because you see how it's been painted over there. It probably had a police style paint scheme and they painted over it when they auctioned it off. So this is probably the one I'd be willing to bet, and we need to open the hood to find out for sure.
(Tommy)>> Is that the only way though?
(Marc)>> No the phone dials, the 10 hole wheels would be one of the first things you look at to be able to tell but because the police cars were so similar to the production cars there were only actually a few things that were different about them. They would have a calibrated speedometer, and I see this car's burnt. So there's no way to tell on it. The seats would be reinforced, the front seats are reinforced. Another way to tell is under the hood it would have heavy duty cooling on it. So it would have a power steering cooler, an oil cooler, better radiator hoses, and things like that.
(Tommy)>> Just standard police stuff.
(Marc)>> Other than that 5.0 liter Mustang. Let's get the hood open. Yeah this is like a '91 to '93 car cause it's got the air bag here. That's about all I can tell from the inside. Let's see if I can get this door open. [ branches cracking ]
(Tommy)>> Careful there is a tree.
(Marc)>> We are on the tree. I'll see if I can slide in here, get this hood popped. [ branches cracking ]
(Tommy)>> Is the cable still in there?
(Marc)>> Yep, the handle's melted, but see if you can put some pressure on it.
(Tommy)>> On the handle?
(Marc)>> On the hood, wiggle it a little bit.
(Tommy)>> Hold on a minute. Let me stomp down these giggy bushes. Yeah it just clicked. It's up now.
(Marc)>> It's open? The handle is melted but the cable's still intact.
(Tommy)>> You allergic to any of this stuff?
(Marc)>> Nah!
(Tommy)>> I'm allergic to a Ford. I want to say I should possibly be a little concerned. There is a spider web with a hole up under the hood here. So before I go to fiddling what side is the hood latch on?
(Marc)>> It's right here you've just got to push up.
(Tommy)>> In and up, yeah? Alright I'm done fiddling. You can try it.
(Marc)>> I'm gonna be the one that ends up with a spider on me. I told you the wrong side too. Got you! It's got the 5.0 liter, that's a good sign. I think we're on the right track. I don't see any of the heavy duty cooling right off the bat, but of course the radiator hoses have probably been replaced over the years. Let's see what else we can find. Another thing too here it's got a high amperage alternator, about like a 130 amp rather than a 75 amp like a regular care would have. The heater hoses were actually that blue silicone too, and I just noticed back here it's still got blue heater hoses back here. So that's a good sign too. Again just a hint not a guarantee. The only way to know for sure are those tags.
(Tommy)>> Now with that tag is that tag riveted in or screwed in?
(Marc)>> It's a metal tag about the size of a credit card or business car that's stapled to the radiator support, and sometimes they're missing. That's why I said if it's there I'll be able to tell. These are still here so that's good, hard to read though?
(Tommy)>> What are you looking for on it? A code or does it say police?
(Marc)>> It will say police. The word police will be on there. You're not gonna believe this, Florida highway patrol.
(Tommy)>> Really!
(Marc)>> Yep and it says it right there. All I can see is the "r-i-d-a h-w-y patrol". That was pretty cool, not what I expected.
(Tommy)>> Got a little critter on me. Really and truthfully with it being a confirmed state trooper car are state trooper cars sought after, are they worth more, anything like that?
(Marc)>> A little bit. If you care about police cars or you just want something that's unique sure.
(Tommy)>> To me it sounds just cool saying this is a true police car, you know what I mean?
(Marc)>> Yeah, there's definitely a cool factor there. And this one too, oh look the antenna, I didn't even notice that earlier. That was a hint. So this one was manufactured in May of '92. So this would be a '92.
(Tommy)>> I am a little let down though. It's a Florida car, not a Tennessee.
(Marc)>> Let's go further.
(Tommy)>> We keep looking in hopes to find the crown jewel.
(Tommy)>> Now Marc that other stuff was what I call the new items if you will. Now around here is the stuff that's been sitting quite a bit longer. You can tell by the foliage in the trees. This stuff around here has been here some of it 50 plus years. There's one old car over here I've got to show you man. Mother Nature has worked its magic on it. I guess you could say she massaged this quarter panel man. Check this old Chrysler Imperial out. Look at that!
(Marc)>> Turned it into an envelope, an-velope, which is it?
(Tommy)>> Yes, it's bent, that's what it is. Look dude that is like 7 inches, every bit of it, and you know I've always dug on these old big bodies. You know how I am.
(Marc)>> You've got a soft spot in your heart for them.
(Tommy)>> This car here back in the day was a Cadillac version in a Chrysler product. This was one of the most expensive cars on the road back then. It had chrome for days. The grille in this thing, ornaments everywhere, and even the steering wheel has jewelry on the side of it.
(Marc)>> They were fancy! I know some of these had dual air right? They had a front unit and a rear unit.
(Tommy)>> Yes sir.
(Marc)>> That's fancy, look what's inside.
(Tommy)>> Need a hub cap?
(Marc)>> You need 300 hub caps?
(Tommy)>> Even check out the hub caps that are in there man. Them things are old. Early stuff, '30's and '40's.
(Marc)>> It's full of them all the way up to here.
(Tommy)>> Wish I could get in there.
(Marc)>> Try.
(Tommy)>> Nah, not gonna do it. I'd buy a hub cap or two.
(Marc)>> So this car would have the, cause it's a '59 you said, so would it have the big dual quad crazy intake manifold on it? Cross Ram?
(Tommy)>> Cross Ram on it, this one came with a 413. I wouldn't think you would have that dual quad setup in it. I can tell you one thing is for sure. This thing would haul the mail and look good doing it. Think we gonna get any chigger bites out here?
(Marc)>> A few I bet.
(Tommy)>> It's worth it son, it's worth it.
(Marc)>> Want to try to open this thing?
(Tommy)>> Go ahead, there may be one of them rattle headed copper moccasins laying up on there.
(Marc)>> Still there!
(Tommy)>> Check out that decal on the valve cover that reads Imperial, yes sir.
(Marc)>> They were proud of that weren't they?
(Tommy)>> They were. I'm telling you this thing back in the day was expensive. Power everything, I mean everything. You've got to look at the ornaments that's on this car. The hood emblem, the "V's" here on the fenders itself. Check out the durn rearview mirror in the thing.
(Marc)>> That's cool!
(Tommy)>> Check out the bumper too brother. You know where they stopped putting chrome? As soon as the hood fell over, you know what I mean.
(Marc)>> Yes chrome everything.
(Tommy)>> I'd love to drive one of these today. You know when you show up at some kind of car show. Yeah I know it's not a Chevelle, Camaro, it's not the fastest but I can tell you you've got plenty of style.
(Marc)>> You know what would be cool? Put a Hellcat in one of those.
(Tommy)>> Could you imagine?
(Marc)>> It would be awesome!
(Tommy)>> Let's go check a couple other ones out.
(Marc)>> Let's do it.
(Tommy)>> So what do you think?
(Marc)>> I've never seen anything like it. How long you think it's been there.
(Tommy)>> Man I don't know but I can tell you by the look of things that Pontiac's pretty fertile.
(Marc)>> That's impressive! [ MUSIC ] So what was your favorite thing you saw today?
(Tommy)>> I could list a couple. Riviera here, there was a big ginormous tree. [ MUSIC ]
Show Full Transcript
(Marc)>> Today on Detroit Muscle we have some tips and tricks for wiring up your project.
(Tommy)>> And we'll show you an easy way to reduce heat and noise in your car.
(Marc)>> Plus we go on a bit of an expedition looking for some Detroit treasures. [ engines revving ]
(Marc)>> Hey everybody welcome to Detroit Muscle. When you're getting to the end of a project it can be very exciting but it can also be somewhat intimidating and time consuming because you get to the point where you're starting to do all those tedious processes, like recently we got our doors assembled, we put the glass and the hardware in, and even though it's not very exciting per se it is very important when you're building your car to do each thing in the right order, and to do it properly and take your time. So the next thing that we need to do on this is gonna be the wiring. Instead of just digging in and showing you how to terminate the specific ends on this car I'm actually gonna broaden it a little bit, take a step back, and talk about wiring in general because it's something we don't normally dig into here. Now there's a lot of tools to the trade, and some tools are better than others, and then there's a lot of different components that you can pick for a certain process. Then you have to actually make the termination. So we're gonna go through all of those today. When we're talking about automotive electrical systems there's one key component that you have to have, and that's the battery. Now most automotive electrical systems are 12 volts. Then once it leaves the battery it has to travel through a wire to get to the components, and depending on the demand of the system that decides the diameter of the wire. Here we've got three different diameters of power wire, and even though they're all for 12 volt they all have different amperage capabilities, like this one is for a battery cable. This is a zero gauge. That'll handle about 1,000 amps, or whatever your battery can put out. This wire right here, I would say this would handle about 150 amps. This is for like a charge wire for your alternator, and then we've got this one here that this would be for your smaller components like lighting and things like that, and this will only handle about 15 or 20 amps. Now you can't just sent that juice directly to your component. You have to have something in the middle that's a failsafe like a fuse or a circuit breaker. Of course fuses, if you blow'em you've got to replace'em. Circuit breaker is nice because if you draw more amps than its rate for it'll open up and then it'll reclose. Let's take a look at a few of these. Here's a 30 circuit breaker. This is where the power comes in from the battery and then the auxiliary power comes out on this side. Then you've got 175 amp mega fuse here, and this could power a car's entire electric system for lighting and things like that. Then your smaller circuits, well you've got all these fuses here. There's different shapes, and sizes, and styles, but what really matters is what their amperage rating is. This one's rated at 10 amps. This would be for like a smaller lighting circuit, and then this one here, this is a 30 amp fuse. This would be for like a fuel pump or a cooling fan. Now if you're installing an aftermarket component, like an electric fan, on a car that was equipped with one from the factory these little things are super handy. This is an inline fuse holder, and you can put that little 30 amp fuse that I showed you a few minutes ago right in there and voila! You've got a nice safe circuit, but there's one more thing you need if you're gonna power up that electric fan and that is a relay. What's great about a relay is it'll power a high amperage circuit, like for a fan, with a low amperage circuit. Let me show you how this works. You've got four wires on this relay. You've got two of the heavier wire and two of the thinner wire. One of the thing wires is gonna be your ground circuit and one is gonna be your trigger wire. The other two big wires that's gonna be your fused power coming from the battery into the relay and then this is your power that's gonna go out to your component like your cooling fan. All you need to do is with a low amperage circuit here send 12 volts to the relay and that'll connect the circuit between the red wire and the yellow wire and power up your fan. When you have a high amperage circuit, say like that cooling fan, you don't want to run that high amperage wire everywhere to your switch and things like that. So this way you can run a low amperage wire inside the car to your switch and that controls the relay and it keeps everything safe and tidy. Now we need to talk about terminals. You have to connect all these wires and components together and we're gonna do that with several different types of terminals. Ring terminals, spades, bullets, disconnect, butt connectors, and weather packs like you see on o-e-m style stuff. So I'm gonna show you some right and wrong ways to use these terminals and we're gonna do it with the butt connectors. Okay when we're talking about making connections on an automobile there's things that I'd like to take into consideration, make rules for myself. The first rule is gonna be minimize the number of connections. Second would be for those connections you do have to make get them done right because you only want to have to do them one time. Now when you're talking about that inline fuse like we were talking about a minute ago you've got to connect wires to it. There's just no way around it. Now you've got to do this in the best way possible, and there's several ways that you can do it. Some are better than others. You can use an old wire nut. This is really not for your car. Use this in your house, don't use it on your car. If it's a quick fix or an emergency that's fine. Another one I like to stay away from are these little guys right here. You can lay the wires in there and then when you close this up it makes the connection, but over time they come off and they're just not the best way to do a wiring job. Plus they look pretty sloppy. Then you've got your old trusty electrical tape, and you can use this in conjunction with those. I'm sure you've all seen it, but you don't want this to protect bare wires. This only goes over joints that you've made, or to clean up your wiring harness a little bit. So what I like to use are the butt connectors. Now there's like three different main types that you can use. I've got all three here. Let's call these good, better, and best, but what we've got here that I would call good would be the insulated butt, and you put your wire in there and then you clamp it down. The drawback is it's not protected for water and stuff to get down in there, and it's hard sometimes to crimp that insulation. The better would be this, which has got the heat shrink already installed. The problem with that is you can't really get solder down inside there, and secondly when you go to crimp this sometimes it can break through that heat shrink, and that allows moisture or for it to contact other wires as well. So what I like to use the best is just this bare butt connector here, and I'll show you how to use that. Well the first thing to do is to make sure you've got the end of your wire cut straight. Now we can strip it. [ MUSIC ] Now it's time for the butt connector. Once we get it crimped on then we can move on to the solder. You want to make sure you heat up the connector and not the wire or the solder. Once that's done we'll cut off a piece of heat shrink... [ MUSIC ] ...heat it up, seal it tight. Now there are other proper ways to do that but that's just the way that I like to do it, and you can apply those same principles to other terminals. Now hopefully you learned something and maybe took away some of the intimidation for doing wiring on your car. Now I need to go do some of these on our Buick.
(Tommy)>> Holley's been in the LS swap and LS performance game for a while now, and their selection of components continues to grow like their modular Lo-Ram manifolds. There's several different options like this top feeD black one with dual injector ports. Or maybe your application needs to have a little lower profile and just a single set of ports. This one has a burst panel recess built into the lid. So if you're running a boosted application you can install an s-f-i approved panel to protect you and your car, and with these being modular you can swap out the top plate no matter your application. We'll show you a simple way to enhance the sound quality in your interior.
(Tommy)>> I sure hope you got that wiring done cause I don't want to do it.
(Marc)>> I don't blame you. I've just got a couple of loose ends and this thing will be all done.
(Tommy)>> Loose ends, you've been fighting loose ends for a while hadn't you?
(Marc)>> You talking about the car or the wiring?
(Tommy)>> Over to the interior, on a different note we're getting dangerously close to having our Buick all finished up and the next big step is gonna be shipping it out to the upholstery shop. Now with this thing from the beginning I wanted it to perform well, look good, and be comfortable. So this next thing that we're gonna be doing is essential in that comfort department. We all know with older cars and hot rods they're plagued with a common problem of being hot, noisy, and rattling on the inside. Now a way to reduce those unwanted factors is by applying some additional thermal and sound control material. We've used this stuff on several of our projects and pretty simple to install. All you have to do is pull off the backing, smash it onto the panel, and you're good to go. Now this stuff drastically reduces road noise, and if you've got a stereo system and you like to listen to it cranked up to 11 that's gonna cut down on those vibrations. Then there are products that have to be applied using a spray gun. Now with the application of these it's a little bit more involved because you've got to have a few more tools, like a compressor and so on. Now with this particular product you just need to make sure that it's mixed thoroughly before you go to spraying, and the surface that you're applying it on is nice and clean. [ drill humming ] [ MUSIC ]
(Tommy)>> Before I go to spraying I like to mask off the stud or the hole where my seat's gonna mount, and also where the seatbelt mounts. Now spending a little bit of time here will save you a bit more time on the back side. If you do happen to get a little bit spray crazy and get out on the rocker or something you can clean that up with just warm water and a rag. [ MUSIC ] We've got everything cleaned up. I'm gonna mask off that shifter, grab an air hose, and then we can get to spraying. That should do it. We're gonna be applying two different materials. The first one is for sound control. You just want to lay it out nice and even, and then let it flash. The second one is a thermal coating. Now it's time to spray on our ceramic insulation. The application is basically the same. [ spray gun hissing ]
(Tommy)>> Now I like using this type of stuff here on the inside of the door panels for a couple of reasons. One of them, since it has a big void here or opening, this type of stuff you can put it over the top of it and it works really nice, and I've got a demonstration for you. [ metal knocking noise ]
(Tommy)>> That's what it sounds like now. [ MUSIC ] See it's that easy and check this out. [ metal knocking noise ]
(Tommy)>> This ole door sounds a whole lot more solid. Now we picked up both of these products at Summit Racing just in case they tickled your fancy and you'd like them for your ride. We've still got to let our floor coating dry, which is no big deal, and then our big bad Buick will be off to the upholstery shop.
(Marc)>> Coming up, we head out on an adventure looking for some automotive artifacts.
(Tommy)>> Well we just dropped off our Buick and it's in some pretty good hands, and basically for me and Marc we don't really have anything in the shop pressing that we've got to work on. So we're out here today on a bit of a treasure hunt.
(Marc)>> That's right, we've got 3,000 cars, trucks, vans, and r/v's at our disposal in this automotive graveyard. It's kind of a jungle I guess but I think we can probably work our way through it, find something cool. [ MUSIC ]
(Tommy)>> Marc I've been through here in years past and I know this would probably be a pretty sweet spot for you cause as you can see it's pretty Ford heavy. I'm not really a Ford guy but there's a couple back here in the back that the guy had mentioned to me, and that was one of them was an old trooper car, Fox body car. Can you tell them apart?
(Marc)>> Oh yeah, if all the parts are there I'll tell you what it is.
(Tommy)>> That's cool! Now these two beauties have been sitting here for a minute, easy to see. So what do you got to look at to tell?
(Marc)>> So one of these used to be a police car?
(Tommy)>> Yeah I don't know which one. All I was told it was a black, rusty, notch back.
(Marc)>> Okay well right off the bat I would say maybe this one because it's got the 10 hole wheels. The call them phone dials cause they've got 10 holes in them, but because it looks like it's got the original paint on it I would say probably this is our car here because you see how it's been painted over there. It probably had a police style paint scheme and they painted over it when they auctioned it off. So this is probably the one I'd be willing to bet, and we need to open the hood to find out for sure.
(Tommy)>> Is that the only way though?
(Marc)>> No the phone dials, the 10 hole wheels would be one of the first things you look at to be able to tell but because the police cars were so similar to the production cars there were only actually a few things that were different about them. They would have a calibrated speedometer, and I see this car's burnt. So there's no way to tell on it. The seats would be reinforced, the front seats are reinforced. Another way to tell is under the hood it would have heavy duty cooling on it. So it would have a power steering cooler, an oil cooler, better radiator hoses, and things like that.
(Tommy)>> Just standard police stuff.
(Marc)>> Other than that 5.0 liter Mustang. Let's get the hood open. Yeah this is like a '91 to '93 car cause it's got the air bag here. That's about all I can tell from the inside. Let's see if I can get this door open. [ branches cracking ]
(Tommy)>> Careful there is a tree.
(Marc)>> We are on the tree. I'll see if I can slide in here, get this hood popped. [ branches cracking ]
(Tommy)>> Is the cable still in there?
(Marc)>> Yep, the handle's melted, but see if you can put some pressure on it.
(Tommy)>> On the handle?
(Marc)>> On the hood, wiggle it a little bit.
(Tommy)>> Hold on a minute. Let me stomp down these giggy bushes. Yeah it just clicked. It's up now.
(Marc)>> It's open? The handle is melted but the cable's still intact.
(Tommy)>> You allergic to any of this stuff?
(Marc)>> Nah!
(Tommy)>> I'm allergic to a Ford. I want to say I should possibly be a little concerned. There is a spider web with a hole up under the hood here. So before I go to fiddling what side is the hood latch on?
(Marc)>> It's right here you've just got to push up.
(Tommy)>> In and up, yeah? Alright I'm done fiddling. You can try it.
(Marc)>> I'm gonna be the one that ends up with a spider on me. I told you the wrong side too. Got you! It's got the 5.0 liter, that's a good sign. I think we're on the right track. I don't see any of the heavy duty cooling right off the bat, but of course the radiator hoses have probably been replaced over the years. Let's see what else we can find. Another thing too here it's got a high amperage alternator, about like a 130 amp rather than a 75 amp like a regular care would have. The heater hoses were actually that blue silicone too, and I just noticed back here it's still got blue heater hoses back here. So that's a good sign too. Again just a hint not a guarantee. The only way to know for sure are those tags.
(Tommy)>> Now with that tag is that tag riveted in or screwed in?
(Marc)>> It's a metal tag about the size of a credit card or business car that's stapled to the radiator support, and sometimes they're missing. That's why I said if it's there I'll be able to tell. These are still here so that's good, hard to read though?
(Tommy)>> What are you looking for on it? A code or does it say police?
(Marc)>> It will say police. The word police will be on there. You're not gonna believe this, Florida highway patrol.
(Tommy)>> Really!
(Marc)>> Yep and it says it right there. All I can see is the "r-i-d-a h-w-y patrol". That was pretty cool, not what I expected.
(Tommy)>> Got a little critter on me. Really and truthfully with it being a confirmed state trooper car are state trooper cars sought after, are they worth more, anything like that?
(Marc)>> A little bit. If you care about police cars or you just want something that's unique sure.
(Tommy)>> To me it sounds just cool saying this is a true police car, you know what I mean?
(Marc)>> Yeah, there's definitely a cool factor there. And this one too, oh look the antenna, I didn't even notice that earlier. That was a hint. So this one was manufactured in May of '92. So this would be a '92.
(Tommy)>> I am a little let down though. It's a Florida car, not a Tennessee.
(Marc)>> Let's go further.
(Tommy)>> We keep looking in hopes to find the crown jewel.
(Tommy)>> Now Marc that other stuff was what I call the new items if you will. Now around here is the stuff that's been sitting quite a bit longer. You can tell by the foliage in the trees. This stuff around here has been here some of it 50 plus years. There's one old car over here I've got to show you man. Mother Nature has worked its magic on it. I guess you could say she massaged this quarter panel man. Check this old Chrysler Imperial out. Look at that!
(Marc)>> Turned it into an envelope, an-velope, which is it?
(Tommy)>> Yes, it's bent, that's what it is. Look dude that is like 7 inches, every bit of it, and you know I've always dug on these old big bodies. You know how I am.
(Marc)>> You've got a soft spot in your heart for them.
(Tommy)>> This car here back in the day was a Cadillac version in a Chrysler product. This was one of the most expensive cars on the road back then. It had chrome for days. The grille in this thing, ornaments everywhere, and even the steering wheel has jewelry on the side of it.
(Marc)>> They were fancy! I know some of these had dual air right? They had a front unit and a rear unit.
(Tommy)>> Yes sir.
(Marc)>> That's fancy, look what's inside.
(Tommy)>> Need a hub cap?
(Marc)>> You need 300 hub caps?
(Tommy)>> Even check out the hub caps that are in there man. Them things are old. Early stuff, '30's and '40's.
(Marc)>> It's full of them all the way up to here.
(Tommy)>> Wish I could get in there.
(Marc)>> Try.
(Tommy)>> Nah, not gonna do it. I'd buy a hub cap or two.
(Marc)>> So this car would have the, cause it's a '59 you said, so would it have the big dual quad crazy intake manifold on it? Cross Ram?
(Tommy)>> Cross Ram on it, this one came with a 413. I wouldn't think you would have that dual quad setup in it. I can tell you one thing is for sure. This thing would haul the mail and look good doing it. Think we gonna get any chigger bites out here?
(Marc)>> A few I bet.
(Tommy)>> It's worth it son, it's worth it.
(Marc)>> Want to try to open this thing?
(Tommy)>> Go ahead, there may be one of them rattle headed copper moccasins laying up on there.
(Marc)>> Still there!
(Tommy)>> Check out that decal on the valve cover that reads Imperial, yes sir.
(Marc)>> They were proud of that weren't they?
(Tommy)>> They were. I'm telling you this thing back in the day was expensive. Power everything, I mean everything. You've got to look at the ornaments that's on this car. The hood emblem, the "V's" here on the fenders itself. Check out the durn rearview mirror in the thing.
(Marc)>> That's cool!
(Tommy)>> Check out the bumper too brother. You know where they stopped putting chrome? As soon as the hood fell over, you know what I mean.
(Marc)>> Yes chrome everything.
(Tommy)>> I'd love to drive one of these today. You know when you show up at some kind of car show. Yeah I know it's not a Chevelle, Camaro, it's not the fastest but I can tell you you've got plenty of style.
(Marc)>> You know what would be cool? Put a Hellcat in one of those.
(Tommy)>> Could you imagine?
(Marc)>> It would be awesome!
(Tommy)>> Let's go check a couple other ones out.
(Marc)>> Let's do it.
(Tommy)>> So what do you think?
(Marc)>> I've never seen anything like it. How long you think it's been there.
(Tommy)>> Man I don't know but I can tell you by the look of things that Pontiac's pretty fertile.
(Marc)>> That's impressive! [ MUSIC ] So what was your favorite thing you saw today?
(Tommy)>> I could list a couple. Riviera here, there was a big ginormous tree. [ MUSIC ]
