More Sydewinder Episodes
More Street Regal Episodes
Detroit Muscle Featured Projects
Detroit Muscle Builds
Want more content like this?
Join the PowerNation Email NewsletterParts Used In This Episode
Lincoln Electric
Lincoln Electric is the Official Welding Supplier to Detroit Muscle
Matco Tools
MATCO Tools are the Official Tool Supplier to Detroit Muscle
National Parts Depot
Head Light Kit Factory Style Incl 2 Low
Scott Rod Fabrications
Fox Body Splitter with Supports
Sonax USA
SONAX Multi Star All Purpose Cleaner
Sonax USA
SONAX Polymer Net Shield
The Industrial Depot
Tools, Hardware, Shop Supplies
Episode Transcript
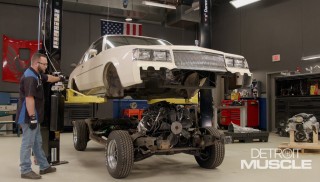
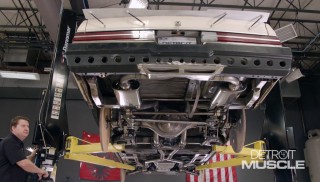
(Narrator)>> This week on Detroit Muscle Marc and Tommy get to work on the front end of our '81 Ford Mustang project adding new accessories and some aero. Plus we pull the top off grandma's grocery getter, prepping it for some body work and paint down the road. [ sander vibrating ]
(Tommy)>> Hey y'all, welcome to Detroit Muscle. Today we've got big plans for our '80's ladies. What we're gonna be doing on the Buick is shedding some unneeded chrome and some trim off the back by removing this vinyl top. And then Marc's got some big plans dressing up the nose of that Fox body Mustang.
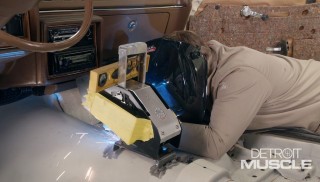
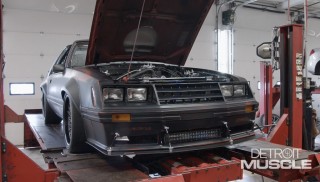
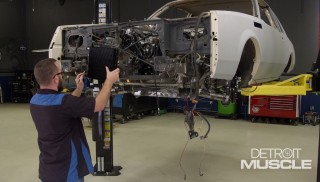
(Marc)>> You know my mom always told me that four eyes are better than two, and she's right. These four eyed Fox bodies are my favorite and we've got some big plans for the front end here. We've got some lights, some aero, and some attitude. The first thing we're gonna do is brighten up the front end of our Fox body with the lighting that you see right here. We've got these sealed beam headlights, both high and low beam, as well as the turn signals. These are all o-e-m style, and the side markers. We got all this stuff from National Parts Depot a while back when they gave us the stuff for the interior, but I'm not gonna show you how to get all that installed. That'd be kind of boring. I do want to show you how to get this installed though. I know this looks like something that ole LT would put on one of those bro trucks he builds down in Truck Tech but this thing's gonna be for a little bit more than just crawling through mall parking lots. We're actually gonna use this as the fog light for our Fox body. Now it comes with all the wiring to get it installed. Everything from the battery to the pigtail here that attaches to the light. It's even got the hardware. A couple of different options there for the brackets, and the bolts to get those installed. But this is generic. So we're gonna fab something up and I'll bet you old Tommy's got an idea for that. All right Tommy, here's the light and I got the longer brackets here. Maybe you can make those work?
(Tommy)>> Cool, I'll figure something out. The first thing that we need to do is make sure this big ole light is gonna fit inside this hole. Alrighty, oh yeah, that ought to work just fine. Now let's just see if those brackets that come with the kit work out for it. ♪ ♪ Oh yeah, that's like them brackets are made for this Mustang. Shoot yeah, now all we've got to do is drill a couple of holes and this thing will be where it needs to be. All right Marc, if you would draw around the feet of those pedestals.
(Marc)>> All right. ♪ ♪
(Tommy)>> You know to drill those holes it sure would be a lot easier with that fascia out of the way.
(Marc)>> Yeah I need to get it off to get those lenses in anyway if you give me a hand.
(Tommy)>> Oh sure, let me put this down. Careful, don't scratch the paint.
(Marc)>> You wouldn't even notice it. I got it from here.
(Tommy)>> I'm gonna use the marks that ole Marcus made to figure out where I need to make my hole. Hit it with a center punch and drill it out. [ drill spinning ]
(Tommy)>> Then I'll do the same to the other side and then bolt it into place. [ ratchet twisting ] ♪ ♪
(Marc)>> Now I know earlier I told you I wasn't gonna show you how to install these but because of this style of headlight they can be difficult to install sometimes. You've got these adjustor screws, and the springs, and sometimes it's hard to get all that in here. So I'm gonna show you an easy way to do it. I'm gonna show you how this works first. We've got two adjustors. One will hook into here, and that one's already down in there, and the other one we'll hook into here. Then the spring will hook in over here. So it'll pivot on those two adjustors and that spring always keeps it down in that socket tight. That way it doesn't shake around a lot, and the best way I've found to install this is to have the one adjustor already in down there and then take the other adjustor, slide it into the groove here. Then put the light down into place, hook it into the other adjustor, and then get this adjustor started. We don't want to tighten this down too far because we want to leave room for adjustment. Then we can fish the spring in from the back side, grab it with the pick, and stretch it into place. ♪ ♪ Then we'll do the same to the other light. Install the bezel and screw it down tight.
That's all there is to it. This thing is ready to go on the car. ♪ ♪
(Narrator)>> Coming up we add the final piece to "Project Sydewinder", giving it the aggressive race appeal.
(Tommy)>> Hey guys, welcome back. We're definitely moving in the right direction and this Mustang's starting to look pretty good.
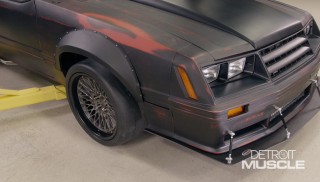
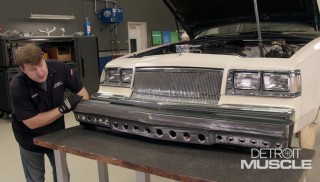
(Marc)>> Yeah and we could leave it just like this and pretty much done except remember earlier, I said we've got some aero for it? Well that's next. Well you probably already guessed that we're gonna be installing a splitter. We got this from Scott Rod Fabrications. That's the company that made all those little block off panels for our engine bay and our interior. This is kind of their first foray into road racy type stuff. It's really thick a-b-s plastic here. So it's gonna be nice and strong but it's gonna be durable in case you scrape it along speed bumps or anything else on the road. Now it also comes with these supports here and these are gonna attach to the bumper cover and also to here on the splitter. And then all the bolts to get it installed as well. We're just gonna have to drill some holes. Maybe trim it up a bit to get it to fit. The first thing we need to do is size it up.
(Tommy)>> So how far you want that to stick out.
(Marc)>> I don't know, as far as it'll stick out.
(Tommy)>> You're one of those guys. You want to put some clamps on it, let it down, see what it looks like? We're gonna use some vice grips to hold it and then we can take some measurements. It looks pretty straight. So we'll lower it down to see what it looks like. ♪ ♪
(Marc)>> I like that! What do you think?
(Tommy)>> I think that dog will hunt.
(Marc)>> All right, let's get it back up and get it mounted. ♪ ♪ Now we need to mark and drill our holes that we're gonna use to mount the splitter to the front fascia. [ drill spinning ]
(Marc)>> We'll use quarter 20 bolts and put plenty of them in there. ♪ ♪ [ ratchet twisting ]
(Tommy)>> Marc when's the first time you rode in a Mustang?
(Marc)>> Let's see. Well my parents took me home from the hospital in a Mustang.
(Tommy)>> Really! What year?
(Marc)>> It was a '79 coupe. That old drab silver that always faded. [ drill spinning ] ♪ ♪
(Marc)>> You could say Fox bodies are in my blood.
(Tommy)>> Well that tells you what's finally wrong with this guy. ♪ ♪
(Marc)>> Well we've got the splitter all mounted nice and solid, and that's good. If we hadn't mounted it out so far we probably wouldn't need the support, but because this is plastic at speed that thing's gonna move around quite a bit. So we want to make sure we keep it from doing that, and I've got two different lengths here. I've got the shorter one here and a longer one. Now the shorter ones I want to put here on the outside and maybe angle out just a bit. Just like that. And if I take the longer one and move here on the inside I think I can mount it like that, and I think that'll look good even though they are at different heights. I think it's still gonna work out just fine, but I can't wish them in place. I need to drill some holes.
(Tommy)>> We're using some masking tape here on the bumper so we don't mark directly onto the paint, and then use the support rods to help us figure out where we need to drill the holes. All that's left is to drill them out and bolt them up. ♪ ♪ [ drill spinning ] ♪ ♪
(Tommy)>> The same steps apply to the other three, and before you know it we're done. ♪ ♪
(Marc)>> Well here's what we started with today on the nose of our Fox body and here's what we have now. Man, what a difference! ♪ ♪
(Tommy)>> Hey guys I want to talk to you about something that's very popular on '70's and '80's era cars. What I'm talking about is vinyl tops. Now you don't see a whole lot of these out there anymore unless you catch somebody out riding around in their weekend warrior or out at car show. Now with the one on our old Buick we're not really planning to keep it because it doesn't fit with the direction of our build. However if we did want to keep this thing it could be saved, and if you've got one of these on your ride here's a few tips for you. First thing is to start off by accessing the top. Look for cracks and dry rot from it being exposed to the sun and weather. If you find some there's not much you can do about that, and the top should really be replaced. That's because those cracks allow water to seep through, and then all that moisture is gonna get trapped, and we all know what that's gonna cause, rust. Now our old top just looks bad and it kind of has the appearance of mold and mildew growing off of it, and a good cleaning would go a long ways. You don't want to grab any old cleaner cause some cleaners are too harsh and can damage the color on your vinyl top. It's a good idea to use an upholstery cleaner like this we got from Sonax. This is the multi-star universal cleaner. It's safe to use on painted surfaces, plastics, and even vinyls. Now we're also gonna be using a scrub brush because that vinyl top's got some grain to it and this'll help loosen up all that crud. What you want to do is spray it on and let it do its thing for two to three minutes. Then with medium to light pressure scrub the surface, and it doesn't take much elbow grease to do a good job.
For final cleanup wipe down with a clean damp cloth and let it dry. That didn't take much effort at all and it sure does look a whole lot better. Now it's time to brighten up that old top and give it back its luster that it once had. We're gonna be using another product from Sonax. This is the polymer net shield. It will seal the surface, restore the color in our old top, and give it some shine. Application is super easy. All you need is a sponge and a clean cloth. You can spray the product directly onto the panel or you can apply it to the sponge, which that's the way I prefer. That way it gives you a whole lot better control of the product. To rub it on here there isn't a special pattern or direction that you need to do. Just make sure to apply it evenly and not in excess. You also don't want to apply it onto a hot surface. If it's cool to the touch you're good to go. And just like that it looks almost new again, and for the amount of work we've got some pretty big gains.
(Narrator)>> Stay tuned as we answer the age old question, does vinyl belong on your house or your car? We give you our solution for "Project Street Regal".
(Marc)>> Hey folks welcome back. A little bit earlier we got the nose all dialed in on our Mustang and it gave it quite a bit of an attitude adjustment. It can see better with all that new lighting and look better with that aero. Won't be long, this thing's gonna be on the road.
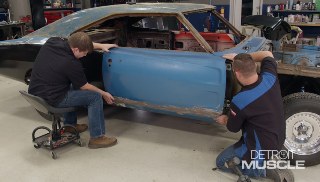
(Tommy)>> Now the task at hand for us today is gonna be removing this vinyl top off of our Buick. We're gonna get rid of some of the trim as well, and when we're all said and done it's gonna make this thing look a whole lot cleaner.
(Marc)>> You know what? If it was me I'd be leaving this vinyl top on and leaving it cream.
(Tommy)>> Trust me man, it's gonna look great.
(Marc)>> All right I'll trust you. The first thing we need to do is get this big ole trim piece off that goes across here. Now it's tempting to just grab a hammer and a chisel and just start banging away at it but we don't want to do that for a couple of reasons. One, you could damage the car itself and we're gonna paint this roof later on. So we want to avoid that. The other reason is because once you start changing the way this thing shaped it might be even harder to get off. You can kink it or even make it clamp down on the clips even tighter. So we want to make sure we do it the right way. ♪ ♪
(Tommy)>> Removing these trim pieces isn't very complicated, and using these plastic pry bars makes it even easier. Plus they're a lot more forgiving than using metal tools. Now here on the skinny trim it's basically the same procedure that we did to remove this big wide stuff, but if you were trying to save this it's a good idea to use a pry tool that's got a wider foot. That way you'll run less chance of bending it up, but all we're trying to do is get this stuff off of here. ♪ ♪
(Marc)>> Well the next thing to take into consideration is gonna be quarter glass. Depending on the design of the car and the design of the vinyl top. The top could have been installed after the glass or before, which is the case with ours. That means that vinyl's sandwich in between the glass and the body. The glass has to get out of the way. Now good thing is we only have to use a 10 millimeter socket to get those nuts out. The window will just pop right out. ♪ ♪ Tommy will you catch this glass for me.
(Tommy)>> Sure! ♪ ♪
(Marc)>> All yours.
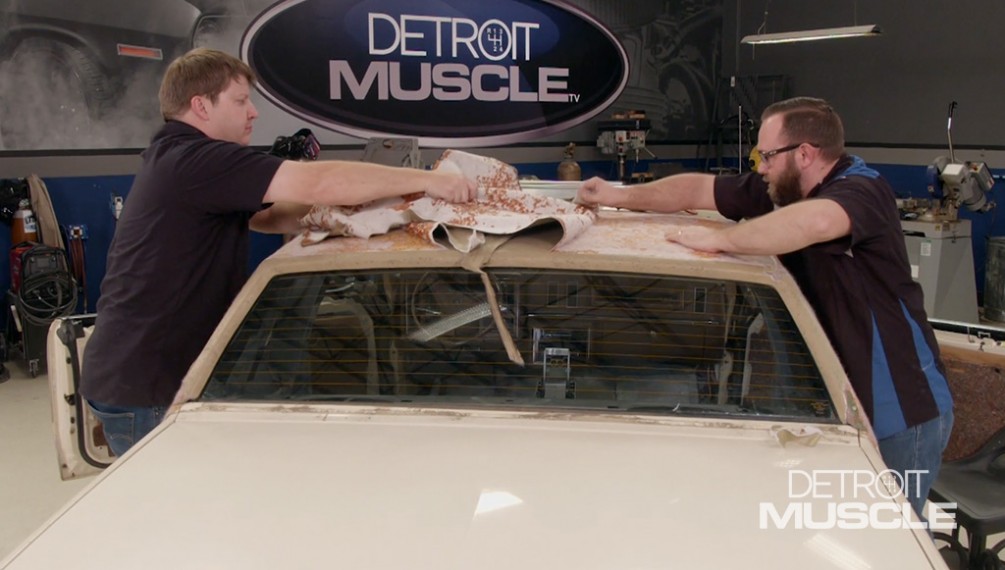
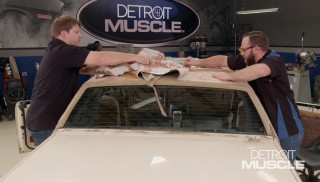
(Tommy)>> We're finally to the point that we get to pull this ugly vinyl off of the roof, and I have a small concern that it may be rather difficult. This top being in such nice shape it's probably really glued on.
(Marc)>> And you know as much as I hate to see this top go, and you know I do, I think this is gonna be my favorite part.
(Tommy)>> Oh yeah, It's really stuck.
(Marc)>> We're just gonna start at the bottom edges near the corners and work our way up and in cause this glue is hard as a rock.
(Tommy)>> Yeah that's why.
(Marc)>> It's harder than it looks. Lift with your legs they said. I'm not enjoying this as much as I thought I would.
(Tommy)>> I like to see you grunt. Looks like I need to use a different knife.
(Marc)>> Need to borrow my knife?
(Tommy)>> Might need to. If I slow down that means he'll do the majority of the work.
(Marc)>> I hear you. ♪ ♪ But with a little team work we get the majority off in no time. ♪ ♪
(Tommy)>> All that's left to get the rest of the vinyl off is this trim panel, which is riveted on.
(Marc)>> My half's done. Time for a coffee.
(Tommy)>> They glued the heck out of that thing. And it just snaps, well breaks, right off.
(Narrator)>> Don't go anywhere as we make the fur fly off our '85 Buick project.
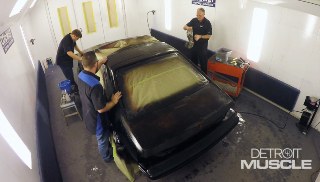
(Marc)>> Hey folks, welcome back. Well just before the break we got the vinyl top off of our Buick but we're not finished because we've got all this glue left on here, and that's gonna be the most tedious part.
(Tommy)>> Yeah this job isn't any fun by any means, and I have to say whenever I do something like this about a quarter of the way through it I start thinking there's got to be a faster way, and usually there's not. About the best way that I've found is to use a big sander and just stay after it, and luckily for me right now cause we've got two of these big things.
(Marc)>> And you're ambidextrous.
(Tommy)>> Well you know, you're right but I know you're just begging to work on this car. Look at that face.
(Marc)>> I'll help.
(Tommy)>> I promise you he's more excited than that.
(Marc)>> All right, a couple of safety items before we get started. Number one would have to be your eyes. Make sure you wear safety glasses. Gonna be a lot of stuff flying around here. The other thing is gonna be your lungs. You want to protect them because we don't know what's in this glue and it's gonna be flying all around. All that dust, you don't want to breathe it in. Now Tommy's got 36 grit on his, I've got 80 grit on mine, and we're really not sure which one's gonna work best on this glue. So we're gonna try them both and go from there. [ sander spinning ]
(Marc)>> Both of these are getting the job done but it sure looks like Tommy's is doing it a lot faster. I think I'm gonna go get some 36.
(Tommy)>> Think so. Might bring me another piece.
(Marc)>> Got it. [ sander spinning ]
(Tommy)>> Well just sand away at it one section at a time until all the glue is gone. ♪ ♪
(Marc)>> All right well we're almost done except we've got these holes back here and the studs here. We need to fill the holes, get rid of the studs, and these studs are welded to the roof. So all I need to do is just sand them down. We're just using a 36 grit pad on an air grinder to knock them down. We're gonna have to body work this roof later anyway. So they don't have to be perfect. [ grinder spinning ]
(Tommy)>> You done making noise over there?
(Marc)>> Huh?
(Tommy)>> Anyhow, we're gonna have to fill in these holes on the back side of the roof, and to do that well we need to protect this piece of glass. I've got some deflection paper here that I need to install, and it is kind of pricey but I'll tell you, you save one piece of glass it's well worth this paper. This stuff is nice because you just stick it right to the glass and you trim it to fit. Then we'll prep our holes by grinding away the remaining paint or glue. [ grinder spinning ]
(Tommy)>> Well I got the roof all cleaned up and while I was doing that grinding I noticed that a couple of these holes still have a part of the rivet in it, and you've got to get that out because it doesn't really work to fuse aluminum to steel. It's no big deal. With a punch and a hammer you can knock it right out. ♪ ♪
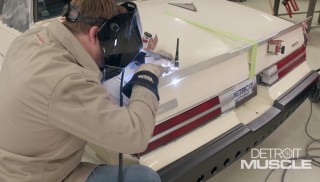
(Marc)>> We're gonna use our Lincoln Electric Power Mig 210 MP to get the job done, and then grind the welds flat. [ grinder spinning ] ♪ ♪
(Tommy)>> Well we took care of a big chore on our Buick today. We got the top off, the holes ground down and welded up. Now we'll have to do some body work but that'll be a little later down the road. You have any questions about what you've seen on today's show go to Powernation TV dot com.
Show Full Transcript
(Tommy)>> Hey y'all, welcome to Detroit Muscle. Today we've got big plans for our '80's ladies. What we're gonna be doing on the Buick is shedding some unneeded chrome and some trim off the back by removing this vinyl top. And then Marc's got some big plans dressing up the nose of that Fox body Mustang.
(Marc)>> You know my mom always told me that four eyes are better than two, and she's right. These four eyed Fox bodies are my favorite and we've got some big plans for the front end here. We've got some lights, some aero, and some attitude. The first thing we're gonna do is brighten up the front end of our Fox body with the lighting that you see right here. We've got these sealed beam headlights, both high and low beam, as well as the turn signals. These are all o-e-m style, and the side markers. We got all this stuff from National Parts Depot a while back when they gave us the stuff for the interior, but I'm not gonna show you how to get all that installed. That'd be kind of boring. I do want to show you how to get this installed though. I know this looks like something that ole LT would put on one of those bro trucks he builds down in Truck Tech but this thing's gonna be for a little bit more than just crawling through mall parking lots. We're actually gonna use this as the fog light for our Fox body. Now it comes with all the wiring to get it installed. Everything from the battery to the pigtail here that attaches to the light. It's even got the hardware. A couple of different options there for the brackets, and the bolts to get those installed. But this is generic. So we're gonna fab something up and I'll bet you old Tommy's got an idea for that. All right Tommy, here's the light and I got the longer brackets here. Maybe you can make those work?
(Tommy)>> Cool, I'll figure something out. The first thing that we need to do is make sure this big ole light is gonna fit inside this hole. Alrighty, oh yeah, that ought to work just fine. Now let's just see if those brackets that come with the kit work out for it. ♪ ♪ Oh yeah, that's like them brackets are made for this Mustang. Shoot yeah, now all we've got to do is drill a couple of holes and this thing will be where it needs to be. All right Marc, if you would draw around the feet of those pedestals.
(Marc)>> All right. ♪ ♪
(Tommy)>> You know to drill those holes it sure would be a lot easier with that fascia out of the way.
(Marc)>> Yeah I need to get it off to get those lenses in anyway if you give me a hand.
(Tommy)>> Oh sure, let me put this down. Careful, don't scratch the paint.
(Marc)>> You wouldn't even notice it. I got it from here.
(Tommy)>> I'm gonna use the marks that ole Marcus made to figure out where I need to make my hole. Hit it with a center punch and drill it out. [ drill spinning ]
(Tommy)>> Then I'll do the same to the other side and then bolt it into place. [ ratchet twisting ] ♪ ♪
(Marc)>> Now I know earlier I told you I wasn't gonna show you how to install these but because of this style of headlight they can be difficult to install sometimes. You've got these adjustor screws, and the springs, and sometimes it's hard to get all that in here. So I'm gonna show you an easy way to do it. I'm gonna show you how this works first. We've got two adjustors. One will hook into here, and that one's already down in there, and the other one we'll hook into here. Then the spring will hook in over here. So it'll pivot on those two adjustors and that spring always keeps it down in that socket tight. That way it doesn't shake around a lot, and the best way I've found to install this is to have the one adjustor already in down there and then take the other adjustor, slide it into the groove here. Then put the light down into place, hook it into the other adjustor, and then get this adjustor started. We don't want to tighten this down too far because we want to leave room for adjustment. Then we can fish the spring in from the back side, grab it with the pick, and stretch it into place. ♪ ♪ Then we'll do the same to the other light. Install the bezel and screw it down tight.
That's all there is to it. This thing is ready to go on the car. ♪ ♪
(Narrator)>> Coming up we add the final piece to "Project Sydewinder", giving it the aggressive race appeal.
(Tommy)>> Hey guys, welcome back. We're definitely moving in the right direction and this Mustang's starting to look pretty good.
(Marc)>> Yeah and we could leave it just like this and pretty much done except remember earlier, I said we've got some aero for it? Well that's next. Well you probably already guessed that we're gonna be installing a splitter. We got this from Scott Rod Fabrications. That's the company that made all those little block off panels for our engine bay and our interior. This is kind of their first foray into road racy type stuff. It's really thick a-b-s plastic here. So it's gonna be nice and strong but it's gonna be durable in case you scrape it along speed bumps or anything else on the road. Now it also comes with these supports here and these are gonna attach to the bumper cover and also to here on the splitter. And then all the bolts to get it installed as well. We're just gonna have to drill some holes. Maybe trim it up a bit to get it to fit. The first thing we need to do is size it up.
(Tommy)>> So how far you want that to stick out.
(Marc)>> I don't know, as far as it'll stick out.
(Tommy)>> You're one of those guys. You want to put some clamps on it, let it down, see what it looks like? We're gonna use some vice grips to hold it and then we can take some measurements. It looks pretty straight. So we'll lower it down to see what it looks like. ♪ ♪
(Marc)>> I like that! What do you think?
(Tommy)>> I think that dog will hunt.
(Marc)>> All right, let's get it back up and get it mounted. ♪ ♪ Now we need to mark and drill our holes that we're gonna use to mount the splitter to the front fascia. [ drill spinning ]
(Marc)>> We'll use quarter 20 bolts and put plenty of them in there. ♪ ♪ [ ratchet twisting ]
(Tommy)>> Marc when's the first time you rode in a Mustang?
(Marc)>> Let's see. Well my parents took me home from the hospital in a Mustang.
(Tommy)>> Really! What year?
(Marc)>> It was a '79 coupe. That old drab silver that always faded. [ drill spinning ] ♪ ♪
(Marc)>> You could say Fox bodies are in my blood.
(Tommy)>> Well that tells you what's finally wrong with this guy. ♪ ♪
(Marc)>> Well we've got the splitter all mounted nice and solid, and that's good. If we hadn't mounted it out so far we probably wouldn't need the support, but because this is plastic at speed that thing's gonna move around quite a bit. So we want to make sure we keep it from doing that, and I've got two different lengths here. I've got the shorter one here and a longer one. Now the shorter ones I want to put here on the outside and maybe angle out just a bit. Just like that. And if I take the longer one and move here on the inside I think I can mount it like that, and I think that'll look good even though they are at different heights. I think it's still gonna work out just fine, but I can't wish them in place. I need to drill some holes.
(Tommy)>> We're using some masking tape here on the bumper so we don't mark directly onto the paint, and then use the support rods to help us figure out where we need to drill the holes. All that's left is to drill them out and bolt them up. ♪ ♪ [ drill spinning ] ♪ ♪
(Tommy)>> The same steps apply to the other three, and before you know it we're done. ♪ ♪
(Marc)>> Well here's what we started with today on the nose of our Fox body and here's what we have now. Man, what a difference! ♪ ♪
(Tommy)>> Hey guys I want to talk to you about something that's very popular on '70's and '80's era cars. What I'm talking about is vinyl tops. Now you don't see a whole lot of these out there anymore unless you catch somebody out riding around in their weekend warrior or out at car show. Now with the one on our old Buick we're not really planning to keep it because it doesn't fit with the direction of our build. However if we did want to keep this thing it could be saved, and if you've got one of these on your ride here's a few tips for you. First thing is to start off by accessing the top. Look for cracks and dry rot from it being exposed to the sun and weather. If you find some there's not much you can do about that, and the top should really be replaced. That's because those cracks allow water to seep through, and then all that moisture is gonna get trapped, and we all know what that's gonna cause, rust. Now our old top just looks bad and it kind of has the appearance of mold and mildew growing off of it, and a good cleaning would go a long ways. You don't want to grab any old cleaner cause some cleaners are too harsh and can damage the color on your vinyl top. It's a good idea to use an upholstery cleaner like this we got from Sonax. This is the multi-star universal cleaner. It's safe to use on painted surfaces, plastics, and even vinyls. Now we're also gonna be using a scrub brush because that vinyl top's got some grain to it and this'll help loosen up all that crud. What you want to do is spray it on and let it do its thing for two to three minutes. Then with medium to light pressure scrub the surface, and it doesn't take much elbow grease to do a good job.
For final cleanup wipe down with a clean damp cloth and let it dry. That didn't take much effort at all and it sure does look a whole lot better. Now it's time to brighten up that old top and give it back its luster that it once had. We're gonna be using another product from Sonax. This is the polymer net shield. It will seal the surface, restore the color in our old top, and give it some shine. Application is super easy. All you need is a sponge and a clean cloth. You can spray the product directly onto the panel or you can apply it to the sponge, which that's the way I prefer. That way it gives you a whole lot better control of the product. To rub it on here there isn't a special pattern or direction that you need to do. Just make sure to apply it evenly and not in excess. You also don't want to apply it onto a hot surface. If it's cool to the touch you're good to go. And just like that it looks almost new again, and for the amount of work we've got some pretty big gains.
(Narrator)>> Stay tuned as we answer the age old question, does vinyl belong on your house or your car? We give you our solution for "Project Street Regal".
(Marc)>> Hey folks welcome back. A little bit earlier we got the nose all dialed in on our Mustang and it gave it quite a bit of an attitude adjustment. It can see better with all that new lighting and look better with that aero. Won't be long, this thing's gonna be on the road.
(Tommy)>> Now the task at hand for us today is gonna be removing this vinyl top off of our Buick. We're gonna get rid of some of the trim as well, and when we're all said and done it's gonna make this thing look a whole lot cleaner.
(Marc)>> You know what? If it was me I'd be leaving this vinyl top on and leaving it cream.
(Tommy)>> Trust me man, it's gonna look great.
(Marc)>> All right I'll trust you. The first thing we need to do is get this big ole trim piece off that goes across here. Now it's tempting to just grab a hammer and a chisel and just start banging away at it but we don't want to do that for a couple of reasons. One, you could damage the car itself and we're gonna paint this roof later on. So we want to avoid that. The other reason is because once you start changing the way this thing shaped it might be even harder to get off. You can kink it or even make it clamp down on the clips even tighter. So we want to make sure we do it the right way. ♪ ♪
(Tommy)>> Removing these trim pieces isn't very complicated, and using these plastic pry bars makes it even easier. Plus they're a lot more forgiving than using metal tools. Now here on the skinny trim it's basically the same procedure that we did to remove this big wide stuff, but if you were trying to save this it's a good idea to use a pry tool that's got a wider foot. That way you'll run less chance of bending it up, but all we're trying to do is get this stuff off of here. ♪ ♪
(Marc)>> Well the next thing to take into consideration is gonna be quarter glass. Depending on the design of the car and the design of the vinyl top. The top could have been installed after the glass or before, which is the case with ours. That means that vinyl's sandwich in between the glass and the body. The glass has to get out of the way. Now good thing is we only have to use a 10 millimeter socket to get those nuts out. The window will just pop right out. ♪ ♪ Tommy will you catch this glass for me.
(Tommy)>> Sure! ♪ ♪
(Marc)>> All yours.
(Tommy)>> We're finally to the point that we get to pull this ugly vinyl off of the roof, and I have a small concern that it may be rather difficult. This top being in such nice shape it's probably really glued on.
(Marc)>> And you know as much as I hate to see this top go, and you know I do, I think this is gonna be my favorite part.
(Tommy)>> Oh yeah, It's really stuck.
(Marc)>> We're just gonna start at the bottom edges near the corners and work our way up and in cause this glue is hard as a rock.
(Tommy)>> Yeah that's why.
(Marc)>> It's harder than it looks. Lift with your legs they said. I'm not enjoying this as much as I thought I would.
(Tommy)>> I like to see you grunt. Looks like I need to use a different knife.
(Marc)>> Need to borrow my knife?
(Tommy)>> Might need to. If I slow down that means he'll do the majority of the work.
(Marc)>> I hear you. ♪ ♪ But with a little team work we get the majority off in no time. ♪ ♪
(Tommy)>> All that's left to get the rest of the vinyl off is this trim panel, which is riveted on.
(Marc)>> My half's done. Time for a coffee.
(Tommy)>> They glued the heck out of that thing. And it just snaps, well breaks, right off.
(Narrator)>> Don't go anywhere as we make the fur fly off our '85 Buick project.
(Marc)>> Hey folks, welcome back. Well just before the break we got the vinyl top off of our Buick but we're not finished because we've got all this glue left on here, and that's gonna be the most tedious part.
(Tommy)>> Yeah this job isn't any fun by any means, and I have to say whenever I do something like this about a quarter of the way through it I start thinking there's got to be a faster way, and usually there's not. About the best way that I've found is to use a big sander and just stay after it, and luckily for me right now cause we've got two of these big things.
(Marc)>> And you're ambidextrous.
(Tommy)>> Well you know, you're right but I know you're just begging to work on this car. Look at that face.
(Marc)>> I'll help.
(Tommy)>> I promise you he's more excited than that.
(Marc)>> All right, a couple of safety items before we get started. Number one would have to be your eyes. Make sure you wear safety glasses. Gonna be a lot of stuff flying around here. The other thing is gonna be your lungs. You want to protect them because we don't know what's in this glue and it's gonna be flying all around. All that dust, you don't want to breathe it in. Now Tommy's got 36 grit on his, I've got 80 grit on mine, and we're really not sure which one's gonna work best on this glue. So we're gonna try them both and go from there. [ sander spinning ]
(Marc)>> Both of these are getting the job done but it sure looks like Tommy's is doing it a lot faster. I think I'm gonna go get some 36.
(Tommy)>> Think so. Might bring me another piece.
(Marc)>> Got it. [ sander spinning ]
(Tommy)>> Well just sand away at it one section at a time until all the glue is gone. ♪ ♪
(Marc)>> All right well we're almost done except we've got these holes back here and the studs here. We need to fill the holes, get rid of the studs, and these studs are welded to the roof. So all I need to do is just sand them down. We're just using a 36 grit pad on an air grinder to knock them down. We're gonna have to body work this roof later anyway. So they don't have to be perfect. [ grinder spinning ]
(Tommy)>> You done making noise over there?
(Marc)>> Huh?
(Tommy)>> Anyhow, we're gonna have to fill in these holes on the back side of the roof, and to do that well we need to protect this piece of glass. I've got some deflection paper here that I need to install, and it is kind of pricey but I'll tell you, you save one piece of glass it's well worth this paper. This stuff is nice because you just stick it right to the glass and you trim it to fit. Then we'll prep our holes by grinding away the remaining paint or glue. [ grinder spinning ]
(Tommy)>> Well I got the roof all cleaned up and while I was doing that grinding I noticed that a couple of these holes still have a part of the rivet in it, and you've got to get that out because it doesn't really work to fuse aluminum to steel. It's no big deal. With a punch and a hammer you can knock it right out. ♪ ♪
(Marc)>> We're gonna use our Lincoln Electric Power Mig 210 MP to get the job done, and then grind the welds flat. [ grinder spinning ] ♪ ♪
(Tommy)>> Well we took care of a big chore on our Buick today. We got the top off, the holes ground down and welded up. Now we'll have to do some body work but that'll be a little later down the road. You have any questions about what you've seen on today's show go to Powernation TV dot com.
