More '01 Mazda B2500/Ford Ranger "Rolling Thunder" Episodes
More Rolling Thunder Episodes
Trucks! Builds
Want more content like this?
Join the PowerNation Email NewsletterParts Used In This Episode
C.P.I. Divisions
Alternator Repair Kit
Dunne-Rite Performance LLC
80mm ProM Mass Air Flow Sensor and Conical Filter
Dunne-Rite Performance LLC
EFI Custom Wiring Harness
Dunne-Rite Performance LLC
Modified PCM
Dunne-Rite Performance LLC
Return Style Fuel Adaptor Block and Regulator
Gold Eagle Co.
Start Your Engines! is the easy, 1-step fuel system revitalizer.
O'Reilly Auto Parts
In-Tank Fuel Pump
Episode Transcript
Today with some simple wiring. We're going to be firing up our 4.6 L modular
in
Project Rolling Thunder
and we'll show you the budget approach to rebuilding your alternator. It's all today here on trucks.
Hey, welcome to trucks.
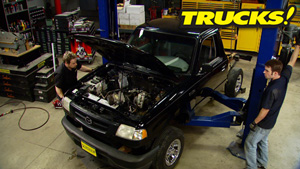
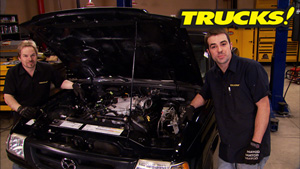
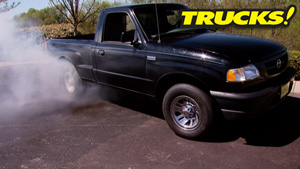
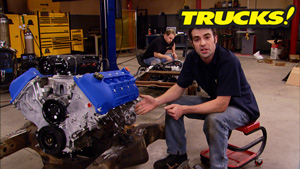
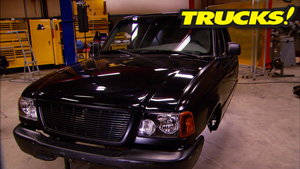
Today, we're back on Project Rolling Thunder, which is our V8 converted Mazda B 2500, which is nothing more than a Reskin Ford Ranger.
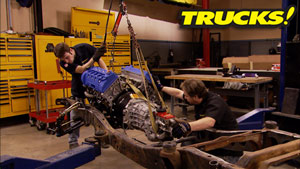
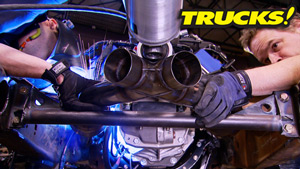
So far we've stuffed in the four valve Marauder engine and transmission and reinstalled our short and drive shaft following that with a custom bent dual exhaust system that kicks out the side just like a full size Ford Lightning.
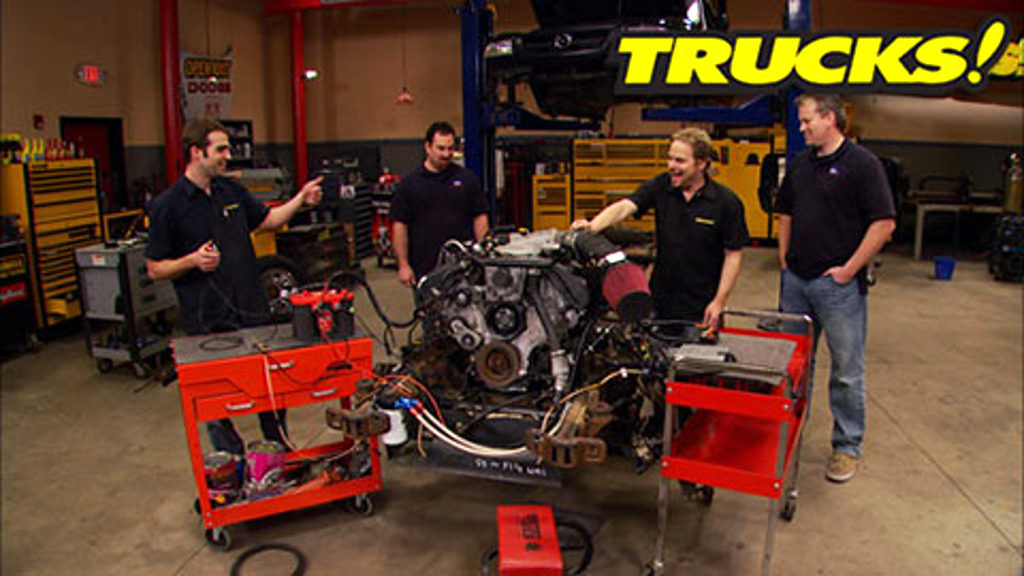
So that gets you guys up to speed on what we've already done to the truck and kind of brings us to an area that we've sort of been avoiding the whole time, which is the challenge of wiring and starting an EF I swap like this one. Well, we got some help today, Jeff Dunn from Duri performance is bringing something really cool to the table. And if you remember we use Jeff's mass air conversion on our first gen lightning,
a mass airflow system like the GTM
tanks have been a joint since 1989 is more efficient and infinitely more tunable. So we're gonna use this mass airflow conversion kit from duri performance that includes a new ECM or engine control module, an injector harness that plugs into the module and accepts the vehicle's injector harness allowing you to control and monitor the rest of the vehicle systems.
Oh, and by the way, in case some of you, Chevy guys have already forgotten it was the full
that actually won the muscle truck series. But even though EF I is nothing new, there's still a lot of guys including myself that just get a little intimidated with some of the voodoo involved in wiring an EF I engine swap. So what makes your system different?
It's interesting you use the word voodoo because you're right. A lot of people see wiring one of these engines as sort of a, a black magic if you will.
And
while we may not necessarily be able to eliminate the mystery of one of these engines, we think that we've done a pretty
your job to eliminate the complexity of wiring one of these engines. Yeah, but you're telling me that, but I'm looking at hundreds of wires, multi pin connectors. But yet you're telling me there's only four wires I need to be worried about connecting to make this thing run just four. You got a battery positive battery negative. We got a fuel pump and a 12 volt Keyon
less no more complicated than a carbureted engine, not with our kit. Well, why don't you show us and everybody watching how simple this is to make this engine run. Let's do it cool.
This system uses a factory style multi
pin connector and plugs right into the existing engine harness.
Don Baron, also from Duri
performance came down to help us fire up the ranger.
He's routing a power feed to the existing four cylinder fuel pump just so we have a fuel supply to start the engine.
Now, this is kind of a demonstration on how simple the system is to hook up. So we're using this toggle switch as our Keyon voltage source connecting the basic connections to a battery stand alone and we'll be using a remote start later on to fire the engine off.
Now, with our connections made well, we still need a computer to make our four valve 46 run.
So Jeff also provided us with a 99 Cobra production PC M with a chip installed that disables the passive anti theft system
and they also hooked us up with an 80 millimeter pro M mass airflow sensor and high flow conical filter.
Now, the DURI system is designed to work with the more popular 99 to 44 valve Cobra engines. And while our Marauder four valve is largely similar, there are some subtle differences with the intake facing the opposite direction put in the throttle position sensor and a few other items on the wrong side.
So to make the Marauder harness work with the done right system. Well, they offer this adapter harness that plugs in between the two. Now, if we decide to go to a Cobra engine, when we convert to stage two, we simply remove this adapter harness, plug everything back together. We'll be up and running.
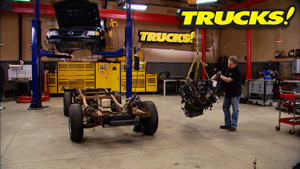
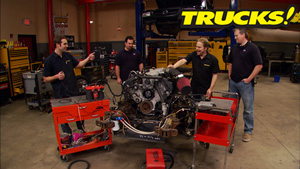
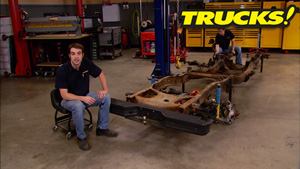
Now, Jeff likes to tell us that with his done right performance system, we could get this engine to run in a shopping cart. Well, as you can see, we're about as close to a shopping cart as we could be with the engine sitting in the bare chassis, but like any other internal combustion engine, we got to have a fuel source. Now, our truck came with a returnless system with the fuel pressure regulated in the tank. Now, technically speaking, our truck came from the factory with a mechanical returnless system. Now you cobra guys, we know that you've got a returnless system, but it requires a fuel pump driver module to make this system work. Since we have the option from DURI performance, we decided to go return style just to simplify the system. So we had to change a few things around. Our temporary fuel supply line comes from the in tank pump into a filter and then up to the fuel rail, the fuel comes back from the fuel rail into a temporary return line, back into the tank, recirculating the fuel creating a traditional return style system.
Now, if you're keeping up with this, you're probably wondering how we're going to connect a fuel return line to a fuel rail that's designed to be returnless. Well, Jeff's got us covered with that with a pretty cool solution that's going to save you time
and money stick around.
Next, we'll convert to a return style fuel line system the easy way and later it's the least expensive way to save an old alternator. Stay tuned.
Hey, welcome back to trucks where we are moments away from firing off our 4.6 mercury Marauder engine stuffed into our mini truck project. Rolling thunder using Jeff Dunn's done right. Performance harness system. But before we do that, we need to finish the conversion to a return style fuel system.
So the first thing we want to do here is we're gonna remove the original fuel rail pressure sensor.
This is the sensor that feeds information to the original Marauder PC M so that it could determine proper voltage to the fuel pump for correct fuel rail pressure and injector pulse width.
Now, our return line conversion starts with this adapter block. Just make sure the old rings are lo before installing
the fuel outlet gets a new gasket and the fuel pressure regulators. O
rings also get looped.
Now to get the fuel back to the tank, we're using a dash 690 degree fitting sealed with Teflon tape.
And lastly the vacuum reference hose is installed under the fuel pressure regulator.
Now, since we don't know the overall condition or how many miles are on the original Mercury Miau or
spark plugs, we're gonna go ahead and replace them with a fresh set of these E three diamond fire plugs.
Now, it's pretty safe to assume that the stock fuel pump is not gonna supply the demands of a big V8 engine. This was made for an in line four cylinder. So what we did is went to o'reilly Auto parts and got a Mercury Marauder fuel pump and just put it in line.
We also clipped the return line so it wouldn't get internally regulated but just flow freely into the tank. So now we know our fuel pump is gonna match the demands of the engine because that's what it's made for. Speaking of fuel, we know the fuel in the tank is decent. We put it there and we drove around on it, but we don't know about the fuel and the fuel rails of that engine. It could have been sitting for years. So we're gonna use some Starcher engines which is designed to stabilize fuel and bring vehicles out of storage. So it should do a good job on those injectors.
Now, even without a filter relocation kit, it's a good idea to fill the filter up before you install it. But remember this do not get any contamination into the fill hole. It's a direct connection to your engine and will get pumped directly into the oil passages and could damage your bearings.
So we're reusing the mercury Marauder inlet tube, but we've loaded it with a Pro M air meter and filter that come with the kit.
The rest of the connections are just as simple. They are one way plugs that you can't make a mistake on.
All right, with that stuff taken care of. We're just about ready to fire this thing off and like we showed you earlier, it only takes four wires to get it up and running. But you may notice we got a couple of extra wires here because we're gonna need some more communication with the body once it's dropped down on the frame. Now, one of these wires is an ac compressor on signal. The other being attack feed capable of running a traditional analog tachometer. Now, this toggle switch is acting like our key on signal with this being our start switch.
Yeah,
check that,
sir.
That is awesome.
Well, there it is, man. It's as easy as you said, it was four wires were up and running. Jeff Don. Thank you guys so much for your help. Uh Wow, this is incredible.
Well, and if you decide you wanna go with the supercharged cobra motor, you're all set with that as well. Cool deal. Well, you guys just get the truck back together and up and running. We're gonna go check email and we'll check in with them when you're done.
I'm gonna stay here and listen to this thing. Run
up next. Bringing a dead alternator back to life is much easier than you think we'll show you how stick around.
Hey, guys, welcome back to the shop. Well, our 66 C 10 was kind of a high end custom. So we had a brand new shiny chrome alternator bolted to the engine to charge the battery.
But what if your truck isn't a show truck and your alternator isn't quite charging like it's supposed to be. I guess you always have the option of going to the local parts store and picking up a new or remanufactured alternator. But you can save yourself a few bucks. Rebuild it yourself.
Build on a budget truck projects that save you time and money.
Now, most of the time a remand alternator is not going to cost you that much money. But like we just told you, if you do it yourself, you're going to save a few bucks and not only that, you're going to learn how this thing goes together a little bit about how it works and you can make sure the job was done. Right.
And the kit you're going to need to get this job done isn't that expensive either.
Now, it's a pretty basic kit, but it does include everything you're gonna need, including springs, brushes, the brush, retaining pin to help with assembly along with a voltage regulator diode trio and a new sealed bearing to make sure it spins nice and smoothly.
Now, the first thing we're doing is making a couple of marks on both the front and rear case ha
that way we can reassemble it in the same orientation, ensuring that the mounting holes and wiring connections are all in the same spot.
Now, separating the cases
is pretty straightforward, just remember the case is aluminum, so don't get carried away.
Now, an alternator obviously produces voltage but it does require an external power source to energize it.
And when you turn the key on 12 volts pass through the brushes and onto the slip rings which transfer the power to this field coil behind these rotor halves creating a magnetic field. Now, half of this rotor is a north pole effect and the other is a south pole and they alternate and as the engine fires up and the belt spins the pulley, this rotor spins in
the state or housing creating an alternating current.
But like most of you guys already know cars run on a direct current or DC system. So the voltage has to be modified. Now to accomplish that they use a rectify diode assembly and diodes are basically one way electrical check valves only allowing current to pass through in one direction.
Now, once the voltage has been converted to DC, it's got to pass through the voltage regulator assembly. Now without that part to be no way to regulate the amount of voltage the alternator produces because the faster it spins, the more voltage it produces and it would do damage to the rest of the electrical components on the vehicle.
And right here you can see the brushes, we're gonna replace those as well.
Now, replacing the front bearing is as simple as pulling out the rotor and removing the bearing retainer.
Then you just got to drive out the old one
and see the new one
and we're using an impact socket and a hammer to get the job done and make sure you hit the outside ring of the bearing. You don't want to damage it.
Now,
sers rarely go bad, but it does need to be removed to gain access to the parts. You will be replacing.
Now, two of the screws holding the voltage regulator down are laned and you need to keep track of where they go.
You also wanna make sure you apply a little bit of grease to the rear bearing to make sure this thing spins nice and smooth.
Now the kit comes with new brushes and new springs and even if your original springs look like they're in good shape, we'll go ahead and replace them with new parts just to make sure it's done right.
And here's where the brush retaining pin is worth its weight in gold because you'd have a heck of a time getting the spring loaded brushes installed without it
during reassembly. Make sure, all the original hardware goes back in the correct location
and keep in mind these are small fasteners that don't require a lot of torque.
Now, before we install the rotor assembly, we want to use a gray scuff pad to clean up the surface of the slip rings. So the brushes make good clean contact.
Now, in putting this thing back together, here's where it pays off big time to keep track of the parts and the order in which they were removed.
And lastly don't forget to pull the pin
because just like our grenade, this thing would be rather ineffective if we didn't.
What
you're watching trucks for a DVD copy of this episode, just go to Power Block tv.com and order your copy for just 595 plus shipping and handling. Start your own trucks, collection delivered right to your door from the power block.
Hey, welcome back to the shop. Now, I know you guys remember just how hard we beat on Dos
Bronco here.
So we're gonna do some badly needed preventive maintenance before we go out again.
Now, I know you've seen these X lock spindle nuts for our Dana 44 axle.
These are made by stage eight locking fasteners and they act like a wrench on the fastener to keep it tight and in place fighting off the effects of motion, vibration,
thermal cycling, shock cycles and over tightening all the typical causes that will loosen regular fasteners over time.
Here's how their X lock system works. First, a thrust washer gets installed, followed by a notched washer and then the groove spindle nut. Once it's tight, the lock and retainer gets installed, locking the spindle nut to the notched washer. Finally, a snap ring holds it all together.
Now, the best part of a mechanical locking fastener is it not only prevents the joint failure itself, but it also prevents any collateral damage from that failure.
Now, stage eight makes a lot of stuff for automotive applications, but they also produce fasteners for other industries with 78 patents and trademarks. Stage eight covers things in a range from as small as eyeglass screws to large industrial applications like these extreme heavy duty fasteners for the railroad industry. They even make a locking fastener for a gigantic bread dough machine because trust me, you don't want this guy getting loose and showing up in your image,
but check this out. This monster is for the US Army Corps of engineers to stabilize their bridges pretty impressive.
Now, what's really cool is all their products are made right here in the USA
and with over 15 million installations over the last 25 years. Stage eight hasn't received a single report of a failure. Now, for more information about stage eight locking fasteners go to power block tv.com, check out the link to the website.
Show Full Transcript
in
Project Rolling Thunder
and we'll show you the budget approach to rebuilding your alternator. It's all today here on trucks.
Hey, welcome to trucks.
Today, we're back on Project Rolling Thunder, which is our V8 converted Mazda B 2500, which is nothing more than a Reskin Ford Ranger.
So far we've stuffed in the four valve Marauder engine and transmission and reinstalled our short and drive shaft following that with a custom bent dual exhaust system that kicks out the side just like a full size Ford Lightning.
So that gets you guys up to speed on what we've already done to the truck and kind of brings us to an area that we've sort of been avoiding the whole time, which is the challenge of wiring and starting an EF I swap like this one. Well, we got some help today, Jeff Dunn from Duri performance is bringing something really cool to the table. And if you remember we use Jeff's mass air conversion on our first gen lightning,
a mass airflow system like the GTM
tanks have been a joint since 1989 is more efficient and infinitely more tunable. So we're gonna use this mass airflow conversion kit from duri performance that includes a new ECM or engine control module, an injector harness that plugs into the module and accepts the vehicle's injector harness allowing you to control and monitor the rest of the vehicle systems.
Oh, and by the way, in case some of you, Chevy guys have already forgotten it was the full
that actually won the muscle truck series. But even though EF I is nothing new, there's still a lot of guys including myself that just get a little intimidated with some of the voodoo involved in wiring an EF I engine swap. So what makes your system different?
It's interesting you use the word voodoo because you're right. A lot of people see wiring one of these engines as sort of a, a black magic if you will.
And
while we may not necessarily be able to eliminate the mystery of one of these engines, we think that we've done a pretty
your job to eliminate the complexity of wiring one of these engines. Yeah, but you're telling me that, but I'm looking at hundreds of wires, multi pin connectors. But yet you're telling me there's only four wires I need to be worried about connecting to make this thing run just four. You got a battery positive battery negative. We got a fuel pump and a 12 volt Keyon
less no more complicated than a carbureted engine, not with our kit. Well, why don't you show us and everybody watching how simple this is to make this engine run. Let's do it cool.
This system uses a factory style multi
pin connector and plugs right into the existing engine harness.
Don Baron, also from Duri
performance came down to help us fire up the ranger.
He's routing a power feed to the existing four cylinder fuel pump just so we have a fuel supply to start the engine.
Now, this is kind of a demonstration on how simple the system is to hook up. So we're using this toggle switch as our Keyon voltage source connecting the basic connections to a battery stand alone and we'll be using a remote start later on to fire the engine off.
Now, with our connections made well, we still need a computer to make our four valve 46 run.
So Jeff also provided us with a 99 Cobra production PC M with a chip installed that disables the passive anti theft system
and they also hooked us up with an 80 millimeter pro M mass airflow sensor and high flow conical filter.
Now, the DURI system is designed to work with the more popular 99 to 44 valve Cobra engines. And while our Marauder four valve is largely similar, there are some subtle differences with the intake facing the opposite direction put in the throttle position sensor and a few other items on the wrong side.
So to make the Marauder harness work with the done right system. Well, they offer this adapter harness that plugs in between the two. Now, if we decide to go to a Cobra engine, when we convert to stage two, we simply remove this adapter harness, plug everything back together. We'll be up and running.
Now, Jeff likes to tell us that with his done right performance system, we could get this engine to run in a shopping cart. Well, as you can see, we're about as close to a shopping cart as we could be with the engine sitting in the bare chassis, but like any other internal combustion engine, we got to have a fuel source. Now, our truck came with a returnless system with the fuel pressure regulated in the tank. Now, technically speaking, our truck came from the factory with a mechanical returnless system. Now you cobra guys, we know that you've got a returnless system, but it requires a fuel pump driver module to make this system work. Since we have the option from DURI performance, we decided to go return style just to simplify the system. So we had to change a few things around. Our temporary fuel supply line comes from the in tank pump into a filter and then up to the fuel rail, the fuel comes back from the fuel rail into a temporary return line, back into the tank, recirculating the fuel creating a traditional return style system.
Now, if you're keeping up with this, you're probably wondering how we're going to connect a fuel return line to a fuel rail that's designed to be returnless. Well, Jeff's got us covered with that with a pretty cool solution that's going to save you time
and money stick around.
Next, we'll convert to a return style fuel line system the easy way and later it's the least expensive way to save an old alternator. Stay tuned.
Hey, welcome back to trucks where we are moments away from firing off our 4.6 mercury Marauder engine stuffed into our mini truck project. Rolling thunder using Jeff Dunn's done right. Performance harness system. But before we do that, we need to finish the conversion to a return style fuel system.
So the first thing we want to do here is we're gonna remove the original fuel rail pressure sensor.
This is the sensor that feeds information to the original Marauder PC M so that it could determine proper voltage to the fuel pump for correct fuel rail pressure and injector pulse width.
Now, our return line conversion starts with this adapter block. Just make sure the old rings are lo before installing
the fuel outlet gets a new gasket and the fuel pressure regulators. O
rings also get looped.
Now to get the fuel back to the tank, we're using a dash 690 degree fitting sealed with Teflon tape.
And lastly the vacuum reference hose is installed under the fuel pressure regulator.
Now, since we don't know the overall condition or how many miles are on the original Mercury Miau or
spark plugs, we're gonna go ahead and replace them with a fresh set of these E three diamond fire plugs.
Now, it's pretty safe to assume that the stock fuel pump is not gonna supply the demands of a big V8 engine. This was made for an in line four cylinder. So what we did is went to o'reilly Auto parts and got a Mercury Marauder fuel pump and just put it in line.
We also clipped the return line so it wouldn't get internally regulated but just flow freely into the tank. So now we know our fuel pump is gonna match the demands of the engine because that's what it's made for. Speaking of fuel, we know the fuel in the tank is decent. We put it there and we drove around on it, but we don't know about the fuel and the fuel rails of that engine. It could have been sitting for years. So we're gonna use some Starcher engines which is designed to stabilize fuel and bring vehicles out of storage. So it should do a good job on those injectors.
Now, even without a filter relocation kit, it's a good idea to fill the filter up before you install it. But remember this do not get any contamination into the fill hole. It's a direct connection to your engine and will get pumped directly into the oil passages and could damage your bearings.
So we're reusing the mercury Marauder inlet tube, but we've loaded it with a Pro M air meter and filter that come with the kit.
The rest of the connections are just as simple. They are one way plugs that you can't make a mistake on.
All right, with that stuff taken care of. We're just about ready to fire this thing off and like we showed you earlier, it only takes four wires to get it up and running. But you may notice we got a couple of extra wires here because we're gonna need some more communication with the body once it's dropped down on the frame. Now, one of these wires is an ac compressor on signal. The other being attack feed capable of running a traditional analog tachometer. Now, this toggle switch is acting like our key on signal with this being our start switch.
Yeah,
check that,
sir.
That is awesome.
Well, there it is, man. It's as easy as you said, it was four wires were up and running. Jeff Don. Thank you guys so much for your help. Uh Wow, this is incredible.
Well, and if you decide you wanna go with the supercharged cobra motor, you're all set with that as well. Cool deal. Well, you guys just get the truck back together and up and running. We're gonna go check email and we'll check in with them when you're done.
I'm gonna stay here and listen to this thing. Run
up next. Bringing a dead alternator back to life is much easier than you think we'll show you how stick around.
Hey, guys, welcome back to the shop. Well, our 66 C 10 was kind of a high end custom. So we had a brand new shiny chrome alternator bolted to the engine to charge the battery.
But what if your truck isn't a show truck and your alternator isn't quite charging like it's supposed to be. I guess you always have the option of going to the local parts store and picking up a new or remanufactured alternator. But you can save yourself a few bucks. Rebuild it yourself.
Build on a budget truck projects that save you time and money.
Now, most of the time a remand alternator is not going to cost you that much money. But like we just told you, if you do it yourself, you're going to save a few bucks and not only that, you're going to learn how this thing goes together a little bit about how it works and you can make sure the job was done. Right.
And the kit you're going to need to get this job done isn't that expensive either.
Now, it's a pretty basic kit, but it does include everything you're gonna need, including springs, brushes, the brush, retaining pin to help with assembly along with a voltage regulator diode trio and a new sealed bearing to make sure it spins nice and smoothly.
Now, the first thing we're doing is making a couple of marks on both the front and rear case ha
that way we can reassemble it in the same orientation, ensuring that the mounting holes and wiring connections are all in the same spot.
Now, separating the cases
is pretty straightforward, just remember the case is aluminum, so don't get carried away.
Now, an alternator obviously produces voltage but it does require an external power source to energize it.
And when you turn the key on 12 volts pass through the brushes and onto the slip rings which transfer the power to this field coil behind these rotor halves creating a magnetic field. Now, half of this rotor is a north pole effect and the other is a south pole and they alternate and as the engine fires up and the belt spins the pulley, this rotor spins in
the state or housing creating an alternating current.
But like most of you guys already know cars run on a direct current or DC system. So the voltage has to be modified. Now to accomplish that they use a rectify diode assembly and diodes are basically one way electrical check valves only allowing current to pass through in one direction.
Now, once the voltage has been converted to DC, it's got to pass through the voltage regulator assembly. Now without that part to be no way to regulate the amount of voltage the alternator produces because the faster it spins, the more voltage it produces and it would do damage to the rest of the electrical components on the vehicle.
And right here you can see the brushes, we're gonna replace those as well.
Now, replacing the front bearing is as simple as pulling out the rotor and removing the bearing retainer.
Then you just got to drive out the old one
and see the new one
and we're using an impact socket and a hammer to get the job done and make sure you hit the outside ring of the bearing. You don't want to damage it.
Now,
sers rarely go bad, but it does need to be removed to gain access to the parts. You will be replacing.
Now, two of the screws holding the voltage regulator down are laned and you need to keep track of where they go.
You also wanna make sure you apply a little bit of grease to the rear bearing to make sure this thing spins nice and smooth.
Now the kit comes with new brushes and new springs and even if your original springs look like they're in good shape, we'll go ahead and replace them with new parts just to make sure it's done right.
And here's where the brush retaining pin is worth its weight in gold because you'd have a heck of a time getting the spring loaded brushes installed without it
during reassembly. Make sure, all the original hardware goes back in the correct location
and keep in mind these are small fasteners that don't require a lot of torque.
Now, before we install the rotor assembly, we want to use a gray scuff pad to clean up the surface of the slip rings. So the brushes make good clean contact.
Now, in putting this thing back together, here's where it pays off big time to keep track of the parts and the order in which they were removed.
And lastly don't forget to pull the pin
because just like our grenade, this thing would be rather ineffective if we didn't.
What
you're watching trucks for a DVD copy of this episode, just go to Power Block tv.com and order your copy for just 595 plus shipping and handling. Start your own trucks, collection delivered right to your door from the power block.
Hey, welcome back to the shop. Now, I know you guys remember just how hard we beat on Dos
Bronco here.
So we're gonna do some badly needed preventive maintenance before we go out again.
Now, I know you've seen these X lock spindle nuts for our Dana 44 axle.
These are made by stage eight locking fasteners and they act like a wrench on the fastener to keep it tight and in place fighting off the effects of motion, vibration,
thermal cycling, shock cycles and over tightening all the typical causes that will loosen regular fasteners over time.
Here's how their X lock system works. First, a thrust washer gets installed, followed by a notched washer and then the groove spindle nut. Once it's tight, the lock and retainer gets installed, locking the spindle nut to the notched washer. Finally, a snap ring holds it all together.
Now, the best part of a mechanical locking fastener is it not only prevents the joint failure itself, but it also prevents any collateral damage from that failure.
Now, stage eight makes a lot of stuff for automotive applications, but they also produce fasteners for other industries with 78 patents and trademarks. Stage eight covers things in a range from as small as eyeglass screws to large industrial applications like these extreme heavy duty fasteners for the railroad industry. They even make a locking fastener for a gigantic bread dough machine because trust me, you don't want this guy getting loose and showing up in your image,
but check this out. This monster is for the US Army Corps of engineers to stabilize their bridges pretty impressive.
Now, what's really cool is all their products are made right here in the USA
and with over 15 million installations over the last 25 years. Stage eight hasn't received a single report of a failure. Now, for more information about stage eight locking fasteners go to power block tv.com, check out the link to the website.
