Parts Used In This Episode
All Star Auto Salvage
Used rear 8.8 axle housing, used front axle shafts, battery box.
Auto Body Toolmart
Five ton Mighty Pull frame puller, hook and chain sets, floor anchor pots, Mo-Clamps.
Insurance Institute for Highway Safety
Crash footage.
Lokar
Billet Locking Dipsticks for transmissions and engines.
Quadratec
Steel front fenders both drivers and passenger side, manual mirrors for both sides, side marker lens for both sides, parking lamps for both sides, front header panel.
Episode Transcript
Today, we're starting a new project with our wrecks. Jeep Cherokee first, we'll show you how to inspect for damage. Then it's how to pull the frame back into shape the right way after that, it's a facelift with new sheet metal. And since we're using a lot of junkyard parts, we're calling this our Jeep Cherokee. It's all today here on trucks.
Hey, welcome to trucks
with those of you guys who watch the show regularly. We know that we have the opportunity to build some extensive and pretty expensive rigs here on the show, we get access to all the brand new parts sometimes even before they hit the parts of those shelves in the aftermarket. Now, most of the time our project goals are realistic and then there are the times that we get a little carried away with the latest and greatest and high performance parts that can sometimes be out of reach for the average guy.
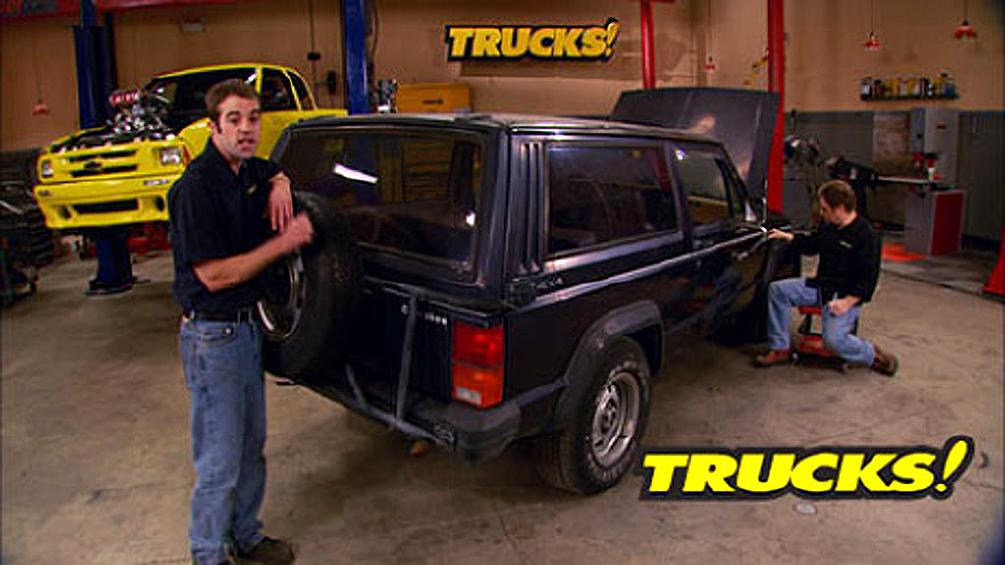
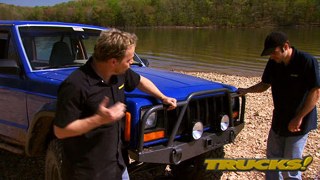
But this project is definitely not one of those, this 88 Cherokee that we picked up for no more cost than what it took to drag it off the previous owner's property. Well, it's beat up is worn out, it's rounded off at all four corners. It's got 100 and 29,000 miles on it and heck, it doesn't even start anymore. And as if that's not enough, it's taken a pretty hard hit right here on the front end. But if you stand back and blur your eyes a little show them, Rob,
you can sort of see the potential in this thing. Now, the Jeep Cherokee platform has been home to some pretty serious trail rigs
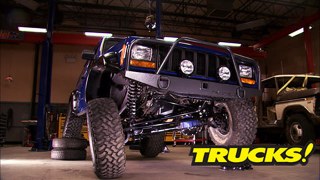
and although you can get crazy with high tech high dollar aftermarket parts to build one of these things, you don't have to. Now, one of the first vehicles I ever owned was a 96 2 door Cherokee, basically the same truck. And while I could barely afford to put gas in it, I did manage to throw a cheap three inch lift and a generic set of 30 ones on it all on a bone stock drive train. And let me tell you these things make damn good dual purpose trail rings and with just a little bit of modification, you can have a tough weekend wheeler.
And since we've got absolutely zero cash invested in this turd, we're gonna call it
our
cheap Cherokee and continue that trend. We're gonna scrape together, beg borrow and steal parts only spending money when we absolutely have to. But we're gonna build this Jeep back up again, give it back some of its self esteem and hopefully pass on some real world tips to you guys so you can do a similar project of your own.
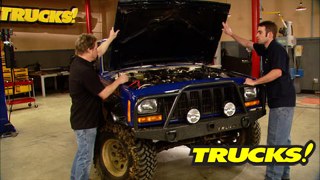
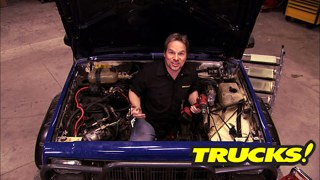
So, let's take a closer look at what we've got to work with. Well, the power steering cap is missing, the reservoir is empty and the pump was howling
and somehow the radiators made contact with the mechanical fan and it's jammed up and when this 4 L did run, well, it sounded pretty good and 100 and 29,000 miles is just getting broken in for these durable and torque straight sixes. So we shouldn't have any problem sticking with the stock engine.
Listen to this.
That's actually a pretty common problem with these Cherokees because the door hinges are actually welded to the pillar instead of bolted on just over time with regular wear and tear, the weld fatigues, the metal and it breaks apart that causes a whole lot of other problems.
The door is misaligned. It gets contact with the fender and causes a bunch of body damage. Well, we're gonna show you guys a fix for that situation. So it'll never happen again. As for the rest of the drive train, the four speed automatic and NP 231 transfer case are actually decent pieces. We've had really good luck with the 231 in our YJ project as for the axles. Well, we've got a Dana 30 up front and while the Dana 30 isn't the strongest axle in the world with some budget upgrades and a few wisely spent dollars it can be made to work. Just don't expect it to be indestructible as for the rear axle. Well, some of these Cherokees made it out of the factory with a Dana 44. Unfortunately, we're stuck with the Dana 35 and building one of those things is like putting lipstick on a pig. So we're gonna have to find a more suitable replacement without breaking the bank.
Now, like the last guy proved the stock stamp steel bumpers don't offer much protection. So we're gonna make some stronger bumpers out of tubing and get rid of these stalkers and this ugly tire rack. Now we need a spare, so we'll get rid of that backseat, throw the spare in the back.
Now, like Kevin said, we're gonna ditch the back seat in favor of some room for a spare tire and some other trail junk. Maybe we'll throw in a simple roll bar. Now, the driver's seat has seen better days and the carpet is beyond nasty, but at least it's got a CD player.
Now, body damage
is obviously nothing new for this old Jeep. And this collision here has got our fender and our inner structure smashed up against a tire cutting it. We can't even do a lock to lock turn, but as bad as this looks, it's not as bad as you think. And we're gonna show you guys how to think your way through and repair collision damage, get this fixed in no time. But while you're busy getting this thing ready for repair to track down, Tommy will head off to the junkyard and, uh, find some parts on the cheap. Sounds like a plan.
Now, step one with any collision. Repair is putting your tools and wrenches and hammers down and I know you're asking yourselves what is this monster? Well, we'll get to that in a minute. The first thing you want to do is take a close look at the damage, try and visualize how the wreck happened in the first place. And that starts with finding your point of impact, which for us is right here in the bumper at the front end of the frame rail, then you trace your damage back
and you carefully look and inspect as you go,
checking out each panel gap and each scene slowly working your way back to the rear of the vehicle. Even if it was a front end collision. Why go this far back? Well, check this out.
Most vehicles weigh more than 3000 pounds. That's a lot of inertia. And if you paid attention in physics class, you know that even though you come to a rather abrupt stop when you hit something, energy continues to transfer back through the entire vehicle, which is why passengers get thrown around in an accident.
Our friends at the Insurance Institute for Highway Safety sent us all this footage including this crash test of a Jeep Cherokee
watch as the vehicle hits the barrier and literally crushes and rolls the front of the vehicle under.
This happens so that the passengers don't absorb all that impact
the energy transfers all the way through the vehicle.
You can see the roof ripple the doors squeeze together, even the rocker panels compress.
And then as the vehicle's mass comes to a stop, all that stored energy whips back to the point of impact up front.
That type of violent impact can break spot, welts, ground straps, isolators, even seat backs causing all kinds of collateral damage. So just because your damage is up here, it doesn't mean that it stops here.
Now, if you want to find out how your vehicle did on crash testing, go to the Insurance Institute for highway safety website at iihs.org type in your vehicle information and check it out. They're a nonprofit organization that does independent testing of all makes and models of vehicle ultimately giving us safer vehicles to drive on our roads. And besides the fact that it's pretty cool to watch crash video when you know that nobody got hurt. Now, we've got a bit of tear down to do before we can even look at our frame damage here
up next. It's off to the junkyard to do a little digging for parts. And later we'll show you an easy way to fix those broken door hinges.
Hey, welcome back to trucks. While Kevin's back at the shop tearing apart our beat up XJ, Tommy and I decided to come down here to All Star Auto Salvage in Lawrenceburg, Tennessee and dig up some parts for our cheap Cherokee project.
All Star Auto Salvage is located in the heart of the southeast in Lawrenceburg, Tennessee.
They specialize in late model salvage parts and have hundreds of vehicles along with thousands of dismantled and stock parts to choose from
and from what we can see it is the perfect place to hunt for what we need.
Uh No, A BS tone ring, we got the same U joints and shafts in our 88 Cherokee. These don't do us any good.
A
little 88 Comanche,
uh
shoot, we could use that mechanical fan,
but at least it's got a battery box. We're after
it looks like we got our choice of axles. Yeah, it looks like there's some six floating in there. Probably kill the budget too,
man. Check that one out in the back. Holy crap. What are you gonna do with that thing? Man. We can find something.
Thank you, buff out.
I
think it might take a little while
but without a windshield, we don't need air conditioning,
just some goggles.
Now, this 94 Jeep Grand Cherokee has the A BS quip for an axle, but it also has the CV style for an axle shaft that we're not really looking for. So we'll just have to keep looking.
Yeah.
Hey, that's it, isn't it?
Yeah.
A BS sensor wire,
this wire tells us that this Dana 30 has a little bit larger 297 U joint. The non A BS equipped axle shafts have a smaller 260 joint while it's not indestructible. It is a good low buck upgrade.
Hey, Tommy, let's grab Carl,
wait till you see his forklift.
Carl 30 ton four wheel drive forklift had us Jones in for one in our shop to move vehicles around.
All star does all the dismantling in a controlled environment in the shop. That way, fluids and other pollution don't soak into the top soil.
We've got one axle shaft pulled, but here's the main reason we came to All Star auto salvage to pick up this Ford 8.8 inch rear axle out of a 96 or newer Ford Explorer. It's got 4, 10 gears, factory installed limited slip, 31 flying axle shafts, disc brakes and the 51, 4.5 bolt pattern that matches our Cherokee. Plus these things are pretty plentiful. So they're not gonna set you back an arm and a leg looks like Carl's got that other axle shaft just about ready. So we'll get this stuff loaded up for now. I'm gonna look around and see what else I can find.
Now, back here at the shop, we got our jeep tore down far enough to where we can take a better look at the damage. By the way, a couple of cardboard boxes help you keep track of your fasteners. Now, over here, the radiator is still in the truck, but that's because it's pinched between the bumper and the unibody. And if we're careful here, we can reuse that radiator and save some more money.
Now to make our pole today, we're gonna be using this champ. Mighty pole frame straightener. We got from Autobody Tool Mart and with 10 tons of combined pulling power, this thing ought to handle anything we can throw at it
after the break, we're pulling the frame back into shape with over 10 tons of force. Stay tuned.
Hey, welcome back to trucks and thanks for sticking with us while we walk you through a basic collision repair on a project cheap Cherokee here, Tommy and Ryan, they're still at the junkyard trying to find a good deal on some used parts for this project. And I've got our mighty pull frame straightener locked down on both sides of the pinch welt with the main beam parallel to the frame rail that we're gonna be pulling.
Now, we also got a set of pulling chains and hooks from Autobody Tool Mart. Now, these chains are specifically designed for pulling frames and that unibody is going to break long before these chains do so. Please use the proper safety gear and equipment. When you're doing this type of repair
a
while back, we had the concrete floor of our shop drilled in six different locations.
That way we can anchor any vehicle from the frame to these new floor pots we got from auto body tool Mart. Now, the floor pots utilize the strength of the concrete around them for their holding power. And when they're not in use, this cover goes over top and it is so smooth, you can slide a creeper over top.
Our first order of business is to get the plumper out of the way since we can't even see the frame rail yet to assess any damage.
So we'll use a hook and just pull it back.
Now, with the bumper peeled back, we could just unbolt the brackets and the bumper itself falls right off. Well, sort of,
we didn't need that wire anyway,
with the bumper out of the way, the radiator
and condenser come out so we can get a good look at that rail.
Ok. Now, we can see the damage and the good news here is that none of this stuff got up into the engine. Our alternator is fine. All the belts and pulleys are fine and our condenser and radiator are still both usable. Now, this frame rail did exactly what it was designed to do and it compressed about two inches as you can see by these crumple zones here,
this one
is completely absorbed here. So this frame absorbed the energy. So the driver didn't have to.
The first real pull is done with a mow clamp locked down with an impact gun.
So we're pulling straight out on the front of the rail using the bumper attachment point.
Now, you can see that my chain is weighted down with another chain that's just in case a clap pulls loose or tears out a chunk of metal and goes flying. Remember there's five tons of force against this metal and that much power deserves some respect.
Notice how I'm pulling and releasing the energy. This wakes up the metals molecules and makes the pulse safer and easier.
You can listen to your pump as well. If you hear it slowing down, that means it's loading up and you may need to reposition your clown.
Another helper is your BFH. If you can see where the metal is kin, you can persuade it back into shape as well. And all of this combined with some patients will get your metal back to its original position, which is where it really wants to be anyway.
Ok. With the help of a frame dimension guide
and a tape measure, we're within a quarter inch of the factory specs on this frame rail and there's no other kinks or wrinkles on the rail behind the damage here. So we're good to go a
little bit of cosmetic work on this apron and on the side of the rail, we're ready to start hanging sheet metal.
When we come back, we'll update our Cherokees. Look with some new sheet metal. Stick around.
Hey, welcome back to trucks and thanks for sticking with us as we kick off another budget build up with our cheap Cherokee project.
Now, all this stuff came from All Star auto salvage and it's gonna make our Jeep a little more trail worthy and it didn't cost us a whole lot either.
And I think we're just in time
because it looks like Kevin's got that frame rail repaired. Yeah. And in case you
missed it, we stretched out our frame rail with our five ton mighty pull system. Then with it back in spec and all measuring up correctly, we cut out the outside of the frame rail, straightened it with a hammer and dolly and then welded it back in place just for cosmetic reasons, make it look a little better. A little bit of undercoat on this and we're good to go. But now I'm dying to see what Ryan and Tommy came up with at the junkyard.
Well, this is the axle we went down there for cool. Did you get the 410? You know it
free disc brakes while we were there, we went ahead and picked up a cheap front axle shaft upgrade, an unbroken battery box and a fan that hasn't met the core support yet.
Well, we're almost ready to hang sheet metal, but let's take a look at that door first,
we unbolted the door from its hinges
and then cut the hinges and the factory wells from the hinge piler.
Then using some scraps, we found around the shop, we made our own homemade mounting plate.
Now, all we did here was take some regular old plate, weld two nuts to the back and that'll serve as our hinge mounting plate. We'll go ahead and grind it to fit
and burn it in.
We trimmed the mounting plates to fit the holes centered them up
and then welded them in place.
Then with the hinges still off the doors, we took them to the drill press drilled out and elongated two holes centered in each hinge so they can be adjusted.
Then we tested the door burned in the wells to ground the metal flush.
Well, that takes care of that. Now, we can give this thing a face lift.
Now, we could go ahead and repair and reuse these old beat up fenders we took off the jeep, but they're so rough that by the time we got them fixed, well, it just wouldn't be worth the time investment, especially when you consider how inexpensive these brand new replacement panels are,
start at the back of the fender and work your way forward. That way you can align everything to the door and control your panel. Gas.
Ok,
days.
Hey, guys, you've seen us use low car products on everything from rock crawlers to street trucks to high end hot rods. That's because their stuff is always high quality made in the USA and comes with a lifetime warranty. Well, today we want to show you low cars, anchor tight, locking, flexible engine dipstick. It features
unique locking mechanism similar to that of an air tool which will positively engage the dipstick handle and prevent it from being forced out under crank case pressure, low cars, anchor type dipsticks are available for most engine applications. The prices start at just under 100 bucks. Thanks for watching trucks. See you guys next week.
Show Full Transcript
Hey, welcome to trucks
with those of you guys who watch the show regularly. We know that we have the opportunity to build some extensive and pretty expensive rigs here on the show, we get access to all the brand new parts sometimes even before they hit the parts of those shelves in the aftermarket. Now, most of the time our project goals are realistic and then there are the times that we get a little carried away with the latest and greatest and high performance parts that can sometimes be out of reach for the average guy.
But this project is definitely not one of those, this 88 Cherokee that we picked up for no more cost than what it took to drag it off the previous owner's property. Well, it's beat up is worn out, it's rounded off at all four corners. It's got 100 and 29,000 miles on it and heck, it doesn't even start anymore. And as if that's not enough, it's taken a pretty hard hit right here on the front end. But if you stand back and blur your eyes a little show them, Rob,
you can sort of see the potential in this thing. Now, the Jeep Cherokee platform has been home to some pretty serious trail rigs
and although you can get crazy with high tech high dollar aftermarket parts to build one of these things, you don't have to. Now, one of the first vehicles I ever owned was a 96 2 door Cherokee, basically the same truck. And while I could barely afford to put gas in it, I did manage to throw a cheap three inch lift and a generic set of 30 ones on it all on a bone stock drive train. And let me tell you these things make damn good dual purpose trail rings and with just a little bit of modification, you can have a tough weekend wheeler.
And since we've got absolutely zero cash invested in this turd, we're gonna call it
our
cheap Cherokee and continue that trend. We're gonna scrape together, beg borrow and steal parts only spending money when we absolutely have to. But we're gonna build this Jeep back up again, give it back some of its self esteem and hopefully pass on some real world tips to you guys so you can do a similar project of your own.
So, let's take a closer look at what we've got to work with. Well, the power steering cap is missing, the reservoir is empty and the pump was howling
and somehow the radiators made contact with the mechanical fan and it's jammed up and when this 4 L did run, well, it sounded pretty good and 100 and 29,000 miles is just getting broken in for these durable and torque straight sixes. So we shouldn't have any problem sticking with the stock engine.
Listen to this.
That's actually a pretty common problem with these Cherokees because the door hinges are actually welded to the pillar instead of bolted on just over time with regular wear and tear, the weld fatigues, the metal and it breaks apart that causes a whole lot of other problems.
The door is misaligned. It gets contact with the fender and causes a bunch of body damage. Well, we're gonna show you guys a fix for that situation. So it'll never happen again. As for the rest of the drive train, the four speed automatic and NP 231 transfer case are actually decent pieces. We've had really good luck with the 231 in our YJ project as for the axles. Well, we've got a Dana 30 up front and while the Dana 30 isn't the strongest axle in the world with some budget upgrades and a few wisely spent dollars it can be made to work. Just don't expect it to be indestructible as for the rear axle. Well, some of these Cherokees made it out of the factory with a Dana 44. Unfortunately, we're stuck with the Dana 35 and building one of those things is like putting lipstick on a pig. So we're gonna have to find a more suitable replacement without breaking the bank.
Now, like the last guy proved the stock stamp steel bumpers don't offer much protection. So we're gonna make some stronger bumpers out of tubing and get rid of these stalkers and this ugly tire rack. Now we need a spare, so we'll get rid of that backseat, throw the spare in the back.
Now, like Kevin said, we're gonna ditch the back seat in favor of some room for a spare tire and some other trail junk. Maybe we'll throw in a simple roll bar. Now, the driver's seat has seen better days and the carpet is beyond nasty, but at least it's got a CD player.
Now, body damage
is obviously nothing new for this old Jeep. And this collision here has got our fender and our inner structure smashed up against a tire cutting it. We can't even do a lock to lock turn, but as bad as this looks, it's not as bad as you think. And we're gonna show you guys how to think your way through and repair collision damage, get this fixed in no time. But while you're busy getting this thing ready for repair to track down, Tommy will head off to the junkyard and, uh, find some parts on the cheap. Sounds like a plan.
Now, step one with any collision. Repair is putting your tools and wrenches and hammers down and I know you're asking yourselves what is this monster? Well, we'll get to that in a minute. The first thing you want to do is take a close look at the damage, try and visualize how the wreck happened in the first place. And that starts with finding your point of impact, which for us is right here in the bumper at the front end of the frame rail, then you trace your damage back
and you carefully look and inspect as you go,
checking out each panel gap and each scene slowly working your way back to the rear of the vehicle. Even if it was a front end collision. Why go this far back? Well, check this out.
Most vehicles weigh more than 3000 pounds. That's a lot of inertia. And if you paid attention in physics class, you know that even though you come to a rather abrupt stop when you hit something, energy continues to transfer back through the entire vehicle, which is why passengers get thrown around in an accident.
Our friends at the Insurance Institute for Highway Safety sent us all this footage including this crash test of a Jeep Cherokee
watch as the vehicle hits the barrier and literally crushes and rolls the front of the vehicle under.
This happens so that the passengers don't absorb all that impact
the energy transfers all the way through the vehicle.
You can see the roof ripple the doors squeeze together, even the rocker panels compress.
And then as the vehicle's mass comes to a stop, all that stored energy whips back to the point of impact up front.
That type of violent impact can break spot, welts, ground straps, isolators, even seat backs causing all kinds of collateral damage. So just because your damage is up here, it doesn't mean that it stops here.
Now, if you want to find out how your vehicle did on crash testing, go to the Insurance Institute for highway safety website at iihs.org type in your vehicle information and check it out. They're a nonprofit organization that does independent testing of all makes and models of vehicle ultimately giving us safer vehicles to drive on our roads. And besides the fact that it's pretty cool to watch crash video when you know that nobody got hurt. Now, we've got a bit of tear down to do before we can even look at our frame damage here
up next. It's off to the junkyard to do a little digging for parts. And later we'll show you an easy way to fix those broken door hinges.
Hey, welcome back to trucks. While Kevin's back at the shop tearing apart our beat up XJ, Tommy and I decided to come down here to All Star Auto Salvage in Lawrenceburg, Tennessee and dig up some parts for our cheap Cherokee project.
All Star Auto Salvage is located in the heart of the southeast in Lawrenceburg, Tennessee.
They specialize in late model salvage parts and have hundreds of vehicles along with thousands of dismantled and stock parts to choose from
and from what we can see it is the perfect place to hunt for what we need.
Uh No, A BS tone ring, we got the same U joints and shafts in our 88 Cherokee. These don't do us any good.
A
little 88 Comanche,
uh
shoot, we could use that mechanical fan,
but at least it's got a battery box. We're after
it looks like we got our choice of axles. Yeah, it looks like there's some six floating in there. Probably kill the budget too,
man. Check that one out in the back. Holy crap. What are you gonna do with that thing? Man. We can find something.
Thank you, buff out.
I
think it might take a little while
but without a windshield, we don't need air conditioning,
just some goggles.
Now, this 94 Jeep Grand Cherokee has the A BS quip for an axle, but it also has the CV style for an axle shaft that we're not really looking for. So we'll just have to keep looking.
Yeah.
Hey, that's it, isn't it?
Yeah.
A BS sensor wire,
this wire tells us that this Dana 30 has a little bit larger 297 U joint. The non A BS equipped axle shafts have a smaller 260 joint while it's not indestructible. It is a good low buck upgrade.
Hey, Tommy, let's grab Carl,
wait till you see his forklift.
Carl 30 ton four wheel drive forklift had us Jones in for one in our shop to move vehicles around.
All star does all the dismantling in a controlled environment in the shop. That way, fluids and other pollution don't soak into the top soil.
We've got one axle shaft pulled, but here's the main reason we came to All Star auto salvage to pick up this Ford 8.8 inch rear axle out of a 96 or newer Ford Explorer. It's got 4, 10 gears, factory installed limited slip, 31 flying axle shafts, disc brakes and the 51, 4.5 bolt pattern that matches our Cherokee. Plus these things are pretty plentiful. So they're not gonna set you back an arm and a leg looks like Carl's got that other axle shaft just about ready. So we'll get this stuff loaded up for now. I'm gonna look around and see what else I can find.
Now, back here at the shop, we got our jeep tore down far enough to where we can take a better look at the damage. By the way, a couple of cardboard boxes help you keep track of your fasteners. Now, over here, the radiator is still in the truck, but that's because it's pinched between the bumper and the unibody. And if we're careful here, we can reuse that radiator and save some more money.
Now to make our pole today, we're gonna be using this champ. Mighty pole frame straightener. We got from Autobody Tool Mart and with 10 tons of combined pulling power, this thing ought to handle anything we can throw at it
after the break, we're pulling the frame back into shape with over 10 tons of force. Stay tuned.
Hey, welcome back to trucks and thanks for sticking with us while we walk you through a basic collision repair on a project cheap Cherokee here, Tommy and Ryan, they're still at the junkyard trying to find a good deal on some used parts for this project. And I've got our mighty pull frame straightener locked down on both sides of the pinch welt with the main beam parallel to the frame rail that we're gonna be pulling.
Now, we also got a set of pulling chains and hooks from Autobody Tool Mart. Now, these chains are specifically designed for pulling frames and that unibody is going to break long before these chains do so. Please use the proper safety gear and equipment. When you're doing this type of repair
a
while back, we had the concrete floor of our shop drilled in six different locations.
That way we can anchor any vehicle from the frame to these new floor pots we got from auto body tool Mart. Now, the floor pots utilize the strength of the concrete around them for their holding power. And when they're not in use, this cover goes over top and it is so smooth, you can slide a creeper over top.
Our first order of business is to get the plumper out of the way since we can't even see the frame rail yet to assess any damage.
So we'll use a hook and just pull it back.
Now, with the bumper peeled back, we could just unbolt the brackets and the bumper itself falls right off. Well, sort of,
we didn't need that wire anyway,
with the bumper out of the way, the radiator
and condenser come out so we can get a good look at that rail.
Ok. Now, we can see the damage and the good news here is that none of this stuff got up into the engine. Our alternator is fine. All the belts and pulleys are fine and our condenser and radiator are still both usable. Now, this frame rail did exactly what it was designed to do and it compressed about two inches as you can see by these crumple zones here,
this one
is completely absorbed here. So this frame absorbed the energy. So the driver didn't have to.
The first real pull is done with a mow clamp locked down with an impact gun.
So we're pulling straight out on the front of the rail using the bumper attachment point.
Now, you can see that my chain is weighted down with another chain that's just in case a clap pulls loose or tears out a chunk of metal and goes flying. Remember there's five tons of force against this metal and that much power deserves some respect.
Notice how I'm pulling and releasing the energy. This wakes up the metals molecules and makes the pulse safer and easier.
You can listen to your pump as well. If you hear it slowing down, that means it's loading up and you may need to reposition your clown.
Another helper is your BFH. If you can see where the metal is kin, you can persuade it back into shape as well. And all of this combined with some patients will get your metal back to its original position, which is where it really wants to be anyway.
Ok. With the help of a frame dimension guide
and a tape measure, we're within a quarter inch of the factory specs on this frame rail and there's no other kinks or wrinkles on the rail behind the damage here. So we're good to go a
little bit of cosmetic work on this apron and on the side of the rail, we're ready to start hanging sheet metal.
When we come back, we'll update our Cherokees. Look with some new sheet metal. Stick around.
Hey, welcome back to trucks and thanks for sticking with us as we kick off another budget build up with our cheap Cherokee project.
Now, all this stuff came from All Star auto salvage and it's gonna make our Jeep a little more trail worthy and it didn't cost us a whole lot either.
And I think we're just in time
because it looks like Kevin's got that frame rail repaired. Yeah. And in case you
missed it, we stretched out our frame rail with our five ton mighty pull system. Then with it back in spec and all measuring up correctly, we cut out the outside of the frame rail, straightened it with a hammer and dolly and then welded it back in place just for cosmetic reasons, make it look a little better. A little bit of undercoat on this and we're good to go. But now I'm dying to see what Ryan and Tommy came up with at the junkyard.
Well, this is the axle we went down there for cool. Did you get the 410? You know it
free disc brakes while we were there, we went ahead and picked up a cheap front axle shaft upgrade, an unbroken battery box and a fan that hasn't met the core support yet.
Well, we're almost ready to hang sheet metal, but let's take a look at that door first,
we unbolted the door from its hinges
and then cut the hinges and the factory wells from the hinge piler.
Then using some scraps, we found around the shop, we made our own homemade mounting plate.
Now, all we did here was take some regular old plate, weld two nuts to the back and that'll serve as our hinge mounting plate. We'll go ahead and grind it to fit
and burn it in.
We trimmed the mounting plates to fit the holes centered them up
and then welded them in place.
Then with the hinges still off the doors, we took them to the drill press drilled out and elongated two holes centered in each hinge so they can be adjusted.
Then we tested the door burned in the wells to ground the metal flush.
Well, that takes care of that. Now, we can give this thing a face lift.
Now, we could go ahead and repair and reuse these old beat up fenders we took off the jeep, but they're so rough that by the time we got them fixed, well, it just wouldn't be worth the time investment, especially when you consider how inexpensive these brand new replacement panels are,
start at the back of the fender and work your way forward. That way you can align everything to the door and control your panel. Gas.
Ok,
days.
Hey, guys, you've seen us use low car products on everything from rock crawlers to street trucks to high end hot rods. That's because their stuff is always high quality made in the USA and comes with a lifetime warranty. Well, today we want to show you low cars, anchor tight, locking, flexible engine dipstick. It features
unique locking mechanism similar to that of an air tool which will positively engage the dipstick handle and prevent it from being forced out under crank case pressure, low cars, anchor type dipsticks are available for most engine applications. The prices start at just under 100 bucks. Thanks for watching trucks. See you guys next week.
