More '01 Mazda B2500/Ford Ranger "Rolling Thunder" Episodes
More Rolling Thunder Episodes
Trucks! Builds
Want more content like this?
Join the PowerNation Email NewsletterParts Used In This Episode
Matco Tools
1/4" Composite Air Ratchet
Matco Tools
Pneumatic Air Hammer
Matco Tools
Pneumatic U-Joint Driver Attachment
Matco Tools
Sheet Metal Forming Locking Pliers
Matco Tools
U-Joint Snap Ring Pliers
Matco Tools
Welding Ground Clamp
Episode Transcript
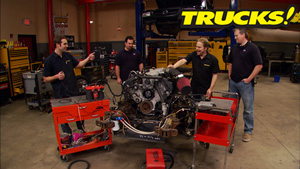
Today, we're making engine mounts for our 4.6 L V8 that's going into Project Rolling Thunder and we're making some more room in the stable for 300 plus horses. It's all today here on trucks.
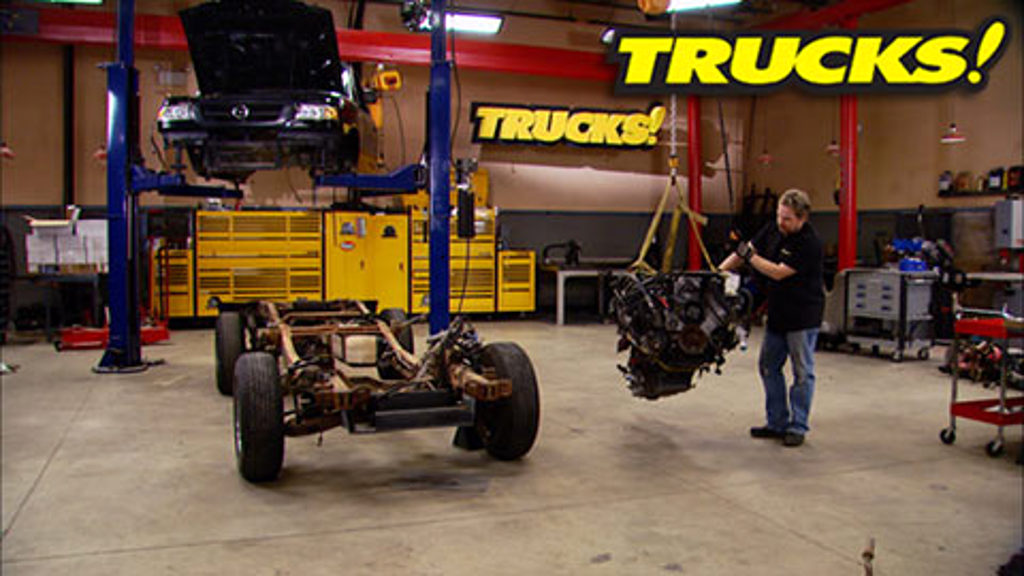
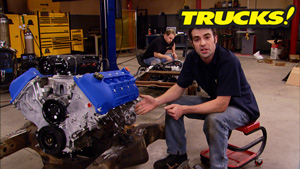
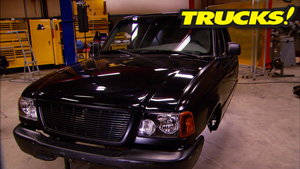
Hey guys, welcome to trucks. Well, this is the new motivation to our latest trucks, project project Rolling Thunder. It's a 4.6 L 300 horsepower modular engine borrowed from an 03 mercury marauder. Now, all of this has got to fit in a happy place here between the framers of our 2001 ranger based truck. In other words, that monster's gotta fit up in between the fenders of that truck. Now
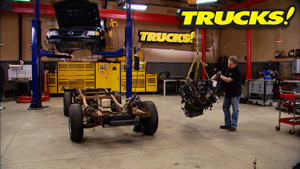
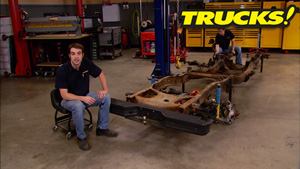
strip the frame down to the bare bones, including pulling the engine mounts out of the cross member just to give ourselves as much room as possible because let's face it. That modular engine is just plain, bigger than a typical small block Ford V8. And there is no kit for this engine swap. So it's going to be a pretty good challenge that by the end of the day, we have that giant drive train fitting comfortably into a compact truck.
Now to make sure that happens. We went ahead and did a little bit of prep work. We pulled just about everything we could off the firewall and we pulled the plastic inner fender liners to gain clearance to help us see what we're doing.
But check this out. We also made some relief cuts on the pinch welt at the base of the firewall and on the trans tunnel, that way we can get as much clearance as possible to help us shoehorn that giant engine and transmission combo down into the engine bay.
Now, in the past, we've had to deal with the AC system and the refrigerant that's in it by paying somebody to come out here and evacuate the system. But this time, we've got a unique and easier solution.
Now, everything in this bed liner that doesn't end up going back on our truck. Well, it's gonna get weighed so we can keep track of vehicle weight that we trimmed down. But this right here is what Ryan was talking about. This giant ac box is gonna come in contact with the right bank giant cam cover. So we just decided to take the whole entire sealed system off of the truck. That way we don't illegally release any Freon into the atmosphere. We don't make any tree huggers angry and if we decide to reclaim the Freon, well, we can take this whole system down to a service center and just do it there.
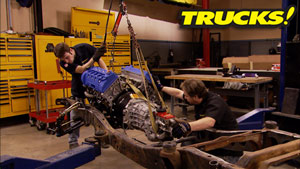
Now dropping this big 46 down in between the frame rails is actually the easiest part of this mock up.
So we're gonna have to drop the cab down, make some adjustments and push some things around
to see what we've got to work with.
And
all right now, there's no doubt about it. It's a tight fit, but the engine's in here and we actually have about an inch of clearance between the back of the cylinder head and the firewall. We definitely needed to remove the heater box and the exhaust is going to be a tight squeeze. But we got all kinds of room up here for a radiator.
Now, the throttle linkage looks like it actually might even work with the original Mazda gas pedal. The cable is just about the right length that we got a little bit of fun
to do with the steering shaft. But the good news is it's gonna work.
Here's the ultimate test
stock hood closes perfectly. Now, there is a stealth factor.
All right. Now, we've gone ahead and taken some measurements on where the engine is sitting right now because we know it fits and we don't want it to move.
But before we start building some engine mounts, we want to see if we can get this factory Mazda cross member to line up with the mercury Marauder transmission mount because as it sits right now, it was pretty darn close. Now, the bolt holes look symmetrical. So we may be able to get away with dropping the cross member, flipping it 100 and 80 degrees and reinstalling it. And hopefully everything line up. And even if it doesn't, well, the bolt holes for the mount itself are drilled offset of center. So we may be able to flip that around as well to see if it will line up. We got a couple of variables to work with. So I think we can get it done. But even if we can't, well, it'll only take a few modifications to the cross member or the mound itself to get the stars to align and get this puppy bolted in because we don't want to spend too much time on it
because it is going to have to change around when we go to stage two for this build swap in a manual.
Well, I don't think that's gonna work now. It looks like by flipping the cross member around, we've actually moved it too far forward and the way it was before, well, it wasn't that far off. So I think what we can do is oblong the mounting holes where the cross member installs to the frame that should give us the adjustment we need.
It goes to show you maybe try working with what you got. The solution may be cheaper and easier than you think.
And it was as simple as using a cone shaped carbide burr
and our dye grinder to oval the holes out.
Hopefully everything will line up.
Let's see if this works a little bit better
and you're not gonna sacrifice any strength by elongating holes, especially with three mounting bolts on either side. So it just goes to show you it pays dividends to try and work with what you've got. Instead of whipping out the credit card,
I don't know why we didn't do that first.
The four valve heads have a unique port design. So we're tied to a certain style of manifold. We're going to solve this problem later and just get them out of the way for now.
All right, we're there.
Perfect.
Well, with our transmission locked into place and our wood blocks holding up the oil pan. This is exactly where this engine is gonna sit. Now, all we have to do is fabricate some kind of a receiver for the existing engine mount, which are the factory engine mounts and that gives us one more part that we can get over the counter and one more way to save big bucks in doing this engine swap
up next. We need to make just a little more room on the firewall and later it's a temporary drive shaft fix. That'll get us back on the road. Stay tuned.
Hey, welcome back to the shop. Well, so far today, we've had a chance to shoehorn our 4.6 L, dual overhead cam engine and transmission combo down in between the frame rails of our Mazda Ranger pickup truck. Heck we even dropped the cab over top of it to make sure it was in the right spot. Now, to get the transmission mount installed, all we did was slot the cross member and lock it into place. Now got to make some engine mounts.
The plan we've got for that is just to create a flat mounting surface for the engine mount to sit on. Now, I went ahead and cut out a cardboard template roughly the same size as the factory engine mount, cut a hole for the mounting stud and once I transfer this over to 3/16 plate, cut it out and drill a hole. Well, we'll go ahead and install it, tighten down the nut and tack weld the steel plate to the cross member and we'll pull the engine back out burn in the welds at a gusset or two. We should be in good shape.
Factory Marauder engine mounts are perfect for this 4.6 swap. Now, even if you didn't use a Marauder engine, you can get these over the counter or from a junk yard and they really make it easy.
All right. Drop it down.
All right. Slow down.
Yeah, right there.
All lift up
right
with the top plate located, you can use transfer paper to make your gusted for the other side. Now, we're only dusted in one side so we can have access to the stud with a fastener
after a quick double check to make sure the plates are level. Ryan Burns in the Gusset.
She's home.
That's cool. Very nice.
Now, one of the coolest things about the dual overhead cam 46 are the giant cam covers. But unfortunately, that's also one of the things that makes it a little more difficult for an engine swap like this. But the placement that we've got, we've got a lot of room for just about everything,
including room up against the firewall on this side, but
the firewall on this side, well,
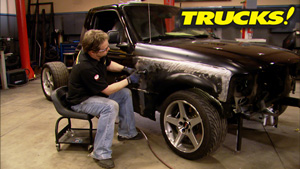
it's adjusted out. It's kind of ballooned out here to make room for the driver control steering shaft, et cetera. So what we're gonna do is flat plate this, so it matches the other side
and we're gonna use the piece that I cut out as our template
tracing around your template. Give yourself a half to three quarters of an inch of extra metal
using an electric sheer. I'm rough cutting around my marking since it's a process of cutting and trimming from this point.
Now, just like selecting the correct hammer and dolly, you want to choose a forming tool that closely resembles the shape of the workpiece you're trying to create.
In our case, it's a pair of duck build vice scripts from Matco.
Now, obviously, we're not trying to reskin the entire firewall. All we're after here is giving a symmetrical firewall on either side of the transmission tunnel. So our giant cam cover doesn't interfere,
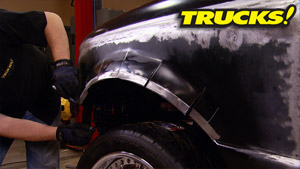
making some relief cuts with a hand shear allows you to easily form a curve in 20 gauge sheet metal.
Once I'm happy with my rough shape, I'll start to tack it in place with rosette wells and then hammer form my way around the edge for a nice flush fit.
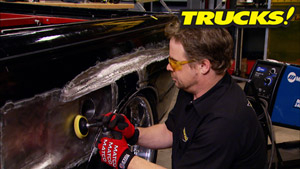
Leveling. The welds of the flap wheel is purely for cosmetic reasons, but this is a visible panel.
We'll follow that by prepping with the red scotch fry pad and sealing the patch.
We're using lock tight black R TV sealant, but you could use an automotive seam sealer as well. The point being you want to seal the patch so you don't have any vapor leaks or moisture leaks.
Painting is pretty straight forward with duplicates
semi gloss black, but here's a cool tip if you're in a hurry like we are, you can force splash the first coat of paint. That way you're not going to get runs if you put on a heavier second or third coat.
Hey, welcome back to the shop. Now, with our engine and transmission swapped in well, the distance between the output of the transmission and the rear axle has changed, calling for a shorter drive shaft. And like we told you earlier for stage one of this conversion, we're gonna keep the automatic. But when we go to a more high performance stage two, we're gonna swap in a manual. So rather than buying a drive shaft. Now and a drive shaft later when we go to stage two. Well, we're just going to try to shorten the stocker and save a few bucks
build on a budget truck projects that save you time and money.
Now, we're gonna need to swap over the Marauder transmission output onto our drive shaft. And we've showed you guys this stuff before, but this time, we want to show you a couple of tools to make the job easier.
Now, both these tools we picked up from Matco. The first is an air hammer attachment that drives on the yoke and drives the U joint cap down into the tool itself. It'll save you from having to do the hammer and socket method.
The second is some U joint snapping pliers and it'll keep you from inventing new words, getting frustrated with needle, not
that was too easy.
The impact hammer and attachment makes quick work of removing the rusted in place you joint caps.
Now, like we said, this is going to be a temporary drive shaft until we can move on to stage two and buy a high RPM, fully balanced drive shaft. But there's still a couple of things we can do to make sure this job gets done as accurately as possible.
Now, to make sure we don't upset the balance of the drive shaft too much
and to make sure the U joint yokes stay in phase, we make a mark down the length of the drive shaft.
We also mark the two inches, we're going to cut out of it
after making sure the tube is level and perpendicular to the saw blade, we can go ahead and make our cuts.
Now, if you're wondering why we're not making the modification closer to the yoke. Well, that's where the weights are attached and we don't want to get into that area. Plus the larger diameter section we're working on will just increase the weld strength.
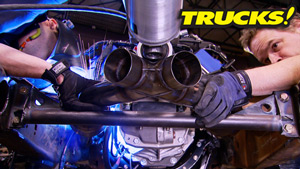
Using the red scuff pad will first clean the area to make sure we get a good clean weld. The second thing we'll do is put a slight bevel on the end of the tube to make sure we get good weld penetration.
Now, here's another tool that's pretty handy. This is a magnetic ground clamp attachment.
A few big tack welds will hold everything in place until we can measure for run out before the final welding.
All right, with our temporary drive shaft tack welded together, we want to make sure the run out is within a reasonable amount before we fully welded in. Now, to do that, we're gonna use these aluminum V blocks and a dial indicator.
Now, scrubbing off any surface rust and applying a little bit of grease to where we're gonna be spinning. Our drive shaft will minimize any rolling resistance, making it easier to turn and increasing the accuracy of our measurement.
Now, ideally, you don't want any run out, but a good rule of thumb if you want it less than five or six thousands.
All right. Once you're happy with the run out, you can go ahead and fully welded together. Just remember, do small sections at a time. You don't want the drive shaft to warp.
You can get this done with a mig welder, but a tig offers a little bit finer heat control. Remember the wall thickness of the tubing is only about 1/16 of an inch.
You're watching trucks for a DVD copy of this episode, just go to power block tv.com and order your copy for just 595 plus shipping and handling. Start your own trucks, collection delivered right to your door from the power block.
My power block is fueled by you, join groups, post build pics
and share videos.
You are the star
at my Power block.com.
Hey, welcome back to the shop. Well, we've had a chance to install our shortened temporary drive shaft that should be more than enough to get us through stage one of this build because like we told you when we go to stage two, we're going to a manual transmission, then we'll go with a brand new drive shaft.
Now, if you guys need to get a job like this done at home and you don't have the tools and equipment or the experience necessary to lay down a decent and safe weld. Well, you can take a measurement, send your drive shaft off to a drive shaft shop and they can shorten it and fully balance it for you for not too much money either.
And now that we got our engine and transmission locked into place, we're gonna roll the chassis back under the cab one more time, set the cab down and see how much clearance we gained with our new firewall relief.
Now, whether you use your tools as a hobbyist or you make your living with your tools, you wanna be able to reach for the best you guys have seen us use Matco Pitbull 38 drive air ratchet with all its features including
more torque than any other ratchet in this class. Well, now
they've got a pit bull in quarter drive.
The MT 2814 is ergonomically designed with a feather trigger, an adjustable exhaust board and
an amazing 45 ft pounds of torque, which is great for a quarter drive rats.
So if you wanna get your hands on the most powerful quarter inch drive air ratchet, get a pit bull from your local Macco tool distributor.
Now, obviously, one of the biggest challenges for any late model ef I swap is engine management and communication, but we have got that covered in a big way, but you're going to have to keep watching to see that for. Now, we're going to declare this phase mission accomplished because it fits less than a half an inch of firewall clearance, but that's ok. Because we have the bulk of the engine weight back behind the center point of the spindle, which is really going to help us balance the weight of this vehicle out
and now check this out as well. We've got nearly 10 inches of clearance between our front engine accessory drive and the stock radiator support. So we'll have all kinds of room for really effective cooling and an electric fan and check this out too.
The stock brake booster with a little bit of creative slotting is gonna fit
right where it's supposed to.
Thanks for watching trucks. If you got any questions about today's show or anything else you've seen, go see us on Power block tv.com. See you next time.
Show Full Transcript
Hey guys, welcome to trucks. Well, this is the new motivation to our latest trucks, project project Rolling Thunder. It's a 4.6 L 300 horsepower modular engine borrowed from an 03 mercury marauder. Now, all of this has got to fit in a happy place here between the framers of our 2001 ranger based truck. In other words, that monster's gotta fit up in between the fenders of that truck. Now
strip the frame down to the bare bones, including pulling the engine mounts out of the cross member just to give ourselves as much room as possible because let's face it. That modular engine is just plain, bigger than a typical small block Ford V8. And there is no kit for this engine swap. So it's going to be a pretty good challenge that by the end of the day, we have that giant drive train fitting comfortably into a compact truck.
Now to make sure that happens. We went ahead and did a little bit of prep work. We pulled just about everything we could off the firewall and we pulled the plastic inner fender liners to gain clearance to help us see what we're doing.
But check this out. We also made some relief cuts on the pinch welt at the base of the firewall and on the trans tunnel, that way we can get as much clearance as possible to help us shoehorn that giant engine and transmission combo down into the engine bay.
Now, in the past, we've had to deal with the AC system and the refrigerant that's in it by paying somebody to come out here and evacuate the system. But this time, we've got a unique and easier solution.
Now, everything in this bed liner that doesn't end up going back on our truck. Well, it's gonna get weighed so we can keep track of vehicle weight that we trimmed down. But this right here is what Ryan was talking about. This giant ac box is gonna come in contact with the right bank giant cam cover. So we just decided to take the whole entire sealed system off of the truck. That way we don't illegally release any Freon into the atmosphere. We don't make any tree huggers angry and if we decide to reclaim the Freon, well, we can take this whole system down to a service center and just do it there.
Now dropping this big 46 down in between the frame rails is actually the easiest part of this mock up.
So we're gonna have to drop the cab down, make some adjustments and push some things around
to see what we've got to work with.
And
all right now, there's no doubt about it. It's a tight fit, but the engine's in here and we actually have about an inch of clearance between the back of the cylinder head and the firewall. We definitely needed to remove the heater box and the exhaust is going to be a tight squeeze. But we got all kinds of room up here for a radiator.
Now, the throttle linkage looks like it actually might even work with the original Mazda gas pedal. The cable is just about the right length that we got a little bit of fun
to do with the steering shaft. But the good news is it's gonna work.
Here's the ultimate test
stock hood closes perfectly. Now, there is a stealth factor.
All right. Now, we've gone ahead and taken some measurements on where the engine is sitting right now because we know it fits and we don't want it to move.
But before we start building some engine mounts, we want to see if we can get this factory Mazda cross member to line up with the mercury Marauder transmission mount because as it sits right now, it was pretty darn close. Now, the bolt holes look symmetrical. So we may be able to get away with dropping the cross member, flipping it 100 and 80 degrees and reinstalling it. And hopefully everything line up. And even if it doesn't, well, the bolt holes for the mount itself are drilled offset of center. So we may be able to flip that around as well to see if it will line up. We got a couple of variables to work with. So I think we can get it done. But even if we can't, well, it'll only take a few modifications to the cross member or the mound itself to get the stars to align and get this puppy bolted in because we don't want to spend too much time on it
because it is going to have to change around when we go to stage two for this build swap in a manual.
Well, I don't think that's gonna work now. It looks like by flipping the cross member around, we've actually moved it too far forward and the way it was before, well, it wasn't that far off. So I think what we can do is oblong the mounting holes where the cross member installs to the frame that should give us the adjustment we need.
It goes to show you maybe try working with what you got. The solution may be cheaper and easier than you think.
And it was as simple as using a cone shaped carbide burr
and our dye grinder to oval the holes out.
Hopefully everything will line up.
Let's see if this works a little bit better
and you're not gonna sacrifice any strength by elongating holes, especially with three mounting bolts on either side. So it just goes to show you it pays dividends to try and work with what you've got. Instead of whipping out the credit card,
I don't know why we didn't do that first.
The four valve heads have a unique port design. So we're tied to a certain style of manifold. We're going to solve this problem later and just get them out of the way for now.
All right, we're there.
Perfect.
Well, with our transmission locked into place and our wood blocks holding up the oil pan. This is exactly where this engine is gonna sit. Now, all we have to do is fabricate some kind of a receiver for the existing engine mount, which are the factory engine mounts and that gives us one more part that we can get over the counter and one more way to save big bucks in doing this engine swap
up next. We need to make just a little more room on the firewall and later it's a temporary drive shaft fix. That'll get us back on the road. Stay tuned.
Hey, welcome back to the shop. Well, so far today, we've had a chance to shoehorn our 4.6 L, dual overhead cam engine and transmission combo down in between the frame rails of our Mazda Ranger pickup truck. Heck we even dropped the cab over top of it to make sure it was in the right spot. Now, to get the transmission mount installed, all we did was slot the cross member and lock it into place. Now got to make some engine mounts.
The plan we've got for that is just to create a flat mounting surface for the engine mount to sit on. Now, I went ahead and cut out a cardboard template roughly the same size as the factory engine mount, cut a hole for the mounting stud and once I transfer this over to 3/16 plate, cut it out and drill a hole. Well, we'll go ahead and install it, tighten down the nut and tack weld the steel plate to the cross member and we'll pull the engine back out burn in the welds at a gusset or two. We should be in good shape.
Factory Marauder engine mounts are perfect for this 4.6 swap. Now, even if you didn't use a Marauder engine, you can get these over the counter or from a junk yard and they really make it easy.
All right. Drop it down.
All right. Slow down.
Yeah, right there.
All lift up
right
with the top plate located, you can use transfer paper to make your gusted for the other side. Now, we're only dusted in one side so we can have access to the stud with a fastener
after a quick double check to make sure the plates are level. Ryan Burns in the Gusset.
She's home.
That's cool. Very nice.
Now, one of the coolest things about the dual overhead cam 46 are the giant cam covers. But unfortunately, that's also one of the things that makes it a little more difficult for an engine swap like this. But the placement that we've got, we've got a lot of room for just about everything,
including room up against the firewall on this side, but
the firewall on this side, well,
it's adjusted out. It's kind of ballooned out here to make room for the driver control steering shaft, et cetera. So what we're gonna do is flat plate this, so it matches the other side
and we're gonna use the piece that I cut out as our template
tracing around your template. Give yourself a half to three quarters of an inch of extra metal
using an electric sheer. I'm rough cutting around my marking since it's a process of cutting and trimming from this point.
Now, just like selecting the correct hammer and dolly, you want to choose a forming tool that closely resembles the shape of the workpiece you're trying to create.
In our case, it's a pair of duck build vice scripts from Matco.
Now, obviously, we're not trying to reskin the entire firewall. All we're after here is giving a symmetrical firewall on either side of the transmission tunnel. So our giant cam cover doesn't interfere,
making some relief cuts with a hand shear allows you to easily form a curve in 20 gauge sheet metal.
Once I'm happy with my rough shape, I'll start to tack it in place with rosette wells and then hammer form my way around the edge for a nice flush fit.
Leveling. The welds of the flap wheel is purely for cosmetic reasons, but this is a visible panel.
We'll follow that by prepping with the red scotch fry pad and sealing the patch.
We're using lock tight black R TV sealant, but you could use an automotive seam sealer as well. The point being you want to seal the patch so you don't have any vapor leaks or moisture leaks.
Painting is pretty straight forward with duplicates
semi gloss black, but here's a cool tip if you're in a hurry like we are, you can force splash the first coat of paint. That way you're not going to get runs if you put on a heavier second or third coat.
Hey, welcome back to the shop. Now, with our engine and transmission swapped in well, the distance between the output of the transmission and the rear axle has changed, calling for a shorter drive shaft. And like we told you earlier for stage one of this conversion, we're gonna keep the automatic. But when we go to a more high performance stage two, we're gonna swap in a manual. So rather than buying a drive shaft. Now and a drive shaft later when we go to stage two. Well, we're just going to try to shorten the stocker and save a few bucks
build on a budget truck projects that save you time and money.
Now, we're gonna need to swap over the Marauder transmission output onto our drive shaft. And we've showed you guys this stuff before, but this time, we want to show you a couple of tools to make the job easier.
Now, both these tools we picked up from Matco. The first is an air hammer attachment that drives on the yoke and drives the U joint cap down into the tool itself. It'll save you from having to do the hammer and socket method.
The second is some U joint snapping pliers and it'll keep you from inventing new words, getting frustrated with needle, not
that was too easy.
The impact hammer and attachment makes quick work of removing the rusted in place you joint caps.
Now, like we said, this is going to be a temporary drive shaft until we can move on to stage two and buy a high RPM, fully balanced drive shaft. But there's still a couple of things we can do to make sure this job gets done as accurately as possible.
Now, to make sure we don't upset the balance of the drive shaft too much
and to make sure the U joint yokes stay in phase, we make a mark down the length of the drive shaft.
We also mark the two inches, we're going to cut out of it
after making sure the tube is level and perpendicular to the saw blade, we can go ahead and make our cuts.
Now, if you're wondering why we're not making the modification closer to the yoke. Well, that's where the weights are attached and we don't want to get into that area. Plus the larger diameter section we're working on will just increase the weld strength.
Using the red scuff pad will first clean the area to make sure we get a good clean weld. The second thing we'll do is put a slight bevel on the end of the tube to make sure we get good weld penetration.
Now, here's another tool that's pretty handy. This is a magnetic ground clamp attachment.
A few big tack welds will hold everything in place until we can measure for run out before the final welding.
All right, with our temporary drive shaft tack welded together, we want to make sure the run out is within a reasonable amount before we fully welded in. Now, to do that, we're gonna use these aluminum V blocks and a dial indicator.
Now, scrubbing off any surface rust and applying a little bit of grease to where we're gonna be spinning. Our drive shaft will minimize any rolling resistance, making it easier to turn and increasing the accuracy of our measurement.
Now, ideally, you don't want any run out, but a good rule of thumb if you want it less than five or six thousands.
All right. Once you're happy with the run out, you can go ahead and fully welded together. Just remember, do small sections at a time. You don't want the drive shaft to warp.
You can get this done with a mig welder, but a tig offers a little bit finer heat control. Remember the wall thickness of the tubing is only about 1/16 of an inch.
You're watching trucks for a DVD copy of this episode, just go to power block tv.com and order your copy for just 595 plus shipping and handling. Start your own trucks, collection delivered right to your door from the power block.
My power block is fueled by you, join groups, post build pics
and share videos.
You are the star
at my Power block.com.
Hey, welcome back to the shop. Well, we've had a chance to install our shortened temporary drive shaft that should be more than enough to get us through stage one of this build because like we told you when we go to stage two, we're going to a manual transmission, then we'll go with a brand new drive shaft.
Now, if you guys need to get a job like this done at home and you don't have the tools and equipment or the experience necessary to lay down a decent and safe weld. Well, you can take a measurement, send your drive shaft off to a drive shaft shop and they can shorten it and fully balance it for you for not too much money either.
And now that we got our engine and transmission locked into place, we're gonna roll the chassis back under the cab one more time, set the cab down and see how much clearance we gained with our new firewall relief.
Now, whether you use your tools as a hobbyist or you make your living with your tools, you wanna be able to reach for the best you guys have seen us use Matco Pitbull 38 drive air ratchet with all its features including
more torque than any other ratchet in this class. Well, now
they've got a pit bull in quarter drive.
The MT 2814 is ergonomically designed with a feather trigger, an adjustable exhaust board and
an amazing 45 ft pounds of torque, which is great for a quarter drive rats.
So if you wanna get your hands on the most powerful quarter inch drive air ratchet, get a pit bull from your local Macco tool distributor.
Now, obviously, one of the biggest challenges for any late model ef I swap is engine management and communication, but we have got that covered in a big way, but you're going to have to keep watching to see that for. Now, we're going to declare this phase mission accomplished because it fits less than a half an inch of firewall clearance, but that's ok. Because we have the bulk of the engine weight back behind the center point of the spindle, which is really going to help us balance the weight of this vehicle out
and now check this out as well. We've got nearly 10 inches of clearance between our front engine accessory drive and the stock radiator support. So we'll have all kinds of room for really effective cooling and an electric fan and check this out too.
The stock brake booster with a little bit of creative slotting is gonna fit
right where it's supposed to.
Thanks for watching trucks. If you got any questions about today's show or anything else you've seen, go see us on Power block tv.com. See you next time.
