More Fat Stack Episodes
Detroit Muscle Featured Projects
Detroit Muscle Builds
Want more content like this?
Join the PowerNation Email NewsletterEpisode Transcript
(Tommy)>> You're watching Powernation!
(Tommy)>> Today on Detroit Muscle it's all about putting the pedal to the metal as we complete our clutch install. [ Music ] [ engines revving ] [ Music ]
(Tommy)>> Hey guys, welcome to Detroit Muscle. I'm Tommy Boshers.
(Joel)>> And I'm Joel McMillan.
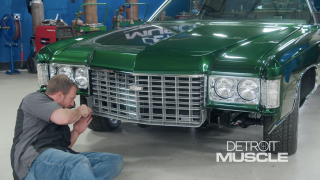
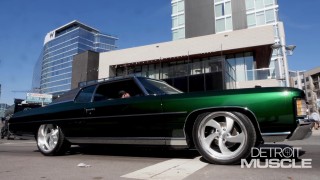
(Tommy)>> Today we're continuing on working on Fat Stack. Now from where you guys are at I'm pretty sure it's easy to see that there isn't much about this ride that would be considered practical. It's leaning far more toward fun and flashy.
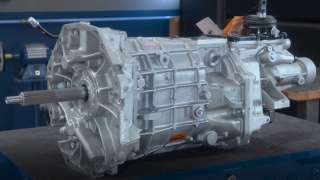
(Joel)>> And everything we've got on tap today is gonna pique the interest of all you muscle car guys who love that feeling of dumping the clutch, grabbing a gear, and blowing smoke straight out those rear tires. We're gonna be converting this bad boy from an automatic to a manual because quite frankly getting to experience all that fun stuff in a big body Chevrolet. It's gonna equal time. When you're out at the track a manual always multiplies the fun factor. Now our old Caprice only came with a Turbo 350 automatic, which served its purpose for a conventional cruiser, but wasn't what we had in mind when we envisioned turning this land yacht into a speed boat. Doing this kind of a swap is a very popular subject, and how could it not be. That feeling of cruising down the road, wind blowing in your hair, keeping your hands and feet busy, big smile on your face give you the sense that you're a real deal race car driver. When we built Road Burner we checked off all the boxes for mean street machine, Hemi power, aggressive stance, and a manual transmission with a locked and loaded piston grip shifter. No matter your flavor of muscle car with that shifter in your hand you know you've got all that r-p-m under your command. Now a little while back we installed an American Powertrain T-56 6-speed Magnum in efforts of giving our 840-horsepower supercharged LS some serious backup. Yeah it did require a little bit of surgery, but in our opinion it was well worth the effort.
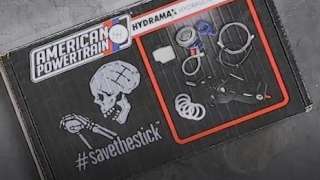
(Tommy)>> One interesting thing about these early model Chevys is that they did come with a manual transmission. However it had nothing to do with performance and it was all about basics, and that would be a stripped down version of these cars, six cylinder and three speed on the column. So if you know a guy that knows a guy there are pedal assemblies that will bolt right into the hole in that car, but we're not running the manual style setup, meaning it has all those linkages and levers. We're going to use a Hydramax setup from American Powertrain. Now I'm not real sure how all this stuff is gonna play together but we've got to get some old parts out, some old parts back in to see what we're working with.
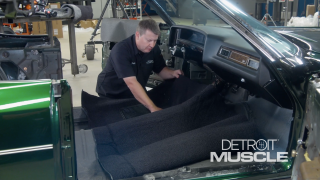
(Joel)>> Despite the leg room you've got in this Caprice it's pretty cramped under the dash. So our first step was to remove the steering column. Then we gave our rusty pedals a bath in the sand blaster and got them cleaned up and ready for a fresh coat of paint. Beautiful! Well I got our pedal assembly all refurbished and it looks pretty sharp. Next thing we're gonna do is bolt it into the hole and just mock it up and see where we need to mount our master cylinder. But another important aspect of doing a swap like this is calculating your pedal ratio. You hear numbers like four to one, five to one, and six to one, and you might wonder what they actually mean. Those are referring to the amount of mechanical leverage you're applying to your clutch. With a five to one let's say you apply one hundred pounds of pedal effort. That is the equivalent of applying 500 pounds of pressure to the hydraulic cylinder. To calculate the pedal ratio you'll need to know two measurements. First the distance from the pivot to the pedal pad. Then the distance from the pivot to the center point where the rod would connect. Divide these two numbers and you will get the pedal ratio. Typically a five to one or a six to one is suggested for a hydraulic clutch setup, but a five to one is considered optimal.
(Tommy)>> Now I've got the little plate that you would bolt on the inside of the firewall to kinda sandwich these two together to use as my template. I'm just gonna lay it in here, make a couple of marks, and then punch a couple of holes. [ drill humming ] [ Music ]
(Tommy)>> Take your top one out if you will.
(Joel)>> Yep, that should work. So with the master cylinder in place you can kinda see that issue to where our pushrod is too far on the right side of the clutch pedal. What we're gonna have to do is mount this and then we're gonna have to bend this over and down into the pushrod to give us that ideal clutch pedal stroke. Now basically what I've done right here is make a little bit of a map that's gonna help coordinate our bends. So all I have to do is set our piece right here. We'll start by heating this inside edge of this all thread, and then we'll bend it out until it reaches this two inch mark, and then we'll come back and heat this inside edge and bend it back straight again, and that should give us the one inch offset that we need. [ Music ] Now if you guys are doing this at home just make sure you don't crank this vice down because you don't want to damage these threads. [ Music ] Now as I'm heating this I'm not exactly putting a whole bunch of pressure on it. I'm just kinda gently nudging it with my thumb and letting the torch do all the work. Kinda alleviates any possibility of stress cracks and that kind of stuff. That is pretty dang close. I think that's worth at least a trial fit. Coming up, let's get bent and talk bleeders.
(Joel)>> Alright, we got our rod for our clutch pedal lined up perfectly with the master cylinder. All that's left to do is cut off this excess, which sounds like a simple task but believe it or not there's a right way and a wrong way to do that. When it comes to cutting any kind of all thread or even a bolt your number one priority is protecting your threads. So I've got a couple of jam nuts here that I'm gonna go ahead and screw down to my mark, and I'm gonna use that as a protector for when I cinch it down into the vice. To make the connection from our clutch pushrod to the master cylinder we're gonna be using this little coupler nut, and there's actually a little bit of a debate among some of you hot rodders to how much threading you need to make one of these strong. Not to worry, there's actually a mathematical formula to figure that out. The first thing you're gonna need to know is the diameter of the rod you're working with times one point five. In this case it's five-sixteenths times one point five. Five-sixteenths as a decimal is .3125 times 1.5 equals .458, or just under .5. So we're gonna go ahead and round that up to half an inch just to be on the safe side. [ Music ] So we've got half an inch of threads on both sides of the coupler. So we're good to cut. [ Music ] You can kinda see on the end of our rod we've got a nasty little bur sticking up, but this is actually where one of these little jam nuts comes in handy. All you've got to do is back it off and that'll re-cone the threads and give it a nice, smooth transition. From there we'll file it down flat and then hit it with the belt sander for a nice, smooth, beveled edge. [ Music ] That should do it.
(Tommy)>> We have all the components in place for our clutch setup. The reservoir's up top, the master cylinder and pedal is all adjusted, and our lines are ran. Now if you've ever tried to bleed a hydraulic clutch setup you know that it can be a daunting task. It seems like you work, and work, and work and don't ever get anywhere but there's a few things that if you keep in mind it can make it go a whole lot smoother. We have a simple drawing up here on our board to explain the ins and outs on a hydraulic clutch setup. Up top you'll have a reservoir that feeds the entire system. Now it does that via gravity. Next you'll have a clutch master cylinder. That's what creates the pressure. As you actuate the rod that will push fluid toward the slave cylinder. That is what will release your clutch disc. With your slave cylinder that's where the bleeder is located. That's where the air will escape the system that you're trying to fill. All you're trying to do is get air out and completely fill it with fluid. This is where you can run into those problems. Next thing is your line. Try not to ever loop that thing. Sometimes with your clutch masters they don't move a tremendous amount of fluid, and if you put that loop in it when the fluid comes up it kinda settles across and then drains back. Having your line run in a continuous downhill motion will save you quite a bit of headache. Third thing, pay attention to how you mount your slave cylinder lines coming in and out. You'll notice with ours the bleeder is on the top. That's because you want it to fill from the bottom and push all the air out as you go up. Now next let's talk about bleed theory. The first and most common is the one that we're all used to. You've probably done it with your old man. Somebody's pumping the brake pedal, somebody's cracking the line, and that can work but I've ended up giving up. The next one is gravity bleed, and you know that's where you just basically fill it up and let the fluid run all the way down, and I'm gonna say that works really well to get half the air out. Now the way we're gonna do it causes you to go about things a little bit backwards. We're actually gonna draw fluid all the way from the bottom to the top.
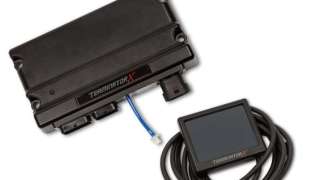
(Joel)>> One of the biggest hurdles you can run into when installing a modern power plant into an old vehicle is setting up your e-c-u. Luckily the guys at Holley have really simplified this entire process with their Terminator-X engine management system. Whether it's a Coyote, Gen-3 Hemi, or in this case an LS, the entire kit comes complete with plug and play tuning, adaptability, and even boost control, which will come in real handy with that big ole supercharger. And for all you junkyard warriors out there who don't mind breaking a sweat and pull all those old parts out of a Yukon or a Denali this entire setup will save you a whole lot more time and get you cruising on the streets that much faster.
(Tommy)>> Up next, we get a little northern exposure with a maple leaf Mopar.
(Joel)>> With each passing day our '71 Caprice, Fat Stack, is inching closer and closer to the finish line. We've put a lot of work into every aspect of this build over the past several months, and we're finally starting to reap the fruits of our labor. Our big body bowtie sat in a driveway for many years, and it didn't get much more attention than maybe an oil change every few thousand miles. Luckily that prolonged exposure to the elements and mild neglect didn't result in more serious issues like rust and corrosion. Rescuing a classic piece of Detroit muscle from a field, junkyard, or barn is high up on the wish list for a lot of car guys. Who doesn't dream of breaking the seal of a dusty barn door and pulling the tarp back on an old big block Chevelle. For two brothers north of the border that bucket list barn find dream became a reality after they not only discovered by fully restored a very rare 1971 Plymouth GTX. We've all heard great barn find stores, but have you ever of finding an iconic piece of Detroit muscle in your own barn? Lars and Tor Skrotter bought this 1971 Plymouth GTX when they were just a couple of kids.
(Tor)>> We were doing some detail engine. Finally put the engine in the car, and cranked it over, and didn't realize that it was the lifters?
(Lar)>> We got a solid lift cam and we put hydraulic lifters in. So we bent some pushrods right away.
(Tommy)>> Then in 2007 they picked right up where they left off and decided to finally finish what they had started.
(Joel)>> This numbers matching car is one of just 135 made that year, and one of the few built in Windsor, Ontario. In case you can't tell where they're from they love maple syrup, hockey, and of course Drake.
(Lars)>> Hey hosers, check this out, eh!
(Joel)>> This power plant is packing six barrels capable of pounding out 385 horsepower, which add an additional 15 horses to the standard 440 Magnum. You could the Hemi option for the steep price tag of $750 bucks, but the lighter weight and lower price point of the 440 six-pack made it hard to pass up.
(Tommy)>> '71 brought a whole new level of styling to Plymouth's mid-size Satellite, which the GTX was built on. A fuselage look transformed the car into a streamlined piece of Detroit muscle with a horse collar front bumper, sculpted body panels, and a slopping fastback roof.
(Joel)>> Painted in the one year only color Curious Yellow, this GTX could best be described as a high octane highlighter rolling on four wheels. It's got the tough steering wheel, which is similar in diameter but had a thicker grip for race-like handling.
(Tommy)>> Heavy duty suspension came standard with it all rolling on steel wheels with wide oval rubber redline radials.
(Joel)>> Introduced in '67 as Plymouth's first all in one muscle car package, the GTX soon played second fiddle to its sister car, just a spruced up version of the hotrodicus supersonicus, the Road Runner. With deluxe interior, chrome rocker moldings, and a 440 as the base engine.
(Tommy)>> With no cool cartoon mascot and a higher price tag it's no wonder the GTX was often overlooked. Sales hit an all time low at less than 3,000 in '71. This marked the last year for the GTX but the name lived on as an option on the Road Runner.
(Joel)>> When Lars and Tor restored the car they weren't expecting a whole lot of attention, but the invitations started rolling in. They were asked to feature the car at SEMA in Las Vegas as a prime example of Mopar performance.
(Tommy)>> What kind of advice do a couple of Canadians have for American muscle car fans?
(Tor)>> Never use snow tires when you try to do a burnout. [ tires squealing ]
(Joel)>> Coming up, we've got a bleeder!
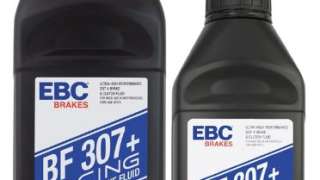
(Tommy)>> Now our bleeder line is a little bit short, but that's kinda how it goes. Now ideally you'd want to take and kinda submerge your fitting into a cup. That gives you a reservoir to draw from, but what we're gonna do in this situation is install a little bity line that's gonna gain us some extra clearance here under the car. Now if you did want to go this route you'd need to make sure that you submerge this entire fitting into the fluid. It can draw air out of the top side if you were just to break that fitting loose. Let's let the car down. It's recommended to use a Dot-3 or a high temp Dot-4 in this application. Now we're gonna be using this ultra high performance fluid that we got from EBC. Now to do all the work of pulling that fluid uphill we've got a little vacuum pump like you'd find at your normal parts store. We're gonna connect this clear hose to the little feed line that would connect to your reservoir. Before we pull that vacuum we need to make a small adjustment. We'll pull this thing up to help remove that air pocket. Now as you pump this thing here you'll notice that the gauge needle will move indicating the vacuum. We got fluid coming up. You want to make sure that you don't run out of fluid down there in the floor because if you do it's gonna pull air back through your lines. Now with this I like to run probably about eight to 10 ounces of fluid through here. That'll help ensure that there is absolutely no air trapped in that line. Now all we need to do is raise the car back up and remove our little line. With this line plugged off the fluid won't run back downhill. You've got to think of it as if you've got a fountain drink with a straw in it. How you put your finger over the top, pull it out, and the fluid stays up in there. Well exactly the same thing. You want to make sure that this line is running straight up and down, not laid off to the side, because otherwise it'll let those fluid out. There will be some that comes out of here once I crack this fitting up top, but it will only be from this point to that joint. Last couple of things we need to do is reattach our hose back to the reservoir, top it off, and then slide our master cylinder back down and attach that pedal. Then we should be good to go. [ Music ]
[ Music ] Well we got one more thing taken care of on ole Fat Stack, but we still have the steering and the brakes that we're gonna have to address. It's funny how that little, short list we had keeps getting longer and longer. A lift is a pretty handy piece of equipment to have, and a lot of guys aspire to have one of these in their personal shop. Did you know that they really should be inspected every so often to ensure that they're safe and working properly?
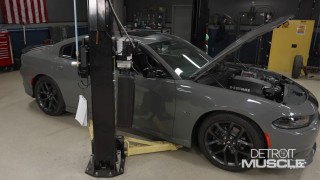
(Joel)>> Just think about it. If you're working on Fat Stack, that over 4,000 pounds hanging above your yeah. If you're unsure there are a few things you can do to see if your lift maybe needs a little extra attention. First let's take a look at the floor. Now you want to inspect the area for any cracks or deviations in the concrete because this is literally the structural integrity and foundation that your lift sits on. If you do find any cracks or missing chunks you're gonna want to get that addressed immediately. Ignoring them could lead to catastrophic results.
(Tommy)>> If you have a hydraulic lift like we do you'll also need to check the cylinders to see if there's any fluid down at the base. That would indicate a leak, and that could tell you that those cylinders may need to be serviced. It's also a good idea to check your hoses and the fittings.
(Joel)>> As the lift goes up listen for any odd or strange noises. If you do hear something you may just need to hit your lift with some white lithium grease to make sure everything is properly lubricated. The locks are something else you need to pay close attention to. You should hear a consistent rhythm as the lift descends, but if you hear offset clicks that means your arms could be out of alignment, which could lead to uneven weight distribution when you're raising your ride. You want everything nice and even when you're working underneath something as heavy as Fat Stack. Now let's get her up in the air and talk about arm placement. Now obviously you want the vehicle centered with each of your lift arms evenly extended, but you also need to be conscious of front to rear weight distribution. Now this old Caprice is definitely front heavy but let's say we needed to take the rear axle out for whatever reason. That's gonna shift the entire dynamic and this whole vehicle could literally come crashing down. In a situation like that you're gonna want to use one of these auxiliary stands just balance out the weight so you don't have a dangerous shift while you're working. Arm placement is also important because you can seriously damage the car if you put them in a spot that isn't structurally sound and designed to hold that weight for an extended period of time. Another way to check your load stability is to raise the car a few inches off the ground, and then just kinda jump up and down on one side or the other, and if it's solid you're good to go. Way better to do it now as opposed to five or six feet in the air. These are just some basic procedures for operating your lift. Keep in mind it's just like any other tool in your shop. As long as it's working properly you'll keep making money, but if your lift ever goes down you'll wonder how you ever got along without one.
Show Full Transcript
(Tommy)>> Today on Detroit Muscle it's all about putting the pedal to the metal as we complete our clutch install. [ Music ] [ engines revving ] [ Music ]
(Tommy)>> Hey guys, welcome to Detroit Muscle. I'm Tommy Boshers.
(Joel)>> And I'm Joel McMillan.
(Tommy)>> Today we're continuing on working on Fat Stack. Now from where you guys are at I'm pretty sure it's easy to see that there isn't much about this ride that would be considered practical. It's leaning far more toward fun and flashy.
(Joel)>> And everything we've got on tap today is gonna pique the interest of all you muscle car guys who love that feeling of dumping the clutch, grabbing a gear, and blowing smoke straight out those rear tires. We're gonna be converting this bad boy from an automatic to a manual because quite frankly getting to experience all that fun stuff in a big body Chevrolet. It's gonna equal time. When you're out at the track a manual always multiplies the fun factor. Now our old Caprice only came with a Turbo 350 automatic, which served its purpose for a conventional cruiser, but wasn't what we had in mind when we envisioned turning this land yacht into a speed boat. Doing this kind of a swap is a very popular subject, and how could it not be. That feeling of cruising down the road, wind blowing in your hair, keeping your hands and feet busy, big smile on your face give you the sense that you're a real deal race car driver. When we built Road Burner we checked off all the boxes for mean street machine, Hemi power, aggressive stance, and a manual transmission with a locked and loaded piston grip shifter. No matter your flavor of muscle car with that shifter in your hand you know you've got all that r-p-m under your command. Now a little while back we installed an American Powertrain T-56 6-speed Magnum in efforts of giving our 840-horsepower supercharged LS some serious backup. Yeah it did require a little bit of surgery, but in our opinion it was well worth the effort.
(Tommy)>> One interesting thing about these early model Chevys is that they did come with a manual transmission. However it had nothing to do with performance and it was all about basics, and that would be a stripped down version of these cars, six cylinder and three speed on the column. So if you know a guy that knows a guy there are pedal assemblies that will bolt right into the hole in that car, but we're not running the manual style setup, meaning it has all those linkages and levers. We're going to use a Hydramax setup from American Powertrain. Now I'm not real sure how all this stuff is gonna play together but we've got to get some old parts out, some old parts back in to see what we're working with.
(Joel)>> Despite the leg room you've got in this Caprice it's pretty cramped under the dash. So our first step was to remove the steering column. Then we gave our rusty pedals a bath in the sand blaster and got them cleaned up and ready for a fresh coat of paint. Beautiful! Well I got our pedal assembly all refurbished and it looks pretty sharp. Next thing we're gonna do is bolt it into the hole and just mock it up and see where we need to mount our master cylinder. But another important aspect of doing a swap like this is calculating your pedal ratio. You hear numbers like four to one, five to one, and six to one, and you might wonder what they actually mean. Those are referring to the amount of mechanical leverage you're applying to your clutch. With a five to one let's say you apply one hundred pounds of pedal effort. That is the equivalent of applying 500 pounds of pressure to the hydraulic cylinder. To calculate the pedal ratio you'll need to know two measurements. First the distance from the pivot to the pedal pad. Then the distance from the pivot to the center point where the rod would connect. Divide these two numbers and you will get the pedal ratio. Typically a five to one or a six to one is suggested for a hydraulic clutch setup, but a five to one is considered optimal.
(Tommy)>> Now I've got the little plate that you would bolt on the inside of the firewall to kinda sandwich these two together to use as my template. I'm just gonna lay it in here, make a couple of marks, and then punch a couple of holes. [ drill humming ] [ Music ]
(Tommy)>> Take your top one out if you will.
(Joel)>> Yep, that should work. So with the master cylinder in place you can kinda see that issue to where our pushrod is too far on the right side of the clutch pedal. What we're gonna have to do is mount this and then we're gonna have to bend this over and down into the pushrod to give us that ideal clutch pedal stroke. Now basically what I've done right here is make a little bit of a map that's gonna help coordinate our bends. So all I have to do is set our piece right here. We'll start by heating this inside edge of this all thread, and then we'll bend it out until it reaches this two inch mark, and then we'll come back and heat this inside edge and bend it back straight again, and that should give us the one inch offset that we need. [ Music ] Now if you guys are doing this at home just make sure you don't crank this vice down because you don't want to damage these threads. [ Music ] Now as I'm heating this I'm not exactly putting a whole bunch of pressure on it. I'm just kinda gently nudging it with my thumb and letting the torch do all the work. Kinda alleviates any possibility of stress cracks and that kind of stuff. That is pretty dang close. I think that's worth at least a trial fit. Coming up, let's get bent and talk bleeders.
(Joel)>> Alright, we got our rod for our clutch pedal lined up perfectly with the master cylinder. All that's left to do is cut off this excess, which sounds like a simple task but believe it or not there's a right way and a wrong way to do that. When it comes to cutting any kind of all thread or even a bolt your number one priority is protecting your threads. So I've got a couple of jam nuts here that I'm gonna go ahead and screw down to my mark, and I'm gonna use that as a protector for when I cinch it down into the vice. To make the connection from our clutch pushrod to the master cylinder we're gonna be using this little coupler nut, and there's actually a little bit of a debate among some of you hot rodders to how much threading you need to make one of these strong. Not to worry, there's actually a mathematical formula to figure that out. The first thing you're gonna need to know is the diameter of the rod you're working with times one point five. In this case it's five-sixteenths times one point five. Five-sixteenths as a decimal is .3125 times 1.5 equals .458, or just under .5. So we're gonna go ahead and round that up to half an inch just to be on the safe side. [ Music ] So we've got half an inch of threads on both sides of the coupler. So we're good to cut. [ Music ] You can kinda see on the end of our rod we've got a nasty little bur sticking up, but this is actually where one of these little jam nuts comes in handy. All you've got to do is back it off and that'll re-cone the threads and give it a nice, smooth transition. From there we'll file it down flat and then hit it with the belt sander for a nice, smooth, beveled edge. [ Music ] That should do it.
(Tommy)>> We have all the components in place for our clutch setup. The reservoir's up top, the master cylinder and pedal is all adjusted, and our lines are ran. Now if you've ever tried to bleed a hydraulic clutch setup you know that it can be a daunting task. It seems like you work, and work, and work and don't ever get anywhere but there's a few things that if you keep in mind it can make it go a whole lot smoother. We have a simple drawing up here on our board to explain the ins and outs on a hydraulic clutch setup. Up top you'll have a reservoir that feeds the entire system. Now it does that via gravity. Next you'll have a clutch master cylinder. That's what creates the pressure. As you actuate the rod that will push fluid toward the slave cylinder. That is what will release your clutch disc. With your slave cylinder that's where the bleeder is located. That's where the air will escape the system that you're trying to fill. All you're trying to do is get air out and completely fill it with fluid. This is where you can run into those problems. Next thing is your line. Try not to ever loop that thing. Sometimes with your clutch masters they don't move a tremendous amount of fluid, and if you put that loop in it when the fluid comes up it kinda settles across and then drains back. Having your line run in a continuous downhill motion will save you quite a bit of headache. Third thing, pay attention to how you mount your slave cylinder lines coming in and out. You'll notice with ours the bleeder is on the top. That's because you want it to fill from the bottom and push all the air out as you go up. Now next let's talk about bleed theory. The first and most common is the one that we're all used to. You've probably done it with your old man. Somebody's pumping the brake pedal, somebody's cracking the line, and that can work but I've ended up giving up. The next one is gravity bleed, and you know that's where you just basically fill it up and let the fluid run all the way down, and I'm gonna say that works really well to get half the air out. Now the way we're gonna do it causes you to go about things a little bit backwards. We're actually gonna draw fluid all the way from the bottom to the top.
(Joel)>> One of the biggest hurdles you can run into when installing a modern power plant into an old vehicle is setting up your e-c-u. Luckily the guys at Holley have really simplified this entire process with their Terminator-X engine management system. Whether it's a Coyote, Gen-3 Hemi, or in this case an LS, the entire kit comes complete with plug and play tuning, adaptability, and even boost control, which will come in real handy with that big ole supercharger. And for all you junkyard warriors out there who don't mind breaking a sweat and pull all those old parts out of a Yukon or a Denali this entire setup will save you a whole lot more time and get you cruising on the streets that much faster.
(Tommy)>> Up next, we get a little northern exposure with a maple leaf Mopar.
(Joel)>> With each passing day our '71 Caprice, Fat Stack, is inching closer and closer to the finish line. We've put a lot of work into every aspect of this build over the past several months, and we're finally starting to reap the fruits of our labor. Our big body bowtie sat in a driveway for many years, and it didn't get much more attention than maybe an oil change every few thousand miles. Luckily that prolonged exposure to the elements and mild neglect didn't result in more serious issues like rust and corrosion. Rescuing a classic piece of Detroit muscle from a field, junkyard, or barn is high up on the wish list for a lot of car guys. Who doesn't dream of breaking the seal of a dusty barn door and pulling the tarp back on an old big block Chevelle. For two brothers north of the border that bucket list barn find dream became a reality after they not only discovered by fully restored a very rare 1971 Plymouth GTX. We've all heard great barn find stores, but have you ever of finding an iconic piece of Detroit muscle in your own barn? Lars and Tor Skrotter bought this 1971 Plymouth GTX when they were just a couple of kids.
(Tor)>> We were doing some detail engine. Finally put the engine in the car, and cranked it over, and didn't realize that it was the lifters?
(Lar)>> We got a solid lift cam and we put hydraulic lifters in. So we bent some pushrods right away.
(Tommy)>> Then in 2007 they picked right up where they left off and decided to finally finish what they had started.
(Joel)>> This numbers matching car is one of just 135 made that year, and one of the few built in Windsor, Ontario. In case you can't tell where they're from they love maple syrup, hockey, and of course Drake.
(Lars)>> Hey hosers, check this out, eh!
(Joel)>> This power plant is packing six barrels capable of pounding out 385 horsepower, which add an additional 15 horses to the standard 440 Magnum. You could the Hemi option for the steep price tag of $750 bucks, but the lighter weight and lower price point of the 440 six-pack made it hard to pass up.
(Tommy)>> '71 brought a whole new level of styling to Plymouth's mid-size Satellite, which the GTX was built on. A fuselage look transformed the car into a streamlined piece of Detroit muscle with a horse collar front bumper, sculpted body panels, and a slopping fastback roof.
(Joel)>> Painted in the one year only color Curious Yellow, this GTX could best be described as a high octane highlighter rolling on four wheels. It's got the tough steering wheel, which is similar in diameter but had a thicker grip for race-like handling.
(Tommy)>> Heavy duty suspension came standard with it all rolling on steel wheels with wide oval rubber redline radials.
(Joel)>> Introduced in '67 as Plymouth's first all in one muscle car package, the GTX soon played second fiddle to its sister car, just a spruced up version of the hotrodicus supersonicus, the Road Runner. With deluxe interior, chrome rocker moldings, and a 440 as the base engine.
(Tommy)>> With no cool cartoon mascot and a higher price tag it's no wonder the GTX was often overlooked. Sales hit an all time low at less than 3,000 in '71. This marked the last year for the GTX but the name lived on as an option on the Road Runner.
(Joel)>> When Lars and Tor restored the car they weren't expecting a whole lot of attention, but the invitations started rolling in. They were asked to feature the car at SEMA in Las Vegas as a prime example of Mopar performance.
(Tommy)>> What kind of advice do a couple of Canadians have for American muscle car fans?
(Tor)>> Never use snow tires when you try to do a burnout. [ tires squealing ]
(Joel)>> Coming up, we've got a bleeder!
(Tommy)>> Now our bleeder line is a little bit short, but that's kinda how it goes. Now ideally you'd want to take and kinda submerge your fitting into a cup. That gives you a reservoir to draw from, but what we're gonna do in this situation is install a little bity line that's gonna gain us some extra clearance here under the car. Now if you did want to go this route you'd need to make sure that you submerge this entire fitting into the fluid. It can draw air out of the top side if you were just to break that fitting loose. Let's let the car down. It's recommended to use a Dot-3 or a high temp Dot-4 in this application. Now we're gonna be using this ultra high performance fluid that we got from EBC. Now to do all the work of pulling that fluid uphill we've got a little vacuum pump like you'd find at your normal parts store. We're gonna connect this clear hose to the little feed line that would connect to your reservoir. Before we pull that vacuum we need to make a small adjustment. We'll pull this thing up to help remove that air pocket. Now as you pump this thing here you'll notice that the gauge needle will move indicating the vacuum. We got fluid coming up. You want to make sure that you don't run out of fluid down there in the floor because if you do it's gonna pull air back through your lines. Now with this I like to run probably about eight to 10 ounces of fluid through here. That'll help ensure that there is absolutely no air trapped in that line. Now all we need to do is raise the car back up and remove our little line. With this line plugged off the fluid won't run back downhill. You've got to think of it as if you've got a fountain drink with a straw in it. How you put your finger over the top, pull it out, and the fluid stays up in there. Well exactly the same thing. You want to make sure that this line is running straight up and down, not laid off to the side, because otherwise it'll let those fluid out. There will be some that comes out of here once I crack this fitting up top, but it will only be from this point to that joint. Last couple of things we need to do is reattach our hose back to the reservoir, top it off, and then slide our master cylinder back down and attach that pedal. Then we should be good to go. [ Music ]
[ Music ] Well we got one more thing taken care of on ole Fat Stack, but we still have the steering and the brakes that we're gonna have to address. It's funny how that little, short list we had keeps getting longer and longer. A lift is a pretty handy piece of equipment to have, and a lot of guys aspire to have one of these in their personal shop. Did you know that they really should be inspected every so often to ensure that they're safe and working properly?
(Joel)>> Just think about it. If you're working on Fat Stack, that over 4,000 pounds hanging above your yeah. If you're unsure there are a few things you can do to see if your lift maybe needs a little extra attention. First let's take a look at the floor. Now you want to inspect the area for any cracks or deviations in the concrete because this is literally the structural integrity and foundation that your lift sits on. If you do find any cracks or missing chunks you're gonna want to get that addressed immediately. Ignoring them could lead to catastrophic results.
(Tommy)>> If you have a hydraulic lift like we do you'll also need to check the cylinders to see if there's any fluid down at the base. That would indicate a leak, and that could tell you that those cylinders may need to be serviced. It's also a good idea to check your hoses and the fittings.
(Joel)>> As the lift goes up listen for any odd or strange noises. If you do hear something you may just need to hit your lift with some white lithium grease to make sure everything is properly lubricated. The locks are something else you need to pay close attention to. You should hear a consistent rhythm as the lift descends, but if you hear offset clicks that means your arms could be out of alignment, which could lead to uneven weight distribution when you're raising your ride. You want everything nice and even when you're working underneath something as heavy as Fat Stack. Now let's get her up in the air and talk about arm placement. Now obviously you want the vehicle centered with each of your lift arms evenly extended, but you also need to be conscious of front to rear weight distribution. Now this old Caprice is definitely front heavy but let's say we needed to take the rear axle out for whatever reason. That's gonna shift the entire dynamic and this whole vehicle could literally come crashing down. In a situation like that you're gonna want to use one of these auxiliary stands just balance out the weight so you don't have a dangerous shift while you're working. Arm placement is also important because you can seriously damage the car if you put them in a spot that isn't structurally sound and designed to hold that weight for an extended period of time. Another way to check your load stability is to raise the car a few inches off the ground, and then just kinda jump up and down on one side or the other, and if it's solid you're good to go. Way better to do it now as opposed to five or six feet in the air. These are just some basic procedures for operating your lift. Keep in mind it's just like any other tool in your shop. As long as it's working properly you'll keep making money, but if your lift ever goes down you'll wonder how you ever got along without one.
