More Fat Stack Episodes
Detroit Muscle Featured Projects
Detroit Muscle Builds
Want more content like this?
Join the PowerNation Email NewsletterParts Used In This Episode
Blast From the Past
Sandblasting & Powder Coating
Continental Tire
ExtremeContact DWS06 Plus Tires
U.S. Mags
Desperado Wheels
Episode Transcript
(Tommy)>> You're watching Powernation!
(Joel)>> Today on Detroit Muscle we blast off and install some shocking new upgrades.
(Tommy)>> Plus we'll gear up and wheel in some fresh five spoke rollers. [ Music ] [ engines revving ] [ Music ]
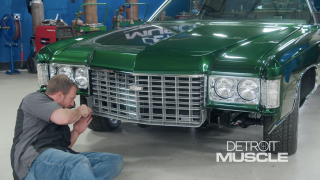
(Tommy)>> Well guys we're well on our way with our new project, Fat Stack, and today is gonna be a pretty good day. We're freshening up the chassis and it's getting all new fancy suspension.
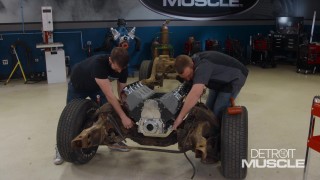
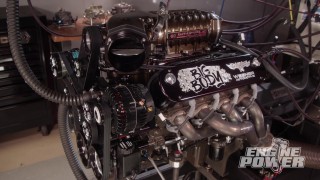
(Joel)>> And if all goes well we're also gonna be dropping in that 800 horsepower supercharged LS to see what it's all gonna look like. After separating the top half from the bottom half of our bowtie we got busy taking it all apart. Luckily there weren't too many surprises. Woo! Well for some of us at least. It didn't take very long, but that's kinda how it goes. You ever notice how it only takes minutes to get something apart, but hours and days to go the opposite direction. [ Music ]
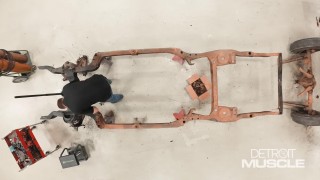
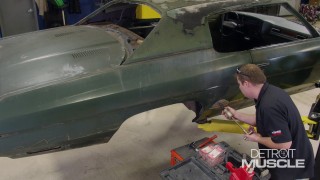
(Tommy)>> With what we have up our sleeve for Fat Stack this rusty and crusty thing isn't gonna cut it. Our big body's getting candy paint, trick interior, and that supercharged LS. This thing obviously needs some attention. We're gonna be addressing the appearance and components of our chassis. Now before you get too carried away rubbing on all that pretty stuff you know it's always a good idea to make sure you're working with something sound. Now with a frame and this car being so old you never know. It could have been involved in an accident and you could have a couple of bends in it. The front and rear rails are where you will normally find the damage. If you see any odd kinks or bumps that's usually a dead giveaway of an accident, especially if the spot in question is only on one side. Here in the middle you will also find spots where people used a jack to lift the car. If this bottom edge is all bent up you should repair it. This center section really isn't all that difficult. All you really need is a big hammer or even an adjustable wrench to massage that edge back flat. But if you're needing to repair the rails that usually requires the help of some professional assistance.
(Joel)>> Another thing you're gonna want to do is make sure that your frame is square, and in order to do that you've just got to measure from a few common points of reference. If your cross measurements between the suspension holes or body mount locations are exactly the same or relatively close you're probably in good shape. Usually there should be no more than three-sixteenths of an inch of difference at the absolute max. Another thing you're gonna want to look out for is rust. Now Fat Stack does come from the great state of Tennessee where there's not a whole lot of salt or snow on the roads. That means that the surface corrosion is minimal. Dirt and debris can build up in the lower parts of a vehicle and cause some serious problems. Sometimes the frame may not necessarily have a hole in it, but that doesn't mean it isn't rusted thin. A quick glance on the inside of the frame can help tell the story.
(Tommy)>> Something else that's a good idea to do is to check your body mounting location holes. This can be a difficult task if you're looking at a chassis that has a body sitting on it. What happens is this opening rusts out, and now these front here on the passenger side are the common two to look at because of the air conditioning evaporator or the heater core. What you have is an upper and lower rubber mount that sandwiches the frame, and moisture gets trapped into here and that causes corrosion, and over a period of time that hole rusts through. I've seen these holes rust so bad that the mount would basically fall right into the frame. You can fix this though. I've used a washer in the past. It takes some cutting and grinding to make everything work. So just be prepared to spend some time if you have that problem.
(Joel)>> Now the overall condition of our frame is in pretty good shape, other than some surface rust and a little bit of grease. And if you guys are doing this project at home you can save yourselves a few bucks by using some scrapers or even some wire brushes. After a little bit of clean up you could just go ahead and paint it or apply some chassis hardener. Now what we plan on doing is actually sand blasting the entire thing and then doing some powder coating. Either method you decide to go with you're just gonna need to do a little bit prep work.
(Tommy)>> Often times with the frame it looks like the trigger man running the welder wasn't too worried about welding boogers. So, we're gonna clean it up. I like to use a blending disc instead of a grinding rock. A rock is really too aggressive, and often times what ends up happening is all your marks that you make on your frame show through your top coat.
(Joel)>> All we're trying to do here is smooth everything out and knock down the high spots. Obviously, the more time spent the better the end result. [ grinder buzzing ]
(Joel)>> A blending disc is more forgiving but it still generates a lot of heat. So, you're gonna want to bounce around to prevent possibly damaging the frame's structural integrity. [ grinder buzzing ]
(Tommy)>> Like I mentioned to you guys earlier about this grinding rock being too aggressive I'm gonna put my John Hancock here on the side of the frame rail. You don't have to be worried about it too much because where this black spot is where the bumper bracket goes, and we'll see once this thing's powder coated if you'll be able to see my name. [ grinder buzzing ]
(Joel)>> Well that should just about do it. We're gonna get this thing loaded up on a trailer and go visit our buddies at the powder coater. Coming up, we grind off some rust and crust and have a run in with some quick sand.
[ Music ]
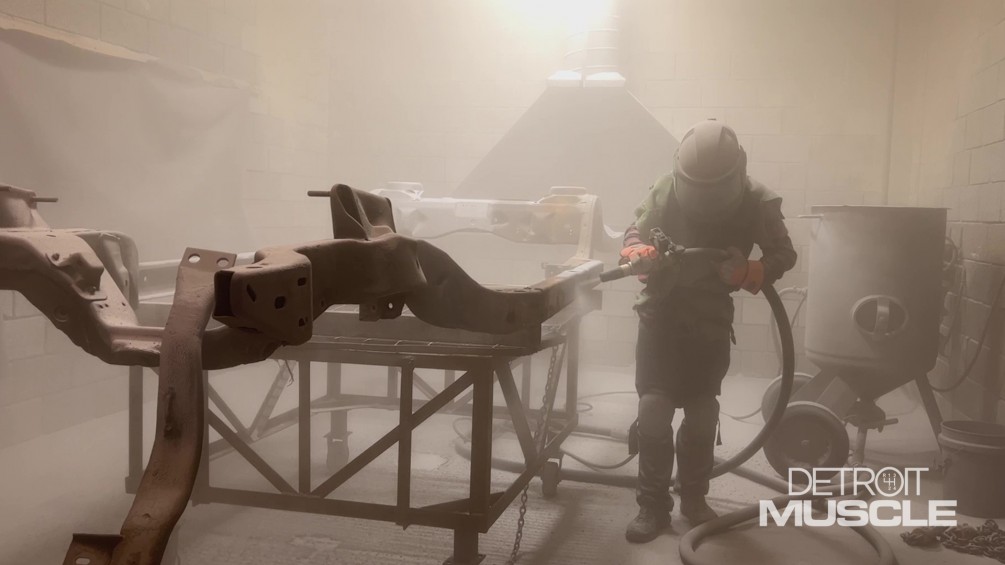
(Joel)>> Today is a big milestone for Fat Stack. We're heading to Blast from the Past to get our frame sand blasted and powder coated. [ Music ] Vance and his crew have years of experience cleaning any and everything that has four wheels or even four legs.
(Tommy)>> I think today's gonna be a pretty light day for us.
(Joel)>> Forklift is already doing most of the work. [ Music ] Our old chassis has over 50 years under its belt and is well past its mid-life crisis. So now it's time for an upgrade, and sometimes that calls for carving it to the bone and starting fresh. [ Music ] [ casters clicking ] [ Music ]
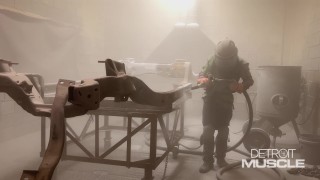
(Joel)>> You know that old saying where you can either have something done fast or good? Well one reason why we go to see these guys is they figured out how to do both. When it comes to sand blasting there are many different types of media that you can use, and it all depends on your application. The guys at Blast from the Past prefer to use crushed glass because they feel it gives them the capability to tackle jobs with surgical precision or open the flood gates to remove industrial grade grime. With our chassis being heavy duty steel they didn't need to worry about any warpage or blowing holes in the frame. They went full scorched Earth and within a few hours Fat Stack's skeleton went back done to bare bones. [ Music ] So why don't we just call it day and paint the chassis ourselves? Well because arguably powder coating is the best method to prevent corrosion and add durability to the finish. [ Music ] Powder coating uses a process known as electrostatic spray deposition. The ions in the powder are charged and they become attracted to the grounded metal of the frame. Similar to how a magnet sticks to your fridge. [ spray gun hissing ]
(Joel)>> You can also pick from a variety of colors and finishes. We went with a semi-gloss black for a slick, classic look. [ Music ] The frame is then moved into a curing oven and left to bake at around 400° degrees Fahrenheit. There the powder melts to form a continuous film across the surface of the chassis, and once cooled will form a finish that is stronger and more durable than paint. And so here it is. A complete transformation from dirty and crusty to fresh and classy. The semi-gloss chassis black was a safe choice. And yeah, we could have went with something a bit more exotic but trust me, when we're all said and done it's gonna be real nice!
(Tommy)>> For sure, and with this step taken care of we can finally install all of our new, fancy suspension. I tell you I'm getting pretty excited to see this thing finished and all dolled up. Oh, and don't forget our little science experiment. Powder coating is usually kinda thick but not enough to hide those grinding marks from the rock. But up here where we used that blending disc it's nice and smooth.
(Joel)>> So if you're looking to add some glamour to your undercarriage powder coating should be an option.
(Tommy)>> Up next, we'll relieve some tension with all new suspension.
(Tommy)>> From day one whenever we kicked off Project Fat Stack we knew we were gonna have to address the suspension. So now the time is upon us. Our frame is all prettified up, and we've got a bunch of parts sitting over there in the floor. Now I ain't gonna lie. I'm feeling a little giddy.
(Joel)>> From the factory that hefty Chevy had excessive amounts of body roll, and kinda handled like an old steamboat. However, this lineup of goodies is gonna be the solution that's gonna give us a tailored ride height, improve stability, and one heck of an attitude adjustment. To have our big body sitting right we went to Summit Racing and snagged us a kit from QA-1. This setup allows you to lower or raise the ride height on a big body. Our goal is to have Fat Stack sitting just a bit lower on the back side, and this will give us more than enough adjustment. To help out in the handling department we have coilovers on all four corners, along with tubular upper and lower control arms and upgraded sway bars.
(Tommy)>> Now out back a rear sway bar on the second gen Caprices was an option from the factory. Just adding one would help reduce body roll, but this one is way better than o-g. Also, the rear links are pretty trick. They're adjustable on the uppers and lowers. This helps to set the pinion angle and also allows you to center the rear axle in the opening at your desired ride height. For the rear end upgrading was a must. This Moser M-9 we found at Summit Racing will handle all the abuse that we're gonna throw at it with that 800 horsepower LS. We checked off all the boxes with a True Track, deeper gears, 31 spline axles, disc brakes, a back brace, and powder coated shiny black. It's strong and a looker.
(Joel)>> The first piece of the puzzle is gonna be our Street Series lower tubular control arms, and man these things got a boatload of benefits. For one they're lighter and stronger than the factory originals. They also have serviceable ball joints and polyurethane bushings that decrease drag for a nice, smooth ride. Not to mention this slick powder coat finish makes for a nice, clean undercarriage.
(Tommy)>> What'd you do with your hammer?
(Joel)>> I'll tell you one thing. One of the big advantages of having this chassis separated from the body is that it makes installation of these suspension components a whole lot easier. [ Music ]
(Tommy)>> One of the most crucial components to this suspension upgrade would have to be the coilovers. Now the ones we chose to go with are dual adjustable, meaning with a twist of these two knobs you can change the rate of compression and rebound. Now as far installation goes you just pretty much slap the coil spring here through it kinda like this, and then mount this coilover as if it was a shock.
(Joel)>> Now don't forget to spread a little anti-seize on the threads of your coilover shocks. This will make it much easier to spin your adjustment collar even after you're finished with final assembly. [ Music ] [ drill humming ] [ Music ]
(Tommy)>> The next trick piece that we're gonna be installing are the QA-1 upper control arms of their Pro Touring Series. What's great about these is it's gonna increase the camber and caster gains over the top of our factory units. Now that alone will help make the car handle daylight and dark difference from that stock setup. [ Music ]
(Joel)>> Now our kit didn't come with new spindles, but we were able to refurbish the old ones with some sand blasting and a fresh coat of paint. Now a little tip for you guys is if you wait to bolt on your dust cover it'll make seating the spindle on the ball joint a little bit easier. Also, if you take an O-ring pick and stick it into your cotter pin hole and just kinda clock it parallel with the frame that'll make slugging that pin in a total breeze. Just some forward thinking that'll save you a little bit of a headache. Coming up, we get in gear and break out some shiny new shoes.
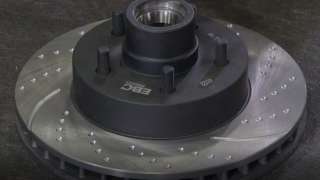
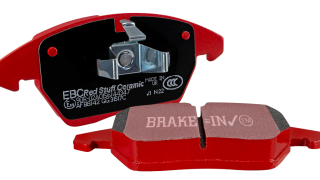
(Joel)>> With Fat Stack pushing some serious horsepower as well as weighing in at almost 4,000 pounds we needed a serious set of brakes to hold up to the abuse. Our friends at EBC Brakes sent us this drill and slotted hub assembly that performs just as good as it looks. And to complete the ensemble we opted for the EBC Red Stuff ceramic brake pads. What's unique about these is that they produce 50 percent less brake dust than an o-e-m pad, and we won't have to worry about any kind of thermal cracking thanks to its air cooled configuration. And since these are designed to be a replacement and improvement off the factory originals installation is a total breeze to where you won't even break a sweat. Most aftermarket brake companies require you to use their internal components in their hub assembly. However, with this EBC setup we were able to use o-e style wheel bearings, seals, and hub covers. So if you're looking to step up the stopping power of your hot rod, or just put some "whoa" in your "go", this setup from EBC Brakes won't steer you wrong.
(Tommy)>> We're getting dangerously close to finishing the front suspension on our big body. One of the last things that we need to take care of is the steering components, like these tie rods and idler arm that we got from RockAuto. Now as far as our gearbox goes, we needed to do something with it. It's all rusty and crusty, and it's leaking out of the pitman shaft. Now you can buy a seal kit that will repair this issue, but we're throwing quite a bit of performance at this big body. So, what we're gonna do is install all our steering components including this old box as a mockup to show you guys the difference between a slow box versus that upgraded fast ratio. [ Music ]
(Tommy)>> Now guys, please don't judge me from this complex apparatus that I've engineered to hold a steering column to basically simulate what it would look like in the car. Now what we're gonna do is show you guys the ratio from the input that you apply to the steering wheel, meaning the rotation, to the amount of degrees that the wheel turns left or right. So, let's see what we've got on this thing. That's all the way to the left side lock. Then I'm gonna use this piece of tape, mark it on the center on the top side to use as a visual aide. Let's see how many we got. One, two, about two and three quarters. So what that tells us is our box isn't a really drastically slow one, but it's really not a fast one either. So the next thing we want to show you is we're gonna take the steering wheel and have the rotors where they're running parallel with the frame rail, and then turn the steering wheel a half of a revolution. And then we want to measure that to see how far they turn in that direction. We already know this is the slower box of the two. So after a half turn the straight edge will show us our baseline to compare from. Now let's swap out to that new gearbox and see what it gets us. We got that new box in place. We're gonna recenter the front end and then do our half a revolution to see what it got us. When you put them side by side you can see the half turn we did on our new setup is wider, and that's gonna equal more responsive steering. We all think of RockAuto when it comes to replacement parts, but if you're looking for performance pieces you may want to check them out as well.
(Joel)>> A big body delivering big power undoubtably deserves big wheels. Now to some of you old school hot roddy guys I know that anything larger than 15 inches on a five spoke wheel is straight up cringy. However if you take a step back and consider the sheer physical size of that car a larger diameter rim, like these Desperados we got from US Mags, is not only gonna compliment the grace, elegance, and style that these cars were known for in their heyday. It's gonna give them one heck of a facelift. We'll also be wrapping them in these Continental Extreme Contact DWS 0-6-Plus tires. These are ultra high performance and specifically designed for sport coupes and sedans, just like old Fat Stack. They're also built to deliver skillful handling at high speeds, which with 840 horses under the hood and three pedals to play with we'll need all the traction we can get. [ Music ]
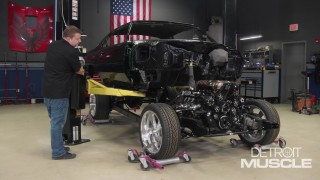
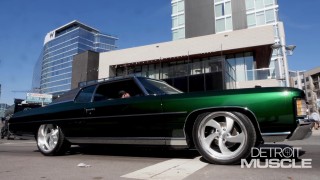
(Tommy)>> With all the pieces in place Fat Stack is looking large and in charge. A Moser M-9 rear and QA-1 suspension sitting on US Mag wheels wrapped in Continental tires sets the tone for the attitude we're going for. Combine that with an American Powertrain six speed tied to 800 plus horses. That's what I call pure Detroit Muscle.
Show Full Transcript
(Joel)>> Today on Detroit Muscle we blast off and install some shocking new upgrades.
(Tommy)>> Plus we'll gear up and wheel in some fresh five spoke rollers. [ Music ] [ engines revving ] [ Music ]
(Tommy)>> Well guys we're well on our way with our new project, Fat Stack, and today is gonna be a pretty good day. We're freshening up the chassis and it's getting all new fancy suspension.
(Joel)>> And if all goes well we're also gonna be dropping in that 800 horsepower supercharged LS to see what it's all gonna look like. After separating the top half from the bottom half of our bowtie we got busy taking it all apart. Luckily there weren't too many surprises. Woo! Well for some of us at least. It didn't take very long, but that's kinda how it goes. You ever notice how it only takes minutes to get something apart, but hours and days to go the opposite direction. [ Music ]
(Tommy)>> With what we have up our sleeve for Fat Stack this rusty and crusty thing isn't gonna cut it. Our big body's getting candy paint, trick interior, and that supercharged LS. This thing obviously needs some attention. We're gonna be addressing the appearance and components of our chassis. Now before you get too carried away rubbing on all that pretty stuff you know it's always a good idea to make sure you're working with something sound. Now with a frame and this car being so old you never know. It could have been involved in an accident and you could have a couple of bends in it. The front and rear rails are where you will normally find the damage. If you see any odd kinks or bumps that's usually a dead giveaway of an accident, especially if the spot in question is only on one side. Here in the middle you will also find spots where people used a jack to lift the car. If this bottom edge is all bent up you should repair it. This center section really isn't all that difficult. All you really need is a big hammer or even an adjustable wrench to massage that edge back flat. But if you're needing to repair the rails that usually requires the help of some professional assistance.
(Joel)>> Another thing you're gonna want to do is make sure that your frame is square, and in order to do that you've just got to measure from a few common points of reference. If your cross measurements between the suspension holes or body mount locations are exactly the same or relatively close you're probably in good shape. Usually there should be no more than three-sixteenths of an inch of difference at the absolute max. Another thing you're gonna want to look out for is rust. Now Fat Stack does come from the great state of Tennessee where there's not a whole lot of salt or snow on the roads. That means that the surface corrosion is minimal. Dirt and debris can build up in the lower parts of a vehicle and cause some serious problems. Sometimes the frame may not necessarily have a hole in it, but that doesn't mean it isn't rusted thin. A quick glance on the inside of the frame can help tell the story.
(Tommy)>> Something else that's a good idea to do is to check your body mounting location holes. This can be a difficult task if you're looking at a chassis that has a body sitting on it. What happens is this opening rusts out, and now these front here on the passenger side are the common two to look at because of the air conditioning evaporator or the heater core. What you have is an upper and lower rubber mount that sandwiches the frame, and moisture gets trapped into here and that causes corrosion, and over a period of time that hole rusts through. I've seen these holes rust so bad that the mount would basically fall right into the frame. You can fix this though. I've used a washer in the past. It takes some cutting and grinding to make everything work. So just be prepared to spend some time if you have that problem.
(Joel)>> Now the overall condition of our frame is in pretty good shape, other than some surface rust and a little bit of grease. And if you guys are doing this project at home you can save yourselves a few bucks by using some scrapers or even some wire brushes. After a little bit of clean up you could just go ahead and paint it or apply some chassis hardener. Now what we plan on doing is actually sand blasting the entire thing and then doing some powder coating. Either method you decide to go with you're just gonna need to do a little bit prep work.
(Tommy)>> Often times with the frame it looks like the trigger man running the welder wasn't too worried about welding boogers. So, we're gonna clean it up. I like to use a blending disc instead of a grinding rock. A rock is really too aggressive, and often times what ends up happening is all your marks that you make on your frame show through your top coat.
(Joel)>> All we're trying to do here is smooth everything out and knock down the high spots. Obviously, the more time spent the better the end result. [ grinder buzzing ]
(Joel)>> A blending disc is more forgiving but it still generates a lot of heat. So, you're gonna want to bounce around to prevent possibly damaging the frame's structural integrity. [ grinder buzzing ]
(Tommy)>> Like I mentioned to you guys earlier about this grinding rock being too aggressive I'm gonna put my John Hancock here on the side of the frame rail. You don't have to be worried about it too much because where this black spot is where the bumper bracket goes, and we'll see once this thing's powder coated if you'll be able to see my name. [ grinder buzzing ]
(Joel)>> Well that should just about do it. We're gonna get this thing loaded up on a trailer and go visit our buddies at the powder coater. Coming up, we grind off some rust and crust and have a run in with some quick sand.
[ Music ]
(Joel)>> Today is a big milestone for Fat Stack. We're heading to Blast from the Past to get our frame sand blasted and powder coated. [ Music ] Vance and his crew have years of experience cleaning any and everything that has four wheels or even four legs.
(Tommy)>> I think today's gonna be a pretty light day for us.
(Joel)>> Forklift is already doing most of the work. [ Music ] Our old chassis has over 50 years under its belt and is well past its mid-life crisis. So now it's time for an upgrade, and sometimes that calls for carving it to the bone and starting fresh. [ Music ] [ casters clicking ] [ Music ]
(Joel)>> You know that old saying where you can either have something done fast or good? Well one reason why we go to see these guys is they figured out how to do both. When it comes to sand blasting there are many different types of media that you can use, and it all depends on your application. The guys at Blast from the Past prefer to use crushed glass because they feel it gives them the capability to tackle jobs with surgical precision or open the flood gates to remove industrial grade grime. With our chassis being heavy duty steel they didn't need to worry about any warpage or blowing holes in the frame. They went full scorched Earth and within a few hours Fat Stack's skeleton went back done to bare bones. [ Music ] So why don't we just call it day and paint the chassis ourselves? Well because arguably powder coating is the best method to prevent corrosion and add durability to the finish. [ Music ] Powder coating uses a process known as electrostatic spray deposition. The ions in the powder are charged and they become attracted to the grounded metal of the frame. Similar to how a magnet sticks to your fridge. [ spray gun hissing ]
(Joel)>> You can also pick from a variety of colors and finishes. We went with a semi-gloss black for a slick, classic look. [ Music ] The frame is then moved into a curing oven and left to bake at around 400° degrees Fahrenheit. There the powder melts to form a continuous film across the surface of the chassis, and once cooled will form a finish that is stronger and more durable than paint. And so here it is. A complete transformation from dirty and crusty to fresh and classy. The semi-gloss chassis black was a safe choice. And yeah, we could have went with something a bit more exotic but trust me, when we're all said and done it's gonna be real nice!
(Tommy)>> For sure, and with this step taken care of we can finally install all of our new, fancy suspension. I tell you I'm getting pretty excited to see this thing finished and all dolled up. Oh, and don't forget our little science experiment. Powder coating is usually kinda thick but not enough to hide those grinding marks from the rock. But up here where we used that blending disc it's nice and smooth.
(Joel)>> So if you're looking to add some glamour to your undercarriage powder coating should be an option.
(Tommy)>> Up next, we'll relieve some tension with all new suspension.
(Tommy)>> From day one whenever we kicked off Project Fat Stack we knew we were gonna have to address the suspension. So now the time is upon us. Our frame is all prettified up, and we've got a bunch of parts sitting over there in the floor. Now I ain't gonna lie. I'm feeling a little giddy.
(Joel)>> From the factory that hefty Chevy had excessive amounts of body roll, and kinda handled like an old steamboat. However, this lineup of goodies is gonna be the solution that's gonna give us a tailored ride height, improve stability, and one heck of an attitude adjustment. To have our big body sitting right we went to Summit Racing and snagged us a kit from QA-1. This setup allows you to lower or raise the ride height on a big body. Our goal is to have Fat Stack sitting just a bit lower on the back side, and this will give us more than enough adjustment. To help out in the handling department we have coilovers on all four corners, along with tubular upper and lower control arms and upgraded sway bars.
(Tommy)>> Now out back a rear sway bar on the second gen Caprices was an option from the factory. Just adding one would help reduce body roll, but this one is way better than o-g. Also, the rear links are pretty trick. They're adjustable on the uppers and lowers. This helps to set the pinion angle and also allows you to center the rear axle in the opening at your desired ride height. For the rear end upgrading was a must. This Moser M-9 we found at Summit Racing will handle all the abuse that we're gonna throw at it with that 800 horsepower LS. We checked off all the boxes with a True Track, deeper gears, 31 spline axles, disc brakes, a back brace, and powder coated shiny black. It's strong and a looker.
(Joel)>> The first piece of the puzzle is gonna be our Street Series lower tubular control arms, and man these things got a boatload of benefits. For one they're lighter and stronger than the factory originals. They also have serviceable ball joints and polyurethane bushings that decrease drag for a nice, smooth ride. Not to mention this slick powder coat finish makes for a nice, clean undercarriage.
(Tommy)>> What'd you do with your hammer?
(Joel)>> I'll tell you one thing. One of the big advantages of having this chassis separated from the body is that it makes installation of these suspension components a whole lot easier. [ Music ]
(Tommy)>> One of the most crucial components to this suspension upgrade would have to be the coilovers. Now the ones we chose to go with are dual adjustable, meaning with a twist of these two knobs you can change the rate of compression and rebound. Now as far installation goes you just pretty much slap the coil spring here through it kinda like this, and then mount this coilover as if it was a shock.
(Joel)>> Now don't forget to spread a little anti-seize on the threads of your coilover shocks. This will make it much easier to spin your adjustment collar even after you're finished with final assembly. [ Music ] [ drill humming ] [ Music ]
(Tommy)>> The next trick piece that we're gonna be installing are the QA-1 upper control arms of their Pro Touring Series. What's great about these is it's gonna increase the camber and caster gains over the top of our factory units. Now that alone will help make the car handle daylight and dark difference from that stock setup. [ Music ]
(Joel)>> Now our kit didn't come with new spindles, but we were able to refurbish the old ones with some sand blasting and a fresh coat of paint. Now a little tip for you guys is if you wait to bolt on your dust cover it'll make seating the spindle on the ball joint a little bit easier. Also, if you take an O-ring pick and stick it into your cotter pin hole and just kinda clock it parallel with the frame that'll make slugging that pin in a total breeze. Just some forward thinking that'll save you a little bit of a headache. Coming up, we get in gear and break out some shiny new shoes.
(Joel)>> With Fat Stack pushing some serious horsepower as well as weighing in at almost 4,000 pounds we needed a serious set of brakes to hold up to the abuse. Our friends at EBC Brakes sent us this drill and slotted hub assembly that performs just as good as it looks. And to complete the ensemble we opted for the EBC Red Stuff ceramic brake pads. What's unique about these is that they produce 50 percent less brake dust than an o-e-m pad, and we won't have to worry about any kind of thermal cracking thanks to its air cooled configuration. And since these are designed to be a replacement and improvement off the factory originals installation is a total breeze to where you won't even break a sweat. Most aftermarket brake companies require you to use their internal components in their hub assembly. However, with this EBC setup we were able to use o-e style wheel bearings, seals, and hub covers. So if you're looking to step up the stopping power of your hot rod, or just put some "whoa" in your "go", this setup from EBC Brakes won't steer you wrong.
(Tommy)>> We're getting dangerously close to finishing the front suspension on our big body. One of the last things that we need to take care of is the steering components, like these tie rods and idler arm that we got from RockAuto. Now as far as our gearbox goes, we needed to do something with it. It's all rusty and crusty, and it's leaking out of the pitman shaft. Now you can buy a seal kit that will repair this issue, but we're throwing quite a bit of performance at this big body. So, what we're gonna do is install all our steering components including this old box as a mockup to show you guys the difference between a slow box versus that upgraded fast ratio. [ Music ]
(Tommy)>> Now guys, please don't judge me from this complex apparatus that I've engineered to hold a steering column to basically simulate what it would look like in the car. Now what we're gonna do is show you guys the ratio from the input that you apply to the steering wheel, meaning the rotation, to the amount of degrees that the wheel turns left or right. So, let's see what we've got on this thing. That's all the way to the left side lock. Then I'm gonna use this piece of tape, mark it on the center on the top side to use as a visual aide. Let's see how many we got. One, two, about two and three quarters. So what that tells us is our box isn't a really drastically slow one, but it's really not a fast one either. So the next thing we want to show you is we're gonna take the steering wheel and have the rotors where they're running parallel with the frame rail, and then turn the steering wheel a half of a revolution. And then we want to measure that to see how far they turn in that direction. We already know this is the slower box of the two. So after a half turn the straight edge will show us our baseline to compare from. Now let's swap out to that new gearbox and see what it gets us. We got that new box in place. We're gonna recenter the front end and then do our half a revolution to see what it got us. When you put them side by side you can see the half turn we did on our new setup is wider, and that's gonna equal more responsive steering. We all think of RockAuto when it comes to replacement parts, but if you're looking for performance pieces you may want to check them out as well.
(Joel)>> A big body delivering big power undoubtably deserves big wheels. Now to some of you old school hot roddy guys I know that anything larger than 15 inches on a five spoke wheel is straight up cringy. However if you take a step back and consider the sheer physical size of that car a larger diameter rim, like these Desperados we got from US Mags, is not only gonna compliment the grace, elegance, and style that these cars were known for in their heyday. It's gonna give them one heck of a facelift. We'll also be wrapping them in these Continental Extreme Contact DWS 0-6-Plus tires. These are ultra high performance and specifically designed for sport coupes and sedans, just like old Fat Stack. They're also built to deliver skillful handling at high speeds, which with 840 horses under the hood and three pedals to play with we'll need all the traction we can get. [ Music ]
(Tommy)>> With all the pieces in place Fat Stack is looking large and in charge. A Moser M-9 rear and QA-1 suspension sitting on US Mag wheels wrapped in Continental tires sets the tone for the attitude we're going for. Combine that with an American Powertrain six speed tied to 800 plus horses. That's what I call pure Detroit Muscle.
