More Fat Stack Episodes
Detroit Muscle Featured Projects
Detroit Muscle Builds
Want more content like this?
Join the PowerNation Email NewsletterEpisode Transcript
(Tommy)>> You're watching Powernation!
(Joel)>> Today on Detroit Muscle we take our Caprice project to a whole other level by teaming up with some shiny new friends.
(Tommy)>> Then later we bust out the vinyl, but we're not talking records. [ Music ] [ engines revving ] [ Music ]
(Tommy)>> If you're into dolling up your ride you're gonna dig what we've got for you guys today. Now you can call it eye candy. You can call it icing on the cake, or even jewelry. Chrome has that effect to just put a smile on your face. The way it twinkles and glitters in the light is something special.
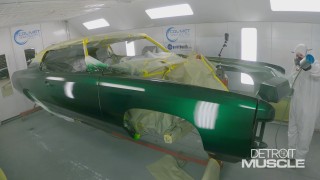
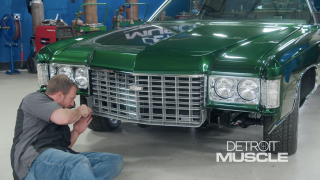
(Joel)>> When you think of a boat load of chrome a car from the '70s is probably not the first thing that comes to mind, but this old Caprice sure has a whole lot of it. What we have planned for Fat Stack is to quite simply make a statement, and between that cool candy paint and all these shiny goodies I'm pretty sure we're not gonna have too much trouble doing exactly that.
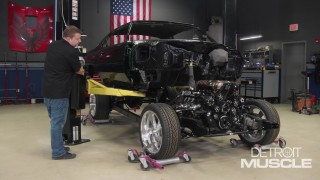
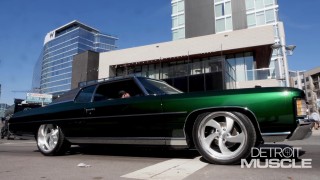
(Tommy)>> The right mix of certain components can really elevate your build. That sheer size of that car back there is one of the reasons we went with the bigger than stock wheels. A big ole car needs larger than stock rollers. 20s and 22s may not be your style. So if you're a bit more old school we've got something coming up later in the show that'll tickle your fancy. Cars of the late '60s, '70s, and '80s had an option for you to top it all off and sometimes they got a bit crazy and exotic. It all depended on your own flavor and maybe even your occupation.
(Joel)>> To do chrome like this requires professional help. So we're gonna take a little field trip and you can sit back and see if you like your reflection. Advanced Plating in Portland, Tennessee, is world renowned for their quality and expertise when it comes to crafting shiny chrome. They plate just about anything you can imagine, and their show stopping work has helped skyrocket the status of many award winning builds. Their taste and expert level artistry are perfectly in sync with the prestige we envision for our '71 Caprice. After we got to peep some of their handywork we got revved up thinking about what Fat Stack is gonna look like with fresh, new brightwork.
(Tommy)>> Good chrome can be the ultimate accent for paint, and it can make certain features of your project stand tall. Doesn't matter if it's a fixed up grille, a shiny set of refurbished rims, or even a custom chrome steering wheel.
(Joel)>> Like most car lovers Steve Tracey has a fondness for all things automotive, and holds a deep bond etched in his heart when it comes to cars and shiny chrome. Over the years he has combined his love for classic cars with his never-ending drive for refining perfect plating processes to transform pieces of Detroit muscle into mesmerizing metallic works of art.
(Tommy)>> Since 1988 Steve has been the owner of Advanced Plating where he has mastered the alchemy of transforming tattered trinkets into perfectly polished chrome.
(Steve)>> I really thrive on the challenge of restoring these parts or developing processes for plating. I've fortunately been very active in the development of electro plating with chemistry and plating on aluminum over the years. Challenge of taking a piece of metal, restoring it back to way beyond what it ever looked like to begin with is really what is very rewarding to me. What also is really rewarding to me is the amount of people that we have that work here that have the same passion as I do. These people come in here driven to do the job and do the best job they can. They're driven to put out the best product, and we take a lot of pride in our work and we try to do the best possible job on every piece, and that's really rewarding to me also. I love seeing the employees here at Advanced Plating take pride in what they do. That's a big part of it to me. [ Music ] We're gonna continue to be cutting edge in developing new finishes, and Advanced Plating as a whole is set up for the long haul in the future. So not only our employees have a future but also customers who have been coming here for years still are coming here and still getting the same quality.
(Joel)>> Coming up, our bright work gets stripped and dipped.
(Tommy)>> Everyone wants your bumpers to look great, and these to call them that is an understatement. Now with the components that they started with were nowhere near this condition, and they had their work cut out. Our chrome pieces had seen better days, but they were at a pretty good starting point for us to send them off to get a second lease on life. Chrome isn't something you can easily do on your own. Getting our chrome out of a rattle can just didn't line up with the level of restoration we were doing on Fat Stack. So we asked Steve to show us how he took our pieces from worst to first.
(Steve)>> How about we take a journey on the pathway that your parts followed?
(Tommy)>> I'm kinda excited to see. Hope it wasn't a long journey.
(Steve)>> It was a pretty long journey. You had a lot of parts there, a lot of aluminum, originally anodized, but we went with chrome, and I think you're gonna be real happy with the results. But getting there, labor of love for everybody involved! So we're here in the strip room and we're gonna start by stripping the anodizing off of a grille. This is a pretty interesting chemical reaction cause we strip anodizing off of aluminum in caustic, and caustic destroys aluminum. You have to stand with this part while it actually is removing the anodizing, and if you sit in here for too long it will dissolve the part away. And you can see the caustic reaction and the oxidation happening. Now he's gonna come over to a clean water rinse. So we're gonna do a dip in the nitric acid, and this is commonly referred to as a bright dip. So we're brightening up the aluminum so that the polishers have a clean canvas to do their metal prep on. There is an art to stripping, and I'm not talking about dancing! It's really important that all the old paint, rust, grease, and oil, and anodizing is removed off of all the parts so that when we polish the part it's done properly. We don't want our polishers trying to sand off or grind off debris. Getting this stripped properly is really important. Tommy, Joel we're in the buffing room in here. Right now Matt is basically roughing it in with an 800 grit d-a paper. So he's gonna get it prepped and then buffed, and then we'll be ready to go to racking. We use copper plating the way a body man uses filler and primer, and that's our restoration tool. Bondo on, bondo off, copper on, copper off. Alright guys, so we are out here in racking, and the racks are made out of solid copper for conductivity, and these wires that he's put on the end are called cheaters, and they're gonna defer the current from the end of the part, and this keeps it from over plating on the ends. Kinda like the edges when you're doing paint on a door or a trunk, your edges are gonna get more paint on them, right? So for us in electro-plating we do try to defer it to keep the buildup down. You're still gonna have to watch the edges for fit. So we're with Will here on the plating line. We're getting ready to run some aluminum trim. We're entering the nitric acid, and this basically is etching the aluminum to help with adhesion. This is all timed. He's standing there counting as he goes. When he goes into this zinc tank this is not electrolytic. This is electroless zinc, and this is putting a deposit of zinc onto the part. Now this part thinks it's a piece of zinc diecast. Copper plating will not adhere to raw aluminum. It has to have this zinc put on it, and now you can actually see the zinc coating that's on that part, that color change. Now we're gonna do a cyanide copper strike. Really important for adhesion. The trick is to go into this copper tank with current on the part. So current on the part, and then we drop down into the solution, and right now you're seeing the copper ions going from the anode to the cathode. But this bath, regulated current, regulated temperature, regulated amperage. Now you can see the copper strike. That's not a thick deposit. That is for adhesion. So from there he's gonna move to a clean water rinse. So he's moved through a cyanide destruct and another rinse, and then we're gonna go to nickel next. Nickel ions are deposited onto the aluminum part, and it's getting bright, and the chemistry allows it to become level. Will's coming around with our nickel platted pillar post, and he's ready to go to chrome. He's gonna do what we call a sour dip here. This is gonna cut the brightener film off the nickel platted part, and then from there he's gonna go into our hexavalent chrome bath. So the average dwell time in here, you're gonna get maximum deposit in 30 seconds. This bath will not build thickness. It's a transparent. You're looking through the chrome at the nickel. So you're really looking at the beauty of what the metal polisher has done, what the nickel has done to provide us depth and brightness, and now you have the chrome as a nice silvery blue deposit. Gonna give you transparency and corrosion protection at the same time. Then our final step here we use a d-i water rinse for a spot free rinse.
(Tommy)>> Our lower quarter trim was beat all up on Fat Stack. You can check out the back side of this panel where there's some tooling marks from them having to do some metal work but check this stuff out right now. That is nice! Can't wait to see this stuff against that green paint. Let's just try one on. [ Music ] Up next, we take a look back at a blue wildcat that isn't from Kentucky.
(Joel)>> You know guys there's no denying that our '71 Caprice, Fat Stack, has plenty of character. Its elongated curves are complimented by a series of factory accessories that really complete the ensemble of a cool, classy ride, including fender skirts, a vinyl top, plush interior, and of course lots of chrome. GM has been known for building some stylistic big bodies in their day, but there was one in particular in the '60s that shined in both good looks and performance. [ Music ] In 1967, if you wanted a big car with loads of power you only had a couple of choices. A Catalina two plus two or Buick's luxury powerhouse, the Wildcat.
(Tommy)>> Tipping the scales at close to 5,000 pounds and stretching over 18 feet, once this car got rolling it was like a runaway freight train.
(Joel)>> The heart of the beast was the brand new 430 cubic inch V-8. [ engine revving ]
(Joel)>> Buick spent $50 million bucks designing a replacement for the legendary 401 nail head, and they opened the heads with a slanted saucer dome chamber and expanded the exhaust ports to help it breathe better.
(Tommy)>> It kept the same four inch bore but a new nodular iron crank upped the stroke to three point nine, giving it an extra 29 cubic inches of displacement. This also jacked up the torque to 475 at 3,200 r-p-ms. You need that low end muscle to get this tank moving.
(Joel)>> All in all in produced $35 more horses for a total output of 360. The engine was so potent it was known to break the motor mounts. Buick issued a recall at the time to equip them with a safety cable.
(Tommy)>> The '67 not only got a new engine but it was also completely reskinned. A sweeping body arc with bulging fenders replaced the rigid straight lines of the previous model. A blacked out crosshair style grille set it apart from the LeSabre, while a claw-like front end made it look like it was ready to pounce.
(Joel)>> The body was dressed up with simulated fender vents, while the rear got new ribbon style taillights. Chrome badges graced the quarter panel and deck lid, and a snarling wildcat spiced up the wheels, which had fender skirts for the first time.
(Tommy)>> Bench seats with luxury styling were standard, but you could order the Wildcat custom that got you bucket seats, a floor shifter, and a sportier interior.
(Joel)>> Wildcats occupied a spot between the upscale Electra and lower priced LeSabre. It shared the same 126 wheelbase as the Electra, and came in everything from a four door sedan, to a sport coupe, and even a convertible.
(Tommy)>> The Wildcat has been around since '62. Some people consider it Buick's first muscle car, though its size gave it less than a cat-like response when taking off and cornering, but cruising on the interstate was like gliding on air.
(Joel)>> Ads called it... ( )>> The tuned car for young people of all ages.
(Joel)>> It was priced to the tune of $3,700 bucks, which with that much power and luxury was a bargain. Over 70,000 were sold, up just a bit from '66, and only about 2,200 were ragtops.
(Tommy)>> Today the Wildcat is sadly overlooked in the muscle car history books. While it was certainly no stoplight warrior, it more than made up for it with its brute force and aggressive styled looks. Driving one, it's the cat's pajamas!
(Joel)>> Coming up, we cover up the bald spot on our old Caprice.
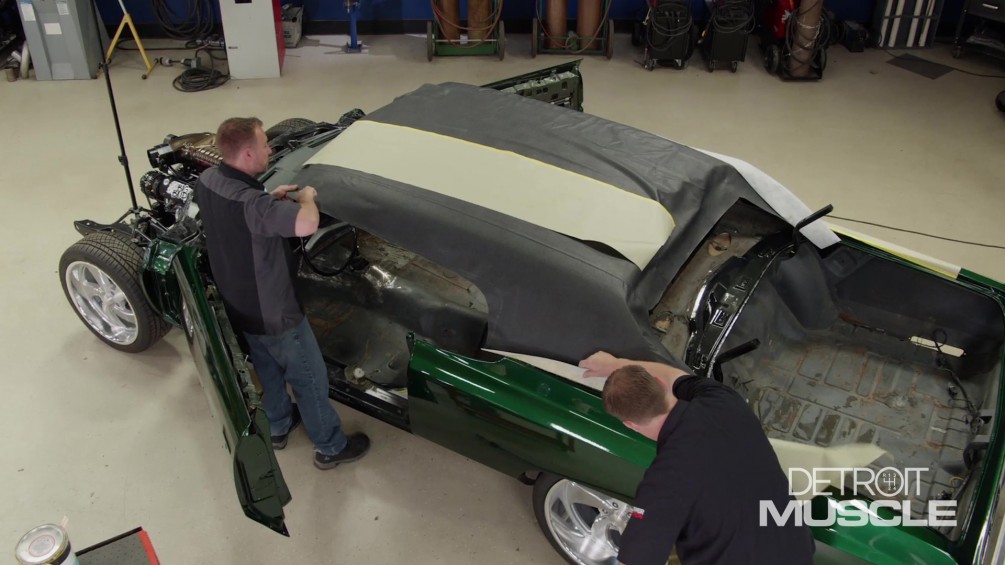
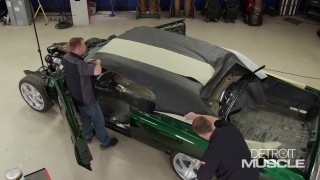
(Joel)>> Well guys the moment is upon us. We've been frothing at the mouth to get a new vinyl top installed on our '71 Caprice, Project Fat Stack, and today's the day we make it happen. The story of this age old accessory can be dated back as early as the 1920s. Their initial purpose was to give fixed roof vehicles a comparable flare and appeal to their convertible counterparts. As time went on they would eventually become a fairly common option on a lot of muscle cars from the 1960s. From there they would evolve into many different styles and materials, including canvas, snake, alligator hides, and those classy mod tops that Chrysler introduced in '69. Even your old Aunt Edna would admit those things were tacky at best. Back in the day it wasn't uncommon for vehicle manufacturers to glue the top straight onto bare steel. The problem with that is at some point you get a pinhole in the liner and that draws in moisture and corrosion. Arguably one of the biggest reasons a lot of guys tend to steer away from vinyl tops is because of the rust issues involved, and having to cut off and weld in a new roof skin on your project isn't exactly the easiest of tasks. When we first got a hold of our old big body its factory top was a little worse for wear. It was cracked, ripped, and almost completely dried out from close to five decades of baking in the sun. Luckily the sheet metal underneath was solid. So we sealed it off with some epoxy primer, black base coat, and a few coats of clear to ensure our new vinyl top would have protection for years to come.
(Tommy)>> To install a vinyl top you're gonna need a few tools. Nothing crazy or elaborate but they are necessary. Now with the top that we're installing it's basically brand new. If you were using some old authentic material you may want to use a heat gun. A few waves of this will help to soften that vinyl up, and it can be your friend. Now the first thing we need to do with installing our top is make a couple of marks and get everything lined up.
(Joel)>> First thing you want to do is find the centerline of your roof measuring from A-pillar to A-pillar. From there you can start spraying your glue from the center out.
(Tommy)>> Some people right now are thinking we just screwed up.
(Joel)>> We'll let them think that. [ Music ] [ spray gun hissing ]
(Tommy)>> Now line your middle up. [ Music ] Stick it and almost hold it down here. [ spray gun hissing ]
(Tommy)>> That cross pattern will get rid of my tire stripes.
(Joel)>> If it's any consolation it is oddly satisfying to watch. [ Music ] [ liquid sloshing ] [ spray gun hissing ]
(Tommy)>> Feel the burn!
(Joel)>> Calisthenics baby! [ spray gun hissing ]
(Tommy)>> It's not a tremendous amount of pressure. You don't want to pull them crazy tight. [ spray gun hissing ] [ Music ] [ paper crackling ]
(Tommy)>> It's all stuck!
(Joel)>> No going back now. That looks pretty good though. Nice and tight! [ Music ]
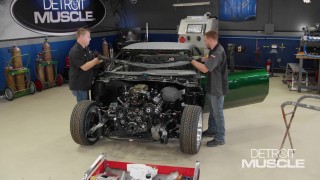
(Tommy)>> Well we got our top stretched out and glued on, and it looks really nice. Now we're at the tedious point, and that is trimming off all this excess. If you don't pay attention now all that hard work is out the window. On the front and back window you have these little T-studs that hold molding clips that hold the molding of the windshield into place. Now you want to make sure when you lay this vinyl around there that you trim out around them cause if you wait until the windshield's in it's a bear. Don't ask me how I know. [ Music ]
[ Music ] Now on all four corners of this roof there is what looks like a T-stud but in all reality it is a panel nail. What it's designed to do is compress this vinyl top here in this seam, and we left them in here so that we wouldn't lose them and we could reuse them. I've got to get a pair of pliers and pull this thing out, and then that hammer that I mentioned earlier, we gonna be driving some nails. [ Music ] [ hammer tapping ] [ Music ]
(Tommy)>> You know Joel, I think that was easier than putting windows in some times.
(Joel)>> It's definitely easier than a head liner.
(Tommy)>> At least this one's on top. Not have to work upside down.
(Joel)>> The vinyl top's already changed the entire look of the car if you ask me.
(Tommy)>> Yeah, kinda to me with it just being a shiny painted top car it almost looked cheap. Now it kinda, I don't want to say elegant. That's not the word either.
(Joel)>> I'll take elegant.
(Tommy)>> I wouldn't say all that. I'll tell you what I'm gonna say for sure, I'm done for the day!
(Joel)>> Not far behind you. It'll be here in the morning waiting for us.
Show Full Transcript
(Joel)>> Today on Detroit Muscle we take our Caprice project to a whole other level by teaming up with some shiny new friends.
(Tommy)>> Then later we bust out the vinyl, but we're not talking records. [ Music ] [ engines revving ] [ Music ]
(Tommy)>> If you're into dolling up your ride you're gonna dig what we've got for you guys today. Now you can call it eye candy. You can call it icing on the cake, or even jewelry. Chrome has that effect to just put a smile on your face. The way it twinkles and glitters in the light is something special.
(Joel)>> When you think of a boat load of chrome a car from the '70s is probably not the first thing that comes to mind, but this old Caprice sure has a whole lot of it. What we have planned for Fat Stack is to quite simply make a statement, and between that cool candy paint and all these shiny goodies I'm pretty sure we're not gonna have too much trouble doing exactly that.
(Tommy)>> The right mix of certain components can really elevate your build. That sheer size of that car back there is one of the reasons we went with the bigger than stock wheels. A big ole car needs larger than stock rollers. 20s and 22s may not be your style. So if you're a bit more old school we've got something coming up later in the show that'll tickle your fancy. Cars of the late '60s, '70s, and '80s had an option for you to top it all off and sometimes they got a bit crazy and exotic. It all depended on your own flavor and maybe even your occupation.
(Joel)>> To do chrome like this requires professional help. So we're gonna take a little field trip and you can sit back and see if you like your reflection. Advanced Plating in Portland, Tennessee, is world renowned for their quality and expertise when it comes to crafting shiny chrome. They plate just about anything you can imagine, and their show stopping work has helped skyrocket the status of many award winning builds. Their taste and expert level artistry are perfectly in sync with the prestige we envision for our '71 Caprice. After we got to peep some of their handywork we got revved up thinking about what Fat Stack is gonna look like with fresh, new brightwork.
(Tommy)>> Good chrome can be the ultimate accent for paint, and it can make certain features of your project stand tall. Doesn't matter if it's a fixed up grille, a shiny set of refurbished rims, or even a custom chrome steering wheel.
(Joel)>> Like most car lovers Steve Tracey has a fondness for all things automotive, and holds a deep bond etched in his heart when it comes to cars and shiny chrome. Over the years he has combined his love for classic cars with his never-ending drive for refining perfect plating processes to transform pieces of Detroit muscle into mesmerizing metallic works of art.
(Tommy)>> Since 1988 Steve has been the owner of Advanced Plating where he has mastered the alchemy of transforming tattered trinkets into perfectly polished chrome.
(Steve)>> I really thrive on the challenge of restoring these parts or developing processes for plating. I've fortunately been very active in the development of electro plating with chemistry and plating on aluminum over the years. Challenge of taking a piece of metal, restoring it back to way beyond what it ever looked like to begin with is really what is very rewarding to me. What also is really rewarding to me is the amount of people that we have that work here that have the same passion as I do. These people come in here driven to do the job and do the best job they can. They're driven to put out the best product, and we take a lot of pride in our work and we try to do the best possible job on every piece, and that's really rewarding to me also. I love seeing the employees here at Advanced Plating take pride in what they do. That's a big part of it to me. [ Music ] We're gonna continue to be cutting edge in developing new finishes, and Advanced Plating as a whole is set up for the long haul in the future. So not only our employees have a future but also customers who have been coming here for years still are coming here and still getting the same quality.
(Joel)>> Coming up, our bright work gets stripped and dipped.
(Tommy)>> Everyone wants your bumpers to look great, and these to call them that is an understatement. Now with the components that they started with were nowhere near this condition, and they had their work cut out. Our chrome pieces had seen better days, but they were at a pretty good starting point for us to send them off to get a second lease on life. Chrome isn't something you can easily do on your own. Getting our chrome out of a rattle can just didn't line up with the level of restoration we were doing on Fat Stack. So we asked Steve to show us how he took our pieces from worst to first.
(Steve)>> How about we take a journey on the pathway that your parts followed?
(Tommy)>> I'm kinda excited to see. Hope it wasn't a long journey.
(Steve)>> It was a pretty long journey. You had a lot of parts there, a lot of aluminum, originally anodized, but we went with chrome, and I think you're gonna be real happy with the results. But getting there, labor of love for everybody involved! So we're here in the strip room and we're gonna start by stripping the anodizing off of a grille. This is a pretty interesting chemical reaction cause we strip anodizing off of aluminum in caustic, and caustic destroys aluminum. You have to stand with this part while it actually is removing the anodizing, and if you sit in here for too long it will dissolve the part away. And you can see the caustic reaction and the oxidation happening. Now he's gonna come over to a clean water rinse. So we're gonna do a dip in the nitric acid, and this is commonly referred to as a bright dip. So we're brightening up the aluminum so that the polishers have a clean canvas to do their metal prep on. There is an art to stripping, and I'm not talking about dancing! It's really important that all the old paint, rust, grease, and oil, and anodizing is removed off of all the parts so that when we polish the part it's done properly. We don't want our polishers trying to sand off or grind off debris. Getting this stripped properly is really important. Tommy, Joel we're in the buffing room in here. Right now Matt is basically roughing it in with an 800 grit d-a paper. So he's gonna get it prepped and then buffed, and then we'll be ready to go to racking. We use copper plating the way a body man uses filler and primer, and that's our restoration tool. Bondo on, bondo off, copper on, copper off. Alright guys, so we are out here in racking, and the racks are made out of solid copper for conductivity, and these wires that he's put on the end are called cheaters, and they're gonna defer the current from the end of the part, and this keeps it from over plating on the ends. Kinda like the edges when you're doing paint on a door or a trunk, your edges are gonna get more paint on them, right? So for us in electro-plating we do try to defer it to keep the buildup down. You're still gonna have to watch the edges for fit. So we're with Will here on the plating line. We're getting ready to run some aluminum trim. We're entering the nitric acid, and this basically is etching the aluminum to help with adhesion. This is all timed. He's standing there counting as he goes. When he goes into this zinc tank this is not electrolytic. This is electroless zinc, and this is putting a deposit of zinc onto the part. Now this part thinks it's a piece of zinc diecast. Copper plating will not adhere to raw aluminum. It has to have this zinc put on it, and now you can actually see the zinc coating that's on that part, that color change. Now we're gonna do a cyanide copper strike. Really important for adhesion. The trick is to go into this copper tank with current on the part. So current on the part, and then we drop down into the solution, and right now you're seeing the copper ions going from the anode to the cathode. But this bath, regulated current, regulated temperature, regulated amperage. Now you can see the copper strike. That's not a thick deposit. That is for adhesion. So from there he's gonna move to a clean water rinse. So he's moved through a cyanide destruct and another rinse, and then we're gonna go to nickel next. Nickel ions are deposited onto the aluminum part, and it's getting bright, and the chemistry allows it to become level. Will's coming around with our nickel platted pillar post, and he's ready to go to chrome. He's gonna do what we call a sour dip here. This is gonna cut the brightener film off the nickel platted part, and then from there he's gonna go into our hexavalent chrome bath. So the average dwell time in here, you're gonna get maximum deposit in 30 seconds. This bath will not build thickness. It's a transparent. You're looking through the chrome at the nickel. So you're really looking at the beauty of what the metal polisher has done, what the nickel has done to provide us depth and brightness, and now you have the chrome as a nice silvery blue deposit. Gonna give you transparency and corrosion protection at the same time. Then our final step here we use a d-i water rinse for a spot free rinse.
(Tommy)>> Our lower quarter trim was beat all up on Fat Stack. You can check out the back side of this panel where there's some tooling marks from them having to do some metal work but check this stuff out right now. That is nice! Can't wait to see this stuff against that green paint. Let's just try one on. [ Music ] Up next, we take a look back at a blue wildcat that isn't from Kentucky.
(Joel)>> You know guys there's no denying that our '71 Caprice, Fat Stack, has plenty of character. Its elongated curves are complimented by a series of factory accessories that really complete the ensemble of a cool, classy ride, including fender skirts, a vinyl top, plush interior, and of course lots of chrome. GM has been known for building some stylistic big bodies in their day, but there was one in particular in the '60s that shined in both good looks and performance. [ Music ] In 1967, if you wanted a big car with loads of power you only had a couple of choices. A Catalina two plus two or Buick's luxury powerhouse, the Wildcat.
(Tommy)>> Tipping the scales at close to 5,000 pounds and stretching over 18 feet, once this car got rolling it was like a runaway freight train.
(Joel)>> The heart of the beast was the brand new 430 cubic inch V-8. [ engine revving ]
(Joel)>> Buick spent $50 million bucks designing a replacement for the legendary 401 nail head, and they opened the heads with a slanted saucer dome chamber and expanded the exhaust ports to help it breathe better.
(Tommy)>> It kept the same four inch bore but a new nodular iron crank upped the stroke to three point nine, giving it an extra 29 cubic inches of displacement. This also jacked up the torque to 475 at 3,200 r-p-ms. You need that low end muscle to get this tank moving.
(Joel)>> All in all in produced $35 more horses for a total output of 360. The engine was so potent it was known to break the motor mounts. Buick issued a recall at the time to equip them with a safety cable.
(Tommy)>> The '67 not only got a new engine but it was also completely reskinned. A sweeping body arc with bulging fenders replaced the rigid straight lines of the previous model. A blacked out crosshair style grille set it apart from the LeSabre, while a claw-like front end made it look like it was ready to pounce.
(Joel)>> The body was dressed up with simulated fender vents, while the rear got new ribbon style taillights. Chrome badges graced the quarter panel and deck lid, and a snarling wildcat spiced up the wheels, which had fender skirts for the first time.
(Tommy)>> Bench seats with luxury styling were standard, but you could order the Wildcat custom that got you bucket seats, a floor shifter, and a sportier interior.
(Joel)>> Wildcats occupied a spot between the upscale Electra and lower priced LeSabre. It shared the same 126 wheelbase as the Electra, and came in everything from a four door sedan, to a sport coupe, and even a convertible.
(Tommy)>> The Wildcat has been around since '62. Some people consider it Buick's first muscle car, though its size gave it less than a cat-like response when taking off and cornering, but cruising on the interstate was like gliding on air.
(Joel)>> Ads called it... ( )>> The tuned car for young people of all ages.
(Joel)>> It was priced to the tune of $3,700 bucks, which with that much power and luxury was a bargain. Over 70,000 were sold, up just a bit from '66, and only about 2,200 were ragtops.
(Tommy)>> Today the Wildcat is sadly overlooked in the muscle car history books. While it was certainly no stoplight warrior, it more than made up for it with its brute force and aggressive styled looks. Driving one, it's the cat's pajamas!
(Joel)>> Coming up, we cover up the bald spot on our old Caprice.
(Joel)>> Well guys the moment is upon us. We've been frothing at the mouth to get a new vinyl top installed on our '71 Caprice, Project Fat Stack, and today's the day we make it happen. The story of this age old accessory can be dated back as early as the 1920s. Their initial purpose was to give fixed roof vehicles a comparable flare and appeal to their convertible counterparts. As time went on they would eventually become a fairly common option on a lot of muscle cars from the 1960s. From there they would evolve into many different styles and materials, including canvas, snake, alligator hides, and those classy mod tops that Chrysler introduced in '69. Even your old Aunt Edna would admit those things were tacky at best. Back in the day it wasn't uncommon for vehicle manufacturers to glue the top straight onto bare steel. The problem with that is at some point you get a pinhole in the liner and that draws in moisture and corrosion. Arguably one of the biggest reasons a lot of guys tend to steer away from vinyl tops is because of the rust issues involved, and having to cut off and weld in a new roof skin on your project isn't exactly the easiest of tasks. When we first got a hold of our old big body its factory top was a little worse for wear. It was cracked, ripped, and almost completely dried out from close to five decades of baking in the sun. Luckily the sheet metal underneath was solid. So we sealed it off with some epoxy primer, black base coat, and a few coats of clear to ensure our new vinyl top would have protection for years to come.
(Tommy)>> To install a vinyl top you're gonna need a few tools. Nothing crazy or elaborate but they are necessary. Now with the top that we're installing it's basically brand new. If you were using some old authentic material you may want to use a heat gun. A few waves of this will help to soften that vinyl up, and it can be your friend. Now the first thing we need to do with installing our top is make a couple of marks and get everything lined up.
(Joel)>> First thing you want to do is find the centerline of your roof measuring from A-pillar to A-pillar. From there you can start spraying your glue from the center out.
(Tommy)>> Some people right now are thinking we just screwed up.
(Joel)>> We'll let them think that. [ Music ] [ spray gun hissing ]
(Tommy)>> Now line your middle up. [ Music ] Stick it and almost hold it down here. [ spray gun hissing ]
(Tommy)>> That cross pattern will get rid of my tire stripes.
(Joel)>> If it's any consolation it is oddly satisfying to watch. [ Music ] [ liquid sloshing ] [ spray gun hissing ]
(Tommy)>> Feel the burn!
(Joel)>> Calisthenics baby! [ spray gun hissing ]
(Tommy)>> It's not a tremendous amount of pressure. You don't want to pull them crazy tight. [ spray gun hissing ] [ Music ] [ paper crackling ]
(Tommy)>> It's all stuck!
(Joel)>> No going back now. That looks pretty good though. Nice and tight! [ Music ]
(Tommy)>> Well we got our top stretched out and glued on, and it looks really nice. Now we're at the tedious point, and that is trimming off all this excess. If you don't pay attention now all that hard work is out the window. On the front and back window you have these little T-studs that hold molding clips that hold the molding of the windshield into place. Now you want to make sure when you lay this vinyl around there that you trim out around them cause if you wait until the windshield's in it's a bear. Don't ask me how I know. [ Music ]
[ Music ] Now on all four corners of this roof there is what looks like a T-stud but in all reality it is a panel nail. What it's designed to do is compress this vinyl top here in this seam, and we left them in here so that we wouldn't lose them and we could reuse them. I've got to get a pair of pliers and pull this thing out, and then that hammer that I mentioned earlier, we gonna be driving some nails. [ Music ] [ hammer tapping ] [ Music ]
(Tommy)>> You know Joel, I think that was easier than putting windows in some times.
(Joel)>> It's definitely easier than a head liner.
(Tommy)>> At least this one's on top. Not have to work upside down.
(Joel)>> The vinyl top's already changed the entire look of the car if you ask me.
(Tommy)>> Yeah, kinda to me with it just being a shiny painted top car it almost looked cheap. Now it kinda, I don't want to say elegant. That's not the word either.
(Joel)>> I'll take elegant.
(Tommy)>> I wouldn't say all that. I'll tell you what I'm gonna say for sure, I'm done for the day!
(Joel)>> Not far behind you. It'll be here in the morning waiting for us.
