More Fat Stack Episodes
Detroit Muscle Featured Projects
Detroit Muscle Builds
Want more content like this?
Join the PowerNation Email NewsletterEpisode Transcript
(Tommy)>> You're watching Powernation!
(Joel)>> Today on Detroit Muscle we're gonna grind, prime, and throw on some shine.
(Tommy)>> We'll strip down our Caprice to bare steel and spray on a few layers of candy curb appeal. [ Music ] [ engines revving ] [ Music ]
(Tommy)>> Hey guys, we're gonna have our noses to the grindstone today for sure, and we plan to use all the elbow grease that we saved up in preparation of applying some fancy, shiny candy paint on Fat Stack.
(Joel)>> That's right, and we did have a few bumps and bruises that we needed to address before we got it all sanded down to bare steel.
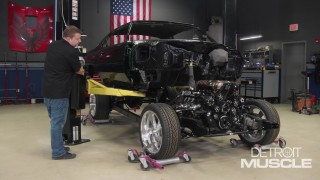
(Tommy)>> So our goal is to have candy green paint sprayed on this, it sitting back on the chassis, and possibly a new vinyl top installed. We spent days repairing, block sanding, and priming to get our '71 Chevy Caprice ready for some show stopping House of Kolor candy paint.
(Joel)>> Now you're going to become intimately familiar with your sanding block to the point of even dreaming about it at night when your head hits the pillow. It's going to feel like Ground Hog Day for a bit, but if you do everything the right way it'll be like an early Christmas.
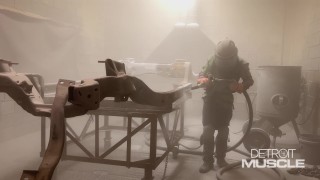
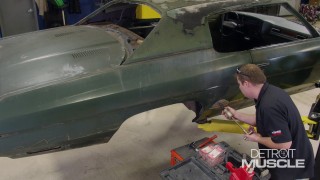
(Tommy)>> If you're looking for the perfect reflection on your ride there's one thing that you're gonna have to get up close and personal with, and that would be some sanding blocks. Because you can't paint a car straight, you have to sand it straight. So, the first thing I'm gonna tell you that you need to do and that is read your panel. Now our big body's got a couple of hard body lines here in the middle, and then here in the broad side of it's got a convex shape, and then on the top side it's concaved, and it runs the length of the quarter panel. Having an assortment of sanding blocks is gonna make your life a whole lot easier. Now I've got a couple of long and short ones, very long ones, one that I like to call an idiot stick because it's pretty hard and flat. If you can't block a car flat with one of these, you get the point. Then we've got this teardrop one. Now not all these are created equal and let me show you why. Some of these are rather flexible, and the other ones don't have any flex at all. Also, the shape of it. Now depending on what you're trying to sand is gonna dictate which one of these you need. For instance, often times the longer the panel the longer the sanding block you need. First thing we're gonna get started on is this piece right up here. Some tools fit better than others. Now the problem that you can run into with some though is if they're flexible they can leave an obscure shape to them. On this one what I would probably do is sand similar to this turning the block up on its edge. One thing you have to be conscious of is you're only cutting on that small portion of the sanding block. So, you could be cutting grooves into the panel depending on your pressure and the coarseness of your sanding paper. So, if you decide to use this technique get the panel about 80 to 90 percent there, and then come back with this one and blend everything in. That should leave that pretty darn nice. Now everyone wants that perfect reflection, and that can be kind of hard to achieve sometimes, but I like to tell everybody if you've got a sanding block in your hand you're basically shaping the side of the car. And that, if you have the right block, can make that reflection get truer a lot faster and easier. For instance, if you think of this little short guy here. We're trying to sand this long quarter panel. This is kinda like a baby bulldozer. If this thing's short and wavy it's gonna follow that contour that's on there from this end to this end. However, if you use this big long mamma jamma you're covering a whole lot larger surface, and whenever you go to sand that away it's gonna blend all of this in together a whole lot nicer. [ Music ] The first thing we need to do is hit the side with some guide coat to help identify any pin holes or surface imperfections. Don't be shy with it. Lay it on thick and make sure to cover the entire area you're gonna be working on. I'm gonna start with my idiot stick and slap on some 220-grit sandpaper. You want to go in controlled motions here following the lay of the panel. If you go against the grain you could dig into the primer and create ripples in the surface. Now I mentioned to you guys earlier that the edge of this thing would cut some grooves into the panel. After blowing it off you can see each individual stroke where I started and stopped. That's what I was talking about you'd have to come back and blend in. [ Music ] I have this center section sanded a little better than halfway, and now I'm gonna switch over to this much longer block. The reason I'm doing that is one, you know you always want that body line to be nice and crisp. This thing will help to ensure that crispness is there. This panel's blocking out really nice, and I hope a few of these tips that I've given you will help you with your project. It's funny with paint and bodywork. Good body work goes unnoticed. Bad body work is highly noticed. If you guys run off for a little bit I'm gonna get after it.
(Joel)>> Since Tommy's got dibs on the prep booth I'm gonna go ahead and get some epoxy primer sprayed on the hood, fenders, and header panel of our Fat Stack project using the pop-up booth we got from the guys over at Mobile Environmental Solutions. This portable auto spray booth is rugged and versatile, giving you everything you need for a fully functional pop-up paint room. It only takes about 10 minutes to set up or tear down and runs off a couple of 110-volt blowers. It's 100 percent vinyl, made in the USA, and checks off all the boxes for capture efficiency regulations, air compliance, and fabric flammability standards. For a fast, flexible, and reliable setup our go-to is Mobile Environmental Solutions. Coming up, we're gonna get our mask on and give you a little candy 101.
(Tommy)>> Well guys, after a few hundred hours of rubbing and massaging on Fat Stack we finally have it in the booth ready to start spraying on some of that candy color. Now the journey to get to this point has been rather a lengthy one.
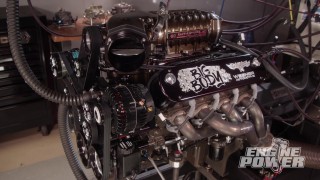
(Joel)>> Now we want ole Fat Stack to look good backwards, forwards, inside and out. So that means taking a little bit of extra time to clean up, prep, and paint all these hard to reach spots, including right here at the firewall. [ Music ] The firewall isn't going to get the candy treatment. So, we just sealed it off with a black epoxy primer and three coats of classic low gloss black. [ Music ] Once we put Fat Stack back together that color will help pop out that bronze supercharged LS when you take a peek under that hood. [ spray gun hissing ]
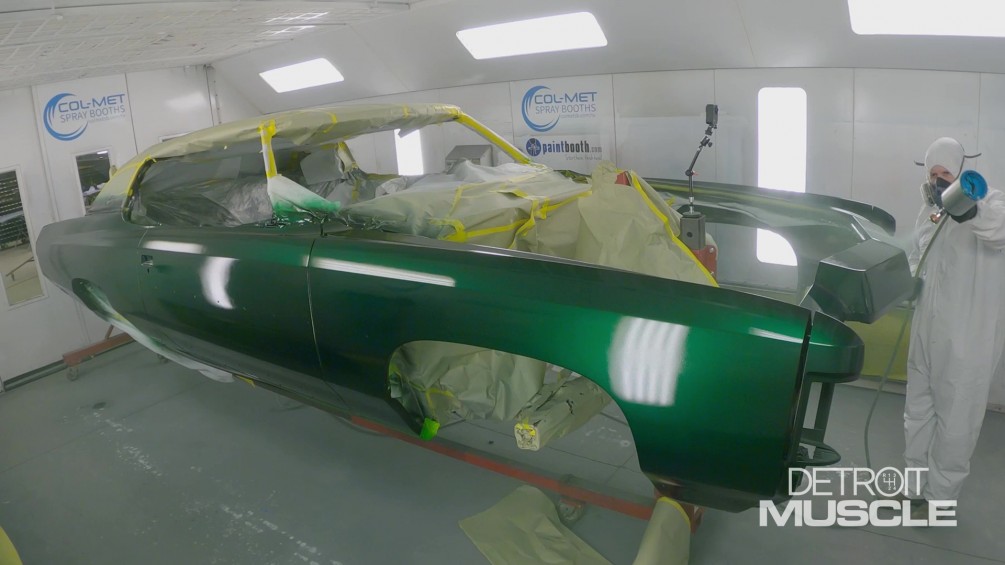
(Tommy)>> Now we've been telling you guys that we're gonna be painting our old car, but you may be questioning things because we've got the outside taped up. It's for a good reason. We're gonna be painting the door jambs first and separately, and it's all because of that cool, trick color we're spraying.
(Joel)>> Now when it comes to these complicated candies and pearls you really want to pay attention to every brush of your paint gun. For example, if you wanted to paint your jambs and the quarter panel at the same time more than likely you're gonna be spraying three coats this way and three coats this way, which is gonna cause a six coat overlap right here in the middle, and that can be a problem. A consistent overlap pattern is crucial when you're spraying a translucent candy like we are. Once you start laying down color the amount of layers can affect the shade. If you're not conscious of how you're spraying you'll get visible dark spots in your paint job.
(Tommy)>> Now the first product that we're gonna be applying is a coat of sealer. Now hopefully it lays down pretty slick and all we have to do is one coat, but we may have to do two. We'll just have to see. Using sealer is an important step to ensure a quality and long lasting paint job. Sealer acts as an adhesion promotor to help bond the coating to the vehicle's surface. It also helps to protect against solvent reactions and can increase the overall life of your finish. The roof and the jambs are the first parts we're gonna hit. The roof is only gonna get our black base coat and a couple of coats of clear, but the jambs will be first in line for the candy paint.
(Joel)>> When it comes to custom automotive paint there's one name that always seems to stand out amongst the rest, and that would be House of Kolor. Our buddy Reed came down to lend his expertise in applying some of their candy onto Fat Stack. Now we opted for what was the KVC-09 Organic Green, and it's not exactly a candy but it's a basecoat candy. Kinda explain the difference between the two.
(Reed)>> A standard candy generally would have a metallic base, something like this, and you would put a tinted candy over that, and that would be what a candy was. The problem with that is you have to be very skilled to get that base, that metallic, to lay out really good, and you have to be really skilled to make sure your overlap and pattern is right on a true candy. So, to help eliminate that John created what we know as a candy basecoat. These actually came out in 1984 but we've just been perfecting them ever since.
(Joel)>> What's the time frame that you would have to establish from sealer to your last coat of clear, to give yourself a window, and can you walk away from it, can you come back to it?
(Reed)>> For the original candies you're kinda stuck in once you start you can't stop because those are a polyurethane, which are activated. Once you step away from that and it activates, hardens up, you have to re-sand that before you can continue. With these candy basecoats, or the base coat style candy, it's a lot more user friendly. You can generally go in, get your sealer on. That takes 15 to 30 minutes to flash off. Once that happens you can go in with your basecoat, and that's usually a 15-minute flash as well. Once you get your color that you want achieved, 15 minutes to a half houryou can walk in with your clearcoat. So, depending on how big the car is and if you're doing graphics or not it can range from bare minimum, you're probably three to four hours. Top side it can be weeks.
(Joel)>> Looks like Tommy's getting ready to wheel out the masking station.
(Reed)>> Let's do it! [ Music ]
(Joel)>> When it comes down to it masking is truly an artform in itself. Taking your time to do it right helps ensure that you'll end up with a cleaner and more professional looking paint job. You want to be sure to apply tape around the edges of your paper, letting half of it stick out before you fit it to the car. After you lay it down you'll still need to apply more tape in certain spots just to make sure everything you don't want painted gets covered. If you have a lot of difficult contours you should probably use fine line tape first. Once you finish laying down all that paper it's finally time to let that paint fly. So Reed, in all your years and experience what are some of the most common myths and misconceptions about candy paint that you could clear up as an expert in your field.
(Reed)>> It's not impossible to touch up. Everybody thinks it is. Everything is possible, it's just your skill level and the patience you put into it. Just practice, practice, practice. If your overlap is right, and your distance is right, and your speed is right you can basically do anything.
(Tommy)>> Up next, it's all about that base. No trouble!
(Joel)>> Well the moment is finally upon us. After almost 200 hours of block sanding, priming, and masking on Fat Stack it's ready to get its candy green paint. We got our buddy Reed in there, who's tacking off the car. Tommy's in the mixing room mixing up some sealer. And after that he's gonna lay down a black basecoat, and then finally that green color. I'll tell you, it's been a long time coming. [ Music ]
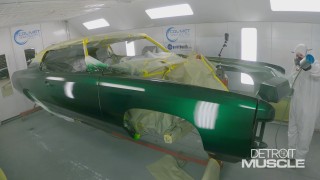
(Tommy)>> We opted to go with a black basecoat for a couple of reasons. One, if you're looking to try your hand at candy spraying over a black base is far more forgiving. Second, what color you use as a base will determine the color that you end up with. Kinda of how light or how dark it is. With us using this black it gave us that perfect green that we had our eye on. [ Music ]
(Joel)>> Now while Tommy's finishing up in the paint booth I went ahead and applied the same masking technique that we used on the body for our front fenders and our header panel. Now a little trick for you guys is if you leave about an eighth of an inch of overhang on your tape that's gonna leave a nice soft edge for your basecoat to lay into. But you want to be careful because if you have too much overhang you can have an umbrella effect, and the paint can pool up and run back down onto the panel. But if you have your tape line too far this way that's gonna cause a hard line that you're gonna have to wet sand out later. [ Music ] [ spray gun hissing ] [ Music ]
(Joel)>> So we've got Tommy in there laying down that first coat of that awesome KVC-09 Organic Green that we got from the boys at House of Kolor. What's the importance of the foundation underneath not just this paint job but any paint job in general?
(Reed)>> Every paint job has to have a foundation, and we like to look at it as like a house. You want something sturdy underneath that that's gonna retain and hold whatever you're building color on top of.
(Joel)>> We used a jet black as our base color. Now how much does it affect it to use maybe a silver, or a yellow, or a red as your base color?
(Reed)>> It effects it tremendously. As you can see how dark it is on the black right now, but if you look on the paper see how light green that is over the white? So, imagine that transition if you had a yellow underneath, or a red underneath. So, you can really create and build your own hues and colors how you want. On top of that every coat of the KVC you add is gonna brighten it. So, you're getting a different hue that way too. So, you really have a lot of control on building the color you want.
(Joel)>> You've been doing this a long time. What kind of technique do you feel like has given you the best success rate for these kind of paint jobs?
(Reed)>> The ongoing saying with House of Kolor is, like a robot. A robot is nice and straight line thinking. So, you want to make sure you keep a nice, even pattern. You don't want to follow the body line. Just keep it parallel every time with about a 75 percent overlap, and that helps keep it nice and even as you drop down. [ Music ]
(Tommy)>> Building a vehicle is supposed to be fun. Yeah, it's a lot of work, time, and money, but it's an opportunity for you to take something that is in your mind and bring it to life. [ Music ] It's hard to explain to others what your vision is, and sometimes they don't know it until they see, but one thing's for certain. It sure feels good to be able to work with your hands and turn one of those dreams into a reality. We've still got a lot more work to go but completing this is a huge step in the right direction. Once you start a fancy paint job like this you need to pay attention to your dry times. At some point you can stop, while others mean you're working late into the night all alone just grinding it out. Just keep your eye on the prize because most good things don't come easy. All that that hard work and sacrifice will pay off. [ Music ]
(Joel)>> Coming up, late to bed and early to rise makes a paint job look real nice.
[ rooster crowing ] [ Music ]
(Tommy)>> Gonna be a straight kinda morning.
(Joel)>> Nothing like a good night's rest. How'd it go last night?
(Tommy)>> Not too bad. It was kinda plentiful and plenty long.
(Joel)>> How'd the car turn out though?
(Tommy)>> Pretty nice I have to say.
(Joel)>> Let's check it out.
(Tommy)>> Go right ahead. [ Joel whistling ]
(Joel)>> You absolutely knocked it out of the park Tom.
(Tommy)>> It's not too bad at all.
(Joel)>> How many coats of clear did you end up doing?
(Tommy)>> If I was to tell you I'd be in violation of the tech sheet man.
(Joel)>> She looks good. Can we roll it out and take a better look at it?
(Tommy)>> Yeah, it's dry enough.
(Joel)>> Let's do it! [ Music ] You can go ahead and start pulling whenever you're ready.
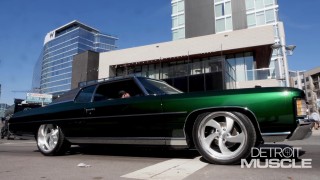
(Tommy)>> I'm trying, I'm trying! You even pushing back there? I guess you probably are, just not much. Well guys on this episode that big body sitting behind me has made some dramatic improvements in curb appeal.
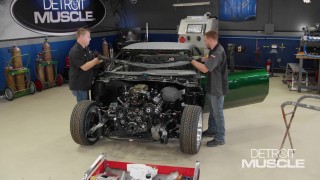
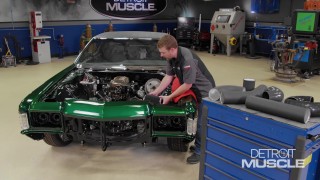
(Joel)>> Tommy and I have sunk hours and hours into the prep work on this old boat, and it's finally nice to just kick back and enjoy the fruits of our labor. I've got to say, pretty sweet. After sanding our old Caprice to bare metal we laid down some epoxy primer, followed by several rounds of polyester. We bounced back and forth between the body and the rest of the panels, but we had to paint the front fenders and header panel at the same time as the doors and body to ensure a consistent color all the way down our big body bowtie. Now it wasn't too long ago when our old Caprice had that worn out and weathered look going for it and was in dire need of some t-l-c. We found old Fat Stack sitting in a driveway just begging to be rescued. We could tell she had potential, but the very first step was just cleaning off all those years of mud and crud. Now with us swinging by the car wash not only gets all that dust and debris off the windshield, but this thing was sitting up under an old hackberry tree, and those things are notorious for dripping off a bunch of black sap. Removing that now will keep us from getting all sticky later. When it comes to upgrades some of the first things that we kicked off was the suspension and power plant, and with Fat Stack being full figured we knew we were gonna need some serious equipment. When we test drove Fat Stack she handled like a literal land yacht. So, we upgraded her suspension with a trick set of coilovers, tubular upper and lower control arms, four wheel disc brakes, and a nine inch rear axle to boot. All of that to handle our crown jewel, a home built 800 plus horsepower supercharged LS. [ engine revving ]
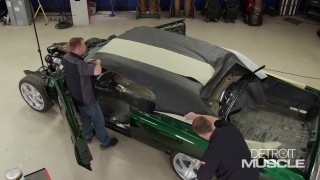
(Tommy)>> Now if I don't see another sanding block anytime soon it's not gonna hurt my feelings. We put in more time than I want to talk about, but it shows in the shine we're getting from that candy paint. All that work means no vinyl top today but there's always tomorrow. With Fat Stack on the rotisserie all shined up that's a huge accomplishment behind us. Now comes the fun part. We get to screw and glue this thing back together.
(Joel)>> Big picture wise we still have a whole lot of work to do, but if that paint job is any indication of how the rest of this build's gonna go I'd say we're heading in the right direction. [ Music ]
Show Full Transcript
(Joel)>> Today on Detroit Muscle we're gonna grind, prime, and throw on some shine.
(Tommy)>> We'll strip down our Caprice to bare steel and spray on a few layers of candy curb appeal. [ Music ] [ engines revving ] [ Music ]
(Tommy)>> Hey guys, we're gonna have our noses to the grindstone today for sure, and we plan to use all the elbow grease that we saved up in preparation of applying some fancy, shiny candy paint on Fat Stack.
(Joel)>> That's right, and we did have a few bumps and bruises that we needed to address before we got it all sanded down to bare steel.
(Tommy)>> So our goal is to have candy green paint sprayed on this, it sitting back on the chassis, and possibly a new vinyl top installed. We spent days repairing, block sanding, and priming to get our '71 Chevy Caprice ready for some show stopping House of Kolor candy paint.
(Joel)>> Now you're going to become intimately familiar with your sanding block to the point of even dreaming about it at night when your head hits the pillow. It's going to feel like Ground Hog Day for a bit, but if you do everything the right way it'll be like an early Christmas.
(Tommy)>> If you're looking for the perfect reflection on your ride there's one thing that you're gonna have to get up close and personal with, and that would be some sanding blocks. Because you can't paint a car straight, you have to sand it straight. So, the first thing I'm gonna tell you that you need to do and that is read your panel. Now our big body's got a couple of hard body lines here in the middle, and then here in the broad side of it's got a convex shape, and then on the top side it's concaved, and it runs the length of the quarter panel. Having an assortment of sanding blocks is gonna make your life a whole lot easier. Now I've got a couple of long and short ones, very long ones, one that I like to call an idiot stick because it's pretty hard and flat. If you can't block a car flat with one of these, you get the point. Then we've got this teardrop one. Now not all these are created equal and let me show you why. Some of these are rather flexible, and the other ones don't have any flex at all. Also, the shape of it. Now depending on what you're trying to sand is gonna dictate which one of these you need. For instance, often times the longer the panel the longer the sanding block you need. First thing we're gonna get started on is this piece right up here. Some tools fit better than others. Now the problem that you can run into with some though is if they're flexible they can leave an obscure shape to them. On this one what I would probably do is sand similar to this turning the block up on its edge. One thing you have to be conscious of is you're only cutting on that small portion of the sanding block. So, you could be cutting grooves into the panel depending on your pressure and the coarseness of your sanding paper. So, if you decide to use this technique get the panel about 80 to 90 percent there, and then come back with this one and blend everything in. That should leave that pretty darn nice. Now everyone wants that perfect reflection, and that can be kind of hard to achieve sometimes, but I like to tell everybody if you've got a sanding block in your hand you're basically shaping the side of the car. And that, if you have the right block, can make that reflection get truer a lot faster and easier. For instance, if you think of this little short guy here. We're trying to sand this long quarter panel. This is kinda like a baby bulldozer. If this thing's short and wavy it's gonna follow that contour that's on there from this end to this end. However, if you use this big long mamma jamma you're covering a whole lot larger surface, and whenever you go to sand that away it's gonna blend all of this in together a whole lot nicer. [ Music ] The first thing we need to do is hit the side with some guide coat to help identify any pin holes or surface imperfections. Don't be shy with it. Lay it on thick and make sure to cover the entire area you're gonna be working on. I'm gonna start with my idiot stick and slap on some 220-grit sandpaper. You want to go in controlled motions here following the lay of the panel. If you go against the grain you could dig into the primer and create ripples in the surface. Now I mentioned to you guys earlier that the edge of this thing would cut some grooves into the panel. After blowing it off you can see each individual stroke where I started and stopped. That's what I was talking about you'd have to come back and blend in. [ Music ] I have this center section sanded a little better than halfway, and now I'm gonna switch over to this much longer block. The reason I'm doing that is one, you know you always want that body line to be nice and crisp. This thing will help to ensure that crispness is there. This panel's blocking out really nice, and I hope a few of these tips that I've given you will help you with your project. It's funny with paint and bodywork. Good body work goes unnoticed. Bad body work is highly noticed. If you guys run off for a little bit I'm gonna get after it.
(Joel)>> Since Tommy's got dibs on the prep booth I'm gonna go ahead and get some epoxy primer sprayed on the hood, fenders, and header panel of our Fat Stack project using the pop-up booth we got from the guys over at Mobile Environmental Solutions. This portable auto spray booth is rugged and versatile, giving you everything you need for a fully functional pop-up paint room. It only takes about 10 minutes to set up or tear down and runs off a couple of 110-volt blowers. It's 100 percent vinyl, made in the USA, and checks off all the boxes for capture efficiency regulations, air compliance, and fabric flammability standards. For a fast, flexible, and reliable setup our go-to is Mobile Environmental Solutions. Coming up, we're gonna get our mask on and give you a little candy 101.
(Tommy)>> Well guys, after a few hundred hours of rubbing and massaging on Fat Stack we finally have it in the booth ready to start spraying on some of that candy color. Now the journey to get to this point has been rather a lengthy one.
(Joel)>> Now we want ole Fat Stack to look good backwards, forwards, inside and out. So that means taking a little bit of extra time to clean up, prep, and paint all these hard to reach spots, including right here at the firewall. [ Music ] The firewall isn't going to get the candy treatment. So, we just sealed it off with a black epoxy primer and three coats of classic low gloss black. [ Music ] Once we put Fat Stack back together that color will help pop out that bronze supercharged LS when you take a peek under that hood. [ spray gun hissing ]
(Tommy)>> Now we've been telling you guys that we're gonna be painting our old car, but you may be questioning things because we've got the outside taped up. It's for a good reason. We're gonna be painting the door jambs first and separately, and it's all because of that cool, trick color we're spraying.
(Joel)>> Now when it comes to these complicated candies and pearls you really want to pay attention to every brush of your paint gun. For example, if you wanted to paint your jambs and the quarter panel at the same time more than likely you're gonna be spraying three coats this way and three coats this way, which is gonna cause a six coat overlap right here in the middle, and that can be a problem. A consistent overlap pattern is crucial when you're spraying a translucent candy like we are. Once you start laying down color the amount of layers can affect the shade. If you're not conscious of how you're spraying you'll get visible dark spots in your paint job.
(Tommy)>> Now the first product that we're gonna be applying is a coat of sealer. Now hopefully it lays down pretty slick and all we have to do is one coat, but we may have to do two. We'll just have to see. Using sealer is an important step to ensure a quality and long lasting paint job. Sealer acts as an adhesion promotor to help bond the coating to the vehicle's surface. It also helps to protect against solvent reactions and can increase the overall life of your finish. The roof and the jambs are the first parts we're gonna hit. The roof is only gonna get our black base coat and a couple of coats of clear, but the jambs will be first in line for the candy paint.
(Joel)>> When it comes to custom automotive paint there's one name that always seems to stand out amongst the rest, and that would be House of Kolor. Our buddy Reed came down to lend his expertise in applying some of their candy onto Fat Stack. Now we opted for what was the KVC-09 Organic Green, and it's not exactly a candy but it's a basecoat candy. Kinda explain the difference between the two.
(Reed)>> A standard candy generally would have a metallic base, something like this, and you would put a tinted candy over that, and that would be what a candy was. The problem with that is you have to be very skilled to get that base, that metallic, to lay out really good, and you have to be really skilled to make sure your overlap and pattern is right on a true candy. So, to help eliminate that John created what we know as a candy basecoat. These actually came out in 1984 but we've just been perfecting them ever since.
(Joel)>> What's the time frame that you would have to establish from sealer to your last coat of clear, to give yourself a window, and can you walk away from it, can you come back to it?
(Reed)>> For the original candies you're kinda stuck in once you start you can't stop because those are a polyurethane, which are activated. Once you step away from that and it activates, hardens up, you have to re-sand that before you can continue. With these candy basecoats, or the base coat style candy, it's a lot more user friendly. You can generally go in, get your sealer on. That takes 15 to 30 minutes to flash off. Once that happens you can go in with your basecoat, and that's usually a 15-minute flash as well. Once you get your color that you want achieved, 15 minutes to a half houryou can walk in with your clearcoat. So, depending on how big the car is and if you're doing graphics or not it can range from bare minimum, you're probably three to four hours. Top side it can be weeks.
(Joel)>> Looks like Tommy's getting ready to wheel out the masking station.
(Reed)>> Let's do it! [ Music ]
(Joel)>> When it comes down to it masking is truly an artform in itself. Taking your time to do it right helps ensure that you'll end up with a cleaner and more professional looking paint job. You want to be sure to apply tape around the edges of your paper, letting half of it stick out before you fit it to the car. After you lay it down you'll still need to apply more tape in certain spots just to make sure everything you don't want painted gets covered. If you have a lot of difficult contours you should probably use fine line tape first. Once you finish laying down all that paper it's finally time to let that paint fly. So Reed, in all your years and experience what are some of the most common myths and misconceptions about candy paint that you could clear up as an expert in your field.
(Reed)>> It's not impossible to touch up. Everybody thinks it is. Everything is possible, it's just your skill level and the patience you put into it. Just practice, practice, practice. If your overlap is right, and your distance is right, and your speed is right you can basically do anything.
(Tommy)>> Up next, it's all about that base. No trouble!
(Joel)>> Well the moment is finally upon us. After almost 200 hours of block sanding, priming, and masking on Fat Stack it's ready to get its candy green paint. We got our buddy Reed in there, who's tacking off the car. Tommy's in the mixing room mixing up some sealer. And after that he's gonna lay down a black basecoat, and then finally that green color. I'll tell you, it's been a long time coming. [ Music ]
(Tommy)>> We opted to go with a black basecoat for a couple of reasons. One, if you're looking to try your hand at candy spraying over a black base is far more forgiving. Second, what color you use as a base will determine the color that you end up with. Kinda of how light or how dark it is. With us using this black it gave us that perfect green that we had our eye on. [ Music ]
(Joel)>> Now while Tommy's finishing up in the paint booth I went ahead and applied the same masking technique that we used on the body for our front fenders and our header panel. Now a little trick for you guys is if you leave about an eighth of an inch of overhang on your tape that's gonna leave a nice soft edge for your basecoat to lay into. But you want to be careful because if you have too much overhang you can have an umbrella effect, and the paint can pool up and run back down onto the panel. But if you have your tape line too far this way that's gonna cause a hard line that you're gonna have to wet sand out later. [ Music ] [ spray gun hissing ] [ Music ]
(Joel)>> So we've got Tommy in there laying down that first coat of that awesome KVC-09 Organic Green that we got from the boys at House of Kolor. What's the importance of the foundation underneath not just this paint job but any paint job in general?
(Reed)>> Every paint job has to have a foundation, and we like to look at it as like a house. You want something sturdy underneath that that's gonna retain and hold whatever you're building color on top of.
(Joel)>> We used a jet black as our base color. Now how much does it affect it to use maybe a silver, or a yellow, or a red as your base color?
(Reed)>> It effects it tremendously. As you can see how dark it is on the black right now, but if you look on the paper see how light green that is over the white? So, imagine that transition if you had a yellow underneath, or a red underneath. So, you can really create and build your own hues and colors how you want. On top of that every coat of the KVC you add is gonna brighten it. So, you're getting a different hue that way too. So, you really have a lot of control on building the color you want.
(Joel)>> You've been doing this a long time. What kind of technique do you feel like has given you the best success rate for these kind of paint jobs?
(Reed)>> The ongoing saying with House of Kolor is, like a robot. A robot is nice and straight line thinking. So, you want to make sure you keep a nice, even pattern. You don't want to follow the body line. Just keep it parallel every time with about a 75 percent overlap, and that helps keep it nice and even as you drop down. [ Music ]
(Tommy)>> Building a vehicle is supposed to be fun. Yeah, it's a lot of work, time, and money, but it's an opportunity for you to take something that is in your mind and bring it to life. [ Music ] It's hard to explain to others what your vision is, and sometimes they don't know it until they see, but one thing's for certain. It sure feels good to be able to work with your hands and turn one of those dreams into a reality. We've still got a lot more work to go but completing this is a huge step in the right direction. Once you start a fancy paint job like this you need to pay attention to your dry times. At some point you can stop, while others mean you're working late into the night all alone just grinding it out. Just keep your eye on the prize because most good things don't come easy. All that that hard work and sacrifice will pay off. [ Music ]
(Joel)>> Coming up, late to bed and early to rise makes a paint job look real nice.
[ rooster crowing ] [ Music ]
(Tommy)>> Gonna be a straight kinda morning.
(Joel)>> Nothing like a good night's rest. How'd it go last night?
(Tommy)>> Not too bad. It was kinda plentiful and plenty long.
(Joel)>> How'd the car turn out though?
(Tommy)>> Pretty nice I have to say.
(Joel)>> Let's check it out.
(Tommy)>> Go right ahead. [ Joel whistling ]
(Joel)>> You absolutely knocked it out of the park Tom.
(Tommy)>> It's not too bad at all.
(Joel)>> How many coats of clear did you end up doing?
(Tommy)>> If I was to tell you I'd be in violation of the tech sheet man.
(Joel)>> She looks good. Can we roll it out and take a better look at it?
(Tommy)>> Yeah, it's dry enough.
(Joel)>> Let's do it! [ Music ] You can go ahead and start pulling whenever you're ready.
(Tommy)>> I'm trying, I'm trying! You even pushing back there? I guess you probably are, just not much. Well guys on this episode that big body sitting behind me has made some dramatic improvements in curb appeal.
(Joel)>> Tommy and I have sunk hours and hours into the prep work on this old boat, and it's finally nice to just kick back and enjoy the fruits of our labor. I've got to say, pretty sweet. After sanding our old Caprice to bare metal we laid down some epoxy primer, followed by several rounds of polyester. We bounced back and forth between the body and the rest of the panels, but we had to paint the front fenders and header panel at the same time as the doors and body to ensure a consistent color all the way down our big body bowtie. Now it wasn't too long ago when our old Caprice had that worn out and weathered look going for it and was in dire need of some t-l-c. We found old Fat Stack sitting in a driveway just begging to be rescued. We could tell she had potential, but the very first step was just cleaning off all those years of mud and crud. Now with us swinging by the car wash not only gets all that dust and debris off the windshield, but this thing was sitting up under an old hackberry tree, and those things are notorious for dripping off a bunch of black sap. Removing that now will keep us from getting all sticky later. When it comes to upgrades some of the first things that we kicked off was the suspension and power plant, and with Fat Stack being full figured we knew we were gonna need some serious equipment. When we test drove Fat Stack she handled like a literal land yacht. So, we upgraded her suspension with a trick set of coilovers, tubular upper and lower control arms, four wheel disc brakes, and a nine inch rear axle to boot. All of that to handle our crown jewel, a home built 800 plus horsepower supercharged LS. [ engine revving ]
(Tommy)>> Now if I don't see another sanding block anytime soon it's not gonna hurt my feelings. We put in more time than I want to talk about, but it shows in the shine we're getting from that candy paint. All that work means no vinyl top today but there's always tomorrow. With Fat Stack on the rotisserie all shined up that's a huge accomplishment behind us. Now comes the fun part. We get to screw and glue this thing back together.
(Joel)>> Big picture wise we still have a whole lot of work to do, but if that paint job is any indication of how the rest of this build's gonna go I'd say we're heading in the right direction. [ Music ]
