More Hard Charger Episodes
Detroit Muscle Featured Projects
Detroit Muscle Builds
Want more content like this?
Join the PowerNation Email NewsletterParts Used In This Episode
Doug's Headers
Doug's Header's '64-'72 GM A-Body LS1-LS6 Swap Ceramic Headers
Lincoln Electric
Lincoln Electric is the Official Welding Supplier to Detroit Muscle
Matco Tools
MATCO Tools are the Official Tool Supplier to Detroit Muscle
The Industrial Depot
Tools, Hardware, and Shop Supplies
Episode Transcript
(Narrator)>> Today on Detroit Muscle we put the finishing touches on Project Hard Charger's hood prepping it for paint. Plus we dive into the interior installing a new headliner. [ music ]
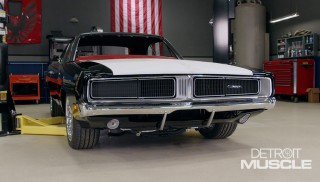
(Tommy)>> Hey y'all, welcome to Detroit Muscle. Now we've been working on our 700 horsepower '69 Charger for quite some time, and it's finally starting to take some shape. Now up here we're missing a piece it's pretty obvious to see, and we're gonna address that today.
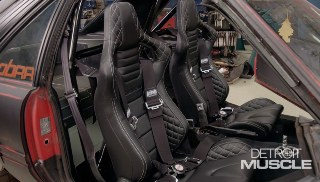
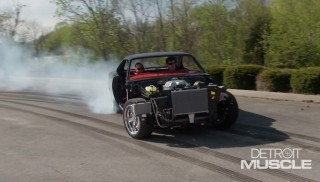
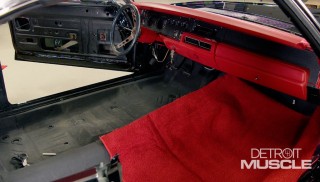
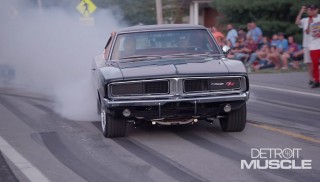
(Marc)>> But that's not the only thing we've got on our plate. I've got to get in this interior because we really haven't done much yet. We put the seats in because we did a big smoky burnout in the parking lot a while back, but I've got to get those out of the way because we have a bunch more stuff that needs to go in first.
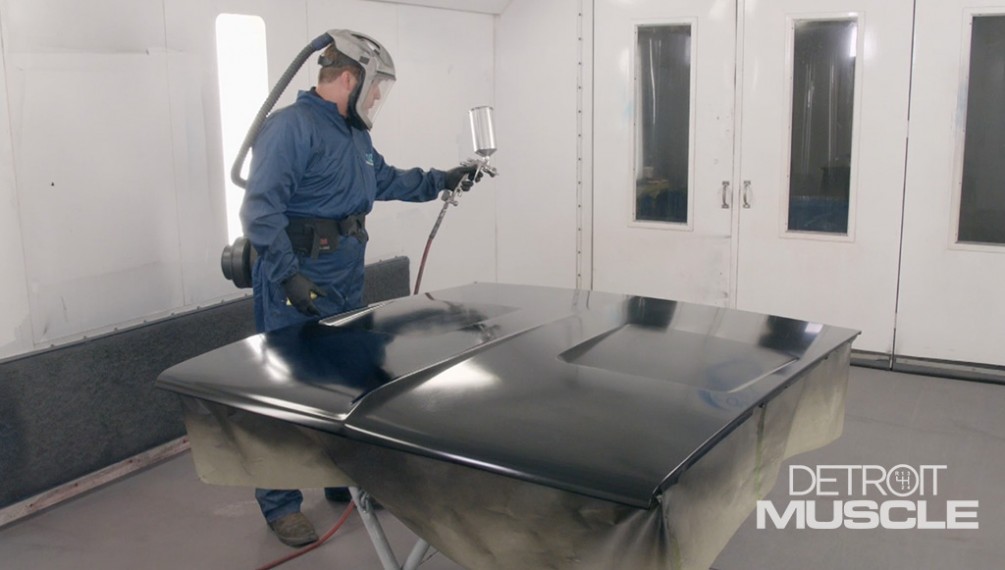
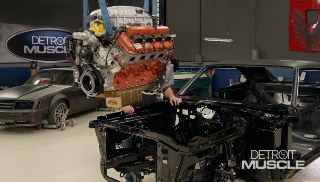
(Tommy)>> We wanted to hold off on painting our hood because with us installing that Hellcat power plant we weren't 100 percent everything was gonna be happy once we closed it. Turns out we're all good and we can move forward. Now I've blocked this thing a few times and it's got a couple of coats of some polyester primer. I run into a little bit of snag. Right here on this recess it had a little bit of a bobble in it. So I had to spot prime it. Now it's time for us to do what everybody enjoys, a little bit of sanding. Polyester primer's a very heavy bodied primer. Heck some people consider it a sprayable form of body filler. And I don't really enjoy that sanding. I've been doing it long enough. So I don't want to waste any time with it. So to get everything going I like to start with a piece of 80 or 120. We're gonna apply some guide coat. This isn't necessary but it helps as a visual aid. [ sand paper scratching ]
(Tommy)>> Now after a little bit of sanding all those imperfections that I was telling you guys about, well they showed their face. Right through here, here, and even here those dark places, that's where it's low. Now to fix all that you've just got to stay after it with this sanding block and it'll cure all your problems, and also with that big heavy bodied primer that we got if you spray it incorrectly, well you can spray on waves onto the panel. And me knowing that are waves are running kind of this direction when I spray that stuff on I went this way to kinda keep everything all nice and good. Now I've got to get back to work. So you guys sit back and enjoy yourselves. On a panel like this you don't want to apply an extreme amount of pressure because you don't want to distort the panel that you're trying to sand flat. Just keep sanding it in a criss cross pattern and don't stay in one spot too long. Oh yeah, that feels good. Here we're not trying to remove a bunch of material. We're just trying to smooth out the overspray from our previous spot prime. 80 grit paper allows you to shape up that panel relatively quickly, but the problem is that the scratches it leaves behind are a little bit to coarse. So what you need to do is take some 180 or 220 and follow it up, and if everything checks out when you and that panel you can prime it for the last time. After another round of this guide coat those deep scratches are obvious. I'm using the same technique with a 180 grit paper. [ sand paper scratching ] [ music ]
(Tommy)>> You can usually tell how long a man's been doing body work by how much he enjoys sanding. Most of them young whipper snappers, they'll tell you I love sanding. Body work is so awesome, it's like yep, you ain't been doing it long enough if you still enjoy it. [ sand paper scratching ]
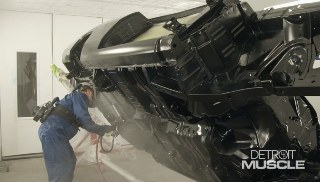
(Tommy)>> After finally getting it smoothed out it gets rubbed down with an air hose and a dry cloth. The primer we're gonna be spraying on now is a two-k urethane primer. Now what we were just scratching on out there is a polyester primer. You don't want to spray paint directly over top of polyester because it's too porous. So after a couple coats of this and it drying, well we can sand it down, splash on some of that color. [ music ] Ain't nothing fancy here. We just got to get the material on there and let it dry. [ music ]
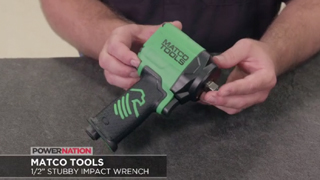
(Marc)>> You know they say dynamite comes in small packages? Well that's extra helpful when you're talking about an impact wrench that'll get the job done in tight spaces, like inside your engine bay. This is Matco's half inch drive stubby impact. Not only is it compact, but it offers best in class output at 700 foot pounds of breakaway torque. It offers one hand operation with forward and reverse push buttons, variable speed throttle, and a reinforced composite housing. Not only that it's light weight and comes with a two year warranty.
(Narrator)>> Don't go away. Tommy finishes up on our '69 Dodge Charger hood, getting it ready to go back on the car.
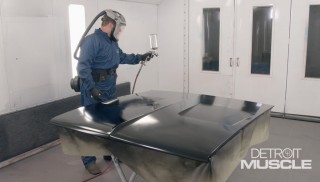
(Tommy)>> Hey guys, glad you made your way back. While you were gone I went ahead and final sanded our hood. I used some 500 grit paper and this thing turned out pretty slick. Now we need to go grab us some paint and we can get to spraying. We're gonna get right in to spraying on some paint. Now we sanded that hood with some fine enough paper so that we can do so. If you had sanded with some 320 or 400 you might want to spray on some sealer. [ music ] Well we're all loaded up and now we just need to set the gun up. So let me give you a couple of tips. First thing we're gonna do is dial in our air pressure. You want to do that with the trigger pulled. We're looking for 15 to 16 p-s-i. Let's go 15 and a half. So now we need to set our fan width, and all I is a piece of paper up here. You just pull a gun, set it up there, pull the trigger. You want your gun about six to nine inches from the surface. Set it like that, pull it, let the air flow, then paint. Now we've got a round one. We're not looking for that. We want the big tall fan. So let's just dial up this knob. See what that got us. Well this thing's starting to run up here as well. So that means our fluid needle's a little far our. So let's crank it in. [ music ] [ spray gun hissing ] [ music ] [ spray gun hissing ] [ music ]
(Tommy)>> Not too bad. See if our pressure, back where we need to be. [ spray gun hissing ]
(Tommy)>> It's not quite wide enough. [ spray gun hissing ]
(Tommy)>> I think too wide there. [ spray gun hissing ]
(Tommy)>> Well that ought to do it. [ music ] Now with our first coat of base we're not trying to cover the surface 100 percent. Just a majority of the panel. [ music ] Well we got our first coat of color on and it looks pretty good. We're gonna be applying two, maybe three coats total. We're just looking for this thing to be up to color. Now with black it's pretty much straight forward, and 50 to 60 percent overlap usually get the job done. The material we're using is pretty good stuff, but if you're using something a little more economy based be prepared to apply more coats to get the same amount of coverage. [ music ] I got the hood tacked off. Now we're ready to start spraying on some of that shiny stuff. Now with our clear coat we're gonna add about a pound of pressure here at the gun because it's thicker than the base. We're gonna spray on three coats, maybe four. So let's go ahead and get started. The application process is basically the same as your base coat here, but your flash time is a bit longer. Don't try to pile it all on in one heavy coat. A few medium to wet coats is always best. [ music ] [ spray gun hissing ]
(Tommy)>> I have to say this thing turned out killer.
(Marc)>> It's beautiful, and I'm glad you did all that sanding instead of me cause I didn't want to do all that, but with all the panels on the car I can definitely say we picked the right color.
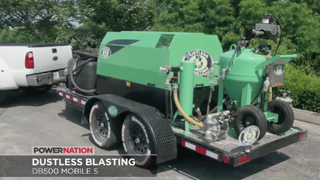
(Tommy)>> You are right. One of the most daunting task whenever you're restoring a car is stripping all your parts down to bare metal. Regular sand blasting creates friction that generates heat, and that heat can damage parts. This machine is a fully functional surface preparation system from Dustless Blasting. And like the name suggests, it's a dustless process that eliminates that friction and heat, while not creating a huge dust cloud in the process. It removes paint, rust, body filler, and even powder coated, and heck you can even buy one of these and start your own business, and make your own hours.
(Narrator)>> Marc gets a little help installing the headliner to our 700 horsepower Charger.
(Marc)>> Hey folks, welcome back. Well we said we were gonna be jumping on the interior of our '69 Dodge Charger and that's exactly what we're gonna do, and we're gonna start with this headliner. Now you folks may remember Kiwi from Kiwi Classics and Customs. He's helped us on the show several times before, and actually on a headliner just recently on our '72 Chevelle. Thanks for coming in.
(Kiwi)>> It's a pleasure, always fun here.
(Marc)>> What's the first thing we need to do? Wait, I remember. Bows right?
(Kiwi)>> Bows, yep, gotta get the bows in, gotta get these little tubes that they stitch into the headlining trimmed to the right length, and start gluing.
(Marc)>> Cool, I'll let you do that. I'm gonna go do some insulation.
(Kiwi)>> Alrighty. Gently slide the bows in. Get them centered is important, which is really just feeling that it's center. And when you do take the bows out of the vehicle when you start this project the important thing is to number them so you get them back in the right place. There's six of them in this car and all six are different. So very important to get them back in the right spots or it's never gonna look any good. [ music ] Number four, and as you get on to the back of the car these tend to have a larger curve in them, which makes them a little harder to thread. You just have to ease them in. Just be gentle with them and they'll go. [ music ] Okay getting the last bow in. Then we just have to trim the little loop section here so we can actually expose the bow. [ music ] Just expose about an inch or so and we'll be ready to start gluing.
(Marc)>> While Kiwi's getting that headliner ready I've been working on getting this boom mat installed here on the roof. Now I've got a couple of pieces trimmed to fit. Already got a couple of other pieces install. You just have to peel the backing off, get it stuck into place, roll it down flat. This boom mat helps dampen sound and reduce temperatures.
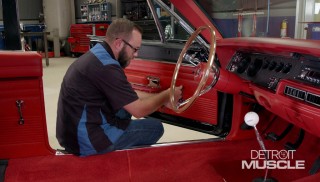
(Tommy)>> On our Charger there's some pieces that go around the headliner and around the window to trim it out, and from the factory they come black but what we're wanting to do is add kind of a custom touch and paint these pieces red to match all that interior. [ music ] We're using the leftover interior paint that we used on our dash a while back. It takes a few coats to cover that black but that red is really gonna make that interior pop. [ music ]
(Kiwi)>> The headliner's already laid out. Now we're just gonna spray the adhesive on the inside of the car. [ music ] Okay time to get some glue on the headliner itself. [ spray gun hissing ] [ music ]
(Kiwi)>> This is where it's great working on American cars and not some tiny little European thing that I don't fit in. [ music ] Okay we've got our center line marked here on the headliner itself, and little wee center line mark on the roof of the car, which we'd previously needed. Really important to get those in the right location. So once you get the middle right you can just workout to the edges front, back, and sides. [ music ] I've got some wrinkles up here. I'm not sure whether you can see but as we pull the tension in here they disappear. [ music ] Now don't be scared to put your back into it. You really do have to get some tension on them. Once the sun hits them outside they're gonna loosen up. [ music ]
(Narrator)>> Stay tuned, we continue to work on our Hellcat powered '69 Charger, finishing up our headliner.
(Tommy)>> Hey guys welcome back. I've got the interior pieces all painted up and they turned out pretty good. Looks like I got here just in time.
(Kiwi)>> Thanks man.
(Tommy)>> Looks like you're making some pretty good progress.
(Kiwi)>> Yeah it's coming together nice. It's a nice color code. [ music ] Well it's working now that I'm doing it. That's it girl. [ music ] Beautiful! [ music ] A little tip, when you put a headliner in the car put the screws for your mirrors and your sun visors, put them first. Sounds a little backwards. When you put them in you can feel them. Hopefully the viewers can see them. They're just poking down a little bit here. Let's you know where they are rather than trying to find a hole. So you just, and then you can just unscrew them. Then you know exactly where it goes. [ music ] Check it's working. Oh good grief I just saw Tommy. [ music ]
(Tommy)>> So this isn't your first one?
(Kiwi)>> Not my first one.
(Tommy)>> You did a good job buddy.
(Kiwi)>> Thanks man. Looks pretty.
(Tommy)>> It is pretty. You know I have to say though it has been a pleasure working with you cause, but I know how Marc feels now. Working with somebody with an accent from the south.
(Kiwi)>> It's fairly deep south, yeah. [ music ]
(Marc)>> You know we've been working on Sydewinder for quite a while now. That's our '81 Mustang Cobra. Now there's one thing about Mustangs that even rings true to today. If you go out and buy a brand new Mustang there's something that it doesn't have that you might find on most other cars, and that's gonna be hood struts. You've got to lift the hood up, you've got to get the prop rod, and put it there, but there is a solution to it. They make aftermarket hood strut kits. We're gonna install one of those on Sydewinder today. Well here's the hood strut kit for Sydewinder. This is '79 to '93 Mustangs. It's a direct fit. What's really cool about this is it's a no drill kit. In other words these brackets that need to be installed on the car do so using the factory hardware that's already there. I'm gonna show you how to do that here in just a couple of minutes, but what's really cool about that is you don't have to drill, cut, saw into your car in any way. That means two things. One, it's gonna be really easy to install, and then two, you can always take it back off if you ever want to put your car back to stock or you want to sell it, you just want to restore it in any way. Another cool thing about this is these gas struts. This is where the business happens. These things are really strong. It's a high pressure gas. So it'll support the weight of the hood but then also when you go to compress it it'll compress nice and easy. You latch your hood and go on about your business, no prop rod, and that's what I'm after. First things first I want to get the lower bracket installed on the driver's side. [ air ratchet buzzing ] [ music ] [ air ratchet buzzing ] [ music ] [ air ratchet buzzing ] [ music ] [ air ratchet buzzing ] [ music ] [ air ratchet buzzing ]
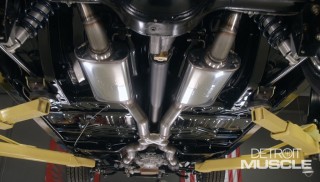
(Marc)>> Alright let's see how that does. Oh yeah, perfect. Don't need this thing anymore. Now all we need to do is get the hood closed, get it latched, and we can hit the road. What's nice about that is it was super easy to install and if you ever want to take it off you can always do that too. GM A-bodies are popular right now, and when it comes time to pick a powertrain for your GM project it's hard to ignore the LS, especially with so much aftermarket support, like these full length headers from Doug's headers. They're for a 1964 to '72 GM A-bodies with anything from an LS One to an LS Six, and feature three-eighths machined flanges, inch and three quarter primaries, and c-n-c mandrel bent tubes. They come with a ceramic coating and V-band flanges for good sealing and easy installation. Well that's all the time we have for today. So to see more tech like you saw on the show go to Powernation TV dot com.
Show Full Transcript
(Tommy)>> Hey y'all, welcome to Detroit Muscle. Now we've been working on our 700 horsepower '69 Charger for quite some time, and it's finally starting to take some shape. Now up here we're missing a piece it's pretty obvious to see, and we're gonna address that today.
(Marc)>> But that's not the only thing we've got on our plate. I've got to get in this interior because we really haven't done much yet. We put the seats in because we did a big smoky burnout in the parking lot a while back, but I've got to get those out of the way because we have a bunch more stuff that needs to go in first.
(Tommy)>> We wanted to hold off on painting our hood because with us installing that Hellcat power plant we weren't 100 percent everything was gonna be happy once we closed it. Turns out we're all good and we can move forward. Now I've blocked this thing a few times and it's got a couple of coats of some polyester primer. I run into a little bit of snag. Right here on this recess it had a little bit of a bobble in it. So I had to spot prime it. Now it's time for us to do what everybody enjoys, a little bit of sanding. Polyester primer's a very heavy bodied primer. Heck some people consider it a sprayable form of body filler. And I don't really enjoy that sanding. I've been doing it long enough. So I don't want to waste any time with it. So to get everything going I like to start with a piece of 80 or 120. We're gonna apply some guide coat. This isn't necessary but it helps as a visual aid. [ sand paper scratching ]
(Tommy)>> Now after a little bit of sanding all those imperfections that I was telling you guys about, well they showed their face. Right through here, here, and even here those dark places, that's where it's low. Now to fix all that you've just got to stay after it with this sanding block and it'll cure all your problems, and also with that big heavy bodied primer that we got if you spray it incorrectly, well you can spray on waves onto the panel. And me knowing that are waves are running kind of this direction when I spray that stuff on I went this way to kinda keep everything all nice and good. Now I've got to get back to work. So you guys sit back and enjoy yourselves. On a panel like this you don't want to apply an extreme amount of pressure because you don't want to distort the panel that you're trying to sand flat. Just keep sanding it in a criss cross pattern and don't stay in one spot too long. Oh yeah, that feels good. Here we're not trying to remove a bunch of material. We're just trying to smooth out the overspray from our previous spot prime. 80 grit paper allows you to shape up that panel relatively quickly, but the problem is that the scratches it leaves behind are a little bit to coarse. So what you need to do is take some 180 or 220 and follow it up, and if everything checks out when you and that panel you can prime it for the last time. After another round of this guide coat those deep scratches are obvious. I'm using the same technique with a 180 grit paper. [ sand paper scratching ] [ music ]
(Tommy)>> You can usually tell how long a man's been doing body work by how much he enjoys sanding. Most of them young whipper snappers, they'll tell you I love sanding. Body work is so awesome, it's like yep, you ain't been doing it long enough if you still enjoy it. [ sand paper scratching ]
(Tommy)>> After finally getting it smoothed out it gets rubbed down with an air hose and a dry cloth. The primer we're gonna be spraying on now is a two-k urethane primer. Now what we were just scratching on out there is a polyester primer. You don't want to spray paint directly over top of polyester because it's too porous. So after a couple coats of this and it drying, well we can sand it down, splash on some of that color. [ music ] Ain't nothing fancy here. We just got to get the material on there and let it dry. [ music ]
(Marc)>> You know they say dynamite comes in small packages? Well that's extra helpful when you're talking about an impact wrench that'll get the job done in tight spaces, like inside your engine bay. This is Matco's half inch drive stubby impact. Not only is it compact, but it offers best in class output at 700 foot pounds of breakaway torque. It offers one hand operation with forward and reverse push buttons, variable speed throttle, and a reinforced composite housing. Not only that it's light weight and comes with a two year warranty.
(Narrator)>> Don't go away. Tommy finishes up on our '69 Dodge Charger hood, getting it ready to go back on the car.
(Tommy)>> Hey guys, glad you made your way back. While you were gone I went ahead and final sanded our hood. I used some 500 grit paper and this thing turned out pretty slick. Now we need to go grab us some paint and we can get to spraying. We're gonna get right in to spraying on some paint. Now we sanded that hood with some fine enough paper so that we can do so. If you had sanded with some 320 or 400 you might want to spray on some sealer. [ music ] Well we're all loaded up and now we just need to set the gun up. So let me give you a couple of tips. First thing we're gonna do is dial in our air pressure. You want to do that with the trigger pulled. We're looking for 15 to 16 p-s-i. Let's go 15 and a half. So now we need to set our fan width, and all I is a piece of paper up here. You just pull a gun, set it up there, pull the trigger. You want your gun about six to nine inches from the surface. Set it like that, pull it, let the air flow, then paint. Now we've got a round one. We're not looking for that. We want the big tall fan. So let's just dial up this knob. See what that got us. Well this thing's starting to run up here as well. So that means our fluid needle's a little far our. So let's crank it in. [ music ] [ spray gun hissing ] [ music ] [ spray gun hissing ] [ music ]
(Tommy)>> Not too bad. See if our pressure, back where we need to be. [ spray gun hissing ]
(Tommy)>> It's not quite wide enough. [ spray gun hissing ]
(Tommy)>> I think too wide there. [ spray gun hissing ]
(Tommy)>> Well that ought to do it. [ music ] Now with our first coat of base we're not trying to cover the surface 100 percent. Just a majority of the panel. [ music ] Well we got our first coat of color on and it looks pretty good. We're gonna be applying two, maybe three coats total. We're just looking for this thing to be up to color. Now with black it's pretty much straight forward, and 50 to 60 percent overlap usually get the job done. The material we're using is pretty good stuff, but if you're using something a little more economy based be prepared to apply more coats to get the same amount of coverage. [ music ] I got the hood tacked off. Now we're ready to start spraying on some of that shiny stuff. Now with our clear coat we're gonna add about a pound of pressure here at the gun because it's thicker than the base. We're gonna spray on three coats, maybe four. So let's go ahead and get started. The application process is basically the same as your base coat here, but your flash time is a bit longer. Don't try to pile it all on in one heavy coat. A few medium to wet coats is always best. [ music ] [ spray gun hissing ]
(Tommy)>> I have to say this thing turned out killer.
(Marc)>> It's beautiful, and I'm glad you did all that sanding instead of me cause I didn't want to do all that, but with all the panels on the car I can definitely say we picked the right color.
(Tommy)>> You are right. One of the most daunting task whenever you're restoring a car is stripping all your parts down to bare metal. Regular sand blasting creates friction that generates heat, and that heat can damage parts. This machine is a fully functional surface preparation system from Dustless Blasting. And like the name suggests, it's a dustless process that eliminates that friction and heat, while not creating a huge dust cloud in the process. It removes paint, rust, body filler, and even powder coated, and heck you can even buy one of these and start your own business, and make your own hours.
(Narrator)>> Marc gets a little help installing the headliner to our 700 horsepower Charger.
(Marc)>> Hey folks, welcome back. Well we said we were gonna be jumping on the interior of our '69 Dodge Charger and that's exactly what we're gonna do, and we're gonna start with this headliner. Now you folks may remember Kiwi from Kiwi Classics and Customs. He's helped us on the show several times before, and actually on a headliner just recently on our '72 Chevelle. Thanks for coming in.
(Kiwi)>> It's a pleasure, always fun here.
(Marc)>> What's the first thing we need to do? Wait, I remember. Bows right?
(Kiwi)>> Bows, yep, gotta get the bows in, gotta get these little tubes that they stitch into the headlining trimmed to the right length, and start gluing.
(Marc)>> Cool, I'll let you do that. I'm gonna go do some insulation.
(Kiwi)>> Alrighty. Gently slide the bows in. Get them centered is important, which is really just feeling that it's center. And when you do take the bows out of the vehicle when you start this project the important thing is to number them so you get them back in the right place. There's six of them in this car and all six are different. So very important to get them back in the right spots or it's never gonna look any good. [ music ] Number four, and as you get on to the back of the car these tend to have a larger curve in them, which makes them a little harder to thread. You just have to ease them in. Just be gentle with them and they'll go. [ music ] Okay getting the last bow in. Then we just have to trim the little loop section here so we can actually expose the bow. [ music ] Just expose about an inch or so and we'll be ready to start gluing.
(Marc)>> While Kiwi's getting that headliner ready I've been working on getting this boom mat installed here on the roof. Now I've got a couple of pieces trimmed to fit. Already got a couple of other pieces install. You just have to peel the backing off, get it stuck into place, roll it down flat. This boom mat helps dampen sound and reduce temperatures.
(Tommy)>> On our Charger there's some pieces that go around the headliner and around the window to trim it out, and from the factory they come black but what we're wanting to do is add kind of a custom touch and paint these pieces red to match all that interior. [ music ] We're using the leftover interior paint that we used on our dash a while back. It takes a few coats to cover that black but that red is really gonna make that interior pop. [ music ]
(Kiwi)>> The headliner's already laid out. Now we're just gonna spray the adhesive on the inside of the car. [ music ] Okay time to get some glue on the headliner itself. [ spray gun hissing ] [ music ]
(Kiwi)>> This is where it's great working on American cars and not some tiny little European thing that I don't fit in. [ music ] Okay we've got our center line marked here on the headliner itself, and little wee center line mark on the roof of the car, which we'd previously needed. Really important to get those in the right location. So once you get the middle right you can just workout to the edges front, back, and sides. [ music ] I've got some wrinkles up here. I'm not sure whether you can see but as we pull the tension in here they disappear. [ music ] Now don't be scared to put your back into it. You really do have to get some tension on them. Once the sun hits them outside they're gonna loosen up. [ music ]
(Narrator)>> Stay tuned, we continue to work on our Hellcat powered '69 Charger, finishing up our headliner.
(Tommy)>> Hey guys welcome back. I've got the interior pieces all painted up and they turned out pretty good. Looks like I got here just in time.
(Kiwi)>> Thanks man.
(Tommy)>> Looks like you're making some pretty good progress.
(Kiwi)>> Yeah it's coming together nice. It's a nice color code. [ music ] Well it's working now that I'm doing it. That's it girl. [ music ] Beautiful! [ music ] A little tip, when you put a headliner in the car put the screws for your mirrors and your sun visors, put them first. Sounds a little backwards. When you put them in you can feel them. Hopefully the viewers can see them. They're just poking down a little bit here. Let's you know where they are rather than trying to find a hole. So you just, and then you can just unscrew them. Then you know exactly where it goes. [ music ] Check it's working. Oh good grief I just saw Tommy. [ music ]
(Tommy)>> So this isn't your first one?
(Kiwi)>> Not my first one.
(Tommy)>> You did a good job buddy.
(Kiwi)>> Thanks man. Looks pretty.
(Tommy)>> It is pretty. You know I have to say though it has been a pleasure working with you cause, but I know how Marc feels now. Working with somebody with an accent from the south.
(Kiwi)>> It's fairly deep south, yeah. [ music ]
(Marc)>> You know we've been working on Sydewinder for quite a while now. That's our '81 Mustang Cobra. Now there's one thing about Mustangs that even rings true to today. If you go out and buy a brand new Mustang there's something that it doesn't have that you might find on most other cars, and that's gonna be hood struts. You've got to lift the hood up, you've got to get the prop rod, and put it there, but there is a solution to it. They make aftermarket hood strut kits. We're gonna install one of those on Sydewinder today. Well here's the hood strut kit for Sydewinder. This is '79 to '93 Mustangs. It's a direct fit. What's really cool about this is it's a no drill kit. In other words these brackets that need to be installed on the car do so using the factory hardware that's already there. I'm gonna show you how to do that here in just a couple of minutes, but what's really cool about that is you don't have to drill, cut, saw into your car in any way. That means two things. One, it's gonna be really easy to install, and then two, you can always take it back off if you ever want to put your car back to stock or you want to sell it, you just want to restore it in any way. Another cool thing about this is these gas struts. This is where the business happens. These things are really strong. It's a high pressure gas. So it'll support the weight of the hood but then also when you go to compress it it'll compress nice and easy. You latch your hood and go on about your business, no prop rod, and that's what I'm after. First things first I want to get the lower bracket installed on the driver's side. [ air ratchet buzzing ] [ music ] [ air ratchet buzzing ] [ music ] [ air ratchet buzzing ] [ music ] [ air ratchet buzzing ] [ music ] [ air ratchet buzzing ]
(Marc)>> Alright let's see how that does. Oh yeah, perfect. Don't need this thing anymore. Now all we need to do is get the hood closed, get it latched, and we can hit the road. What's nice about that is it was super easy to install and if you ever want to take it off you can always do that too. GM A-bodies are popular right now, and when it comes time to pick a powertrain for your GM project it's hard to ignore the LS, especially with so much aftermarket support, like these full length headers from Doug's headers. They're for a 1964 to '72 GM A-bodies with anything from an LS One to an LS Six, and feature three-eighths machined flanges, inch and three quarter primaries, and c-n-c mandrel bent tubes. They come with a ceramic coating and V-band flanges for good sealing and easy installation. Well that's all the time we have for today. So to see more tech like you saw on the show go to Powernation TV dot com.
