More Hard Charger Episodes
Detroit Muscle Featured Projects
Detroit Muscle Builds
Want more content like this?
Join the PowerNation Email NewsletterParts Used In This Episode
Original Parts Group
1966 Pontiac GTO/LeMans Bright Work - Bumpers, mouldings, lenses, bezels, emblems
Lincoln Electric
Lincoln Electric is the Official Welding Supplier to Detroit Muscle
Matco Tools
MATCO Tools are the Official Tool Supplier to Detroit Muscle
The Industrial Depot
Tools, Hardware, and Shop Supplies
Episode Transcript
(Narrator)>> Today on Detroit Muscle Marc and Tommy invite an old friend into the shop to work on a custom exhaust system for our 700 plus horsepower Hellcat powered Charger, giving it that muscle car rumble. Plus Tommy did some wheeling and dealing on his west coast trip that landed us a new project car. [ music ]
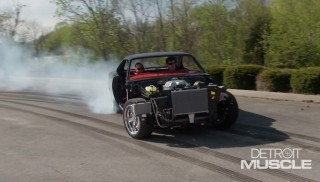
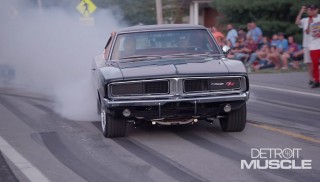
(Marc)>> Hey everybody welcome to Detroit Muscle. Now we just recently got our Hellcat powered '69 Dodge Charger back in the shop. It runs, it drives, and it'll do one nasty burnout. Now since you saw it last we've been busy doing some of that tedious stuff like trim, glass, and we even got the doors hung, but we don't want to waste your time with all of that. We do want to show you something else though.
(Tommy)>> That would be the exhaust. We brought in Richard our buddy with Magnaflow, and you brought us a bunch of goodies. You got a plan of attack on this car?
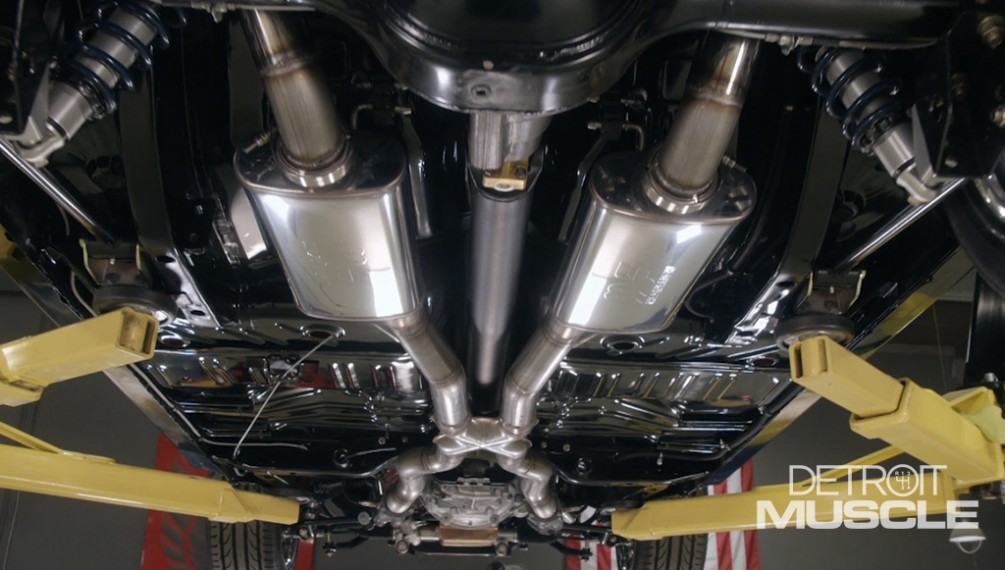
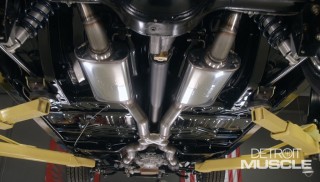
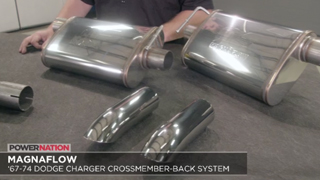
(Richard)>> Well it's exhaust. So I'm starting at some headers and finishing at a bumper. Apart from that though I've got some pieces to go in between. Obviously we've got the Hellcat motor. So some three inch pipe to support the power. I've got some V-band clamps so that we can get there and do some service if we ever have to pull a transmission or anything else. I want to make sure the system comes apart. We're gonna wrap up with some tips but as you can see I did bring two sets of mufflers because when I got the description for the car I wasn't sure if you wanted something that's gonna be loud all the time or something that gave you a little cruise and comfort to match the style, and when you get on that pedal you can hear the full exhaust with the little bit larger muffler.
(Tommy)>> So you're wanting to actually try these a little later down?
(Richard)>> Well that's what I'm hoping. I should probably get through the X-pipe and get to the mid body, and since the car runs we can pop them in there and see what you like.
(Tommy)>> Cool, well where do you want to get started at?
(Richard)>> Probably grab some pipe and get behind those headers. A few people who've seen me work before and they say man, you spend a lot of time in the front, and really that comes from the fact that everything you do at the front of the exhaust system is amplified, whether positive or negative, towards the rear. If you make a sixteenth of an inch error in the front, whether that's the direction of the pipe or an over bend, imagine over eight feet that can easily become a half inch error. Combine that with another half a dozen bends on each tube you can end up hard into a suspension component, or interfere with the cycling of the rear end. So spend your time in the front. If there's nothing else I could suggest when building that system is make sure that your front pipes are definitely bolted up and everything's tight. You don't have a header that's loose because that slight bit of movement will amplify any problems behind that. Once you've kind of traversed through the front of the vehicle really you only have to worry about your driveshaft and ground clearance. I want the exhaust to look like it runs with the car. The car can be at kind of a different level. So I need a reference point to a body line since whether or not this is level isn't the point. It's I need to make the bubble do the same thing. So I'll measure the body here and see we're slightly up in the rear. I need to make sure that when I do the pipe I'm about the same so that they're running on the same plane. It'll make the exhaust look like it's fitted to the car versus just hanging below it. With all my cuts on the pipe done I just have to make a couple of marks, take it back to the bench, and finish the weld. [ music ] So basically what we've done with the levels is determine that the exhaust system is not only flat side to side, but we're running in the same parallel as the actual body. This means the exhaust looks like it's nice and neatly tucked, and as a dual has the right kind of symmetry from left and right. So with everything lined up I can lock in the tacks and we're ready to move back from here. I like to spend the time to make sure everything's level and even. You want to make sure that when you see the exhaust, in this case it's going to protrude underneath the visual line of the car, that it looks like it's supposed to be there. No sudden air gaps. We want to make sure there's enough there for heat resistance and heat transference, but at the same time it should run parallel with the body line. So what I'm working on now is creating the second set of S-pipes. We've worked from the header and pinched into the crossmember where we have the two holes that are there for the exhaust to tuck nice and neat behind the transmission. Now we have to get even closer to go through the X-pipe cause the X-pipe has a five and three quarter inch spread. So to do that the easy way is to take some 90's and cut them in half, turn them 180 out, and you get 45's on the same plane, which means now you've staggered that and you've got a nice inset. We'll do that twice and that'll get us to where we need to be. With my pieces cut I'm gonna take them back to the car and fit them to the X-pipe. This is where I'm gonna make sure I have the orientation correct. I'll grab the mig, verify that the level's correct, and tack them in place. It's important to go ahead and get them tacked so the orientation doesn't change, but I will go back to the bench and finish it up with a tig weld. [ music ] Now you can very well finish everything with the mig but I like to take it back to the bench and do a nice tig weld. Not only does it have a better finish, but if you've got the time, the equipment, and a little bit of know how it's definitely worth the extra efforts. So with everything installed on the front section. We've got our header collectors to the X-pipe, and pretty much in their permanent position. We've just got to work back from our middle break point to the mufflers, over the axle, and obviously to the tail pipes. The fun part is here and this is where we'll get the mufflers installed. We'll get both Marc and Tommy out here to kind of decide where the character of the car goes. A little louder, a little more conservative, but for the most part we're on the home stretch.
(Narrator)>> Stay tuned as we figure out which is better for "Project Hard Charger", smaller or bigger mufflers, and we'll finish up the fabrication of our exhaust so we can hear that Hellcat roar.
(Tommy)>> Hey y'all, welcome back to the shop. Richard's done an amazing job on our exhaust and he's got it just about here to the rear axle.
(Marc)>> So all we need to do now is put some turn downs on it and we're ready to go, right Rich?
(Tommy)>> I hope not.
(Richard)>> Now we brought some 18 inch ones to put in here, and I figured that would be a tighter fit to what you did for the build on the car, but just in case I got some 14's. They're a little shorter and a little louder. I figured let's put them both on there and let you guys pick it out.
(Tommy)>> So you want to put the car down and fire it up?
(Richard)>> You got it.
(Marc)>> Let's do it. Hey the 14's are gonna sound better, you watch.
[ engine starting and idling ]
(Tommy)>> Don't sound too bad.
(Richard)>> Nah that's how it should sound. Nice deep kinda muscle-y tone to it.
(Tommy)>> I like that throaty sound, but I know Slim's gonna want to put them shorter ones on there.
(Marc)>> I want to hear the louder ones. [ mechanical humming ]
[ engine starts & idles ]
(Tommy)>> Yeah that definitely sounds louder for sure.
(Richard)>> Yeah it's definitely deeper, and when he gets on that throttle it'll rap a little louder. [ engine revving ]
(Marc)>> Told you it was gonna sound better.
(Tommy)>> Well it sounds different. I don't know if I'd say better.
(Marc)>> Well I think this sounds right for this car. It's loud, it's aggressive.
(Tommy)>> What do you think?
(Richard)>> I've still got to go with my original choice. If you're definitely looking at a road cruiser it's gonna have almost the same volume at wide open but you'll have a lot more comfort inside when you're cruising.
(Tommy)>> Well I'm gonna go off of you then. My vote's for you.
(Marc)>> I'm outnumbered, let's swap them. [ welder crackling ]
(Richard)>> At Magnaflow quality's premiere. From the '80's when we originally started the company it's what differentiated us from the others that were in the industry. We chose a stainless steel component to be our primary piece to avoid the corrosion. On top that we sought out the best methodology for welding. What started out as hand welding moved to c-n-c and robotic welding. What required manufacturing for tubing we brought in house. The more things we can control the better the finished product because, and why is that so important? Well our design is a straight through muffler. The design is hundreds of years old. It's nothing new. It's not even patentable, but what our job was was to make it better, and that's what we've done is tried to put all the resources together to make a part that's a worry free experience for the owners today. [ music ]
(Tommy)>> While Richard's burning those pipes together I have something I want to show you. On our Charger we're running that Hellcrate and it makes 700 plus horsepower. So that requires us to use a big ole three inch exhaust. So we're using one of their custom builder kits, but if you were making 550 or less you may be interested in this. This is their all stainless two and a half inch dual crossmember back system. It has all mandrel bends, comes with 14 inch straight through mufflers, and some fancy polished turn down tips. You'll have to do some fab work up front to accommodate your particular engine and header combination, but other than that this is a direct bolt in kit. So if you're building a resto mod or a restoration this might be right up your alley. [ drill spinning ]
(Tommy)>> Dang fella, it looks like you got this thing figured out.
(Richard)>> Just about.
(Marc)>> It looks nice.
(Richard)>> Yeah we pretty much went straight up and got all the three inch in that we were looking for. Kept it tight and tucked, true "X", the big 18 inch muffler, over the axle, and just wrapped up the tips.
(Tommy)>> Well I guess you want to hear this thing for sure don't you?
(Richard)>> Oh yeah, finished stuff is always the best.
(Tommy)>> Well let's let it down and see what it sounds like. [ engine revving ]
(Marc)>> You guys were right about the mufflers. It sounds great and looks great too. I love when we lower the car the whole thing just disappeared except those tail pipes, and they match that body line perfectly. Great job!
(Richard)>> Thanks so much. It's always a pleasure coming out here and working on these special projects.
(Marc)>> Well we'll be sure to call you on the next one, but it'll be a while before we have another one like this.
(Narrator)>> Coming up, Tommy and Marc start a new project vehicle adding all new shiny stuff that makes restoring old iron look so nice.
(Marc)>> Hey folks, welcome back. We've made some pretty good progress on our '69 Charger today getting the exhaust all wrapped thanks to our buddy Rich Waitas at Magnaflow, but now it's time to switch gears. A while back Tommy made a trip out to the west coast to visit our friends at Original Parts Group. While he was out there, you know how Tommy is, he likes to wheel and deal and he got to rubbing elbows and flapping his gums, and the next thing you know we got a new project car.
(Tommy)>> Original Parts Group has been supplying you GM guys with high quality restoration parts for nearly 40 years, and the reason for that is because of their extensive research and development from using original cars. One of those cars caught my eye and I thought it would be a great project for us back in the shop. Y'all check out the ole test mule. She cleaned up pretty nice but we're not quite ready to ride into town yet. Now those guys did all the hard work for us by spraying on this new metallic green paint, upgrading the hood, and bolting on those fancy new retro 17 inch aluminum wheels. The job we're gonna be doing today, in my opinion, is one of the most fun parts of a restoration, and that is bolting on all that jewelry.
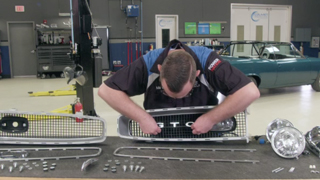
(Marc)>> Now when it comes to the shiny stuff you just can't get any better than the front end. The first thing I'm gonna do is get these grilles assembled and on the car. The first thing we'll do is get the turn signal housings in the grille, followed by the lens... [ music ] ...And then the bezel. A couple of screws and those are done. Now it's time for the emblem. This car started its life as a Lemans but OPGI want to show off what you can do to your car with their parts. [ music ] So this car is getting the GTO treatment. [ music ]
(Tommy)>> Man the nose of that thing is looking good.
(Marc)>> Thanks, I'm gonna go get the headlights.
(Tommy)>> Sure, now while he's off fetching more parts I'm gonna go ahead and install this fender well trim. Super simple, just takes a few screws. [ music ]
(Marc)>> Well I got the head lamps in place and it's time to move on to these nice shiny headlamp bezels. One cool thing about OPGI is they don't only offer the shiny stuff. They've got the things that you might not think of, like these retainers for the screws that hold that bezel in place. I just need to get these on, the bezel will go right in. [ music ]
(Tommy)>> Hey big man you ready for this bumper?
(Marc)>> Yeah let's do it. I need the other end.
(Tommy)>> This is my first day.
(Marc)>> Perfect! Man that thing's shiny.
(Tommy)>> We'll just slide it into place.
(Marc)>> Like a glove. [ music ]
(Tommy)>> And after checking the adjustment we can tighten her up. Ain't much prettier than a Pontiac. Man that looks good. [ music ]
(Marc)>> You guys might remember a while back Tommy took a piece of glass and he showed you how to remove the old tint. Well he actually used this very piece of glass here, but the problem is he didn't clean the rest of the glass. He got all the tint and the glue off but there's still a bunch of stuff on here. I'm gonna show you how to get it off. Now when I rub my hand across here if you listen. [ scraping sound ]
(Marc)>> You can actually hear all of the stuff that's on the glass. Now there's a lot of stuff here below the body line here that never gets cleaned. It's kind of milky. That's just build up over the years, and actually down here there's even some dirty. Not to mention that, there's actually some overspray right here. It's even blue, you can see, and that's what color that our '69 Charger was painted when we got it, and that's where this glass came from. Let's get the heavy stuff off first. [ music ]
(Marc)>> One thing I noticed when I was scraping is right here there's a place that's really rough, and what I think that is is splatter from welding. The quarter panels had been replaced on this car at some point and they probably left the glass in when they did it, but it looks like the blade's taking it right off. [ music ] Well now I got the heavy stuff off with the razor blade. I'm gonna move on to my next tool, and that's gonna be this steel wool. I know it seems like something you shouldn't be using to clean glass. You think it would scratch it but it actually doesn't. This is double ought. You want to make sure you use at least that fine. They actually make a triple and quadruple. Those will work as well but this is gonna do the job really well, you'll see. [ music ] [ squeaking ]
(Marc)>> Oh squeaky clean. Don't forget to do the inside. [ music ]
Wow just like that it looks new again. Now there are some scratches on here but that's a completely different process we're gonna have to show you another time.
(Narrator)>> Don't go away as we finish dolling up our '66 Pontiac convertible.
(Marc)>> Hey folks welcome back. We're working with Original Parts Group on this 1966 Pontiac convertible. Now while you were gone we got a bunch of the shiny stuff installed on the side, like all those moldings as well as the GTO badges. Now it's time to move on to the rear.
(Tommy)>> The first parts of the bright work that we're gonna be installing are the three pieces that go on the quarters and the bottom of the trunk lid. This quarter trim piece is first, and this thing just slides in and gets attached using self-threading nuts. Well I got that on and I'm not gonna completely tighten it up because I may have to adjust it a little bit when I get this piece on. These retainers attach to the molding itself. Snap into place, and then go onto the car. We'll make a slight adjustment on these, and then tighten them down. [ music ] And then to the other quarter trim. [ music ] Alright let's check the fitment. [ music ] Oh yeah, that looks good. On the back side of our Pontiac there's several components that make up the tail lamp assembly, like this outer bezel that's paint the color of the car, the body gasket, the tail lamp lens, and the housing itself, and thanks to OPGI they've got these hard to find components that's gonna make it look like a million bucks. We'll start by attaching the lenses to the housing, followed by the body gasket, and then she's ready to go. [ music ] Here you go hero. Are they all that hard to put in?
(Marc)>> Nah they're easy man. What do you want to do next?
(Tommy)>> I can get the bumper.
(Marc)>> Sounds good. The lens and housing go on the inside, and the bezel slides through the tail panel and the housing, and gets tightened down with self-threading nuts.
(Tommy)>> Here's this big hunk of shiny.
(Marc)>> Yeah, man that thing is big and shiny. [ music ]
(Tommy)>> This bumper goes on just like the front, with the bolts started and a little bit of adjustment. Alright cinch her down, and that chrome's pretty. Oh wait, that's my reflection. It's ready to get tight. [ music ] The last thing we're gonna install here on the back of our car is gonna be our Pontiac letters. Now one thing you may not think about, and that is that you need to seal off all your studs. Whenever you look at how many holes it takes to install these that gives you a pretty good opportunity for rain and moisture to seep in into your trunk floor. Now it doesn't take a whole lot to do it. All you need is some of this soft butyl, like what we've got left over from a windshield installation kit, and you take it and wrap it around your stud. Then you can install it. We're gonna press these into place one at a time nice and easy, and then secure them with some of that fancy hardware.
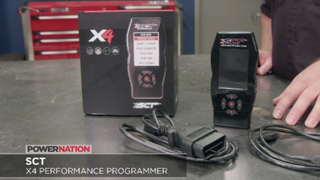
(Marc)>> Look at that back side. This ole Pontiac has gone from a boring shell to a shiny work of art. The front doesn't look too back either. Are you looking to increase horsepower and torque on your daily driver, tow rig, or modern muscle car? Then take a look at the X-four from SCT. This is a programmer that comes pre-loaded with dyno proven tune files to give you that added performance. Not only will it tune, but it'll data log, has built in wi-fi for easy updates, and can hold up to 10 custom tunes. It'll even read and clear trouble codes for you, and it'll store your factory tune for easy restoration back to stock. For more information go to SCT Flash dot com. Well that's all the time we have for today folks. So until next time go to Powernation TV dot com.
Show Full Transcript
(Marc)>> Hey everybody welcome to Detroit Muscle. Now we just recently got our Hellcat powered '69 Dodge Charger back in the shop. It runs, it drives, and it'll do one nasty burnout. Now since you saw it last we've been busy doing some of that tedious stuff like trim, glass, and we even got the doors hung, but we don't want to waste your time with all of that. We do want to show you something else though.
(Tommy)>> That would be the exhaust. We brought in Richard our buddy with Magnaflow, and you brought us a bunch of goodies. You got a plan of attack on this car?
(Richard)>> Well it's exhaust. So I'm starting at some headers and finishing at a bumper. Apart from that though I've got some pieces to go in between. Obviously we've got the Hellcat motor. So some three inch pipe to support the power. I've got some V-band clamps so that we can get there and do some service if we ever have to pull a transmission or anything else. I want to make sure the system comes apart. We're gonna wrap up with some tips but as you can see I did bring two sets of mufflers because when I got the description for the car I wasn't sure if you wanted something that's gonna be loud all the time or something that gave you a little cruise and comfort to match the style, and when you get on that pedal you can hear the full exhaust with the little bit larger muffler.
(Tommy)>> So you're wanting to actually try these a little later down?
(Richard)>> Well that's what I'm hoping. I should probably get through the X-pipe and get to the mid body, and since the car runs we can pop them in there and see what you like.
(Tommy)>> Cool, well where do you want to get started at?
(Richard)>> Probably grab some pipe and get behind those headers. A few people who've seen me work before and they say man, you spend a lot of time in the front, and really that comes from the fact that everything you do at the front of the exhaust system is amplified, whether positive or negative, towards the rear. If you make a sixteenth of an inch error in the front, whether that's the direction of the pipe or an over bend, imagine over eight feet that can easily become a half inch error. Combine that with another half a dozen bends on each tube you can end up hard into a suspension component, or interfere with the cycling of the rear end. So spend your time in the front. If there's nothing else I could suggest when building that system is make sure that your front pipes are definitely bolted up and everything's tight. You don't have a header that's loose because that slight bit of movement will amplify any problems behind that. Once you've kind of traversed through the front of the vehicle really you only have to worry about your driveshaft and ground clearance. I want the exhaust to look like it runs with the car. The car can be at kind of a different level. So I need a reference point to a body line since whether or not this is level isn't the point. It's I need to make the bubble do the same thing. So I'll measure the body here and see we're slightly up in the rear. I need to make sure that when I do the pipe I'm about the same so that they're running on the same plane. It'll make the exhaust look like it's fitted to the car versus just hanging below it. With all my cuts on the pipe done I just have to make a couple of marks, take it back to the bench, and finish the weld. [ music ] So basically what we've done with the levels is determine that the exhaust system is not only flat side to side, but we're running in the same parallel as the actual body. This means the exhaust looks like it's nice and neatly tucked, and as a dual has the right kind of symmetry from left and right. So with everything lined up I can lock in the tacks and we're ready to move back from here. I like to spend the time to make sure everything's level and even. You want to make sure that when you see the exhaust, in this case it's going to protrude underneath the visual line of the car, that it looks like it's supposed to be there. No sudden air gaps. We want to make sure there's enough there for heat resistance and heat transference, but at the same time it should run parallel with the body line. So what I'm working on now is creating the second set of S-pipes. We've worked from the header and pinched into the crossmember where we have the two holes that are there for the exhaust to tuck nice and neat behind the transmission. Now we have to get even closer to go through the X-pipe cause the X-pipe has a five and three quarter inch spread. So to do that the easy way is to take some 90's and cut them in half, turn them 180 out, and you get 45's on the same plane, which means now you've staggered that and you've got a nice inset. We'll do that twice and that'll get us to where we need to be. With my pieces cut I'm gonna take them back to the car and fit them to the X-pipe. This is where I'm gonna make sure I have the orientation correct. I'll grab the mig, verify that the level's correct, and tack them in place. It's important to go ahead and get them tacked so the orientation doesn't change, but I will go back to the bench and finish it up with a tig weld. [ music ] Now you can very well finish everything with the mig but I like to take it back to the bench and do a nice tig weld. Not only does it have a better finish, but if you've got the time, the equipment, and a little bit of know how it's definitely worth the extra efforts. So with everything installed on the front section. We've got our header collectors to the X-pipe, and pretty much in their permanent position. We've just got to work back from our middle break point to the mufflers, over the axle, and obviously to the tail pipes. The fun part is here and this is where we'll get the mufflers installed. We'll get both Marc and Tommy out here to kind of decide where the character of the car goes. A little louder, a little more conservative, but for the most part we're on the home stretch.
(Narrator)>> Stay tuned as we figure out which is better for "Project Hard Charger", smaller or bigger mufflers, and we'll finish up the fabrication of our exhaust so we can hear that Hellcat roar.
(Tommy)>> Hey y'all, welcome back to the shop. Richard's done an amazing job on our exhaust and he's got it just about here to the rear axle.
(Marc)>> So all we need to do now is put some turn downs on it and we're ready to go, right Rich?
(Tommy)>> I hope not.
(Richard)>> Now we brought some 18 inch ones to put in here, and I figured that would be a tighter fit to what you did for the build on the car, but just in case I got some 14's. They're a little shorter and a little louder. I figured let's put them both on there and let you guys pick it out.
(Tommy)>> So you want to put the car down and fire it up?
(Richard)>> You got it.
(Marc)>> Let's do it. Hey the 14's are gonna sound better, you watch.
[ engine starting and idling ]
(Tommy)>> Don't sound too bad.
(Richard)>> Nah that's how it should sound. Nice deep kinda muscle-y tone to it.
(Tommy)>> I like that throaty sound, but I know Slim's gonna want to put them shorter ones on there.
(Marc)>> I want to hear the louder ones. [ mechanical humming ]
[ engine starts & idles ]
(Tommy)>> Yeah that definitely sounds louder for sure.
(Richard)>> Yeah it's definitely deeper, and when he gets on that throttle it'll rap a little louder. [ engine revving ]
(Marc)>> Told you it was gonna sound better.
(Tommy)>> Well it sounds different. I don't know if I'd say better.
(Marc)>> Well I think this sounds right for this car. It's loud, it's aggressive.
(Tommy)>> What do you think?
(Richard)>> I've still got to go with my original choice. If you're definitely looking at a road cruiser it's gonna have almost the same volume at wide open but you'll have a lot more comfort inside when you're cruising.
(Tommy)>> Well I'm gonna go off of you then. My vote's for you.
(Marc)>> I'm outnumbered, let's swap them. [ welder crackling ]
(Richard)>> At Magnaflow quality's premiere. From the '80's when we originally started the company it's what differentiated us from the others that were in the industry. We chose a stainless steel component to be our primary piece to avoid the corrosion. On top that we sought out the best methodology for welding. What started out as hand welding moved to c-n-c and robotic welding. What required manufacturing for tubing we brought in house. The more things we can control the better the finished product because, and why is that so important? Well our design is a straight through muffler. The design is hundreds of years old. It's nothing new. It's not even patentable, but what our job was was to make it better, and that's what we've done is tried to put all the resources together to make a part that's a worry free experience for the owners today. [ music ]
(Tommy)>> While Richard's burning those pipes together I have something I want to show you. On our Charger we're running that Hellcrate and it makes 700 plus horsepower. So that requires us to use a big ole three inch exhaust. So we're using one of their custom builder kits, but if you were making 550 or less you may be interested in this. This is their all stainless two and a half inch dual crossmember back system. It has all mandrel bends, comes with 14 inch straight through mufflers, and some fancy polished turn down tips. You'll have to do some fab work up front to accommodate your particular engine and header combination, but other than that this is a direct bolt in kit. So if you're building a resto mod or a restoration this might be right up your alley. [ drill spinning ]
(Tommy)>> Dang fella, it looks like you got this thing figured out.
(Richard)>> Just about.
(Marc)>> It looks nice.
(Richard)>> Yeah we pretty much went straight up and got all the three inch in that we were looking for. Kept it tight and tucked, true "X", the big 18 inch muffler, over the axle, and just wrapped up the tips.
(Tommy)>> Well I guess you want to hear this thing for sure don't you?
(Richard)>> Oh yeah, finished stuff is always the best.
(Tommy)>> Well let's let it down and see what it sounds like. [ engine revving ]
(Marc)>> You guys were right about the mufflers. It sounds great and looks great too. I love when we lower the car the whole thing just disappeared except those tail pipes, and they match that body line perfectly. Great job!
(Richard)>> Thanks so much. It's always a pleasure coming out here and working on these special projects.
(Marc)>> Well we'll be sure to call you on the next one, but it'll be a while before we have another one like this.
(Narrator)>> Coming up, Tommy and Marc start a new project vehicle adding all new shiny stuff that makes restoring old iron look so nice.
(Marc)>> Hey folks, welcome back. We've made some pretty good progress on our '69 Charger today getting the exhaust all wrapped thanks to our buddy Rich Waitas at Magnaflow, but now it's time to switch gears. A while back Tommy made a trip out to the west coast to visit our friends at Original Parts Group. While he was out there, you know how Tommy is, he likes to wheel and deal and he got to rubbing elbows and flapping his gums, and the next thing you know we got a new project car.
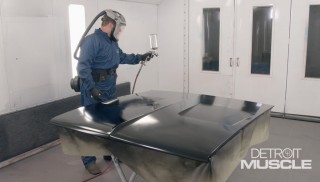
(Tommy)>> Original Parts Group has been supplying you GM guys with high quality restoration parts for nearly 40 years, and the reason for that is because of their extensive research and development from using original cars. One of those cars caught my eye and I thought it would be a great project for us back in the shop. Y'all check out the ole test mule. She cleaned up pretty nice but we're not quite ready to ride into town yet. Now those guys did all the hard work for us by spraying on this new metallic green paint, upgrading the hood, and bolting on those fancy new retro 17 inch aluminum wheels. The job we're gonna be doing today, in my opinion, is one of the most fun parts of a restoration, and that is bolting on all that jewelry.
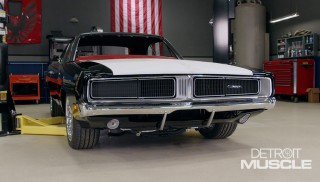
(Marc)>> Now when it comes to the shiny stuff you just can't get any better than the front end. The first thing I'm gonna do is get these grilles assembled and on the car. The first thing we'll do is get the turn signal housings in the grille, followed by the lens... [ music ] ...And then the bezel. A couple of screws and those are done. Now it's time for the emblem. This car started its life as a Lemans but OPGI want to show off what you can do to your car with their parts. [ music ] So this car is getting the GTO treatment. [ music ]
(Tommy)>> Man the nose of that thing is looking good.
(Marc)>> Thanks, I'm gonna go get the headlights.
(Tommy)>> Sure, now while he's off fetching more parts I'm gonna go ahead and install this fender well trim. Super simple, just takes a few screws. [ music ]
(Marc)>> Well I got the head lamps in place and it's time to move on to these nice shiny headlamp bezels. One cool thing about OPGI is they don't only offer the shiny stuff. They've got the things that you might not think of, like these retainers for the screws that hold that bezel in place. I just need to get these on, the bezel will go right in. [ music ]
(Tommy)>> Hey big man you ready for this bumper?
(Marc)>> Yeah let's do it. I need the other end.
(Tommy)>> This is my first day.
(Marc)>> Perfect! Man that thing's shiny.
(Tommy)>> We'll just slide it into place.
(Marc)>> Like a glove. [ music ]
(Tommy)>> And after checking the adjustment we can tighten her up. Ain't much prettier than a Pontiac. Man that looks good. [ music ]
(Marc)>> You guys might remember a while back Tommy took a piece of glass and he showed you how to remove the old tint. Well he actually used this very piece of glass here, but the problem is he didn't clean the rest of the glass. He got all the tint and the glue off but there's still a bunch of stuff on here. I'm gonna show you how to get it off. Now when I rub my hand across here if you listen. [ scraping sound ]
(Marc)>> You can actually hear all of the stuff that's on the glass. Now there's a lot of stuff here below the body line here that never gets cleaned. It's kind of milky. That's just build up over the years, and actually down here there's even some dirty. Not to mention that, there's actually some overspray right here. It's even blue, you can see, and that's what color that our '69 Charger was painted when we got it, and that's where this glass came from. Let's get the heavy stuff off first. [ music ]
(Marc)>> One thing I noticed when I was scraping is right here there's a place that's really rough, and what I think that is is splatter from welding. The quarter panels had been replaced on this car at some point and they probably left the glass in when they did it, but it looks like the blade's taking it right off. [ music ] Well now I got the heavy stuff off with the razor blade. I'm gonna move on to my next tool, and that's gonna be this steel wool. I know it seems like something you shouldn't be using to clean glass. You think it would scratch it but it actually doesn't. This is double ought. You want to make sure you use at least that fine. They actually make a triple and quadruple. Those will work as well but this is gonna do the job really well, you'll see. [ music ] [ squeaking ]
(Marc)>> Oh squeaky clean. Don't forget to do the inside. [ music ]
Wow just like that it looks new again. Now there are some scratches on here but that's a completely different process we're gonna have to show you another time.
(Narrator)>> Don't go away as we finish dolling up our '66 Pontiac convertible.
(Marc)>> Hey folks welcome back. We're working with Original Parts Group on this 1966 Pontiac convertible. Now while you were gone we got a bunch of the shiny stuff installed on the side, like all those moldings as well as the GTO badges. Now it's time to move on to the rear.
(Tommy)>> The first parts of the bright work that we're gonna be installing are the three pieces that go on the quarters and the bottom of the trunk lid. This quarter trim piece is first, and this thing just slides in and gets attached using self-threading nuts. Well I got that on and I'm not gonna completely tighten it up because I may have to adjust it a little bit when I get this piece on. These retainers attach to the molding itself. Snap into place, and then go onto the car. We'll make a slight adjustment on these, and then tighten them down. [ music ] And then to the other quarter trim. [ music ] Alright let's check the fitment. [ music ] Oh yeah, that looks good. On the back side of our Pontiac there's several components that make up the tail lamp assembly, like this outer bezel that's paint the color of the car, the body gasket, the tail lamp lens, and the housing itself, and thanks to OPGI they've got these hard to find components that's gonna make it look like a million bucks. We'll start by attaching the lenses to the housing, followed by the body gasket, and then she's ready to go. [ music ] Here you go hero. Are they all that hard to put in?
(Marc)>> Nah they're easy man. What do you want to do next?
(Tommy)>> I can get the bumper.
(Marc)>> Sounds good. The lens and housing go on the inside, and the bezel slides through the tail panel and the housing, and gets tightened down with self-threading nuts.
(Tommy)>> Here's this big hunk of shiny.
(Marc)>> Yeah, man that thing is big and shiny. [ music ]
(Tommy)>> This bumper goes on just like the front, with the bolts started and a little bit of adjustment. Alright cinch her down, and that chrome's pretty. Oh wait, that's my reflection. It's ready to get tight. [ music ] The last thing we're gonna install here on the back of our car is gonna be our Pontiac letters. Now one thing you may not think about, and that is that you need to seal off all your studs. Whenever you look at how many holes it takes to install these that gives you a pretty good opportunity for rain and moisture to seep in into your trunk floor. Now it doesn't take a whole lot to do it. All you need is some of this soft butyl, like what we've got left over from a windshield installation kit, and you take it and wrap it around your stud. Then you can install it. We're gonna press these into place one at a time nice and easy, and then secure them with some of that fancy hardware.
(Marc)>> Look at that back side. This ole Pontiac has gone from a boring shell to a shiny work of art. The front doesn't look too back either. Are you looking to increase horsepower and torque on your daily driver, tow rig, or modern muscle car? Then take a look at the X-four from SCT. This is a programmer that comes pre-loaded with dyno proven tune files to give you that added performance. Not only will it tune, but it'll data log, has built in wi-fi for easy updates, and can hold up to 10 custom tunes. It'll even read and clear trouble codes for you, and it'll store your factory tune for easy restoration back to stock. For more information go to SCT Flash dot com. Well that's all the time we have for today folks. So until next time go to Powernation TV dot com.
