More '66 Chevy C-10 Episodes
More One-Half A C-10 Episodes
Trucks! Builds
Want more content like this?
Join the PowerNation Email NewsletterParts Used In This Episode
J&W Auto Wreckers
4.0 Intake manifold, Throttle Body, P/S Pump and Bracket.
Powder-X
Powder Coating of Chevy C-10 Frame
Strip Masters of Nashville
Media Blasting of Chevy C-10 Frame
Episode Transcript
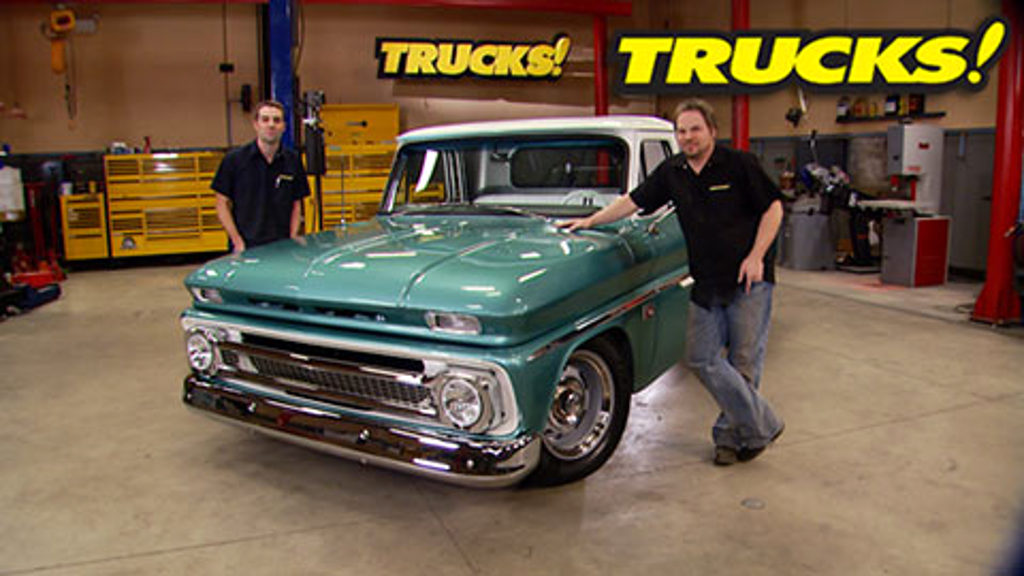
Today, the time has finally come for us to hit the road with our daily driver 66 C 10.
We'll see just how much better this nearly 45 year old truck rides and handles. The classic look remains, but now it's on air and has a more powerful drive train.
It's all today here on trucks.
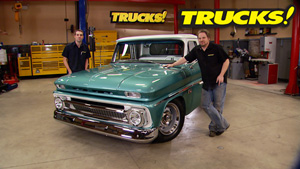
Hey, welcome to trucks. Well, the day is finally here where we get to take our 1966 Chevy C 10 out on its maiden voyage. Now we know it's been a long time coming and you guys have been anxious to see this thing completed and out on the road. Well, we've been just as anxious to get some seat time behind the wheel. So, needless to say, we're both pretty pumped
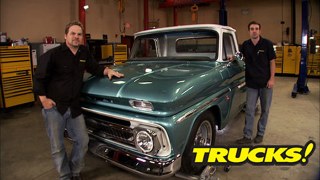
and as good as it feels to finally have this truck finished. It's gonna be a little sad to see it go. It's kind of become a member of the family here. And although it looks outwardly like the same 66 Chevy, we started with the truth is this truck has gone through a complete transformation.
Our truck was used as a truck its whole life, but remained pretty much stock other than a few repairs along the way,
but it was still a long wheelbase truck. So what do we do? We cut it in half,
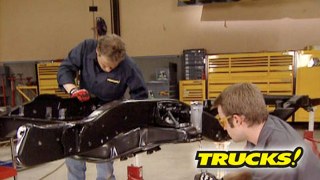
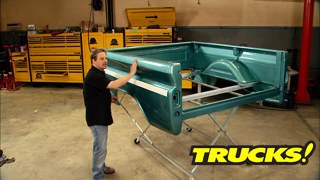
getting 20 inches out of the frame and section 20 inches also from the bed size, front and rear. That way, we get to keep the crown of the panel and have a factory appearance.
So now that we had the short bed, we wanted, give us time to do something about the frame. So we took it to strip masters to have it media blasted. Now I say media blasted and not sandblasted because strip masters uses the appropriate media for the job at hand. In this case, it was glass beads where it doesn't destroy or profile the metal and set it up perfectly for powder coating.
Our friends at powder X coated the frame in a factory appearing semi gloss black and had a booth big enough for a train car. So in less than an afternoon, our frame went from bare steel to a coating that's going to last a lifetime.
And now that we had the frame and the sheet metal reduced to the more popular short bed size. Well, we knew we had a solid foundation to work off of. So we wanted to pick out a nice suspension system and upgrade the drive train.
But what we ended up going with was a strong arm system from ride tech and it replaced every single component in our suspension system.
Now, the air is not only going to give us a good ride and good handling. It's gonna let us pick out the ride height we want
and it was largely a bolt on short of the sea, not
to the rear frame. Then we wanted to pay some attention to the braking department. So we ditched the factory drum brakes and upgraded to this.
Now, the guys at horsepower did a mild rebuild to our original 283
and they added some higher flowing cylinder heads that could handle unleaded fuel.
After that, we bolted it up to our 700 R four overdrive transmission, dropped it in the frame rails and our new drive shaft will get that 280 plus horsepower to the ground. And a new fuel tank located between the frame rails will keep the fumes out of the cab.
Now to get the fumes out of the engine, we went with a 2.5 inch stainless steel exhaust system that was designed for this truck, but that we had to modify since our truck's been customized a little bit.
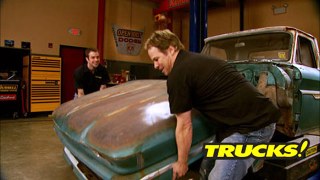
That's cool. Well, once we were satisfied with the new dimensions and the new stance of the truck, well, it was time to pay attention to the sheet metal. Now, we got pretty lucky starting with the project vehicle with solid panels and original paint, but we still wanted to start from the bare metal up to really see what was there and build a solid foundation for the new paint job. But what we did not want to do was pro file the metal with a bunch of heavy grit Sanders or warp the panels with sand. So we did a bunch of research. What we came up with was an interesting, do it yourself, user friendly, inexpensive method of completely removing the paint without damaging the sheet metal in any way. And on top of that, the bonus was that we got an environmentally friendly method as well.
The green method we found for removing the green paint was by using a pressurized blaster, using bicarbonate soda, not too far from tabletop, baking soda, but it doesn't profile the metal and you can blast right over plastic and chrome with no damage.
And with the metal strip, we could see the rust that needed to be repaired. Typical for these trucks, we put lower fenders on both sides and some other patch panels here and there.
And after 100 odd hours of priming and blocking the body, it was ready for paint
and we wanted to keep our environmental theme. So we use the environmentally friendly waterborne paint with 80% less Vo CS,
which is the pollution and paint that goes up into the
atmosphere. Our new modern two stage paint system was a near perfect match for the original colors, but with the added benefit of a clear coat to give the color more depth and had a lot more gloss.
And we complemented the new paint with all new bright work and trim pieces
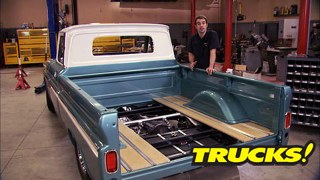
and with the rest of the exterior looking so good, we finished it off with the installation of a bed wood kit.
Now, we just had to do something with the interior to match the quality we have already established with this thing. Now, the interior that we started with wasn't in terrible shape, but it wasn't new either. So we decided to freshen up on maintaining the classic look
and that started with refurbishing our original windshield which had been subjected to over 50 years of road debris and wiper scrub. So we polished it back to a nearly new condition.
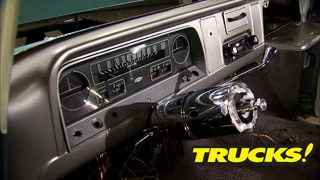
We also wanted to breathe some life into our original instrument cluster. So we painted up the needles, cleaned everything up and reassembled it. It turned out looking nearly new.
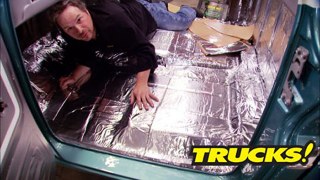
Now, we didn't want the inside of the cab to have any road noise or drone or sound like an empty 50 gallon barrel. So we threw down some extra sound deader.
We also adapted our parking brake lever to our new chrome tilt column and got rid of the clutch pedal since this thing is now an automatic.
Now we put our air tank and control solenoids in the spot vacated by the factory fuel tank
and the bench seat that's gonna sit in front of it got recovered to match our painted two tone interior.
It's pretty cool.
Now, this truck was a lot of work and a lot of fun to build and we learned a lot during the process. But let me tell you just like we saw on the very first show when we introduced this project, I've got a bone stock 66 Chevy truck sitting at home in the garage and I know how it drives and believe me, it ain't so pretty. So now is the time, do we get to test our upgrades and throw some miles on this thing and see if what we did counts
up next. We're out on the open road
and later it's do it yourself, weather pack connectors. Stay tuned.
Hey, welcome back to trucks. Well, we're finally on the road with our 66 C 10 project and it's been so long since this thing has been driving under its own power. What it feels like a brand new truck and that's kind of a wordplay because for all intents and purposes, it is a brand new truck. Every component has been replaced or refurbished and man, it feels like it
and we weren't the only ones to notice the new power under the hood.
Look at, they're jealous.
We have more horsepower.
Uh
That was really bad.
Got you.
Now, since this is the truck's first time out, we wanted to take it easy and skip the interstate. So we stuck to back roads keeping the speeds low,
enjoying the scenery and feeling the truck out.
And as we felt more and more comfortable with the truck, we picked the pace up a little bit, paying attention to any noises or vibrations.
Once we felt things were good to go, we hit the highway and opened her up.
Now, all the sound deadening and weather seals that we installed in this truck really paid off with a much more solid feel, but there's no getting around the classic styling and the aerodynamics and wind noise that go along with that,
but a little bit of wind noise. Well, it's a trade off because the classic design and styling of these vehicles is instantly recognizable and arguably beautiful. It's something you just don't find in modern vehicles
and this truck looks good from every angle with the classic green and white two tone looking good to everybody that laid eyes on it.
And the oak wood floor with the blonde stain and stainless steel slides just finished things off.
Now, out on the back roads and on the highway, the air ride suspension felt good and solid with it. Handling well and soaking up the bumps.
Another benefit of an air suspension is that not only can you dial in your ride height for different aesthetics, but you can also dial in a little bit of firmness if you're towing
and that can all be accomplished from the comfort of the cab while you're driving down the road
now, our nice new radial tires sure give a smoother ride than the old bias ply tires. They ran back in the day
and our 17 inch steel wheels with our chrome trim rings give a great mix of classic and modern styling
without being too big.
But as well as our shakedown runs went, there's always something. And for us, well, we didn't notice it until after we saw the footage and it's the backup light coming on and drive and that's just hot rodding, we'll fix that later.
All right, when we go around this corner don't go too fast
because this is the bench seat
and I don't want you sitting next to me.
Ok.
So slow it down. Despite the air ride being able to take it, you know, let's not get too comfortable here.
Now, some of the nicest compliments we've had on this project are regarding the paint job and the color scheme
and as we know, the best way to look at a paint job on a vehicle is outside in natural light,
it's also good to see that all the panels match each other. And like we showed you if you follow the same recipe, no matter when or where the panels were painted, it's all going to match when you put it back together.
Now, all in all, we were really happy with the way this old truck turned out.
The engine performed great. The automatic overdrive transmission handled the highway, no problem.
And the tires, wheels, brakes and suspension did their job
and we turned heads everywhere we went.
So, I guess it's safe to say our months and months of hard work paid off big time.
Hey,
welcome back to trucks.
Well, it was sure a lot of fun getting the old 66 out on the road finally. And man, the truck did good and we had one small problem, like you saw the backup lights are coming on when we weren't actually backing up. But that's just a matter of chasing down the electrical issue and fixing it, which brings us to a subject that we don't cover much because it takes so much time. The flip side of that is finding electrical problems and fixing them. Well, all it really cost you is time,
build on a budget truck projects that save you time and money.
Now, most of your electrical failures come from connection points. So right here, we've got some of the most simple and basic connections that you're going to run into in a wiring harness. Now, the simplest electrical connection short of twisting two wires together is a but connector where your stripped wire just gets inserted into the end and then crimped down for crimping. Most guys have one of these. It's a multi tool that cramps as well as strips.
But Matco offers this crimping tool which does short work and an amazing job
of ripping
a better connection than that is just a simple blade connector. The reason it's better is because you can disconnect the load from the circuit. But as you can see, it's unprotected from the elements.
Now, another simple connection that you don't even have to crimp is the posi
lock. It's very simple to operate. The wire goes in the cap
and as you tighten the threads,
the connection gets forced into the pin. Now, this is reversible. But as you can see, there's still no protection from moisture.
Now, by far, the most reliable and consistent electrical connection is the weather pack connection which a lot of oes and a lot of aftermarket companies use.
There's a moisture barrier here where the male and female ends of the plug go together as well as a moisture barrier at each wire inlet.
You don't have to spend a ton of cash, buying a premade weather pack harness or a circuit. There's lots of kits available and you can make your own. Here's how
the first step is stripping about 1/8 inch of insulation from the wire.
Next slide, the weather seal or the collar up over your wire until the end of the collar meets the installation.
Now, just like there's a male and female end of the plug, there's also a male and female terminal. Right now, we're working with the male slide, the terminal end into the terminal pliers and tighten down until you hear the first click
that holds the terminal in place while you slide in the wire and the collar and then tramp it all the way down.
Once you've inspected your crib to make sure you've got a good contact, just slide it into the end of the plug.
Now, the process for each seal is identical. Just make sure you have a male and a female connector
and you're rocking. Now, making your own weather pack connections is a great way to make sure that your project stays reliable no matter where you drive them and
what's the point of building them if we can't drive them.
You're watching trucks for a DVD copy of this episode. Just go to Power Block tv.com and order your copy for just 595 plus shipping and handling. Start your own trucks, collection delivered right to your door from the power block.
My power block is fueled by you, join groups, post build pics
and share videos.
You are the star
at my Power block.com.
There you go.
Hey, welcome back to trucks.
Well, I gotta tell you we're really proud of this truck because every goal we set we accomplish, it looks great. It drives great. It runs great and hopefully it's reinforced to some of you guys that you can build the truck of your dreams. And as sad as we are to see this thing go, the good thing about it is that it clears some more space for some new better projects. So
I think we can officially stick the fork in this truck because it buddy
is done.
Yeah, that was definitely a rewarding and fun truck to drive. Now, another fun project we've had here at the truck shop is our cheap Cherokee here. And I know a lot of you guys have been wondering what the final dyno results were. So after we added our intake manifold and throttle body that we picked up from J and W auto recorders and the header we picked up from
Brock. Well, here's what we ended up with.
We picked up another 11 or 12 horsepower and another seven or eight pound feet of torque. And while that's definitely not gonna win us any drag races, that's all right, because this thing has got more than enough power to get us up and down the highway and more importantly up and down the trail. So just like our green C 10,
we're gonna consider this thing
done.
Now, you guys already know specter performance from their cold air intake and diy intake options. Well, if you're dressing up your V8 engine, they've got something for you too.
These small block Chevy valve covers are made from a rugged construction tig welded with lightweight aluminum and they're coated for durability.
If you've got a taller rocker on profile, these 3.9 inch small block covers should give you all the clearance you need for just about any typical setup. But there's one other feature, this sleeve is gonna keep the valve cover from compressing when you tighten it down. That way you can minimize your gasket leaks and keep the rest of your engine looking as good as these specter covers.
Now, if you got any questions about the products we use on the show, go to Power Block tv.com.
Thanks for watching trucks. See you guys next time.
Show Full Transcript
We'll see just how much better this nearly 45 year old truck rides and handles. The classic look remains, but now it's on air and has a more powerful drive train.
It's all today here on trucks.
Hey, welcome to trucks. Well, the day is finally here where we get to take our 1966 Chevy C 10 out on its maiden voyage. Now we know it's been a long time coming and you guys have been anxious to see this thing completed and out on the road. Well, we've been just as anxious to get some seat time behind the wheel. So, needless to say, we're both pretty pumped
and as good as it feels to finally have this truck finished. It's gonna be a little sad to see it go. It's kind of become a member of the family here. And although it looks outwardly like the same 66 Chevy, we started with the truth is this truck has gone through a complete transformation.
Our truck was used as a truck its whole life, but remained pretty much stock other than a few repairs along the way,
but it was still a long wheelbase truck. So what do we do? We cut it in half,
getting 20 inches out of the frame and section 20 inches also from the bed size, front and rear. That way, we get to keep the crown of the panel and have a factory appearance.
So now that we had the short bed, we wanted, give us time to do something about the frame. So we took it to strip masters to have it media blasted. Now I say media blasted and not sandblasted because strip masters uses the appropriate media for the job at hand. In this case, it was glass beads where it doesn't destroy or profile the metal and set it up perfectly for powder coating.
Our friends at powder X coated the frame in a factory appearing semi gloss black and had a booth big enough for a train car. So in less than an afternoon, our frame went from bare steel to a coating that's going to last a lifetime.
And now that we had the frame and the sheet metal reduced to the more popular short bed size. Well, we knew we had a solid foundation to work off of. So we wanted to pick out a nice suspension system and upgrade the drive train.
But what we ended up going with was a strong arm system from ride tech and it replaced every single component in our suspension system.
Now, the air is not only going to give us a good ride and good handling. It's gonna let us pick out the ride height we want
and it was largely a bolt on short of the sea, not
to the rear frame. Then we wanted to pay some attention to the braking department. So we ditched the factory drum brakes and upgraded to this.
Now, the guys at horsepower did a mild rebuild to our original 283
and they added some higher flowing cylinder heads that could handle unleaded fuel.
After that, we bolted it up to our 700 R four overdrive transmission, dropped it in the frame rails and our new drive shaft will get that 280 plus horsepower to the ground. And a new fuel tank located between the frame rails will keep the fumes out of the cab.
Now to get the fumes out of the engine, we went with a 2.5 inch stainless steel exhaust system that was designed for this truck, but that we had to modify since our truck's been customized a little bit.
That's cool. Well, once we were satisfied with the new dimensions and the new stance of the truck, well, it was time to pay attention to the sheet metal. Now, we got pretty lucky starting with the project vehicle with solid panels and original paint, but we still wanted to start from the bare metal up to really see what was there and build a solid foundation for the new paint job. But what we did not want to do was pro file the metal with a bunch of heavy grit Sanders or warp the panels with sand. So we did a bunch of research. What we came up with was an interesting, do it yourself, user friendly, inexpensive method of completely removing the paint without damaging the sheet metal in any way. And on top of that, the bonus was that we got an environmentally friendly method as well.
The green method we found for removing the green paint was by using a pressurized blaster, using bicarbonate soda, not too far from tabletop, baking soda, but it doesn't profile the metal and you can blast right over plastic and chrome with no damage.
And with the metal strip, we could see the rust that needed to be repaired. Typical for these trucks, we put lower fenders on both sides and some other patch panels here and there.
And after 100 odd hours of priming and blocking the body, it was ready for paint
and we wanted to keep our environmental theme. So we use the environmentally friendly waterborne paint with 80% less Vo CS,
which is the pollution and paint that goes up into the
atmosphere. Our new modern two stage paint system was a near perfect match for the original colors, but with the added benefit of a clear coat to give the color more depth and had a lot more gloss.
And we complemented the new paint with all new bright work and trim pieces
and with the rest of the exterior looking so good, we finished it off with the installation of a bed wood kit.
Now, we just had to do something with the interior to match the quality we have already established with this thing. Now, the interior that we started with wasn't in terrible shape, but it wasn't new either. So we decided to freshen up on maintaining the classic look
and that started with refurbishing our original windshield which had been subjected to over 50 years of road debris and wiper scrub. So we polished it back to a nearly new condition.
We also wanted to breathe some life into our original instrument cluster. So we painted up the needles, cleaned everything up and reassembled it. It turned out looking nearly new.
Now, we didn't want the inside of the cab to have any road noise or drone or sound like an empty 50 gallon barrel. So we threw down some extra sound deader.
We also adapted our parking brake lever to our new chrome tilt column and got rid of the clutch pedal since this thing is now an automatic.
Now we put our air tank and control solenoids in the spot vacated by the factory fuel tank
and the bench seat that's gonna sit in front of it got recovered to match our painted two tone interior.
It's pretty cool.
Now, this truck was a lot of work and a lot of fun to build and we learned a lot during the process. But let me tell you just like we saw on the very first show when we introduced this project, I've got a bone stock 66 Chevy truck sitting at home in the garage and I know how it drives and believe me, it ain't so pretty. So now is the time, do we get to test our upgrades and throw some miles on this thing and see if what we did counts
up next. We're out on the open road
and later it's do it yourself, weather pack connectors. Stay tuned.
Hey, welcome back to trucks. Well, we're finally on the road with our 66 C 10 project and it's been so long since this thing has been driving under its own power. What it feels like a brand new truck and that's kind of a wordplay because for all intents and purposes, it is a brand new truck. Every component has been replaced or refurbished and man, it feels like it
and we weren't the only ones to notice the new power under the hood.
Look at, they're jealous.
We have more horsepower.
Uh
That was really bad.
Got you.
Now, since this is the truck's first time out, we wanted to take it easy and skip the interstate. So we stuck to back roads keeping the speeds low,
enjoying the scenery and feeling the truck out.
And as we felt more and more comfortable with the truck, we picked the pace up a little bit, paying attention to any noises or vibrations.
Once we felt things were good to go, we hit the highway and opened her up.
Now, all the sound deadening and weather seals that we installed in this truck really paid off with a much more solid feel, but there's no getting around the classic styling and the aerodynamics and wind noise that go along with that,
but a little bit of wind noise. Well, it's a trade off because the classic design and styling of these vehicles is instantly recognizable and arguably beautiful. It's something you just don't find in modern vehicles
and this truck looks good from every angle with the classic green and white two tone looking good to everybody that laid eyes on it.
And the oak wood floor with the blonde stain and stainless steel slides just finished things off.
Now, out on the back roads and on the highway, the air ride suspension felt good and solid with it. Handling well and soaking up the bumps.
Another benefit of an air suspension is that not only can you dial in your ride height for different aesthetics, but you can also dial in a little bit of firmness if you're towing
and that can all be accomplished from the comfort of the cab while you're driving down the road
now, our nice new radial tires sure give a smoother ride than the old bias ply tires. They ran back in the day
and our 17 inch steel wheels with our chrome trim rings give a great mix of classic and modern styling
without being too big.
But as well as our shakedown runs went, there's always something. And for us, well, we didn't notice it until after we saw the footage and it's the backup light coming on and drive and that's just hot rodding, we'll fix that later.
All right, when we go around this corner don't go too fast
because this is the bench seat
and I don't want you sitting next to me.
Ok.
So slow it down. Despite the air ride being able to take it, you know, let's not get too comfortable here.
Now, some of the nicest compliments we've had on this project are regarding the paint job and the color scheme
and as we know, the best way to look at a paint job on a vehicle is outside in natural light,
it's also good to see that all the panels match each other. And like we showed you if you follow the same recipe, no matter when or where the panels were painted, it's all going to match when you put it back together.
Now, all in all, we were really happy with the way this old truck turned out.
The engine performed great. The automatic overdrive transmission handled the highway, no problem.
And the tires, wheels, brakes and suspension did their job
and we turned heads everywhere we went.
So, I guess it's safe to say our months and months of hard work paid off big time.
Hey,
welcome back to trucks.
Well, it was sure a lot of fun getting the old 66 out on the road finally. And man, the truck did good and we had one small problem, like you saw the backup lights are coming on when we weren't actually backing up. But that's just a matter of chasing down the electrical issue and fixing it, which brings us to a subject that we don't cover much because it takes so much time. The flip side of that is finding electrical problems and fixing them. Well, all it really cost you is time,
build on a budget truck projects that save you time and money.
Now, most of your electrical failures come from connection points. So right here, we've got some of the most simple and basic connections that you're going to run into in a wiring harness. Now, the simplest electrical connection short of twisting two wires together is a but connector where your stripped wire just gets inserted into the end and then crimped down for crimping. Most guys have one of these. It's a multi tool that cramps as well as strips.
But Matco offers this crimping tool which does short work and an amazing job
of ripping
a better connection than that is just a simple blade connector. The reason it's better is because you can disconnect the load from the circuit. But as you can see, it's unprotected from the elements.
Now, another simple connection that you don't even have to crimp is the posi
lock. It's very simple to operate. The wire goes in the cap
and as you tighten the threads,
the connection gets forced into the pin. Now, this is reversible. But as you can see, there's still no protection from moisture.
Now, by far, the most reliable and consistent electrical connection is the weather pack connection which a lot of oes and a lot of aftermarket companies use.
There's a moisture barrier here where the male and female ends of the plug go together as well as a moisture barrier at each wire inlet.
You don't have to spend a ton of cash, buying a premade weather pack harness or a circuit. There's lots of kits available and you can make your own. Here's how
the first step is stripping about 1/8 inch of insulation from the wire.
Next slide, the weather seal or the collar up over your wire until the end of the collar meets the installation.
Now, just like there's a male and female end of the plug, there's also a male and female terminal. Right now, we're working with the male slide, the terminal end into the terminal pliers and tighten down until you hear the first click
that holds the terminal in place while you slide in the wire and the collar and then tramp it all the way down.
Once you've inspected your crib to make sure you've got a good contact, just slide it into the end of the plug.
Now, the process for each seal is identical. Just make sure you have a male and a female connector
and you're rocking. Now, making your own weather pack connections is a great way to make sure that your project stays reliable no matter where you drive them and
what's the point of building them if we can't drive them.
You're watching trucks for a DVD copy of this episode. Just go to Power Block tv.com and order your copy for just 595 plus shipping and handling. Start your own trucks, collection delivered right to your door from the power block.
My power block is fueled by you, join groups, post build pics
and share videos.
You are the star
at my Power block.com.
There you go.
Hey, welcome back to trucks.
Well, I gotta tell you we're really proud of this truck because every goal we set we accomplish, it looks great. It drives great. It runs great and hopefully it's reinforced to some of you guys that you can build the truck of your dreams. And as sad as we are to see this thing go, the good thing about it is that it clears some more space for some new better projects. So
I think we can officially stick the fork in this truck because it buddy
is done.
Yeah, that was definitely a rewarding and fun truck to drive. Now, another fun project we've had here at the truck shop is our cheap Cherokee here. And I know a lot of you guys have been wondering what the final dyno results were. So after we added our intake manifold and throttle body that we picked up from J and W auto recorders and the header we picked up from
Brock. Well, here's what we ended up with.
We picked up another 11 or 12 horsepower and another seven or eight pound feet of torque. And while that's definitely not gonna win us any drag races, that's all right, because this thing has got more than enough power to get us up and down the highway and more importantly up and down the trail. So just like our green C 10,
we're gonna consider this thing
done.
Now, you guys already know specter performance from their cold air intake and diy intake options. Well, if you're dressing up your V8 engine, they've got something for you too.
These small block Chevy valve covers are made from a rugged construction tig welded with lightweight aluminum and they're coated for durability.
If you've got a taller rocker on profile, these 3.9 inch small block covers should give you all the clearance you need for just about any typical setup. But there's one other feature, this sleeve is gonna keep the valve cover from compressing when you tighten it down. That way you can minimize your gasket leaks and keep the rest of your engine looking as good as these specter covers.
Now, if you got any questions about the products we use on the show, go to Power Block tv.com.
Thanks for watching trucks. See you guys next time.
