More '66 Chevy C-10 Episodes
More One-Half A C-10 Episodes
Trucks! Builds
Want more content like this?
Join the PowerNation Email NewsletterParts Used In This Episode
Summit Racing
16 Gallon Black Plastic Pro Street Fuel Cell with 0-90 ohm sending unit and two -8AN outlets and -6AN vent/return line. Steel mounting straps.
Summit Racing
Fuel Tank Sealing Kit, Cleaner, M.E.K. Prep, Tank Sealer, 1 qt. of Each, Kit.
Air-Ride Technologies
Front strong arm system- comes complete with upper and lower strong arms with cool ride system, cross shafts, bushings, air springs, shocks and mounting hardware. Rear strong arm system- comes complete with tubular arms, frame c-notches, panhard bar and mounting bracket. Upper crossmember, lower crossmember, air springs, shocks and mounting hardware.
ATS Diesel Performance, Inc.
A combination of the Aurora 3000 and 5000 turbo systems. The ATS Aurora Compound Turbo is designed for a twin compound configuration. Each turbo complements the other's performance, providing quick spool-up and delivering massive power. Using the existing Dodge Cummins factory components, the compound turbo installs easily and without interference. There are no welded flanges or pipes with ATS cast components. The custom-designed internal waste gate allows the large turbo to be securely mounted
Bowler Performance Transmissions
Tru-shift System for Demon Carbs, Edelbrock carbs, and Holley carbs, includes auto adjusting, detent cable, cable bracket,try-shift correction arm,lock up arm control module kit
Denny's Driveshaft
Street Rod Driveshafts are affordably priced and custom built in your choice of Steel or Aluminum.
Gearstar Performance Transmissions
Custom built 700-R4 overdrive transmission complete with torque convertor, dipstick, oil cooler, transmission mount and Throttle Valve cable.
LMC Truck
Fender patch panels both LH and RH.
LMC Truck
Fleetside side moldings '62-'66 Chevy Truck LB, side moldings clips.
LMC Truck
Rubber weatherseal kit, door bumper set, fender seal, hood bumper kit, cowl seal, sill plates, window channel kit, front bumper, bumper bolt kit, rear bumper, bumper bolt kit, bumper bracket kit, front grille, headlight bezels, door mirrors, euro style headlights, parking lamp bezels, parking lamp lenses, gaskets, bumper guard set, fender emblem set, cab corner trim, taligate chains, chain covers, bed to frame bolt kit, radiator support mount, cab mount kit, carpet kit, kick panel carpet, outsid
LMC Truck
Steel bed strips, oak wood flooring, front bed panel, bed bolt kit, & bed/frame bolt kit.
Master Power Brakes
Rear disc brake conversion kit, valving kit with fittings/brackets, master cylinder, & line kit.
O'Reilly Auto Parts
Rear Brake Line
O'Reilly Auto Parts
-6AN fuel cell bulkhead
O'Reilly Auto Parts
Pioneer flexplate 168T
O'Reilly Auto Parts
Fuel Filler Concealment Kit
O'Reilly Auto Parts
3/8" Fuel Hose 25 Ft.
O'Reilly Auto Parts
Non Power Master Cylinder
O'Reilly Auto Parts
Caliper Rebuild Kit, 3/16" Female Tee
O'Reilly Auto Parts
Ultima reman. starter
O'Reilly Auto Parts
Outer Tie Rod Ends
REZ Engineering
Power Steering Gearbox drop bracket.
The Eastwood Company
Soda blasting equipment.
The Industrial Depot
Miscellaneous Hardware and bolts of all types.
Episode Transcript
Today, it's the final assembly of our project. Daily Driver C 10,
our shorten 1966 Chevy C 10 is all painted but in a million pieces. So we'll show you how to completely reassemble an entire truck without a single scratch. It's all today here on trucks.
Hey, welcome to trucks. Well, today is the day we finally get to start the reassembly of our 66 Chevy Driver project. We've been working hard behind the scenes, getting everything assembled and tweaked in the paint done front and backsides. And let me tell you, we're both stoked because seeing the single back together for the last time,
it's been a long time coming and it seems like everybody that lays their eyes on the Waterborne two tone paint job just really digs it. I guess it fits the character of the truck. We've gotten some good feedback on the chassis as well and we made some progress there. I want to show you guys the details. But before we do that, let's get you up to speed on this project.
We went to work with one main goal in mine to convert our long bed truck into the more popular short bed version. So we sectioned the frame under the cab
and the bedside at both ends and ended up 20 inches shorter with a factory correct short wheelbase pickup.
Then it was off to have our frame media blasted and powder coated,
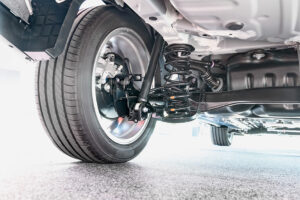
followed by a trick air suspension system from air ride technologies.
Then we used Eastwood's soda blasting kit to strip off the original paint and L MC patch panels took care of any body rust.
Our friends over at horsepower, took the original 283 with some upgrades and made almost 300 horsepower. We threw a gear star 700 R four behind it and dropped it right back down in the chassis.
Now in the interest of safety and efficiency, our rear drum brakes were converted with the master power rear disc brake conversion kit.
Then we started spraying the body with an environmentally friendly waterborne paint
and we just had to keep the classic two tone green and white paint scheme
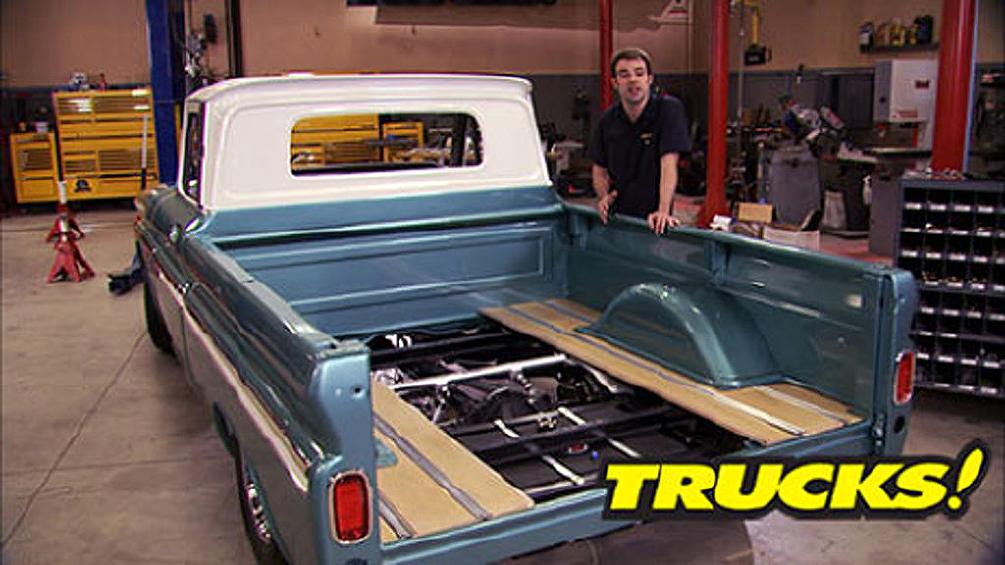
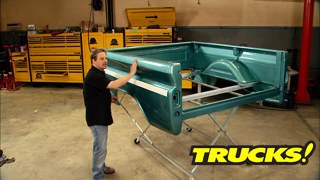
and even with just the bed done, but we couldn't resist setting it down on the frame to get an idea of what it's gonna look like.
Now, obviously, we weren't gonna put the fuel tank back in the cab where it was originally and well, we just didn't have it in the budget to have a custom stainless steel tank built. So what we did do is go to summit racing and pick up one of the universal and affordable 16 gallon fuel cells. It fits right in the space we had available and it comes with a 0 to 90 0 GM sending unit already installed. And since we're just running a mechanical fuel pump, a 38 line ought to be plenty.
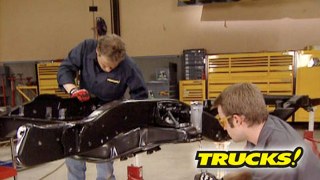
Now, our four wheel disc brake system is just about finished up. We got our hard lines bent and installed the flex lines mocked up. Everything's in place just waiting on the finishing details. Now, last year you saw us put on most of our air ride suspension system. But since then, we've also installed the included ride height sensors at all four corners,
plumb the air bags using the supplied hard line and attach the ride height sensors to the wiring harness.
Then we installed our twin compressors here on the frame. Now, since we went with the longer gear star 700 R four overdrive transmission, well, we need a shorter drive shaft. So we picked up the phone gave Denny a call
and using the measurements we provided, he sent us one of their steel high speed balanced street ride shafts. It's a little bit more moderately priced than is higher horsepower or nitrous ready shafts. Since we've got a mild 283 in front of ours, we should handle anything we throw at it and save us a few bucks too.
Now, we also wanted to upgrade to power steering. If you guys remember we robbed some parts of a 72 C 10, like the drag link or center link and the power steering box. The problem is the power steering box didn't bold up to our 66 frame. So we called the originators of the power steering conversion swap kit. Res engineering their kit sandwiches, the frame it's easy to install and it maintains factory steering geometry. So we won't run into issues like bump, steer or stress cracks at the mounting point. Now, to finish things up up front, we installed new outer tie rod ends that match the taper of our air rod supplied knuckles.
Now you saw us paint the bed, the cab and the rest of the sheet metal. We followed exactly the same recipe, the same amount of coats, the same paint gun, the same pressure. That way we know our color is gonna match.
The only deviation from stock with this cab is we shave the fuel filler because we've relocated the fuel tank.
We've been calling this a two tone, but the fact is, and you Chevy guys know this, that there's more than two colors on this truck. For instance, this pewter color on the inside of the cab and the inside of the doors. Well, believe it or not, this is leftover base coat from our second chance Silverado. So again, we're recycling and it looks really stock covered by the PPG flat clear.
Now you're gonna find an interesting phenomenon when you do a restoration like this trim pieces like this cab panel. Well, when we took them off the truck, they were in great shape, but once you put them up against that shiny new paint job,
well, they just don't cut it, especially when compared to a new piece, that's where a company like L MC truck comes into play. They've got beautiful reproductions of all these trim pieces and they make your paint pop more importantly they fit.
Now, L MC has a catalog full of parts for our truck as well as just about every other truck out there. This is just a small
couple of, some of the pieces that we're gonna put on our 66 starting with these skid plates are reproductions, but they're beautiful. Of course, our cab panel that we showed you and take a look at this. This is the original tailgate chain. It's kind of beat up, but it could be restored. This one is a replacement and it's chrome. Now, chrome won't get you home, but it will make our tailgate look better and he won't beat the heck out of the paint with his protective cover. Now, see these pits in here, you're never gonna polish those out a replacement handle like this. Well, it just gets the job done.
This is what we pulled off of the truck and it's in perfect condition except for the fact that the anodized coating is faded.
This will get you up and running in seconds and look original.
Now, this mirror we've got pitted chrome again and it just looks kind of beat up. It's worn out. This one isn't exactly the same, but it's gonna look beautiful in the truck and do the job it needs to do
here again.
Outside door handles, they're in nice shape, but they've got pitted chrome.
Here's a replacement that looks fantastic, including all the screws and hardware for mounting and the gaskets in the kit,
check these mirrors out. This is the West Coast style mirror that we pulled off of this truck. This is not going back on rather, we're gonna put this guy on there that's gonna look original and again, fit the function that we need.
My point is this whether you're going mild custom like we are or a full on original restoration. L MC truck has got some great options for you. And if you decide to get all new pieces, we can take some of these nice factory original pieces, swap me to get some of your money back. But before we start installing all these detail parts, we got to get the body back on the frame and we'll show you how to do that without damaging it. And that starts with getting this cab back on that chassis
up next. It's the easy way to remount your doors and get perfect panel gaps.
And later we'll finish off our truck with all new molding stick around.
Yeah, let's not go too far. I wanna hit the.
All right, little towards Dr
here. All right,
that's it.
Cool.
Thanks, fellas.
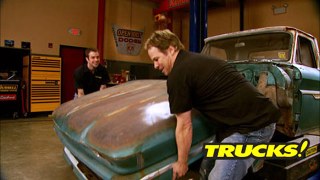
Hey, welcome back to trucks and thanks for sticking with us. Well, the first step in reassembling a truck body and frame together is putting the cab on new isolators. Really the only place that you can mess up here is
front of your firewall. Yeah, we thought we were gonna have a clearance issue with our Excel large cap he I distributor, but
looks like we've got just enough room.
Now, I'm sure when the guys over at horsepower picked out that Excel distributor, they were more concerned about getting a healthy spark than they were about firewall clearance. So I guess we lucked out
now not having a amount of coil externally is a great way to clean up your intake manifold and engine bay.
Now, here's where a little bit of prevention goes. A long way. Any possible area that one body panel could come into contact with another. We need to protect both sides.
A
second set of hands and a second set of eyes come into play here as well. Now, what we're doing here is hanging the door by the latch on the back first. This takes the pressure off the door and allows you to align your hinges.
Now, this hole right here is not original. This was a pilot hole that we drilled with an eight inch drill bit before this assembly
using your drill bit again
to line everything up.
Well, that'll get you in the ballpark.
So your adjustment is a lot easier. There we go.
When we painted the cab, we left the hinge bolts in the cab pillar itself. This was to keep up the bolts as well as to protect the fine threads and you might as well get used to the fact that you're gonna skin the paint off the bolts. When you tighten it down,
when you take your protective tape off your door edges, you can get a better idea of what your panel gap looks like and it ain't pretty, it's wide enough to throw an angry cat through. So some adjustment is in order.
Yeah.
Yeah, looking good.
Now, there's a universal rule for adjusting sheet metal on every vehicle, including trucks and that is start with a panel that cannot be adjusted in our case. It's this cab corner, it's fixed. So we start with our door gap here and work our way forward. This applies to every single vehicle. We're looking pretty good here.
Which way
f you left that Wayne?
All.
Mhm.
There it is.
Now, some of the bolts on our old C 10 were just a little too rusted and pitted. It would just take too much time to make them look new again.
So it's a good thing. Our friends at Industrial Depot
keep us well stocked with all kinds of hardware. Now, all these bolts are coded, so we don't have to worry about any corrosion issues. Now, these right here are gonna be covered up and hidden, but we are gonna have some exposed hardware that doesn't match.
Luckily we got some left over green paint. We can hand brush the bolt heads for a nice detailed look.
We painted the entire dog house as one unit. It was never disassembled because it had never been wrecked and the factory fit was ok. However, don't lock anything down just yet. You may have to shim for your final fit.
This thing started to look really good.
You good.
Yeah,
cool.
Hey, welcome back to the shop. Well, our 66 C 10 is coming together nicely and starting to look like a truck again.
And so far the reassembly has gone really, really smoothly. We've managed not to damage any of the paint during the reassembly process.
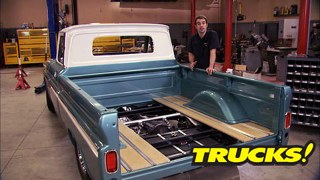
Now take a look at this bed kit we got from L MC. These are oak slats with a white oak stain and a satin polyurethane finish. The lighter color wood looks great against the cream color on the cab. These metal strips are stainless steel with stainless steel hardware that we just scuffed with a scotch bright pad to give it that finished look.
Yeah, like Ryan said, everything's gone very smoothly up until this point and that's because of the tips and tricks that we showed you and the help of some friends kicking in.
But Hey, this is hot rotting and there's always gonna be something that you gotta drop back and improvise and change your plan a little bit for us. Well, take a look at our fuel delivery system.
The inlet is right here and obviously this cross race can't go away. That's what holds the bed to the frame. Good thing is this is a polyethylene tank. So all we have to do is make a filler plate with our torch mate, glue it in here and change the whole location to the fuel inlet to here or maybe even here where it's centered in a board and it's gonna be a very easy conversion thanks to the Summit Racing Tank. Now, speaking of fuel tanks,
build on a budget truck projects that save you time and money
finding a suitable replacement fuel tank for our C 10 was fairly easy.
But what if you want to keep your original style tank in your classic truck? And a, they don't even make one or B it's just way too expensive. And the only thing wrong with yours is some pinholes and a little bit of rust. Well, it's fixable. We'll show you how using this three part kit we got from summit racing.
Now, the first part is a cleaner degreaser that removes any rust or scale or funky, build up on the inside of the tank. The second part is basically a chemical drying agent that removes any of the degreaser left over from step one
and finally, third step is the fuel tank liner that forms a membrane over the entire tank, sealing it up, preventing leaks.
Now, once you have all the openings closed up, dump all the fuel tank cleaner into the tank and shake it up, try to remove all the rust and scale from the inside walls of the tank. The worse it is, the more you need to do it.
All right, we'll let that degreaser soak for about 15 minutes. Shake it around again. Let it sit for another five minutes. Shake it one more time. Then we can rinse it out.
Now, removing liquid from a baffled fuel tank can be next to impossible. So have a siphon pump on hand to help in the process.
Now with the fuel tank cleaner removed, go ahead and add the drying agent and any time you're handling a harsh chemical or solvent like this, it's best to protect yourself. That's just common sense.
Now, with all the scale and rust build up removed, you can see that the inside of the tank is actually in pretty good shape.
We're ready to move on to the next step thick.
Now, the fuel tank liner is really thick and one quart will treat up to 12 gallons,
two quarts that'll take care of the bigger tanks up to 24 gallons.
All right. Well, here we are 24 hours later, everything's dried, sealed up and a membrane has formed over the entire tank.
So if you've got a truck with an irreplaceable gas tank or one that's just plain expensive to replace. Well, you can salvage yours for less than 50 bucks
need to do something about the outside of that thing.
Hey, guys, welcome back to trucks. Well, most of the heavy lifting has been done with our 66 long to short wheelbase converted C 10, 2 wheel drive pickup
and that's a mouthful. Now, we can slow down long enough to throw on some of the eye candy, which includes this grill. Now, the original grill we told you from day one is in almost perfect shape, but the anodized coating is faded like a lot of the pieces of this truck. So we dug into the L MC catalog to get this chrome grill that's shaved of the Chevrolet script features chrome headlight doors and these cool halogen headlights that are gonna give us a lot better visibility.
We replaced the turn signal bezels with brand new ones and also replaced these worn out amber lenses with clear ones, but we're using an amber ball behind. So we're dot legal.
So take a look at the progress we've made on our truck today.
The body is almost completely assembled and I gotta say I love the way this classic is turning out.
It didn't require any special tools, just a little bit of care and some help from a few friends.
Now we've left out some details like the windshield and we've got a replacement glass on hand just in case. But later on, we're going to show you guys projects like polishing wiper scrubs and fixing rock chips and show you that you can actually repair glass very effectively if it's not in your budget to replace it.
Now, almost all of us know that turbo
charging is a great way to make more power, especially you diesel guys. But what's better than a single turbo? Obviously, two of them. That's why A TS developed this Aurora plus compound dual turbo setup to complement your factory turbo. This complete bolt on kit includes all the intake plumbing, a heat shield, oil lines, all the hardware necessary as well as an isolated high flow air filter and box, a high flow manifold. And of course, the Aurora 4000 turbo charger
and with your factory turbo feeding this turbo, well, your 03 to 0759 cummins equipped Dodge ought to be putting out about 430 horsepower to get this almost 900 ft pounds of torque.
A ts aurora plus compound dual turbo setup starts about 3200 bucks.
Now, if you've got any questions about today's show or anything else that you've seen on trucks, go to power Block tv.com and check out our online resources. Thanks for watching trucks. See you guys next week.
Show Full Transcript
our shorten 1966 Chevy C 10 is all painted but in a million pieces. So we'll show you how to completely reassemble an entire truck without a single scratch. It's all today here on trucks.
Hey, welcome to trucks. Well, today is the day we finally get to start the reassembly of our 66 Chevy Driver project. We've been working hard behind the scenes, getting everything assembled and tweaked in the paint done front and backsides. And let me tell you, we're both stoked because seeing the single back together for the last time,
it's been a long time coming and it seems like everybody that lays their eyes on the Waterborne two tone paint job just really digs it. I guess it fits the character of the truck. We've gotten some good feedback on the chassis as well and we made some progress there. I want to show you guys the details. But before we do that, let's get you up to speed on this project.
We went to work with one main goal in mine to convert our long bed truck into the more popular short bed version. So we sectioned the frame under the cab
and the bedside at both ends and ended up 20 inches shorter with a factory correct short wheelbase pickup.
Then it was off to have our frame media blasted and powder coated,
followed by a trick air suspension system from air ride technologies.
Then we used Eastwood's soda blasting kit to strip off the original paint and L MC patch panels took care of any body rust.
Our friends over at horsepower, took the original 283 with some upgrades and made almost 300 horsepower. We threw a gear star 700 R four behind it and dropped it right back down in the chassis.
Now in the interest of safety and efficiency, our rear drum brakes were converted with the master power rear disc brake conversion kit.
Then we started spraying the body with an environmentally friendly waterborne paint
and we just had to keep the classic two tone green and white paint scheme
and even with just the bed done, but we couldn't resist setting it down on the frame to get an idea of what it's gonna look like.
Now, obviously, we weren't gonna put the fuel tank back in the cab where it was originally and well, we just didn't have it in the budget to have a custom stainless steel tank built. So what we did do is go to summit racing and pick up one of the universal and affordable 16 gallon fuel cells. It fits right in the space we had available and it comes with a 0 to 90 0 GM sending unit already installed. And since we're just running a mechanical fuel pump, a 38 line ought to be plenty.
Now, our four wheel disc brake system is just about finished up. We got our hard lines bent and installed the flex lines mocked up. Everything's in place just waiting on the finishing details. Now, last year you saw us put on most of our air ride suspension system. But since then, we've also installed the included ride height sensors at all four corners,
plumb the air bags using the supplied hard line and attach the ride height sensors to the wiring harness.
Then we installed our twin compressors here on the frame. Now, since we went with the longer gear star 700 R four overdrive transmission, well, we need a shorter drive shaft. So we picked up the phone gave Denny a call
and using the measurements we provided, he sent us one of their steel high speed balanced street ride shafts. It's a little bit more moderately priced than is higher horsepower or nitrous ready shafts. Since we've got a mild 283 in front of ours, we should handle anything we throw at it and save us a few bucks too.
Now, we also wanted to upgrade to power steering. If you guys remember we robbed some parts of a 72 C 10, like the drag link or center link and the power steering box. The problem is the power steering box didn't bold up to our 66 frame. So we called the originators of the power steering conversion swap kit. Res engineering their kit sandwiches, the frame it's easy to install and it maintains factory steering geometry. So we won't run into issues like bump, steer or stress cracks at the mounting point. Now, to finish things up up front, we installed new outer tie rod ends that match the taper of our air rod supplied knuckles.
Now you saw us paint the bed, the cab and the rest of the sheet metal. We followed exactly the same recipe, the same amount of coats, the same paint gun, the same pressure. That way we know our color is gonna match.
The only deviation from stock with this cab is we shave the fuel filler because we've relocated the fuel tank.
We've been calling this a two tone, but the fact is, and you Chevy guys know this, that there's more than two colors on this truck. For instance, this pewter color on the inside of the cab and the inside of the doors. Well, believe it or not, this is leftover base coat from our second chance Silverado. So again, we're recycling and it looks really stock covered by the PPG flat clear.
Now you're gonna find an interesting phenomenon when you do a restoration like this trim pieces like this cab panel. Well, when we took them off the truck, they were in great shape, but once you put them up against that shiny new paint job,
well, they just don't cut it, especially when compared to a new piece, that's where a company like L MC truck comes into play. They've got beautiful reproductions of all these trim pieces and they make your paint pop more importantly they fit.
Now, L MC has a catalog full of parts for our truck as well as just about every other truck out there. This is just a small
couple of, some of the pieces that we're gonna put on our 66 starting with these skid plates are reproductions, but they're beautiful. Of course, our cab panel that we showed you and take a look at this. This is the original tailgate chain. It's kind of beat up, but it could be restored. This one is a replacement and it's chrome. Now, chrome won't get you home, but it will make our tailgate look better and he won't beat the heck out of the paint with his protective cover. Now, see these pits in here, you're never gonna polish those out a replacement handle like this. Well, it just gets the job done.
This is what we pulled off of the truck and it's in perfect condition except for the fact that the anodized coating is faded.
This will get you up and running in seconds and look original.
Now, this mirror we've got pitted chrome again and it just looks kind of beat up. It's worn out. This one isn't exactly the same, but it's gonna look beautiful in the truck and do the job it needs to do
here again.
Outside door handles, they're in nice shape, but they've got pitted chrome.
Here's a replacement that looks fantastic, including all the screws and hardware for mounting and the gaskets in the kit,
check these mirrors out. This is the West Coast style mirror that we pulled off of this truck. This is not going back on rather, we're gonna put this guy on there that's gonna look original and again, fit the function that we need.
My point is this whether you're going mild custom like we are or a full on original restoration. L MC truck has got some great options for you. And if you decide to get all new pieces, we can take some of these nice factory original pieces, swap me to get some of your money back. But before we start installing all these detail parts, we got to get the body back on the frame and we'll show you how to do that without damaging it. And that starts with getting this cab back on that chassis
up next. It's the easy way to remount your doors and get perfect panel gaps.
And later we'll finish off our truck with all new molding stick around.
Yeah, let's not go too far. I wanna hit the.
All right, little towards Dr
here. All right,
that's it.
Cool.
Thanks, fellas.
Hey, welcome back to trucks and thanks for sticking with us. Well, the first step in reassembling a truck body and frame together is putting the cab on new isolators. Really the only place that you can mess up here is
front of your firewall. Yeah, we thought we were gonna have a clearance issue with our Excel large cap he I distributor, but
looks like we've got just enough room.
Now, I'm sure when the guys over at horsepower picked out that Excel distributor, they were more concerned about getting a healthy spark than they were about firewall clearance. So I guess we lucked out
now not having a amount of coil externally is a great way to clean up your intake manifold and engine bay.
Now, here's where a little bit of prevention goes. A long way. Any possible area that one body panel could come into contact with another. We need to protect both sides.
A
second set of hands and a second set of eyes come into play here as well. Now, what we're doing here is hanging the door by the latch on the back first. This takes the pressure off the door and allows you to align your hinges.
Now, this hole right here is not original. This was a pilot hole that we drilled with an eight inch drill bit before this assembly
using your drill bit again
to line everything up.
Well, that'll get you in the ballpark.
So your adjustment is a lot easier. There we go.
When we painted the cab, we left the hinge bolts in the cab pillar itself. This was to keep up the bolts as well as to protect the fine threads and you might as well get used to the fact that you're gonna skin the paint off the bolts. When you tighten it down,
when you take your protective tape off your door edges, you can get a better idea of what your panel gap looks like and it ain't pretty, it's wide enough to throw an angry cat through. So some adjustment is in order.
Yeah.
Yeah, looking good.
Now, there's a universal rule for adjusting sheet metal on every vehicle, including trucks and that is start with a panel that cannot be adjusted in our case. It's this cab corner, it's fixed. So we start with our door gap here and work our way forward. This applies to every single vehicle. We're looking pretty good here.
Which way
f you left that Wayne?
All.
Mhm.
There it is.
Now, some of the bolts on our old C 10 were just a little too rusted and pitted. It would just take too much time to make them look new again.
So it's a good thing. Our friends at Industrial Depot
keep us well stocked with all kinds of hardware. Now, all these bolts are coded, so we don't have to worry about any corrosion issues. Now, these right here are gonna be covered up and hidden, but we are gonna have some exposed hardware that doesn't match.
Luckily we got some left over green paint. We can hand brush the bolt heads for a nice detailed look.
We painted the entire dog house as one unit. It was never disassembled because it had never been wrecked and the factory fit was ok. However, don't lock anything down just yet. You may have to shim for your final fit.
This thing started to look really good.
You good.
Yeah,
cool.
Hey, welcome back to the shop. Well, our 66 C 10 is coming together nicely and starting to look like a truck again.
And so far the reassembly has gone really, really smoothly. We've managed not to damage any of the paint during the reassembly process.
Now take a look at this bed kit we got from L MC. These are oak slats with a white oak stain and a satin polyurethane finish. The lighter color wood looks great against the cream color on the cab. These metal strips are stainless steel with stainless steel hardware that we just scuffed with a scotch bright pad to give it that finished look.
Yeah, like Ryan said, everything's gone very smoothly up until this point and that's because of the tips and tricks that we showed you and the help of some friends kicking in.
But Hey, this is hot rotting and there's always gonna be something that you gotta drop back and improvise and change your plan a little bit for us. Well, take a look at our fuel delivery system.
The inlet is right here and obviously this cross race can't go away. That's what holds the bed to the frame. Good thing is this is a polyethylene tank. So all we have to do is make a filler plate with our torch mate, glue it in here and change the whole location to the fuel inlet to here or maybe even here where it's centered in a board and it's gonna be a very easy conversion thanks to the Summit Racing Tank. Now, speaking of fuel tanks,
build on a budget truck projects that save you time and money
finding a suitable replacement fuel tank for our C 10 was fairly easy.
But what if you want to keep your original style tank in your classic truck? And a, they don't even make one or B it's just way too expensive. And the only thing wrong with yours is some pinholes and a little bit of rust. Well, it's fixable. We'll show you how using this three part kit we got from summit racing.
Now, the first part is a cleaner degreaser that removes any rust or scale or funky, build up on the inside of the tank. The second part is basically a chemical drying agent that removes any of the degreaser left over from step one
and finally, third step is the fuel tank liner that forms a membrane over the entire tank, sealing it up, preventing leaks.
Now, once you have all the openings closed up, dump all the fuel tank cleaner into the tank and shake it up, try to remove all the rust and scale from the inside walls of the tank. The worse it is, the more you need to do it.
All right, we'll let that degreaser soak for about 15 minutes. Shake it around again. Let it sit for another five minutes. Shake it one more time. Then we can rinse it out.
Now, removing liquid from a baffled fuel tank can be next to impossible. So have a siphon pump on hand to help in the process.
Now with the fuel tank cleaner removed, go ahead and add the drying agent and any time you're handling a harsh chemical or solvent like this, it's best to protect yourself. That's just common sense.
Now, with all the scale and rust build up removed, you can see that the inside of the tank is actually in pretty good shape.
We're ready to move on to the next step thick.
Now, the fuel tank liner is really thick and one quart will treat up to 12 gallons,
two quarts that'll take care of the bigger tanks up to 24 gallons.
All right. Well, here we are 24 hours later, everything's dried, sealed up and a membrane has formed over the entire tank.
So if you've got a truck with an irreplaceable gas tank or one that's just plain expensive to replace. Well, you can salvage yours for less than 50 bucks
need to do something about the outside of that thing.
Hey, guys, welcome back to trucks. Well, most of the heavy lifting has been done with our 66 long to short wheelbase converted C 10, 2 wheel drive pickup
and that's a mouthful. Now, we can slow down long enough to throw on some of the eye candy, which includes this grill. Now, the original grill we told you from day one is in almost perfect shape, but the anodized coating is faded like a lot of the pieces of this truck. So we dug into the L MC catalog to get this chrome grill that's shaved of the Chevrolet script features chrome headlight doors and these cool halogen headlights that are gonna give us a lot better visibility.
We replaced the turn signal bezels with brand new ones and also replaced these worn out amber lenses with clear ones, but we're using an amber ball behind. So we're dot legal.
So take a look at the progress we've made on our truck today.
The body is almost completely assembled and I gotta say I love the way this classic is turning out.
It didn't require any special tools, just a little bit of care and some help from a few friends.
Now we've left out some details like the windshield and we've got a replacement glass on hand just in case. But later on, we're going to show you guys projects like polishing wiper scrubs and fixing rock chips and show you that you can actually repair glass very effectively if it's not in your budget to replace it.
Now, almost all of us know that turbo
charging is a great way to make more power, especially you diesel guys. But what's better than a single turbo? Obviously, two of them. That's why A TS developed this Aurora plus compound dual turbo setup to complement your factory turbo. This complete bolt on kit includes all the intake plumbing, a heat shield, oil lines, all the hardware necessary as well as an isolated high flow air filter and box, a high flow manifold. And of course, the Aurora 4000 turbo charger
and with your factory turbo feeding this turbo, well, your 03 to 0759 cummins equipped Dodge ought to be putting out about 430 horsepower to get this almost 900 ft pounds of torque.
A ts aurora plus compound dual turbo setup starts about 3200 bucks.
Now, if you've got any questions about today's show or anything else that you've seen on trucks, go to power Block tv.com and check out our online resources. Thanks for watching trucks. See you guys next week.
