More Cheep Cherokee Episodes
Trucks! Builds
Want more content like this?
Join the PowerNation Email NewsletterParts Used In This Episode
Interdynamics Inc.
SUPER SEAL Radiator Stop Leak
O'Reilly Auto Parts
Accessory Belt
O'Reilly Auto Parts
Power Steering hoses high and low side
O'Reilly Auto Parts
Power Steering Pump
O'Reilly Auto Parts
Idler Pulley
O'Reilly Auto Parts
Upper and Lower Radiator Hoses
O'Reilly Auto Parts
Replacement transmission mount
O'Reilly Auto Parts
Wheel Speed Sensor
O'Reilly Auto Parts
Crank Sensor
O'Reilly Auto Parts
Temp, Sender, Oil Pressor Sensor
O'Reilly Auto Parts
Axle U-Joints (2)
Rusty's Off Road
Advance Adapters Slip Yoke Eliminator.
Rusty's Off Road
Diff Guard Skid Plates.
Rusty's Off Road
Drop Pitman Arm 3" (XJ/TJ/YJ)
Rusty's Off Road
Frame Strengthener & Trac-bar Mount Brace.
Rusty's Off Road
Over-the-Knuckle Steering Conversion. The system includes a version of our proven steering conversion, adjustable trac bar with frame mount, weld on axle mounts, weld on sway bar axle mount, and knuckle shim inserts.
Rusty's Off Road
Rusty's Off Road long travel suspension, Kit includes: HD Cross member, Adjustable Long Arm, Adjustable Radius Arm, Frame Reinforcement(inner and outer), Hardware Kit, Flex Joint Wrench.
Episode Transcript
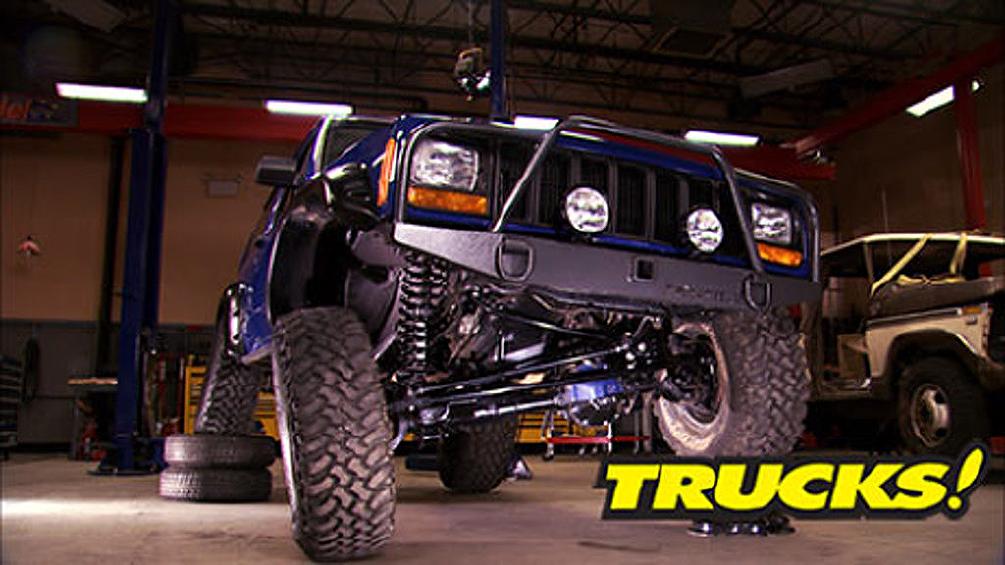
Today, project cheap Cherokees, getting a long arm suspension upgrade, a slip Yoke Eliminator kit and three more inches of Tyrod ground clearance. The easy way it's all today here on trucks.
Hey, welcome to trucks.
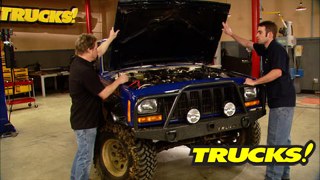
Well, our cheap Cherokee's budget 4.6 L stroke engine obviously completely installed and running pretty well. And I'm sure we're gonna make a great improvement over the stock 4 L engines. Lackluster
dyno numbers.
But before we put this thing on the dyno and thrash it, I wanna put a few break in miles on it.
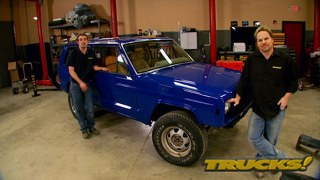
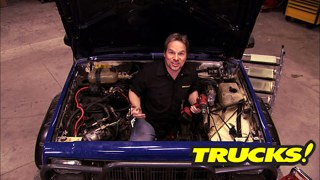
We gave it a bath on the outside. And so now the exterior matches how nice it looks under the hood and the coolest thing about a Stroker is that it fits in exactly the same place as the original engine.
The way we stroke this one, it's not gonna be an expensive ordeal to have to repair anything. It's all over the counter parts and I'm sure you guys will agree. This cheap Cherokee has come a long way since we started.
Now, our rebuilt Straight six is making good oil pressure and it's running nice and cool. But to ensure it lives a long life. We're gonna give it plenty of time for the Rings to seed in and make sure it's fully broken in. So today we're gonna address some issues on the underside of the Jeep, make a few upgrades
upgrade.
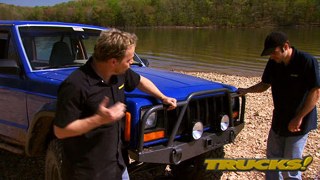
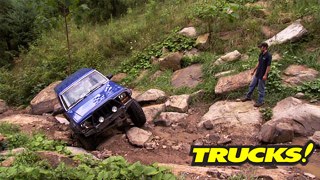
Now, this budget minded suspension actually did pretty good even on the rock crawling course. However,
as you can see the tires came into contact with the fender players on several occasions on the more aggressive trails. Now, I guess we could lower the bump stops and limit the suspension travel, but that kind of defeats the purpose of an off road suspension in the first place. So we're figuring with a long arm suspension system and longer coil springs, we'll get the articulation and flex that we need along with a better and smoother ride on and off road
and while we're in here making upgrades, well, we might as well ditch the weak factory steering set up and we're gonna add some diff protection as well.
And although we've managed to avoid any drive shaft vibrations so far, even on the
dyno and four wheel drive, well, we were at the limits of what you can get away with without a slip Yoke Eliminator kit installed in the transfer case. So, since we're gonna be sitting at a little bit taller lift tight, we're gonna add one of those as well. We'll do that today.
Now, if you're just doing the long arm swap, you can keep your coil springs and your shocks. But that's, we're going for a little more altitude today as well. So the entire suspension gets ripped off and then some,
you have clear. Yep.
Now, just like the Grand Cherokee we worked on, you gotta cut off the lower control on mounting brackets to make room for the long arm.
All right, with the front suspension gutted in the control arm brackets cut off. We're almost ready to start installing this long arm upgrade kit we got from Rusty's, but like we told you, we got some work to do to the transfer case. So we wanna get that done before we install our new cross member. Now, just like the system we put on the Grand Cherokee, it bolts in utilizing these brackets that sandwich
frame rail holding everything together.
Now, the control arms, it's a radius style arm uses heavy duty tubing
in OEM style rubber bushing on one end to minimize road noise and vibration
and a forged heavy duty flex joint at the other. It's grea
preload, adjustable and rebuildable. So you get plenty of flex out of it and a long life
so you can keep the mess to a minimum by draining the fluid before you split the case open on a bench top.
All right. Well, it's been a while since we did a Slip Yoke Eliminator kit install in a Jeep transfer case. So just to make sure we're all on the same page, we're gonna go over a couple of reasons why as the suspension cycles, the distance between here and the axle will actually change. So to account for that, the factory installs a slip yoke at the back of the transfer case. The problem is if you break a U joint and need to remove the shaft, we could lose all the fluid leaving you stranded on the side of the trail.
So we're gonna upgrade to a fixed yoke output and that'll move all the slip travel to the drive shaft.
And the other reason is the fixed yoke output is actually shorter, allowing us to change to a longer drive shaft, which is especially beneficial to short wheel base rigs like Wranglers. We're also gonna upgrade to a CV style drive shaft which will completely eliminate drive line vibrations even at taller lift heights,
start the disassembly of the transfer case by removing the retainer and the speedometer drive gear. Follow that with the removal of the front output yoke. If you don't have an impact gun, you can use a pair of channel locks and a breaker bar.
Follow that with the removal of the tail cone assembly and don't worry about scarring up the surface with a screwdriver and a hammer because it doesn't get reused.
Now,
there's a location on either end of the transfer case where you can insert a screwdriver and pry up on without damaging the mating surfaces. That way you don't end up with a leak down the road
and you might as well check the chain for any slack or any stretch and if need be replace it. Now,
now, while you got the case apart, make sure you take a look at the shift fork pads on both sides. If they're not in good condition, replace them, they're cheap. Otherwise it could cause you popping out of gear and just headaches down the road.
Now, you also need to take time to wipe off the magnet that sits in the transfer case, remove any debris.
You follow that with removal of the snap ring and the shift hub from the original main shaft. Now, certain model year transfer cases have bearings installed that need to be removed before reinstallation onto the new main shaft
to do that. We're using a large socket
in the world's largest rubber mallet
and with that taken care of, you can reinstall the dry sprocket and hub assembly back onto the new much larger main shaft. Follow that with the installation of the retaining snap ring
and just make sure it's fully seated before you move on.
Now, we've got all the gasket material scraped off both case
hs but before we reassemble everything, we wanna make sure we clean out any debris that may have fallen down in there.
Now to seal the two case halves, we're using lock tight 518 gasket eliminator flange ceiling
and you don't need to go ape with it. It's a machine surface and all you need is a light continuous feed all the way around the edges to get the job done
with the case bolted together. You can install the snap ring that retains the oil pump. Follow that with the speedometer drive gear and one more snap ring.
After shifting the transfer case into four wheel drive, you need to measure the shift rod stick out length. If it's more than an inch, you need to trim it down because the new tail housing only has a pocket depth of 1.125 inches.
We use one inch masking tape as a guide.
Then the job gets finished up by installing the new tail housing
and don't forget to put a little bit of lubrication on the output yoke seal.
That'll prevent possible damage to the seal during first start up
up. Next, we're installing our long arms
and showing you why
and later, just one simple hand tool and two little inserts give you more Tyrod ground clearance. Stay tuned.
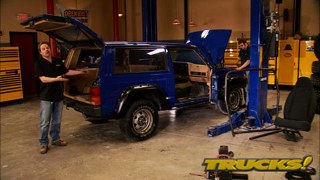
Hey, welcome back to trucks. Well, we got a transfer case reinstalled complete with a slip oak Eliminator kit. And we took a little time to address these areas where we cut off the original control arm mounts on the left and right frame rail now ready to throw on some big chunks.
Now, since the original isolator was seriously deteriorated from decades of oil leaks, we threw a new one on, we got from o'reilly before we put the Russe cross memberm in place.
Now, like we told you earlier, this system is designed to bolt in. However, we've got a fitment issue due to our previously welded in rocker skids. So to solve that problem, we're gonna notch this bracket and weld it in,
but we still need to support the cross member because that's where the control arms mount and it needs to be nice and strong.
So we're gonna remove this section here, cut out a plate that'll bolt in and it'll evenly distribute the load along the unibody frame rail.
Well, Ryan takes care of the mining bracket. I thought I'd take care of a leak that we had on the rear diff seal,
which was caused by us dragging this thing over a gnarly rock course and slightly peeling back the diff cover.
Now, the bad news is it's gonna cause us some diff lube, but it also gives us a really good opportunity to check for debris in the bottom of the case.
And rather than using an abrasive disk on a rotary tool, we're using a single edge razor blade and some brake clean to clean off the old sealant from the mating surfaces.
Now, there's different schools of thought on sealing a surface like this. Some people like the cork gasket, some people like a combination of cork and R TV. But what we found that works great for us is a thin film of our TV, on each side of the mating surface and just being careful not to, over to
now, since we have every intention of crawling rocks again, we're using rusty's heavy duty d
protector to keep the same thing from happening twice
and it'll keep us from caving the cover in or punching a hole in it in case we back into a rock.
All right. Well, after some modifications, here's what we've got, we've got the bracket notch to fit. We've got holes drilled for some plug welds and we've got some nuts welded to the back side of the bracket. So we can use this plate
to bolt everything together, sandwich the cross member in a place weld this bracket in,
lock it down.
Now, if you're wondering why we're spending the extra money upgrading to a long arm kit, we'll check this out.
This is about the length of the factory lower control arm. This is our new lower control arm and this line down here represents about the same amount of suspension drop, about 12 inches. A droop. Look what happens here. The angle in the shorter arm is drastically different. And as you know, as suspension drops, it's a single pivot point. So it pulls it back and changes the suspension geometry that can cause binding on the trail not good. So the longer arm also absorbs more road energy translating into a smoother ride, bottom line, long arm system, smoother ride more suspension dynamics better articulation, less binding money well spent.
Yeah.
Ok. We gotta go forward
the
whole,
there we go. It works.
Ok. Yeah, that's better for this side too.
Now, Rusty's provides measurements to get you in the ballpark with a basic set up, but you're probably going to have to readjust with the vehicle weight on the chassis for pin angle and other adjustments.
That's it.
After the break, we're installing the steering linkage upside down for a good reason. That is and later we'll flex this thing out. Stick around.
Hey, welcome back today. We're upgrading the suspension system on our cheap Cherokee to a long arm kit that we got from Rusty's off road products. Now, we're also gonna do a steering system upgrade while we're at it. Now, check out the stock system, we took off this drag link, it's solid, it's ok. But
the tie rod is just thin wall round tubing. And if you've ever wheeled one of these vehicles, you know that these things are
pretty much sacrificial to bend up in a heartbeat.
Not to mention,
look at the tie rod end. These things are mild up and worn out. So an upgrade is definitely necessary. Since we're going up in altitude, we're also gonna use a drop pitman arm that we got with the steering system, which includes these heavy duty pieces from Rusty's while we're doing all of this. We'll show you guys a way to get an extra three inches of ground clearance for almost nothing.
Build on a budget truck projects that save you time and money.
All right. Well, we've got our drop Pitman arm and drag link on and we're ready to add our tie rod. Now, this is where it typically gets installed on the bottom side of the knuckle. But like Kevin said, we're gonna gain some clearance by installing it on the top side of the knuckle. And to do that, we're gonna use these, these tapered inserts get installed in the bottom side of the knuckle to remove the taper. Then we'll add taper to the top using this reamer tool.
Now, we're removing the end from the rusty's tie rod assembly so we can use it as a depth gauge of sorts
because you don't want to ream out the attachment point of the knuckle too far.
Now, when doing the job, you need to keep the tool as perpendicular as possible to the knuckle and you only wanna remove a little bit of material at a time. So you can use the tea handle provided on the tool, use a wrench or even a ratchet,
just take your time and
be sure to check with your tie rod end every few turns or so because it's a lot easier to remove material than it is to add it back in
couple more turns and we'll be in good shape. Now, if you're still not comfortable doing this job yourself, you could always take the knuckle off the axle, take it to a machine shop and have them perform the task.
And once you're happy with the depth of the ream, install the insert,
the tie rod end
and move on to the other side
that tighten down. We'll be in good shape.
Now, this tool matches the taper of our tie rod end and it works by turning it clockwise and letting the sharpened flutes remove a little bit of material at a time.
Now, these reamers are available in varying qualities and of course varying prices, but don't get tempted into throwing this thing into a high speed drill to try to get the job done. You don't need to remove too much material.
You don't wanna burn up a bit.
Now, for the final installation, don't forget the grease, retaining boot and the cotter pin and
be sure to pump a few shots of grease into the tie rod end before you move on.
Sweet.
Now, you can see from this shot how much clearance we've gained for just a few dollars over the oe set up,
put the turns of the castle down.
Hey, welcome back to trucks. Well, as you can see, our long arm insulation is on the home stretch and now with the vehicle weight down on the suspension, we can set our track bar height on the driver's side.
We're gonna use a provided drop bracket and on the other side, we're gonna use a rusty's bracket kit. The important thing to remember is when you're setting a track bar,
keep the bar itself as parallel as possible to the drag link. That way you eliminate bump steer.
Now, diagnosing a vehicle system leak can be pretty difficult, especially if you're laying underneath the truck or underneath the dark hood. That's where super seals. Two part leak detection and repair kits come in handy. Check this out. Here's a 5050 mixture of antifreeze and water and here's the same mix with a few drops of the UV Dy in. Now with the help of a regularly available UV light.
Well, you can see the difference here. You're gonna, you're gonna see that there's no mista
where that leak is coming from.
They make these systems for engines, transmissions and cooling systems. And the manufacturer claims that by using both parts of this two part system, you may very well repair the leak that you just diagnosed.
That's cool.
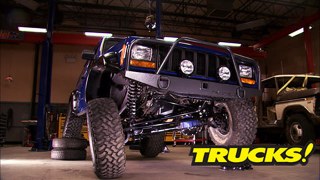
Well, our cheap Cherokees is almost finished and check out the clearance we gained by flipping our steering to the top side of the knuckles
and we've had a chance to weld on and paint our track bar bracket as well as add our Rusty's track bar brace. Now, we've got this thing flexed out so we can check shock links the rears, they're fine, but the front is limiting down travel. So, rather than buy a new pair of shocks, we're gonna use these
gasket shock extenders, they thread right on top of our old shocks and it'll buy us an extra couple of inches. That way we're not using them as limiting straps, blowing our shocks out. Now, if you got any questions about any products you saw on today's show, go to Power Block tv.com. Thanks for watching trucks. See you next week.
Show Full Transcript
Hey, welcome to trucks.
Well, our cheap Cherokee's budget 4.6 L stroke engine obviously completely installed and running pretty well. And I'm sure we're gonna make a great improvement over the stock 4 L engines. Lackluster
dyno numbers.
But before we put this thing on the dyno and thrash it, I wanna put a few break in miles on it.
We gave it a bath on the outside. And so now the exterior matches how nice it looks under the hood and the coolest thing about a Stroker is that it fits in exactly the same place as the original engine.
The way we stroke this one, it's not gonna be an expensive ordeal to have to repair anything. It's all over the counter parts and I'm sure you guys will agree. This cheap Cherokee has come a long way since we started.
Now, our rebuilt Straight six is making good oil pressure and it's running nice and cool. But to ensure it lives a long life. We're gonna give it plenty of time for the Rings to seed in and make sure it's fully broken in. So today we're gonna address some issues on the underside of the Jeep, make a few upgrades
upgrade.
Now, this budget minded suspension actually did pretty good even on the rock crawling course. However,
as you can see the tires came into contact with the fender players on several occasions on the more aggressive trails. Now, I guess we could lower the bump stops and limit the suspension travel, but that kind of defeats the purpose of an off road suspension in the first place. So we're figuring with a long arm suspension system and longer coil springs, we'll get the articulation and flex that we need along with a better and smoother ride on and off road
and while we're in here making upgrades, well, we might as well ditch the weak factory steering set up and we're gonna add some diff protection as well.
And although we've managed to avoid any drive shaft vibrations so far, even on the
dyno and four wheel drive, well, we were at the limits of what you can get away with without a slip Yoke Eliminator kit installed in the transfer case. So, since we're gonna be sitting at a little bit taller lift tight, we're gonna add one of those as well. We'll do that today.
Now, if you're just doing the long arm swap, you can keep your coil springs and your shocks. But that's, we're going for a little more altitude today as well. So the entire suspension gets ripped off and then some,
you have clear. Yep.
Now, just like the Grand Cherokee we worked on, you gotta cut off the lower control on mounting brackets to make room for the long arm.
All right, with the front suspension gutted in the control arm brackets cut off. We're almost ready to start installing this long arm upgrade kit we got from Rusty's, but like we told you, we got some work to do to the transfer case. So we wanna get that done before we install our new cross member. Now, just like the system we put on the Grand Cherokee, it bolts in utilizing these brackets that sandwich
frame rail holding everything together.
Now, the control arms, it's a radius style arm uses heavy duty tubing
in OEM style rubber bushing on one end to minimize road noise and vibration
and a forged heavy duty flex joint at the other. It's grea
preload, adjustable and rebuildable. So you get plenty of flex out of it and a long life
so you can keep the mess to a minimum by draining the fluid before you split the case open on a bench top.
All right. Well, it's been a while since we did a Slip Yoke Eliminator kit install in a Jeep transfer case. So just to make sure we're all on the same page, we're gonna go over a couple of reasons why as the suspension cycles, the distance between here and the axle will actually change. So to account for that, the factory installs a slip yoke at the back of the transfer case. The problem is if you break a U joint and need to remove the shaft, we could lose all the fluid leaving you stranded on the side of the trail.
So we're gonna upgrade to a fixed yoke output and that'll move all the slip travel to the drive shaft.
And the other reason is the fixed yoke output is actually shorter, allowing us to change to a longer drive shaft, which is especially beneficial to short wheel base rigs like Wranglers. We're also gonna upgrade to a CV style drive shaft which will completely eliminate drive line vibrations even at taller lift heights,
start the disassembly of the transfer case by removing the retainer and the speedometer drive gear. Follow that with the removal of the front output yoke. If you don't have an impact gun, you can use a pair of channel locks and a breaker bar.
Follow that with the removal of the tail cone assembly and don't worry about scarring up the surface with a screwdriver and a hammer because it doesn't get reused.
Now,
there's a location on either end of the transfer case where you can insert a screwdriver and pry up on without damaging the mating surfaces. That way you don't end up with a leak down the road
and you might as well check the chain for any slack or any stretch and if need be replace it. Now,
now, while you got the case apart, make sure you take a look at the shift fork pads on both sides. If they're not in good condition, replace them, they're cheap. Otherwise it could cause you popping out of gear and just headaches down the road.
Now, you also need to take time to wipe off the magnet that sits in the transfer case, remove any debris.
You follow that with removal of the snap ring and the shift hub from the original main shaft. Now, certain model year transfer cases have bearings installed that need to be removed before reinstallation onto the new main shaft
to do that. We're using a large socket
in the world's largest rubber mallet
and with that taken care of, you can reinstall the dry sprocket and hub assembly back onto the new much larger main shaft. Follow that with the installation of the retaining snap ring
and just make sure it's fully seated before you move on.
Now, we've got all the gasket material scraped off both case
hs but before we reassemble everything, we wanna make sure we clean out any debris that may have fallen down in there.
Now to seal the two case halves, we're using lock tight 518 gasket eliminator flange ceiling
and you don't need to go ape with it. It's a machine surface and all you need is a light continuous feed all the way around the edges to get the job done
with the case bolted together. You can install the snap ring that retains the oil pump. Follow that with the speedometer drive gear and one more snap ring.
After shifting the transfer case into four wheel drive, you need to measure the shift rod stick out length. If it's more than an inch, you need to trim it down because the new tail housing only has a pocket depth of 1.125 inches.
We use one inch masking tape as a guide.
Then the job gets finished up by installing the new tail housing
and don't forget to put a little bit of lubrication on the output yoke seal.
That'll prevent possible damage to the seal during first start up
up. Next, we're installing our long arms
and showing you why
and later, just one simple hand tool and two little inserts give you more Tyrod ground clearance. Stay tuned.
Hey, welcome back to trucks. Well, we got a transfer case reinstalled complete with a slip oak Eliminator kit. And we took a little time to address these areas where we cut off the original control arm mounts on the left and right frame rail now ready to throw on some big chunks.
Now, since the original isolator was seriously deteriorated from decades of oil leaks, we threw a new one on, we got from o'reilly before we put the Russe cross memberm in place.
Now, like we told you earlier, this system is designed to bolt in. However, we've got a fitment issue due to our previously welded in rocker skids. So to solve that problem, we're gonna notch this bracket and weld it in,
but we still need to support the cross member because that's where the control arms mount and it needs to be nice and strong.
So we're gonna remove this section here, cut out a plate that'll bolt in and it'll evenly distribute the load along the unibody frame rail.
Well, Ryan takes care of the mining bracket. I thought I'd take care of a leak that we had on the rear diff seal,
which was caused by us dragging this thing over a gnarly rock course and slightly peeling back the diff cover.
Now, the bad news is it's gonna cause us some diff lube, but it also gives us a really good opportunity to check for debris in the bottom of the case.
And rather than using an abrasive disk on a rotary tool, we're using a single edge razor blade and some brake clean to clean off the old sealant from the mating surfaces.
Now, there's different schools of thought on sealing a surface like this. Some people like the cork gasket, some people like a combination of cork and R TV. But what we found that works great for us is a thin film of our TV, on each side of the mating surface and just being careful not to, over to
now, since we have every intention of crawling rocks again, we're using rusty's heavy duty d
protector to keep the same thing from happening twice
and it'll keep us from caving the cover in or punching a hole in it in case we back into a rock.
All right. Well, after some modifications, here's what we've got, we've got the bracket notch to fit. We've got holes drilled for some plug welds and we've got some nuts welded to the back side of the bracket. So we can use this plate
to bolt everything together, sandwich the cross member in a place weld this bracket in,
lock it down.
Now, if you're wondering why we're spending the extra money upgrading to a long arm kit, we'll check this out.
This is about the length of the factory lower control arm. This is our new lower control arm and this line down here represents about the same amount of suspension drop, about 12 inches. A droop. Look what happens here. The angle in the shorter arm is drastically different. And as you know, as suspension drops, it's a single pivot point. So it pulls it back and changes the suspension geometry that can cause binding on the trail not good. So the longer arm also absorbs more road energy translating into a smoother ride, bottom line, long arm system, smoother ride more suspension dynamics better articulation, less binding money well spent.
Yeah.
Ok. We gotta go forward
the
whole,
there we go. It works.
Ok. Yeah, that's better for this side too.
Now, Rusty's provides measurements to get you in the ballpark with a basic set up, but you're probably going to have to readjust with the vehicle weight on the chassis for pin angle and other adjustments.
That's it.
After the break, we're installing the steering linkage upside down for a good reason. That is and later we'll flex this thing out. Stick around.
Hey, welcome back today. We're upgrading the suspension system on our cheap Cherokee to a long arm kit that we got from Rusty's off road products. Now, we're also gonna do a steering system upgrade while we're at it. Now, check out the stock system, we took off this drag link, it's solid, it's ok. But
the tie rod is just thin wall round tubing. And if you've ever wheeled one of these vehicles, you know that these things are
pretty much sacrificial to bend up in a heartbeat.
Not to mention,
look at the tie rod end. These things are mild up and worn out. So an upgrade is definitely necessary. Since we're going up in altitude, we're also gonna use a drop pitman arm that we got with the steering system, which includes these heavy duty pieces from Rusty's while we're doing all of this. We'll show you guys a way to get an extra three inches of ground clearance for almost nothing.
Build on a budget truck projects that save you time and money.
All right. Well, we've got our drop Pitman arm and drag link on and we're ready to add our tie rod. Now, this is where it typically gets installed on the bottom side of the knuckle. But like Kevin said, we're gonna gain some clearance by installing it on the top side of the knuckle. And to do that, we're gonna use these, these tapered inserts get installed in the bottom side of the knuckle to remove the taper. Then we'll add taper to the top using this reamer tool.
Now, we're removing the end from the rusty's tie rod assembly so we can use it as a depth gauge of sorts
because you don't want to ream out the attachment point of the knuckle too far.
Now, when doing the job, you need to keep the tool as perpendicular as possible to the knuckle and you only wanna remove a little bit of material at a time. So you can use the tea handle provided on the tool, use a wrench or even a ratchet,
just take your time and
be sure to check with your tie rod end every few turns or so because it's a lot easier to remove material than it is to add it back in
couple more turns and we'll be in good shape. Now, if you're still not comfortable doing this job yourself, you could always take the knuckle off the axle, take it to a machine shop and have them perform the task.
And once you're happy with the depth of the ream, install the insert,
the tie rod end
and move on to the other side
that tighten down. We'll be in good shape.
Now, this tool matches the taper of our tie rod end and it works by turning it clockwise and letting the sharpened flutes remove a little bit of material at a time.
Now, these reamers are available in varying qualities and of course varying prices, but don't get tempted into throwing this thing into a high speed drill to try to get the job done. You don't need to remove too much material.
You don't wanna burn up a bit.
Now, for the final installation, don't forget the grease, retaining boot and the cotter pin and
be sure to pump a few shots of grease into the tie rod end before you move on.
Sweet.
Now, you can see from this shot how much clearance we've gained for just a few dollars over the oe set up,
put the turns of the castle down.
Hey, welcome back to trucks. Well, as you can see, our long arm insulation is on the home stretch and now with the vehicle weight down on the suspension, we can set our track bar height on the driver's side.
We're gonna use a provided drop bracket and on the other side, we're gonna use a rusty's bracket kit. The important thing to remember is when you're setting a track bar,
keep the bar itself as parallel as possible to the drag link. That way you eliminate bump steer.
Now, diagnosing a vehicle system leak can be pretty difficult, especially if you're laying underneath the truck or underneath the dark hood. That's where super seals. Two part leak detection and repair kits come in handy. Check this out. Here's a 5050 mixture of antifreeze and water and here's the same mix with a few drops of the UV Dy in. Now with the help of a regularly available UV light.
Well, you can see the difference here. You're gonna, you're gonna see that there's no mista
where that leak is coming from.
They make these systems for engines, transmissions and cooling systems. And the manufacturer claims that by using both parts of this two part system, you may very well repair the leak that you just diagnosed.
That's cool.
Well, our cheap Cherokees is almost finished and check out the clearance we gained by flipping our steering to the top side of the knuckles
and we've had a chance to weld on and paint our track bar bracket as well as add our Rusty's track bar brace. Now, we've got this thing flexed out so we can check shock links the rears, they're fine, but the front is limiting down travel. So, rather than buy a new pair of shocks, we're gonna use these
gasket shock extenders, they thread right on top of our old shocks and it'll buy us an extra couple of inches. That way we're not using them as limiting straps, blowing our shocks out. Now, if you got any questions about any products you saw on today's show, go to Power Block tv.com. Thanks for watching trucks. See you next week.
