More Cheep Cherokee Episodes
Trucks! Builds
Want more content like this?
Join the PowerNation Email NewsletterParts Used In This Episode
Comp Cams
Xtreme 4x4 Hydraulic Flat Tappet Camshafts for fuel injected, AMC High Energy Timing Set, High Energy Hydraulic Lifters.
Auto Body Color & Supply Co.
Red scuff pads.
Kimberly-Clark Professional
SCOTT Shop Towels.
Napa Auto Parts
Labor to Press Rod Bolts
O'Reilly Auto Parts
Remanufactured Cylinder Head
O'Reilly Auto Parts
Crank Kit 4.2l, Connecting Rods, .040 Pistons, Shipping, Piston Rings, Cam Bearings, Valve Keeper
O'Reilly Auto Parts
Remove Broken Bolt, Freeze Plugs, Install Freeze Plugs, R&R Cracked Head, Head Gasket, Conversion Set, Head Set
O'Reilly Auto Parts
.040 Bore, Chem Dip, Magnaflux, Align Hone, Install Cam Bearings, Zero Deck, Press Piston Pins, Balance Rotating Assembly X2
O'Reilly Auto Parts
Oil Pump, Pickup, Oil Filter, Thermostat, Thermostat Gasket, V-Belt, Harmonic Balancer
O'Reilly Auto Parts
Rubber Oil Pan Gasket, Rubber Valve Cover Gasket, Main Bearing Set .020
O'Reilly Auto Parts
Case of Brake Clean
O'Reilly Auto Parts
Microfiber towels 2-24 pack
O'Reilly Auto Parts
Motor Mounts
O'Reilly Auto Parts
Six Oil Filters (2)
O'Reilly Auto Parts
Knock Sensor
O'Reilly Auto Parts
Intake gasket, Nitrile Gloves
O'Reilly Auto Parts
8mm Valve Locks
Episode Transcript
Today, project cheap Cherokees is back for a budget boring stroke on its 4 L straight six. We'll show you how to create more displacement and how to let it breathe better to make more power. It's all today here on trucks.
Hey, welcome to trucks. Well, we got everything back from the machine shop for a cheap Cherokee stroke 4 L rebuild. And if you've ever been intimidated by engine reassembly. Well, that's exactly what today's show is all about. And since this isn't a full on race engine that's gonna be spinning at eight grand. Well, it's a lot more forgiving and it's definitely a project that you guys can do at home.
Now, we knew our 140,000 mile XJ was down on power from our trail test. So we carried it over to horsepower for our very first four wheel drive
dyno Pull. And man, the numbers didn't lie.
Our first run netted us a dismal 47 horsepower and 82 pound feet of torque. The second one even worse had 35 horse and 61 pound feet of torque,
but that's ok because we had a plan. So we stripped it down and shipped it off to the machine shop
and here's what they did after a quick cleaning and magni flexing to make sure there wasn't any cracks. Well, they aligned and board all the main journals as well as installed some new cam bearings.
They also replaced our steel freeze plugs with new brass plugs.
Now, up top, you can see they deck the service to make sure it's nice and flat as well as board all six cylinders. 40 thousands over.
Now, here's what they did for the internals. They bounced our crank shaft which is nothing more than an off the shelf. 4.2 L crank shaft from o'reilly auto parts.
They also supplied us with our 4.2 L connecting rods and our Jeep 4 L pistons of course matched to our 40 thousands overboard. Now, what the machine shop did is we all six, these connecting rod and piston assemblies and found the lightest one. Then they took the other five and removed material till they all weighed the same.
Now, balancing the rotating assembly isn't absolutely necessary. It does add to the total bill, but it'll make your engine run so smooth, you'll barely know it's running. So to us, it's money well spent.
Now when picking out your 4.2 L Stroker crank shaft, but
you got a few options. His Jeep made the 4.2 L or 258 from the early seventies all the way up to 1990. Now there's different options as far as number of counterweights or overall weight goes. But we went with an 87 and 90 crank chef because the snout stick out length is the same as the original 4 L crank. That way, we won't have to deal with any issues with this being too long.
Now, here's a quick break down of what the machine shop charged us to dip and magna flux. The block was 100 and 33 bucks to bore a lion hone and deck. The block was another $281 to install the cam bearings, press the pistons in and install the freeze plugs was another $112 and to balance the rotating assembly, which we all agree was a great idea was another $185 which brings us to a grand total of $711 and
I threw in a six pack so all I'd have to do is paint it.
We start our reassembly by laying all of our crank shaft bearings, including the thrust bearing into the block dry.
You only want to reassemble the bottom end one time
measuring for bearing tolerances is kind of mechanics 101. And it's a necessary step with any build, especially a mild high performance build like this Stroker
Rs
laying a piece of plastic gauge on the top of each bearing journal.
Plastic gauge is a way of measuring the space between the journal and the bearing surface itself.
And that's accomplished by installing the main caps and torquing them to spec
with your cats removed, you can use the guide provided by plastic age to measure your tolerances.
This right here is the impression plastic age leaves behind.
Wow, two thousands. That's perfect.
All right. With our crankshaft main bearing journal clearance, with spec we can install the crank shaft for the final time
that starts with installing this rear main seal.
A liberal application of royal purple engine assembly loop is a necessary step
coating both sides of all surfaces. Make sure that you're not going to have any dry start issues the first time you turn your engine over
and hey, don't forget to reinstall your main caps in the correct order.
This engine has a two piece rear main seal and Ryan, he's using a little bit of our TV on the corners just to make sure we don't have any seeping issues
when you break engine reassembly down into the basic steps. It's really not that complicated.
One of the most important things to pay attention to though is torque spec and torque sequence.
Now, installing piston rings seems fairly straightforward and it is, but there are a few things you need to pay attention to when doing it.
Now, the expander ring goes on first but make note of where the gap is
because your other two oil control rings need to be staggered about an inch
on either side of the gap.
And the same happens with the compression rings, make sure they're offset. So you don't bleed off any compression
to lubricate the cylinder bores. We're using a 30 weight, non detergent engine oil,
just
the plastic caps on the rod bolts will make sure you don't scar your bearing journals.
Just like on the crank shaft. We're gonna measure each rod's bearing tolerance with plastic agent.
This is exactly the same procedure with a different torque spec, of course, but it's equally as important.
We are right in between 1.5 and two thousands, which is perfect right in spec
just like the crankshaft journals. Each raw journal gets a liberal coating of royal purple assembly loop and torque back down to spec.
Next on the list is installing the new cam
chap again with plenty of assembly loop,
we're installing our cam straight up.
The new camshaft is followed by the new timing set. And again, the most important thing here is to make sure that your timing marks are lined up
up. Next, we'll grind our way to a lower compression ratio and port match the intake and cylinder head. And later it's the budget friendly way to make your engine bay look better. Stay tuned.
Hey, welcome back to trucks. Now, we got our rotating assembly buttoned up and with our 4.2 L crank shaft and connecting rods in conjunction with our 4 L pistons. Well, we now have a 4.6 L Stroker short block. But before we go any farther on this, well, we got some work to do to our cylinder head and intake manifold.
This is the later model cylinder head that we showed you guys last time that we picked up for less than 50 bucks.
And we sent it off to the machine shop where they cleaned it and resurfaced it. And as you can see, I've already guessed it matched the intake and exhaust ports. And for now, we still got the stock valves and springs installed. But when we go back for final assembly, we're gonna use these higher rate Mopar performance springs, retainers and locks that we picked up from summit racing.
We also got a new set of valve seals to install
now using off the shelf pistons like we did well, it saved us a few bucks, but it's also gonna cause our compression ratio to be a little bit higher than we want.
So we're gonna buy some of that back by removing some material from the combustion chamber.
The liquid we're using to measure the combustion chambers volume is really nothing more than water with the food coloring in it.
The plexiglass plate is sealed to the head surface with petroleum jelly and all we're doing is seeing how many CCS of fluid it takes to fill up the chamber.
All right, looks like we got 57.5, maybe 58 CCS. We'll see what we end up with. Once we open this thing up,
Ryan's using the head gasket as a guide and using a paint marker to mark the outside edge at the top of the cylinder board. This gives him a reference. So he won't remove any material that will affect the ceiling of the head gasket
using a carbide bur in an angle grinder, he's slowly removing material from the combustion chamber itself. Now, obviously, we've sped this up, but it's going to give you a better look at the progress.
The second bird is more pointed and allows him to get inside some of the tight corners and especially remove material around the valves.
Now, obviously, these aren't the valves that our engine is going to end up with. They're just in place to protect the valve seat and they'll be replaced when the work's done.
Now, ideally, you need to get this done before you resurface your head either way, take your time and take it slow.
Now, the slight texture we've got left behind is not gonna matter in our case, just make sure that you don't leave any hard angles behind that could cause you hot spots.
All right, looks like our new measurement is 60
a half CCS. So that means we picked up about three CCS which should bring our compression ratio down from 9.6 to 1 to a much more manageable 9.3 to 1
and that'll keep us from having to spend the extra cash on some premium fuel.
Now, we'll repeat the process on these other five chambers, make sure they all equal out. We'll be in good shape.
Now, over here, you can see I've already been working on the intake runners of our old manifold because our new cylinder head, well, it has a higher port design which flows more air. We just have to make sure these ports line up for a nice smooth transition.
This spur is specifically made for aluminum with much wider flutes and we've stuffed a rag down in the intake runners to avoid getting debris into the intake manifold.
Now, with the aluminum, you're going to move a lot more material a lot faster. But we're basically using exactly the same technique of gasket matching and tapering into the runner.
Now take a look, our intake manifold runners line up almost perfectly with the gasket.
That means we'll have nice smooth air flow from the intake into the cylinder head. Now, by gasket matching this and the intake and exhaust runners on the cylinder head along with the combustion chamber work. Well, we're going to pick up a fair amount of horsepower
and for basically free
up next, a little bit of elbow grease and a little bit of spray paint can turn this into this
and just because you're on a budget, well, it doesn't mean it has to look like it. Now,
I
gotta do something about that book
build on a budget truck projects that save you time and money.
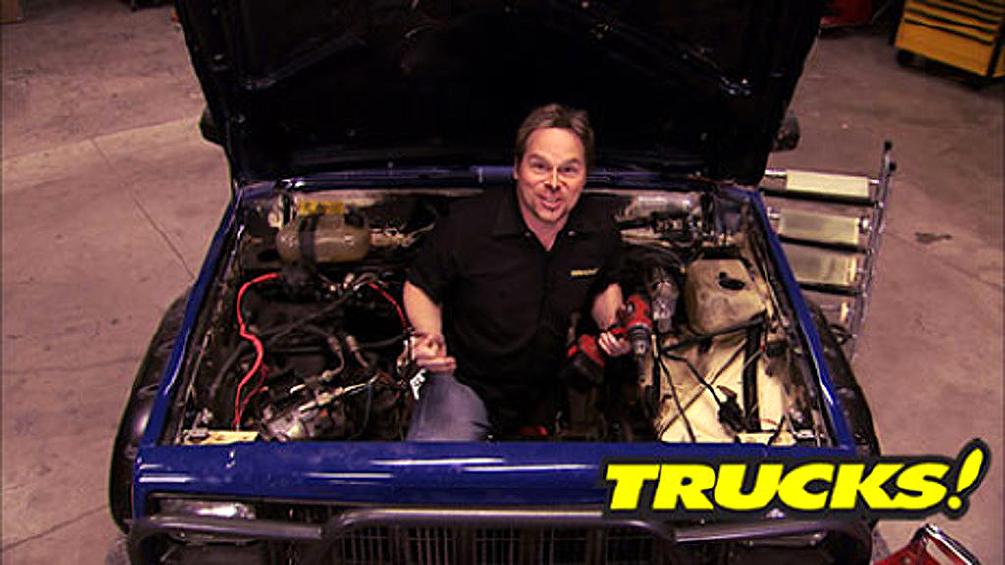
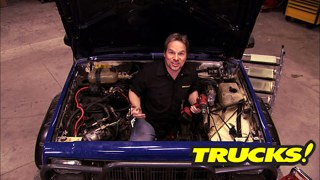
Now, there's no way we're gonna put a fresh painted Stroker engine in this nasty greasy engine bay. The guy that last tried to paint this, well, he painted over top of dirt and rust and he didn't even send the paint underneath. We can do better than this and you can do better than this at home and it's only gonna cost you a few bucks. Now, the first thing we gotta do is pull away all the stuff that we can away from these aprons and firewall.
Now, what you're doing by peeling your harnesses and electronics back is eliminating the possibility of having weak edges where you painted around something this causes flaking, especially with all the heat cycles that an engine bay goes through.
Ok. I've got almost all the harnesses peeled back, but look at my hands. This was no way ready to paint. Now that we've got as much moved as we can. Now, we can clean the surfaces and then mask a little bit of stuff off, shoot some color.
Now, masking serves two purposes here. Number one, it protects our exterior panels from overspray when we do paint, but the harsh chemicals that we're going to use to clean the aprons, well, they don't need to get on your paint surfaces. Either
one of those cleaners is a pre painting prep spray that we got from the Eastwood company. It's a milder solvent, but it does a nice job of lifting the grease to where we can wipe it off. Using a Kimberly Clark disposable towel.
We're stepping it up with a brake parts cleaner. We got from o'reilly, which is a much stronger solvent and actually melts that thin layer of paint that our previous owner applied.
Now, these chemicals are no joke. Guys, please be safe and wear safety glasses and gloves to avoid skin absorption and the backlash from the spray.
Once everything's clean, the best way to prep is with a red scuffing pad.
Ours came from auto body color and supply, but you can get them at any paint jobber.
The scuffing pads will get inside the contours and corners and prep the surface properly.
Once everything's dull and flat and blown off, you can start painting.
We're using a duplicate
semi gloss black exterior paint for strength.
Now, what I'm doing is a mist coat or a medium dry coat
and it's just to get a foundation of paint that you can build on. Later on this way, you don't get runs.
Now, here's where guys mess up with spray can paint and I've done the same thing, although this looks painted, there's only two thin coats of paint and it's not enough duple color makes a nice product, but you can expect it to work miracles once you achieve this, which in the painting world we call full hiding or complete color coating. You need at least two wet coats on top of this sprayed within an hour to have the strength that you need. Once you do that, you're gonna have a coating that's gonna last you for years
in between coats. We grabbed a can of del
color spray can bed liner
to coat the inside of the transmission tunnel and the bottoms of the frame rails.
This gives an impact resistant coating that covers fast.
Uh, buying a Miss coat at first allows you to make your last two coats wet and back.
That way you get an even sheen and the color strength that you need.
Well, there you go. About 12 bucks worth of paint and a couple of hours of your time and you can make a huge difference under the hood of any vehicle and just because you're on a budget, well, it doesn't mean it has to look like it. Now,
I
gotta do something about that hood.
Hey, welcome back. Now,
Kevin's got the engine bait and the cheap Cherokee looking really good for not a whole lot of money either.
So we use the same idea for a lot of the parts that we bolted back on our 4.6 L Stroker. It's just about ready to be reinstalled.
Now, you guys probably notice we're still running the stock throttle body and exhaust manifold on this thing.
Now, we wanted to keep throwing speed parts at it. But frankly, we're running out of money and those parts we can upgrade later if we need to. So we kept the majority of our modifications internal.
Now, one place we had to spend a little more money was the fuel system with our comp cam and stroked internals. This engine is going to be breathing a lot more air. So we want to make sure the fuel keeps up. So we called Summit racing and they sent us these 24 pound an hour injectors. That way we don't run the risk of running lean. But right now, let's take a look at what we did spend
our crank rods and the rest of the rotating assembly from o'reilly auto parts were 735 bucks. The oil pump balancer
get set in new injectors were 733 bucks. Machine shop like we said, charged 7-Eleven for a grand total of 2179 bucks.
Now, if we've played our cards, right.
And I think we have that is money well spent, but keep on watching because the next time you see this XJ, we're going to strap it down to horsepower
dyno again and see if we can do a little bit better than 35 horsepower at the wheels. Personally, I think we got a heck of a sleeper on our hands.
Now, if you can't find a cold air intake for your truck Well, Specter has the solution for you.
This is the Pro
Fab Quick Kit and it comes with a wide variety of bent and straight aluminum tubes as well as mounting hardware and these foam inserts.
So these foam inserts will hold the desired shape that you need.
Then you can just weld everything together.
Plus you got the option of marking it
and sending it back to Specter
where they can weld and polish everything for you. So, all you have to do is install it
naturally. They'll charge you a fee for that.
Specter's line of Pro
Fab Quick kits. Start at just $250. But if you send the parts back that you're not going to use, well, they'll reimburse you for them. Meaning that if you can weld you can put together a simple custom intake for your truck for as little as 100 and $50.
Now, if you've got questions about anything you've seen on today's show, go to the trucks website on Power Block tv.com. Thanks for watching trucks. See you next weekend.
What's got
tivo?
Show Full Transcript
Hey, welcome to trucks. Well, we got everything back from the machine shop for a cheap Cherokee stroke 4 L rebuild. And if you've ever been intimidated by engine reassembly. Well, that's exactly what today's show is all about. And since this isn't a full on race engine that's gonna be spinning at eight grand. Well, it's a lot more forgiving and it's definitely a project that you guys can do at home.
Now, we knew our 140,000 mile XJ was down on power from our trail test. So we carried it over to horsepower for our very first four wheel drive
dyno Pull. And man, the numbers didn't lie.
Our first run netted us a dismal 47 horsepower and 82 pound feet of torque. The second one even worse had 35 horse and 61 pound feet of torque,
but that's ok because we had a plan. So we stripped it down and shipped it off to the machine shop
and here's what they did after a quick cleaning and magni flexing to make sure there wasn't any cracks. Well, they aligned and board all the main journals as well as installed some new cam bearings.
They also replaced our steel freeze plugs with new brass plugs.
Now, up top, you can see they deck the service to make sure it's nice and flat as well as board all six cylinders. 40 thousands over.
Now, here's what they did for the internals. They bounced our crank shaft which is nothing more than an off the shelf. 4.2 L crank shaft from o'reilly auto parts.
They also supplied us with our 4.2 L connecting rods and our Jeep 4 L pistons of course matched to our 40 thousands overboard. Now, what the machine shop did is we all six, these connecting rod and piston assemblies and found the lightest one. Then they took the other five and removed material till they all weighed the same.
Now, balancing the rotating assembly isn't absolutely necessary. It does add to the total bill, but it'll make your engine run so smooth, you'll barely know it's running. So to us, it's money well spent.
Now when picking out your 4.2 L Stroker crank shaft, but
you got a few options. His Jeep made the 4.2 L or 258 from the early seventies all the way up to 1990. Now there's different options as far as number of counterweights or overall weight goes. But we went with an 87 and 90 crank chef because the snout stick out length is the same as the original 4 L crank. That way, we won't have to deal with any issues with this being too long.
Now, here's a quick break down of what the machine shop charged us to dip and magna flux. The block was 100 and 33 bucks to bore a lion hone and deck. The block was another $281 to install the cam bearings, press the pistons in and install the freeze plugs was another $112 and to balance the rotating assembly, which we all agree was a great idea was another $185 which brings us to a grand total of $711 and
I threw in a six pack so all I'd have to do is paint it.
We start our reassembly by laying all of our crank shaft bearings, including the thrust bearing into the block dry.
You only want to reassemble the bottom end one time
measuring for bearing tolerances is kind of mechanics 101. And it's a necessary step with any build, especially a mild high performance build like this Stroker
Rs
laying a piece of plastic gauge on the top of each bearing journal.
Plastic gauge is a way of measuring the space between the journal and the bearing surface itself.
And that's accomplished by installing the main caps and torquing them to spec
with your cats removed, you can use the guide provided by plastic age to measure your tolerances.
This right here is the impression plastic age leaves behind.
Wow, two thousands. That's perfect.
All right. With our crankshaft main bearing journal clearance, with spec we can install the crank shaft for the final time
that starts with installing this rear main seal.
A liberal application of royal purple engine assembly loop is a necessary step
coating both sides of all surfaces. Make sure that you're not going to have any dry start issues the first time you turn your engine over
and hey, don't forget to reinstall your main caps in the correct order.
This engine has a two piece rear main seal and Ryan, he's using a little bit of our TV on the corners just to make sure we don't have any seeping issues
when you break engine reassembly down into the basic steps. It's really not that complicated.
One of the most important things to pay attention to though is torque spec and torque sequence.
Now, installing piston rings seems fairly straightforward and it is, but there are a few things you need to pay attention to when doing it.
Now, the expander ring goes on first but make note of where the gap is
because your other two oil control rings need to be staggered about an inch
on either side of the gap.
And the same happens with the compression rings, make sure they're offset. So you don't bleed off any compression
to lubricate the cylinder bores. We're using a 30 weight, non detergent engine oil,
just
the plastic caps on the rod bolts will make sure you don't scar your bearing journals.
Just like on the crank shaft. We're gonna measure each rod's bearing tolerance with plastic agent.
This is exactly the same procedure with a different torque spec, of course, but it's equally as important.
We are right in between 1.5 and two thousands, which is perfect right in spec
just like the crankshaft journals. Each raw journal gets a liberal coating of royal purple assembly loop and torque back down to spec.
Next on the list is installing the new cam
chap again with plenty of assembly loop,
we're installing our cam straight up.
The new camshaft is followed by the new timing set. And again, the most important thing here is to make sure that your timing marks are lined up
up. Next, we'll grind our way to a lower compression ratio and port match the intake and cylinder head. And later it's the budget friendly way to make your engine bay look better. Stay tuned.
Hey, welcome back to trucks. Now, we got our rotating assembly buttoned up and with our 4.2 L crank shaft and connecting rods in conjunction with our 4 L pistons. Well, we now have a 4.6 L Stroker short block. But before we go any farther on this, well, we got some work to do to our cylinder head and intake manifold.
This is the later model cylinder head that we showed you guys last time that we picked up for less than 50 bucks.
And we sent it off to the machine shop where they cleaned it and resurfaced it. And as you can see, I've already guessed it matched the intake and exhaust ports. And for now, we still got the stock valves and springs installed. But when we go back for final assembly, we're gonna use these higher rate Mopar performance springs, retainers and locks that we picked up from summit racing.
We also got a new set of valve seals to install
now using off the shelf pistons like we did well, it saved us a few bucks, but it's also gonna cause our compression ratio to be a little bit higher than we want.
So we're gonna buy some of that back by removing some material from the combustion chamber.
The liquid we're using to measure the combustion chambers volume is really nothing more than water with the food coloring in it.
The plexiglass plate is sealed to the head surface with petroleum jelly and all we're doing is seeing how many CCS of fluid it takes to fill up the chamber.
All right, looks like we got 57.5, maybe 58 CCS. We'll see what we end up with. Once we open this thing up,
Ryan's using the head gasket as a guide and using a paint marker to mark the outside edge at the top of the cylinder board. This gives him a reference. So he won't remove any material that will affect the ceiling of the head gasket
using a carbide bur in an angle grinder, he's slowly removing material from the combustion chamber itself. Now, obviously, we've sped this up, but it's going to give you a better look at the progress.
The second bird is more pointed and allows him to get inside some of the tight corners and especially remove material around the valves.
Now, obviously, these aren't the valves that our engine is going to end up with. They're just in place to protect the valve seat and they'll be replaced when the work's done.
Now, ideally, you need to get this done before you resurface your head either way, take your time and take it slow.
Now, the slight texture we've got left behind is not gonna matter in our case, just make sure that you don't leave any hard angles behind that could cause you hot spots.
All right, looks like our new measurement is 60
a half CCS. So that means we picked up about three CCS which should bring our compression ratio down from 9.6 to 1 to a much more manageable 9.3 to 1
and that'll keep us from having to spend the extra cash on some premium fuel.
Now, we'll repeat the process on these other five chambers, make sure they all equal out. We'll be in good shape.
Now, over here, you can see I've already been working on the intake runners of our old manifold because our new cylinder head, well, it has a higher port design which flows more air. We just have to make sure these ports line up for a nice smooth transition.
This spur is specifically made for aluminum with much wider flutes and we've stuffed a rag down in the intake runners to avoid getting debris into the intake manifold.
Now, with the aluminum, you're going to move a lot more material a lot faster. But we're basically using exactly the same technique of gasket matching and tapering into the runner.
Now take a look, our intake manifold runners line up almost perfectly with the gasket.
That means we'll have nice smooth air flow from the intake into the cylinder head. Now, by gasket matching this and the intake and exhaust runners on the cylinder head along with the combustion chamber work. Well, we're going to pick up a fair amount of horsepower
and for basically free
up next, a little bit of elbow grease and a little bit of spray paint can turn this into this
and just because you're on a budget, well, it doesn't mean it has to look like it. Now,
I
gotta do something about that book
build on a budget truck projects that save you time and money.
Now, there's no way we're gonna put a fresh painted Stroker engine in this nasty greasy engine bay. The guy that last tried to paint this, well, he painted over top of dirt and rust and he didn't even send the paint underneath. We can do better than this and you can do better than this at home and it's only gonna cost you a few bucks. Now, the first thing we gotta do is pull away all the stuff that we can away from these aprons and firewall.
Now, what you're doing by peeling your harnesses and electronics back is eliminating the possibility of having weak edges where you painted around something this causes flaking, especially with all the heat cycles that an engine bay goes through.
Ok. I've got almost all the harnesses peeled back, but look at my hands. This was no way ready to paint. Now that we've got as much moved as we can. Now, we can clean the surfaces and then mask a little bit of stuff off, shoot some color.
Now, masking serves two purposes here. Number one, it protects our exterior panels from overspray when we do paint, but the harsh chemicals that we're going to use to clean the aprons, well, they don't need to get on your paint surfaces. Either
one of those cleaners is a pre painting prep spray that we got from the Eastwood company. It's a milder solvent, but it does a nice job of lifting the grease to where we can wipe it off. Using a Kimberly Clark disposable towel.
We're stepping it up with a brake parts cleaner. We got from o'reilly, which is a much stronger solvent and actually melts that thin layer of paint that our previous owner applied.
Now, these chemicals are no joke. Guys, please be safe and wear safety glasses and gloves to avoid skin absorption and the backlash from the spray.
Once everything's clean, the best way to prep is with a red scuffing pad.
Ours came from auto body color and supply, but you can get them at any paint jobber.
The scuffing pads will get inside the contours and corners and prep the surface properly.
Once everything's dull and flat and blown off, you can start painting.
We're using a duplicate
semi gloss black exterior paint for strength.
Now, what I'm doing is a mist coat or a medium dry coat
and it's just to get a foundation of paint that you can build on. Later on this way, you don't get runs.
Now, here's where guys mess up with spray can paint and I've done the same thing, although this looks painted, there's only two thin coats of paint and it's not enough duple color makes a nice product, but you can expect it to work miracles once you achieve this, which in the painting world we call full hiding or complete color coating. You need at least two wet coats on top of this sprayed within an hour to have the strength that you need. Once you do that, you're gonna have a coating that's gonna last you for years
in between coats. We grabbed a can of del
color spray can bed liner
to coat the inside of the transmission tunnel and the bottoms of the frame rails.
This gives an impact resistant coating that covers fast.
Uh, buying a Miss coat at first allows you to make your last two coats wet and back.
That way you get an even sheen and the color strength that you need.
Well, there you go. About 12 bucks worth of paint and a couple of hours of your time and you can make a huge difference under the hood of any vehicle and just because you're on a budget, well, it doesn't mean it has to look like it. Now,
I
gotta do something about that hood.
Hey, welcome back. Now,
Kevin's got the engine bait and the cheap Cherokee looking really good for not a whole lot of money either.
So we use the same idea for a lot of the parts that we bolted back on our 4.6 L Stroker. It's just about ready to be reinstalled.
Now, you guys probably notice we're still running the stock throttle body and exhaust manifold on this thing.
Now, we wanted to keep throwing speed parts at it. But frankly, we're running out of money and those parts we can upgrade later if we need to. So we kept the majority of our modifications internal.
Now, one place we had to spend a little more money was the fuel system with our comp cam and stroked internals. This engine is going to be breathing a lot more air. So we want to make sure the fuel keeps up. So we called Summit racing and they sent us these 24 pound an hour injectors. That way we don't run the risk of running lean. But right now, let's take a look at what we did spend
our crank rods and the rest of the rotating assembly from o'reilly auto parts were 735 bucks. The oil pump balancer
get set in new injectors were 733 bucks. Machine shop like we said, charged 7-Eleven for a grand total of 2179 bucks.
Now, if we've played our cards, right.
And I think we have that is money well spent, but keep on watching because the next time you see this XJ, we're going to strap it down to horsepower
dyno again and see if we can do a little bit better than 35 horsepower at the wheels. Personally, I think we got a heck of a sleeper on our hands.
Now, if you can't find a cold air intake for your truck Well, Specter has the solution for you.
This is the Pro
Fab Quick Kit and it comes with a wide variety of bent and straight aluminum tubes as well as mounting hardware and these foam inserts.
So these foam inserts will hold the desired shape that you need.
Then you can just weld everything together.
Plus you got the option of marking it
and sending it back to Specter
where they can weld and polish everything for you. So, all you have to do is install it
naturally. They'll charge you a fee for that.
Specter's line of Pro
Fab Quick kits. Start at just $250. But if you send the parts back that you're not going to use, well, they'll reimburse you for them. Meaning that if you can weld you can put together a simple custom intake for your truck for as little as 100 and $50.
Now, if you've got questions about anything you've seen on today's show, go to the trucks website on Power Block tv.com. Thanks for watching trucks. See you next weekend.
What's got
tivo?
