More Super Dually Episodes
Trucks! Builds
Want more content like this?
Join the PowerNation Email NewsletterParts Used In This Episode
Kimberly-Clark Professional
Blue Nitrile Gloves
LMC Truck
Chrome Aluminum Grille Shell with Billet Insert
Episode Transcript
Today, we're spraying sound insulation inside the cab of Project Super duly and we're adding a
diy bed liner and we've got some painting tips to help you get a perfect paint job. Finally, we'll give super duly some chrome. It's all today here on trucks.
It looks pretty tough.
Hey, welcome to trucks.
Well, Project Super duly is going to be a one of a kind vehicle. Now, we were going to submit a request for a brand new diesel duly tow rig that we could use as a parts chaser and to pull our rigs around to off road events and things like that. And then we started
about it and you know what? We don't buy trucks, we build trucks. So that's exactly what we said about to do. But instead of getting a used rig, used dole and fixing it up, we decided to go a different direction and get two completely different vehicles and mash them together. And
this is what we ended up with.
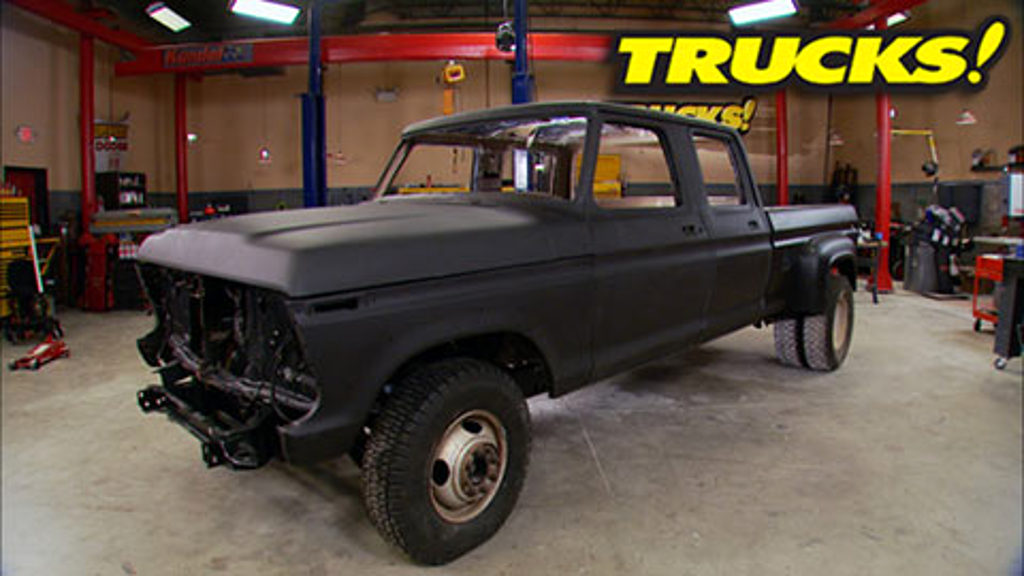
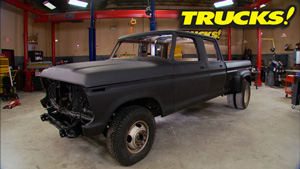
Super duly is a 79 Ford body sitting on top of a 97 Dodge Dooly chassis
and we had seven of the baddest metal masters in the land come and help us straighten out the wrinkles in the body work.
And in less than a week these guys brought this truck back to life,
man. Those guys did a great job on the exterior of the truck getting it ready for paint, but
there just wasn't any time left over to pay any attention to the interior. So that's what we're gonna do today.
Now, this is a seventies era pickup truck and back then
they just didn't focus that much on sound deadening and insulation.
And you combine that with the fact that we're running a 12 valve cummins diesel and they're not exactly known for their whisper quiet operation and you can easily see how it would get kind of loud and boomy here in the cab.
So we're going to address that and try to keep the diesel clatter and road noise on the outside of the truck, keep it comfortable and quiet here on the inside.
Now, inside the bed, other than a few places where we've patched to replace some rotten metal. Well, it's almost exactly like we found it. But remember this is a work truck, not a show truck, so it's a little rough, but that's ok. We're gonna prep the surface, not worry too much about a few little dancer pop knots here and there and throw a fat coat of bed liner in this thing.
Now, inside the cab, we're going to use a product that the guys over in horsepower have had really good luck with in the past and it's lizard skin spray on sound insulation. Now, we've had success with the adhesive sound deadening mats before as well. But there are some advantages to the spray on insulation. Now, they've had a couple of different formulas first being their sc or sound control formula and this stuff is really gonna reduce the noise and vibration inside the cab.
It's also gonna protect all the surfaces from continued moisture and corrosion. Any rust issues that we'd see. This stuff's good to about 300
°F.
Now, the other option is their C I or ceramic insulation formula and it's good for higher heat applications as it can withstand temperatures of about 500 degrees, it'll also reduce engine and heat transfer by about 25 degrees. And since it's water based, well, it's easy to clean up. It's environmentally friendly and you don't need a respirator to apply it. Now, another advantage to both of these coatings is they go on really
thin, just 40 mils or one millimeter thick and that will prevent you from altering the fitment of your interior panels, saving you extra work and a big fat headache. Now, you can use both of these products on the same panels, but if you do make sure you apply the sound control formula first,
now to spray it on, you're going to need a gun with a rather large orifice or opening. Now since we're going to be focusing on the interior today,
we're going to go with this one.
Now, this stuff's a pretty thick consistency. So use an electric drill with the paddle mixer and go ahead and mix it for a good little while. If it helps you count to 100
you want to make sure it's thoroughly mixed.
Now, once you're happy that everything is evenly mixed and you've saved as much of the product as you can go ahead and dunk the mixing paddle in water. That is if you want to reuse it. Once the lizard skin sets up, it's gonna be very difficult to remove.
At least I'm not making a mess.
Now, this stuff sprays really easily, especially if you use the spray gun that they offer. But if you're using a spray gun that you already own, just remember to change out to a larger diameter tip before you start.
Now, it's always a good technique to use an overlapping pattern, whether you're spraying paint or laying down an insulation type product like this.
But this stuff is a lot more forgiving.
We're also applying some insulation to the rear cab panel because basically this entire huge cab is just one big steel drum and the more places we can spray on sound insulation, the better
now spraying the grayish colored insulation against the contrasting brown paint makes it really easy to tell when you have full coverage. There's no need to pile this stuff on real thick.
And if you're not really happy with the texture of the final product, well, just remember this stuff is sand
and paint as well. So if you got any exposed panels, well, don't be afraid to use it on them too.
And with the cab just about finished up, time to pay some attention to the well used bed,
we've got the scaly surface rust knocked off the bed floor with a wire brush and all the dust blown out. So we're ready to rock and roll. Now, we've shown you prepping rusty metal with a chemical to set it up to be able to put a bed liner on it in the past. But there's different ways to go about this. We're going to do it different this time with Por 15. It stands for paint over rust and basically it bonds with the rust and creates a solid coating that you can then put your bed liner over top of
now, just like the bed liner we're going to put on top of it. Por 15 is a moisture cured urethane, meaning it doesn't need a catalyst to cure it uses moisture in the atmosphere.
Now, I'm not using por on the good metal that'll take a different primer
up. Next, we'll roll on our diy bed liner and later painting secrets reveal. Stay tuned and you can see the perfect impression
of my hand on the steel.
Hey guys, welcome back to the shop. Well, our lizard skin spray on sound insulation is dry to the touch for the most part. But like most spray on coatings, it does need a full 24 hours to completely cure. So we can't crawl up in here and get any work done. But the good news is, there's plenty of work to be done in the bed.
That's right. There is plenty of work to do on both of these projects, but they're both easy to do making them great diy projects that you guys can do at home. Now, I've gotten a little bit of a head start here, but I've thrown some seam sealer in some of the gaps and coating the bare steel with some dup color primer. Since the bed liner system we're putting in here likes to sit on a coating rather than bear steel.
Now, this is something fairly recent from duple
color. They're calling it their bed armor Diy bed liner kit and it's a little bit different than what they've had before in that. It's a moisture cured urethane, which means that it uses good old fashioned h2o or moisture in the atmosphere to lock it together and make it a very strong coating.
Now, one thing I like about duplicate color is that they know how to assemble a kit and they've included everything you need here, including a tray, an applicator that's going to create the right texture and look great
a stir stick
a prep pad for surface prep, even a touch up brush to get in those hard to reach recesses and areas that you can't reach with a roller.
Oh yeah.
Providing your bed surface paint and everything is clean like ours is a red scuffing pad is all you need to create the tooth or texture that the bed liner needs to sit on.
Now. Diy obviously means do it yourself. So get ready to burn some calories because the sacrifice for not paying somebody to do it is a little bit of hard work.
That's it.
Now with paint prep, there's no such thing as too clean and the thin layer of dust that I'm blowing off. Well, it would interfere with the adhesion of the bed liner. So you better make sure your substrate is clean.
We're going to follow that with a final wipe down of duple
colors. Paint prep in an aerosol can
this makes sure that all the wax and grease and contaminants are off of the panels and will further aid in the adhesion of our new bed light.
Now, the piece of masking paper that I'm using to sit on, just make sure I don't drag anything else into what I'm trying to coat over top of it just keeps things cleaner.
Now, there's no real technique in putting the first coat on, but the roller gives it the opportunity to smooth out any runs or clumps that are in the coating.
Now, another benefit to using a piece of paper is that I can paint myself out of the corner and not get trapped.
Now, the first coat doesn't look like much, but that's ok. It's not supposed to, it's got a single purpose and that is to hang on to the second coat of bed liner. The second coat is what has the mill thickness and the strength and the texture look of a bed liner.
Now, the second coat is where the magic happens and where you get the look of a professionally applied bed coating.
Now, two coats will give you a strong coding, but if you have to apply three, well, that's not a problem either. This is rec coded
and repairable unlike
a vulcanized co
and you may notice that we're putting the coating over top of DS, but that's ok because this is going to be a work truck and we're going to use it for one.
It would probably take 30 or 40 hours of body work technique to get the inside of this bed smooth and quite frankly, it's just not worth it when it's going to get beat up all over again.
Now, from the time your bed is prepped, it's probably going to take you an hour, maybe an hour and a half to apply it, but it's time well spent because it's a good looking coating and hides a lot of sins.
There you go. The second coat sure gives it the texture and the strength that you want. Another good thing is that, like we said before, it's water based. So if you mess up like I did right here kind of went over my masking tape. It's a simple water. Clean up
up
next. It's proactive painting tips. And later we'll try on the biggest piece of jewelry in the shop. Stick around.
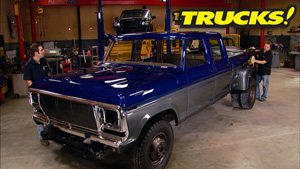
Hey, guys, welcome back to trucks. We're getting closer and closer to being able to put paint on super duly. Now that we've got the lizard skin on the inside of the interior and the bed liner inside the bed, we can finally focus on the exterior panels. Speaking of, we wanted to show you the paint scheme that we've picked out for the truck. This is Summit Racing's new line of base coat clear coat paint systems. This is their bomber blue and gun metal metallic. We think the color combination looks great.
The clear has a nice gloss. Hold out. It's gonna look fantastic on that truck. Now, speaking of a paint job, you always wanna strive for the perfect paint job. Well, the secret to a perfect paint job is actually not a secret at all. It's technique and it's not just one technique. It's a bunch of different procedures thrown together and it's being conscientious every step of the way. So what I wanted to do is show you some things that are gonna really help you achieve that perfect paint job.
Now you're always gonna see me painting with some kind of a monkey suit or a paint suit on gloves and a good breathing apparatus. And as important as that is to safety, it's also important for controlling contamination. Contamination is your enemy in a paint job stuff falling into the paint coming off your skin or off your clothes. And it's very important especially to wear gloves. And here's why
now this is a piece of bare 20 gauge steel that I laid my hand on and kind of held it there a couple of weeks ago for about 0 1520 seconds. And you can see the perfect impression of my hand on the steel. That's because the acid and oil that's secreted from my skin deposited onto the steel and reacted. This will get trapped on your surface between your primer layers between your paint layers, especially on bare steel. So it's a great idea to wear gloves. Now, these blue gloves are nitro, we get them from Kimberly Clark and they're really good protection against depositing contamination into your work.
These latex gloves don't hold up as well under solvent, but they're better than nothing.
Now, contamination can come from your equipment as well. So it's kind of a no brainer to keep your paint guns clean. But here's something you don't want to do. You don't want to get solvent inside the air inlet. The reason is is that the inside of these passages aren't coated like the outside and they'll actually rust or corrode from the inside with the moisture that's insolvent. So, here's a good idea. Let's just, it's a simple cheap vacuum cap. Plug the end while you're cleaning your paint gun, keep the moisture and the solvent out of the inside air passages of the gun while you clean it.
Now, after your spray guns clean, use a dedicated spray gun lubricant. These won't react with paint,
just a drop in all the metal on metal
areas.
That's all you need. That way your guns ready for you the next time you pick it up
and resist the urge to use metal objects to clean the inside passages of the paint gun, like a paper clip or these welding files. These can damage the highly machined internal surfaces and ruin a paint gun. Only use products and equipment that's dedicated and specifically made to clean out a paint gun. These won't break down under solvent either. Now another area you can get contamination or dirty in your paint job is from the air hose itself. So, whatever I do a paint job, I'll prep the hose with some wax and grease remover
and give it a wipe down the first three or 4 ft of the hose. That way, you know, you're not transferring dirt or contamination onto the panel, which is actually really close to the paint gun. Now, here's something
old school.
Now, think of your car in the paint booth as a big giant magnet and all the dust particles floating around in the air as pieces of steel that are gonna get sucked down into your magnet and into your wet paint. Well, here's an old school trick that's very easy to do,
grind off the paint or the rust in this case, off of a frame chunk and
simply bolt the chain up to the frame, make sure it hangs down onto the floor
on a clean spot too. And what this is gonna do is discharge the magnet and really help to eliminate the static cling that's gonna draw that stuff and all that other contamination that you don't want to buff out of your paint job into those panels.
Now, each one of these tips by themselves. Well, they'll help but stringing a lot of different, really proactive and good tips together creates a mindset to where you're gonna have a clean atmosphere and you're gonna be careful doing your procedures because remember the perfect paint job. Well, it's all in the details and every little bit helps
you're watching trucks for a DVD copy of this episode. Just go to Power Block tv.com and order your copy for just 595 plus shipping and handling. Start your own trucks, collection delivered right to your door from the power block.
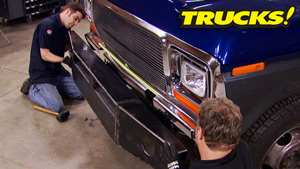
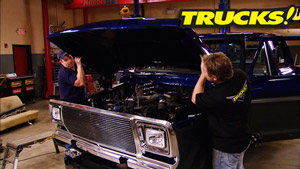
Hey guys, welcome back to the shop. Well, Project super duly is getting closer to being ready for that blue and gray paint. Scheme that Kevin showed you earlier. But once we get it done, we're not gonna throw the beat up and dented factory grill back in this thing, we're gonna upgrade to something a little bit cleaner and a little bit meaner.
Now,
this is a factory replacement grill shell with a billet aluminum insert.
It looks pretty tough.
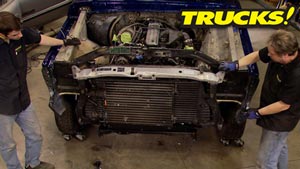
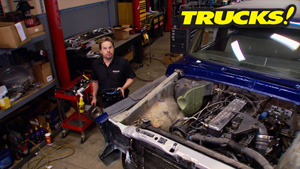
Now, I've measured the factory dodge radiator, condenser and inner cooler set up and they require about 7.5 or eight inches worth of room.
Now, if I measure from behind the grill to the face of the fan clutch,
well, it looks like we've got a little over nine inches of space to deal with.
Now, we'll obviously have to remove the center post from the factory radiator core support, but we'll reinforce it with something else
that's going to be a tight fit if we need a little bit of extra room. Well, we'll just remove the mechanical fan and replace it with two slimmer electric fans either way, I think we're in good shape.
Hey, guys, if you've got a powerful but loud diesel or gas powered vehicle and you want to keep all the power but lose some of the noise.
Well, you might wanna look into a couple of hush power products from Flowmaster.
Now, the Pro series mufflers do a great job at controlling the amount of sound that the exhaust system produces while maximizing power and efficiency. These have even been shown to produce more power than a completely open exhaust system.
Now, if you've already got a flow master exhaust and you just wanna quiet it down,
check out their hush power to resonators. Now, this one is 409 stainless steel and it works great behind a chambered muffler or a hush power muffler. So if you need to make power, but it needs to be done quietly. Check out the hush power line of products from Flowmaster. They're available for a multitude of applications guys. Thanks for watching the show. See you next week.
Show Full Transcript
diy bed liner and we've got some painting tips to help you get a perfect paint job. Finally, we'll give super duly some chrome. It's all today here on trucks.
It looks pretty tough.
Hey, welcome to trucks.
Well, Project Super duly is going to be a one of a kind vehicle. Now, we were going to submit a request for a brand new diesel duly tow rig that we could use as a parts chaser and to pull our rigs around to off road events and things like that. And then we started
about it and you know what? We don't buy trucks, we build trucks. So that's exactly what we said about to do. But instead of getting a used rig, used dole and fixing it up, we decided to go a different direction and get two completely different vehicles and mash them together. And
this is what we ended up with.
Super duly is a 79 Ford body sitting on top of a 97 Dodge Dooly chassis
and we had seven of the baddest metal masters in the land come and help us straighten out the wrinkles in the body work.
And in less than a week these guys brought this truck back to life,
man. Those guys did a great job on the exterior of the truck getting it ready for paint, but
there just wasn't any time left over to pay any attention to the interior. So that's what we're gonna do today.
Now, this is a seventies era pickup truck and back then
they just didn't focus that much on sound deadening and insulation.
And you combine that with the fact that we're running a 12 valve cummins diesel and they're not exactly known for their whisper quiet operation and you can easily see how it would get kind of loud and boomy here in the cab.
So we're going to address that and try to keep the diesel clatter and road noise on the outside of the truck, keep it comfortable and quiet here on the inside.
Now, inside the bed, other than a few places where we've patched to replace some rotten metal. Well, it's almost exactly like we found it. But remember this is a work truck, not a show truck, so it's a little rough, but that's ok. We're gonna prep the surface, not worry too much about a few little dancer pop knots here and there and throw a fat coat of bed liner in this thing.
Now, inside the cab, we're going to use a product that the guys over in horsepower have had really good luck with in the past and it's lizard skin spray on sound insulation. Now, we've had success with the adhesive sound deadening mats before as well. But there are some advantages to the spray on insulation. Now, they've had a couple of different formulas first being their sc or sound control formula and this stuff is really gonna reduce the noise and vibration inside the cab.
It's also gonna protect all the surfaces from continued moisture and corrosion. Any rust issues that we'd see. This stuff's good to about 300
°F.
Now, the other option is their C I or ceramic insulation formula and it's good for higher heat applications as it can withstand temperatures of about 500 degrees, it'll also reduce engine and heat transfer by about 25 degrees. And since it's water based, well, it's easy to clean up. It's environmentally friendly and you don't need a respirator to apply it. Now, another advantage to both of these coatings is they go on really
thin, just 40 mils or one millimeter thick and that will prevent you from altering the fitment of your interior panels, saving you extra work and a big fat headache. Now, you can use both of these products on the same panels, but if you do make sure you apply the sound control formula first,
now to spray it on, you're going to need a gun with a rather large orifice or opening. Now since we're going to be focusing on the interior today,
we're going to go with this one.
Now, this stuff's a pretty thick consistency. So use an electric drill with the paddle mixer and go ahead and mix it for a good little while. If it helps you count to 100
you want to make sure it's thoroughly mixed.
Now, once you're happy that everything is evenly mixed and you've saved as much of the product as you can go ahead and dunk the mixing paddle in water. That is if you want to reuse it. Once the lizard skin sets up, it's gonna be very difficult to remove.
At least I'm not making a mess.
Now, this stuff sprays really easily, especially if you use the spray gun that they offer. But if you're using a spray gun that you already own, just remember to change out to a larger diameter tip before you start.
Now, it's always a good technique to use an overlapping pattern, whether you're spraying paint or laying down an insulation type product like this.
But this stuff is a lot more forgiving.
We're also applying some insulation to the rear cab panel because basically this entire huge cab is just one big steel drum and the more places we can spray on sound insulation, the better
now spraying the grayish colored insulation against the contrasting brown paint makes it really easy to tell when you have full coverage. There's no need to pile this stuff on real thick.
And if you're not really happy with the texture of the final product, well, just remember this stuff is sand
and paint as well. So if you got any exposed panels, well, don't be afraid to use it on them too.
And with the cab just about finished up, time to pay some attention to the well used bed,
we've got the scaly surface rust knocked off the bed floor with a wire brush and all the dust blown out. So we're ready to rock and roll. Now, we've shown you prepping rusty metal with a chemical to set it up to be able to put a bed liner on it in the past. But there's different ways to go about this. We're going to do it different this time with Por 15. It stands for paint over rust and basically it bonds with the rust and creates a solid coating that you can then put your bed liner over top of
now, just like the bed liner we're going to put on top of it. Por 15 is a moisture cured urethane, meaning it doesn't need a catalyst to cure it uses moisture in the atmosphere.
Now, I'm not using por on the good metal that'll take a different primer
up. Next, we'll roll on our diy bed liner and later painting secrets reveal. Stay tuned and you can see the perfect impression
of my hand on the steel.
Hey guys, welcome back to the shop. Well, our lizard skin spray on sound insulation is dry to the touch for the most part. But like most spray on coatings, it does need a full 24 hours to completely cure. So we can't crawl up in here and get any work done. But the good news is, there's plenty of work to be done in the bed.
That's right. There is plenty of work to do on both of these projects, but they're both easy to do making them great diy projects that you guys can do at home. Now, I've gotten a little bit of a head start here, but I've thrown some seam sealer in some of the gaps and coating the bare steel with some dup color primer. Since the bed liner system we're putting in here likes to sit on a coating rather than bear steel.
Now, this is something fairly recent from duple
color. They're calling it their bed armor Diy bed liner kit and it's a little bit different than what they've had before in that. It's a moisture cured urethane, which means that it uses good old fashioned h2o or moisture in the atmosphere to lock it together and make it a very strong coating.
Now, one thing I like about duplicate color is that they know how to assemble a kit and they've included everything you need here, including a tray, an applicator that's going to create the right texture and look great
a stir stick
a prep pad for surface prep, even a touch up brush to get in those hard to reach recesses and areas that you can't reach with a roller.
Oh yeah.
Providing your bed surface paint and everything is clean like ours is a red scuffing pad is all you need to create the tooth or texture that the bed liner needs to sit on.
Now. Diy obviously means do it yourself. So get ready to burn some calories because the sacrifice for not paying somebody to do it is a little bit of hard work.
That's it.
Now with paint prep, there's no such thing as too clean and the thin layer of dust that I'm blowing off. Well, it would interfere with the adhesion of the bed liner. So you better make sure your substrate is clean.
We're going to follow that with a final wipe down of duple
colors. Paint prep in an aerosol can
this makes sure that all the wax and grease and contaminants are off of the panels and will further aid in the adhesion of our new bed light.
Now, the piece of masking paper that I'm using to sit on, just make sure I don't drag anything else into what I'm trying to coat over top of it just keeps things cleaner.
Now, there's no real technique in putting the first coat on, but the roller gives it the opportunity to smooth out any runs or clumps that are in the coating.
Now, another benefit to using a piece of paper is that I can paint myself out of the corner and not get trapped.
Now, the first coat doesn't look like much, but that's ok. It's not supposed to, it's got a single purpose and that is to hang on to the second coat of bed liner. The second coat is what has the mill thickness and the strength and the texture look of a bed liner.
Now, the second coat is where the magic happens and where you get the look of a professionally applied bed coating.
Now, two coats will give you a strong coding, but if you have to apply three, well, that's not a problem either. This is rec coded
and repairable unlike
a vulcanized co
and you may notice that we're putting the coating over top of DS, but that's ok because this is going to be a work truck and we're going to use it for one.
It would probably take 30 or 40 hours of body work technique to get the inside of this bed smooth and quite frankly, it's just not worth it when it's going to get beat up all over again.
Now, from the time your bed is prepped, it's probably going to take you an hour, maybe an hour and a half to apply it, but it's time well spent because it's a good looking coating and hides a lot of sins.
There you go. The second coat sure gives it the texture and the strength that you want. Another good thing is that, like we said before, it's water based. So if you mess up like I did right here kind of went over my masking tape. It's a simple water. Clean up
up
next. It's proactive painting tips. And later we'll try on the biggest piece of jewelry in the shop. Stick around.
Hey, guys, welcome back to trucks. We're getting closer and closer to being able to put paint on super duly. Now that we've got the lizard skin on the inside of the interior and the bed liner inside the bed, we can finally focus on the exterior panels. Speaking of, we wanted to show you the paint scheme that we've picked out for the truck. This is Summit Racing's new line of base coat clear coat paint systems. This is their bomber blue and gun metal metallic. We think the color combination looks great.
The clear has a nice gloss. Hold out. It's gonna look fantastic on that truck. Now, speaking of a paint job, you always wanna strive for the perfect paint job. Well, the secret to a perfect paint job is actually not a secret at all. It's technique and it's not just one technique. It's a bunch of different procedures thrown together and it's being conscientious every step of the way. So what I wanted to do is show you some things that are gonna really help you achieve that perfect paint job.
Now you're always gonna see me painting with some kind of a monkey suit or a paint suit on gloves and a good breathing apparatus. And as important as that is to safety, it's also important for controlling contamination. Contamination is your enemy in a paint job stuff falling into the paint coming off your skin or off your clothes. And it's very important especially to wear gloves. And here's why
now this is a piece of bare 20 gauge steel that I laid my hand on and kind of held it there a couple of weeks ago for about 0 1520 seconds. And you can see the perfect impression of my hand on the steel. That's because the acid and oil that's secreted from my skin deposited onto the steel and reacted. This will get trapped on your surface between your primer layers between your paint layers, especially on bare steel. So it's a great idea to wear gloves. Now, these blue gloves are nitro, we get them from Kimberly Clark and they're really good protection against depositing contamination into your work.
These latex gloves don't hold up as well under solvent, but they're better than nothing.
Now, contamination can come from your equipment as well. So it's kind of a no brainer to keep your paint guns clean. But here's something you don't want to do. You don't want to get solvent inside the air inlet. The reason is is that the inside of these passages aren't coated like the outside and they'll actually rust or corrode from the inside with the moisture that's insolvent. So, here's a good idea. Let's just, it's a simple cheap vacuum cap. Plug the end while you're cleaning your paint gun, keep the moisture and the solvent out of the inside air passages of the gun while you clean it.
Now, after your spray guns clean, use a dedicated spray gun lubricant. These won't react with paint,
just a drop in all the metal on metal
areas.
That's all you need. That way your guns ready for you the next time you pick it up
and resist the urge to use metal objects to clean the inside passages of the paint gun, like a paper clip or these welding files. These can damage the highly machined internal surfaces and ruin a paint gun. Only use products and equipment that's dedicated and specifically made to clean out a paint gun. These won't break down under solvent either. Now another area you can get contamination or dirty in your paint job is from the air hose itself. So, whatever I do a paint job, I'll prep the hose with some wax and grease remover
and give it a wipe down the first three or 4 ft of the hose. That way, you know, you're not transferring dirt or contamination onto the panel, which is actually really close to the paint gun. Now, here's something
old school.
Now, think of your car in the paint booth as a big giant magnet and all the dust particles floating around in the air as pieces of steel that are gonna get sucked down into your magnet and into your wet paint. Well, here's an old school trick that's very easy to do,
grind off the paint or the rust in this case, off of a frame chunk and
simply bolt the chain up to the frame, make sure it hangs down onto the floor
on a clean spot too. And what this is gonna do is discharge the magnet and really help to eliminate the static cling that's gonna draw that stuff and all that other contamination that you don't want to buff out of your paint job into those panels.
Now, each one of these tips by themselves. Well, they'll help but stringing a lot of different, really proactive and good tips together creates a mindset to where you're gonna have a clean atmosphere and you're gonna be careful doing your procedures because remember the perfect paint job. Well, it's all in the details and every little bit helps
you're watching trucks for a DVD copy of this episode. Just go to Power Block tv.com and order your copy for just 595 plus shipping and handling. Start your own trucks, collection delivered right to your door from the power block.
Hey guys, welcome back to the shop. Well, Project super duly is getting closer to being ready for that blue and gray paint. Scheme that Kevin showed you earlier. But once we get it done, we're not gonna throw the beat up and dented factory grill back in this thing, we're gonna upgrade to something a little bit cleaner and a little bit meaner.
Now,
this is a factory replacement grill shell with a billet aluminum insert.
It looks pretty tough.
Now, I've measured the factory dodge radiator, condenser and inner cooler set up and they require about 7.5 or eight inches worth of room.
Now, if I measure from behind the grill to the face of the fan clutch,
well, it looks like we've got a little over nine inches of space to deal with.
Now, we'll obviously have to remove the center post from the factory radiator core support, but we'll reinforce it with something else
that's going to be a tight fit if we need a little bit of extra room. Well, we'll just remove the mechanical fan and replace it with two slimmer electric fans either way, I think we're in good shape.
Hey, guys, if you've got a powerful but loud diesel or gas powered vehicle and you want to keep all the power but lose some of the noise.
Well, you might wanna look into a couple of hush power products from Flowmaster.
Now, the Pro series mufflers do a great job at controlling the amount of sound that the exhaust system produces while maximizing power and efficiency. These have even been shown to produce more power than a completely open exhaust system.
Now, if you've already got a flow master exhaust and you just wanna quiet it down,
check out their hush power to resonators. Now, this one is 409 stainless steel and it works great behind a chambered muffler or a hush power muffler. So if you need to make power, but it needs to be done quietly. Check out the hush power line of products from Flowmaster. They're available for a multitude of applications guys. Thanks for watching the show. See you next week.
