More '49 Chevy 3100 "ClasSix" Episodes
Trucks! Builds
Want more content like this?
Join the PowerNation Email NewsletterParts Used In This Episode
Auto Body Color & Supply Co.
KREW 600 hand towels
Certified Auto Recycling
Used 8.8 rear axle housing with 3.73 gears, limited slip differential and disc brakes.
Gold Eagle Co.
104+ Octane Boost тАУ REGULAR Formula.
Gold Eagle Co.
STA-BIL Fuel Stabilizer.
Jim Weimer Rod Garage
Set of four stamped Mustang II arms. Mustang II spindles. Strut Rod Kit with Hardware. Bushing kit for strut rods. Calipers with rotors, bearings and seals.
Matco Tools
4-1/2" Electric Grinder.
Matco Tools
Pneumatic air saw with swivel inlet.
Mustang Project
1959 Cadillac Sequential Tail Light Kit.
Mustang Project
64-66 Shelby Tail Light Conversion Kit.
Mustang Project
LED Headlight Kit.
O'Reilly Auto Parts
104+ Octane Boost, Regular Formula, 104+ Octane Boost, MAXIMUM Formula. (2) EACH
O'Reilly Auto Parts
Fuel line 3/8" and 5/16" 25 FT. Each, Vacuum hose 7/32" and 1/4" 50 FT. each
RPPG Inc.
1959 Caddy Tail Light Buckets.
RPPG Inc.
Custom beams frenched headlight kit.
RPPG Inc.
LI'L Frenchie Antenna Kit.
The Industrial Depot
.040 cut-off wheels
The Industrial Depot
.040 cut-off wheels
Welder Series
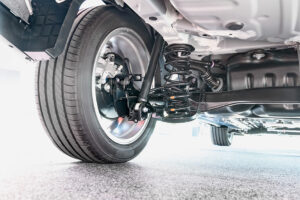
Triangulated rear four link kit. C-notch kits and frame bend sections. Rear axle bracket for mounting coil-over shocks.
Episode Transcript
This is what the guys were doing
today. It's old school custom body work straight from the fifties. We're French in our headlights and tunneling our tail lights, check it out and it's the latest in led lighting technology. It's all today here on trucks.
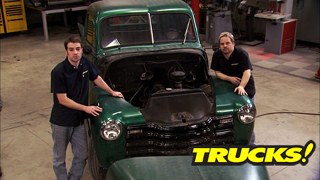
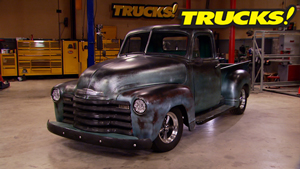
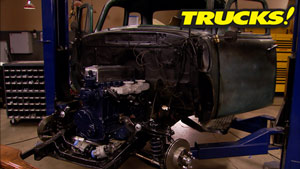
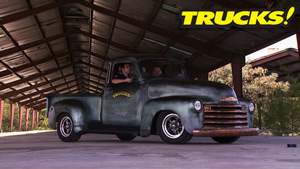
Hey, welcome to trucks today. We're back on class six, our 1949 Chevy project. Now the last time we had this thing in the shop, we did some major suspension work. We installed a welder series Mustang two front end kit along with one of their universal triangulation
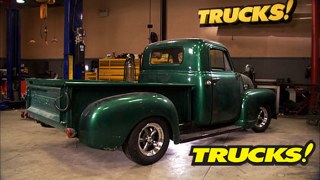
four link rear suspension systems and that will locate our swapped in Ford Explorer rear axle and we've got the whole truck rolling some new tires and wheels and now that we've got the stance just how we want it. We want to make some styling changes. Nothing too drastic, just some tasteful customizing.
Now, when you're going for a retro look, it doesn't necessarily mean that you have to reach for 50 or 60 year old components to get that look just like our suspension. We're gonna be reaching for modern components to do our custom body mods during the research for this project. And trying to figure out what to do to be, period. Correct. I came across something pretty cool. Check this out.
This is a 1956 annual custom car book by the editors of Car Craft Motor Trend and Hot Rod. Now, this is one of my dad's old custom car books from when he was a teenager. So obviously it's pretty special to me. But what's more important is what's inside it.
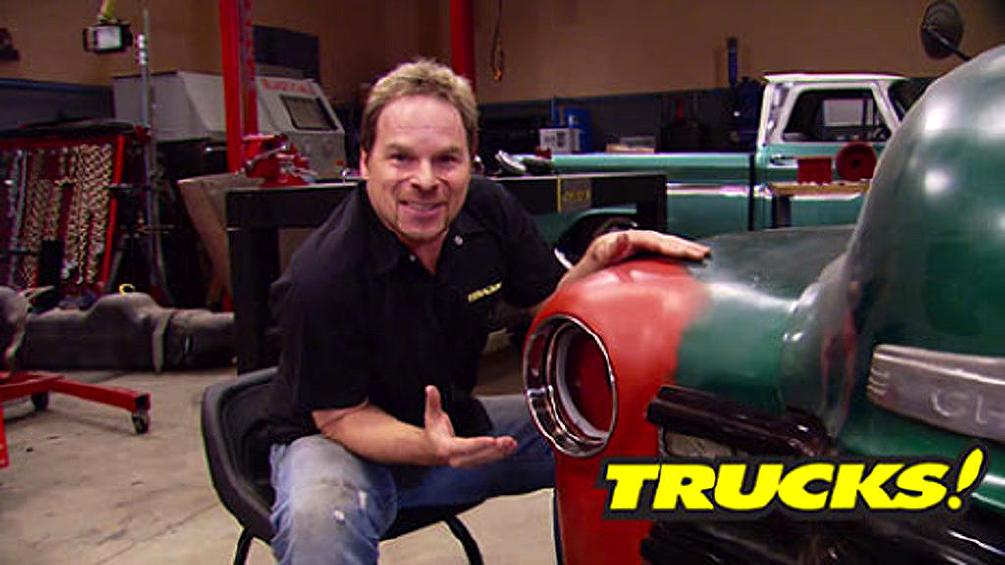
There's all kinds of custom body mods and techniques from the fifties. This is 1956. This is what the guys were doing back in the day. They've even got a section for trucks and this is way cool stuff. Now, you may have noticed like I did flipping through this book that there's a common theme with almost every single custom job in here and that is French or recess headlights and taillights. For instance,
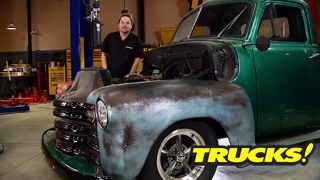
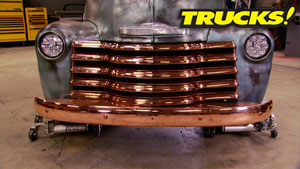
this is the stock headlight of our advanced design series truck. It looks fantastic, especially with the Polish trim ring that we showed you how to repair a while ago. But over here,
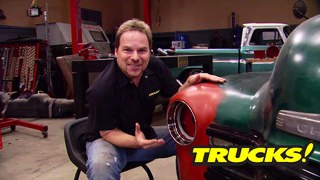
this is a typical classic fifties custom mud. This is a French headlight. The light itself is recessed back into the fender and the sheet metal is wrapped around where that headlight ring used to be.
Now, this looks like it would be a pretty involved project, right? Not so much. This is easier than you think. And we're gonna walk you through every step of it.
Now, another cool custom mod from the fifties is tunneling the tail lights into the fender gives the truck a cleaner, more custom look and it's gonna get rid of our bug eyed trailer lights that came on the back of our truck when we bought it.
Now, you can make an argument for reduced visibility when performing this modification. You combine that with the fact that we're going from a larger lamp to a smaller lamp
and well, we just don't wanna sacrifice safety.
So we're going with a brighter, much more visible led light. Plus these things look like they're straight out of the fifties. We'll show you more later,
reliable power products group, better known as RPPG Incorporated, started out about 20 years ago with two guys a great idea and about 600 bucks between them. Now, they've got almost 30,000 square feet, 20 employees and they're kicking out some cool custom body work projects like these custom beams, French headlight kits. They come with the universal headlight bucket kit fits several applications and includes all the hardware you need adjusters, grommets, a headlight retainer and seat that accepts a standard six inch high low beam bulb and a stainless steel trim ring that sits in from the top.
Now, one of the cool things about this kit is that the headlight goes in from the front. Whereas with your typical fifties, custom the bulb is located from the back.
We also had them send us their fad C ad taillight kit, which is designed to accept the stock 59 Cadillac taillights. Again, a traditional custom trick
on top of that, they sent us one of their French antenna kits along with the power antenna itself that's designed to work with most radio systems. Now,
you can take your time and hand fabricate all of this stuff. But the point is with the kits, you save so much time and they fit great. Not to mention that you're not working with a bunch of hazardous lead like they had to do back in the day.
Actually, there's very little tear down to do to get ready for a French headlight kit.
Once you've got your antique parts safely out of the way, what we're gonna do is prep around the headlight so we can later use our plasma torch and trim the ring
and that will allow you to sink the bucket into the fender and mark around the outside edge of the headlight ring itself.
Now, keep in mind you want to cut conservatively, make sure that you leave a little room for adjustment.
Lo be
high,
lo be
hen. After testing out the new headlight, we're removing the paint about an inch or so back from the opening using a 50 grit grinder.
Cool. That's what we're looking for. Now, if you're using this kid, this hole on the bottom is what you feed your wires through. Also acts as a drain hole. It's important to keep that on the bottom because even though the buckets are universal, your adjusters need to be aligned. So you've got an up and down adjustment and a left to right adjustment. Otherwise you get a bug eyed truck, that's no good.
Now, we gotta prep the edge, start tacking it in place. See easy.
Now, the headlight buckets are shipped out already primed and since we're going to be welding right around the perimeter of the ring, you don't want to contaminate your wel. So we're stripping the primer back.
Now, once you're happy with your placement, use the tried and true method of spacing out your tax to minimize heat warpage.
Now, there's some obvious differences between the shape of the 60 year old fender and the brand new headlight bucket. So you've got to make the metal do what you want it to do
the way to do that around a very strong crowned panel like our front fender is by doing relief cuts very much the same as you would cut a paper template or cutting the metal.
You can see by my reference points exactly where I'm going to do my relief cuts. And then basically you just work the metal around to where it meets your new headlight bucket.
Now, there are a variety of different tools that you can use to cut the metal and your relief cuts. We're using a Matco grinder with a 40 thousands cut off blade, which is very thin.
What this allows us to do is do the controlled cut that we want, utilizing the torque of an electric tool.
Now, where we couldn't reach with a cut off wheel, we're using a pneumatic
AOSA.
This allows us to get into the tighter angles that the larger blade wouldn't fit into.
Now, it looks like there's a giant gap at the bottom of the ring, but it's kind of an illusion.
You can see when I'm pulling the metal out with a pick, it comes out and actually meets the edge of the headlight ring. Then all you do is tack it in place.
No,
just make sure you hold the metal in place until your weld pool cools.
Now, if you're working on an older panel, you're going to run into the situation to where the metal just sort of melts away from your welder.
There's a way to work around this.
When you create a solid tack weld off of the tack
where you're actually working off of a more solid substrate, then you're trying to weld too.
It's kind of a delicate dance because you're waiting for your weld pool to cool about half way,
wait for it to get a bit of an orange color in your mask and then you can safely build off of it.
Now, of course, there's a ton of tack welds here and we didn't want to bore you to tears. So we sped it up, but keep this in mind as well. All the strength that is engineered into that crown stamped fender, you've now deteriorated by doing the relief cuts. So you've got to work around that and let it cool down effectively between tacks. So you don't force a warp into it
up next. It's lead sled custom tricks without all the lead and later led s aren't just for your computer anymore. Stay tuned.
Hey, welcome back to trucks. Well, I've got all the welds ground flush using the same technique as welding moving around. So we minimize any distortion that might occur with excessive heat. Now, we knew going in that there's going to be a bunch of filler around this light. We're going to use our filler and work off of the ring to make sure that we have a nice
ooth contour from our headlight bucket into the rest of the fender. We're gonna start off with fiberglass filler to fill in any pinholes that may be present from the welding process and then go to Polyester and then finally to primer. When we're done, it's gonna look just like this side over here blocked out nice
call this thing done.
Now, when choosing the location for our tunnel taillight, but we didn't just pick it at random. We tried to follow the good rule of thumb of keeping it on the same plane as the headlight. So before we cut this out, we ran a tape line down the entire side of the truck level with the headlight and that put us right here. And another reason this looks right is because it follows the rule of thirds. I'm sure you've heard about basically, it keeps the light in the upper third of the fender, leaving two thirds of the fender exposed, giving it the correct proportion.
Now, to make sure we put the driver's side light in the correct location, We simply use the same technique that we use on Project H RT. When laying out the flame job, we simply took some masking paper, contoured it to fit the fender, then traced the area that we had already cut out and it was just a matter of
transferring the paper over to this side, flipping it over. All we gotta do is trace the area that's been cut out.
Now, we've lowered our truck about six inches. So it works out really well that the new taillight is about six inches higher than the old one that'll keep us visible to traffic behind us.
Now, we're tracing the cut out which is a mirror image of the other side,
but we wanna make our cut about a half inch inboard of that.
Now, we'll just trim a little bit at a time. We're gonna work our way outward
because just like on the front. Well, it's a lot easier to keep removing material a little bit at a time than it is to add it back in. Once you've made a mistake,
now we're dealing with multiple curves and angles here. So getting the taillight tunnel to line up correctly can be a challenge. But it's also very important. And it's another good reason to trim just a little bit at a time.
Now, we're using a plasma cutter just to get our general shape because it flat out, gets the job done quick.
But once we get close to exactly where we want it, we're going to switch up tools to something a little bit more precise.
And since we want the tail light bucket almost perpendicular with the rear of the truck,
well, the outermost edge is going to be sticking outside of the fender and will need to be trimmed off later.
Now, you're probably wondering why we didn't just use a piece of exhaust tubing to save a bunch of money instead of purchasing a kit.
Well, these tail light buckets are hand formed to fit the 59 caddy tail lights perfectly
and that's going to save us a bunch of time on the installation.
I don't know about you, but around here time is money.
Now, like we said, we're using a multitude of tools to get this job done. Getting more and more precise as we get closer to our final shape.
All right. Well, after lots of grinding, fitting and trimming, we got this thing sitting exactly where we want it.
And that means having this joint line parallel with the top of the bed rail as well as keeping the bucket as perpendicular as possible to the traffic that's gonna be behind us because led lights tend to be highly directional. Now,
all we got left to do is grind some of this paint away,
this thing welded in.
Now, it's pretty apparent somebody's been here before doing some body work.
And once we ground down through all the previous repairs, we finally found some decent metal to work with.
After fitting our tail light bucket where we want it, we tacked it in place, spacing our tacks about a quarter inch apart
and that'll keep it from moving while we grind it flush with the rest of the fender.
It'll also give those tack welds and the surrounding metal a chance to cool off
and using a fresh 40 grip flap wheel gets the job done quickly without overheating the metal
and with it all ground flush, we can continue with the tack welding process.
Now, when we're doing sheet metal work like this, we like to use our little 110 volt welder and some 0.025 wire
after the break, it's led headlights that are plug and play, stick around.
Hey, welcome back to the shop. Well, we've had a chance to grind down the welds on a recess tail light as well as wipe some mud on it. Now, we told you right up front this truck ain't gonna be a show truck. Now, if you take a closer look, you can see the multiple layers of body filler that have already been applied to this vendor. So, rather than grind it all down to bare metal and start over, we're just gonna work with what's already here. There's no crime in that. We're simply blending our new body filler in with the old. Now, all we got left to do is spray it with some primer. We're gonna do that on the cheap as well. But first we want to show you some of the new lighting technology that is going on this old truck. Now, early on, we talked about led lighting. The fact is that more and more car makers are using led technology for a couple of different reasons. It's brighter and it requires less power. We've used led aftermarket kits in a couple of our trucks. Projects H RT and old school both used led tail lights. Now, I don't know if you recognize these lights, but they're from a company called Mustang Project. They're Shelby Lights.
Mustang Project is the original
of the sequential led tail light kit along with these, they've got some really cool products that we're gonna show you, but check this out. This is brand new.
Now, this is an led headlight, it fits in where a standard seal beam bulb does and plugs right into your existing receptacle. Now, we've all seen the seal beam headlights that just don't offer much illumination, especially at night. Coupled with the fact that we're sinking it down, french it into the fender, we can do a little bit better than that. And I think these guys will compensate, check it out,
that's low beam
and that's high beam.
We are definitely gonna be able to see with these puppies. No worries.
Now, Ryan showed you these a little earlier on, this is a modern led version of the classic 59 Cadillac tail light. Now, this is a pretty cool trick back in the day to sink these into your fenders, but no longer do you have to go hunting around the swap meets or the classified to find them? Just give Mustang project a call.
Now, the fact that these aftermarket lights plug right into your factory wiring makes the installation pretty straightforward.
The led taillights require a chassis ground which is easily done by running a screw into the back of the bucket into the light itself with the light mounted, all that's left is simply slicing into the existing taillight harness.
Hey, welcome back. Watch this.
Now, I think you'll agree that we have not lost any visibility due to changing these tail lights and we hope we've made George Barris and some of his peers proud with this cool modern twist on a fifties custom trick. Now, this looks like it's flickering a little bit. Well, sometimes TV has a way of doing that to led lighting. But trust me, this is constant. It's bright and man, it looks cool.
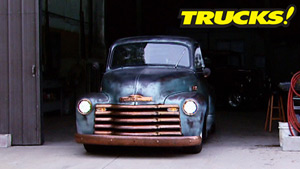
You have these French in headlights and tunnel taillights give our 49 Chevy a classic custom look with a modern twist like we showed you. It's not that hard to do.
So, if you got some free time and access to a welder, well, you can get creative with your project.
Well, let's face it. The quality of today's fuel is just different than it used to be. And if you've got a vehicle like our C 10 here that sits any more than a couple of weeks, let's face it. This thing is not gonna see any harsh winters. Well, you might wanna consider a fuel stabilizer like stable.
Now, the new improved stable has more corrosion inhibitors in it to help counteract the effect of more ethanol in today's fuel. The correct ratio of stable in your tank will keep your fuel safe up to 12 months. Now, if you've got a dual purpose vehicle that you like to take out and play with on the weekends, you wanna run a little bit more timing or maybe a second tune on it with some 104 octane boost mixed in with a full tank of fuel will bump up your octane, take care of any pre ignition problems that you might have.
Now, for information on what you've seen on today's show, go to Power Block tv.com and check out the truck's website. Thanks for watching. See you next time.
Definite improvement,
don't you think?
Show Full Transcript
today. It's old school custom body work straight from the fifties. We're French in our headlights and tunneling our tail lights, check it out and it's the latest in led lighting technology. It's all today here on trucks.
Hey, welcome to trucks today. We're back on class six, our 1949 Chevy project. Now the last time we had this thing in the shop, we did some major suspension work. We installed a welder series Mustang two front end kit along with one of their universal triangulation
four link rear suspension systems and that will locate our swapped in Ford Explorer rear axle and we've got the whole truck rolling some new tires and wheels and now that we've got the stance just how we want it. We want to make some styling changes. Nothing too drastic, just some tasteful customizing.
Now, when you're going for a retro look, it doesn't necessarily mean that you have to reach for 50 or 60 year old components to get that look just like our suspension. We're gonna be reaching for modern components to do our custom body mods during the research for this project. And trying to figure out what to do to be, period. Correct. I came across something pretty cool. Check this out.
This is a 1956 annual custom car book by the editors of Car Craft Motor Trend and Hot Rod. Now, this is one of my dad's old custom car books from when he was a teenager. So obviously it's pretty special to me. But what's more important is what's inside it.
There's all kinds of custom body mods and techniques from the fifties. This is 1956. This is what the guys were doing back in the day. They've even got a section for trucks and this is way cool stuff. Now, you may have noticed like I did flipping through this book that there's a common theme with almost every single custom job in here and that is French or recess headlights and taillights. For instance,
this is the stock headlight of our advanced design series truck. It looks fantastic, especially with the Polish trim ring that we showed you how to repair a while ago. But over here,
this is a typical classic fifties custom mud. This is a French headlight. The light itself is recessed back into the fender and the sheet metal is wrapped around where that headlight ring used to be.
Now, this looks like it would be a pretty involved project, right? Not so much. This is easier than you think. And we're gonna walk you through every step of it.
Now, another cool custom mod from the fifties is tunneling the tail lights into the fender gives the truck a cleaner, more custom look and it's gonna get rid of our bug eyed trailer lights that came on the back of our truck when we bought it.
Now, you can make an argument for reduced visibility when performing this modification. You combine that with the fact that we're going from a larger lamp to a smaller lamp
and well, we just don't wanna sacrifice safety.
So we're going with a brighter, much more visible led light. Plus these things look like they're straight out of the fifties. We'll show you more later,
reliable power products group, better known as RPPG Incorporated, started out about 20 years ago with two guys a great idea and about 600 bucks between them. Now, they've got almost 30,000 square feet, 20 employees and they're kicking out some cool custom body work projects like these custom beams, French headlight kits. They come with the universal headlight bucket kit fits several applications and includes all the hardware you need adjusters, grommets, a headlight retainer and seat that accepts a standard six inch high low beam bulb and a stainless steel trim ring that sits in from the top.
Now, one of the cool things about this kit is that the headlight goes in from the front. Whereas with your typical fifties, custom the bulb is located from the back.
We also had them send us their fad C ad taillight kit, which is designed to accept the stock 59 Cadillac taillights. Again, a traditional custom trick
on top of that, they sent us one of their French antenna kits along with the power antenna itself that's designed to work with most radio systems. Now,
you can take your time and hand fabricate all of this stuff. But the point is with the kits, you save so much time and they fit great. Not to mention that you're not working with a bunch of hazardous lead like they had to do back in the day.
Actually, there's very little tear down to do to get ready for a French headlight kit.
Once you've got your antique parts safely out of the way, what we're gonna do is prep around the headlight so we can later use our plasma torch and trim the ring
and that will allow you to sink the bucket into the fender and mark around the outside edge of the headlight ring itself.
Now, keep in mind you want to cut conservatively, make sure that you leave a little room for adjustment.
Lo be
high,
lo be
hen. After testing out the new headlight, we're removing the paint about an inch or so back from the opening using a 50 grit grinder.
Cool. That's what we're looking for. Now, if you're using this kid, this hole on the bottom is what you feed your wires through. Also acts as a drain hole. It's important to keep that on the bottom because even though the buckets are universal, your adjusters need to be aligned. So you've got an up and down adjustment and a left to right adjustment. Otherwise you get a bug eyed truck, that's no good.
Now, we gotta prep the edge, start tacking it in place. See easy.
Now, the headlight buckets are shipped out already primed and since we're going to be welding right around the perimeter of the ring, you don't want to contaminate your wel. So we're stripping the primer back.
Now, once you're happy with your placement, use the tried and true method of spacing out your tax to minimize heat warpage.
Now, there's some obvious differences between the shape of the 60 year old fender and the brand new headlight bucket. So you've got to make the metal do what you want it to do
the way to do that around a very strong crowned panel like our front fender is by doing relief cuts very much the same as you would cut a paper template or cutting the metal.
You can see by my reference points exactly where I'm going to do my relief cuts. And then basically you just work the metal around to where it meets your new headlight bucket.
Now, there are a variety of different tools that you can use to cut the metal and your relief cuts. We're using a Matco grinder with a 40 thousands cut off blade, which is very thin.
What this allows us to do is do the controlled cut that we want, utilizing the torque of an electric tool.
Now, where we couldn't reach with a cut off wheel, we're using a pneumatic
AOSA.
This allows us to get into the tighter angles that the larger blade wouldn't fit into.
Now, it looks like there's a giant gap at the bottom of the ring, but it's kind of an illusion.
You can see when I'm pulling the metal out with a pick, it comes out and actually meets the edge of the headlight ring. Then all you do is tack it in place.
No,
just make sure you hold the metal in place until your weld pool cools.
Now, if you're working on an older panel, you're going to run into the situation to where the metal just sort of melts away from your welder.
There's a way to work around this.
When you create a solid tack weld off of the tack
where you're actually working off of a more solid substrate, then you're trying to weld too.
It's kind of a delicate dance because you're waiting for your weld pool to cool about half way,
wait for it to get a bit of an orange color in your mask and then you can safely build off of it.
Now, of course, there's a ton of tack welds here and we didn't want to bore you to tears. So we sped it up, but keep this in mind as well. All the strength that is engineered into that crown stamped fender, you've now deteriorated by doing the relief cuts. So you've got to work around that and let it cool down effectively between tacks. So you don't force a warp into it
up next. It's lead sled custom tricks without all the lead and later led s aren't just for your computer anymore. Stay tuned.
Hey, welcome back to trucks. Well, I've got all the welds ground flush using the same technique as welding moving around. So we minimize any distortion that might occur with excessive heat. Now, we knew going in that there's going to be a bunch of filler around this light. We're going to use our filler and work off of the ring to make sure that we have a nice
ooth contour from our headlight bucket into the rest of the fender. We're gonna start off with fiberglass filler to fill in any pinholes that may be present from the welding process and then go to Polyester and then finally to primer. When we're done, it's gonna look just like this side over here blocked out nice
call this thing done.
Now, when choosing the location for our tunnel taillight, but we didn't just pick it at random. We tried to follow the good rule of thumb of keeping it on the same plane as the headlight. So before we cut this out, we ran a tape line down the entire side of the truck level with the headlight and that put us right here. And another reason this looks right is because it follows the rule of thirds. I'm sure you've heard about basically, it keeps the light in the upper third of the fender, leaving two thirds of the fender exposed, giving it the correct proportion.
Now, to make sure we put the driver's side light in the correct location, We simply use the same technique that we use on Project H RT. When laying out the flame job, we simply took some masking paper, contoured it to fit the fender, then traced the area that we had already cut out and it was just a matter of
transferring the paper over to this side, flipping it over. All we gotta do is trace the area that's been cut out.
Now, we've lowered our truck about six inches. So it works out really well that the new taillight is about six inches higher than the old one that'll keep us visible to traffic behind us.
Now, we're tracing the cut out which is a mirror image of the other side,
but we wanna make our cut about a half inch inboard of that.
Now, we'll just trim a little bit at a time. We're gonna work our way outward
because just like on the front. Well, it's a lot easier to keep removing material a little bit at a time than it is to add it back in. Once you've made a mistake,
now we're dealing with multiple curves and angles here. So getting the taillight tunnel to line up correctly can be a challenge. But it's also very important. And it's another good reason to trim just a little bit at a time.
Now, we're using a plasma cutter just to get our general shape because it flat out, gets the job done quick.
But once we get close to exactly where we want it, we're going to switch up tools to something a little bit more precise.
And since we want the tail light bucket almost perpendicular with the rear of the truck,
well, the outermost edge is going to be sticking outside of the fender and will need to be trimmed off later.
Now, you're probably wondering why we didn't just use a piece of exhaust tubing to save a bunch of money instead of purchasing a kit.
Well, these tail light buckets are hand formed to fit the 59 caddy tail lights perfectly
and that's going to save us a bunch of time on the installation.
I don't know about you, but around here time is money.
Now, like we said, we're using a multitude of tools to get this job done. Getting more and more precise as we get closer to our final shape.
All right. Well, after lots of grinding, fitting and trimming, we got this thing sitting exactly where we want it.
And that means having this joint line parallel with the top of the bed rail as well as keeping the bucket as perpendicular as possible to the traffic that's gonna be behind us because led lights tend to be highly directional. Now,
all we got left to do is grind some of this paint away,
this thing welded in.
Now, it's pretty apparent somebody's been here before doing some body work.
And once we ground down through all the previous repairs, we finally found some decent metal to work with.
After fitting our tail light bucket where we want it, we tacked it in place, spacing our tacks about a quarter inch apart
and that'll keep it from moving while we grind it flush with the rest of the fender.
It'll also give those tack welds and the surrounding metal a chance to cool off
and using a fresh 40 grip flap wheel gets the job done quickly without overheating the metal
and with it all ground flush, we can continue with the tack welding process.
Now, when we're doing sheet metal work like this, we like to use our little 110 volt welder and some 0.025 wire
after the break, it's led headlights that are plug and play, stick around.
Hey, welcome back to the shop. Well, we've had a chance to grind down the welds on a recess tail light as well as wipe some mud on it. Now, we told you right up front this truck ain't gonna be a show truck. Now, if you take a closer look, you can see the multiple layers of body filler that have already been applied to this vendor. So, rather than grind it all down to bare metal and start over, we're just gonna work with what's already here. There's no crime in that. We're simply blending our new body filler in with the old. Now, all we got left to do is spray it with some primer. We're gonna do that on the cheap as well. But first we want to show you some of the new lighting technology that is going on this old truck. Now, early on, we talked about led lighting. The fact is that more and more car makers are using led technology for a couple of different reasons. It's brighter and it requires less power. We've used led aftermarket kits in a couple of our trucks. Projects H RT and old school both used led tail lights. Now, I don't know if you recognize these lights, but they're from a company called Mustang Project. They're Shelby Lights.
Mustang Project is the original
of the sequential led tail light kit along with these, they've got some really cool products that we're gonna show you, but check this out. This is brand new.
Now, this is an led headlight, it fits in where a standard seal beam bulb does and plugs right into your existing receptacle. Now, we've all seen the seal beam headlights that just don't offer much illumination, especially at night. Coupled with the fact that we're sinking it down, french it into the fender, we can do a little bit better than that. And I think these guys will compensate, check it out,
that's low beam
and that's high beam.
We are definitely gonna be able to see with these puppies. No worries.
Now, Ryan showed you these a little earlier on, this is a modern led version of the classic 59 Cadillac tail light. Now, this is a pretty cool trick back in the day to sink these into your fenders, but no longer do you have to go hunting around the swap meets or the classified to find them? Just give Mustang project a call.
Now, the fact that these aftermarket lights plug right into your factory wiring makes the installation pretty straightforward.
The led taillights require a chassis ground which is easily done by running a screw into the back of the bucket into the light itself with the light mounted, all that's left is simply slicing into the existing taillight harness.
Hey, welcome back. Watch this.
Now, I think you'll agree that we have not lost any visibility due to changing these tail lights and we hope we've made George Barris and some of his peers proud with this cool modern twist on a fifties custom trick. Now, this looks like it's flickering a little bit. Well, sometimes TV has a way of doing that to led lighting. But trust me, this is constant. It's bright and man, it looks cool.
You have these French in headlights and tunnel taillights give our 49 Chevy a classic custom look with a modern twist like we showed you. It's not that hard to do.
So, if you got some free time and access to a welder, well, you can get creative with your project.
Well, let's face it. The quality of today's fuel is just different than it used to be. And if you've got a vehicle like our C 10 here that sits any more than a couple of weeks, let's face it. This thing is not gonna see any harsh winters. Well, you might wanna consider a fuel stabilizer like stable.
Now, the new improved stable has more corrosion inhibitors in it to help counteract the effect of more ethanol in today's fuel. The correct ratio of stable in your tank will keep your fuel safe up to 12 months. Now, if you've got a dual purpose vehicle that you like to take out and play with on the weekends, you wanna run a little bit more timing or maybe a second tune on it with some 104 octane boost mixed in with a full tank of fuel will bump up your octane, take care of any pre ignition problems that you might have.
Now, for information on what you've seen on today's show, go to Power Block tv.com and check out the truck's website. Thanks for watching. See you next time.
Definite improvement,
don't you think?
