More '01 Chevy "Second Chance" Silverado Episodes
Trucks! Builds
Want more content like this?
Join the PowerNation Email NewsletterParts Used In This Episode
EBC Brakes
EBC Yellowstuff is an aramid fibre based brake compound with high brake effect form cold and is possibly one of the first ever compounds that can be used for street and track driving., EBC Redstuff High Performance brake pads have the lowest dust rating pads for Prestige imports and faster street driving. Designed for premium street driving offering better brake effect up to 600°C (1100°F). EBC Greenstuff has a high initial brake effect and gives drivers confidence from first application
LMC Truck
Outer rocker panel RH, front fender RH, & cab corner RH.
Episode Transcript
Today, we're back on our second chance Silverado. Our rescued Chevy is now sporting replacement body panels. So it's time to fix up our dented passenger door and get it all ready for paint.
We'll also show you the cheapest way to get damaged plastic interior panels looking like new again. It's all today here on trucks.
Hey, welcome to trucks. Well, today we're back on our second chance Silverado, which is our little experiment on how we can take a once totalled out 2001 Chevy Silverado full size pickup that really had nothing more wrong with it than some sheet metal damage and transform it into a nice looking daily driven vehicle that you'd never know was wrecked in the first place.
And so far we're into this thing for 2200 bucks. That was the purchase price of the truck and less than $900 for all our replacement sheet metal, including our salvage yard door. When it's all said and done with, we hope to have this thing completely rebuilt for about $4000. That's not too bad considering a truck like this has a book value about nine grand.
The first thing we did was a rough out pull on both the cab and the bedside to get everything back into a lineman.
We use the outer sheet metal as a sacrificial spot to weld some tabs so we can straighten out the floor.
Then we cut out the cab corner to what's left of the rocker says the cab corners included in our replacement sheet metal followed by a coat of DPA color zinc. We
through primer
then we sectioned in our LNC truck rocker panel, utilizing the factory spot web locations to reattach it. E
plug welts
with the rocker in place. We hung the door to get the correct alignment on the cab corner which literally fell into place.
Then using state of the art panel bonding adhesive, we glued our bedside on rather than welding it, which saved us a lot of time and believe it or not a lot of money.
Now, some of what you haven't seen us do is dress down these welds and our weld seams and apply a little bit of filler to blend our new panels in with our old ones. But we did leave one project for you guys to see and that is repairing this front door. But before we get started on that, there's a couple of things I wanna show you.
Now here in this
upper cab corner, you can clearly see the clear coat flaking and peeling off. This is from a previous repair and you can tell by how shiny it is here that they got lazy. They didn't even prep this properly. They should have blended their color all the way up to the top and clear coated the whole panel. That's just bad technique.
And again, over here by the door, they cheesed out and got lazy and painted up to the stripe. Instead of blending up in the whole door, it doesn't take any more effort to pull these moldings loose and do it properly. We're gonna show you guys how to not cheat like this and get a better result doing it right the first time. Now, as far as this door,
the insurance company had figured in a door skin, which is about 290 bucks pretty pricey and about six hours labor on top of that. Well, you can see how it starts to stack up, but this is repairable. This is not that bad. And we're gonna show you that with about 10 bucks worth of polyester surface enhancement material, you can get a solid repair that looks great.
Now, this door has been fixed before there's a layer of filler on top of it. In order for us to fix it, we gotta get that layer of filler off, get it down to bear steel.
50 grid on an angle grinder gets the work done fast. And since we're using a stud welder to pull the damage out from the outside, we've got to have bare steel to weld to
stud placement starts at the lowest portion of your damage. This usually brings the rest of the panel back in line faster.
Oh,
and with a straight edge, you can tell where your low spots are and we're obviously low right here. Ending here.
It's a good idea to leave the previous round of studs attached to the panel. That way if you have to, they're there for you to use as leverage.
Now, our goal here is not to get the metal perfect. It's to make sure that the filler is no more than a quarter inch thick and we're almost there.
I had previously sliced through the outer skin right next to the door ridge. This made it a lot easier for me to reshape the door skin itself
since I've got my shape back, it needs to be tacked and then ground flush.
Now, you know, the drill with the appropriate amount of catalyst, mix your two components until they're fully blended.
And no, I haven't had too much coffee. We just didn't want to waste your time
when you spread your filler
just to an even layer. At first, don't try and do it all at once. You're gonna have the opportunity for several coats or as many as you need
with your filler dry. There's any number of right ways to shape filler you with pneumatic tools or a good old fashioned sanding board.
Well, I'm pretty happy with the rough shape. There's a little low spot right there, but we'll get that in the next stage of filler, which is a finishing putty.
The finishing putty is quite literally a skin coat and gets applied over the entire repair.
After leaving it about 10 minutes to dry, it works down surprisingly easy with 80 grit on a long board
followed by 180 to finish.
We're prepping around a repair area with 180 grit on a six inch D A. Remember this flaking clear coat from right here on the pillar while we're just feathering that into the rest of the panel, blending it in.
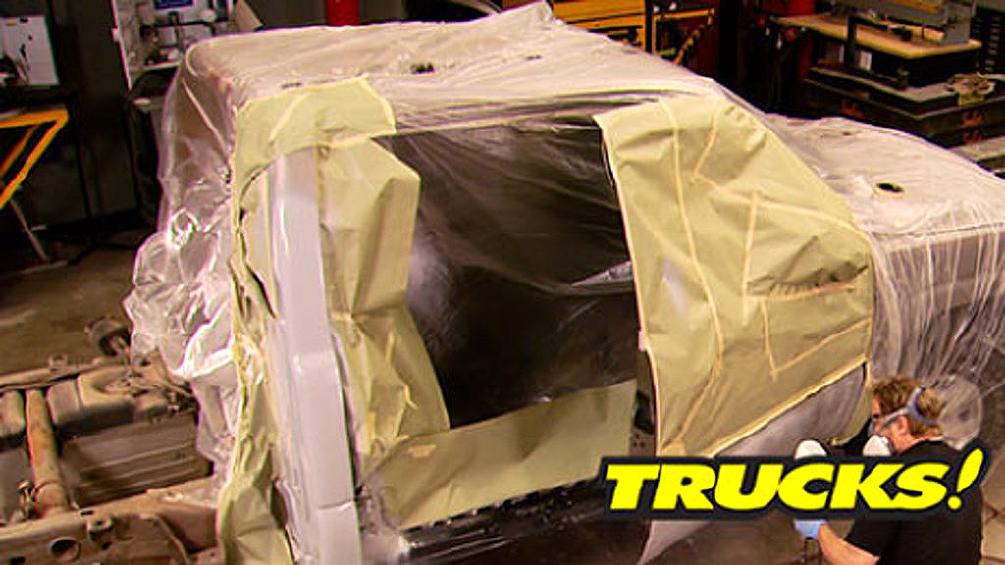
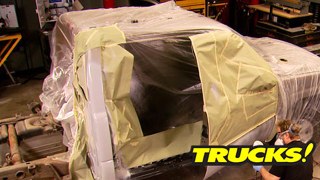
So we called out the troops to mask off the truck which is 18 inches of paper around the repair and a big sheet of plastic over the unpainted parts.
We're using shop line polyester primer surface which is extremely high build and doesn't shrink at all. One of the biggest benefits of shop line poly is that you can paint right over top of it and we will,
we're giving our truck three fat coats.
All right. Now, we got the door pretty much stripped down and everything in here. Well, it's gonna get covered up by the door panel, so we don't have to worry about it. Now, normally we'd remove the glass before painting but the way this is glued in or we risk damaging the glass or the seal if we try to pry it out, but we got a solution for that and we'll show you in a few minutes.
Now, what we really need to do is clean up the dirt and grime built up on the door jam, so the paint will stick
up next. We'll paint our door jams to match our truck's color. And later, all you need is a heat gun to fix molded plastic panels. Stick around.
Hey, welcome back to trucks. We're making good progress on our second chance Silverado. And so far we've got all our body work primed. We're getting ready to cut in on the door jams and right now using a red scuff pad to give these panels some mechanical tooth. So the paint has something to stick to. Now, if you're wondering why we're using this instead of a piece of sandpaper. Well, there's so many little areas it would be difficult to access with a piece of paper. These things come in real handy.
We're also using a red pad to scuff the jams of the cap and we applied some seam sealer over top of the seams like this one right here that was messed up during the repair.
Now, there's a misconception about this black primer. Some people think that you have to strip it off and get down to the good metal that the primer is not any good. Well, actually it's the exact opposite. You need to leave this primer alone. It's electro deposited primer. It actually bonds to the metal. It makes a really good rust to turn and you can scuff it up, prep right over top of it.
When you're painting your door jams, don't think you have to paint every inch up here. There's nothing wrong with this paint. So we're not gonna repaint it. What we're gonna do is utilize this break right here. Create a natural break at a style line. We're gonna save time and money this way.
Now, we're also gonna use 220 sandpaper since, unlike a scuff pad, it'll actually help us level this primer surface.
Now, all these little low places here,
the scuff pa would have skated right over the top and they would have showed through the paint.
Now it's level
look.
That is why you wipe down before you spray paint.
Like we said before, we're gonna use this angle to disguise our clear code transition. Now, what you can do,
it's just
just create a hard line with your tape. But your base coat and your clear coat are going to build up against this edge and create a nasty, ugly line just like on the outside of the door.
A better and easier way to do this transition is to take your masking tape
and roll it back. This is called back taping.
What you're gonna do
is tape it the reverse way just like that come back with another piece of tape, sticky to sticky
and pin it back.
You can see what that does. It creates a tapered edge that's rolled under for your paint to go underneath and it won't form a hard line rather, it will form a soft line that you can then take and polish out and it'll be an invisible transition.
The first task with any paid job is a pre cleaning with the appropriate solvent.
We will follow that with tacking the panel off at the same time as blowing with the air gun straight air. The same pressures we're painting
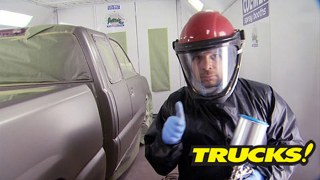
the shop line. Epoxy primer serves two purposes. One, it gives us a solid colored ground coat to lay our paid on and effectively covers any bare steel left over from the body work.
We're using our epoxy and base coats wet on wet. What that means is that you don't have to sand between steps, just wait for them to dry, to touch and then move on to the next layer.
The gray epoxy gives us the perfect colored ground coat for our pewter colored base,
which is applied medium wet.
Ok. We'll give that another five minutes flash time. Then we hit it with another co
the second coda base is for metallic distribution and it's sprayed medium wet with a slightly dropped air pressure.
After about a half an hour of flash time, your first coat of clear needs to be sprayed just like you want to see it nice and smooth.
Ok. We're looking good. We'll give that five or 10 minutes, flash time and hit it with one more coat and we'll be done with this stuff
after your final coat of clear, pull back the taped edge. This way, your transition line melts into the panel and disappears
up next. We'll fix this $150 panel with a $15 heat gun
and later we'll put it all back together again. Stay tuned.
Build on a budget truck projects that save you time and money.
Part of what makes collision repairs so expensive is that the insurance company factors in brand new parts for everything that's damaged. For instance, this trim piece would cost you about 100 and 50 bucks from GM. But if you've got a $15 heat gun, you can fix it for free
while carefully using your heat gun. Your goal is just to re flow the plastic on the top of the damage,
too much heat will melt the plastic and ruin the grain. All you're after is re flowing and changing the color.
Now we sped the film up, but real time it took us about three minutes to re flow the color on the top.
Once the plastic is cool enough to touch, you can hit it with a gray scuffing pad to kill the gloss.
Now, not only does this work really well on the discoloration, but if you've got distortion, you can fix that too.
Now, when you're correcting the shape of plastic, it's a little bit different approach where you're heating it from both sides, being careful at the same time because again, you don't want to ruin the grain of the plastic. Just wake up the molecules to where you can reshape it.
Again, we've sped the film up here, but our time investment is about five minutes to really throw the plastic out.
Now it hangs on to the heat quite well and stays Moldable. So take something with a similar shape and just reshape your panel
when you're happy with your new contour quench it with water which cools it and locks it in.
Now with our shape back where we want it, there's still a little bit of discoloration. So we'll bring the heat gun back out and do exactly the same as the prior repair.
Now, a heat gun is not a hair dryer. It's much more powerful and they're available at almost any hardware store or automotive body shop supply.
Now, as cool as this repair is, it works best on plastic that's molded in color. So don't try it on your leather upholstery.
There you go. It is as easy as that and you just saved yourself 100 and 50 bucks.
Hey, welcome back to trucks. Well, our door jams are all the right color now, but we're far from being finished with this
and we've got a replacement door all painted up and just about ready to install. But before we do that, we're gonna fill the interior back in this truck.
Now, when installing the weather seal, make sure you put the seam at the bottom
that'll prevent any water leaks.
Now, when we disassemble this truck, we suggested that you don't just cut the wires and here's where it pays off. No splicing, no soldering, no taping, just plug and go
and check out our heat gun repaired panel. I don't think anyone would be able to tell this was ever damaged.
Now, reassembly is pretty much common sense. But one thing you might want to remember is to use some lock tight when you're bolting down your seats and especially your seat belts. They did this from the factory and they did it for a good reason to keep it in place.
Now, when we did our pre fitting before paint, we made sure and attached the weather seals and gaskets. This can really affect the outcome and the fitment of a panel,
it's looking more like a truck.
Good. Yeah.
Well, our body work is finally finished. This thing's ready for paint, but we're not gonna bolt our bed down because we need access to the back of the bed in the back of the cap. And when you do see this thing get painted, we're gonna show you how to do it with only painting the pieces that need refinished. Getting a perfect color match to boot.
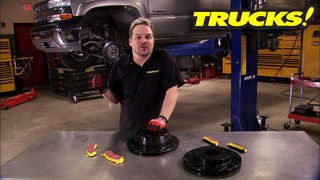
Hey, guys, if you're looking to stop your truck up to three lengths faster, then you need to take a look at E BC brakes because for less than 70 bucks you can do just that. But for you guys that wanna minimize the time you spend cleaning up your wheels, you need to check out the red stuff ceramic pad.
It'll keep that unsightly black dust off your nice looking wheels. Now, if you're looking for a moderate break up grade for everyday use, check out the E BC green stuff pads, but if you're after maximum stopping power, whether you're towing or hauling a heavy load, the yellow stuff pad is the one you want. Now, the rotors come dimpled and slotted to help remove any gas or debris, build up on the pad contact area. It also promotes even pad
as well as cooler brake temperatures
and you can see how the rotor comes out of the box completely coated in zinc. But after just a few miles, the pad contact area gets worn down, leaving a corrosion resistant finish everywhere else.
E BC sport rotors start at less than 100 and $30 a set. Their direct fit pads less than 70.
If you've got any questions about the second chance Silverado or anything you've seen on our show. Go to Power Block tv.com. Thank you for watching trucks. We'll see you guys next week.
Show Full Transcript
We'll also show you the cheapest way to get damaged plastic interior panels looking like new again. It's all today here on trucks.
Hey, welcome to trucks. Well, today we're back on our second chance Silverado, which is our little experiment on how we can take a once totalled out 2001 Chevy Silverado full size pickup that really had nothing more wrong with it than some sheet metal damage and transform it into a nice looking daily driven vehicle that you'd never know was wrecked in the first place.
And so far we're into this thing for 2200 bucks. That was the purchase price of the truck and less than $900 for all our replacement sheet metal, including our salvage yard door. When it's all said and done with, we hope to have this thing completely rebuilt for about $4000. That's not too bad considering a truck like this has a book value about nine grand.
The first thing we did was a rough out pull on both the cab and the bedside to get everything back into a lineman.
We use the outer sheet metal as a sacrificial spot to weld some tabs so we can straighten out the floor.
Then we cut out the cab corner to what's left of the rocker says the cab corners included in our replacement sheet metal followed by a coat of DPA color zinc. We
through primer
then we sectioned in our LNC truck rocker panel, utilizing the factory spot web locations to reattach it. E
plug welts
with the rocker in place. We hung the door to get the correct alignment on the cab corner which literally fell into place.
Then using state of the art panel bonding adhesive, we glued our bedside on rather than welding it, which saved us a lot of time and believe it or not a lot of money.
Now, some of what you haven't seen us do is dress down these welds and our weld seams and apply a little bit of filler to blend our new panels in with our old ones. But we did leave one project for you guys to see and that is repairing this front door. But before we get started on that, there's a couple of things I wanna show you.
Now here in this
upper cab corner, you can clearly see the clear coat flaking and peeling off. This is from a previous repair and you can tell by how shiny it is here that they got lazy. They didn't even prep this properly. They should have blended their color all the way up to the top and clear coated the whole panel. That's just bad technique.
And again, over here by the door, they cheesed out and got lazy and painted up to the stripe. Instead of blending up in the whole door, it doesn't take any more effort to pull these moldings loose and do it properly. We're gonna show you guys how to not cheat like this and get a better result doing it right the first time. Now, as far as this door,
the insurance company had figured in a door skin, which is about 290 bucks pretty pricey and about six hours labor on top of that. Well, you can see how it starts to stack up, but this is repairable. This is not that bad. And we're gonna show you that with about 10 bucks worth of polyester surface enhancement material, you can get a solid repair that looks great.
Now, this door has been fixed before there's a layer of filler on top of it. In order for us to fix it, we gotta get that layer of filler off, get it down to bear steel.
50 grid on an angle grinder gets the work done fast. And since we're using a stud welder to pull the damage out from the outside, we've got to have bare steel to weld to
stud placement starts at the lowest portion of your damage. This usually brings the rest of the panel back in line faster.
Oh,
and with a straight edge, you can tell where your low spots are and we're obviously low right here. Ending here.
It's a good idea to leave the previous round of studs attached to the panel. That way if you have to, they're there for you to use as leverage.
Now, our goal here is not to get the metal perfect. It's to make sure that the filler is no more than a quarter inch thick and we're almost there.
I had previously sliced through the outer skin right next to the door ridge. This made it a lot easier for me to reshape the door skin itself
since I've got my shape back, it needs to be tacked and then ground flush.
Now, you know, the drill with the appropriate amount of catalyst, mix your two components until they're fully blended.
And no, I haven't had too much coffee. We just didn't want to waste your time
when you spread your filler
just to an even layer. At first, don't try and do it all at once. You're gonna have the opportunity for several coats or as many as you need
with your filler dry. There's any number of right ways to shape filler you with pneumatic tools or a good old fashioned sanding board.
Well, I'm pretty happy with the rough shape. There's a little low spot right there, but we'll get that in the next stage of filler, which is a finishing putty.
The finishing putty is quite literally a skin coat and gets applied over the entire repair.
After leaving it about 10 minutes to dry, it works down surprisingly easy with 80 grit on a long board
followed by 180 to finish.
We're prepping around a repair area with 180 grit on a six inch D A. Remember this flaking clear coat from right here on the pillar while we're just feathering that into the rest of the panel, blending it in.
So we called out the troops to mask off the truck which is 18 inches of paper around the repair and a big sheet of plastic over the unpainted parts.
We're using shop line polyester primer surface which is extremely high build and doesn't shrink at all. One of the biggest benefits of shop line poly is that you can paint right over top of it and we will,
we're giving our truck three fat coats.
All right. Now, we got the door pretty much stripped down and everything in here. Well, it's gonna get covered up by the door panel, so we don't have to worry about it. Now, normally we'd remove the glass before painting but the way this is glued in or we risk damaging the glass or the seal if we try to pry it out, but we got a solution for that and we'll show you in a few minutes.
Now, what we really need to do is clean up the dirt and grime built up on the door jam, so the paint will stick
up next. We'll paint our door jams to match our truck's color. And later, all you need is a heat gun to fix molded plastic panels. Stick around.
Hey, welcome back to trucks. We're making good progress on our second chance Silverado. And so far we've got all our body work primed. We're getting ready to cut in on the door jams and right now using a red scuff pad to give these panels some mechanical tooth. So the paint has something to stick to. Now, if you're wondering why we're using this instead of a piece of sandpaper. Well, there's so many little areas it would be difficult to access with a piece of paper. These things come in real handy.
We're also using a red pad to scuff the jams of the cap and we applied some seam sealer over top of the seams like this one right here that was messed up during the repair.
Now, there's a misconception about this black primer. Some people think that you have to strip it off and get down to the good metal that the primer is not any good. Well, actually it's the exact opposite. You need to leave this primer alone. It's electro deposited primer. It actually bonds to the metal. It makes a really good rust to turn and you can scuff it up, prep right over top of it.
When you're painting your door jams, don't think you have to paint every inch up here. There's nothing wrong with this paint. So we're not gonna repaint it. What we're gonna do is utilize this break right here. Create a natural break at a style line. We're gonna save time and money this way.
Now, we're also gonna use 220 sandpaper since, unlike a scuff pad, it'll actually help us level this primer surface.
Now, all these little low places here,
the scuff pa would have skated right over the top and they would have showed through the paint.
Now it's level
look.
That is why you wipe down before you spray paint.
Like we said before, we're gonna use this angle to disguise our clear code transition. Now, what you can do,
it's just
just create a hard line with your tape. But your base coat and your clear coat are going to build up against this edge and create a nasty, ugly line just like on the outside of the door.
A better and easier way to do this transition is to take your masking tape
and roll it back. This is called back taping.
What you're gonna do
is tape it the reverse way just like that come back with another piece of tape, sticky to sticky
and pin it back.
You can see what that does. It creates a tapered edge that's rolled under for your paint to go underneath and it won't form a hard line rather, it will form a soft line that you can then take and polish out and it'll be an invisible transition.
The first task with any paid job is a pre cleaning with the appropriate solvent.
We will follow that with tacking the panel off at the same time as blowing with the air gun straight air. The same pressures we're painting
the shop line. Epoxy primer serves two purposes. One, it gives us a solid colored ground coat to lay our paid on and effectively covers any bare steel left over from the body work.
We're using our epoxy and base coats wet on wet. What that means is that you don't have to sand between steps, just wait for them to dry, to touch and then move on to the next layer.
The gray epoxy gives us the perfect colored ground coat for our pewter colored base,
which is applied medium wet.
Ok. We'll give that another five minutes flash time. Then we hit it with another co
the second coda base is for metallic distribution and it's sprayed medium wet with a slightly dropped air pressure.
After about a half an hour of flash time, your first coat of clear needs to be sprayed just like you want to see it nice and smooth.
Ok. We're looking good. We'll give that five or 10 minutes, flash time and hit it with one more coat and we'll be done with this stuff
after your final coat of clear, pull back the taped edge. This way, your transition line melts into the panel and disappears
up next. We'll fix this $150 panel with a $15 heat gun
and later we'll put it all back together again. Stay tuned.
Build on a budget truck projects that save you time and money.
Part of what makes collision repairs so expensive is that the insurance company factors in brand new parts for everything that's damaged. For instance, this trim piece would cost you about 100 and 50 bucks from GM. But if you've got a $15 heat gun, you can fix it for free
while carefully using your heat gun. Your goal is just to re flow the plastic on the top of the damage,
too much heat will melt the plastic and ruin the grain. All you're after is re flowing and changing the color.
Now we sped the film up, but real time it took us about three minutes to re flow the color on the top.
Once the plastic is cool enough to touch, you can hit it with a gray scuffing pad to kill the gloss.
Now, not only does this work really well on the discoloration, but if you've got distortion, you can fix that too.
Now, when you're correcting the shape of plastic, it's a little bit different approach where you're heating it from both sides, being careful at the same time because again, you don't want to ruin the grain of the plastic. Just wake up the molecules to where you can reshape it.
Again, we've sped the film up here, but our time investment is about five minutes to really throw the plastic out.
Now it hangs on to the heat quite well and stays Moldable. So take something with a similar shape and just reshape your panel
when you're happy with your new contour quench it with water which cools it and locks it in.
Now with our shape back where we want it, there's still a little bit of discoloration. So we'll bring the heat gun back out and do exactly the same as the prior repair.
Now, a heat gun is not a hair dryer. It's much more powerful and they're available at almost any hardware store or automotive body shop supply.
Now, as cool as this repair is, it works best on plastic that's molded in color. So don't try it on your leather upholstery.
There you go. It is as easy as that and you just saved yourself 100 and 50 bucks.
Hey, welcome back to trucks. Well, our door jams are all the right color now, but we're far from being finished with this
and we've got a replacement door all painted up and just about ready to install. But before we do that, we're gonna fill the interior back in this truck.
Now, when installing the weather seal, make sure you put the seam at the bottom
that'll prevent any water leaks.
Now, when we disassemble this truck, we suggested that you don't just cut the wires and here's where it pays off. No splicing, no soldering, no taping, just plug and go
and check out our heat gun repaired panel. I don't think anyone would be able to tell this was ever damaged.
Now, reassembly is pretty much common sense. But one thing you might want to remember is to use some lock tight when you're bolting down your seats and especially your seat belts. They did this from the factory and they did it for a good reason to keep it in place.
Now, when we did our pre fitting before paint, we made sure and attached the weather seals and gaskets. This can really affect the outcome and the fitment of a panel,
it's looking more like a truck.
Good. Yeah.
Well, our body work is finally finished. This thing's ready for paint, but we're not gonna bolt our bed down because we need access to the back of the bed in the back of the cap. And when you do see this thing get painted, we're gonna show you how to do it with only painting the pieces that need refinished. Getting a perfect color match to boot.
Hey, guys, if you're looking to stop your truck up to three lengths faster, then you need to take a look at E BC brakes because for less than 70 bucks you can do just that. But for you guys that wanna minimize the time you spend cleaning up your wheels, you need to check out the red stuff ceramic pad.
It'll keep that unsightly black dust off your nice looking wheels. Now, if you're looking for a moderate break up grade for everyday use, check out the E BC green stuff pads, but if you're after maximum stopping power, whether you're towing or hauling a heavy load, the yellow stuff pad is the one you want. Now, the rotors come dimpled and slotted to help remove any gas or debris, build up on the pad contact area. It also promotes even pad
as well as cooler brake temperatures
and you can see how the rotor comes out of the box completely coated in zinc. But after just a few miles, the pad contact area gets worn down, leaving a corrosion resistant finish everywhere else.
E BC sport rotors start at less than 100 and $30 a set. Their direct fit pads less than 70.
If you've got any questions about the second chance Silverado or anything you've seen on our show. Go to Power Block tv.com. Thank you for watching trucks. We'll see you guys next week.
