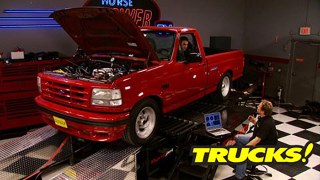
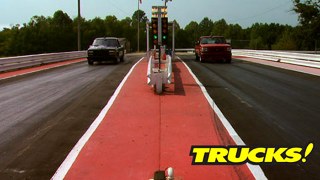
More "MuscleTrux Wars" - '90 Chevy 454 SS vs. '94 Ford Lightning Episodes
Trucks! Builds
Want more content like this?
Join the PowerNation Email NewsletterParts Used In This Episode
ADDCO Manufacturing,Inc.
Performance upgrade front and rear sway bars.
American Racing
18X8 Polished Torq-Thrust II, 18X10 Polished Torq-Thrust II, 5x5 b.c. 4.5" B.S.
Calvert Racing Products
CalTracs Traction bars, modified spring hangers, u-bolts.
Edelbrock
Pro-Flo EFI setup with manifold and calibration chip upgraded to Pro-Flo 2, hydraulic roller lifters, hydraulic roller camshaft, exhaust headers, gasket kit set, timing set, head bolts, intake bolts, heat treated pushrods, aluminum cylinder heads.
Goodmark Industries
Steel cowl induction hood.
KW Automotive North America Inc. Belltech
3"F/4"R drop kit complete with Street Performance shocks, front sway bar upgrade and alignment kit.
Lightning Force Performance
LFP True 58" Torque Arm Traction Bar Kit.
LMC Truck
Smooth style front bumper replacement.
Mickey Thompson
28x11.50-15 M/T E/T Street tires, 15x10 M/T Racing wheels, 5x5/5x5.5 b.c. 4.5" B.S.
O'Reilly Auto Parts
EBC Green Stuff performance brake pads.
O'Reilly Auto Parts
Stock replacement brake rotors.
Scoggin-Dickey Parts Center
GMPP HT383E, also supplied gaskets, hoses, oil filter adapter, belts, valve covers, CIS fuel injection harness. A major distributor of Whaba photo-instruction manuals.
Summit Racing
GM Performance tall aluminum valve covers.
Summit Racing
Street Scene roll pan fits 88-98 Chevrolet fleetside, smooth with license plate recess.
WD-40
Penetrating lubricant.
Yokohama Tire
255/55R18 Yokohama ADVAN S.T., 285/50R18 ADVAN S.T.
Episode Transcript
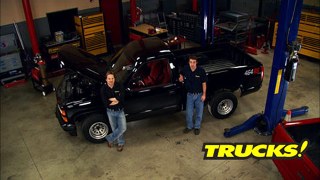
Today, Ryan returns fire in our muscle trucks war as his Chevy 454 Ss gets dropped into the weeds to match stance for stance with Kevin's lightning.
Also, we'll show you how to breathe new life into your worn out truck by doing a simple hand tools, only engine swap and it's easier than you think it's all today here on trucks.
Hey, welcome to trucks.
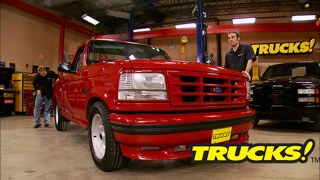
Well, check out the changes on our 94 lightning. The most obvious thing that you're gonna see right off the bat is the huge drop in altitude. How along with a new set of tires. But one of the things we kept were these aluminum factory wheels which offer kind of a signature look to these first gen lightnings. One thing that's not so obvious is the huge honk
contraction bars from LFP and the beefy rear adco sway bar. All of that stuff together is gonna make this truck handle way better than it ever did from the factory.
So I guess it's only fair that we pay a little attention to Ryan's 454 assassin. Even up the playing field a bit. Yeah. And although these trucks were pretty impressive right out of the box. Well, there's always room for improvement. So today we're gonna show you how to give these 450 fours a lowering and handling package, including some stickier and much better looking wheels and tires. And what we'll end up with is a great looking truck that still hauls like a truck and hauls a little, you know what as well.
But before we start dropping this SS, well, you may have noticed the steel roll pan that we got from Summit racing
and that and our good mark cow induction hood both got a slick coat of black paint
and we also replaced our bent up front bumper with a steel bumper from L MC that doesn't have the impact strip for a cleaner look. The icing on the cake. Well, it costs less than replacing the stocker.
Now under hood, the short block was in decent shape, but the top end needed some help. So we added an Edelbrock cam cylinder heads and fuel injection system
topped them off with some good looking GM valve covers and let it all breathe through some ceramic coated headers.
Now, we've got the computer for the EF I mounted right here in the glove box along with the connector for the handheld tuner.
And if you guys remember when we first got this truck, well, the center console was missing,
but Dave
Ceppi from the North American truck club came through for us big time. And gave us his extra center console he had kicking around.
It looks like new
and really finishes off this interior
today. We're using belt X three inch up front and four inch outback system on this truck.
It comes with drop spindles and lowering springs up front
and the shackles and hangers bolt in place out back. But with just a four inch drop, we don't have to see notch the frame
and a lot of you, Chevy guys wanted to make sure the old 454 hooked up.
So we picked up a set of cal tracks, traction bars to plant the power.
Now, there's a bit of a clearance issue with the cow tracks on some lower trucks.
So we boxed up our Bell tech hangers and shipped them off to Calvert racing.
They clearanced them for the traction bars, repower coated them and shipped them back
and now we'll have the stance we want and the traction we need.
We're also using Belt
street performance shocks on all four corners. And since it's such a simple drop out front, we're gonna get the heavy lifting done first, get this rear down on the ground.
There are just a handful of bolts and two connectors holding the bed in place. And although a drop kit can be installed with the bed on, it's just plain easier with the bed removed, giving you open access to the entire rear frame section.
The shackles give you several different options for ride height.
We're hitting bottom with the lowest setting we can adjust from there if need be
with the weight off the rear axle, the front spring hangers get removed with a little bit of coaxing from a cut off wheel and an air chisel
and knocking the surface rust off and splashing on a couple of coats of zero rust spray will really help with future rusting issues.
The cal track bars use an aluminum sleeve in the leaf spring that replaces the factory rubber bushing.
Now, these are a bear cat to remove. But the easiest way we found is to drill the rubber out around the edge and then chisel the old bushing and sleeve out.
The new bushing is led with the provided grease and massaged into place.
The cow tracks eliminate spring wrap by transferring the stored energy through the bar to the front of the spring mount instead of to the leaf spring
and should really make this truck hook up.
But we're finally getting rid of these passenger car tires and I can't wait to show you guys the tires and wheels we got picked out for this thing.
Cabbage will have to wait a little longer to see what Ryan's picked out. Since we're not quite finished here,
the overload lead gets removed just because it's no longer needed, but also gives us a little more drop in the suspension.
And one of these hind joints is right hand thread and the other one's left hand thread. That way, we don't have to remove the bar to set our final preload. We'll do that with the vehicle weight on the ground for now. We'll just put everything in hand tight.
Now, the driver side spring hanger is pretty much the same story as the passenger side, except for the nuts are harder to get to with this fuel tank in the way. But the good news is that to remove the stock hanger, you don't have to disconnect your E brake cables. All you have to do is V cut the stamped holes. The cables pull right out.
Belte
provides a bracket for the cable to go into it just slides in
locks into place. Perfect.
All right.
All right. Once we get our sway bar mounted to the axle, we'll need to mark and drill a hole in the C channel frame for our end links. And we'll do that. Once we get the bed installed and the full weight of the truck back on the suspension,
the old shocks get removed to give us a little more clearance to mount the rear sway bar.
We're using belt
street performance shocks all the way around on the SS
and they bolt right in place of the factory shocks
up next. It's new springs shocks and a bigger sway bar up front for Ryan Chevy. And later it's an all hand tools, direct engine swap that will actually get you more horsepower. Stay tuned.
Hey, welcome back to trucks today, we're catching up to Kevin's Lightning with the Bell tech drop kit on my 454 Ss.
And so far we finished up the rear shackles and spring hangers as well as installed integrated traction bars from Calvert racing.
We also added a rear sway bar and installed belte
performance shocks
and the good news is the hard part is already done because drop in the front of one of these trucks is relatively straightforward with drop swindles, drop coil springs and performance shocks. Now, these sway bars are already pretty beefy with these trucks from the factory. But we're taking that to the next level as well. While we're in there, we're gonna get rid of these Co op tires and circa 1987 aluminum wheels too.
If you've got a buddy with a regular Silverado that wants a cheap upgrade,
save your original sway bar for him.
The SS bar is almost a quarter inch larger than the regular production unit.
Now, you just want to loosen the ball joints with your truck in the air,
then let it down to the ground and use a floor jack to control the amount of spring energy that you release carefully.
Now to keep costs down, we're rolling with the stock size rotors, but we are upgrading the pads to the more aggressive Eb CS, the same ones we used on the lightning.
Now we got this stuff from o'reilly Auto parts. And Jamie, the guy that works at the parts counter, it's pretty clear what truck he thinks is gonna win. I couldn't agree more.
All right, Tom
Five.
Now, our truck already has eccentric camp bolts in this upper control arm, but in case your truck doesn't bel Tech provides you with a kit to hand your wheel alignment guy when you take your truck in because you are gonna have to have a wheel alignment.
Thank you.
Now, the stock sway bar did a pretty good job of minimizing the body roll on this big heavy truck. But the new Sway Bar is a giant in three eights in diameter and it'll do an even better job.
Now, the last piece of the puzzle is a decent set of tires and wheels. And when we first got our truck, well, the chrome super sport wheels were long gone and we just had to do better than the junk that was on there.
Now, you just can't go wrong with the classic styling of the American racing torque thrust. We're using an 18 inch polished aluminum wheels and a 10 inch width out back and an eight inch width up front.
And this is a sport truck, but it's still a truck and an 18 inch wheel will leave us a decent amount of side wall. And these directional Yokohama ad band sts will hopefully get some of that newfound power to the ground.
It's got a pretty good looking tread pattern too.
Now, you guys remember Kevin picked up a set of Mickey Thompson's for his lightning for track day use. We didn't want him to have an unfair advantage, so we picked up a set as well.
Hey, welcome back to trucks. Well, we finally get to see what the Chevy looks like with the suspension done and sitting on its tires and wheels and I got to say it looks pretty darn good, even better than that red pile. Now, like we told you earlier, we wanted to show you an easy way to breathe some life back into a higher mileage. Vortec powered GM truck or SUV. And Kevin's got that solution right outside the door
and that comes in the form of this HD 383 crate engine, which is quite literally a drop in replacement for your worn out high mileage. 350.
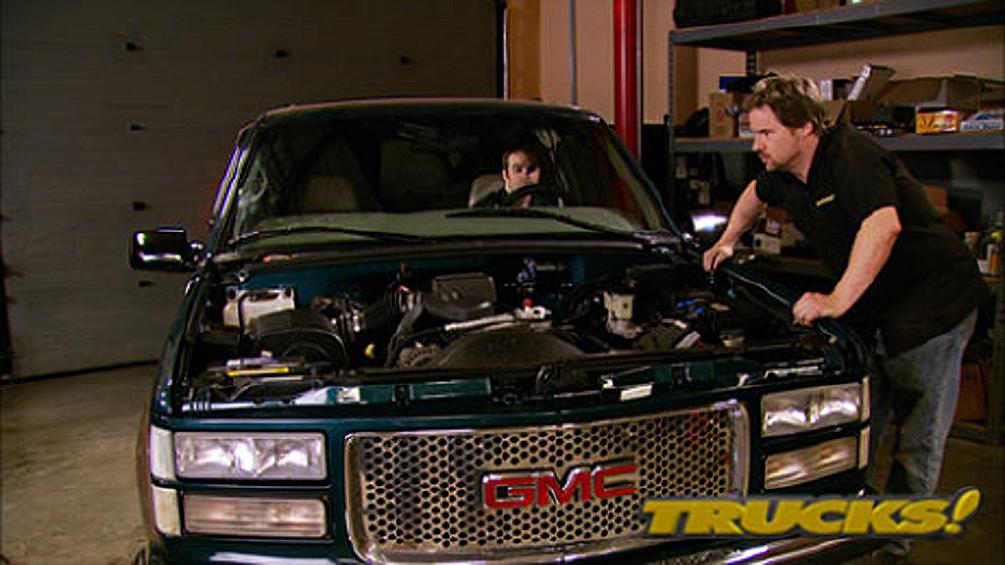
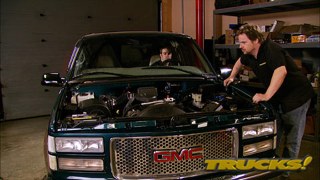
Now, the truck we're wrenching on today is a 97 suburban. It's used primarily as a work truck. So the 165,000 miles on it. Well, they're hard miles now, taking the hood off isn't a requirement to swap the engine but makes the job a whole lot easier.
It's only four bolts.
Now, everybody knows we're a little spoiled when it comes to tools, but this time we're going back to basics to show you guys that it doesn't take a lot of expensive tools to do this engine swap, not much more than what you see here.
But the last time we took a look at an HT 383 we also showed you this two part manual from
W A.
This shows crystal clear photo instructions, tool guides, torque specs a beginner's guide, helpful hints at the bottom of almost every page. Now, this manual is instant access to information that it usually takes a career's worth of wrenching to accumulate. So whether you're an expert or a beginner, this is an awesome guide to have around.
Just like in any engine swap, you'll need to strip down to the basics.
But the WBA manual will show you exactly what to remove
and in what order
and you don't need to evacuate your air conditioning system either just leave the lines connected and set the pump out of the way to the side.
Now, not having to evacuate and recharge your air conditioning system. Well, it saves you both time and money
and if you're a little intimidated by all the electrical components on a late model engine. Well, don't worry, the WBA photo instructions tell you exactly how to unplug each connector.
This may not seem like a big deal but breaking just one plug may cause you to have to replace an entire harness and that's not cheap. So these helpful hints really pay off.
All right,
all this engine is just about ready to come out. We've already removed the converter dust cover and hung the starter out of the way. But before we pull this 350 I've got to unplug the knock sensor, unbolt the converter and the engine mounts and disconnect the exhaust of the manifold.
Now, even though we're reinstalling some of the parts off the 350 onto the new 383 there's still some things that you're gonna need, like hoses, gaskets, filters and fluids. Well, a quick phone call to Skog
and
DICY will get you everything that you need to do this swap. So if you quite a few trips to the parts store and remember if you buy your 383 from Skog
and
DICY, they'll throw in 100 and $50. We manual for free.
Starting with marking the distributor location.
The rest of the long block gets torn down
and removing reusable components like the dipstick valve covers and exhaust manifolds carefully, lets you inspect them and keep them in good shape.
After the break. We'll transfer our parts onto the new 383 to get our 97 suburban running better than ever.
Yeah.
Hey, welcome back to trucks where we've yanked out the tire 350 in the suburban to replace it with a new HT 383 E
all with basic tools and reusing as many of the good use parts as possible like the factory exhaust manifolds. The best part about this trade engine swap is that you can use a lot of the original components and we know that saves money.
If you do the math and factor in your labor, rebuilding an old engine can actually cost more than the 383 cost to buy.
Now, you don't need an expensive parts washer to get your parts clean and this lower intake sure needs it.
The important thing to remember here is to make sure that your EGR ports are nice and clean.
The central injection unit is probably something you don't wanna reuse
the originals out of these Vortec three fifties were known to be problematic. So it's a good idea to just replace it.
We opted for new chrome valve covers just to dress up the engine compartment a little
and now the long block is ready to just drop right back in,
reassembly, is covered in detail with these manuals and it's pretty straightforward,
but it's helpful to ha
the books as a resource in case. This is your first rodeo. One of the biggest benefits of this crate engine is that it comes with a factory warranty. So all you need to do is drop it in and fire it up, but use your time and money wisely by replacing regular ware items like filters, thermostats and hoses because that just gives you extra insurance for a trouble free start up.
Now, all we got to do is make sure the fluids are topped off, throw in Canada's E
OS to help with the break in.
Now with a job like this. It's always a good idea to cycle the key a few times that'll prime the fuel system so you can check for leaks.
Yep,
it's dry, started up.
Yeah.
Yeah.
Now, like we showed you guys this engine swap can be done in a couple of days with you and your buddies and thanks to a heart transplant, this old suburban, well, she's ready to rack up another couple of 100,000 miles on the clock. Now, this 383 is gonna run great just like it is with more power than the 350. But you guys know the awesome potential of a 383 Stroker and with a custom tune, you can easily see power gains of 20 or so more horsepower over the baseline. So you can put new life into an old vehicle and kick it in the pants. Thanks for watching trucks. See you guys next week.
Yeah.
Yeah.
Show Full Transcript
Also, we'll show you how to breathe new life into your worn out truck by doing a simple hand tools, only engine swap and it's easier than you think it's all today here on trucks.
Hey, welcome to trucks.
Well, check out the changes on our 94 lightning. The most obvious thing that you're gonna see right off the bat is the huge drop in altitude. How along with a new set of tires. But one of the things we kept were these aluminum factory wheels which offer kind of a signature look to these first gen lightnings. One thing that's not so obvious is the huge honk
contraction bars from LFP and the beefy rear adco sway bar. All of that stuff together is gonna make this truck handle way better than it ever did from the factory.
So I guess it's only fair that we pay a little attention to Ryan's 454 assassin. Even up the playing field a bit. Yeah. And although these trucks were pretty impressive right out of the box. Well, there's always room for improvement. So today we're gonna show you how to give these 450 fours a lowering and handling package, including some stickier and much better looking wheels and tires. And what we'll end up with is a great looking truck that still hauls like a truck and hauls a little, you know what as well.
But before we start dropping this SS, well, you may have noticed the steel roll pan that we got from Summit racing
and that and our good mark cow induction hood both got a slick coat of black paint
and we also replaced our bent up front bumper with a steel bumper from L MC that doesn't have the impact strip for a cleaner look. The icing on the cake. Well, it costs less than replacing the stocker.
Now under hood, the short block was in decent shape, but the top end needed some help. So we added an Edelbrock cam cylinder heads and fuel injection system
topped them off with some good looking GM valve covers and let it all breathe through some ceramic coated headers.
Now, we've got the computer for the EF I mounted right here in the glove box along with the connector for the handheld tuner.
And if you guys remember when we first got this truck, well, the center console was missing,
but Dave
Ceppi from the North American truck club came through for us big time. And gave us his extra center console he had kicking around.
It looks like new
and really finishes off this interior
today. We're using belt X three inch up front and four inch outback system on this truck.
It comes with drop spindles and lowering springs up front
and the shackles and hangers bolt in place out back. But with just a four inch drop, we don't have to see notch the frame
and a lot of you, Chevy guys wanted to make sure the old 454 hooked up.
So we picked up a set of cal tracks, traction bars to plant the power.
Now, there's a bit of a clearance issue with the cow tracks on some lower trucks.
So we boxed up our Bell tech hangers and shipped them off to Calvert racing.
They clearanced them for the traction bars, repower coated them and shipped them back
and now we'll have the stance we want and the traction we need.
We're also using Belt
street performance shocks on all four corners. And since it's such a simple drop out front, we're gonna get the heavy lifting done first, get this rear down on the ground.
There are just a handful of bolts and two connectors holding the bed in place. And although a drop kit can be installed with the bed on, it's just plain easier with the bed removed, giving you open access to the entire rear frame section.
The shackles give you several different options for ride height.
We're hitting bottom with the lowest setting we can adjust from there if need be
with the weight off the rear axle, the front spring hangers get removed with a little bit of coaxing from a cut off wheel and an air chisel
and knocking the surface rust off and splashing on a couple of coats of zero rust spray will really help with future rusting issues.
The cal track bars use an aluminum sleeve in the leaf spring that replaces the factory rubber bushing.
Now, these are a bear cat to remove. But the easiest way we found is to drill the rubber out around the edge and then chisel the old bushing and sleeve out.
The new bushing is led with the provided grease and massaged into place.
The cow tracks eliminate spring wrap by transferring the stored energy through the bar to the front of the spring mount instead of to the leaf spring
and should really make this truck hook up.
But we're finally getting rid of these passenger car tires and I can't wait to show you guys the tires and wheels we got picked out for this thing.
Cabbage will have to wait a little longer to see what Ryan's picked out. Since we're not quite finished here,
the overload lead gets removed just because it's no longer needed, but also gives us a little more drop in the suspension.
And one of these hind joints is right hand thread and the other one's left hand thread. That way, we don't have to remove the bar to set our final preload. We'll do that with the vehicle weight on the ground for now. We'll just put everything in hand tight.
Now, the driver side spring hanger is pretty much the same story as the passenger side, except for the nuts are harder to get to with this fuel tank in the way. But the good news is that to remove the stock hanger, you don't have to disconnect your E brake cables. All you have to do is V cut the stamped holes. The cables pull right out.
Belte
provides a bracket for the cable to go into it just slides in
locks into place. Perfect.
All right.
All right. Once we get our sway bar mounted to the axle, we'll need to mark and drill a hole in the C channel frame for our end links. And we'll do that. Once we get the bed installed and the full weight of the truck back on the suspension,
the old shocks get removed to give us a little more clearance to mount the rear sway bar.
We're using belt
street performance shocks all the way around on the SS
and they bolt right in place of the factory shocks
up next. It's new springs shocks and a bigger sway bar up front for Ryan Chevy. And later it's an all hand tools, direct engine swap that will actually get you more horsepower. Stay tuned.
Hey, welcome back to trucks today, we're catching up to Kevin's Lightning with the Bell tech drop kit on my 454 Ss.
And so far we finished up the rear shackles and spring hangers as well as installed integrated traction bars from Calvert racing.
We also added a rear sway bar and installed belte
performance shocks
and the good news is the hard part is already done because drop in the front of one of these trucks is relatively straightforward with drop swindles, drop coil springs and performance shocks. Now, these sway bars are already pretty beefy with these trucks from the factory. But we're taking that to the next level as well. While we're in there, we're gonna get rid of these Co op tires and circa 1987 aluminum wheels too.
If you've got a buddy with a regular Silverado that wants a cheap upgrade,
save your original sway bar for him.
The SS bar is almost a quarter inch larger than the regular production unit.
Now, you just want to loosen the ball joints with your truck in the air,
then let it down to the ground and use a floor jack to control the amount of spring energy that you release carefully.
Now to keep costs down, we're rolling with the stock size rotors, but we are upgrading the pads to the more aggressive Eb CS, the same ones we used on the lightning.
Now we got this stuff from o'reilly Auto parts. And Jamie, the guy that works at the parts counter, it's pretty clear what truck he thinks is gonna win. I couldn't agree more.
All right, Tom
Five.
Now, our truck already has eccentric camp bolts in this upper control arm, but in case your truck doesn't bel Tech provides you with a kit to hand your wheel alignment guy when you take your truck in because you are gonna have to have a wheel alignment.
Thank you.
Now, the stock sway bar did a pretty good job of minimizing the body roll on this big heavy truck. But the new Sway Bar is a giant in three eights in diameter and it'll do an even better job.
Now, the last piece of the puzzle is a decent set of tires and wheels. And when we first got our truck, well, the chrome super sport wheels were long gone and we just had to do better than the junk that was on there.
Now, you just can't go wrong with the classic styling of the American racing torque thrust. We're using an 18 inch polished aluminum wheels and a 10 inch width out back and an eight inch width up front.
And this is a sport truck, but it's still a truck and an 18 inch wheel will leave us a decent amount of side wall. And these directional Yokohama ad band sts will hopefully get some of that newfound power to the ground.
It's got a pretty good looking tread pattern too.
Now, you guys remember Kevin picked up a set of Mickey Thompson's for his lightning for track day use. We didn't want him to have an unfair advantage, so we picked up a set as well.
Hey, welcome back to trucks. Well, we finally get to see what the Chevy looks like with the suspension done and sitting on its tires and wheels and I got to say it looks pretty darn good, even better than that red pile. Now, like we told you earlier, we wanted to show you an easy way to breathe some life back into a higher mileage. Vortec powered GM truck or SUV. And Kevin's got that solution right outside the door
and that comes in the form of this HD 383 crate engine, which is quite literally a drop in replacement for your worn out high mileage. 350.
Now, the truck we're wrenching on today is a 97 suburban. It's used primarily as a work truck. So the 165,000 miles on it. Well, they're hard miles now, taking the hood off isn't a requirement to swap the engine but makes the job a whole lot easier.
It's only four bolts.
Now, everybody knows we're a little spoiled when it comes to tools, but this time we're going back to basics to show you guys that it doesn't take a lot of expensive tools to do this engine swap, not much more than what you see here.
But the last time we took a look at an HT 383 we also showed you this two part manual from
W A.
This shows crystal clear photo instructions, tool guides, torque specs a beginner's guide, helpful hints at the bottom of almost every page. Now, this manual is instant access to information that it usually takes a career's worth of wrenching to accumulate. So whether you're an expert or a beginner, this is an awesome guide to have around.
Just like in any engine swap, you'll need to strip down to the basics.
But the WBA manual will show you exactly what to remove
and in what order
and you don't need to evacuate your air conditioning system either just leave the lines connected and set the pump out of the way to the side.
Now, not having to evacuate and recharge your air conditioning system. Well, it saves you both time and money
and if you're a little intimidated by all the electrical components on a late model engine. Well, don't worry, the WBA photo instructions tell you exactly how to unplug each connector.
This may not seem like a big deal but breaking just one plug may cause you to have to replace an entire harness and that's not cheap. So these helpful hints really pay off.
All right,
all this engine is just about ready to come out. We've already removed the converter dust cover and hung the starter out of the way. But before we pull this 350 I've got to unplug the knock sensor, unbolt the converter and the engine mounts and disconnect the exhaust of the manifold.
Now, even though we're reinstalling some of the parts off the 350 onto the new 383 there's still some things that you're gonna need, like hoses, gaskets, filters and fluids. Well, a quick phone call to Skog
and
DICY will get you everything that you need to do this swap. So if you quite a few trips to the parts store and remember if you buy your 383 from Skog
and
DICY, they'll throw in 100 and $50. We manual for free.
Starting with marking the distributor location.
The rest of the long block gets torn down
and removing reusable components like the dipstick valve covers and exhaust manifolds carefully, lets you inspect them and keep them in good shape.
After the break. We'll transfer our parts onto the new 383 to get our 97 suburban running better than ever.
Yeah.
Hey, welcome back to trucks where we've yanked out the tire 350 in the suburban to replace it with a new HT 383 E
all with basic tools and reusing as many of the good use parts as possible like the factory exhaust manifolds. The best part about this trade engine swap is that you can use a lot of the original components and we know that saves money.
If you do the math and factor in your labor, rebuilding an old engine can actually cost more than the 383 cost to buy.
Now, you don't need an expensive parts washer to get your parts clean and this lower intake sure needs it.
The important thing to remember here is to make sure that your EGR ports are nice and clean.
The central injection unit is probably something you don't wanna reuse
the originals out of these Vortec three fifties were known to be problematic. So it's a good idea to just replace it.
We opted for new chrome valve covers just to dress up the engine compartment a little
and now the long block is ready to just drop right back in,
reassembly, is covered in detail with these manuals and it's pretty straightforward,
but it's helpful to ha
the books as a resource in case. This is your first rodeo. One of the biggest benefits of this crate engine is that it comes with a factory warranty. So all you need to do is drop it in and fire it up, but use your time and money wisely by replacing regular ware items like filters, thermostats and hoses because that just gives you extra insurance for a trouble free start up.
Now, all we got to do is make sure the fluids are topped off, throw in Canada's E
OS to help with the break in.
Now with a job like this. It's always a good idea to cycle the key a few times that'll prime the fuel system so you can check for leaks.
Yep,
it's dry, started up.
Yeah.
Yeah.
Now, like we showed you guys this engine swap can be done in a couple of days with you and your buddies and thanks to a heart transplant, this old suburban, well, she's ready to rack up another couple of 100,000 miles on the clock. Now, this 383 is gonna run great just like it is with more power than the 350. But you guys know the awesome potential of a 383 Stroker and with a custom tune, you can easily see power gains of 20 or so more horsepower over the baseline. So you can put new life into an old vehicle and kick it in the pants. Thanks for watching trucks. See you guys next week.
Yeah.
Yeah.
