More '79 Ford Bronco "Das Bronco" Episodes
Trucks! Builds
Want more content like this?
Join the PowerNation Email NewsletterParts Used In This Episode
AEM
99-06 Chevrolet.
Borgeson
Steering U-joint.
Crane Cams
Hydraulic cam and lifter set.
Edelbrock
650 AVS OFF-ROAD.
Edelbrock
Performer w/o ERG.
Gold Eagle Co.
Cetane Booster, Anti-gel Additive, Fuel Treatment.
LMC Truck
Front and rear drive shafts.
LMC Truck
Inner Fenders.
Mr. Gasket
Gasket set.
O'Reilly Auto Parts
Remanufactured long block built by Jasper.
O'Reilly Auto Parts
Transmission.
Prothane
Leaf spring bushings, body cab mounts, track arm bushings, C-trac bushings.
Summit Racing
Oil Pan swap kit.
Super Chips
Firefly Module.
Trans-Dapt
Motor swap mount.
Episode Transcript
Today, it's part two of our low buck Bronco build up
and we're working over our junkyard 460 for maximum torque. After that, we're adding a remand C six and stiffening up the frame with just a welder.
Then we'll bolt the body to the chassis to get our Bronco ready for some more low buck work.
That's all today here on trucks.
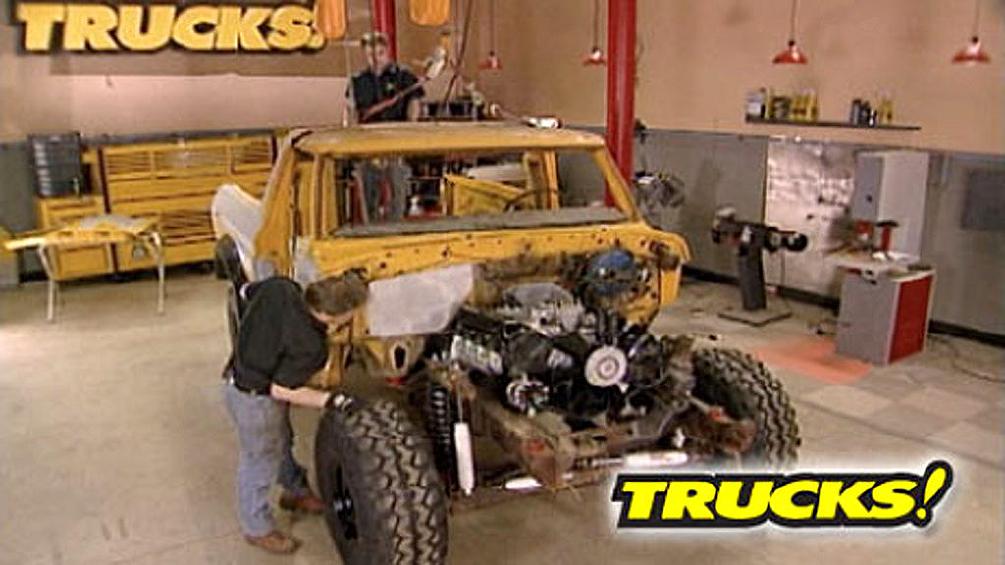
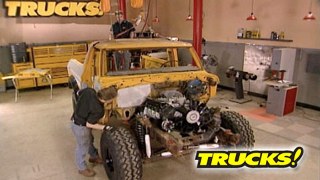
Hey, thanks for watching trucks. As you can see, we're back on the low buck Bronco project getting ready for some action because believe me, it's gonna see it. Now, if you're thinking, it looks like we just dragged this thing out of some field somewhere. Well, it's because we did,
we saw this rig just off an old back road one weekend and wondered if it was for sale. Well, this time, instead of wondering, we asked about it and ended up dragging it home for next to nothing.
We even got a big block thrown in for free.
Everybody knows about Broncos, especially you guys that get into off roading
and the second generation Broncos have an interesting history. Ford, almost canceled production of the full size Bronco, but even a recession and an energy crisis couldn't hold back such a great vehicle. And the 78 and 70 nines, well, they kicked the competition's butts. Plus they were the only full size Broncos that had the solid axle front end.
Now, a chassis, it could definitely withstand the power and torque of a big
block. So, like everything else on this Bronco, we're going on the cheap with our free 460
a stock engine build along with a cam that's designed for a little bit more torque. Now, we sent our block out of the machine shop to have it checked. And lucky for us, there was no surprises, no cracks, but we did find a couple cylinder boards that were a little out around. So we had a mild 30,000 silver board put on it and we had the crank dress at the same time,
they put the bottom end together, gave us a short lock for an extra couple of 100 bucks.
Now, I know some of you guys are saying that truck didn't come with a 460
you're right, it came with a 3 51 M which isn't a bad engine either. Like the old saying goes,
there's no replacement for displacement. And if you're anything like us, you've got a real hard time turning down 100 extra cubes of free engine.
And if you find yourself in our position and on a budget, let me show you a performance tip that won't cost you anything but a little bit of your time.
Now, I know you guys have heard of port matching before. All that means is matching the size of the cylinder head ports and manifold ports to the size of the gaskets. In order to eliminate restriction,
using your gasket as a template, align it with the bolt holes as a reference
and use a marker to color in the overlap or excess metal on the ports,
then remove the gasket and slowly trim the opening with a dye grinder and a car by bird until you have a smooth transition from the intake gasket to the port.
Now don't get carried away and try and hog out the heads. If you go too far and change the shape of the intake runners, you can actually hurt performance.
Now, unless you have access to a flow bench, keep things on the mild side because even a little goes a long way.
These techniques work on exhaust manifolds too, even headers.
The engine is an air pump and all you're doing is enhancing its flow capability.
You can use brake cleaner, a parts washer, an air hose, even hot soapy water but always clean the shavings out of your ported parts.
Every different cylinder head has its own torque sequence usually working from the center outward.
Our new head bolts are torque to 100 and 40 ft pounds.
There are benefits from using cast manifolds instead of headers due to less expansion and contraction, the bolts are much less likely to back out.
And since this is a low RPM engine, the extra flow at high RPM, the headers would give us will be lost on this Bronco. Anyway,
depending on which cam you select,
you can actually change your engines basic RPM range, which is the place that it makes the most power. Now, most big blocks aren't high revving engines, they make their power down low in the RPM range, which is perfect for our Bronco because we're gonna make a lot of power way down low in the revs that's going to be easy to control.
Our train cam is specs for off road use and towing
valve lift is right around 500 thousands and the RPM range is between 1248 100 RPM which matches the rest of our components and that means we won't have to wind this engine out to make good power
since we're using new push rods and lifters. There's no specific reassembly order to follow. Just drop the new parts in place.
Valve springs are not as critical on our set up as on a high RPM race engine, but they do wear out. And if you're not sure of the wear or mileage on your valve train, it's just cheap insurance to replace them. Now,
the Valley pan keeps the hot oil down in the crank case where it belongs and helps to keep the fuel and air charge passing through the intake manifold as cool as possible.
Any of you guys that have changed out a cast intake on a big block can appreciate the substantial weight loss that an aluminum manifold will give you
just because it's a big block doesn't mean that it needs 1000 CFM car.
This Edelbrock Thunder Series 650 will give us plenty of air and fuel.
It has spring loaded needles and seats for a consistent fuel supply
and side mounted fuel chambers that are less likely to flood while we're getting sideways on some trails.
Well, Ryan's putting the accessories on the front of the engine. I'm gonna give this water pump a coat of paint. It's a rock casting and it'll rust if you don't. Now rust won't stop the water pump from working, but it will make it look bad.
Here's where you can take a little pride in your handiwork. A clean looking engine never hurt anybody's performance.
When we come back, we're paying attention to the bottom end of our big block
so we can make it up with our new tranny. See
drops right in.
Hey, welcome back
with a combination of our basically stock 460 along with the cam that we picked out to go in, it is gonna give us somewhere around 400 horsepower and about 460 ft pounds of torque that is stump pulling power. Now, if you followed us along on this build, you know that this 460 is not the original engine that came in our low buck Bronco. That's ok because the C six transmission will made up with the bell housing on the block perfectly. The problem lies with the oil pan that came on here. It's all wrong.
Yeah, this old pan is a front sump pan and we need a rear sump to clear our front axle and believe it or not, they make a swap kit to put a 460 in a Fox body Mustang.
Now, this complete pan kit with pickup tube will work great on our conversion as well as give us an extra quarter capacity.
Plus it'll only set us back about 100 and 45 bucks.
We're using a stock replacement oil pump that'll give us all the pressure we need without the parasitic drag of a high volume pump.
And to whoever invented the one piece oil pan gasket, we just want to say thanks.
Now, our stock transmission was chock full of nasty metallic hunks of stuff when we opened it up. Plus it made this cool grinding sound when we turned the pump around. So we popped for this remand C six from o'reilly's and we saved another couple of 100 bucks by turning our core in. Now, one area that we did not spend a lot of money on was by buying an expensive higher stalls speed torque converter when this engine is a low RPM torque monster. Anyway, that would have actually worked against us. Now, this converter that came with the C six, it stalls around 1819 100 RPM, which is perfect for the 460 because that's where it starts making its peak power in the first place.
Trans DAPT offers these urethane adapters to drop a 460 into a full size Bronco or F 150.
That's simple enough. They just bolted the side of the block so you can drop it right into your factory frame mounts.
If you're using a cherry picker to lower your engine in. Keep in mind that a fully dressed big block is right around the 600 pound mark.
So make sure you've got an extra set of hands to help guide it into place.
See
drop right
in
the studs on your converter, need to find their home. And the dolls on the tranny have got to be seated before you tighten your bolts up, breaking an ear off on an aluminum bell housing on AC six gets expensive to replace or repair.
He's a big boy.
Oh, yeah,
here you go.
So its front drive shaft was laying in the tub of the Bronco. When we dragged it out of the weeds, we kind of lucked out. U joints are good and tight with only four inches of lift. We can reuse the stock shafts,
but the rear shaft was hatched. So we got a stock length replacement from L MC truck and that's gonna get us back on the trail real quick.
We've got some other tricks up our sleeve to help your on and off road performance. That'll cost next to nothing
up next. Our low buck Bronco is all starting to come together. Literally,
it is. Then we'll take care of our steering and our inner fenders
stick around.
Hey, thanks for hanging with us here at the truck shop. Well, we finally have a rolling chassis for a low buck Bronco that features a 460 cubic inch stump puller backed by a Reman C six for the rest of it. We threw a four inch lift on it and rebuilt everything else on the cheap. Now,
the original body mounts look like dry rotted rubber pancakes.
So we're gonna replace them with these polyurethane bushings we got from pro
also for added rigidity. We did a low buck chassis strengthening trick.
Our cross members are riveted in at the assembly plant just by running partial beads from the frame of the cross member. You can stiffen up the chassis
and if you're wondering why we didn't finish these welds. Well, in case this cross member ever has to come out, you gotta break out the grinder to get rid of these rivet heads anyway. And by doing it this way, you don't create a bunch of unnecessary work for yourself.
If your body is still on the frame and all, you gotta do is change body mount bushings. You can get it done with a floor jack or an old bumper jack.
Go
ahead. Rain.
Yep. Here it is
perfect.
All
now with the body back home on the frame, we can connect the steering and braking systems. Now, we had decent pedal right from the start. So all we did was flush the lines out. And if you remember Ryan put a couple of wheel cylinders in the drums out back as for this booster in the master cylinder, you guessed it, we recycle
now, since we've ditched a couple of 100 pounds of parts as well as put fresh pads and rotors all the way around on a braking system designed to stop a 5500 pound truck, but we shouldn't have any braking issues. But here is a problem. This is the original steering shaft and U joint that came on our Bronco.
I said,
so we're going to use this double D shaft we had laying around the shop from a previous build as well as use a new Borge.
And U joint
steering is one of the areas that you don't want to compromise safety.
It doesn't cost much to make sure you've got a solid connection to the road.
This is the original fiberglass top for our Bronco and it is very obvious that this thing is in sad shape. It's moldy,
the gel coat is gone. It's down to the matting. Plus look, it's broken
a
bunch of different places. This thing is done.
Our original inner fenders are beat up, nasty and
they're rusty. Our battery would have fallen right down on the tire. Not good. So we spent a little bit more money. Went to LNC and got a pair of these inner fenders that bolted right in and they come with the primer on them. Now, our outer fenders on the front. Yes, they were rusty but the rust was only where we cut out for the bush whacker flares. So we saved a little more money. We get to run with our original sheet metal
after the break. It's low buck tips on fixing up trash bolts. It works every time and how to keep costly paint hardener from going bad.
Hey, welcome back to trucks. Well, take a look at the low buck Bronco. Now, the stance is awesome. We got tons of wheel and tire clearance, but we're not quite done yet.
That's your sheet metal. We need a little more protection.
So we're gonna make our own roll cage and, uh,
we might need a windshield too.
Now, on both ends of this truck, we're gonna build some heavy duty bumpers on the cheap and we might as well plan on adding a winch because this thing's got some weight to it. We just might get it stuck in the mud.
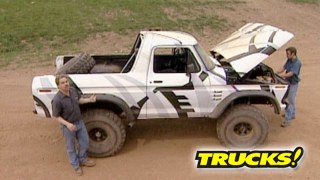
We're not done with the body yet either. And this dot Yellow paint, it's gotta go but we got a great plan for a paint job and it might be something that your great grandfather might recognize. But the best thing about it is that it's gonna cost a fraction of what a conventional paint job will cost.
Not only did we get an extra four inches of height from our suspension lift by going to a taller tire, we gain another four or five inches that'll help keep the axles out of the mud.
Now, you guys are gonna have to keep watching to see how this thing turns out. It's gonna be awesome. And remember our biggest investment in this low buck Bronco is our time and labor. So if it breaks, what the heck as the saying goes, it ain't broke till you can't fix it anymore.
Now, even though our Broncos, a gas burner, here's something for you. Diesel guys. This is Gold Eagle line of diesel fuel additives. Gold Eagle has been around since 1932 and they've been a leader and innovator in diesel fuel additive technology ever since. And you can get really respectable results just by adding this into your fuel.
They've got a fuel system treatment that cleans your injectors and fuel lines and loss your fuel pump for improved power and acceleration.
And their C 10 booster actually bumps up your fuel C tan, which is its ignitable by 5 to 10 numbers to increase power for towing
and finally, their anti gel prevents gelled and frozen fuel lines and filters up to 25 degrees below zero.
A 20 ounce bottle of Gold Eagle diesel power can treat up to 100 gallons of fuel could be bought at most auto parts stores and starts out at just six bucks a bottle.
Now, here's another trick product for you. Diesel guys. Now, you've heard of super chips and their handheld programmers for gas engines. Well, they've now introduced their new Firefly programmer for diesel pickups.
The Firefly has three on the fly adjustable power levels to add up to 65 horses and an additional 150 ft pounds of torque to eliminate downshifting while towing heavy loads. Now, the power module plugs in like any tuner but comes with this cool dual boost pressure
and exhaust gas temperature gauge with programmable alarm settings for each Super chip's new Firefly programmer and dual gauge package is available for 0 4.5 to 07 dodge diesels goes for about 600 bucks.
This is a ems brute force intake and they're taking a little bit different approach to a cold air intake system.
Now, it's well built in CNC manual
bent from 6061 aluminum and all the fittings and brackets are hand tig welded and steel heat shield is even powder coated. But what's different here is the system uses a dry performance filter that is 99.4% efficient and can filter dirt as small as one micron, which is about the size of the sharp end of a pin and it never needs oiling that eliminates any oily build up on your mass airflow sensor and cuts down on your service time. A ems brute force intake is 50 state legal and comes in at just over 300 bucks.
Now, I know you guys have been in this situation where you've got a bolt with damaged threads on the end for whatever reason. Well, instead of scrounging around the shop looking for another one, let me show you a quick way to clean up the threads
using a bench grinder or a sander, hold the bolt at a 45 degree angle and just
be the end
that'll clean up the threads
and it works every time.
Now, all you pay and body guys know that once you open a can of expensive hardener, you introduce oxygen into it and it can actually go bad in the can. Well, if you haven't used it all and you don't want to buy a brand new can of harder before you pay it again. Here's a tip that'll keep it fresh indefinitely.
Use some of the inner shielding gas from your mig or tig welder and blow some of the gas into the open can of hardener.
The argon mix is heavier than air and forces the air out, creating a barrier between the air and the hardener, keeping it fresh until the next time you want to use it. Thanks for watching trucks. See you guys next week.
Show Full Transcript
and we're working over our junkyard 460 for maximum torque. After that, we're adding a remand C six and stiffening up the frame with just a welder.
Then we'll bolt the body to the chassis to get our Bronco ready for some more low buck work.
That's all today here on trucks.
Hey, thanks for watching trucks. As you can see, we're back on the low buck Bronco project getting ready for some action because believe me, it's gonna see it. Now, if you're thinking, it looks like we just dragged this thing out of some field somewhere. Well, it's because we did,
we saw this rig just off an old back road one weekend and wondered if it was for sale. Well, this time, instead of wondering, we asked about it and ended up dragging it home for next to nothing.
We even got a big block thrown in for free.
Everybody knows about Broncos, especially you guys that get into off roading
and the second generation Broncos have an interesting history. Ford, almost canceled production of the full size Bronco, but even a recession and an energy crisis couldn't hold back such a great vehicle. And the 78 and 70 nines, well, they kicked the competition's butts. Plus they were the only full size Broncos that had the solid axle front end.
Now, a chassis, it could definitely withstand the power and torque of a big
block. So, like everything else on this Bronco, we're going on the cheap with our free 460
a stock engine build along with a cam that's designed for a little bit more torque. Now, we sent our block out of the machine shop to have it checked. And lucky for us, there was no surprises, no cracks, but we did find a couple cylinder boards that were a little out around. So we had a mild 30,000 silver board put on it and we had the crank dress at the same time,
they put the bottom end together, gave us a short lock for an extra couple of 100 bucks.
Now, I know some of you guys are saying that truck didn't come with a 460
you're right, it came with a 3 51 M which isn't a bad engine either. Like the old saying goes,
there's no replacement for displacement. And if you're anything like us, you've got a real hard time turning down 100 extra cubes of free engine.
And if you find yourself in our position and on a budget, let me show you a performance tip that won't cost you anything but a little bit of your time.
Now, I know you guys have heard of port matching before. All that means is matching the size of the cylinder head ports and manifold ports to the size of the gaskets. In order to eliminate restriction,
using your gasket as a template, align it with the bolt holes as a reference
and use a marker to color in the overlap or excess metal on the ports,
then remove the gasket and slowly trim the opening with a dye grinder and a car by bird until you have a smooth transition from the intake gasket to the port.
Now don't get carried away and try and hog out the heads. If you go too far and change the shape of the intake runners, you can actually hurt performance.
Now, unless you have access to a flow bench, keep things on the mild side because even a little goes a long way.
These techniques work on exhaust manifolds too, even headers.
The engine is an air pump and all you're doing is enhancing its flow capability.
You can use brake cleaner, a parts washer, an air hose, even hot soapy water but always clean the shavings out of your ported parts.
Every different cylinder head has its own torque sequence usually working from the center outward.
Our new head bolts are torque to 100 and 40 ft pounds.
There are benefits from using cast manifolds instead of headers due to less expansion and contraction, the bolts are much less likely to back out.
And since this is a low RPM engine, the extra flow at high RPM, the headers would give us will be lost on this Bronco. Anyway,
depending on which cam you select,
you can actually change your engines basic RPM range, which is the place that it makes the most power. Now, most big blocks aren't high revving engines, they make their power down low in the RPM range, which is perfect for our Bronco because we're gonna make a lot of power way down low in the revs that's going to be easy to control.
Our train cam is specs for off road use and towing
valve lift is right around 500 thousands and the RPM range is between 1248 100 RPM which matches the rest of our components and that means we won't have to wind this engine out to make good power
since we're using new push rods and lifters. There's no specific reassembly order to follow. Just drop the new parts in place.
Valve springs are not as critical on our set up as on a high RPM race engine, but they do wear out. And if you're not sure of the wear or mileage on your valve train, it's just cheap insurance to replace them. Now,
the Valley pan keeps the hot oil down in the crank case where it belongs and helps to keep the fuel and air charge passing through the intake manifold as cool as possible.
Any of you guys that have changed out a cast intake on a big block can appreciate the substantial weight loss that an aluminum manifold will give you
just because it's a big block doesn't mean that it needs 1000 CFM car.
This Edelbrock Thunder Series 650 will give us plenty of air and fuel.
It has spring loaded needles and seats for a consistent fuel supply
and side mounted fuel chambers that are less likely to flood while we're getting sideways on some trails.
Well, Ryan's putting the accessories on the front of the engine. I'm gonna give this water pump a coat of paint. It's a rock casting and it'll rust if you don't. Now rust won't stop the water pump from working, but it will make it look bad.
Here's where you can take a little pride in your handiwork. A clean looking engine never hurt anybody's performance.
When we come back, we're paying attention to the bottom end of our big block
so we can make it up with our new tranny. See
drops right in.
Hey, welcome back
with a combination of our basically stock 460 along with the cam that we picked out to go in, it is gonna give us somewhere around 400 horsepower and about 460 ft pounds of torque that is stump pulling power. Now, if you followed us along on this build, you know that this 460 is not the original engine that came in our low buck Bronco. That's ok because the C six transmission will made up with the bell housing on the block perfectly. The problem lies with the oil pan that came on here. It's all wrong.
Yeah, this old pan is a front sump pan and we need a rear sump to clear our front axle and believe it or not, they make a swap kit to put a 460 in a Fox body Mustang.
Now, this complete pan kit with pickup tube will work great on our conversion as well as give us an extra quarter capacity.
Plus it'll only set us back about 100 and 45 bucks.
We're using a stock replacement oil pump that'll give us all the pressure we need without the parasitic drag of a high volume pump.
And to whoever invented the one piece oil pan gasket, we just want to say thanks.
Now, our stock transmission was chock full of nasty metallic hunks of stuff when we opened it up. Plus it made this cool grinding sound when we turned the pump around. So we popped for this remand C six from o'reilly's and we saved another couple of 100 bucks by turning our core in. Now, one area that we did not spend a lot of money on was by buying an expensive higher stalls speed torque converter when this engine is a low RPM torque monster. Anyway, that would have actually worked against us. Now, this converter that came with the C six, it stalls around 1819 100 RPM, which is perfect for the 460 because that's where it starts making its peak power in the first place.
Trans DAPT offers these urethane adapters to drop a 460 into a full size Bronco or F 150.
That's simple enough. They just bolted the side of the block so you can drop it right into your factory frame mounts.
If you're using a cherry picker to lower your engine in. Keep in mind that a fully dressed big block is right around the 600 pound mark.
So make sure you've got an extra set of hands to help guide it into place.
See
drop right
in
the studs on your converter, need to find their home. And the dolls on the tranny have got to be seated before you tighten your bolts up, breaking an ear off on an aluminum bell housing on AC six gets expensive to replace or repair.
He's a big boy.
Oh, yeah,
here you go.
So its front drive shaft was laying in the tub of the Bronco. When we dragged it out of the weeds, we kind of lucked out. U joints are good and tight with only four inches of lift. We can reuse the stock shafts,
but the rear shaft was hatched. So we got a stock length replacement from L MC truck and that's gonna get us back on the trail real quick.
We've got some other tricks up our sleeve to help your on and off road performance. That'll cost next to nothing
up next. Our low buck Bronco is all starting to come together. Literally,
it is. Then we'll take care of our steering and our inner fenders
stick around.
Hey, thanks for hanging with us here at the truck shop. Well, we finally have a rolling chassis for a low buck Bronco that features a 460 cubic inch stump puller backed by a Reman C six for the rest of it. We threw a four inch lift on it and rebuilt everything else on the cheap. Now,
the original body mounts look like dry rotted rubber pancakes.
So we're gonna replace them with these polyurethane bushings we got from pro
also for added rigidity. We did a low buck chassis strengthening trick.
Our cross members are riveted in at the assembly plant just by running partial beads from the frame of the cross member. You can stiffen up the chassis
and if you're wondering why we didn't finish these welds. Well, in case this cross member ever has to come out, you gotta break out the grinder to get rid of these rivet heads anyway. And by doing it this way, you don't create a bunch of unnecessary work for yourself.
If your body is still on the frame and all, you gotta do is change body mount bushings. You can get it done with a floor jack or an old bumper jack.
Go
ahead. Rain.
Yep. Here it is
perfect.
All
now with the body back home on the frame, we can connect the steering and braking systems. Now, we had decent pedal right from the start. So all we did was flush the lines out. And if you remember Ryan put a couple of wheel cylinders in the drums out back as for this booster in the master cylinder, you guessed it, we recycle
now, since we've ditched a couple of 100 pounds of parts as well as put fresh pads and rotors all the way around on a braking system designed to stop a 5500 pound truck, but we shouldn't have any braking issues. But here is a problem. This is the original steering shaft and U joint that came on our Bronco.
I said,
so we're going to use this double D shaft we had laying around the shop from a previous build as well as use a new Borge.
And U joint
steering is one of the areas that you don't want to compromise safety.
It doesn't cost much to make sure you've got a solid connection to the road.
This is the original fiberglass top for our Bronco and it is very obvious that this thing is in sad shape. It's moldy,
the gel coat is gone. It's down to the matting. Plus look, it's broken
a
bunch of different places. This thing is done.
Our original inner fenders are beat up, nasty and
they're rusty. Our battery would have fallen right down on the tire. Not good. So we spent a little bit more money. Went to LNC and got a pair of these inner fenders that bolted right in and they come with the primer on them. Now, our outer fenders on the front. Yes, they were rusty but the rust was only where we cut out for the bush whacker flares. So we saved a little more money. We get to run with our original sheet metal
after the break. It's low buck tips on fixing up trash bolts. It works every time and how to keep costly paint hardener from going bad.
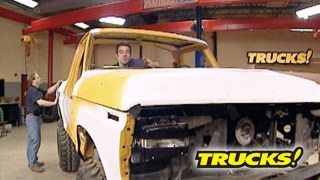
Hey, welcome back to trucks. Well, take a look at the low buck Bronco. Now, the stance is awesome. We got tons of wheel and tire clearance, but we're not quite done yet.
That's your sheet metal. We need a little more protection.
So we're gonna make our own roll cage and, uh,
we might need a windshield too.
Now, on both ends of this truck, we're gonna build some heavy duty bumpers on the cheap and we might as well plan on adding a winch because this thing's got some weight to it. We just might get it stuck in the mud.
We're not done with the body yet either. And this dot Yellow paint, it's gotta go but we got a great plan for a paint job and it might be something that your great grandfather might recognize. But the best thing about it is that it's gonna cost a fraction of what a conventional paint job will cost.
Not only did we get an extra four inches of height from our suspension lift by going to a taller tire, we gain another four or five inches that'll help keep the axles out of the mud.
Now, you guys are gonna have to keep watching to see how this thing turns out. It's gonna be awesome. And remember our biggest investment in this low buck Bronco is our time and labor. So if it breaks, what the heck as the saying goes, it ain't broke till you can't fix it anymore.
Now, even though our Broncos, a gas burner, here's something for you. Diesel guys. This is Gold Eagle line of diesel fuel additives. Gold Eagle has been around since 1932 and they've been a leader and innovator in diesel fuel additive technology ever since. And you can get really respectable results just by adding this into your fuel.
They've got a fuel system treatment that cleans your injectors and fuel lines and loss your fuel pump for improved power and acceleration.
And their C 10 booster actually bumps up your fuel C tan, which is its ignitable by 5 to 10 numbers to increase power for towing
and finally, their anti gel prevents gelled and frozen fuel lines and filters up to 25 degrees below zero.
A 20 ounce bottle of Gold Eagle diesel power can treat up to 100 gallons of fuel could be bought at most auto parts stores and starts out at just six bucks a bottle.
Now, here's another trick product for you. Diesel guys. Now, you've heard of super chips and their handheld programmers for gas engines. Well, they've now introduced their new Firefly programmer for diesel pickups.
The Firefly has three on the fly adjustable power levels to add up to 65 horses and an additional 150 ft pounds of torque to eliminate downshifting while towing heavy loads. Now, the power module plugs in like any tuner but comes with this cool dual boost pressure
and exhaust gas temperature gauge with programmable alarm settings for each Super chip's new Firefly programmer and dual gauge package is available for 0 4.5 to 07 dodge diesels goes for about 600 bucks.
This is a ems brute force intake and they're taking a little bit different approach to a cold air intake system.
Now, it's well built in CNC manual
bent from 6061 aluminum and all the fittings and brackets are hand tig welded and steel heat shield is even powder coated. But what's different here is the system uses a dry performance filter that is 99.4% efficient and can filter dirt as small as one micron, which is about the size of the sharp end of a pin and it never needs oiling that eliminates any oily build up on your mass airflow sensor and cuts down on your service time. A ems brute force intake is 50 state legal and comes in at just over 300 bucks.
Now, I know you guys have been in this situation where you've got a bolt with damaged threads on the end for whatever reason. Well, instead of scrounging around the shop looking for another one, let me show you a quick way to clean up the threads
using a bench grinder or a sander, hold the bolt at a 45 degree angle and just
be the end
that'll clean up the threads
and it works every time.
Now, all you pay and body guys know that once you open a can of expensive hardener, you introduce oxygen into it and it can actually go bad in the can. Well, if you haven't used it all and you don't want to buy a brand new can of harder before you pay it again. Here's a tip that'll keep it fresh indefinitely.
Use some of the inner shielding gas from your mig or tig welder and blow some of the gas into the open can of hardener.
The argon mix is heavier than air and forces the air out, creating a barrier between the air and the hardener, keeping it fresh until the next time you want to use it. Thanks for watching trucks. See you guys next week.
