More '53 Ford F-100 "Old Skool" Episodes
More Project Old Skool Episodes
Trucks! Builds
Want more content like this?
Join the PowerNation Email NewsletterParts Used In This Episode
AGR
Performance Power Steering Box.
Auto Body Color & Supply Co.
Clausen Super High Build All You Need Poly Primer.
Auto Body Color & Supply Co.
Hippo Liner Do-It-Yourself Two Part Bed Liner Mix.
Auto Body Color & Supply Co.
PPG Black Epoxy Sealer, Jet Black Base Coat and Pre-Flattened Clear Coat .
Auto Body Color & Supply Co.
PPG DX 330 Pre-Cleaner.
Coker Tire
Vintage Wheels and Tires.
Dupli-Color
Zinc Primer .
Edelbrock
Endurashine Dual Quad Intake.
LMC Truck
Windsheild.
Mid Fifty
Corner Patch Panels .
Roundeyes
Conversion Head Lamp Kits.
Episode Transcript
Today we're painting project old school.
The guys are fixing the body's rough spots and then they're sanding it all down
after that.
It's into the paint booth for an old school hot rod look done with modern paint.
It's all here today
on trucks.
Hey,
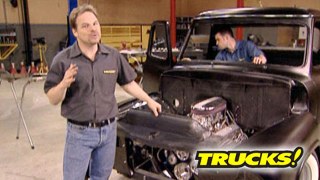
welcome to trucks where we are one step closer to turning our F 100
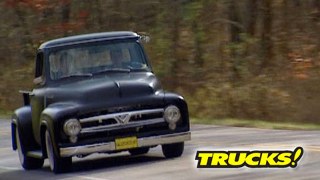
into a retro style classic with attitude
and reliability.
Now, we started our resurrection on a $2500 truck that had definitely seen better days and by our best guess, this thing had already been restored once about 20 years ago.
At
some point, somebody had swapped out the original front frame section for a 69 Nova clip and threw in the rest of the run gear for good measure.
We wanted to stick with a super solid GM drive train since there's tons of these es
that are done the same way,
but we had to up the ante with air suspension, a butt kicking new remand engine and Edelbrock, dual quad top end custom overdrive tranny, a posse with low gears, stainless exhaust, custom fiberglass body work and an all new bed and floor kit and then we threw some real style and attitude at it with retro style Coker wheels and tires.
Now it's time when you started on the body work.
Obviously, we're not alone here today. We've enlisted the expert help of Daniel and Tom to help us get this job done fast and done. Right.
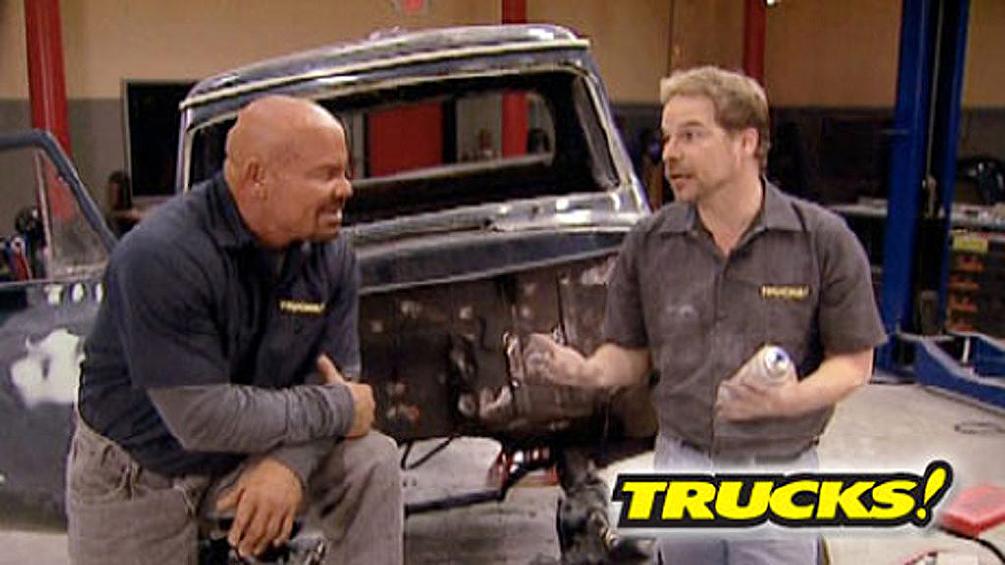
Well, we got pretty lucky with our cab. There's no real rust to speak of, but there's still some metal work to do. For instance, these gnarly holes left by those
crass looking West Coast style camper
Mars that were mounted on here before. Now, there's a couple of different ways that you can fill holes in sheet metal. Here's what works best for me.
I'll make the hole a larger uniform size with a step drill.
Then I'll take a piece of flat stock and slip it up into the door and trace my hole from the outside.
And what that does is give me a perfectly sized template for each one of these holes. Now, all I've got to do is trim them out, tack them in,
try and match the thickness of your patch to the sheet metal you're working on
behind that door is a huge hole. It's where the gas tank filler neck used to go, but
we're putting our gas tank under the bed, so we don't need that hole anymore. So we got these corner patch panels for mid 50 f 100 parts.
They're gonna work just perfect.
Here you go, Tom. Thanks, Paul. All right,
Tom is making a two piece patch for the fuel filler hole in the cab corner. The inner patch will seal out the moisture and debris from the underside and is coated with a dup. The color zinc primer to keep the metal from rusting.
Fiberglass is great.
I mean, it's nice and light, but sometimes
there can be some real issues.
Rocks can shoot up off the tires and damage the fender paint on the backside.
So we're gonna prep the inside and spray a thick undercoating that'll absorb any impacts.
We want to stay with a nice clean, smooth look. That means doing something about this firewall. So Tom's over there filling about a half dozen holes that we don't need.
We can come back later and drill out the ones that we are gonna need.
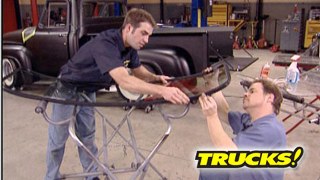
A windshield is not broken, but it's in a kind of sad shape. You can repair glass to a certain extent, but you can create optical distortion by polishing too much. This windshield is not that expensive, believe it or not. So we're just going to replace it with a brand new one from L MC truck. Your weather strip always needs to be replaced when you replace this type of glass,
don't pry it out, you'll break the glass. The easiest way to do it is just by cutting it from the outside edge,
simply run your utility knife on the outside of the glass and trim the weather strip away.
Now, some of you guys might be wondering why we're not stripping this truck to the bare metal. Well, if the paint job that you're working on is not cracked, flaking or peeling anywhere, then you're fine to put another paint job on top of it.
And this truck has been sprayed at one time with a modern base coat clear coat system. How do I know? Here's a simple test where you can tell,
pour a little paint thinner onto a rag
and rub it around on the surface.
Now, if your rag comes up clean, well, if your rag comes up with, without any blue color on it and your surface hasn't been moved. Well, then you know that it's a clear coat or a catalyze system. Another way to tell a clear coat is, look here, we have blue paint and white sanding dust that also indicates a clear coat.
Now, this truck's paint was originally lacquer and the problem with putting a modern system over top of a lacquer system is that the aggressive solvents in the modern systems will actually go down and re flow the lacquer and give you a weak foundation for a modern paint job. Let me show you what I mean.
We're over here at the muscle car shop where Lou is hacking up this 1970 Nova that's still wearing its original coat of paint.
I'm gonna do the same test on this car.
Look, the solvent is attacked and reloaded the lacquer and that's exactly what's gonna happen if you put new chemicals over old chemicals.
Well, we're gonna continue our little sanding party here while you guys take a break. But when we come back it's gonna be prime time. Stick around
after the break. We're going to finish up the body and then the primer is going to fly.
Hey, welcome back to trucks. Well, we're about to give our old school f 100
an old school retro code of paint,
but with a modern twist.
That's right. So we've teamed up on this old girl and prepped the new parts as well as the old and got them ready for primer. Well, almost, we're still gonna have to use a little bit of filler and the key is using it properly filler like anything else it can be abused. But if you keep your body filler no more than a quarter of an inch thick and don't use it as a crutch. It can be a great tool
before you can wipe your mud. You've got rough up your metal. Now, I'm using 50 grit sandpaper to rough this up. That'll give that filler something to really bite onto.
We're going to wipe a skim coat of filler on this cab corner. So I'm using Acetone to make sure I wipe any dust or contamination off a metal before I put the filler on.
Here's something to think about when you're applying filler, start from the top and work down. This allows gravity to help you spread. And even co
this fiberglass
has a polyester resin that holds this glass together.
That makes polyester filler a natural choice for leveling imperfections.
Tommy's taking care of some of those on the mold seam of our fiberglass fenders.
This will create the perfect foundation for our primer surface to sit on
to level the filler on the door. I'm using 80 grit on a block and I just work the contour until the filler is level and it feels right
now. You can tell when your filler is feathered in right by the edges, turning milky or transparent,
that feels nice and smooth.
Let's talk about the paint. We're going for a retro look which is also known as the suede look or hot rod black. Pretty cool. Huh? Oh, it's really cool. But the problem is guys used to get that look by using primer, which is porous. It's weak and it can actually wick water in and cause rust.
So we talked to the guys at auto body color and supply and they dial us in the system that starts off with a black epoxy sealer, followed by a jet black base coat. And here's the secret ingredient. This is a pre flattened clear coat that's going to give us all the strength and durability of a modern catalyzed base coat clear coat system, but it's going to give us that cool retro flat black hot rod look. It's going to last for years.
Now. We're gonna head over to the muscle car shop and bust into their booth.
You get this stuff primed.
The primer surface that I'm using is cloths and super high build. All you need. Poly primer. It's good on any substrate. It's going to be perfect for old school.
All this stuff's looking good. I'm gonna get the rest of these parts under primer. When we come back, we'll get this thing prepped for paint
up. Next.
Kevin's going to old school. You on sanding primer and the right way to paint
later, it's back in the paint booth for a little hot rod black.
Hey, welcome back to trucks and project old school. If you're just joining us, we're kicking butt on this F 100 project. We got our metal work done. Our filler is shaped and blocked out and we got a fat coat of primer on all the body work. Now, this is the work part of body work.
You can't just hope that your panels are gonna be nice and smooth.
You have to create that smoothness by carefully blocking it out.
So instead of flapping my gums and telling you why you should use a sanding block, I'll just show you three reasons,
your fingertips and the surface of your hand have an inconsistent surface. However, a sanding block is dead flat and you're going to create the flat and level surface that you want to see in your paint job.
Well, now that we know that we need a block, how do you choose the right block? There's lots of different sanding blocks out there.
The simple answer is you want the block to fit the panel. We've got a long hood. So we use a long board. The reason is that you've got several waves and imperfections in your surface, you want to level them all out all at once. So the longest board that'll fit your panel is what you want to reach for.
So I've sanded in an X pattern or a cross blocking pattern. Why? Well, if you use your sanding board front to back or in a linear sanding pattern, you can literally cut grooves with the edge of the panel by using an X.
You're taking the leading edge of the block and creating the flat surface that you want to see.
We got a lot of different blocks, a lot of different shapes. The reason for that is because you want to match your sander to your surface and this rounded block fits in this hood peak area perfectly
with your panel blocked out. You want to check it to make sure it's straight. Here's an easy way to do that
using a cleaning solvent or wax and grease remover soak the panel down and inspect the wet surface
and the solvent on the panel shows you exactly what the panel is going to look like with a fresh clear coat on it. So you can just take and sight it and look,
see if you can see any waves.
Just make sure that you wipe off your solvent before you go back to reprime or blocking again
with the primer dried on our fenders. Now we're gonna apply the protective coating on the inside.
This is actually a two part bed liner. You mix together, then you either spray it on or roll it on.
It cures in 24 hours and this coating will stop rocks from making those star shaped cracks
that I know you've seen in the fiberglass of some cars.
Now, before we throw old school in the booth and start squirting paint, let's talk about some gun technique, keeping your paint gun, the proper distance from the panel is critical to getting a nice smooth coat, modern HP LP equipment like this demands 4 to 6 inches, which seems pretty tight, but that's the way this equipment works the best
right here is about five inches to the panel and you want to remain completely consistent all the way through your passes
if you don't and you go in and out and you're inconsistent. Well, your paint finish is going to be inconsistent. You're going to have dry spray and heavy spray splotching. It's not going to look good.
You also want to be aware of your fan pattern, the paint comes out of the gun in the shape of a triangle. Now, if your gun technique is lazy, well, it's going to be heavy on the bottom.
Same thing. If it's lazy on the top, what's going to be heavy on the top and dry. Spray it on the bottom of the pattern. If you're shooting a metallic color like we did on S
10-K, well, you can tiger stripe it up and you can ruin a paint job like that.
Maintaining proper gun distance with the right orientation, perfectly parallel is absolutely important. You got to have it to get good technique and a good paint job.
You want to use a 50% overlap when you're spraying your coatings. Now, I've got a water based craft pen in here that is safe to show you what I'm talking about. Here's what I mean.
If you made a pass, bring it down half way, 50%
and again stepping down halfway, 50%
a
50% overlap technique will build the coat evenly and make sure that you get a nice even coat. It'll be a lot less likely to run the paint.
Mhm.
We got everything prepped. Now, all we gotta do is throw old school in the booth and shoot it with some homemade hot rod black.
Don't go anywhere.
When we come back, we'll put old school back together again with its new coat of paint.
You're going to like what you see?
Hey, welcome. Back to trucks and believe it or not, this is project old school we're doing what's called an exploded paint job, which means the vehicle is completely disassembled painted and then put back together after the paint str
before I start shooting paint. There's a couple of tips I want to share with you
and we've already wiped the fenders off with a wax and grease remover in the shop. But now I'm using a mixture of alcohol and water. 75% alcohol, 25% water. This acts as an anti static spray. Fiberglass creates its own static cling and this eliminates the static electricity, which is going to draw dirt and dust into my paint job and gives me a cleaner job.
I also like to use a dust control spray on the floor that keeps any dust that's already there down, stops it from being blown back up into my paint shop. Now, we've got a beautiful coal ma spray booth to shoot in. But if you use some of these tits, you can get a nice clean job wherever you spray.
I'm using a single coat of black Epoxy Cinder that will help to paint it here and create a solid and even foundation for the color coats.
So this is where most guys leave their hot rod black just in the black primer, but it doesn't last what we're going to put on is gonna last a good 10 years easy.
The jet black color is sprayed directly over top of the epoxy. And since our center is already black, all we need is one coat of color.
Well, that's it for the color coat. We wait about 15 minutes flash shine. We will throw that flat clear on it.
Give it what it needs.
The pre flattened clear coat goes on shiny but flattens out as it dries and cures two full wet coats of clear will give us great strength and UV protection.
Got it.
After about 12 hours of dry time, the parts are drying up to handle so we can mock up the panels and get a taste of what old school is going to look like. Finished.
Oh, man, this is awesome. I can't wait to start driving this to shows. Now. Hold on there slick. We still got a whole lot of work to do before we can drive this truck anywhere. Yeah, I guess you're right. So we'll just have to do another show.
Yeah,
here's a quick and easy upgrade for you Toyota and Jeep Boners
round eyes is now making these conversion headlamp kits that are 60% brighter than a conventional sealed beam head lamp. The multi
surface reflector produces a wider beam pattern and it can handle off road bulbs up to 100 and 30 watt they're dot approved and they drop right in place of your old bulbs and need no additional wiring.
You guys can pick up your own pair of round eye conversion headlamps for just under 100 bucks.
If your truck steers like it's got a mind of its own, you might want to think about one of these performance power steering boxes from a GR these are remanufactured right here in the USA and they add high speed roller bearings, stainless steel balls in the worm gear and high performance bearings and seals throughout. New valves manufactured by A GR are installed to fit you
application to obtain the best driver feel and control at the wheel. All the boxes are tested for pressure balance and return ability as well as leaks and are topped off with billet aluminum on both ends for better cooling and great looks. A GRS performance power steering box go for about 500 bucks. Thanks for watching trucks. We'll see you next week.
Show Full Transcript
The guys are fixing the body's rough spots and then they're sanding it all down
after that.
It's into the paint booth for an old school hot rod look done with modern paint.
It's all here today
on trucks.
Hey,
welcome to trucks where we are one step closer to turning our F 100
into a retro style classic with attitude
and reliability.
Now, we started our resurrection on a $2500 truck that had definitely seen better days and by our best guess, this thing had already been restored once about 20 years ago.
At
some point, somebody had swapped out the original front frame section for a 69 Nova clip and threw in the rest of the run gear for good measure.
We wanted to stick with a super solid GM drive train since there's tons of these es
that are done the same way,
but we had to up the ante with air suspension, a butt kicking new remand engine and Edelbrock, dual quad top end custom overdrive tranny, a posse with low gears, stainless exhaust, custom fiberglass body work and an all new bed and floor kit and then we threw some real style and attitude at it with retro style Coker wheels and tires.
Now it's time when you started on the body work.
Obviously, we're not alone here today. We've enlisted the expert help of Daniel and Tom to help us get this job done fast and done. Right.
Well, we got pretty lucky with our cab. There's no real rust to speak of, but there's still some metal work to do. For instance, these gnarly holes left by those
crass looking West Coast style camper
Mars that were mounted on here before. Now, there's a couple of different ways that you can fill holes in sheet metal. Here's what works best for me.
I'll make the hole a larger uniform size with a step drill.
Then I'll take a piece of flat stock and slip it up into the door and trace my hole from the outside.
And what that does is give me a perfectly sized template for each one of these holes. Now, all I've got to do is trim them out, tack them in,
try and match the thickness of your patch to the sheet metal you're working on
behind that door is a huge hole. It's where the gas tank filler neck used to go, but
we're putting our gas tank under the bed, so we don't need that hole anymore. So we got these corner patch panels for mid 50 f 100 parts.
They're gonna work just perfect.
Here you go, Tom. Thanks, Paul. All right,
Tom is making a two piece patch for the fuel filler hole in the cab corner. The inner patch will seal out the moisture and debris from the underside and is coated with a dup. The color zinc primer to keep the metal from rusting.
Fiberglass is great.
I mean, it's nice and light, but sometimes
there can be some real issues.
Rocks can shoot up off the tires and damage the fender paint on the backside.
So we're gonna prep the inside and spray a thick undercoating that'll absorb any impacts.
We want to stay with a nice clean, smooth look. That means doing something about this firewall. So Tom's over there filling about a half dozen holes that we don't need.
We can come back later and drill out the ones that we are gonna need.
A windshield is not broken, but it's in a kind of sad shape. You can repair glass to a certain extent, but you can create optical distortion by polishing too much. This windshield is not that expensive, believe it or not. So we're just going to replace it with a brand new one from L MC truck. Your weather strip always needs to be replaced when you replace this type of glass,
don't pry it out, you'll break the glass. The easiest way to do it is just by cutting it from the outside edge,
simply run your utility knife on the outside of the glass and trim the weather strip away.
Now, some of you guys might be wondering why we're not stripping this truck to the bare metal. Well, if the paint job that you're working on is not cracked, flaking or peeling anywhere, then you're fine to put another paint job on top of it.
And this truck has been sprayed at one time with a modern base coat clear coat system. How do I know? Here's a simple test where you can tell,
pour a little paint thinner onto a rag
and rub it around on the surface.
Now, if your rag comes up clean, well, if your rag comes up with, without any blue color on it and your surface hasn't been moved. Well, then you know that it's a clear coat or a catalyze system. Another way to tell a clear coat is, look here, we have blue paint and white sanding dust that also indicates a clear coat.
Now, this truck's paint was originally lacquer and the problem with putting a modern system over top of a lacquer system is that the aggressive solvents in the modern systems will actually go down and re flow the lacquer and give you a weak foundation for a modern paint job. Let me show you what I mean.
We're over here at the muscle car shop where Lou is hacking up this 1970 Nova that's still wearing its original coat of paint.
I'm gonna do the same test on this car.
Look, the solvent is attacked and reloaded the lacquer and that's exactly what's gonna happen if you put new chemicals over old chemicals.
Well, we're gonna continue our little sanding party here while you guys take a break. But when we come back it's gonna be prime time. Stick around
after the break. We're going to finish up the body and then the primer is going to fly.
Hey, welcome back to trucks. Well, we're about to give our old school f 100
an old school retro code of paint,
but with a modern twist.
That's right. So we've teamed up on this old girl and prepped the new parts as well as the old and got them ready for primer. Well, almost, we're still gonna have to use a little bit of filler and the key is using it properly filler like anything else it can be abused. But if you keep your body filler no more than a quarter of an inch thick and don't use it as a crutch. It can be a great tool
before you can wipe your mud. You've got rough up your metal. Now, I'm using 50 grit sandpaper to rough this up. That'll give that filler something to really bite onto.
We're going to wipe a skim coat of filler on this cab corner. So I'm using Acetone to make sure I wipe any dust or contamination off a metal before I put the filler on.
Here's something to think about when you're applying filler, start from the top and work down. This allows gravity to help you spread. And even co
this fiberglass
has a polyester resin that holds this glass together.
That makes polyester filler a natural choice for leveling imperfections.
Tommy's taking care of some of those on the mold seam of our fiberglass fenders.
This will create the perfect foundation for our primer surface to sit on
to level the filler on the door. I'm using 80 grit on a block and I just work the contour until the filler is level and it feels right
now. You can tell when your filler is feathered in right by the edges, turning milky or transparent,
that feels nice and smooth.
Let's talk about the paint. We're going for a retro look which is also known as the suede look or hot rod black. Pretty cool. Huh? Oh, it's really cool. But the problem is guys used to get that look by using primer, which is porous. It's weak and it can actually wick water in and cause rust.
So we talked to the guys at auto body color and supply and they dial us in the system that starts off with a black epoxy sealer, followed by a jet black base coat. And here's the secret ingredient. This is a pre flattened clear coat that's going to give us all the strength and durability of a modern catalyzed base coat clear coat system, but it's going to give us that cool retro flat black hot rod look. It's going to last for years.
Now. We're gonna head over to the muscle car shop and bust into their booth.
You get this stuff primed.
The primer surface that I'm using is cloths and super high build. All you need. Poly primer. It's good on any substrate. It's going to be perfect for old school.
All this stuff's looking good. I'm gonna get the rest of these parts under primer. When we come back, we'll get this thing prepped for paint
up. Next.
Kevin's going to old school. You on sanding primer and the right way to paint
later, it's back in the paint booth for a little hot rod black.
Hey, welcome back to trucks and project old school. If you're just joining us, we're kicking butt on this F 100 project. We got our metal work done. Our filler is shaped and blocked out and we got a fat coat of primer on all the body work. Now, this is the work part of body work.
You can't just hope that your panels are gonna be nice and smooth.
You have to create that smoothness by carefully blocking it out.
So instead of flapping my gums and telling you why you should use a sanding block, I'll just show you three reasons,
your fingertips and the surface of your hand have an inconsistent surface. However, a sanding block is dead flat and you're going to create the flat and level surface that you want to see in your paint job.
Well, now that we know that we need a block, how do you choose the right block? There's lots of different sanding blocks out there.
The simple answer is you want the block to fit the panel. We've got a long hood. So we use a long board. The reason is that you've got several waves and imperfections in your surface, you want to level them all out all at once. So the longest board that'll fit your panel is what you want to reach for.
So I've sanded in an X pattern or a cross blocking pattern. Why? Well, if you use your sanding board front to back or in a linear sanding pattern, you can literally cut grooves with the edge of the panel by using an X.
You're taking the leading edge of the block and creating the flat surface that you want to see.
We got a lot of different blocks, a lot of different shapes. The reason for that is because you want to match your sander to your surface and this rounded block fits in this hood peak area perfectly
with your panel blocked out. You want to check it to make sure it's straight. Here's an easy way to do that
using a cleaning solvent or wax and grease remover soak the panel down and inspect the wet surface
and the solvent on the panel shows you exactly what the panel is going to look like with a fresh clear coat on it. So you can just take and sight it and look,
see if you can see any waves.
Just make sure that you wipe off your solvent before you go back to reprime or blocking again
with the primer dried on our fenders. Now we're gonna apply the protective coating on the inside.
This is actually a two part bed liner. You mix together, then you either spray it on or roll it on.
It cures in 24 hours and this coating will stop rocks from making those star shaped cracks
that I know you've seen in the fiberglass of some cars.
Now, before we throw old school in the booth and start squirting paint, let's talk about some gun technique, keeping your paint gun, the proper distance from the panel is critical to getting a nice smooth coat, modern HP LP equipment like this demands 4 to 6 inches, which seems pretty tight, but that's the way this equipment works the best
right here is about five inches to the panel and you want to remain completely consistent all the way through your passes
if you don't and you go in and out and you're inconsistent. Well, your paint finish is going to be inconsistent. You're going to have dry spray and heavy spray splotching. It's not going to look good.
You also want to be aware of your fan pattern, the paint comes out of the gun in the shape of a triangle. Now, if your gun technique is lazy, well, it's going to be heavy on the bottom.
Same thing. If it's lazy on the top, what's going to be heavy on the top and dry. Spray it on the bottom of the pattern. If you're shooting a metallic color like we did on S
10-K, well, you can tiger stripe it up and you can ruin a paint job like that.
Maintaining proper gun distance with the right orientation, perfectly parallel is absolutely important. You got to have it to get good technique and a good paint job.
You want to use a 50% overlap when you're spraying your coatings. Now, I've got a water based craft pen in here that is safe to show you what I'm talking about. Here's what I mean.
If you made a pass, bring it down half way, 50%
and again stepping down halfway, 50%
a
50% overlap technique will build the coat evenly and make sure that you get a nice even coat. It'll be a lot less likely to run the paint.
Mhm.
We got everything prepped. Now, all we gotta do is throw old school in the booth and shoot it with some homemade hot rod black.
Don't go anywhere.
When we come back, we'll put old school back together again with its new coat of paint.
You're going to like what you see?
Hey, welcome. Back to trucks and believe it or not, this is project old school we're doing what's called an exploded paint job, which means the vehicle is completely disassembled painted and then put back together after the paint str
before I start shooting paint. There's a couple of tips I want to share with you
and we've already wiped the fenders off with a wax and grease remover in the shop. But now I'm using a mixture of alcohol and water. 75% alcohol, 25% water. This acts as an anti static spray. Fiberglass creates its own static cling and this eliminates the static electricity, which is going to draw dirt and dust into my paint job and gives me a cleaner job.
I also like to use a dust control spray on the floor that keeps any dust that's already there down, stops it from being blown back up into my paint shop. Now, we've got a beautiful coal ma spray booth to shoot in. But if you use some of these tits, you can get a nice clean job wherever you spray.
I'm using a single coat of black Epoxy Cinder that will help to paint it here and create a solid and even foundation for the color coats.
So this is where most guys leave their hot rod black just in the black primer, but it doesn't last what we're going to put on is gonna last a good 10 years easy.
The jet black color is sprayed directly over top of the epoxy. And since our center is already black, all we need is one coat of color.
Well, that's it for the color coat. We wait about 15 minutes flash shine. We will throw that flat clear on it.
Give it what it needs.
The pre flattened clear coat goes on shiny but flattens out as it dries and cures two full wet coats of clear will give us great strength and UV protection.
Got it.
After about 12 hours of dry time, the parts are drying up to handle so we can mock up the panels and get a taste of what old school is going to look like. Finished.
Oh, man, this is awesome. I can't wait to start driving this to shows. Now. Hold on there slick. We still got a whole lot of work to do before we can drive this truck anywhere. Yeah, I guess you're right. So we'll just have to do another show.
Yeah,
here's a quick and easy upgrade for you Toyota and Jeep Boners
round eyes is now making these conversion headlamp kits that are 60% brighter than a conventional sealed beam head lamp. The multi
surface reflector produces a wider beam pattern and it can handle off road bulbs up to 100 and 30 watt they're dot approved and they drop right in place of your old bulbs and need no additional wiring.
You guys can pick up your own pair of round eye conversion headlamps for just under 100 bucks.
If your truck steers like it's got a mind of its own, you might want to think about one of these performance power steering boxes from a GR these are remanufactured right here in the USA and they add high speed roller bearings, stainless steel balls in the worm gear and high performance bearings and seals throughout. New valves manufactured by A GR are installed to fit you
application to obtain the best driver feel and control at the wheel. All the boxes are tested for pressure balance and return ability as well as leaks and are topped off with billet aluminum on both ends for better cooling and great looks. A GRS performance power steering box go for about 500 bucks. Thanks for watching trucks. We'll see you next week.
