More Faux Guy K10 Square Body Truck Episodes
Music City Trucks Featured Projects
Music City Trucks Builds
Want more content like this?
Join the PowerNation Email NewsletterEpisode Transcript
(Marc)>> You're watching Powernation!
(Marc)>> Today on Music City Trucks our K-10 square body is making some serious headway. With our cab back on we start installing the brake system, dive into how brake lines are made.
(Michael)>> I'll walk you through freshening up your a/c box.
(Marc)>> And finally we throw some exhaust on our square body. The end is in sight. [ Music ]
(Marc)>> This has got to be the most iconic design. [ Music ]
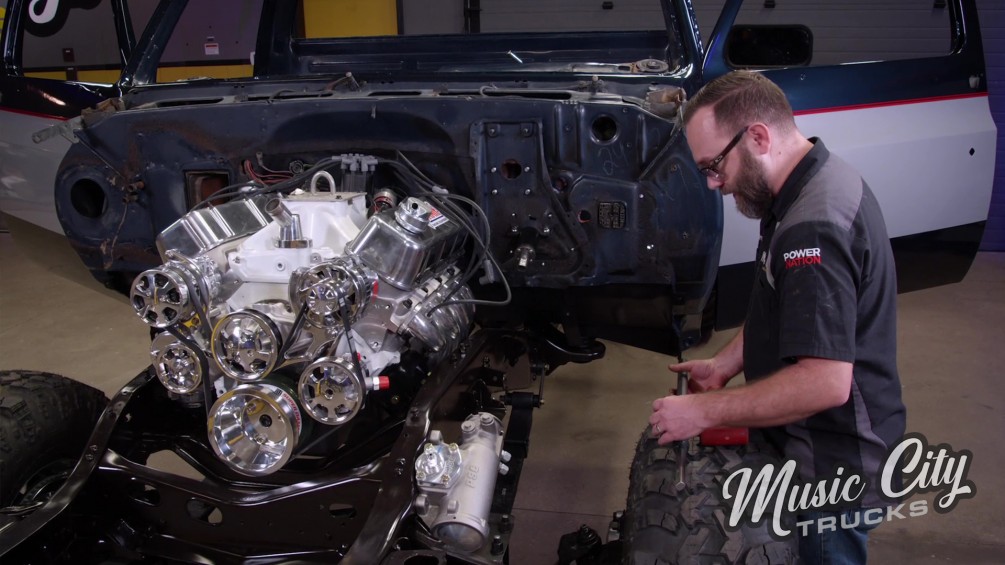
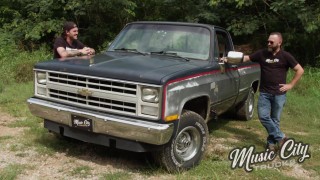
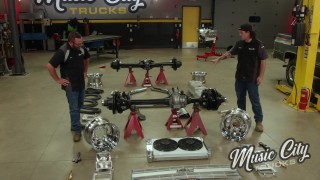
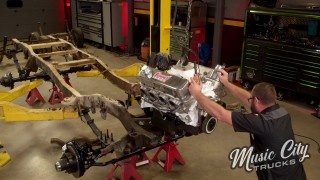
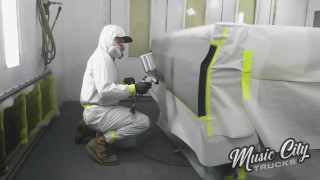
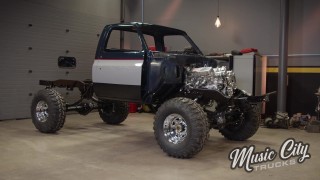
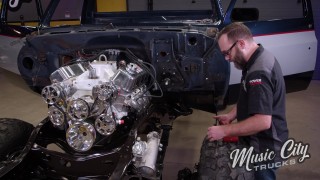
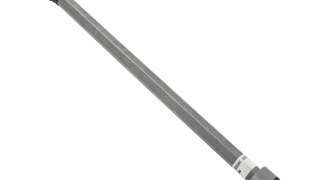
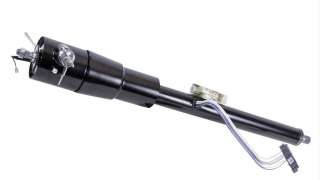
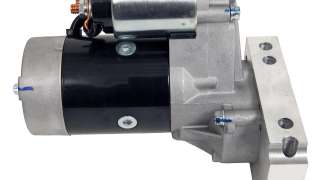
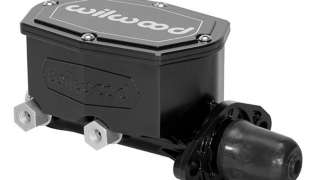
(Marc)>> Hey everybody, welcome to Music City Trucks. I'm Marc Christ, and this is our 1985 Chevy K-10 square body. Now I get pegged as being a Ford guy, which is partially true, but something like this is right up my alley, especially when you couple in the fact that we're building an old school truck. But it's not just any old school build. This is a tribute to the hero truck from the '80s t-v show "The Fall Guy". I know, it's not a GMC High Sierra, and it's not brown and gold, nor is it gonna be. There's nothing wrong with that cause this is a tribute to that truck, right down to the old school chrome wagon wheels. Now this truck, still got a lot of work to get it done but it's come a long way from where we started. What we started with was a pretty straight, clean truck. Although it was showing some age it really didn't need much work to get it in tip top shape. We threw on some upgrades to the normal wear and tear items, and then took it out to Woolys just to have some fun in the mud. Mission accomplished! I love this truck. When we got back it was tear down time. Once we got the truck completely torn down then we got busy on the body work and the chassis. We added a 600-horsepower big block, 4-L-80-E transmission, transfer case, a pair of Dana 60 crate axles, and had the chassis blasted and painted. We worked our magic on the body panels getting them painted back to the original paint scheme that this truck had from the factory. Man, that looks good! Well the last thing that we did to this truck is get the cab bolted onto the chassis, which is very exciting. It does have the a/c stuff still in here including the control panel, the pedals are here, and the wiring harness, but other than that this thing is gutted. Now we do have an entire interior coming for this truck from TMI Products. I'm looking forward to that, but that's not what we're gonna do now. I want to tackle what's on the other side of this firewall. Now there's a lot of stuff missing here. Probably the most obvious would be the sheet metal, but that's not what I'm gonna do next. I want to get as much done as I can inside here before that sheet metal gets in my way. I'm mainly talking about what's on the firewall, or what's missing from the firewall. We took the a/c box out of the way to get the firewall all cleaned up, which I think turned out really nice. We decided not to paint it because this was such a clean, original truck. It's even got some chalk marks here. We figured we'd just leave it like that. It's pretty much how it would have looked from the factory. So, beyond that wiper motor's missing, the brake booster and master, and of course the steering column, which is what I think I'm gonna tackle first because that'll be the easiest to do with the rest of the stuff out of the way. Well on a build like this it's easy to forget some of the miscellaneous components. So that's why I go to Summit Racing for what you see here on the table as an example for some steering, braking, as well as the starter here. We have this mini high torque starter, which is for small block and big block Chevys. This is actually Summit branded. It even comes with the shims and the bolts to get it installed. As for the braking system this is a universal Wilwood master but it comes with the proportioning valve and all the hardware to get it installed, which really simplifies the build as well as all the hard lines. We're running all new hard lines here for the brakes. Copper/nickel, very easy to move, bend into place to make a really nice brake line. It's also easy to flare, and it's not gonna rust like the factory steel lines will. Then we got an assortment of tube nuts here to get all the connections made. As for the steering this is a Flaming River o-e style column for a square body Chevy. It does have factory style connectors on the electrical side. It even has a GM style ignition switch here. This will eliminate all the problems that the factory steering columns had. So, this is a nice heavy duty unit and it looks nice. To connect that to our steering box this Borgeson steering shaft. It's got U-joints on both ends and it's collapsible. So it's nice and safe. First things first, I'm gonna get this column installed. Bring this truck back together! [ Music ] [ ratchet clicking ]
(Marc)>> Alright, well now it's time for the steering shaft. This is the one that we got from Summit. Now it's long on purpose because it's trim to fit. We just need to get the U-joint installed onto the steering box, which we already got on there, and then we'll mark it on this end, make one cut, get it installed. I always try to get the shaft flush with the inside of the sleeve here inside the joint but not too deep because it'll bind up. Maximum engagement, no binding. I'm gonna measure just on this edge where I like that shaft to be all the way to the end of the steering column shaft, which is 18 and a quarter. Need that fully extended. [ Music ] [ saw buzzing ]
(Marc)>> And the next thing I need to do is just use a file to clean up the edge. With the rough edges taken off the next thing is fitting it into the steering joint at the box. The reason why we wanted it fully extended when we made our measurement is because the amount that it needs to be collapsed is the same length that the upper joint needs to be installed. Time to drill. The reason we're drilling is because there's one longer set screw that needs to extend through the steering column and into the inside wall of the shaft for safety. Done deal! Up next, I'll show you how to make some brake lines and the tools you'll need. Turn the knob, spin the tool, keep doing this.
(Marc)>> Well we've got our steering system pretty much wrapped up except for the hoses and reservoir, which we'll mount that later once we get all the sheet metal in place cause we don't really know where that's gonna go yet. For now, I want to jump on to the braking system. You might remember earlier I showed you we found this Wilwood master and proportioning valve combo on Summit Racing. It needs a little bit of prep before we can get it installed. Mainly it needs to be bench bled. That's why we have the vice here. But before we can get that installed we've got to get our booster. You guys probably remember Michael Huxley. Welcome back. He's gonna be helping us out in the shop here for a while. I guess that's the booster that came off the truck?
(Michael)>> It is. I just cleaned it up and put a fresh coat of paint on it so it'd look like the rest of the truck.
(Marc)>> No point in replacing it.
(Michael)>> Not at all!
(Marc)>> It looks great. You're a regular rattle can Rambo.
(Michael)>> I've had a little bit of practice.
(Marc)>> Let's get that installed. Then I'll cut you loose on getting this thing ready.
(Michael)>> Let's do it! [ drill humming ]
(Michael)>> While he finishes up there, I'm gonna go ahead and prep our master cylinder to be bench bled. Our unit is universal. So it does have ports on each side. We've chosen the drivers side because our kit comes with this bracket here to mount our proportioning valve directly to the master cylinder. It also includes these pre-bent lines to make installation a breeze. [ Music ] I'm installing these adapter fittings and hoses so I can loop my fluid back into the reservoir. Then fill it with brake fluid. What I'm gonna do here is go ahead and push this plunger in here, and what I'm doing is watching for air in the hoses here. I'm gonna keep doing this until there's no air coming out of the hoses. You may get to a point where it may aerate, and that's okay. Just stop and let it rest. A good habit to keep here is I like to keep everything a little loose while I fit everything up so it makes it that much easier to install. Simply add the pre-bent hard line and tighten it down.
(Marc)>> Now that we've got the master cylinder and proportioning valve installed all we have to do is connect the dots to our four wheels with our brake hard lines. Which I mentioned earlier we got this copper/nickel stuff from Summit Racing. We're gonna start by sending the coil tubing through the roller tool. That straightens the tubing out to make it easier to work with. To use this tubing cutter I'm just gonna tighten the knob and turn it. Then tighten and turn again until it breaks off. After it's cut I just file it down a bit to get rid of any burrs. The next thing we need to do now that we have our cut nice and clean is to move on to our tubing nuts. We've got an assortment of nuts but what we're using is the three-eighths by 24. This is very important. The tube nut has to go on the tube before we make the flare because if we don't put the tube nut on first it's never going to go on the tube. So it's very important to do that. Well we have to have a special tool to do the flaring, which is what this is right here. This is a hydraulic flaring tool, which is a little more heavy duty than the kind that you normally use with the hand crank. What's nice about this is it comes with all of the pieces that you need to do all the way from three-sixteenths up to three-eighths. If you want to do fuel line or something like this this'll work for that. We need to use this dye to hold the tubing to the end of the tool. You want the end of the tube to be sticking through the dye the same amount that the diameter of the tube is. We'll tighten the clamp, insert the inverted flare tool, tighten the valve, and clamp it down until it stops. Then we can replace it with the cone and bottom that out, there's your flared end. Well now all we need to do is bend the tubing, and I want to start with about a 90 degree bend that's really close to the end here. I'll bend it around this dye. It's super easy with this copper/nickel. That looks good! Now we're gonna make a coil in the brake line by taking a piece of round tubing. This copper/nickel tubing is very compliant. The more compliant it is the less likely it is to kink. And wrapping the brake line around it three or four times. Do four full. It's probably a little overboard but it'll look nice. Got the end made here, and if you're wondering why I put the coils in there the reason is because this is like a shock absorber between the chassis and the body because the master's mounted to the body and this end is mounted hard to chassis. If you don't have that shock absorber in there it'll put stress on the brake line and eventually crack it. Plus it looks cool, and it also makes it easier to install with that in there because you can move it. Rather than have a hard line that's right there you can move it around a little bit. I'll snug those down later. Another thing too, I'm gonna be using these little line clamps that we got from Earl's. What's nice about these is like I mentioned. You don't want to put too much stress on the brake lines. This will clamp to the hard line and then attach to the chassis, and that'll keep that line from moving around too much. So I just need to get that installed, and then I can get the other three lines done and we'll have us a brake system.
(Michael)>> Coming up next, I'm gonna take this thing the rest of the way apart and clean the box up. We'll make our a/c evaporator case look shinny and new!
(Michael)>> Well we've got our brakes most of the way set up. So now what I'm gonna do is turn our attention to the other side of the truck. Now some of you might know that this is a really hard spot to get to with the fender and the fender well blocking these bottom bolts. So while it's off the truck I'm gonna go ahead and look at our a/c box here. A couple of things I want look at are the evaporator core and the blower motor just to make sure they're in a good working condition. After that I'm gonna go ahead and clean it up and make it look good as new. Let's go ahead and take this thing apart. [ Music ] Boy these bolts are long winded. At first glance this thing looks pretty good. Let's look at the rest of it here. What I'm looking at is trying to find any kind of sign of oil leaks or damage to the evaporator core, and this thing looks alright. Notice that this says 85 right here. So, I'm willing to be that this is actually an o-e-m evaporator core. I'm gonna go ahead and call this good though. Let's go ahead and check out the blower motor. Just by looking at it everything seems to be okay. The fins are not broken, and it does spin free. Here's a tip. To easily check to see if the fan still works just connect the wires to a battery. [ fan humming ]
(Michael)>> That works pretty good. It spins free, doesn't make any noise. So, I'm gonna call that a win. Now I'm gonna take this thing the rest of the way apart and clean the box up. [ ratchet clicking ] [ Music ]
(Michael)>> I took out the blower motor resistor because I wanted to protect it from any damage that might occur. This looks really good for something that's been probably on the truck for all its life. Now that I've got the mud cleaned off of it I'm gonna go ahead and get this thing ready for some clear. I started with a red scuffing pad making sure that I get a good rough surface. Skipping this step will result in your clear not sticking to your project. This might seem like a tedious process but when you're finished with it it'll look a lot better in the long run. [ aerosol can hissing ] [ Music ]
(Michael)>> Alright, now that I've got this thing cleaned up I went ahead and put a fresh coat of clear on it. I've replaced the seals. I even got a fresh coat of paint on the blower motor here to make sure that it matches the rest of the truck. What I'm gonna do now is bolt it on. [ ratchet clicking ]
(Marc)>> How'd that turn out?
(Michael)>> I think it turned out pretty good.
(Marc)>> It looks really good! You ready to move on to something else?
(Michael)>> What do you want to do?
(Marc)>> What do you say we do the exhaust?
(Michael)>> I'm gamed.
(Marc)>> We've just got to move the truck up. Next, we custom fit some exhaust on our K-10 square body.
(Marc)>> Well we're getting a lot accomplished on our square body today. You can see our firewall is almost finished. Michael did a fantastic job getting our evaporator case all restored, cleaned up, and reinstalled. I went ahead and installed a brand new accumulator on there. Sealed it off so we didn't get any moisture in there, and then I finished off the firewall, did a coat of satin clear. We got a new coil on there, the wiring harness cleaned up and reinstalled, new wiper motor, vacuum cannisters back on there. The firewall's basically done. brake lines are all done. You might notice our valve covers are different. We swapped out the ones that were on this engine. There was nothing wrong with them, but we just thought these looked cooler. These are Billet Specialties that we found on Summit Racing. I think it really fits the build a little better. You might notice also that our headers aren't installed and they were earlier because we ran into a problem. Let me show you what we've got here. These headers that we had, there's absolutely nothing wrong with these Hookers. They're a direct fit for a big block in a square body and I was really excited about using these but there was one problem. Being that square bodies would have all had the diff on the passenger side you might notice the passenger side header is more compact top to bottom to make room for that driveshaft to go through there. Since we went with these crate Dana 60s that have the diff on the drivers side it was a little too close for comfort here with the primary tubes. The driveshaft probably wasn't gonna hit ever but with the suspension travel and everything I didn't want to take any chances. So the solution is gonna be these shorty headers right here that we found on Summit Racing. These are pretty close to our long tubes. They're the same size primary, inch and seven-eighths. They are a three inch collector, which is also the same, and they're ceramic coated and they look really nice. The only difference, which is the drawback, is that they're shorty, not long tubes. So they're not gonna allow that engine to make as much power as it really could, within 10 or 15 horsepower max. But being this truck is hat it is we're not gonna do any racing with it. It's not trying to set any records. So these headers are gonna be just fine. I'm gonna go ahead and get these installed, and we'll move on to the rest of the exhaust. [ ratchet clicking ]
(Marc)>> Let's get this thing in the air. Well we've got those shorty headers in place and it's time to move on to the rest of the exhaust. You can see we've got this true dual three inch stainless steel mandrel bent kit by Stainless Works that we found on Summit Racing. The only problem is we might run into an issue on the drivers side like we did with the headers, but we've got the solution for that. We've got a bunch of stainless three inch mandrel bent stuff from old projects laying around here. We've got a bunch of 90s. We've got several of these 180 U-bends, which come in handy, and of course we've got some straight tubing as well if we need it. I'd like to use as much of this kit as we possibly can, but if we run into an issue we'll tap into this. For now, I want to start up front on the drivers side and see where we're at. Well I've got the collectors bolted to the flanges here on the headers, and this kit's made for shorties. So it should just bolt right in with the exception of this driveshaft being on the drivers side up front. We need to do a test fit. I think the solution is gonna be to swap these tubes being that this one has a big kink in it here to go over the transfer case. So let's move that to the driver's side.
(Michael)>> Let me give you a hand with that.
(Marc)>> Thank you sir! Do a little test fit there.
(Michael)>> You good over there?
(Marc)>> Looks good! How's it look back there?
(Michael)>> It looks alright back here.
(Marc)>> I think we've got room. The problem is we are not gonna get past this shift linkage. I think we can just go ahead and cross over here, and then go through this nice big hole that we have here. Just do two tubes, and then mufflers, and then maybe a "Y" into one tail pipe.
(Michael)>> I like that a lot better. So there's a few fitment issues we need to worry about here. Our driveshaft, our flex plate, and our transmission pan. I've got this 180-degree pipe here that I'll cut in the middle, and that should give us a tight enough 90 degree angle to get us where we need to be. I go ahead and pre-fit the pipe to get the proper angle and then mark it. [ welder crackling ]
(Marc)>> We just need to go from there to there. Be careful, it's still hot! [ saw buzzing ]
(Marc)>> So what we've got here is this mid-pipe that we had laying around the shop that I think is gonna work perfectly. We went ahead and cut those pipes off same length and made some grooves in there so they'll slide over the ends of this.
(Michael)>> Passenger side's all the way in. We've just got to get the drivers side now.
(Marc)>> I need that hammer. Wow, look at that! [ drill humming ]
(Marc)>> Well I don't want to put this on yet until we get the bed on here because we don't know where this is gonna end up. We'll get a hanger on there too. I say we call that good. Now the next time you see this truck we're hopefully gonna get all of the sheet metal on, maybe assemble the cab. What else?
(Michael)>> I want to hear it run.
(Marc)>> Good idea. See y'all next time.
Show Full Transcript
(Marc)>> Today on Music City Trucks our K-10 square body is making some serious headway. With our cab back on we start installing the brake system, dive into how brake lines are made.
(Michael)>> I'll walk you through freshening up your a/c box.
(Marc)>> And finally we throw some exhaust on our square body. The end is in sight. [ Music ]
(Marc)>> This has got to be the most iconic design. [ Music ]
(Marc)>> Hey everybody, welcome to Music City Trucks. I'm Marc Christ, and this is our 1985 Chevy K-10 square body. Now I get pegged as being a Ford guy, which is partially true, but something like this is right up my alley, especially when you couple in the fact that we're building an old school truck. But it's not just any old school build. This is a tribute to the hero truck from the '80s t-v show "The Fall Guy". I know, it's not a GMC High Sierra, and it's not brown and gold, nor is it gonna be. There's nothing wrong with that cause this is a tribute to that truck, right down to the old school chrome wagon wheels. Now this truck, still got a lot of work to get it done but it's come a long way from where we started. What we started with was a pretty straight, clean truck. Although it was showing some age it really didn't need much work to get it in tip top shape. We threw on some upgrades to the normal wear and tear items, and then took it out to Woolys just to have some fun in the mud. Mission accomplished! I love this truck. When we got back it was tear down time. Once we got the truck completely torn down then we got busy on the body work and the chassis. We added a 600-horsepower big block, 4-L-80-E transmission, transfer case, a pair of Dana 60 crate axles, and had the chassis blasted and painted. We worked our magic on the body panels getting them painted back to the original paint scheme that this truck had from the factory. Man, that looks good! Well the last thing that we did to this truck is get the cab bolted onto the chassis, which is very exciting. It does have the a/c stuff still in here including the control panel, the pedals are here, and the wiring harness, but other than that this thing is gutted. Now we do have an entire interior coming for this truck from TMI Products. I'm looking forward to that, but that's not what we're gonna do now. I want to tackle what's on the other side of this firewall. Now there's a lot of stuff missing here. Probably the most obvious would be the sheet metal, but that's not what I'm gonna do next. I want to get as much done as I can inside here before that sheet metal gets in my way. I'm mainly talking about what's on the firewall, or what's missing from the firewall. We took the a/c box out of the way to get the firewall all cleaned up, which I think turned out really nice. We decided not to paint it because this was such a clean, original truck. It's even got some chalk marks here. We figured we'd just leave it like that. It's pretty much how it would have looked from the factory. So, beyond that wiper motor's missing, the brake booster and master, and of course the steering column, which is what I think I'm gonna tackle first because that'll be the easiest to do with the rest of the stuff out of the way. Well on a build like this it's easy to forget some of the miscellaneous components. So that's why I go to Summit Racing for what you see here on the table as an example for some steering, braking, as well as the starter here. We have this mini high torque starter, which is for small block and big block Chevys. This is actually Summit branded. It even comes with the shims and the bolts to get it installed. As for the braking system this is a universal Wilwood master but it comes with the proportioning valve and all the hardware to get it installed, which really simplifies the build as well as all the hard lines. We're running all new hard lines here for the brakes. Copper/nickel, very easy to move, bend into place to make a really nice brake line. It's also easy to flare, and it's not gonna rust like the factory steel lines will. Then we got an assortment of tube nuts here to get all the connections made. As for the steering this is a Flaming River o-e style column for a square body Chevy. It does have factory style connectors on the electrical side. It even has a GM style ignition switch here. This will eliminate all the problems that the factory steering columns had. So, this is a nice heavy duty unit and it looks nice. To connect that to our steering box this Borgeson steering shaft. It's got U-joints on both ends and it's collapsible. So it's nice and safe. First things first, I'm gonna get this column installed. Bring this truck back together! [ Music ] [ ratchet clicking ]
(Marc)>> Alright, well now it's time for the steering shaft. This is the one that we got from Summit. Now it's long on purpose because it's trim to fit. We just need to get the U-joint installed onto the steering box, which we already got on there, and then we'll mark it on this end, make one cut, get it installed. I always try to get the shaft flush with the inside of the sleeve here inside the joint but not too deep because it'll bind up. Maximum engagement, no binding. I'm gonna measure just on this edge where I like that shaft to be all the way to the end of the steering column shaft, which is 18 and a quarter. Need that fully extended. [ Music ] [ saw buzzing ]
(Marc)>> And the next thing I need to do is just use a file to clean up the edge. With the rough edges taken off the next thing is fitting it into the steering joint at the box. The reason why we wanted it fully extended when we made our measurement is because the amount that it needs to be collapsed is the same length that the upper joint needs to be installed. Time to drill. The reason we're drilling is because there's one longer set screw that needs to extend through the steering column and into the inside wall of the shaft for safety. Done deal! Up next, I'll show you how to make some brake lines and the tools you'll need. Turn the knob, spin the tool, keep doing this.
(Marc)>> Well we've got our steering system pretty much wrapped up except for the hoses and reservoir, which we'll mount that later once we get all the sheet metal in place cause we don't really know where that's gonna go yet. For now, I want to jump on to the braking system. You might remember earlier I showed you we found this Wilwood master and proportioning valve combo on Summit Racing. It needs a little bit of prep before we can get it installed. Mainly it needs to be bench bled. That's why we have the vice here. But before we can get that installed we've got to get our booster. You guys probably remember Michael Huxley. Welcome back. He's gonna be helping us out in the shop here for a while. I guess that's the booster that came off the truck?
(Michael)>> It is. I just cleaned it up and put a fresh coat of paint on it so it'd look like the rest of the truck.
(Marc)>> No point in replacing it.
(Michael)>> Not at all!
(Marc)>> It looks great. You're a regular rattle can Rambo.
(Michael)>> I've had a little bit of practice.
(Marc)>> Let's get that installed. Then I'll cut you loose on getting this thing ready.
(Michael)>> Let's do it! [ drill humming ]
(Michael)>> While he finishes up there, I'm gonna go ahead and prep our master cylinder to be bench bled. Our unit is universal. So it does have ports on each side. We've chosen the drivers side because our kit comes with this bracket here to mount our proportioning valve directly to the master cylinder. It also includes these pre-bent lines to make installation a breeze. [ Music ] I'm installing these adapter fittings and hoses so I can loop my fluid back into the reservoir. Then fill it with brake fluid. What I'm gonna do here is go ahead and push this plunger in here, and what I'm doing is watching for air in the hoses here. I'm gonna keep doing this until there's no air coming out of the hoses. You may get to a point where it may aerate, and that's okay. Just stop and let it rest. A good habit to keep here is I like to keep everything a little loose while I fit everything up so it makes it that much easier to install. Simply add the pre-bent hard line and tighten it down.
(Marc)>> Now that we've got the master cylinder and proportioning valve installed all we have to do is connect the dots to our four wheels with our brake hard lines. Which I mentioned earlier we got this copper/nickel stuff from Summit Racing. We're gonna start by sending the coil tubing through the roller tool. That straightens the tubing out to make it easier to work with. To use this tubing cutter I'm just gonna tighten the knob and turn it. Then tighten and turn again until it breaks off. After it's cut I just file it down a bit to get rid of any burrs. The next thing we need to do now that we have our cut nice and clean is to move on to our tubing nuts. We've got an assortment of nuts but what we're using is the three-eighths by 24. This is very important. The tube nut has to go on the tube before we make the flare because if we don't put the tube nut on first it's never going to go on the tube. So it's very important to do that. Well we have to have a special tool to do the flaring, which is what this is right here. This is a hydraulic flaring tool, which is a little more heavy duty than the kind that you normally use with the hand crank. What's nice about this is it comes with all of the pieces that you need to do all the way from three-sixteenths up to three-eighths. If you want to do fuel line or something like this this'll work for that. We need to use this dye to hold the tubing to the end of the tool. You want the end of the tube to be sticking through the dye the same amount that the diameter of the tube is. We'll tighten the clamp, insert the inverted flare tool, tighten the valve, and clamp it down until it stops. Then we can replace it with the cone and bottom that out, there's your flared end. Well now all we need to do is bend the tubing, and I want to start with about a 90 degree bend that's really close to the end here. I'll bend it around this dye. It's super easy with this copper/nickel. That looks good! Now we're gonna make a coil in the brake line by taking a piece of round tubing. This copper/nickel tubing is very compliant. The more compliant it is the less likely it is to kink. And wrapping the brake line around it three or four times. Do four full. It's probably a little overboard but it'll look nice. Got the end made here, and if you're wondering why I put the coils in there the reason is because this is like a shock absorber between the chassis and the body because the master's mounted to the body and this end is mounted hard to chassis. If you don't have that shock absorber in there it'll put stress on the brake line and eventually crack it. Plus it looks cool, and it also makes it easier to install with that in there because you can move it. Rather than have a hard line that's right there you can move it around a little bit. I'll snug those down later. Another thing too, I'm gonna be using these little line clamps that we got from Earl's. What's nice about these is like I mentioned. You don't want to put too much stress on the brake lines. This will clamp to the hard line and then attach to the chassis, and that'll keep that line from moving around too much. So I just need to get that installed, and then I can get the other three lines done and we'll have us a brake system.
(Michael)>> Coming up next, I'm gonna take this thing the rest of the way apart and clean the box up. We'll make our a/c evaporator case look shinny and new!
(Michael)>> Well we've got our brakes most of the way set up. So now what I'm gonna do is turn our attention to the other side of the truck. Now some of you might know that this is a really hard spot to get to with the fender and the fender well blocking these bottom bolts. So while it's off the truck I'm gonna go ahead and look at our a/c box here. A couple of things I want look at are the evaporator core and the blower motor just to make sure they're in a good working condition. After that I'm gonna go ahead and clean it up and make it look good as new. Let's go ahead and take this thing apart. [ Music ] Boy these bolts are long winded. At first glance this thing looks pretty good. Let's look at the rest of it here. What I'm looking at is trying to find any kind of sign of oil leaks or damage to the evaporator core, and this thing looks alright. Notice that this says 85 right here. So, I'm willing to be that this is actually an o-e-m evaporator core. I'm gonna go ahead and call this good though. Let's go ahead and check out the blower motor. Just by looking at it everything seems to be okay. The fins are not broken, and it does spin free. Here's a tip. To easily check to see if the fan still works just connect the wires to a battery. [ fan humming ]
(Michael)>> That works pretty good. It spins free, doesn't make any noise. So, I'm gonna call that a win. Now I'm gonna take this thing the rest of the way apart and clean the box up. [ ratchet clicking ] [ Music ]
(Michael)>> I took out the blower motor resistor because I wanted to protect it from any damage that might occur. This looks really good for something that's been probably on the truck for all its life. Now that I've got the mud cleaned off of it I'm gonna go ahead and get this thing ready for some clear. I started with a red scuffing pad making sure that I get a good rough surface. Skipping this step will result in your clear not sticking to your project. This might seem like a tedious process but when you're finished with it it'll look a lot better in the long run. [ aerosol can hissing ] [ Music ]
(Michael)>> Alright, now that I've got this thing cleaned up I went ahead and put a fresh coat of clear on it. I've replaced the seals. I even got a fresh coat of paint on the blower motor here to make sure that it matches the rest of the truck. What I'm gonna do now is bolt it on. [ ratchet clicking ]
(Marc)>> How'd that turn out?
(Michael)>> I think it turned out pretty good.
(Marc)>> It looks really good! You ready to move on to something else?
(Michael)>> What do you want to do?
(Marc)>> What do you say we do the exhaust?
(Michael)>> I'm gamed.
(Marc)>> We've just got to move the truck up. Next, we custom fit some exhaust on our K-10 square body.
(Marc)>> Well we're getting a lot accomplished on our square body today. You can see our firewall is almost finished. Michael did a fantastic job getting our evaporator case all restored, cleaned up, and reinstalled. I went ahead and installed a brand new accumulator on there. Sealed it off so we didn't get any moisture in there, and then I finished off the firewall, did a coat of satin clear. We got a new coil on there, the wiring harness cleaned up and reinstalled, new wiper motor, vacuum cannisters back on there. The firewall's basically done. brake lines are all done. You might notice our valve covers are different. We swapped out the ones that were on this engine. There was nothing wrong with them, but we just thought these looked cooler. These are Billet Specialties that we found on Summit Racing. I think it really fits the build a little better. You might notice also that our headers aren't installed and they were earlier because we ran into a problem. Let me show you what we've got here. These headers that we had, there's absolutely nothing wrong with these Hookers. They're a direct fit for a big block in a square body and I was really excited about using these but there was one problem. Being that square bodies would have all had the diff on the passenger side you might notice the passenger side header is more compact top to bottom to make room for that driveshaft to go through there. Since we went with these crate Dana 60s that have the diff on the drivers side it was a little too close for comfort here with the primary tubes. The driveshaft probably wasn't gonna hit ever but with the suspension travel and everything I didn't want to take any chances. So the solution is gonna be these shorty headers right here that we found on Summit Racing. These are pretty close to our long tubes. They're the same size primary, inch and seven-eighths. They are a three inch collector, which is also the same, and they're ceramic coated and they look really nice. The only difference, which is the drawback, is that they're shorty, not long tubes. So they're not gonna allow that engine to make as much power as it really could, within 10 or 15 horsepower max. But being this truck is hat it is we're not gonna do any racing with it. It's not trying to set any records. So these headers are gonna be just fine. I'm gonna go ahead and get these installed, and we'll move on to the rest of the exhaust. [ ratchet clicking ]
(Marc)>> Let's get this thing in the air. Well we've got those shorty headers in place and it's time to move on to the rest of the exhaust. You can see we've got this true dual three inch stainless steel mandrel bent kit by Stainless Works that we found on Summit Racing. The only problem is we might run into an issue on the drivers side like we did with the headers, but we've got the solution for that. We've got a bunch of stainless three inch mandrel bent stuff from old projects laying around here. We've got a bunch of 90s. We've got several of these 180 U-bends, which come in handy, and of course we've got some straight tubing as well if we need it. I'd like to use as much of this kit as we possibly can, but if we run into an issue we'll tap into this. For now, I want to start up front on the drivers side and see where we're at. Well I've got the collectors bolted to the flanges here on the headers, and this kit's made for shorties. So it should just bolt right in with the exception of this driveshaft being on the drivers side up front. We need to do a test fit. I think the solution is gonna be to swap these tubes being that this one has a big kink in it here to go over the transfer case. So let's move that to the driver's side.
(Michael)>> Let me give you a hand with that.
(Marc)>> Thank you sir! Do a little test fit there.
(Michael)>> You good over there?
(Marc)>> Looks good! How's it look back there?
(Michael)>> It looks alright back here.
(Marc)>> I think we've got room. The problem is we are not gonna get past this shift linkage. I think we can just go ahead and cross over here, and then go through this nice big hole that we have here. Just do two tubes, and then mufflers, and then maybe a "Y" into one tail pipe.
(Michael)>> I like that a lot better. So there's a few fitment issues we need to worry about here. Our driveshaft, our flex plate, and our transmission pan. I've got this 180-degree pipe here that I'll cut in the middle, and that should give us a tight enough 90 degree angle to get us where we need to be. I go ahead and pre-fit the pipe to get the proper angle and then mark it. [ welder crackling ]
(Marc)>> We just need to go from there to there. Be careful, it's still hot! [ saw buzzing ]
(Marc)>> So what we've got here is this mid-pipe that we had laying around the shop that I think is gonna work perfectly. We went ahead and cut those pipes off same length and made some grooves in there so they'll slide over the ends of this.
(Michael)>> Passenger side's all the way in. We've just got to get the drivers side now.
(Marc)>> I need that hammer. Wow, look at that! [ drill humming ]
(Marc)>> Well I don't want to put this on yet until we get the bed on here because we don't know where this is gonna end up. We'll get a hanger on there too. I say we call that good. Now the next time you see this truck we're hopefully gonna get all of the sheet metal on, maybe assemble the cab. What else?
(Michael)>> I want to hear it run.
(Marc)>> Good idea. See y'all next time.
