Music City Trucks Featured Projects
Music City Trucks Builds
Want more content like this?
Join the PowerNation Email NewsletterEpisode Transcript
[ Eric ] You're watching Powernation.
[ Mike ] Today on Music City Trucks our little F-150 gets a big blue oval engine upgrade, and we walk you through the installation of a modern fuel injection system. [ Eric ] Plus we're gonna run you through the basics of building your own motor mounts and make a couple other supporting upgrades on this truck to get it ready for all this power. All that and more today on Music City Trucks. [ Music ] [ Joel ] Nothing cooler than an old pickup am I right? [ Music ] [ Eric ] Underneath all this dirt there's probably a pretty good truck.
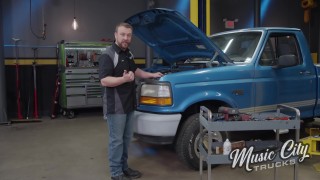
[ Eric ] Well we've got our '94 F-150 back here in the shop and as you guys probably already know we've already done a lot of work on it to get it where it's at now. But we've been driving around for a while as a little shop truck and we decided it's time to take things up a notch. This is a 1994 Ford F-150 running the legendary 4.9-liter or 300 cubic inch inline six. It's also a single cab short bed with that sought after OBS profile. This is one of the coveted Ford F-series trucks, which is the best selling truck in the last 40 years by a landslide. [ Joel ] Oh yeah, that clutch has never been changed. [ Eric ] Pretty impressive though, 125,000 miles on the factory clutch. [ Joel ] She had a good run. [ Eric ] We swapped out the worn out brakes for a fresh set and also upgraded a few necessary maintenance items including the steering linkage and tie rod ends. That's a lot of dirt. Slides in nice and smooth. Grab on! [ Music ] Then we made our way underneath the hood to do a little open heart surgery with a quick tune-up. I think I have a couple of ideas. [ Joel ] Oh god! [ ratchet clicking ] [ Eric ] All in all it could have been worse. [ Joel ] I think we've had worse. [ Eric ] I've definitely had worse experiences with 30 year old Fords. [ Music ] A little squeak! [ Joel ] What the Ford? [ Music ] [ Eric ] You know what? [ Joel ] Take a break. [ Eric ] Where we going? [ Joel ] Dumpster! [ Eric ] We also made some cosmetic upgrades by replacing the front fascia including the grille, headlight bezels, and all the light lenses. Are you able to get the clips in on your side? [ Joel ] Gotta hold your tongue on the side of your mouth just right while you're trying to put it on. [ Eric ] You're starting to sound like one of my old bosses. Things are about to get a little bumper-y. [ Joel ] You're just full of jokes today. [ Eric ] if you're a fan of the show you know we couldn't resist slapping on some new shiny chrome. I'd say we're good there if you want to tighten them down. It's just about summertime. How about a grille? [ Music ]
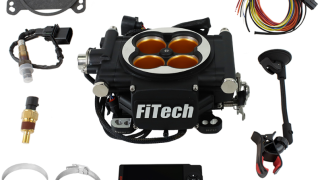
[ Joel ] Heck yeah! [ Eric ] Big difference. [ Joel ] She's smiling right back at us. [ Eric ] We've addressed some of the minor upgrades but no we're moving on to putting some power under the hood. [ Mike ] When we get going on our Ford here as a reminder this thing is equipped with our straight six. That engine provided a lot of durability, good fuel economy, but for our plans we're gonna need a little bit more power. We're gonna need a couple more cylinders. So that's why we're going with a V-8. Not just any V-8, a 460 big block. Our buddies Pat and Frankie over at Engine Power birthed this big blue behemoth from a bare block installing forged Icon pistons, a hydraulic roller lifter camshaft, Performer RPM aluminum heads, and the cherry on top of this big block sundae an Air Gap 460 intake manifold all to complete the ensemble for the power plant on our Ford F-150 project. Our Ford is gonna have a new power plant and we're also gonna have a modern fuel management system thanks to this FiTech Go EFI-8 1,200 kit. Everything you see from sump to solenoids will support up to 1,200 horsepower. We may not have that initially but you never know down the road what our project ideas could include. If we look at it close what we've got is our throttle body setup. It has all the fuel injectors. It has the brains of the system. We have all the wiring needed, the air cleaner. We've got all the components. It comes stacked with fuel lines provided so you can do this at home. Why do you want to have fuel injection on this truck? A lot of off road vehicles, rock climbers, ever done any mudding you may have had your vehicle in a particular situation if it was carbureted where the engine might stall. Carburetors have a lot of positive aspects but when you take that carburetor and start sloshing it around the fuel can get down in the engine and it doesn't run right. The benefit with electronic fuel injection is it maintains that engine's operation no matter what the situation. One of the key things about this fuel injection system and all fuel injection systems is that oxygen sensor. This has to monitor what is coming out the tailpipe so it can adjust the fuel curve. A lot of you may be thinking, I don't want to drill a hole and weld a bung in my exhaust pipe. If you don't want to weld that bung in your exhaust pipe FiTech makes this bung right here where it straps on to your exhaust pipe. Inside the vehicle you'll have this little dash. You can put it inside, leave it underneath the hood, it's up to you. You could disconnect it, but this is gonna provide us the input to talk to our computer system. Our desired idle, our air/fuel ratio, all that we can command in this box right here. All these cool parts are gonna make a big difference in this engine. First of all, we've got to get it mounted up and get it plumbed up, and that's what we're gonna show you next. [ Eric ] Coming up, we wrangle some angles to reinforce our run stand.
[ Eric ] We are well underway with getting our 460 mocked up onto this run stand but we're still missing one or two very important pieces to make that happen, and that is our motor mounts. Because this run stand is set up to be universal we've got to make new motor mounts every time we put a different type of engine on here, and this is the first time that this series of Ford big block has been on there. I know making motor mounts sounds like a pretty daunting task but it's really not all that hard. The first step in this process was to get some plates made both for the run stand itself and for the engine. Our next step was to measure the distance between the two so we knew how long our coupling needed to be. I've already done that and the measurement came out at about ten and seven-eights and I've already cut this section of one and five-eighths o-d pipe to make that connection. This is gonna give us what is known as a solid motor mount, and that differs from conventional motor mounts in that there is no rubber isolator in between the two metal halves. The biggest difference between solid mounts and conventional mounts is that solid mounts do not absorb any of the vibrations from your engine. For a daily driver application I really would not recommend running solid motor mounts but there are super useful for high performance applications where you need the strongest connection possible. In this case we're not concerned with that vibration absorption because we're just putting this on a run stand and there's not gonna be any load on the engine because it's spinning free. So we're gonna go ahead with these solid mounts, and the next step in getting these made is gonna be to figure out what angles we need to cut on the ends of our pipe. We're gonna start by checking the angle of the motor mount itself. The engine side plate is sitting at a perfect 45 degrees. So now we're gonna check the stand side. That is measuring in at zero degrees, which means we have a 45 degree difference from this end to this end of the motor mount, but we can't just cut a 45 degree end onto our pipe and stick it in there. Let me show you why. Right about there is where we want our pipe to end up on the engine side. That way we've still got easy access to all three bolts, but if we were to cut a 45 degree end on this that would put our pipe way too high up to be able to weld it on both sides. So how do we fix that? If we add a little bit of an angle to this end, say 10 degrees, and then use that to offset the cut on the other end from 45 to 55 degrees and cut them at opposite directions then those angles will even out to the 45 degrees that we have as a difference between these two plates but it's gonna lower this side down to where we need it right in the middle of these bolts. Now I'm gonna take this pipe and go get those angles cut and then we'll test fit. [ saw humming ] [ Eric ] We don't have a chop saw that can go past 45 degrees. So I used a protractor to mark our angles and I've got to cut this on the band saw very carefully. The next cut is only 10 degrees. So I was able to pull out the chop saw and do this the easy way. [ saw buzzing] [ Music ]
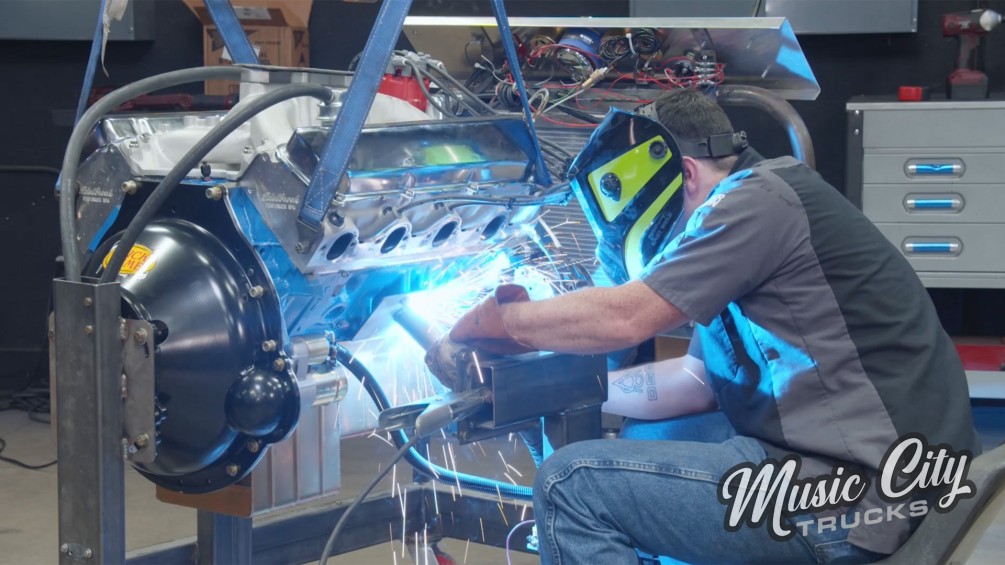
[ welder crackling ] [ Eric ] Once I got those cuts clean the angles we're looking for I tacked these in place before welding them all the way so we could lock this engine in place and get it fired up. [ welder popping ] [ Eric ] All we've got left to do is get the other side tacked up, pull them off and weld them all the way, and then let Mike have his way with this thing. [ Mike ] Up next, we're having our own little key party and spicing up our Ford's fuel system.
[ Mike ] We got our FiTech throttle body system here. We're gonna get it set down on the engine, bolted up, and run on this run stand. This run stand we're using this so we can demonstrate the install of the fuel injection, the plumbing from the tank up to this system here, and it's a lot easier to show you when it's outside the vehicle. We could go ahead and put this in the truck but it'd be harder for you to see. So we're gonna use this run stand and fire it up. I'm gonna get it bolted down and then I'll walk you through each of these connections on this system. These systems are very popular nowadays, and the big thing with these to make them work correctly a lot of people will say I put this on and it didn't work well for my vehicle. The main thing is the engine has to be mechanically sound. If you try to put one of these fuel injection units, self-contained units, on an engine that is not mechanically sound your problems carry over and now it makes it look like the throttle body has an issue. The big thing with intake manifold leaks. If you have any type of leak where it's getting unmetered air into the combustion chamber the fuel injection system can't compensate. Making sure the engine is mechanically sound is one of the first steps of having a good install on a good working unit. Got it bolted down, gaskets installed in place, sealed up. Now let's look at these connections here. On the front side this one is for our coolant temp sensor. It's already installed here in the manifold to our coolant passage. I'll go ahead and click that in. The other connections at the front of this throttle body unit, this black one here is gonna be for power. So whenever you turn the key on it fires this up. Turn the key off it'll shut it down as well. The other one is gonna go to the ignition coil. This is also a distributor style ignition. The other one here comes up to this box right here. FiTech makes this little power box. It's got fuses, it's got relays all built into this nice compartment. One side of it is gonna be power from the battery to feed our fuses and relays, and then the other one goes directly to the fuel pump. It will drive the fuel pump through this pigtail here. The other connector plugs up here and that's gonna give our power to the fuses as well. Let's get the tank over here, get it plumbed up, and finish up this install on this 460 Ford. With our hose cut to the length that we need we've got to put these hose ends on. Let me show you how this works. Unscrew the nut here, and this will slide onto the hose, and then this little ferrule is in between. We have to take this and slide this in between the steel braiding on the outside and that p-t-f-e liner on the inside. We'll get that in there and then the actual end of it goes in the middle. We tighten it down and as it tightens it compresses against the outside wall and makes a strong connection. Take our line here. First thing we've got to get the nut on the end down this side. This is where it can get frustrating because all these little steel ends like to poke your fingers, but they make these good fittings that have the funnel end on it to keep it from popping out. Got our nut on the line. Now we've got to take our ferrule, slide it over the p-t-f-e liner here, get that on top of that. Then the end has to go inside of that. I like to squirt a little bit of lube on the end of it so it slides a little bit easier. Then just goes down through here on the inside of that liner. Now what we're gonna do is put it in the vice and twist it in. It's threaded so they'll lock together. Now this vice has steel teeth. I like to use these soft jaws inside of the vice. They're made out of aluminum as well because these fittings are aluminum. So if you use a steel vice on those fittings it's gonna mar up the surface. Use the soft jaws and when it grips it it'll keep it soft. Same principle with our AN wrenches. When you want to tighten any of these fittings it's best to use an AN wrench because they are made out of aluminum as well. It won't mar the surface like a standard steel wrench would. We can start tightening our fitting together. Nice and tight. Now we've got to do the rest of the fittings and we'll be done. It's time to fire this beast up. We've checked everything. Let's put some fire in the pipes. Key on, fuel pressure going up. [ engine starts ] [ engine revving ] [ engine rumbling ] [ Music ]
[ Mike ] Well there you go. Ignition timing set, all of our vitals look good. When our F-150 is ready for this engine she's ready to go. [ Eric ] Coming up, we filter out the particulars for bringing up the rear to match the power under the hood.
[ Eric ] Now that Magic Mike's done his thing and got our FiTech unit dialed in we're gonna change the oil in this thing before we pull it off the stand and we're gonna be using this Berryman Brake Parts Cleaner to clean this out. These guys have been in business for a long time and they make a ton of different cleaning products. When you're cleaning out a drain pan for something like this always make sure you get up inside the lip of the pan because when you drain oil into there's always a chance it could splash some stuff up and get caught in there. When you're being particular enough to look for particulates you want to make sure that there's nothing old that's leftover in your pan. Last thing just wipe it out and make sure there is nothing left in there. [ Music ] That's looking pretty good. So I'm gonna go grab another rag just to get one more wipe down on it to be sure and then we can move on to the engine. With a clean drain pan it's time to actually change our oil, and we're gonna start here with our filter which we're gonna be replacing with a brand new one from Wix. Even though this thing's only had time on the dyno and on the run stand dyno time is hard time, especially with the way Pat and Frankie run. They are top tear A-plus engine builders but it's never too early to make sure your engine is in good health. One of the most important parts of keeping your engine healthy is in your choice of filtration, and that's why we're going with Wix because they've been around since 1939 producing top quality filtration for oil, fuel, air and more. Plus this engine is already running a Wix oil filter from next door. If it's good enough for them it's more than good enough for me. Woo, starting early. Where are my shop towels? Always make sure you wipe off the filter seat whenever you do an oil change. [ Music ] Another great thing about Wix oil filters is they're also great for severe driving conditions such as stop and go traffic, more importantly driving in dusty and dirty conditions like we plan on doing a whole lot of with this Ford when we get done with it. Another thing I love about these Wix filters is they've got markers on the side to show you where you're at in your turn. As you can see we've got number three facing us on the filter. We're gonna give it that last quarter turn until we see number four, and that means this filter is properly installed and we're finished up. We're ready to drain this oil out, go inspect it, make sure this thing is ready to go. Engine swaps and power adders are a ton of fun but eventually you're gonna start breaking stuff and have to replace some supporting components in whatever it is you're working on. Stuff like your transmission, transfer case, or like you see here your rear axle. [ Mike ] That's why we reached out to our friends at Quick Performance and they provided us this Pro Fab nine inch housing. This housing, the tubes are 250 thousandths on the thickness providing plenty of strength for our application. Let's get this thing put together, starting off with our third member. [ Eric ] Nice and easy. [ Mike ] Sometimes when you press in these studs they don't come out exactly perpendicular. So you might have to give a little whack-a-mole to it. [ Eric ] There we go. [ Music ] Send it on down. [ drill humming ] [ Mike ] We'll get a wrench on those. These nuts are a nylock. They have a little nylon on the end that acts as a locking device but they also have a torque spec, 35 pound feet. We're gonna get those zipped down and she's ready to go. Got the center section in. Now it's time to install our axles. These are unique on the flange that hold the axle and bearing together with these T-bolts. So we'll slide these T-bolts in and then we've got our brake backing plate to put on. Then we can slide our axle shaft in. These axle shafts, this is a semi-floating design. The flange for the wheel and the axle shaft are connected as one piece. You could go up to a three quarter floating or even a full floating axle, which separates those two pieces to make it even stronger, but for our application this will be just right. Let's get our brake rotor installed. Now our caliper. Get our pins slid back into place and our bolts. This is just a single piston caliper for the rear. It'll be fine for our application. We've got them installed. We'll get that tightened up and this axle is a wrap. Eric I've had a blast on this project today. We've worked on this truck from the front to the back, everything we've done, and got it ready for some big upgrades. [ Eric ] We got the fuel injection all dialed in. We know this engine's ready to go. All we've got left is to rip everything out and drop this one in. Got that rear axle about ready to go. Just need some spring perches and a couple other little things. We're off to a pretty good start this time around but that's all the time we've got for today. What do you say we go grab a drink? [ Mike ] Let's go!
Show Full Transcript
[ Mike ] Today on Music City Trucks our little F-150 gets a big blue oval engine upgrade, and we walk you through the installation of a modern fuel injection system. [ Eric ] Plus we're gonna run you through the basics of building your own motor mounts and make a couple other supporting upgrades on this truck to get it ready for all this power. All that and more today on Music City Trucks. [ Music ] [ Joel ] Nothing cooler than an old pickup am I right? [ Music ] [ Eric ] Underneath all this dirt there's probably a pretty good truck.
[ Eric ] Well we've got our '94 F-150 back here in the shop and as you guys probably already know we've already done a lot of work on it to get it where it's at now. But we've been driving around for a while as a little shop truck and we decided it's time to take things up a notch. This is a 1994 Ford F-150 running the legendary 4.9-liter or 300 cubic inch inline six. It's also a single cab short bed with that sought after OBS profile. This is one of the coveted Ford F-series trucks, which is the best selling truck in the last 40 years by a landslide. [ Joel ] Oh yeah, that clutch has never been changed. [ Eric ] Pretty impressive though, 125,000 miles on the factory clutch. [ Joel ] She had a good run. [ Eric ] We swapped out the worn out brakes for a fresh set and also upgraded a few necessary maintenance items including the steering linkage and tie rod ends. That's a lot of dirt. Slides in nice and smooth. Grab on! [ Music ] Then we made our way underneath the hood to do a little open heart surgery with a quick tune-up. I think I have a couple of ideas. [ Joel ] Oh god! [ ratchet clicking ] [ Eric ] All in all it could have been worse. [ Joel ] I think we've had worse. [ Eric ] I've definitely had worse experiences with 30 year old Fords. [ Music ] A little squeak! [ Joel ] What the Ford? [ Music ] [ Eric ] You know what? [ Joel ] Take a break. [ Eric ] Where we going? [ Joel ] Dumpster! [ Eric ] We also made some cosmetic upgrades by replacing the front fascia including the grille, headlight bezels, and all the light lenses. Are you able to get the clips in on your side? [ Joel ] Gotta hold your tongue on the side of your mouth just right while you're trying to put it on. [ Eric ] You're starting to sound like one of my old bosses. Things are about to get a little bumper-y. [ Joel ] You're just full of jokes today. [ Eric ] if you're a fan of the show you know we couldn't resist slapping on some new shiny chrome. I'd say we're good there if you want to tighten them down. It's just about summertime. How about a grille? [ Music ]
[ Joel ] Heck yeah! [ Eric ] Big difference. [ Joel ] She's smiling right back at us. [ Eric ] We've addressed some of the minor upgrades but no we're moving on to putting some power under the hood. [ Mike ] When we get going on our Ford here as a reminder this thing is equipped with our straight six. That engine provided a lot of durability, good fuel economy, but for our plans we're gonna need a little bit more power. We're gonna need a couple more cylinders. So that's why we're going with a V-8. Not just any V-8, a 460 big block. Our buddies Pat and Frankie over at Engine Power birthed this big blue behemoth from a bare block installing forged Icon pistons, a hydraulic roller lifter camshaft, Performer RPM aluminum heads, and the cherry on top of this big block sundae an Air Gap 460 intake manifold all to complete the ensemble for the power plant on our Ford F-150 project. Our Ford is gonna have a new power plant and we're also gonna have a modern fuel management system thanks to this FiTech Go EFI-8 1,200 kit. Everything you see from sump to solenoids will support up to 1,200 horsepower. We may not have that initially but you never know down the road what our project ideas could include. If we look at it close what we've got is our throttle body setup. It has all the fuel injectors. It has the brains of the system. We have all the wiring needed, the air cleaner. We've got all the components. It comes stacked with fuel lines provided so you can do this at home. Why do you want to have fuel injection on this truck? A lot of off road vehicles, rock climbers, ever done any mudding you may have had your vehicle in a particular situation if it was carbureted where the engine might stall. Carburetors have a lot of positive aspects but when you take that carburetor and start sloshing it around the fuel can get down in the engine and it doesn't run right. The benefit with electronic fuel injection is it maintains that engine's operation no matter what the situation. One of the key things about this fuel injection system and all fuel injection systems is that oxygen sensor. This has to monitor what is coming out the tailpipe so it can adjust the fuel curve. A lot of you may be thinking, I don't want to drill a hole and weld a bung in my exhaust pipe. If you don't want to weld that bung in your exhaust pipe FiTech makes this bung right here where it straps on to your exhaust pipe. Inside the vehicle you'll have this little dash. You can put it inside, leave it underneath the hood, it's up to you. You could disconnect it, but this is gonna provide us the input to talk to our computer system. Our desired idle, our air/fuel ratio, all that we can command in this box right here. All these cool parts are gonna make a big difference in this engine. First of all, we've got to get it mounted up and get it plumbed up, and that's what we're gonna show you next. [ Eric ] Coming up, we wrangle some angles to reinforce our run stand.
[ Eric ] We are well underway with getting our 460 mocked up onto this run stand but we're still missing one or two very important pieces to make that happen, and that is our motor mounts. Because this run stand is set up to be universal we've got to make new motor mounts every time we put a different type of engine on here, and this is the first time that this series of Ford big block has been on there. I know making motor mounts sounds like a pretty daunting task but it's really not all that hard. The first step in this process was to get some plates made both for the run stand itself and for the engine. Our next step was to measure the distance between the two so we knew how long our coupling needed to be. I've already done that and the measurement came out at about ten and seven-eights and I've already cut this section of one and five-eighths o-d pipe to make that connection. This is gonna give us what is known as a solid motor mount, and that differs from conventional motor mounts in that there is no rubber isolator in between the two metal halves. The biggest difference between solid mounts and conventional mounts is that solid mounts do not absorb any of the vibrations from your engine. For a daily driver application I really would not recommend running solid motor mounts but there are super useful for high performance applications where you need the strongest connection possible. In this case we're not concerned with that vibration absorption because we're just putting this on a run stand and there's not gonna be any load on the engine because it's spinning free. So we're gonna go ahead with these solid mounts, and the next step in getting these made is gonna be to figure out what angles we need to cut on the ends of our pipe. We're gonna start by checking the angle of the motor mount itself. The engine side plate is sitting at a perfect 45 degrees. So now we're gonna check the stand side. That is measuring in at zero degrees, which means we have a 45 degree difference from this end to this end of the motor mount, but we can't just cut a 45 degree end onto our pipe and stick it in there. Let me show you why. Right about there is where we want our pipe to end up on the engine side. That way we've still got easy access to all three bolts, but if we were to cut a 45 degree end on this that would put our pipe way too high up to be able to weld it on both sides. So how do we fix that? If we add a little bit of an angle to this end, say 10 degrees, and then use that to offset the cut on the other end from 45 to 55 degrees and cut them at opposite directions then those angles will even out to the 45 degrees that we have as a difference between these two plates but it's gonna lower this side down to where we need it right in the middle of these bolts. Now I'm gonna take this pipe and go get those angles cut and then we'll test fit. [ saw humming ] [ Eric ] We don't have a chop saw that can go past 45 degrees. So I used a protractor to mark our angles and I've got to cut this on the band saw very carefully. The next cut is only 10 degrees. So I was able to pull out the chop saw and do this the easy way. [ saw buzzing] [ Music ]
[ welder crackling ] [ Eric ] Once I got those cuts clean the angles we're looking for I tacked these in place before welding them all the way so we could lock this engine in place and get it fired up. [ welder popping ] [ Eric ] All we've got left to do is get the other side tacked up, pull them off and weld them all the way, and then let Mike have his way with this thing. [ Mike ] Up next, we're having our own little key party and spicing up our Ford's fuel system.
[ Mike ] We got our FiTech throttle body system here. We're gonna get it set down on the engine, bolted up, and run on this run stand. This run stand we're using this so we can demonstrate the install of the fuel injection, the plumbing from the tank up to this system here, and it's a lot easier to show you when it's outside the vehicle. We could go ahead and put this in the truck but it'd be harder for you to see. So we're gonna use this run stand and fire it up. I'm gonna get it bolted down and then I'll walk you through each of these connections on this system. These systems are very popular nowadays, and the big thing with these to make them work correctly a lot of people will say I put this on and it didn't work well for my vehicle. The main thing is the engine has to be mechanically sound. If you try to put one of these fuel injection units, self-contained units, on an engine that is not mechanically sound your problems carry over and now it makes it look like the throttle body has an issue. The big thing with intake manifold leaks. If you have any type of leak where it's getting unmetered air into the combustion chamber the fuel injection system can't compensate. Making sure the engine is mechanically sound is one of the first steps of having a good install on a good working unit. Got it bolted down, gaskets installed in place, sealed up. Now let's look at these connections here. On the front side this one is for our coolant temp sensor. It's already installed here in the manifold to our coolant passage. I'll go ahead and click that in. The other connections at the front of this throttle body unit, this black one here is gonna be for power. So whenever you turn the key on it fires this up. Turn the key off it'll shut it down as well. The other one is gonna go to the ignition coil. This is also a distributor style ignition. The other one here comes up to this box right here. FiTech makes this little power box. It's got fuses, it's got relays all built into this nice compartment. One side of it is gonna be power from the battery to feed our fuses and relays, and then the other one goes directly to the fuel pump. It will drive the fuel pump through this pigtail here. The other connector plugs up here and that's gonna give our power to the fuses as well. Let's get the tank over here, get it plumbed up, and finish up this install on this 460 Ford. With our hose cut to the length that we need we've got to put these hose ends on. Let me show you how this works. Unscrew the nut here, and this will slide onto the hose, and then this little ferrule is in between. We have to take this and slide this in between the steel braiding on the outside and that p-t-f-e liner on the inside. We'll get that in there and then the actual end of it goes in the middle. We tighten it down and as it tightens it compresses against the outside wall and makes a strong connection. Take our line here. First thing we've got to get the nut on the end down this side. This is where it can get frustrating because all these little steel ends like to poke your fingers, but they make these good fittings that have the funnel end on it to keep it from popping out. Got our nut on the line. Now we've got to take our ferrule, slide it over the p-t-f-e liner here, get that on top of that. Then the end has to go inside of that. I like to squirt a little bit of lube on the end of it so it slides a little bit easier. Then just goes down through here on the inside of that liner. Now what we're gonna do is put it in the vice and twist it in. It's threaded so they'll lock together. Now this vice has steel teeth. I like to use these soft jaws inside of the vice. They're made out of aluminum as well because these fittings are aluminum. So if you use a steel vice on those fittings it's gonna mar up the surface. Use the soft jaws and when it grips it it'll keep it soft. Same principle with our AN wrenches. When you want to tighten any of these fittings it's best to use an AN wrench because they are made out of aluminum as well. It won't mar the surface like a standard steel wrench would. We can start tightening our fitting together. Nice and tight. Now we've got to do the rest of the fittings and we'll be done. It's time to fire this beast up. We've checked everything. Let's put some fire in the pipes. Key on, fuel pressure going up. [ engine starts ] [ engine revving ] [ engine rumbling ] [ Music ]
[ Mike ] Well there you go. Ignition timing set, all of our vitals look good. When our F-150 is ready for this engine she's ready to go. [ Eric ] Coming up, we filter out the particulars for bringing up the rear to match the power under the hood.
[ Eric ] Now that Magic Mike's done his thing and got our FiTech unit dialed in we're gonna change the oil in this thing before we pull it off the stand and we're gonna be using this Berryman Brake Parts Cleaner to clean this out. These guys have been in business for a long time and they make a ton of different cleaning products. When you're cleaning out a drain pan for something like this always make sure you get up inside the lip of the pan because when you drain oil into there's always a chance it could splash some stuff up and get caught in there. When you're being particular enough to look for particulates you want to make sure that there's nothing old that's leftover in your pan. Last thing just wipe it out and make sure there is nothing left in there. [ Music ] That's looking pretty good. So I'm gonna go grab another rag just to get one more wipe down on it to be sure and then we can move on to the engine. With a clean drain pan it's time to actually change our oil, and we're gonna start here with our filter which we're gonna be replacing with a brand new one from Wix. Even though this thing's only had time on the dyno and on the run stand dyno time is hard time, especially with the way Pat and Frankie run. They are top tear A-plus engine builders but it's never too early to make sure your engine is in good health. One of the most important parts of keeping your engine healthy is in your choice of filtration, and that's why we're going with Wix because they've been around since 1939 producing top quality filtration for oil, fuel, air and more. Plus this engine is already running a Wix oil filter from next door. If it's good enough for them it's more than good enough for me. Woo, starting early. Where are my shop towels? Always make sure you wipe off the filter seat whenever you do an oil change. [ Music ] Another great thing about Wix oil filters is they're also great for severe driving conditions such as stop and go traffic, more importantly driving in dusty and dirty conditions like we plan on doing a whole lot of with this Ford when we get done with it. Another thing I love about these Wix filters is they've got markers on the side to show you where you're at in your turn. As you can see we've got number three facing us on the filter. We're gonna give it that last quarter turn until we see number four, and that means this filter is properly installed and we're finished up. We're ready to drain this oil out, go inspect it, make sure this thing is ready to go. Engine swaps and power adders are a ton of fun but eventually you're gonna start breaking stuff and have to replace some supporting components in whatever it is you're working on. Stuff like your transmission, transfer case, or like you see here your rear axle. [ Mike ] That's why we reached out to our friends at Quick Performance and they provided us this Pro Fab nine inch housing. This housing, the tubes are 250 thousandths on the thickness providing plenty of strength for our application. Let's get this thing put together, starting off with our third member. [ Eric ] Nice and easy. [ Mike ] Sometimes when you press in these studs they don't come out exactly perpendicular. So you might have to give a little whack-a-mole to it. [ Eric ] There we go. [ Music ] Send it on down. [ drill humming ] [ Mike ] We'll get a wrench on those. These nuts are a nylock. They have a little nylon on the end that acts as a locking device but they also have a torque spec, 35 pound feet. We're gonna get those zipped down and she's ready to go. Got the center section in. Now it's time to install our axles. These are unique on the flange that hold the axle and bearing together with these T-bolts. So we'll slide these T-bolts in and then we've got our brake backing plate to put on. Then we can slide our axle shaft in. These axle shafts, this is a semi-floating design. The flange for the wheel and the axle shaft are connected as one piece. You could go up to a three quarter floating or even a full floating axle, which separates those two pieces to make it even stronger, but for our application this will be just right. Let's get our brake rotor installed. Now our caliper. Get our pins slid back into place and our bolts. This is just a single piston caliper for the rear. It'll be fine for our application. We've got them installed. We'll get that tightened up and this axle is a wrap. Eric I've had a blast on this project today. We've worked on this truck from the front to the back, everything we've done, and got it ready for some big upgrades. [ Eric ] We got the fuel injection all dialed in. We know this engine's ready to go. All we've got left is to rip everything out and drop this one in. Got that rear axle about ready to go. Just need some spring perches and a couple other little things. We're off to a pretty good start this time around but that's all the time we've got for today. What do you say we go grab a drink? [ Mike ] Let's go!
