More Nissan Trailgater Episodes
Music City Trucks Featured Projects
Music City Trucks Builds
Want more content like this?
Join the PowerNation Email NewsletterParts Used In This Episode
Dakota Lithium
180W Folding Solar Panel for Lithium Batteries & Solar Generators
Dakota Lithium
Battery Monitor & Solar Integration Kit with DL Dashboard
Dakota Lithium
Dakota Lithium 12V 1500 Watt DC to AC Inverter
Dakota Lithium
Dakota Lithium Powerbox 10
Dakota Lithium
DL+ 12V 320AH LifeP04 Dual Purpose Battery
Dakota Lithium
Powerbox+ 60 Waterproof Power Station
Dakota Lithium
Victron Energy Orion-TR Smart 12/12-18A Isolated DC-DC Charger
Dometic
Dometic CFX3 Powered Cooler
Dometic
Dometic Tie-Down Kit
Overland Vehicle Systems
Ultimate 39 Piece Utensil Set - Black Powder Coat Universal
Episode Transcript
[ Joel ] You're watching Powernation!
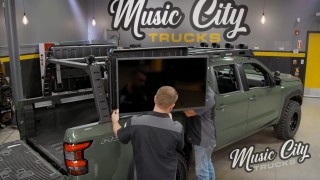
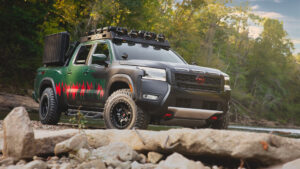
[ Eric ] It's the fourth quarter, the bottom of the ninth, and the last few minutes of the third period for this 2025 Nissan Frontier that we've dubbed Project Trailgater. [ Joel ] We've got a few more things we need to wrap up before we get this thing across the goal line, spike the football, celebrate our victory. All that and more today on Music City Trucks. [ Music ] [ Joel ] Nothing cooler than an old pickup, am I right? [ Music ] [ Eric ] Underneath all this dirt there's probably a pretty good truck. [ Joel ] Today we're putting the finishing touches on project trailgater and since I'm on injured reserve, we've got our buddy Mike, who's going to be subbing in, to get us across the goal line. And if you haven't been paying attention to this project so far, check out the highlights. [ Joel ] When our 2025 Nissan Frontier first came into the shop, it was bone stock, but it had all of the top of the line goodies that you would expect out of the Pro-4X package. Sporting a 310 horsepower V6, deluxe interior, off road shock absorbers, skid plates and tactical green metallic paint, this thing was already a looker. But as you know, we just can't leave well enough alone around here. We upgraded its' stance with a new leveling kit, increased its' growl with a new exhaust and threw in a few exterior goodies with a roof and bed rack. We also added some extra glow with some spot and a-pillar lights, so that we could brighten up the party a little bit. [ Eric ] Moment of truth. See if this side is any sturdier. Push it in a little more. [ Joel ] Just when you thought we were done, we added not one but two outdoor weatherproof TVs on each side of the bed rack, to give it that real deal tailgating extravaganza look. [ Music ] [ Joel ] Look at that, Wow! [ Eric ] That's a lot of space in there. [ Joel ]To store all of our utensils, chairs and anything else we may need in the stadium parking lot or out on the trail, we added a Decked Drawer cargo glide system, complimented with a one off Eric Smart 5000 barbeque grill mount, patent pending. [ Mike ] It's easy to dream up a project with tons of gadgets. But to make that happen, you're going to run into some roadblocks. And we've teamed up with Dakota Lithium here, to provide the answers to those questions, to make all of these components work smoothly together. So let's look at what we have here to make it all work. We're going to install 3 of these Dakota Lithium batteries into our truck, that way that gives us enough power all day long to do things like watch the tv. We've got a refrigerator. We've got sound bars. We've got coolers. Now, these batteries, they don't last forever. They're going to lose charge. Because of that, we're going to have different ways to charge these batteries. First one here is our DC to DC charger. This particular unit will allow us to run the gas engine and the alternator on the truck, when it's running, say we're traveling to a sight or what not. It's going to be charging our battery system there. We also have another option. We've got solar panels. The solar panels connect to this little dashboard right here, that takes that energy, converts it to charge our battery system. But we need to convert it to A/C for our TVs and the soundbar as well. So that's where this little inverter comes into play. We run this from one side to the battery. It allows us to plug in our TVs and other components right here, to give us power for those. This battery system is going to provide enough juice for our specific components but if there's other things that you need too for all your electrical demands, this would work as well. Enough about the details, let's burn some energy and get this stuff installed. So we've got our platform made inside the back seat here, and now we've got to put all of our batteries in. Now the batteries can float around but we've got our custom bracket that we made here. It looks kind of medieval, but this bracket here is going to hold our batteries in place. The first thing we gotta do is mark it out and square it up, get our holes drilled and then we get our batteries in and attached. Our little bracket's here, we'll go ahead and mark for our locations for our holes. Now I'll move this out for the way so we can access it and get our holes drilled. [ drill humming ] [ Music ] [ drill humming ] [ Music ] [ Mike ] Let's see if she fits. Back over. Couple of screws. [ screws clank ] [ Mike ] There we go. Got our screws in, now we'll get our batteries in. We know we've trial fitted it. We'll get our batteries in and get it set up for good. [ Music ]
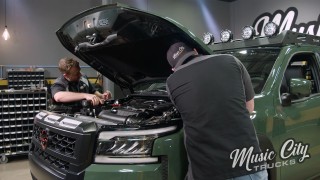
We've got our battery set in, now we just got to button up our bracket. [ Music ] [ Mike ] Get some nuts on the back side of that then we're good to go. Alright, so we've got all of our components finalized. We've got it mounted up. We've got our solar charger there. That manages the power from our solar panels on the roof. The one in the middle there, that is our power box for we can hook up to our power from the house or your garage or you're converting your home AC to this and to charge the batteries when it's parked. And this blue one, once again, that's our DC to DC charger. So one side of this is hooked up to the battery underneath the hood, so when the truck is running, the alternator is charging. That power is coming back here to charge these batteries as well. So we've got all that mounted up, wired up, all of our lights, everything works. Now we're just ready for the fridge. [ Eric ] Well the battery system is looking pretty good. [ Mike ] Yep! Almost done. [ Eric ] Like a glove. [ Mike ] Can't get any closer than that. [ Eric ] Look at that! All right, well I guess now we just gotta get plugged in and strapped down right? [ Mike ] Good to go. [ Music ]
[ Mike ] Up next, strap in and chill out as we energize our Frontier with some cool upgrades.
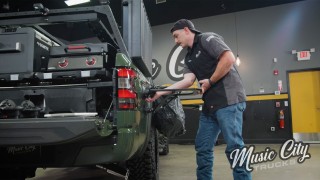
[ Eric ] Project Trailgater is almost ready for its first adventure. But before we roll out the door, we've got a few more essentials we've need to load up here in the bed. Like this Ultimate 39 piece utensil set from Overland Vehicle Systems. Once the food starts flying off the grill, this little box here has everything we need to eat on and with and not leave any waste behind. And we're going to be putting this and a few other cool things on our Decked Cargo Glide system because this truck is built to bring the party everywhere. So we've got to make sure that everything is secure before we hit the trail. And in order to get everything secured down, we're going to be using these D-rings that came with the Cargo Glide from Decked. And it's the same specialty nut that we used to secure our grill bracket on the front. [ ratchet clicking ] [ Music ] [ Eric ] Now we get this dropped on the slide. In order to make sure that this stuff is actually secure, we're going to be using this Dometic tie down kit. Now this is a complete kit that comes with its' own D-rings that you can mount just about anywhere. But since we're using the D-rings on the slide outs, we're going save those in case we need them anywhere else. [ Music ]
[ Music ]
[ Eric ] Next up, we've got this CFX3 powered cooler from Dometic. And really for the size of it it's pretty light. And yeah, you heard me right, I said powered. So no matter what, you're going to be able to keep all of your food, drinks and else you might not be able to fit in the fridge, in here and it will stay cool no matter what. This powered cooler is a 12 volt portable fridge that reach temperatures as low as negative 7 degrees Fahrenheit, all while using less juice that a 60 watt light bulb. It even has its' own app where you can monitor and control the coolers' temperature from the palm of your hand. For this, we're going to be using the same D-ring and strap setup. [ ratchet clicking ] [ Music ]
[ Music ] [ Eric ] Now these straps are a little short to cover this whole thing by themselves, but thankfully we can just bridge two of them together and work just fine. Come over here and tighten this one. All right! Well, that ain't going nowhere. Now that we've got our cooler strapped down, we've got to get some power run to it. The guys at Dometic designed this to run off of AC or DC power so we can run it through an inverter or off of a 12 volt socket. Initially we thought about running it off the same inverter as the TVs and the soundbar, but to save a plug, we figured that we're going to utilize the DC feature for this instead. Now Dometic does offer a 2 port, 12 volt powered socket that you can mount just about anywhere and you can hardwire it into a battery, through a switch or however you want to do it. But that still keeps it leashed to the bed of the truck. So we're not going to be running this for this application. Now the third option that we thought of and the one that we're going to be using, is to utilize a Dakota Lithium Powerbox. We've got the Powerbox 10 here and believe it or not, this little ammo can will power that cooler and plenty other things. There's a Dakota lithium battery inside. It's all internal. Switch controlled. You've got your 12 volt socket right there and that's what we would be using to run that cooler. But then we thought, that probably won't last for an entire weekend of partying. So, we're going to save that for some of the smaller stuff and utilize the Dakota Lithium Powerbox 60 to run the cooler. And utilizing the Powerbox gives a few advantages. Biggest being that we can carry that and the cooler anywhere around our campsite and have everything stay nice and cold. So we're just gonna add in a couple more D-rings, get that strapped down and call this done. Coming up, sun's out fun's out! We step up our outdoor kitchen and get this truck ready to catch some rays.
[ Mike ] Now that we've got the refrigerator installed, we the batteries installed, and we showed you the solar charger module inside, well this is the other part to it. These are the actual solar panels themselves. We've got them laid out on the roof here. This system will help maintain our batteries as we're going about our day. This system will help provide additional charge. This is from Dakota Lithium. This is their Solar 180. So it's a 180 watt system. Now this is not a permanent install. This has flexibility to where you can move it wherever you need for your application. Whether it's the roof, the bed like we have it here. If you find that this one system is not enough power you can actually add a second set of solar panels as well. They can tie in together with that same charger. Now all that we have to do with this is fold it back up and you can safely store it inside the vehicle as you go down the road. We're ready to go. One of the last pieces for our Nissan Project Trailgater are these step bars. Now these step bars are gonna provide easier access to get into the truck but also they're rugged enough to provide protection along our rocker panel there. So let me show you how easy these are to install. Now it's time to go under. [ Music ]
There's already studs installed on the rockers. So these brackets merely go on the stud. Apply a couple of nuts, tighten them down, and then we can move on to the bar. Literally all I have to install this is a ratchet with a 12 millimeter socket. That's how easy these are. [ ratchet clicking ] [ Music ]
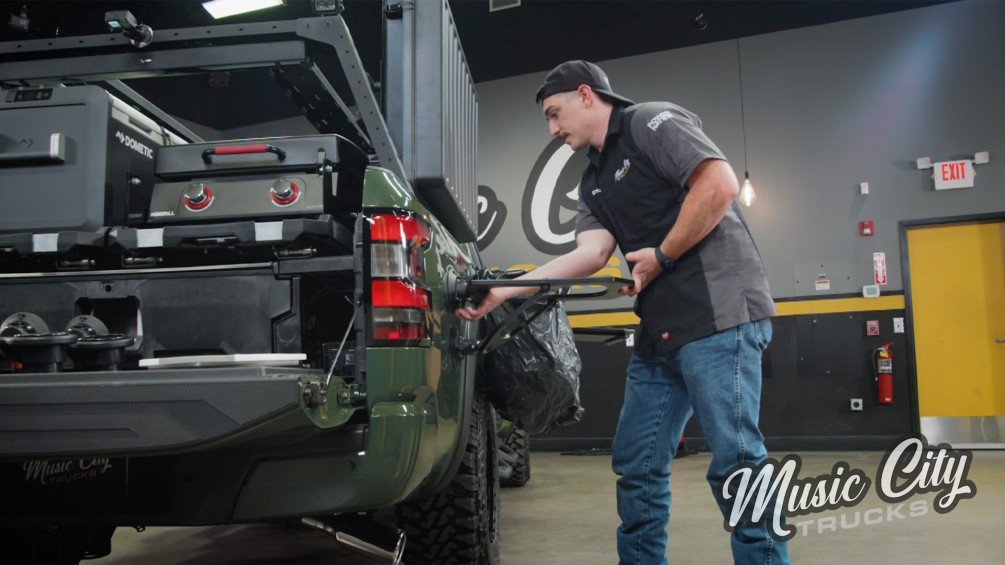
[ Music ] [ ratchet clicking ] [ Mike ] I think what we'll do here is we'll leave all these loose. Then get our step put on and then we can tighten them back up. [ Music ] One more bracket here. All these parts and pieces, hardware, brackets, step all provided in the Nissan kit. Everything you need to get this project whipped out. Final piece is the step bar. [ Music ] Before I tighten it down let's just take a step back and make sure everything looks level, looks square, and then we'll tighten it up and be ready to go. [ Eric ] With the power system finished up, storage figured out, the t-v's, grill, and everything else installed Project Trailgater is almost ready to take on its first adventure. Before we do that we've got a few more things we want to throw in just to make sure we've got everything we're gonna need to have a successful party. You're probably wondering exactly what all of this is, and I thought the same thing when I first found it. Essentially what this system is is a bunch of accessories that you can attach to the side of a truck, or a car, or a boat, or anything else with a smooth flat surface using suction cups. One reason we decided to use these instead of some of the other options that are out there is for ease of setup and teardown. Another thing we ordered with this setup is this trash bag holder. One thing we want to make sure we're doing is leaving no trace anywhere that we bring this truck. [ Music ] [ trash bag crackling ] [ Music ]
[ Music ] [ Eric ] What I'm putting on now is actually our sink. I know it probably just looks like a table with a big ole hole in the middle but give me a second and I'll show you what I mean. With that popped in there this actually has a drain that you can pop in and out. So it does work like a regular sink. You can wash your vegetables, dishes, anything else you need to do. Last thing I'm gonna attach over on this side is gonna be this paper towel holder. [ Music ] As you can see now that we've got all this stuff set up it's pretty much an entire kitchenette going from the fridge in the back seat to your table with the extension, your trash bag and paper towel holders, and your sink. One of the best things about this stuff being attached with suction cups is it makes setup and teardown super easy. Teardown's what I'm gonna work on right now. Get all this stuff and a few other goodies loaded up into our Decked system, and then we're finally ready to get this thing out on the road. [ Music ] [ Mike ] Up next, we finally reach the endzone and now it's time to celebrate.
[ Eric ] Today is finally the day that we've got Project Trailgater out here in the beautiful woods of southern middle Tennessee where we are gonna put all of these gadgets to the test. [ Mike ] We couldn't have picked a better day to test out this Nissan Frontier to see if it is the actual ultimate tailgater. [ Music ] [ Eric ] Gotta make sure we don't leave anything behind. [ Mike ] Get our table setup over here right about the middle, perfect! Check this one out. We've got a little lock down here. That's always good. Setting up the campsite. Presto extendo! [ Eric ] Ready to set your firepit up over there. That's a pretty nice firepit from Frontrunner. That's a nice table too. See how this goes together. We're two relatively smart dudes. I think we can figure this out. [ Music ]
I think it's something like that. There we go, oh yeah. [ Mike ] We'll go with that. [ Music ] Get this thing down out of here. These cargo glides make this kind of stuff way easier. Grilling time! There we go! Slide her right on down there. It's a lot easier to set up on soft ground. You can use different angles. [ Music ]
Let this guy warm up for a minute. Get this Starlink out so we can have the inter-web. This thing's pretty cool. It's all about the base. [ Music ] [ beep ] [ Eric ] Oh yeah. [ Mike ] These cases were designed to protect the t-v's as they were going down the road. Let's see how the fared. Hey it's still there, perfect. We even added some extra foam here on the corners to protect that from bouncing up and down the road or the trails. [ Eric ] I think we're just about ready to start cooking. You want to get the table set and get that t-v going? [ Mike ] Hurry up with them hot dogs. I'm getting hungry. [ Eric ] I'm going, I'm going! [ Mike ] Burgers, hot dogs, and the old buns there. Good to go! Kill it! I want mine done. [ Eric ] Not even a little bit of pink? [ Mike ] It can't be mooing. Throw some dogs on here. [ Eric ] Dogs are good. Oh yeah, get them in that burger grease. [ Mike ] A little extra kick to them. [ Eric ] Sit down for a minute. [ Mike ] I'll tell you what, it's time to rest with all that work on that truck. We've done so much. From the custom wrap, the Nismo lights, the roof rack, the bed rack, all that turned out really well. [ Eric ] Off course everything else too. We've got the grill, the fridge, all the Decked stuff in the bed that made it possible to do all this. [ Mike ] You did a great job on that grill. Speaking of that grill these burgers turned out good. Time to dig in. [ Eric ] Usually the fruits of our labor aren't quite this tasty.
Show Full Transcript
[ Eric ] It's the fourth quarter, the bottom of the ninth, and the last few minutes of the third period for this 2025 Nissan Frontier that we've dubbed Project Trailgater. [ Joel ] We've got a few more things we need to wrap up before we get this thing across the goal line, spike the football, celebrate our victory. All that and more today on Music City Trucks. [ Music ] [ Joel ] Nothing cooler than an old pickup, am I right? [ Music ] [ Eric ] Underneath all this dirt there's probably a pretty good truck. [ Joel ] Today we're putting the finishing touches on project trailgater and since I'm on injured reserve, we've got our buddy Mike, who's going to be subbing in, to get us across the goal line. And if you haven't been paying attention to this project so far, check out the highlights. [ Joel ] When our 2025 Nissan Frontier first came into the shop, it was bone stock, but it had all of the top of the line goodies that you would expect out of the Pro-4X package. Sporting a 310 horsepower V6, deluxe interior, off road shock absorbers, skid plates and tactical green metallic paint, this thing was already a looker. But as you know, we just can't leave well enough alone around here. We upgraded its' stance with a new leveling kit, increased its' growl with a new exhaust and threw in a few exterior goodies with a roof and bed rack. We also added some extra glow with some spot and a-pillar lights, so that we could brighten up the party a little bit. [ Eric ] Moment of truth. See if this side is any sturdier. Push it in a little more. [ Joel ] Just when you thought we were done, we added not one but two outdoor weatherproof TVs on each side of the bed rack, to give it that real deal tailgating extravaganza look. [ Music ] [ Joel ] Look at that, Wow! [ Eric ] That's a lot of space in there. [ Joel ]To store all of our utensils, chairs and anything else we may need in the stadium parking lot or out on the trail, we added a Decked Drawer cargo glide system, complimented with a one off Eric Smart 5000 barbeque grill mount, patent pending. [ Mike ] It's easy to dream up a project with tons of gadgets. But to make that happen, you're going to run into some roadblocks. And we've teamed up with Dakota Lithium here, to provide the answers to those questions, to make all of these components work smoothly together. So let's look at what we have here to make it all work. We're going to install 3 of these Dakota Lithium batteries into our truck, that way that gives us enough power all day long to do things like watch the tv. We've got a refrigerator. We've got sound bars. We've got coolers. Now, these batteries, they don't last forever. They're going to lose charge. Because of that, we're going to have different ways to charge these batteries. First one here is our DC to DC charger. This particular unit will allow us to run the gas engine and the alternator on the truck, when it's running, say we're traveling to a sight or what not. It's going to be charging our battery system there. We also have another option. We've got solar panels. The solar panels connect to this little dashboard right here, that takes that energy, converts it to charge our battery system. But we need to convert it to A/C for our TVs and the soundbar as well. So that's where this little inverter comes into play. We run this from one side to the battery. It allows us to plug in our TVs and other components right here, to give us power for those. This battery system is going to provide enough juice for our specific components but if there's other things that you need too for all your electrical demands, this would work as well. Enough about the details, let's burn some energy and get this stuff installed. So we've got our platform made inside the back seat here, and now we've got to put all of our batteries in. Now the batteries can float around but we've got our custom bracket that we made here. It looks kind of medieval, but this bracket here is going to hold our batteries in place. The first thing we gotta do is mark it out and square it up, get our holes drilled and then we get our batteries in and attached. Our little bracket's here, we'll go ahead and mark for our locations for our holes. Now I'll move this out for the way so we can access it and get our holes drilled. [ drill humming ] [ Music ] [ drill humming ] [ Music ] [ Mike ] Let's see if she fits. Back over. Couple of screws. [ screws clank ] [ Mike ] There we go. Got our screws in, now we'll get our batteries in. We know we've trial fitted it. We'll get our batteries in and get it set up for good. [ Music ]
We've got our battery set in, now we just got to button up our bracket. [ Music ] [ Mike ] Get some nuts on the back side of that then we're good to go. Alright, so we've got all of our components finalized. We've got it mounted up. We've got our solar charger there. That manages the power from our solar panels on the roof. The one in the middle there, that is our power box for we can hook up to our power from the house or your garage or you're converting your home AC to this and to charge the batteries when it's parked. And this blue one, once again, that's our DC to DC charger. So one side of this is hooked up to the battery underneath the hood, so when the truck is running, the alternator is charging. That power is coming back here to charge these batteries as well. So we've got all that mounted up, wired up, all of our lights, everything works. Now we're just ready for the fridge. [ Eric ] Well the battery system is looking pretty good. [ Mike ] Yep! Almost done. [ Eric ] Like a glove. [ Mike ] Can't get any closer than that. [ Eric ] Look at that! All right, well I guess now we just gotta get plugged in and strapped down right? [ Mike ] Good to go. [ Music ]
[ Mike ] Up next, strap in and chill out as we energize our Frontier with some cool upgrades.
[ Eric ] Project Trailgater is almost ready for its first adventure. But before we roll out the door, we've got a few more essentials we've need to load up here in the bed. Like this Ultimate 39 piece utensil set from Overland Vehicle Systems. Once the food starts flying off the grill, this little box here has everything we need to eat on and with and not leave any waste behind. And we're going to be putting this and a few other cool things on our Decked Cargo Glide system because this truck is built to bring the party everywhere. So we've got to make sure that everything is secure before we hit the trail. And in order to get everything secured down, we're going to be using these D-rings that came with the Cargo Glide from Decked. And it's the same specialty nut that we used to secure our grill bracket on the front. [ ratchet clicking ] [ Music ] [ Eric ] Now we get this dropped on the slide. In order to make sure that this stuff is actually secure, we're going to be using this Dometic tie down kit. Now this is a complete kit that comes with its' own D-rings that you can mount just about anywhere. But since we're using the D-rings on the slide outs, we're going save those in case we need them anywhere else. [ Music ]
[ Music ]
[ Eric ] Next up, we've got this CFX3 powered cooler from Dometic. And really for the size of it it's pretty light. And yeah, you heard me right, I said powered. So no matter what, you're going to be able to keep all of your food, drinks and else you might not be able to fit in the fridge, in here and it will stay cool no matter what. This powered cooler is a 12 volt portable fridge that reach temperatures as low as negative 7 degrees Fahrenheit, all while using less juice that a 60 watt light bulb. It even has its' own app where you can monitor and control the coolers' temperature from the palm of your hand. For this, we're going to be using the same D-ring and strap setup. [ ratchet clicking ] [ Music ]
[ Music ] [ Eric ] Now these straps are a little short to cover this whole thing by themselves, but thankfully we can just bridge two of them together and work just fine. Come over here and tighten this one. All right! Well, that ain't going nowhere. Now that we've got our cooler strapped down, we've got to get some power run to it. The guys at Dometic designed this to run off of AC or DC power so we can run it through an inverter or off of a 12 volt socket. Initially we thought about running it off the same inverter as the TVs and the soundbar, but to save a plug, we figured that we're going to utilize the DC feature for this instead. Now Dometic does offer a 2 port, 12 volt powered socket that you can mount just about anywhere and you can hardwire it into a battery, through a switch or however you want to do it. But that still keeps it leashed to the bed of the truck. So we're not going to be running this for this application. Now the third option that we thought of and the one that we're going to be using, is to utilize a Dakota Lithium Powerbox. We've got the Powerbox 10 here and believe it or not, this little ammo can will power that cooler and plenty other things. There's a Dakota lithium battery inside. It's all internal. Switch controlled. You've got your 12 volt socket right there and that's what we would be using to run that cooler. But then we thought, that probably won't last for an entire weekend of partying. So, we're going to save that for some of the smaller stuff and utilize the Dakota Lithium Powerbox 60 to run the cooler. And utilizing the Powerbox gives a few advantages. Biggest being that we can carry that and the cooler anywhere around our campsite and have everything stay nice and cold. So we're just gonna add in a couple more D-rings, get that strapped down and call this done. Coming up, sun's out fun's out! We step up our outdoor kitchen and get this truck ready to catch some rays.
[ Mike ] Now that we've got the refrigerator installed, we the batteries installed, and we showed you the solar charger module inside, well this is the other part to it. These are the actual solar panels themselves. We've got them laid out on the roof here. This system will help maintain our batteries as we're going about our day. This system will help provide additional charge. This is from Dakota Lithium. This is their Solar 180. So it's a 180 watt system. Now this is not a permanent install. This has flexibility to where you can move it wherever you need for your application. Whether it's the roof, the bed like we have it here. If you find that this one system is not enough power you can actually add a second set of solar panels as well. They can tie in together with that same charger. Now all that we have to do with this is fold it back up and you can safely store it inside the vehicle as you go down the road. We're ready to go. One of the last pieces for our Nissan Project Trailgater are these step bars. Now these step bars are gonna provide easier access to get into the truck but also they're rugged enough to provide protection along our rocker panel there. So let me show you how easy these are to install. Now it's time to go under. [ Music ]
There's already studs installed on the rockers. So these brackets merely go on the stud. Apply a couple of nuts, tighten them down, and then we can move on to the bar. Literally all I have to install this is a ratchet with a 12 millimeter socket. That's how easy these are. [ ratchet clicking ] [ Music ]
[ Music ] [ ratchet clicking ] [ Mike ] I think what we'll do here is we'll leave all these loose. Then get our step put on and then we can tighten them back up. [ Music ] One more bracket here. All these parts and pieces, hardware, brackets, step all provided in the Nissan kit. Everything you need to get this project whipped out. Final piece is the step bar. [ Music ] Before I tighten it down let's just take a step back and make sure everything looks level, looks square, and then we'll tighten it up and be ready to go. [ Eric ] With the power system finished up, storage figured out, the t-v's, grill, and everything else installed Project Trailgater is almost ready to take on its first adventure. Before we do that we've got a few more things we want to throw in just to make sure we've got everything we're gonna need to have a successful party. You're probably wondering exactly what all of this is, and I thought the same thing when I first found it. Essentially what this system is is a bunch of accessories that you can attach to the side of a truck, or a car, or a boat, or anything else with a smooth flat surface using suction cups. One reason we decided to use these instead of some of the other options that are out there is for ease of setup and teardown. Another thing we ordered with this setup is this trash bag holder. One thing we want to make sure we're doing is leaving no trace anywhere that we bring this truck. [ Music ] [ trash bag crackling ] [ Music ]
[ Music ] [ Eric ] What I'm putting on now is actually our sink. I know it probably just looks like a table with a big ole hole in the middle but give me a second and I'll show you what I mean. With that popped in there this actually has a drain that you can pop in and out. So it does work like a regular sink. You can wash your vegetables, dishes, anything else you need to do. Last thing I'm gonna attach over on this side is gonna be this paper towel holder. [ Music ] As you can see now that we've got all this stuff set up it's pretty much an entire kitchenette going from the fridge in the back seat to your table with the extension, your trash bag and paper towel holders, and your sink. One of the best things about this stuff being attached with suction cups is it makes setup and teardown super easy. Teardown's what I'm gonna work on right now. Get all this stuff and a few other goodies loaded up into our Decked system, and then we're finally ready to get this thing out on the road. [ Music ] [ Mike ] Up next, we finally reach the endzone and now it's time to celebrate.
[ Eric ] Today is finally the day that we've got Project Trailgater out here in the beautiful woods of southern middle Tennessee where we are gonna put all of these gadgets to the test. [ Mike ] We couldn't have picked a better day to test out this Nissan Frontier to see if it is the actual ultimate tailgater. [ Music ] [ Eric ] Gotta make sure we don't leave anything behind. [ Mike ] Get our table setup over here right about the middle, perfect! Check this one out. We've got a little lock down here. That's always good. Setting up the campsite. Presto extendo! [ Eric ] Ready to set your firepit up over there. That's a pretty nice firepit from Frontrunner. That's a nice table too. See how this goes together. We're two relatively smart dudes. I think we can figure this out. [ Music ]
I think it's something like that. There we go, oh yeah. [ Mike ] We'll go with that. [ Music ] Get this thing down out of here. These cargo glides make this kind of stuff way easier. Grilling time! There we go! Slide her right on down there. It's a lot easier to set up on soft ground. You can use different angles. [ Music ]
Let this guy warm up for a minute. Get this Starlink out so we can have the inter-web. This thing's pretty cool. It's all about the base. [ Music ] [ beep ] [ Eric ] Oh yeah. [ Mike ] These cases were designed to protect the t-v's as they were going down the road. Let's see how the fared. Hey it's still there, perfect. We even added some extra foam here on the corners to protect that from bouncing up and down the road or the trails. [ Eric ] I think we're just about ready to start cooking. You want to get the table set and get that t-v going? [ Mike ] Hurry up with them hot dogs. I'm getting hungry. [ Eric ] I'm going, I'm going! [ Mike ] Burgers, hot dogs, and the old buns there. Good to go! Kill it! I want mine done. [ Eric ] Not even a little bit of pink? [ Mike ] It can't be mooing. Throw some dogs on here. [ Eric ] Dogs are good. Oh yeah, get them in that burger grease. [ Mike ] A little extra kick to them. [ Eric ] Sit down for a minute. [ Mike ] I'll tell you what, it's time to rest with all that work on that truck. We've done so much. From the custom wrap, the Nismo lights, the roof rack, the bed rack, all that turned out really well. [ Eric ] Off course everything else too. We've got the grill, the fridge, all the Decked stuff in the bed that made it possible to do all this. [ Mike ] You did a great job on that grill. Speaking of that grill these burgers turned out good. Time to dig in. [ Eric ] Usually the fruits of our labor aren't quite this tasty.
