More Faux Guy K10 Square Body Truck Episodes
Music City Trucks Featured Projects
Music City Trucks Builds
Want more content like this?
Join the PowerNation Email NewsletterParts Used In This Episode
ARP
ARP Bolts
ARP
Fuel Pump Pushrod
Billet Specialties
Big Block Chevy Tru Trac System
Blast From the Past
Powdercoating & Sandblasting
Episode Transcript
(Marc)>> You're watching Powernation!
(Marc)>> Coming up next, we tear this chassis down and give it a fresh coat of paint. It's almost like we mocked all this up already. Then we give the suspension a lift and we start adding the powertrain back to this '85 square body. Finally we'll put it back on all fours with some new rubber. This is gonna be one awesome ride!
(Brandon)>> Custom little touch! [ Music ]
(Marc)>> This has got to be the most iconic design. [ Music ]
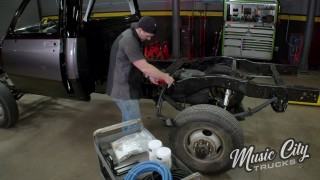
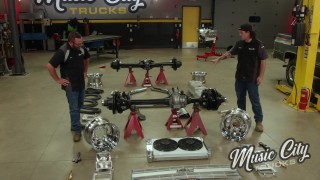
(Marc)>> It's looking good! Welcome to Music City Trucks. I'm Marc Christ and we've got a new guy here helping us out at Powernation, Michael Huxley. You're gonna be seeing more of him later on, but for now I want to focus on the project that we're working on today, and that is our square body Chevy. It's a huge day for us and this project. Our frame right here is gonna get painted, and we're gonna start final assembly on this build, and I can't wait. Now our frame, we sent it out to our friends at Blast from the Past in Lebanon, Tennessee. They worked their magic on it. Check it out! Blast from the Past has been around since 1996. They are our go-to when it comes to anything sand blasting and powder coating. We dropped off our square body chassis, and they took it down to bare metal quickly and did an amazing job. We've worked with Vance and his guys for years now. They always go above and beyond what we want or need. There's no job too big, no job too small. Well, a special thanks to the guys there at Blast from the Past. They always do an amazing job for us, as you can see. Frame looks amazing. Now typically we will just let them go ahead and powder coat something like this but being that this build is the way it is this seemed like the perfect build for us to just paint the chassis ourselves, which is what we're gonna do now. We're actually gonna be applying just a black chassis paint to this thing. Then on top of that you can see our Mobile Environmental Solutions booth all set up here. The reason we're doing that is a couple of reasons. One, Brandon's still in our paint booth spraying some of the components, some of the body panels for the Faux Guy here. So the booth is tied up and this booth is ideal for that. You just pop it up, use it when you need. Or if you run out of room like we have, or you just need something temporarily it's the perfect solution. Michael, as you can see, is back there prepping the frame. I'm getting ready to go mix up some paint to spray on, and before you know it our frame's gonna be black. The most important part of any paint job is preparation, and other than the blasting we're using Summit's Wax and Grease Remover. I recommend using gloves cause you don't want to get any oils from your skin onto the finished surface, and you want to protect your skin from the mineral spirits that's in the wax and grease remover. Well for the paint that we're gonna be using to spray our chassis it's from Summit Racing. It's Summit brand called Chassis Shield. It's a satin black chassis paint. It's actually an epoxy you mix one to one with a catalyst. You can spray it on top of a primer or direct to metal like we're gonna be doing here. You just want to make sure you get the surface prepped properly, which Michael and I have already done. So we just need to apply two coats and we're gonna have a nice, black chassis here. This paint has to be applied in two wet coats with at least 30 minutes of flash time between each coat. It can be brushed on if you prefer but spraying provides a nicer finish in our opinion. We're using an h-v-l-p, or high volume low pressure, gun with a one point six millimeter tip. Now we all know that I'm not the paint and body guru around here but this is one of those tasks that I feel comfortable attacking on my own. Well the paint's dry on our chassis now, and we've got it back in here, and it looks fantastic. Really like the way the finish looks, especially after it dried. It's got that nice satin finish, and it's super heavy duty. So, it's gonna make this chassis and this build last a really long time. Now we just need to get it bolted back to the suspension and we'll be ready to start assembling this truck. Looking good! It's almost like we mocked all this up already. And stop right there! [ metal clanging ] [ hammer banging metal ]
(Marc)>> You about ready for this thing over there?
(Michael)>> Bring it on over!
(Marc)>> Gotta go back six inches.
(Michael)>> I'm in on this side.
(Marc)>> Up or down?
(Michael)>> Go down. There we go! We're in!
(Marc)>> Let's move on, get the chassis up in the air, and get that transmission installed. I'll be glad to have this thing installed for the final time, you know?
(Michael)>> That makes two of us. [ Music ] I see the dowel on my side.
(Marc)>> Wiggle it in there. These ARP bolts already lubed up. [ Music ]
(Michael)>> Marc this is starting to look really good.
(Marc)>> Thanks, I appreciate your help. [ Music ] They got blasted and paint. Look at that. Restored bolts! [ Music ] Thanks for doing the heavy lifting.
(Michael)>> I think this is the real reason you asked me to come over here.
(Marc)>> It really is. Down on your side right there. It's in there! [ Music ] I've got a fuel system to run, brake pads and rotors to upgrade. I'll leave this with you. You finish tightening these up and I'll go get everything for the fuel system.
(Michael)>> Have at it.
(Marc)>> Up next, we take a deeper dive into the fuel system upgrade that will rock on our new 496 big block.
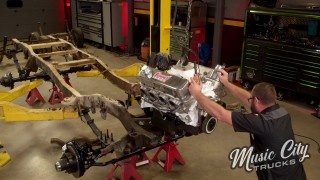
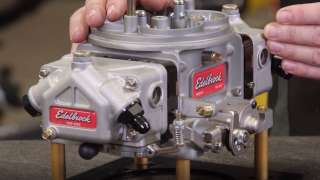
(Marc)>> Well things are coming along rather nicely with our square body Chevy here. Got the frame all painted up, nicely attached to the axles and leaves. Got the engine, transmission, transfer case back in permanently. It's starting to look like a truck now, which is really refreshing. We've got some things that we need to take care of next. I want to get the accessory drive installed. Got some pads and rotors I want to do to upgrade these Dana 60s, and the next thing's gonna be the fuel system. As you can see we've got the fuel tank already installed, and the rest of the fuel system's right over here on the table. Now a lot of times on our projects, and you can probably look back. Pretty much everything we've built here at Music City Trucks had a big electric fuel pump, e-f-i, same old thing. With this truck this was our opportunity to go old school baby. So that's what we're gonna do with everything that you see here on the table that we got from Edelbrock. First things first, fuel pump. 600 horsepower capable mechanical fuel pump. Nothing wrong with that right? Of course we got all the fittings and the hose to connect the dots that we got from Russell. And then the coup de gras, this is the cherry on top, this is gonna be Edelbrock's brand new VRS 41-50 carburetor. This isn't your pappy's Edelbrock that he had on his Chevelle I promise you. This thing, they knocked it out of the park. This is an all new carburetor. It's kinda the jack of all trades of carburetor except it does all of those things really well. Let's talk about some of the features. This four circuit small carburetor is easily tunable with adjustability on the idle circuit, intermediate circuit, and high speed circuit with two air bleeds on that high speed circuit. One for low r-p-m, and one for high r-p-m. This carb will help you achieve your engine's maximum horsepower while maintaining drivability. The air/fuel curve at wide open throttle is as flat as a pancake, and if you don't feel comfortable tuning it's ready to go right out of the box. Just drop it on and go. It even has a built-in provision for a throttle position sensor, which is gonna come in real handy because we're running that 4-L-80-E. This VRS line is gonna be available in several different sizes. Right now it's only available in 650 and 750 c-f-m versions. We chose the 750, which is gonna be plenty for a 600 horsepower big block Chevy. It'll actually handle even more than that. Now we're not gonna be installing that today for obvious reasons. We want to get the rest of the truck assembled before we do that. I don't want to damage it but I just couldn't miss this opportunity to show it off just because I think it's so cool. For now I'm gonna get this fuel pump installed, and maybe install some fuel lines. Well before we install our new fuel pump we need to install this fuel pump pushrod because Engine Power, when they built the engine, they had it blocked off. They weren't using mechanical fuel pump but because we are we've got to go with this. We got this from ARP. So it's gonna be super strong and do the job to drive that fuel pump. This is the lube they said to use. We'll get the pushrod in place. Then with a little r-t-v on the gasket we can install the fuel pump. It gets held in with two bolts... [ Music ] ...and then we can install the a-n fitting. Nice and simple. When it comes to running new fuel systems this as about as simple as it gets. This is the feed line that goes to the pump from the pick-up, and this is a returnless system. So this is the only hose that attaches to that sending unit. Just need to connect it to the pump. I know you can't see down in here cause it's so tight, but that's the feed line that goes to the pump. Now all we need to do is run the line that comes out of the pump, up through the filter to the carb, but we're not gonna do that right now because we're not installing the carb. For all intents and purposes that's pretty much it for our fuel system, thankfully. This steering box is serviceable even with the accessories in place, but it's a lot easier to access now before we install them. Man, that looks good! Next up is the final fitment for the drag link, which now fits like a glove. This was such a creative solution. Alright, well that solves our problem here with the clearance between the track bar and the leaf spring. Steering's all back together. Now I'm gonna move on and do the accessory drive, and that's next. Coming up, chrome, chrome, and more chrome. We add on our accessory drive components.
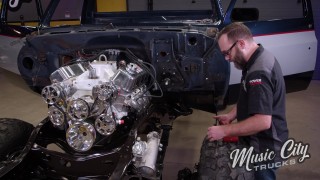
(Marc)>> Well we're plugging away on final assembly on our square body here, the Faux Guy. I went ahead and got this electric water pump out of the way. They installed that down in Engine Power to run it on the dyno. I'm sure they want that back, but we're getting ready to install our accessory drive, and we're gonna do that with all of this stuff here that you see on the table. This is one single part number from Billet Specialties. This is their big block Chevy True Track setup that's obviously polished. This kit is a really nice kit. Let's start with the alternator. You want a good alternator Powermaster's the way to go. 130 amp, polished to a shine just like everything else in this kit. The a/c compressor is a Sanden SD-7. GM style power steering pump, nice and efficient. Actually the a/c compressor comes with this nice little manifold too, and it points down to hide the hoses. It gives you a cleaner look. The water pump's an Edelbrock aluminum high flow. The main bracket here, polished billet just like most of the rest of the pulleys and brackets here. It comes with a seven rib belt, and then of course all the hardware to get it installed, which is all stainless. It even comes with several ARPs here, which I like. It matches some of our other hardware on the truck here. The first thing though to be installed is gonna be these studs right here. A little black r-t-v on these studs. One nice thing about this kit is the way the water passages are sealed. They use these O-rings, which makes installation nice and easy and prevents leaks. Put a little anti-seize on there. [ ratchet clicking ]
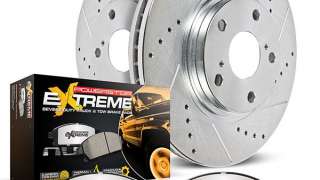
(Marc)>> And the water pump. Then we can start installing the rest of the accessories one at a time. Another great thing about this kit is that it's compact and doesn't take up a bunch of room in your engine bay. Well, that looks really nice. Now I would say it's a little too nice for this truck but actually it's not because once the rest of this truck gets assembled this is gonna fit right in cause this is gonna be a really, really nice truck. Now I do want to address the brake system next, and although I can't do the entire brake system, not without the cab in place, I do want to upgrade the pads and rotors because I want that out of the way. I want to get the wheels and tires on here cause I already got the tires mounted and balanced, and I've got to show you these. Let's start with talking about the pads and rotors that are on our Dana 60 crate axle. There's absolutely nothing wrong with these. Everything is fresh on these axles including the brakes, but it's just o-e-m style pads and rotors. They'll do the job but we want to take ours to the next level and that's what we're gonna use. This brake kit right here is the Z-36 Truck and Tow upgrade kit by Powerstop. It comes with pads and rotors. Let's talk about the rotors first. These things are drilled and slotted. That's gonna help keep the brake surface nice and cool. The slots will also help remove the gas, de-gas the pads, stuff that's created from the braking process as well as the dust. Pull that dust away from there so you have a nice, solid bite. As for the coating you can see it's a really nice zinc coating that's gonna help protect against rust and corrosion. Now as far as the pads this is a Z-36 carbon fiber ceramic brake pad. So, it's not just ceramic. They've got carbon fiber in here. It's for severe duty towing and hauling or off roading. It's a really nice brake pad that's gonna be minimal with the brake dust and still provide amazing stopping performance. The kit also comes with all this hardware here and the lubricant, but we're not gonna need that on this one because everything's still brand new. We just need to tear it down and swap these in. Pretty impressive! [ Music ] Now I'm removing the wheel speed sensors because these axles come equipped with wheel speed sensors for a-b-s from the factory, and we're definitely not running a-b-s on this truck. So instead of just snipping them and getting them out of the way now's the time I can just unbolt them and remove them, nice and clean. [ Music ] Whenever you're doing a brake job, that rotor likes to lean a little bit on these slip on style rotors. So when you're doing a brake job, you swap out the rotors, you can just put a lug nut on finger tight and that'll hole that rotor straight so you can get the caliper bracket, and the pads, and the caliper installed nice and easy. [ Music ] Alright, that's all there is to it. Again, got to do all the rest of the brake plumbing and everything, but I'll get to that later on. Next up though, wheels and tires. Next, it's time to reunite this cab with our chassis, add some wheels and tires, and I love it when a plan comes together!
(Marc)>> Well on any build we all know wheels and tires can either make it or brake it, and when you're talking about an old school build that's especially true. And then take something like this where we're doing a tribute and we have to have the exact right wheel, and that's what we've got right here that we found on Summit Racing. These are eight spoke chrome wagon wheels. Nothing screams 1980s build like these. They are 16.5 by 9.75 with eight on six and a half lug pattern for our Dana 60s here. To me it doesn't get any better than this. And then for the tire had to have a specific size, 36 x 13.50 because that's what they ran on the Fall Guy truck for the majority of the series. So, 36 x 13.5, 16.5 on chrome wagon wheels. I think that's enough said, but let's talk about the tires a little bit more. These are from Super Swamper. These are called the IROK. They look a little bit like a regular super swamper would. They've got that triple stage lug design, but with a little bit of a twist. It's really cool looking tire, and it fits this build really well. I can't wait to get these on here. I'm gonna get them bolted on and make this thing a roller. I want to roll it back and really soak it in. [ drill humming ]
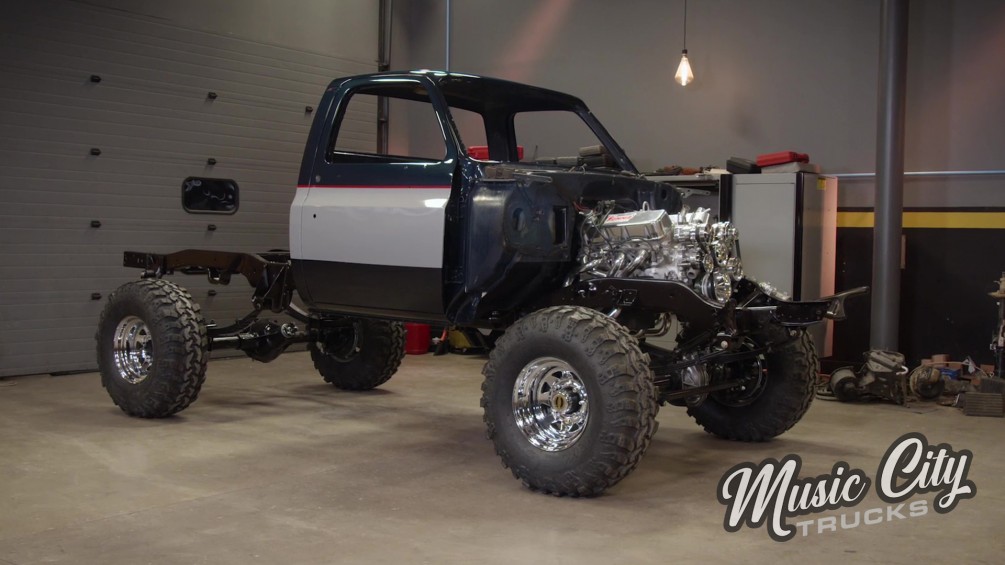
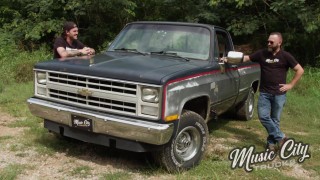
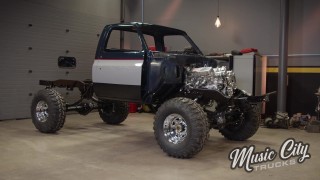
(Marc)>> Now this is not ride height because we don't have the weight of the body on here yet, but it's pretty close. I can't wait to see what this looks like when I roll it back. [ Music ] Oh yeah, let's take a look at this. Oh, come on! Yeah! I love it when a plan comes together. Wait, wrong '80s t-v show. Let's just reflect for a second on where we started and where we are now. We started out with a mud caked completely stock half ton chassis. Although impressive in its day it definitely was not up to our standards for this build. After stripping it down we blasted it and gave it a fresh coat of Summit chassis paint. The power plant is where the change really starts to happen. We started with this 305 boat anchor that gave us a whopping 160 horsepower with 235 pound feet of torque. Then we slammed in this 496 cubic inch big block Chevy that makes an impressive 596 horsepower and 629 pound feet of torque, wow! The 700-R-4 transmission was ahead of its time back in the mid-'80s but it's not up to the task of handling that nearly 600 horsepower. However, thanks to TCI Automotive we now have a new electronic 4-L-80-E transmission. Then we ditched the half ton 10-bolts for a pair of one ton Dana 60 crate axles, a six inch Skyjacker lift, and some 36-inch super swampers on a set of chrome wagon wheels. This is what we started with, and this is what we've got now. Now all this thing needs is a body and we've got ourselves a complete truck, and thankfully while I was doing all the greasy stuff Brandon was busy doing the dusty stuff.
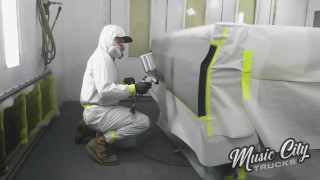
(Brandon)>> And since we started with a really nice truck we ended up not painting the firewall or the dash. Just the outside and the door jams. That way when we put this truck back together it looks fairly original, and we ended up going with some undercoating on the bottom side to protect it from rocks and rust. Now that the chassis' done and the cab's done I say we sandwich these things back together.
(Marc)>> The anticipation as they say is killing me. Now it's time to get our body mounts ready. We went ahead and upgraded to these polyurethane mounts. It's a really nice kit but it doesn't come with all of the hardware. You've got to reuse all of the sleeve, and then the washer of course. So, it just replaces the rubber bushing. This is an original one. You can really see the difference here; how nasty they were. But in order to do that I've got to press out the sleeve from this rubber. That's the hard part. There's really not a great way to do this. Just got a pair of channel locks here on the rubber part, and then I'm gonna hit it with the air hammer here. [ air hammer vibrating ]
(Marc)>> Well that's the hard part. Once that's done just blast these and paint them, and then they look like this. Now all we need to do is assemble our mount, drop it in place, down comes the body. [ drill humming ]
(Marc)>> Wow, what do you think? You're speechless?
(Brandon)>> The blue and silver. Nothing screams '80s like chrome wagon wheels baby!
(Marc)>> I hate to say it but this is Brandon's last episode on Music City Trucks. We wish him the best on his future endeavors, and maybe we'll see him down the road.
Show Full Transcript
(Marc)>> Coming up next, we tear this chassis down and give it a fresh coat of paint. It's almost like we mocked all this up already. Then we give the suspension a lift and we start adding the powertrain back to this '85 square body. Finally we'll put it back on all fours with some new rubber. This is gonna be one awesome ride!
(Brandon)>> Custom little touch! [ Music ]
(Marc)>> This has got to be the most iconic design. [ Music ]
(Marc)>> It's looking good! Welcome to Music City Trucks. I'm Marc Christ and we've got a new guy here helping us out at Powernation, Michael Huxley. You're gonna be seeing more of him later on, but for now I want to focus on the project that we're working on today, and that is our square body Chevy. It's a huge day for us and this project. Our frame right here is gonna get painted, and we're gonna start final assembly on this build, and I can't wait. Now our frame, we sent it out to our friends at Blast from the Past in Lebanon, Tennessee. They worked their magic on it. Check it out! Blast from the Past has been around since 1996. They are our go-to when it comes to anything sand blasting and powder coating. We dropped off our square body chassis, and they took it down to bare metal quickly and did an amazing job. We've worked with Vance and his guys for years now. They always go above and beyond what we want or need. There's no job too big, no job too small. Well, a special thanks to the guys there at Blast from the Past. They always do an amazing job for us, as you can see. Frame looks amazing. Now typically we will just let them go ahead and powder coat something like this but being that this build is the way it is this seemed like the perfect build for us to just paint the chassis ourselves, which is what we're gonna do now. We're actually gonna be applying just a black chassis paint to this thing. Then on top of that you can see our Mobile Environmental Solutions booth all set up here. The reason we're doing that is a couple of reasons. One, Brandon's still in our paint booth spraying some of the components, some of the body panels for the Faux Guy here. So the booth is tied up and this booth is ideal for that. You just pop it up, use it when you need. Or if you run out of room like we have, or you just need something temporarily it's the perfect solution. Michael, as you can see, is back there prepping the frame. I'm getting ready to go mix up some paint to spray on, and before you know it our frame's gonna be black. The most important part of any paint job is preparation, and other than the blasting we're using Summit's Wax and Grease Remover. I recommend using gloves cause you don't want to get any oils from your skin onto the finished surface, and you want to protect your skin from the mineral spirits that's in the wax and grease remover. Well for the paint that we're gonna be using to spray our chassis it's from Summit Racing. It's Summit brand called Chassis Shield. It's a satin black chassis paint. It's actually an epoxy you mix one to one with a catalyst. You can spray it on top of a primer or direct to metal like we're gonna be doing here. You just want to make sure you get the surface prepped properly, which Michael and I have already done. So we just need to apply two coats and we're gonna have a nice, black chassis here. This paint has to be applied in two wet coats with at least 30 minutes of flash time between each coat. It can be brushed on if you prefer but spraying provides a nicer finish in our opinion. We're using an h-v-l-p, or high volume low pressure, gun with a one point six millimeter tip. Now we all know that I'm not the paint and body guru around here but this is one of those tasks that I feel comfortable attacking on my own. Well the paint's dry on our chassis now, and we've got it back in here, and it looks fantastic. Really like the way the finish looks, especially after it dried. It's got that nice satin finish, and it's super heavy duty. So, it's gonna make this chassis and this build last a really long time. Now we just need to get it bolted back to the suspension and we'll be ready to start assembling this truck. Looking good! It's almost like we mocked all this up already. And stop right there! [ metal clanging ] [ hammer banging metal ]
(Marc)>> You about ready for this thing over there?
(Michael)>> Bring it on over!
(Marc)>> Gotta go back six inches.
(Michael)>> I'm in on this side.
(Marc)>> Up or down?
(Michael)>> Go down. There we go! We're in!
(Marc)>> Let's move on, get the chassis up in the air, and get that transmission installed. I'll be glad to have this thing installed for the final time, you know?
(Michael)>> That makes two of us. [ Music ] I see the dowel on my side.
(Marc)>> Wiggle it in there. These ARP bolts already lubed up. [ Music ]
(Michael)>> Marc this is starting to look really good.
(Marc)>> Thanks, I appreciate your help. [ Music ] They got blasted and paint. Look at that. Restored bolts! [ Music ] Thanks for doing the heavy lifting.
(Michael)>> I think this is the real reason you asked me to come over here.
(Marc)>> It really is. Down on your side right there. It's in there! [ Music ] I've got a fuel system to run, brake pads and rotors to upgrade. I'll leave this with you. You finish tightening these up and I'll go get everything for the fuel system.
(Michael)>> Have at it.
(Marc)>> Up next, we take a deeper dive into the fuel system upgrade that will rock on our new 496 big block.
(Marc)>> Well things are coming along rather nicely with our square body Chevy here. Got the frame all painted up, nicely attached to the axles and leaves. Got the engine, transmission, transfer case back in permanently. It's starting to look like a truck now, which is really refreshing. We've got some things that we need to take care of next. I want to get the accessory drive installed. Got some pads and rotors I want to do to upgrade these Dana 60s, and the next thing's gonna be the fuel system. As you can see we've got the fuel tank already installed, and the rest of the fuel system's right over here on the table. Now a lot of times on our projects, and you can probably look back. Pretty much everything we've built here at Music City Trucks had a big electric fuel pump, e-f-i, same old thing. With this truck this was our opportunity to go old school baby. So that's what we're gonna do with everything that you see here on the table that we got from Edelbrock. First things first, fuel pump. 600 horsepower capable mechanical fuel pump. Nothing wrong with that right? Of course we got all the fittings and the hose to connect the dots that we got from Russell. And then the coup de gras, this is the cherry on top, this is gonna be Edelbrock's brand new VRS 41-50 carburetor. This isn't your pappy's Edelbrock that he had on his Chevelle I promise you. This thing, they knocked it out of the park. This is an all new carburetor. It's kinda the jack of all trades of carburetor except it does all of those things really well. Let's talk about some of the features. This four circuit small carburetor is easily tunable with adjustability on the idle circuit, intermediate circuit, and high speed circuit with two air bleeds on that high speed circuit. One for low r-p-m, and one for high r-p-m. This carb will help you achieve your engine's maximum horsepower while maintaining drivability. The air/fuel curve at wide open throttle is as flat as a pancake, and if you don't feel comfortable tuning it's ready to go right out of the box. Just drop it on and go. It even has a built-in provision for a throttle position sensor, which is gonna come in real handy because we're running that 4-L-80-E. This VRS line is gonna be available in several different sizes. Right now it's only available in 650 and 750 c-f-m versions. We chose the 750, which is gonna be plenty for a 600 horsepower big block Chevy. It'll actually handle even more than that. Now we're not gonna be installing that today for obvious reasons. We want to get the rest of the truck assembled before we do that. I don't want to damage it but I just couldn't miss this opportunity to show it off just because I think it's so cool. For now I'm gonna get this fuel pump installed, and maybe install some fuel lines. Well before we install our new fuel pump we need to install this fuel pump pushrod because Engine Power, when they built the engine, they had it blocked off. They weren't using mechanical fuel pump but because we are we've got to go with this. We got this from ARP. So it's gonna be super strong and do the job to drive that fuel pump. This is the lube they said to use. We'll get the pushrod in place. Then with a little r-t-v on the gasket we can install the fuel pump. It gets held in with two bolts... [ Music ] ...and then we can install the a-n fitting. Nice and simple. When it comes to running new fuel systems this as about as simple as it gets. This is the feed line that goes to the pump from the pick-up, and this is a returnless system. So this is the only hose that attaches to that sending unit. Just need to connect it to the pump. I know you can't see down in here cause it's so tight, but that's the feed line that goes to the pump. Now all we need to do is run the line that comes out of the pump, up through the filter to the carb, but we're not gonna do that right now because we're not installing the carb. For all intents and purposes that's pretty much it for our fuel system, thankfully. This steering box is serviceable even with the accessories in place, but it's a lot easier to access now before we install them. Man, that looks good! Next up is the final fitment for the drag link, which now fits like a glove. This was such a creative solution. Alright, well that solves our problem here with the clearance between the track bar and the leaf spring. Steering's all back together. Now I'm gonna move on and do the accessory drive, and that's next. Coming up, chrome, chrome, and more chrome. We add on our accessory drive components.
(Marc)>> Well we're plugging away on final assembly on our square body here, the Faux Guy. I went ahead and got this electric water pump out of the way. They installed that down in Engine Power to run it on the dyno. I'm sure they want that back, but we're getting ready to install our accessory drive, and we're gonna do that with all of this stuff here that you see on the table. This is one single part number from Billet Specialties. This is their big block Chevy True Track setup that's obviously polished. This kit is a really nice kit. Let's start with the alternator. You want a good alternator Powermaster's the way to go. 130 amp, polished to a shine just like everything else in this kit. The a/c compressor is a Sanden SD-7. GM style power steering pump, nice and efficient. Actually the a/c compressor comes with this nice little manifold too, and it points down to hide the hoses. It gives you a cleaner look. The water pump's an Edelbrock aluminum high flow. The main bracket here, polished billet just like most of the rest of the pulleys and brackets here. It comes with a seven rib belt, and then of course all the hardware to get it installed, which is all stainless. It even comes with several ARPs here, which I like. It matches some of our other hardware on the truck here. The first thing though to be installed is gonna be these studs right here. A little black r-t-v on these studs. One nice thing about this kit is the way the water passages are sealed. They use these O-rings, which makes installation nice and easy and prevents leaks. Put a little anti-seize on there. [ ratchet clicking ]
(Marc)>> And the water pump. Then we can start installing the rest of the accessories one at a time. Another great thing about this kit is that it's compact and doesn't take up a bunch of room in your engine bay. Well, that looks really nice. Now I would say it's a little too nice for this truck but actually it's not because once the rest of this truck gets assembled this is gonna fit right in cause this is gonna be a really, really nice truck. Now I do want to address the brake system next, and although I can't do the entire brake system, not without the cab in place, I do want to upgrade the pads and rotors because I want that out of the way. I want to get the wheels and tires on here cause I already got the tires mounted and balanced, and I've got to show you these. Let's start with talking about the pads and rotors that are on our Dana 60 crate axle. There's absolutely nothing wrong with these. Everything is fresh on these axles including the brakes, but it's just o-e-m style pads and rotors. They'll do the job but we want to take ours to the next level and that's what we're gonna use. This brake kit right here is the Z-36 Truck and Tow upgrade kit by Powerstop. It comes with pads and rotors. Let's talk about the rotors first. These things are drilled and slotted. That's gonna help keep the brake surface nice and cool. The slots will also help remove the gas, de-gas the pads, stuff that's created from the braking process as well as the dust. Pull that dust away from there so you have a nice, solid bite. As for the coating you can see it's a really nice zinc coating that's gonna help protect against rust and corrosion. Now as far as the pads this is a Z-36 carbon fiber ceramic brake pad. So, it's not just ceramic. They've got carbon fiber in here. It's for severe duty towing and hauling or off roading. It's a really nice brake pad that's gonna be minimal with the brake dust and still provide amazing stopping performance. The kit also comes with all this hardware here and the lubricant, but we're not gonna need that on this one because everything's still brand new. We just need to tear it down and swap these in. Pretty impressive! [ Music ] Now I'm removing the wheel speed sensors because these axles come equipped with wheel speed sensors for a-b-s from the factory, and we're definitely not running a-b-s on this truck. So instead of just snipping them and getting them out of the way now's the time I can just unbolt them and remove them, nice and clean. [ Music ] Whenever you're doing a brake job, that rotor likes to lean a little bit on these slip on style rotors. So when you're doing a brake job, you swap out the rotors, you can just put a lug nut on finger tight and that'll hole that rotor straight so you can get the caliper bracket, and the pads, and the caliper installed nice and easy. [ Music ] Alright, that's all there is to it. Again, got to do all the rest of the brake plumbing and everything, but I'll get to that later on. Next up though, wheels and tires. Next, it's time to reunite this cab with our chassis, add some wheels and tires, and I love it when a plan comes together!
(Marc)>> Well on any build we all know wheels and tires can either make it or brake it, and when you're talking about an old school build that's especially true. And then take something like this where we're doing a tribute and we have to have the exact right wheel, and that's what we've got right here that we found on Summit Racing. These are eight spoke chrome wagon wheels. Nothing screams 1980s build like these. They are 16.5 by 9.75 with eight on six and a half lug pattern for our Dana 60s here. To me it doesn't get any better than this. And then for the tire had to have a specific size, 36 x 13.50 because that's what they ran on the Fall Guy truck for the majority of the series. So, 36 x 13.5, 16.5 on chrome wagon wheels. I think that's enough said, but let's talk about the tires a little bit more. These are from Super Swamper. These are called the IROK. They look a little bit like a regular super swamper would. They've got that triple stage lug design, but with a little bit of a twist. It's really cool looking tire, and it fits this build really well. I can't wait to get these on here. I'm gonna get them bolted on and make this thing a roller. I want to roll it back and really soak it in. [ drill humming ]
(Marc)>> Now this is not ride height because we don't have the weight of the body on here yet, but it's pretty close. I can't wait to see what this looks like when I roll it back. [ Music ] Oh yeah, let's take a look at this. Oh, come on! Yeah! I love it when a plan comes together. Wait, wrong '80s t-v show. Let's just reflect for a second on where we started and where we are now. We started out with a mud caked completely stock half ton chassis. Although impressive in its day it definitely was not up to our standards for this build. After stripping it down we blasted it and gave it a fresh coat of Summit chassis paint. The power plant is where the change really starts to happen. We started with this 305 boat anchor that gave us a whopping 160 horsepower with 235 pound feet of torque. Then we slammed in this 496 cubic inch big block Chevy that makes an impressive 596 horsepower and 629 pound feet of torque, wow! The 700-R-4 transmission was ahead of its time back in the mid-'80s but it's not up to the task of handling that nearly 600 horsepower. However, thanks to TCI Automotive we now have a new electronic 4-L-80-E transmission. Then we ditched the half ton 10-bolts for a pair of one ton Dana 60 crate axles, a six inch Skyjacker lift, and some 36-inch super swampers on a set of chrome wagon wheels. This is what we started with, and this is what we've got now. Now all this thing needs is a body and we've got ourselves a complete truck, and thankfully while I was doing all the greasy stuff Brandon was busy doing the dusty stuff.
(Brandon)>> And since we started with a really nice truck we ended up not painting the firewall or the dash. Just the outside and the door jams. That way when we put this truck back together it looks fairly original, and we ended up going with some undercoating on the bottom side to protect it from rocks and rust. Now that the chassis' done and the cab's done I say we sandwich these things back together.
(Marc)>> The anticipation as they say is killing me. Now it's time to get our body mounts ready. We went ahead and upgraded to these polyurethane mounts. It's a really nice kit but it doesn't come with all of the hardware. You've got to reuse all of the sleeve, and then the washer of course. So, it just replaces the rubber bushing. This is an original one. You can really see the difference here; how nasty they were. But in order to do that I've got to press out the sleeve from this rubber. That's the hard part. There's really not a great way to do this. Just got a pair of channel locks here on the rubber part, and then I'm gonna hit it with the air hammer here. [ air hammer vibrating ]
(Marc)>> Well that's the hard part. Once that's done just blast these and paint them, and then they look like this. Now all we need to do is assemble our mount, drop it in place, down comes the body. [ drill humming ]
(Marc)>> Wow, what do you think? You're speechless?
(Brandon)>> The blue and silver. Nothing screams '80s like chrome wagon wheels baby!
(Marc)>> I hate to say it but this is Brandon's last episode on Music City Trucks. We wish him the best on his future endeavors, and maybe we'll see him down the road.
