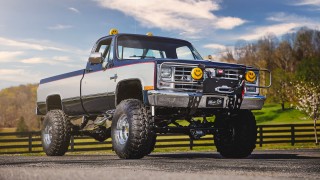
More Faux Guy K10 Square Body Truck Episodes
Music City Trucks Featured Projects
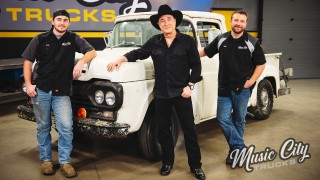
Music City Trucks Builds
Want more content like this?
Join the PowerNation Email NewsletterEpisode Transcript
(Marc)>> You're watching
Powernation!
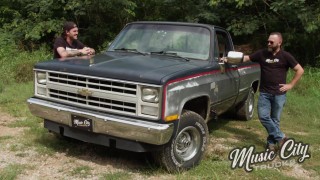
(Marc)>> Coming up next, the transformation begins on our '85 Chevy square body. We strip the body down to bare metal and give you some tips and tricks along the way. We throw down some color and put a bow on this K-10 square body. [ Music ]
(Marc)>> This has got to be the most iconic design. [ Music ]
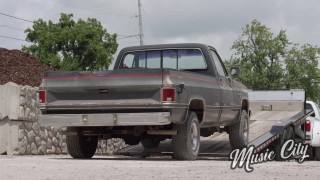
(Brandon)>> Welcome to Music City Trucks. I'm Brandon Burke, and on this episode we're gonna be diving into the body and paint on our square body Chevy project. First thing we need to do is get rid of all this dirt from when we took it out to Wooleys. [ engine humming ] [ Music ] While Marc's getting the chassis all built up and all those new parts hung I've been working on the body work. I've already got the passenger side done. Now it's time to work on the driver's side, and normally we take everything to the blaster but there's more than one way to strip paint off a vehicle. One is your tried and true aircraft paint remover, and the only real downside to this is it's messy. Then you've got your angle grinder with a wire wheel. This one actually works really well. It's just gonna give you a nice forearm workout, and you might get a little acupuncture when these wires let go. So, wear your safety glasses. My favorite is probably gonna be the mud hog. This is an eight inch pad. This is like a big d/a. It takes a lot of material off really quickly without damaging your metal, and then probably something everyone's familiar with is gonna be your normal six inch d/a. You can use 80, 180. This is mostly for not stripping paint but just getting the topcoat ready for primer, getting all your imperfections out of there. Normally you don't strip a hole car with a d/a. But let's start with the aircraft stripper and get some paint off. [ Music ] Ooh yeah! It's been a long time since I've used this stuff. Usually, it takes about 15 minutes to take the paint off. Let's see! Oh yeah! [ Music ] Let's move on to the angle grinder with the wire wheel. [ grinder buzzing ]
(Brandon)>> Wire wheel works pretty good. Mud hog time! [ d/a buzzing ]
(Brandon)>> That is why the mud hog is my favorite option. It takes a lot of material off really quick and it gives you that nice 36 grit tooth for that epoxy to stick to. Last but not least, six inch d/a. [ d/a buzzing ] [ Music ]
(Brandon)>> Now the one thing with the d/a is you really don't want to try to take pinstripes off cause it'll gum up your sandpaper. So, what you need to do is get you a rubber eraser wheel... [ drill humming ]
(Brandon)>> Get that pinstripe off where you can sand the paint underneath. So that's four ways you can strip paint off a vehicle if you're at your house or a collision shop. Most of the time they're gonna use one of these four ways. Paint remover, the paint stripper works really well, but there is still a mess, and you still have to sand it to get the primer to stick. Wire wheel works excellent, takes all the material off, but it's pretty smooth. So, you still have to braid it. The 36 grit on a Mud Hog is my personal favorite cause you've got the nice, deep scratches, and all the material's gone. So, this is pretty much ready for primer. Then you've got your d/a, which is most of the time what a collision shop's gonna use to feather edge all those imperfections out and then get it ready for top coat. [ mud hog buzzing ]
(Brandon)>> Well I call that bare metal. The only thing left to do now is wipe it down, mask it up, and throw some primer on this thing.
(Marc)>> Up next, Brandon sprays, sands, adds some filler, all to get this body ready for some color.
[ Music ]
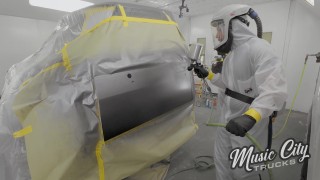
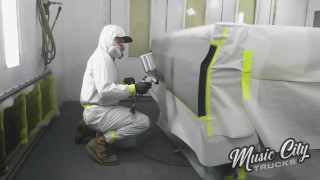
(Brandon)>> So the primer we're using is Summit Racing's Direct to Metal Epoxy Primer. It's a one to one. Always want to double check and make sure that the primer was mixed even though it was on the shaker. Body work is probably my most favorite thing ever. That's probably hard to believe. I'll show you a little trick to get the paint, or primer, out of the can without making a mess cause I'm sure anyone who's ever tried to pour paint out of one of these gallon cans gets it everywhere. Take a razor blade, and there! You made yourself a little funnel. We are going to the four on the one to one. [ Music ] And this is your catalyst. This is what's gonna activate the primer to cure up. So, we're gonna go to the four on this one. Tasty! [ spray gun hissing ] [ Music ] [ spray gun hissing ] [ paint shaker vibrating ]
(Brandon)>> The primer we're gonna be throwing on top of our epoxy is Evercoat's super build. This is a really nice primer to get a panel straight and level. It's a polyester primer, and actually this one's got the guide coat built into it. So it sprays paint and sands gray, which is kinda cool, and we also got this from Summit Racing. This stuff pours four to one. [ Music ] This primer's actually recommended to spray through at least a 2.0 tip. You could spray this through a 2.5mm tip. Just depends on how much material you want on the panel. [ spray gun hissing ] [ Music ]
(Brandon)>> It's time to start blocking down our super build, and you might notice one thing. It's not pink anymore, and that's because I spent a couple of days getting everything else in super build. So, the paint kinda flashed off. So I'm just gonna have to sand it like normal primer with some guide coat. [ Music ] The whole reason you put guide coat down is to find your highs and lows to get rid of all the orange peel. So once the orange peel's gone you're ready to do either body work, or re-prime, or whatever your next step is. So, we started this process with 36 grit on a mud hog. Now that the primer's on there we're gonna go to 80, and that's gonna shape our panel. The key is to get the biggest block on the panel that you can get. That way you get the flattest surface as possible, and you can try to get the panel flat first before you cut down your edges. Right here, this dark spot, this is actually the epoxy primer coming through. So we're gonna stop there because I don't want to burn all the way through this high build. So, this spot actually is a little too low. You might not be able to see this on camera yet, but this is why super build is great. There's 36 grit flat marks from where I took the bed liner off. [ sandpaper scratching/scraping ]
(Brandon)>> See all those low spots? Low, low, low, all through here, flat spots here. This super build is literally gonna fill in all of those, and then we're just gonna shape that panel back in. We lucked out on this truck because it was a really straight truck. So far zero body filler.
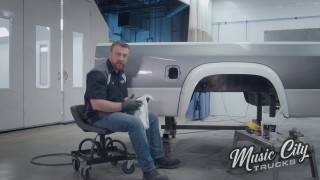
Well, the whole bed's in 80. I've got the high spot down, and all we've got left are some low spots here and here and a little bit on the bed sides, and we're gonna be fixing those with some Evercoat Rage Gold and Evercoat Metal Glaze putty that you can find on Summit Racing. So, let's get these low spots to not be low anymore. [ Music ] Oh yeah! Again, this is not gonna need much. [ Music ] That's pretty close. One thing about body filler is you really want to start sanding it or shaping it before it hardens all the way up. Don't be going to lunch after spreading body filler. Coming back and trying to sand it when it's a rock. This is an extremely thin layer. Pretty good! 80 grit's done. Pretty sure all the body work's done. So let's hit it with 180 and see how straight it is. "X" pattern always! I can't say this enough about this truck. The straightest square body I've seen in a long time, maybe ever. Well I'm gonna get the rest of this body in 180, and then I'm gonna show you guys how to make sure all the panels are straight before you lay your next round of primer.
(Marc)>> Coming up, Brandon sprays the final coat of primer. Then an in depth look into final sanding. That's gonna be interesting!
(Brandon)>> Now that the panel's all blocked down we're gonna be checking for straightness. We're gonna be using just some wax and grease remover and some rags. That way we can find any highs, lows, or even some waves in the panel if we didn't block it correctly. [ Music ] I can see the camera guy. Hey Greg! [ Music ] Oh yeah! On to our last round of primer. We're going back with another Evercoat product. This is Evercoat's Feather Fill that we also found on Summit Racing. This is another polyester primer but it's gonna be a lot thinner than the Super Build, and we got this one in buff cause I like yellow. [ Music ] [ spray gun hissing ]
(Brandon)>> You guys won't believe what the next step is. More sanding! [ sandpaper scratching ]
(Brandon)>> This step is 320 grit. This is gonna be for smoothing out all the orange peel. Not too much shaping going on. I might be the only one in the world who truly loves sanding. This is orange peel. This is what you're trying to get rid of. This is gonna make your paint look rough. Now that we've got all the orange peel cut down with 320 it's time to go on, in some cases to final sand, which is gonna be 400, but since we're going with a metallic color we've got to actually take it all the way to 600. At the end I'm gonna show a little comparison of why you'd only go to 400 for a solid color and 600 for a metallic color. [ sandpaper scratching ]
(Brandon)>> This cuts very easy now. You can see it doesn't take much effort with the 400. Time for the actual final sand, 600 wet with just a soft block. [ sandpaper scratching ]
(Brandon)>> This is the part where your fingers turn into raisins. [ spray bottle swishing ]
(Brandon)>> I know y'all at home probably can't tell the difference between these three sections. Let me try to show you. 320, looks smooth, not that smooth. 400, pretty smooth. This is good enough for most paint job. 600, that's smooth. Now let me try to show you with eyeballs. Throw a little guide coat on there. I'll have to sand this back off but. Can you see those? Fine scratches!
Hopefully you can see those. Those are a lot smaller scratches than that 600.
Almost invisible. They're still there but they're very fine. This is the point of no return. Once you get to 400 or 600 you can still fix things like pin holes, small cracks. You can spot prime and sand it back down cause you don't want to find out in the paint process that you got in a hurry or you got lazy. So take a little bit of pride, make sure all the body work is correct before you move on to the next step, which is painting. Now I just have the rest of this truck to do. I guess I've got to get to it. Man if I was nicer in school I'd probably have more people to come help me. Just a day in the life of a body guy. Late nights!
(Marc)>> Next, we lay down some color, show you an easy way to lay down some pinstripes, and we'll wrap it up with some nice shiny clear.
(Brandon)>> Well that took a lot longer than I expected but we're finally ready for paint, and the only thing we have to do is finish masking up the cab. And then we're gonna jamb it, hang the doors, and get the aligned, and then paint the rest of the truck. [ Music ] [ paper crackling ]
(Brandon)>> Time to clean everything, and then start spraying sealer. What we're doing is just making sure that we got sealer and base on all the door hinges. Anything that's gonna be really hard to get to once the door is actually on the truck. Last bolt! Let's see if I got this door all lined up. It opens, it shuts, oh yeah, I'm calling that good. [ spray gun hissing ] [ Music ] [ spray gun hissing ] [ Music ]
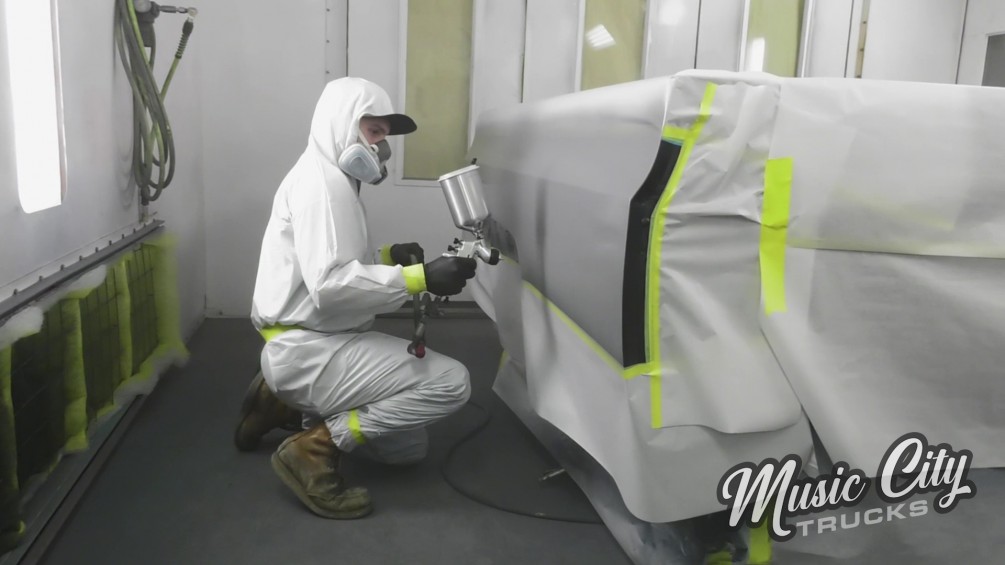
(Brandon)>> Sealer and our main color is sprayed. Now it's time to measure out for our two tone, which is gonna be the silver in the middle. Now there's more than one way to skin a cat. Some people like to do the smaller color first. I chose to do it this way. That way the whole truck had a uniform color before we actually put our silver down. Really the only thing you need is a measuring device, the pictures on the phone that we took before strip the truck down, and some tape. [ Music ] 12 inches! Don't want to pull on it too hard. Just enough. I'm good with that. This is gonna get a red pinstripe. So, I want the line to be clean. I like that. [ Music ] That looks pretty dang good. That's it! Everything's taped up. We got the overspray plastic on. It's pretty much time to spray some silver. [ spray gun hissing ] [ Music ]
(Brandon)>> We decided to go with painting our stripes on instead of the traditional stick-on stripes, and that's kinda why I went with the order of which I painted the truck in. That way the stripes are not buried in the first layer of paint. They're actually on the last layer. That way it feels like an original stripe would feel. We already got this door done. So, I'm gonna show you how to lay these stripes on the bed side. First thing you want to do is decide on the spacing of your stripe. We're gonna go with quarter inch and eighth inch. Now we're gonna use the quarter inch as our border of the silver, and what I'm gonna do here is leave a little bit of the silver showing. That way I know there's no blue. First stripe done. Now our spacing for our next stripe is gonna be eighth inch. Again, very close but not touching. And then our second stripe is gonna be eighth inch. Stack that on there as well. [ Music ] This is going to be our top border. Last layer I swear! [ Music ] Now we get to peel the inner layers out, the bottom line. I like it, I like it a lot! Now all we've got to do is finish masking up with the paper and shoot some red. [ spray gun hissing ] [ Music ] [ spray gun hissing ]
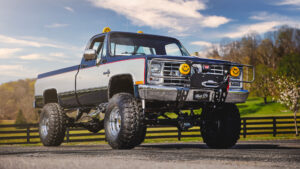
(Brandon)>> This is the point where you can actually stand back and really appreciate all the hard work you've put into your paint job. Probably have about 200 hours into this at this point, and I'm really satisfied with the way this truck turned out. Super straight, the color scheme, and I'm really glad that we decided to paint the pinstripes into the truck. It looks really good. Now that the truck's done we can go ahead and give it to Marc so he can finish up with frame. And before I go help him I actually have a few more pieces to paint.
Show Full Transcript
(Marc)>> Coming up next, the transformation begins on our '85 Chevy square body. We strip the body down to bare metal and give you some tips and tricks along the way. We throw down some color and put a bow on this K-10 square body. [ Music ]
(Marc)>> This has got to be the most iconic design. [ Music ]
(Brandon)>> Welcome to Music City Trucks. I'm Brandon Burke, and on this episode we're gonna be diving into the body and paint on our square body Chevy project. First thing we need to do is get rid of all this dirt from when we took it out to Wooleys. [ engine humming ] [ Music ] While Marc's getting the chassis all built up and all those new parts hung I've been working on the body work. I've already got the passenger side done. Now it's time to work on the driver's side, and normally we take everything to the blaster but there's more than one way to strip paint off a vehicle. One is your tried and true aircraft paint remover, and the only real downside to this is it's messy. Then you've got your angle grinder with a wire wheel. This one actually works really well. It's just gonna give you a nice forearm workout, and you might get a little acupuncture when these wires let go. So, wear your safety glasses. My favorite is probably gonna be the mud hog. This is an eight inch pad. This is like a big d/a. It takes a lot of material off really quickly without damaging your metal, and then probably something everyone's familiar with is gonna be your normal six inch d/a. You can use 80, 180. This is mostly for not stripping paint but just getting the topcoat ready for primer, getting all your imperfections out of there. Normally you don't strip a hole car with a d/a. But let's start with the aircraft stripper and get some paint off. [ Music ] Ooh yeah! It's been a long time since I've used this stuff. Usually, it takes about 15 minutes to take the paint off. Let's see! Oh yeah! [ Music ] Let's move on to the angle grinder with the wire wheel. [ grinder buzzing ]
(Brandon)>> Wire wheel works pretty good. Mud hog time! [ d/a buzzing ]
(Brandon)>> That is why the mud hog is my favorite option. It takes a lot of material off really quick and it gives you that nice 36 grit tooth for that epoxy to stick to. Last but not least, six inch d/a. [ d/a buzzing ] [ Music ]
(Brandon)>> Now the one thing with the d/a is you really don't want to try to take pinstripes off cause it'll gum up your sandpaper. So, what you need to do is get you a rubber eraser wheel... [ drill humming ]
(Brandon)>> Get that pinstripe off where you can sand the paint underneath. So that's four ways you can strip paint off a vehicle if you're at your house or a collision shop. Most of the time they're gonna use one of these four ways. Paint remover, the paint stripper works really well, but there is still a mess, and you still have to sand it to get the primer to stick. Wire wheel works excellent, takes all the material off, but it's pretty smooth. So, you still have to braid it. The 36 grit on a Mud Hog is my personal favorite cause you've got the nice, deep scratches, and all the material's gone. So, this is pretty much ready for primer. Then you've got your d/a, which is most of the time what a collision shop's gonna use to feather edge all those imperfections out and then get it ready for top coat. [ mud hog buzzing ]
(Brandon)>> Well I call that bare metal. The only thing left to do now is wipe it down, mask it up, and throw some primer on this thing.
(Marc)>> Up next, Brandon sprays, sands, adds some filler, all to get this body ready for some color.
[ Music ]
(Brandon)>> So the primer we're using is Summit Racing's Direct to Metal Epoxy Primer. It's a one to one. Always want to double check and make sure that the primer was mixed even though it was on the shaker. Body work is probably my most favorite thing ever. That's probably hard to believe. I'll show you a little trick to get the paint, or primer, out of the can without making a mess cause I'm sure anyone who's ever tried to pour paint out of one of these gallon cans gets it everywhere. Take a razor blade, and there! You made yourself a little funnel. We are going to the four on the one to one. [ Music ] And this is your catalyst. This is what's gonna activate the primer to cure up. So, we're gonna go to the four on this one. Tasty! [ spray gun hissing ] [ Music ] [ spray gun hissing ] [ paint shaker vibrating ]
(Brandon)>> The primer we're gonna be throwing on top of our epoxy is Evercoat's super build. This is a really nice primer to get a panel straight and level. It's a polyester primer, and actually this one's got the guide coat built into it. So it sprays paint and sands gray, which is kinda cool, and we also got this from Summit Racing. This stuff pours four to one. [ Music ] This primer's actually recommended to spray through at least a 2.0 tip. You could spray this through a 2.5mm tip. Just depends on how much material you want on the panel. [ spray gun hissing ] [ Music ]
(Brandon)>> It's time to start blocking down our super build, and you might notice one thing. It's not pink anymore, and that's because I spent a couple of days getting everything else in super build. So, the paint kinda flashed off. So I'm just gonna have to sand it like normal primer with some guide coat. [ Music ] The whole reason you put guide coat down is to find your highs and lows to get rid of all the orange peel. So once the orange peel's gone you're ready to do either body work, or re-prime, or whatever your next step is. So, we started this process with 36 grit on a mud hog. Now that the primer's on there we're gonna go to 80, and that's gonna shape our panel. The key is to get the biggest block on the panel that you can get. That way you get the flattest surface as possible, and you can try to get the panel flat first before you cut down your edges. Right here, this dark spot, this is actually the epoxy primer coming through. So we're gonna stop there because I don't want to burn all the way through this high build. So, this spot actually is a little too low. You might not be able to see this on camera yet, but this is why super build is great. There's 36 grit flat marks from where I took the bed liner off. [ sandpaper scratching/scraping ]
(Brandon)>> See all those low spots? Low, low, low, all through here, flat spots here. This super build is literally gonna fill in all of those, and then we're just gonna shape that panel back in. We lucked out on this truck because it was a really straight truck. So far zero body filler.
Well, the whole bed's in 80. I've got the high spot down, and all we've got left are some low spots here and here and a little bit on the bed sides, and we're gonna be fixing those with some Evercoat Rage Gold and Evercoat Metal Glaze putty that you can find on Summit Racing. So, let's get these low spots to not be low anymore. [ Music ] Oh yeah! Again, this is not gonna need much. [ Music ] That's pretty close. One thing about body filler is you really want to start sanding it or shaping it before it hardens all the way up. Don't be going to lunch after spreading body filler. Coming back and trying to sand it when it's a rock. This is an extremely thin layer. Pretty good! 80 grit's done. Pretty sure all the body work's done. So let's hit it with 180 and see how straight it is. "X" pattern always! I can't say this enough about this truck. The straightest square body I've seen in a long time, maybe ever. Well I'm gonna get the rest of this body in 180, and then I'm gonna show you guys how to make sure all the panels are straight before you lay your next round of primer.
(Marc)>> Coming up, Brandon sprays the final coat of primer. Then an in depth look into final sanding. That's gonna be interesting!
(Brandon)>> Now that the panel's all blocked down we're gonna be checking for straightness. We're gonna be using just some wax and grease remover and some rags. That way we can find any highs, lows, or even some waves in the panel if we didn't block it correctly. [ Music ] I can see the camera guy. Hey Greg! [ Music ] Oh yeah! On to our last round of primer. We're going back with another Evercoat product. This is Evercoat's Feather Fill that we also found on Summit Racing. This is another polyester primer but it's gonna be a lot thinner than the Super Build, and we got this one in buff cause I like yellow. [ Music ] [ spray gun hissing ]
(Brandon)>> You guys won't believe what the next step is. More sanding! [ sandpaper scratching ]
(Brandon)>> This step is 320 grit. This is gonna be for smoothing out all the orange peel. Not too much shaping going on. I might be the only one in the world who truly loves sanding. This is orange peel. This is what you're trying to get rid of. This is gonna make your paint look rough. Now that we've got all the orange peel cut down with 320 it's time to go on, in some cases to final sand, which is gonna be 400, but since we're going with a metallic color we've got to actually take it all the way to 600. At the end I'm gonna show a little comparison of why you'd only go to 400 for a solid color and 600 for a metallic color. [ sandpaper scratching ]
(Brandon)>> This cuts very easy now. You can see it doesn't take much effort with the 400. Time for the actual final sand, 600 wet with just a soft block. [ sandpaper scratching ]
(Brandon)>> This is the part where your fingers turn into raisins. [ spray bottle swishing ]
(Brandon)>> I know y'all at home probably can't tell the difference between these three sections. Let me try to show you. 320, looks smooth, not that smooth. 400, pretty smooth. This is good enough for most paint job. 600, that's smooth. Now let me try to show you with eyeballs. Throw a little guide coat on there. I'll have to sand this back off but. Can you see those? Fine scratches!
Hopefully you can see those. Those are a lot smaller scratches than that 600.
Almost invisible. They're still there but they're very fine. This is the point of no return. Once you get to 400 or 600 you can still fix things like pin holes, small cracks. You can spot prime and sand it back down cause you don't want to find out in the paint process that you got in a hurry or you got lazy. So take a little bit of pride, make sure all the body work is correct before you move on to the next step, which is painting. Now I just have the rest of this truck to do. I guess I've got to get to it. Man if I was nicer in school I'd probably have more people to come help me. Just a day in the life of a body guy. Late nights!
(Marc)>> Next, we lay down some color, show you an easy way to lay down some pinstripes, and we'll wrap it up with some nice shiny clear.
(Brandon)>> Well that took a lot longer than I expected but we're finally ready for paint, and the only thing we have to do is finish masking up the cab. And then we're gonna jamb it, hang the doors, and get the aligned, and then paint the rest of the truck. [ Music ] [ paper crackling ]
(Brandon)>> Time to clean everything, and then start spraying sealer. What we're doing is just making sure that we got sealer and base on all the door hinges. Anything that's gonna be really hard to get to once the door is actually on the truck. Last bolt! Let's see if I got this door all lined up. It opens, it shuts, oh yeah, I'm calling that good. [ spray gun hissing ] [ Music ] [ spray gun hissing ] [ Music ]
(Brandon)>> Sealer and our main color is sprayed. Now it's time to measure out for our two tone, which is gonna be the silver in the middle. Now there's more than one way to skin a cat. Some people like to do the smaller color first. I chose to do it this way. That way the whole truck had a uniform color before we actually put our silver down. Really the only thing you need is a measuring device, the pictures on the phone that we took before strip the truck down, and some tape. [ Music ] 12 inches! Don't want to pull on it too hard. Just enough. I'm good with that. This is gonna get a red pinstripe. So, I want the line to be clean. I like that. [ Music ] That looks pretty dang good. That's it! Everything's taped up. We got the overspray plastic on. It's pretty much time to spray some silver. [ spray gun hissing ] [ Music ]
(Brandon)>> We decided to go with painting our stripes on instead of the traditional stick-on stripes, and that's kinda why I went with the order of which I painted the truck in. That way the stripes are not buried in the first layer of paint. They're actually on the last layer. That way it feels like an original stripe would feel. We already got this door done. So, I'm gonna show you how to lay these stripes on the bed side. First thing you want to do is decide on the spacing of your stripe. We're gonna go with quarter inch and eighth inch. Now we're gonna use the quarter inch as our border of the silver, and what I'm gonna do here is leave a little bit of the silver showing. That way I know there's no blue. First stripe done. Now our spacing for our next stripe is gonna be eighth inch. Again, very close but not touching. And then our second stripe is gonna be eighth inch. Stack that on there as well. [ Music ] This is going to be our top border. Last layer I swear! [ Music ] Now we get to peel the inner layers out, the bottom line. I like it, I like it a lot! Now all we've got to do is finish masking up with the paper and shoot some red. [ spray gun hissing ] [ Music ] [ spray gun hissing ]
(Brandon)>> This is the point where you can actually stand back and really appreciate all the hard work you've put into your paint job. Probably have about 200 hours into this at this point, and I'm really satisfied with the way this truck turned out. Super straight, the color scheme, and I'm really glad that we decided to paint the pinstripes into the truck. It looks really good. Now that the truck's done we can go ahead and give it to Marc so he can finish up with frame. And before I go help him I actually have a few more pieces to paint.
