Music City Trucks Featured Projects
Music City Trucks Builds
Want more content like this?
Join the PowerNation Email NewsletterEpisode Transcript
[ Eric ] You're watching Powernation!
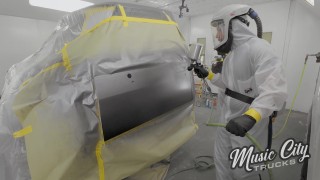
[ Joel ] Today's a very special day in the shop. We've got our Ram W-350 project completely tore apart as we start prepping it for a custom paint job that's gonna make it the envy of any truck owner out there. [ Eric ] That's right! Today's the day that Project Nightshift earns its name and its stripes as we get it one step closer to becoming the two tone one ton highway hauler it came here to be. [ Music ] [ Joel ] Nothing cooler than an old pickup am I right? [ Music ] [ Eric ] Underneath all this dirt there's probably a pretty good truck. [ Joel ] If you guys have never seen the inside of a Dodge W-350 take a good look at this thing. When it comes to the ideal paint project candidate this fits that to a "T". This old Ram has almost no corrosion. The cab corners, rocker panels, floors are all completely solid. That means less time welding on some sheet metal and doing any patch panels, and more time laying down some super cool color. [ Eric ] As far as paint jobs go this is about as close as possible to a scuff and shoot job, which is gonna make that much easier to execute our plan of attack. The first step in that plan is gonna be to buzz down this cab with some 180-grit sandpaper and a couple of d/a's. Once we get done sanding on this cab we're gonna roll it out, rinse, and repeat with the rest of our body panels. [ Joel ] Well buddy there's no point in delaying the inevitable anymore. [ Joel ] Now we want this truck to have a clean sinister look. So we're shaving off all the trim molding. Everything on this truck was pretty much stick on except for this back piece that has a couple of mounting holes that we need to fill. [ grinder humming ] [ Music ] [ grinder humming ] [ Joel ] Well I was hoping we could get lucky and just fill these in with the welder but looks like these holes are just gonna be a little bit too big and it's gonna generate a lot of heat. So I'm gonna go ahead and grab some sheet metal and we're gonna fill these in right. [ welder crackling ] [ Joel ] It's just going to take a few tacks here to lock in our sheet metal. Once that's firmly in place we can hit it with the air grinder to smooth everything down and get those plug welds flush with the panel. [ grinder buzzing ] [ Joel ] I think I'm gonna call that good. Time to move over to the driver's side. [ Music ] Be sure to control your heat with some compressed air, or just slow things down to give it time to cool off. [ sander humming ] [ Joel ] Now we're ready to buzz off the rest of this bland body paint for our Nightshift makeover. I'm just using some 180 grit to make light work of this so that when we go to spray our epoxy it has something to stick to. I hope you don't mind monotonous tasks because you're gonna be doing a whole lot of rinse and repeat until this surface is shaved down. [ sander humming ] [ Music ] [ Joel ] Alright, we got our old Ram buzzed down, masked off, ready for some primer. First thing we're gonna lay down is a black epoxy, and I'm a big proponent of this stuff because it's tough, it's sturdy, seals out moisture and eliminates any chance of this old paint lifting in the future. [ spray gun hissing ] [ Music ] [ Joel ] This epoxy primer uses a one-to-one ratio, meaning it's half primer and half activator. Overall it lays out pretty smooth but you can up the reducer by 10 percent if you're trying to stretch your primer spraying a big behemoth like we are. You have the option to do two light coats or one heavy coat for this step. If you're new to this stuff you may try hitting it with a couple of light coats to get accustomed to working with it. You always want to make sure this stuff is fully cured before you move on. Typically that could take anywhere from a few minutes to several hours depending on your project and your paint environment. [ Music ]
With our epoxy flashed off Eric's in there applying polyester primer, or what a lot of you may know as a high build primer. This stuff works like a spray foam insulation at your house. As it cures it expands, and it works really great at filling in any 80 grit sand scratches that might occur during body and filler work. Unlike our epoxy primer this stuff mixes at a four to one ratio. It's also super thick. So a 2.5 or 2.8 millimeter tip on your paint gun is gonna be your best friend. Even though it is very thick if you apply it too lightly it can harden up on you like concrete and become very difficult to sand. Take your time with this stuff to make sure it won't cost you more labor later. Coming up, it's bed time at Music City Trucks as we fix some fiberglass flaws in our Dodge dually.
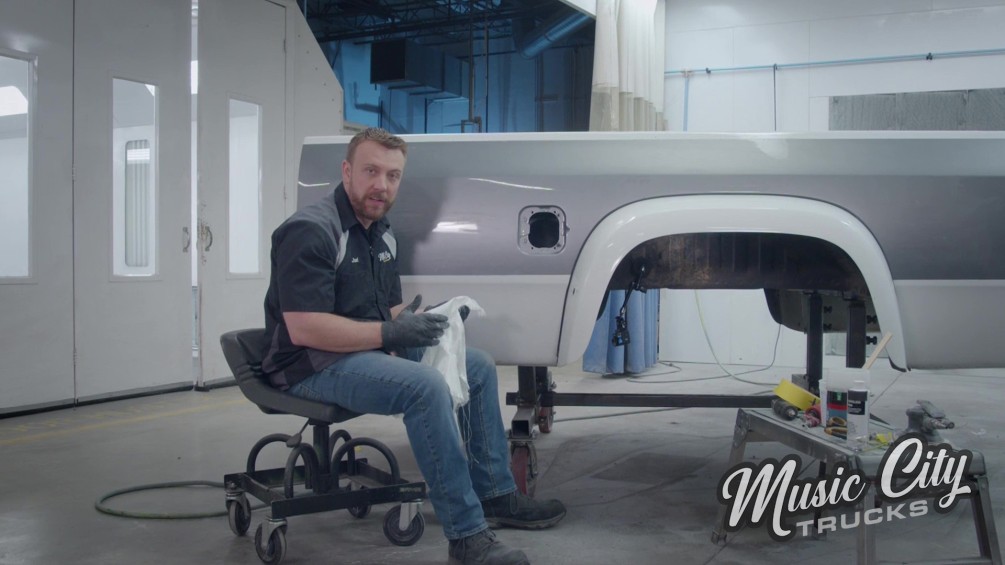
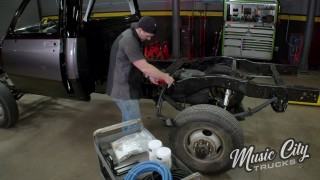
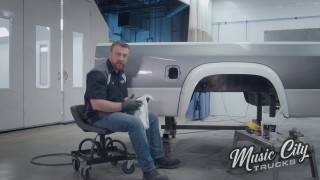
[ Joel ] With our truck cab at a good stopping point we're gonna focus our attention towards the bed. Much like the cab this thing's in pretty good shape. However we do have a little bit of damage on our driver's side bed flare here. What a lot of you guys at home like to do is just swap these out for a junkyard one because these are made out of fiberglass and doing a repair like that can be a bit of a daunting task, or is it? Basically what I've done here is ground out the center of the crack to relieve the stress. What that's gonna do is shift both edges from sitting on top of each other to nice and even. Now our next step is to build our patch. Most fiberglass repair kits are gonna come with this woven cloth that's gonna be used as your primary foundation for your patch. Basically you just lay it over your work area, guestimate how much you need, and just cut it to size. Some guys like to just use this for the backing on their patch but this one's pretty deep. So I think it's gonna be good if we do both sides. That also means we've got to do one side at a time. With our patches made it's time to mix up some resin. Now the ratio on this is roughly for every ounce of resin you need about ten drops of hardener. About two ounces right there. So that means we need 20 drops of hardener. Hopefully I don't lose count. Two, three, four, five, six, sixteen, seventeen, nineteen, and twenty. [ Music ] This stuff doesn't harden super fast but you still need to be aware of your time slots because you need to get your patch on as soon as possible so that it sticks nice and evenly like so. You really want that resin to seep into your cloth. Once it's stuck on there we can do both sides. Feel free to go a little crazy on this step because you can't really oversaturate it. If anything it's only gonna help it. If you can try and do this in a well ventilated area or even outside. This stuff can get kinda nasty. That looks pretty good right there. We'll let that sit for about 20, 30 minutes. Looks like our resin is completely cured. So I'm gonna cut this down with some 80 grit. The light is green, the trap is clean! Now you're probably watching this and saying Joel, why are you working in such awkward positions? Can't you just pull this off and set it on a panel stand and work with it that way? Well we need to keep the fenders bolted in on the truck so that they maintain their shape. If you pull them off and attempt to repair it could warp them and distort them and cause a whole mess and can of worms that you don't want to get into. [ grinder humming ] [ Joel ] Now the next thing we're gonna be applying is what a lot of you refer to as kitty hair, which is basically a fiberglass filler. Now this stuff is a lot sturdier and more rigid than your standard body filler because it has almost no flexibility but it is a key part of the process because it's gonna maintain the structural integrity on your fiberglass. Now there's no mathematical equation to exactly how much hardener you need. You just need to make sure that you start with a dime size amount and realize that the more hardener you put in it the faster it's gonna set up. I like to use the figure eight technique where I'll swipe, do a figure eight, swipe until she's good and mixed. It's kinda hard to tell with this stuff because it really won't change color all that much. Gotta just kinda use your best judgement. So far this process has never failed me. Knock on wood. I'm gonna start with a light coat. I'm pushing it in as far as I can go. That way it's filling all the pores of that fiberglass cloth in there. Then once it's got a good foundation under it I can pile it in there. Can't forget our back side. Our next step is to slap on some body filler. This is gonna fill any pores or any imperfections that we might have missed with the kitty hair. This is also gonna keep that kitty hair from shrinking back after we lay down some primer and eventually our base coat. Once it's dry you're good to knock it down with some 80 grit, and you can come back and smooth back over with some 180 grit. Then you're ready for primer. Other than needing to clean up a couple of these edges I'm gonna call that a successful repair. Now that we know that our shape is good and it's gonna stay in place we can take this bed flare off and start sanding the rest of this thing down. Where's Eric? [ Eric ] Before we actually get started on any of the work we're gonna do we've got to get this chassis all cleaned up and ready to go to have that body dropped back on it. So it's montage time! [ '80s upbeat music ] [ power washer humming ] [ Eric ] Instead of thrilling you with tips and tricks on how to spray water to clean off dirt I thought I'd hit you with some truck trivia about our Dodge. In 1993 Dodge produced close to 50 thousand diesel equipped trucks, and on December 12th, 1991, Dodge rolled their 100 thousandth Cummins Ram off the assembly line. Our Dodge has a Cummins in it but they didn't only make truck engines. Cummins made engines for all kinds of vehicles, and each one had their own CPL based on what they were going in. CPL stands for Control Parts List, and that CPL will show you every part in your engine. You can find it on your engine i-d tag on the driver's side just in front of the injection pump on the side of the timing case. Our Cummins CPL is 1-5-7-9, but in 1991 all Cummins CPLs had to be updated to reflect changes to the engine to meet EPA emissions standards. Our Cummins has that updated CPL tag since this Dodge is a '93. Up next, we frame up the perfect rear axle so we can achieve the ideal balance between power and performance.
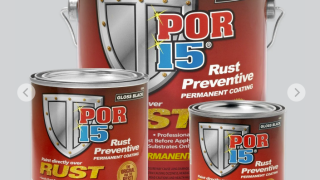
[ Eric ] Now that we've got this frame all cleaned up and ready to go it's time to get some POR-15 rust preventative coating put on here not just for looks but also for protection. [ Music ] That's good stuff right there. All the nooks and crannies. [ Music ] This is where it helps to be just a little amphibious so you can use your other hand.
Ribbit! This POR-15 is gonna make our frame look good next to our custom paint job and it's gonna prevent it from rusting over once we get it back out on the road. [ Music ]
I'm almost done getting this POR applied on the frame, and once I get finished up with this we're gonna let it sit and dry for a while before we put it up on the lift to get the bottom side of the frame rails and the crossmembers. While we're waiting for that let's talk gear ratios. Your ring and pinion gear ratio is a crucial decision with any project, but how do you make sure you get the right setup without spending a ton of time and money on trial and error. In our case with Project Nightshift we want it to be a good all around truck so that we can go highway cruising, long hauling, or have a little bit of fun off road. What that means for us is we need a gear that's gonna be good and torquey in the low end but not strung out when we're at highway speeds. Before we start calculating there's a few numbers that we need to know or at least be able to estimate. Your vehicle speed, engine speed, tire size, transmission gear ratio, and your ring and pinion gear ratio are all related. Now if you know four out of those five values you can use those to calculate for the unknown fifth. Now let's just start with vehicle speed. You're gonna take your engine speed and multiply that by your tire size, and you're gonna take your transmission final drive ratio, multiply that by your ring and pinion ratio, multiply that by 336. Once you have those two valves you're gonna divide them and that's gonna give you your vehicle speed at that r-p-m with that tire size, that final drive ratio, and that ring and pinion gear. Since we're trying to keep the r-p-ms down on the highway that's what we're gonna calculate for first. We're gonna plug in 70 miles an hour cause that's the standard speed on most interstates. Now tire size this truck had 235/85 16s from the factory, which is roughly a 31.7-inch tire. Now the transmission ratio, the final drive in the factory transmission, was 0.69, and our final number is gonna be the factory ring and pinion ratio of 3.54. We're gonna get started by getting our equation down here, solving for "R". Going for 70 as our value for vehicle speed. Multiply that by our final drive ratio of 0.69. Multiply that by our ring and pinion ratio of 3.54. Multiply that by 336, and that is gonna get divided by our tire size of 31.7, but if you want to make it even easier on yourself you can get online. Go to our website at Powernation TV and we actually have a bunch of different calculators including a gear ratio calculator so that you don't have to try and do all this math by yourself. Solving for r-p-m, gear ratio of 3.54, tire diameter 31.7, speed of 70, and a final drive ratio of 0.69, and that gives us 1,812 r-p-m. Let's plug in some numbers for an engine speed of 1,812. For tire size options let's go ahead, we're obviously going bigger with the lift kit. So we'll calculate for 33s, 35s, and 37s. The transmission we're getting has a final drive ratio of 0.62 in sixth gear. Ratios that we're gonna explore are gonna be 3.73, 4.10, and 4.56. We're trying to keep this r-p-m at 70 miles an hour or lower. Any number that's below 70 over here can immediately get cancelled out because that is not gonna work for what we're doing. If you watched this from the beginning you'll know that we already put a six inch lift kit on this truck, which means that 33s especially on a lifted one ton are gonna be a little bit small. So let's go ahead and get rid of those too. The options that we're left with are the 35s and the 37s with any gear ratio on the 37s or 3.73s or 4.10s on the 35s. If you look at the middle ground with the 4.10s we've got a good intermediate speed and that's gonna get us off the line quicker than the 3.73s. Let's go ahead and knock out 3.73s just cause that's not what we're really looking for. The 4.56s being the deepest gears we have on this list are gonna get us off the line the fastest but they're gonna cut our top end down more. So let's go ahead and knock that out right now because that number being lower means that we're gonna have even less to stretch that gear out at the top end. That leaves us with 4.10s and 35s or 37s. Considering our lift kit 37s are probably gonna be a little bit of a tight fit but we haven't settled for sure on which size we're gonna use. Either way looks like 4.10s are gonna be the way to go with gears. Our ultimate goal here was to figure out what gears we need and we've done that. So now it's time to get to work. [ Joel ] Coming up, a primer on what primer you should be using on your next project.
[ Eric ] You guys have seen us use POR-15 products here plenty of times, but what you haven't seen us use is their American Icon paint products. It is a complete paint system with everything that you need from start to finish to get your paint job done and done right. This includes your primers, your additives, base coat, and clear coat. Everything you need to get your paint job looking good. Every good paint job has to start with a good base, and that's where your primer comes in. Not all primers are created equal. This P-101 DTS primer that we got from American Icon is quite a bit different from your probably used to. Let me explain. Now when priming for paint it's not just as simple as spraying on a coat of primer and then getting your base coat on. It's actually a process that you have multiple different stages and different products that you've got to use. For your first step it's always gonna be your base layer, which is either gonna be an epoxy or a self etching primer. Now self etching primers are a little bit outdated. So we use epoxy around here. Epoxy is gonna go down as your base layer, which means it's gonna go straight onto your sub-straight, whether it's bare metal, fiberglass, or body filler. Epoxy primer is highly adherent, it creates a good moisture barrier, and you can still do body work over the top of it, which makes it perfect for going over our sub-straight. Your next step is gonna be your primer/surfacer. Now this step is used in conjunction with block sanding to get you a level surface that's gonna help you get that smooth as glass look on your final paint. What we use for this is a polyester or a high build primer. Now as the name implies, it builds up a lot so that you've got something to knock down and fill in any light scratches. Once you've got your high build sprayed it's time to start the process of repeatedly sanding and reapplying this stuff until you get that nice, smooth surface. If you need a little bit of help doing this you could always throw some guide coat on there that'll help show you the low spots, where you need to fill in, and where you need to sand down. The last step in your process is gonna be your sealer. This is what acts as a layer between the primer surface and the base coat. This is gonna prevent anything underneath from bleeding up and also prevent the base coat from being absorbed down into the primer layer. If you're looking for something that'll save a little bit of space in the cabinet and some room in the budget definitely check this out. [ Joel ] Tag, you're it. [ Eric ] Oh boy! [ Joel ] Now that everything is buzzed down, masked off, ready to go we're gonna go ahead and lay down our first layer of epoxy. This may seem like a little overkill looking like I'm about to go for a walk on the moon but if you're really going for an elite level paint job you want to make sure you're not contaminating your surface even if you are just laying down primer. Good to always wear your proper p-p-e because you don't want this stuff getting into your lungs. Also it's just good to practice these habits for when you actually lay down your paint. The less contamination the better. You'd be surprised how much stuff can just be stuck to your shirt that can disfigure your perfectly planned paint project. Even your paint suit can be hiding some horrendous hazards if you don't take care. So keep it nice and clean, stowed away, and you can even wash it with some cold water before you go in there. Taking a little time and following these simple rules you learn to achieve a nice, smooth, professional finish every time. [ Eric ] This thing's coming along great! [ Joel ] You can say that again. It sanded out super slick. I've got to be honest. By the time it's said and done this old farm truck's gonna shine like glass once we lay down that custom paint. [ Eric ] I got that chassis in there all ready to go. Got the axles re-geared. We're getting pretty close to getting this thing back on the road. [ Joel ] Between all that, custom paint, cool interior, aggressive stance, Cummins power, this is gonna be probably the baddest dually on the planet by the time it's said and done. [ Eric ] That's a pretty tall order. I don't know about the baddest on the planet, but baddest looking good possibility of that. [ Joel ] I know what I'm about son.
Show Full Transcript
[ Joel ] Today's a very special day in the shop. We've got our Ram W-350 project completely tore apart as we start prepping it for a custom paint job that's gonna make it the envy of any truck owner out there. [ Eric ] That's right! Today's the day that Project Nightshift earns its name and its stripes as we get it one step closer to becoming the two tone one ton highway hauler it came here to be. [ Music ] [ Joel ] Nothing cooler than an old pickup am I right? [ Music ] [ Eric ] Underneath all this dirt there's probably a pretty good truck. [ Joel ] If you guys have never seen the inside of a Dodge W-350 take a good look at this thing. When it comes to the ideal paint project candidate this fits that to a "T". This old Ram has almost no corrosion. The cab corners, rocker panels, floors are all completely solid. That means less time welding on some sheet metal and doing any patch panels, and more time laying down some super cool color. [ Eric ] As far as paint jobs go this is about as close as possible to a scuff and shoot job, which is gonna make that much easier to execute our plan of attack. The first step in that plan is gonna be to buzz down this cab with some 180-grit sandpaper and a couple of d/a's. Once we get done sanding on this cab we're gonna roll it out, rinse, and repeat with the rest of our body panels. [ Joel ] Well buddy there's no point in delaying the inevitable anymore. [ Joel ] Now we want this truck to have a clean sinister look. So we're shaving off all the trim molding. Everything on this truck was pretty much stick on except for this back piece that has a couple of mounting holes that we need to fill. [ grinder humming ] [ Music ] [ grinder humming ] [ Joel ] Well I was hoping we could get lucky and just fill these in with the welder but looks like these holes are just gonna be a little bit too big and it's gonna generate a lot of heat. So I'm gonna go ahead and grab some sheet metal and we're gonna fill these in right. [ welder crackling ] [ Joel ] It's just going to take a few tacks here to lock in our sheet metal. Once that's firmly in place we can hit it with the air grinder to smooth everything down and get those plug welds flush with the panel. [ grinder buzzing ] [ Joel ] I think I'm gonna call that good. Time to move over to the driver's side. [ Music ] Be sure to control your heat with some compressed air, or just slow things down to give it time to cool off. [ sander humming ] [ Joel ] Now we're ready to buzz off the rest of this bland body paint for our Nightshift makeover. I'm just using some 180 grit to make light work of this so that when we go to spray our epoxy it has something to stick to. I hope you don't mind monotonous tasks because you're gonna be doing a whole lot of rinse and repeat until this surface is shaved down. [ sander humming ] [ Music ] [ Joel ] Alright, we got our old Ram buzzed down, masked off, ready for some primer. First thing we're gonna lay down is a black epoxy, and I'm a big proponent of this stuff because it's tough, it's sturdy, seals out moisture and eliminates any chance of this old paint lifting in the future. [ spray gun hissing ] [ Music ] [ Joel ] This epoxy primer uses a one-to-one ratio, meaning it's half primer and half activator. Overall it lays out pretty smooth but you can up the reducer by 10 percent if you're trying to stretch your primer spraying a big behemoth like we are. You have the option to do two light coats or one heavy coat for this step. If you're new to this stuff you may try hitting it with a couple of light coats to get accustomed to working with it. You always want to make sure this stuff is fully cured before you move on. Typically that could take anywhere from a few minutes to several hours depending on your project and your paint environment. [ Music ]
With our epoxy flashed off Eric's in there applying polyester primer, or what a lot of you may know as a high build primer. This stuff works like a spray foam insulation at your house. As it cures it expands, and it works really great at filling in any 80 grit sand scratches that might occur during body and filler work. Unlike our epoxy primer this stuff mixes at a four to one ratio. It's also super thick. So a 2.5 or 2.8 millimeter tip on your paint gun is gonna be your best friend. Even though it is very thick if you apply it too lightly it can harden up on you like concrete and become very difficult to sand. Take your time with this stuff to make sure it won't cost you more labor later. Coming up, it's bed time at Music City Trucks as we fix some fiberglass flaws in our Dodge dually.
[ Joel ] With our truck cab at a good stopping point we're gonna focus our attention towards the bed. Much like the cab this thing's in pretty good shape. However we do have a little bit of damage on our driver's side bed flare here. What a lot of you guys at home like to do is just swap these out for a junkyard one because these are made out of fiberglass and doing a repair like that can be a bit of a daunting task, or is it? Basically what I've done here is ground out the center of the crack to relieve the stress. What that's gonna do is shift both edges from sitting on top of each other to nice and even. Now our next step is to build our patch. Most fiberglass repair kits are gonna come with this woven cloth that's gonna be used as your primary foundation for your patch. Basically you just lay it over your work area, guestimate how much you need, and just cut it to size. Some guys like to just use this for the backing on their patch but this one's pretty deep. So I think it's gonna be good if we do both sides. That also means we've got to do one side at a time. With our patches made it's time to mix up some resin. Now the ratio on this is roughly for every ounce of resin you need about ten drops of hardener. About two ounces right there. So that means we need 20 drops of hardener. Hopefully I don't lose count. Two, three, four, five, six, sixteen, seventeen, nineteen, and twenty. [ Music ] This stuff doesn't harden super fast but you still need to be aware of your time slots because you need to get your patch on as soon as possible so that it sticks nice and evenly like so. You really want that resin to seep into your cloth. Once it's stuck on there we can do both sides. Feel free to go a little crazy on this step because you can't really oversaturate it. If anything it's only gonna help it. If you can try and do this in a well ventilated area or even outside. This stuff can get kinda nasty. That looks pretty good right there. We'll let that sit for about 20, 30 minutes. Looks like our resin is completely cured. So I'm gonna cut this down with some 80 grit. The light is green, the trap is clean! Now you're probably watching this and saying Joel, why are you working in such awkward positions? Can't you just pull this off and set it on a panel stand and work with it that way? Well we need to keep the fenders bolted in on the truck so that they maintain their shape. If you pull them off and attempt to repair it could warp them and distort them and cause a whole mess and can of worms that you don't want to get into. [ grinder humming ] [ Joel ] Now the next thing we're gonna be applying is what a lot of you refer to as kitty hair, which is basically a fiberglass filler. Now this stuff is a lot sturdier and more rigid than your standard body filler because it has almost no flexibility but it is a key part of the process because it's gonna maintain the structural integrity on your fiberglass. Now there's no mathematical equation to exactly how much hardener you need. You just need to make sure that you start with a dime size amount and realize that the more hardener you put in it the faster it's gonna set up. I like to use the figure eight technique where I'll swipe, do a figure eight, swipe until she's good and mixed. It's kinda hard to tell with this stuff because it really won't change color all that much. Gotta just kinda use your best judgement. So far this process has never failed me. Knock on wood. I'm gonna start with a light coat. I'm pushing it in as far as I can go. That way it's filling all the pores of that fiberglass cloth in there. Then once it's got a good foundation under it I can pile it in there. Can't forget our back side. Our next step is to slap on some body filler. This is gonna fill any pores or any imperfections that we might have missed with the kitty hair. This is also gonna keep that kitty hair from shrinking back after we lay down some primer and eventually our base coat. Once it's dry you're good to knock it down with some 80 grit, and you can come back and smooth back over with some 180 grit. Then you're ready for primer. Other than needing to clean up a couple of these edges I'm gonna call that a successful repair. Now that we know that our shape is good and it's gonna stay in place we can take this bed flare off and start sanding the rest of this thing down. Where's Eric? [ Eric ] Before we actually get started on any of the work we're gonna do we've got to get this chassis all cleaned up and ready to go to have that body dropped back on it. So it's montage time! [ '80s upbeat music ] [ power washer humming ] [ Eric ] Instead of thrilling you with tips and tricks on how to spray water to clean off dirt I thought I'd hit you with some truck trivia about our Dodge. In 1993 Dodge produced close to 50 thousand diesel equipped trucks, and on December 12th, 1991, Dodge rolled their 100 thousandth Cummins Ram off the assembly line. Our Dodge has a Cummins in it but they didn't only make truck engines. Cummins made engines for all kinds of vehicles, and each one had their own CPL based on what they were going in. CPL stands for Control Parts List, and that CPL will show you every part in your engine. You can find it on your engine i-d tag on the driver's side just in front of the injection pump on the side of the timing case. Our Cummins CPL is 1-5-7-9, but in 1991 all Cummins CPLs had to be updated to reflect changes to the engine to meet EPA emissions standards. Our Cummins has that updated CPL tag since this Dodge is a '93. Up next, we frame up the perfect rear axle so we can achieve the ideal balance between power and performance.
[ Eric ] Now that we've got this frame all cleaned up and ready to go it's time to get some POR-15 rust preventative coating put on here not just for looks but also for protection. [ Music ] That's good stuff right there. All the nooks and crannies. [ Music ] This is where it helps to be just a little amphibious so you can use your other hand.
Ribbit! This POR-15 is gonna make our frame look good next to our custom paint job and it's gonna prevent it from rusting over once we get it back out on the road. [ Music ]
I'm almost done getting this POR applied on the frame, and once I get finished up with this we're gonna let it sit and dry for a while before we put it up on the lift to get the bottom side of the frame rails and the crossmembers. While we're waiting for that let's talk gear ratios. Your ring and pinion gear ratio is a crucial decision with any project, but how do you make sure you get the right setup without spending a ton of time and money on trial and error. In our case with Project Nightshift we want it to be a good all around truck so that we can go highway cruising, long hauling, or have a little bit of fun off road. What that means for us is we need a gear that's gonna be good and torquey in the low end but not strung out when we're at highway speeds. Before we start calculating there's a few numbers that we need to know or at least be able to estimate. Your vehicle speed, engine speed, tire size, transmission gear ratio, and your ring and pinion gear ratio are all related. Now if you know four out of those five values you can use those to calculate for the unknown fifth. Now let's just start with vehicle speed. You're gonna take your engine speed and multiply that by your tire size, and you're gonna take your transmission final drive ratio, multiply that by your ring and pinion ratio, multiply that by 336. Once you have those two valves you're gonna divide them and that's gonna give you your vehicle speed at that r-p-m with that tire size, that final drive ratio, and that ring and pinion gear. Since we're trying to keep the r-p-ms down on the highway that's what we're gonna calculate for first. We're gonna plug in 70 miles an hour cause that's the standard speed on most interstates. Now tire size this truck had 235/85 16s from the factory, which is roughly a 31.7-inch tire. Now the transmission ratio, the final drive in the factory transmission, was 0.69, and our final number is gonna be the factory ring and pinion ratio of 3.54. We're gonna get started by getting our equation down here, solving for "R". Going for 70 as our value for vehicle speed. Multiply that by our final drive ratio of 0.69. Multiply that by our ring and pinion ratio of 3.54. Multiply that by 336, and that is gonna get divided by our tire size of 31.7, but if you want to make it even easier on yourself you can get online. Go to our website at Powernation TV and we actually have a bunch of different calculators including a gear ratio calculator so that you don't have to try and do all this math by yourself. Solving for r-p-m, gear ratio of 3.54, tire diameter 31.7, speed of 70, and a final drive ratio of 0.69, and that gives us 1,812 r-p-m. Let's plug in some numbers for an engine speed of 1,812. For tire size options let's go ahead, we're obviously going bigger with the lift kit. So we'll calculate for 33s, 35s, and 37s. The transmission we're getting has a final drive ratio of 0.62 in sixth gear. Ratios that we're gonna explore are gonna be 3.73, 4.10, and 4.56. We're trying to keep this r-p-m at 70 miles an hour or lower. Any number that's below 70 over here can immediately get cancelled out because that is not gonna work for what we're doing. If you watched this from the beginning you'll know that we already put a six inch lift kit on this truck, which means that 33s especially on a lifted one ton are gonna be a little bit small. So let's go ahead and get rid of those too. The options that we're left with are the 35s and the 37s with any gear ratio on the 37s or 3.73s or 4.10s on the 35s. If you look at the middle ground with the 4.10s we've got a good intermediate speed and that's gonna get us off the line quicker than the 3.73s. Let's go ahead and knock out 3.73s just cause that's not what we're really looking for. The 4.56s being the deepest gears we have on this list are gonna get us off the line the fastest but they're gonna cut our top end down more. So let's go ahead and knock that out right now because that number being lower means that we're gonna have even less to stretch that gear out at the top end. That leaves us with 4.10s and 35s or 37s. Considering our lift kit 37s are probably gonna be a little bit of a tight fit but we haven't settled for sure on which size we're gonna use. Either way looks like 4.10s are gonna be the way to go with gears. Our ultimate goal here was to figure out what gears we need and we've done that. So now it's time to get to work. [ Joel ] Coming up, a primer on what primer you should be using on your next project.
[ Eric ] You guys have seen us use POR-15 products here plenty of times, but what you haven't seen us use is their American Icon paint products. It is a complete paint system with everything that you need from start to finish to get your paint job done and done right. This includes your primers, your additives, base coat, and clear coat. Everything you need to get your paint job looking good. Every good paint job has to start with a good base, and that's where your primer comes in. Not all primers are created equal. This P-101 DTS primer that we got from American Icon is quite a bit different from your probably used to. Let me explain. Now when priming for paint it's not just as simple as spraying on a coat of primer and then getting your base coat on. It's actually a process that you have multiple different stages and different products that you've got to use. For your first step it's always gonna be your base layer, which is either gonna be an epoxy or a self etching primer. Now self etching primers are a little bit outdated. So we use epoxy around here. Epoxy is gonna go down as your base layer, which means it's gonna go straight onto your sub-straight, whether it's bare metal, fiberglass, or body filler. Epoxy primer is highly adherent, it creates a good moisture barrier, and you can still do body work over the top of it, which makes it perfect for going over our sub-straight. Your next step is gonna be your primer/surfacer. Now this step is used in conjunction with block sanding to get you a level surface that's gonna help you get that smooth as glass look on your final paint. What we use for this is a polyester or a high build primer. Now as the name implies, it builds up a lot so that you've got something to knock down and fill in any light scratches. Once you've got your high build sprayed it's time to start the process of repeatedly sanding and reapplying this stuff until you get that nice, smooth surface. If you need a little bit of help doing this you could always throw some guide coat on there that'll help show you the low spots, where you need to fill in, and where you need to sand down. The last step in your process is gonna be your sealer. This is what acts as a layer between the primer surface and the base coat. This is gonna prevent anything underneath from bleeding up and also prevent the base coat from being absorbed down into the primer layer. If you're looking for something that'll save a little bit of space in the cabinet and some room in the budget definitely check this out. [ Joel ] Tag, you're it. [ Eric ] Oh boy! [ Joel ] Now that everything is buzzed down, masked off, ready to go we're gonna go ahead and lay down our first layer of epoxy. This may seem like a little overkill looking like I'm about to go for a walk on the moon but if you're really going for an elite level paint job you want to make sure you're not contaminating your surface even if you are just laying down primer. Good to always wear your proper p-p-e because you don't want this stuff getting into your lungs. Also it's just good to practice these habits for when you actually lay down your paint. The less contamination the better. You'd be surprised how much stuff can just be stuck to your shirt that can disfigure your perfectly planned paint project. Even your paint suit can be hiding some horrendous hazards if you don't take care. So keep it nice and clean, stowed away, and you can even wash it with some cold water before you go in there. Taking a little time and following these simple rules you learn to achieve a nice, smooth, professional finish every time. [ Eric ] This thing's coming along great! [ Joel ] You can say that again. It sanded out super slick. I've got to be honest. By the time it's said and done this old farm truck's gonna shine like glass once we lay down that custom paint. [ Eric ] I got that chassis in there all ready to go. Got the axles re-geared. We're getting pretty close to getting this thing back on the road. [ Joel ] Between all that, custom paint, cool interior, aggressive stance, Cummins power, this is gonna be probably the baddest dually on the planet by the time it's said and done. [ Eric ] That's a pretty tall order. I don't know about the baddest on the planet, but baddest looking good possibility of that. [ Joel ] I know what I'm about son.
