More Junk Mail DJ5 Episodes
Carcass Featured Projects
Carcass Builds
Want more content like this?
Join the PowerNation Email NewsletterParts Used In This Episode
ARP
ARP Bolts
Benchmark Abrasives
Premium Cutoff Wheel
Matco Tools
MATCO Tools are the Official Tool Supplier to Carcass
The Industrial Depot
Tools, Hardware, Shop Supplies
Tom Wood's Custom Drive Shafts
Driveshafts
Episode Transcript
(Jimmy)>> You're watching Powernation!
(Jimmy)>> Today on Carcass we put the finishing touches on Junk Mail. We address the last pieces of our interior on our 1978 DJ-5.
(Jeremy)>> Plus figure out how we're gonna shift the transmission and transfer case. Then we install our brake lines and head out on the trial to see if our old postal Jeep truly can deliver the goods. [ MUSIC ] [ tires screeching ] [ MUSIC ] [ engine revving ] [ MUSIC ]
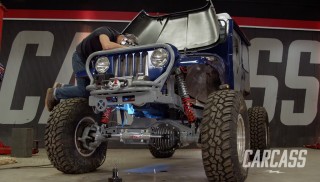
(Jeremy)>> Hey everybody, welcome to Carcass. Our Jeep that we're calling Junk Mail has made a huge transformation from the two wheel drive Jeep that originally rolled into the shop into this four wheel drive off road rig.
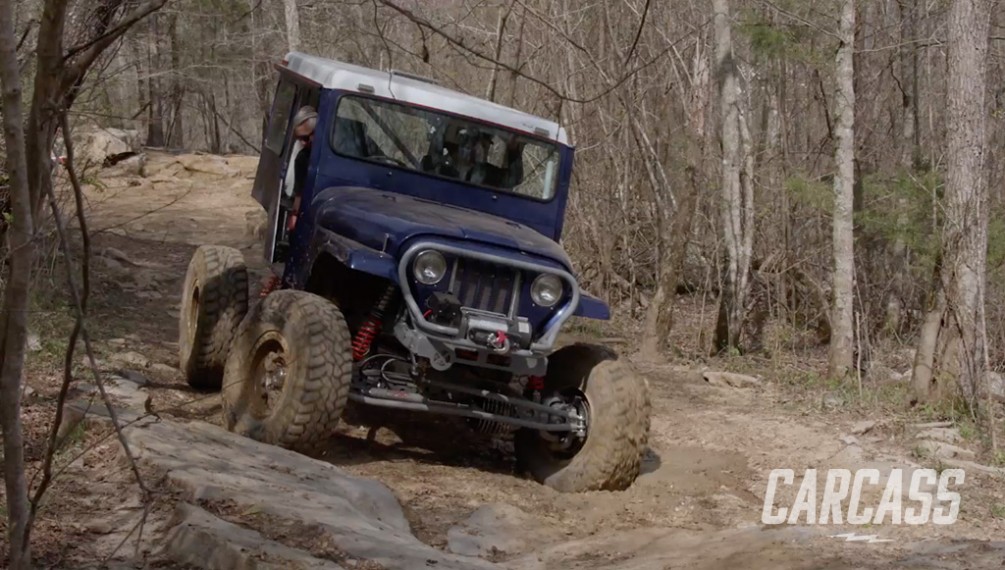
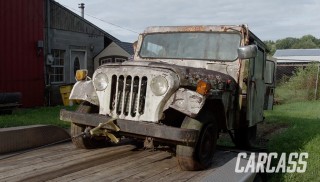
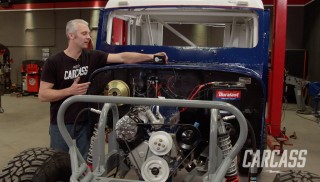
(Jimmy)>> And it all start with a 1978 postal Jeep that originally had a four cylinder engine in it, but because we bought three Jeeps we have the option of putting a six cylinder in here along with a custom four link suspension, one ton axles, coil over shocks, a roll cage for safety, and some fresh coats of paints.
(Jeremy)>> And today is the day that we get to take this thing out but we've got a couple of things that we've got to do. We've got to wrap up the brakes, install the complete interior, add some shifters. Then we're gonna throw in the driveshafts, load this thing up, and go have some fun.
(Jimmy)>> Let's start on the interior.
(Jeremy)>> Sounds good!
(Jimmy)>> For our seat situation we're gonna be pretty resourceful. We found a matching pair of seats from the other two Jeeps that we bought. So that's what we'll use. This particular seat is looking pretty weathered and we do have a way to fix that later. As far as mounting it goes it's really simple. There are still holes in the floor for the rear part of the bracket but because we replaced the floor pans we're gonna have to drill two new holes for the front part, and that's where we'll start. [ MUSIC ] I'll line up the rear brackets with the existing holes so that I can mark the front mounting holes. [ MUSIC ] Once marked I'll remove the seat and drill the holes using a Matco hyper step drill bit. [ drill humming ]
(Jimmy)>> Now I can install the seat and snug it down. [ MUSIC ]
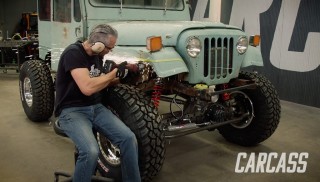
(Jeremy)>> Now that Jimmy has the driver's seat installed it's time for me to hop in and take care of the shifters. For the transmission we're gonna be running the stock one. For the transfer case we went to Summit Racing and picked up a KRC shifter. Now if you guys remember the original floor had a small little transmission hump in it, and now it's completely flat. So to install this shifter we've got to make a small little modification. Using a straight edge I'll mark a line across the bracket. Then I'll use a cutoff wheel to make a relief cut. I'll bend the tab up to 90 degrees. [ MUSIC ] Then finish it by welding it up. [ MUSIC ] Back over at the Jeep we need to cut a hole in the floor for the shifter arm to go through. Now I already went underneath and I found out I've got to come over 23.5 inches and forward about 16 inches. So we're gonna put a little mark on the floor, and then we'll just get to cutting. With it marked I'll draw a line to mark the slot we need to cut out, drill a few holes, and then connect the dots using a Benchmark Abrasives premium cutoff wheel. With our shifter in place we need to find a way to connect that to the transmission. Now the idea is to use a piece of solid stock but we can't do it in a straight run because the new transmission crossmember we built is in the way. So the plan here is to use a piece of tig rod, and we're gonna feed up where it needs to be and add some specific bends to it so we can get our shape. Then all I need to do is transfer this over to our piece of solid stock on the table. We'll match the bends. We'll come back and do a test fit. [ MUSIC ] Using a piece of three-eighths stock I'll use my template to mark where my bends should be. Then using a torch I'll heat up the area to cherry red, place it into the jig, and use a little bit of muscle to make the bend. [ MUSIC ] I'll use the same process on the other end. [ MUSIC ] Yeah that's pretty close. See how it fits! Alright let's see how this works, and then from here if we're right we can drill some holes, install the shifter. Yeah that'll work perfectly. [ MUSIC ] With the holes marked I'll drill them out... [ drill humming ]
(Jeremy)>> ...drop in our shifter, and tighten it down. [ MUSIC ]
(Jeremy)>> Now we can install our linkage for our transmission. [ MUSIC ] Alright let's try this. Reverse, neutral, drive, second, first, perfect! Now we'll move on to the transfer case. With the location set we can drill and cut the floor just like we did with the other shifter. [ MUSIC ] With the shifter body installed we'll slide underneath the body and bolt up our handle. [ MUSIC ] After a quick test run it's time to mount the transfer case linkage. Alright shifters are installed and it's times to button up the interior, but before we get onto that I want to throw a fresh coat of paint on this one. We'll show you a quick and easy way to update your seats.
(Jimmy)>> Plus install some stopping power for Junk Mail.
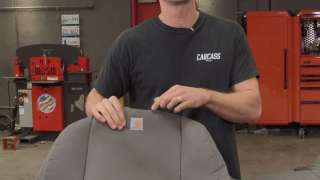
(Jeremy)>> With the shifters installed we also threw in the set of seats that we got from our donor vehicles, and like Jimmy said these things are a little worse for wear and we want to put a set of seat covers on them. The only issue was is we had no idea what they originally came out of, but as we were pulling them apart to clean up all the brackets we noticed on the back of one of these covers was a little Ford insignia and a seven digit part number. Well armed with that information we went to the internet and it turns out we have a set of seats from a 1983 Ford Mustang. We took that information and headed over to CoverCraft, and they confirmed we truly do have Mustang seats. So we ordered up a set of Carhartt style precision fit seat covers, and these things should work perfect in Junk Mail. Carhartt fabric is the perfect choice for protecting our seats from water, mud, grease, oil, and dirt. They're crafted and sewn from the highest quality duck weave water resistant material, which makes it easy to clean and will hold up against anything we can toss its way. It has a classic Carhartt styling, and they're made to perfectly fit around our seats. They also have a foam backing for added comfort. These CoverCraft precision fit Carhartt custom seat covers if you have children, pets, work in construction, or just love the outdoors. They're great in cold and hot climates as it maintains an even temperature, and it comes with a three year warranty.
(Jimmy)>>> With Jeremy wrapping up the interior we can move on to the brake system. It all starts with this master cylinder that we got from Summit Racing, and then we can move on to some lines. [ MUSIC ] With our master cylinder installed we can start bending our lines. It's a good idea to put a few coils in the brake line as this provides some straight relief. The body and chassis can shift relative to one another, which can stress the brake lines. [ MUSIC ] Alright that's looking pretty good. Just got to connect it to our other brake line. We ordered brake lines from Summit Racing for a Ford truck, which would have a six to eight inch lift. This gives us the extra length we need for our suspension to articulate. [ MUSIC ] That wraps up the front brakes. So we'll finish the rears, bleed them, we'll be ready to go.
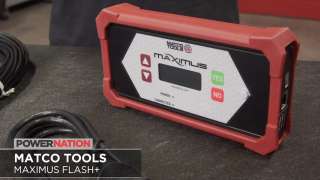
(Jeremy)>> If you're doing repairs on late model vehicles from '08 and up reprogramming the vehicle's computer tends to be something that you have to send out to the dealership. Well Matco's Maximus Flash Plus puts those repairs right at your fingertips. This little box puts o-e level flashing back in your hands. Simply just plug it into your vehicle's o-b-d port, connect it to the battery, and then just hook it up to the internet. Then simply request service from a Matco factory certified technician. It provides o-e solutions for most major manufacturers, and will save your customers both time and money. To make a move we'll need some driveshafts. Then add a few more components so we can hit the trails.
(Jeremy)>> Alright try that Jimmy. How do the brakes feel?
(Jimmy)>> Yeah that's a good pedal.
(Jeremy)>> Well now that the brakes are taken care of we've still got a couple more things we've got to do. We've got to throw the driveshafts in it. Then we're gonna install the bump stops, and we'll move on to those limit straps. Now for our driveshafts we went to Tom Wood's custom driveshafts so they could build us a set for our Jeep. Now you guys know we have a fully custom suspension, updated powertrain, and one ton axles. We wanted to make sure we had a set of driveshafts that would hold up to our 37 inch tall tires and the abuse this thing's gonna see when it's out on the trails. Now the driveshafts that they sent us utilize a double cardon style joint on the transfer case side. What that does is allows us to reach full suspension travel and get all of our articulation out of driveshafts when we're out on the trails. For the bolts we're gonna be using ARP bolts, and we'll add a little bit of thread locker. When measuring for driveshafts you want to make sure your vehicle is at ride height. Also you'll need to know what series U-joint fits your pinion as well as the angle of the driveshaft. [ MUSIC ] Alright let's get the front one in. [ MUSIC ] Sweet! If you roll that in underneath here we'll pick this up, we'll check for flex, check for binding, and then we can check for the bump stops as well.
(Jimmy)>> Let's see how it does.
(Jeremy)>> That's good right there actually. Yeah that'll work, go ahead! I'm gonna take a look at the driveshaft. Make sure it doesn't touch anything. Keep going, keep going, stop there! Okay so that's about a finger width between the driveshaft and the upper four link mount.
(Jimmy)>> That's impressive.
(Jeremy)>> So think we're good there to probably take a measurement for the bump. It's probably safer for you to take that measurement. You're on that side. Just see what it reads from the chassis to that axle truss.
(Jimmy)>> Like five and a half.
(Jeremy)>> And our bumps are like four and three quarter. Do some math we'll figure out what we've got to do there. We'll build a bracket and we'll get setup. You go back down with this just to make it safe. Now watch! [ MUSIC ] Straighten the tire back out. There you go! Perfect, that'll work.
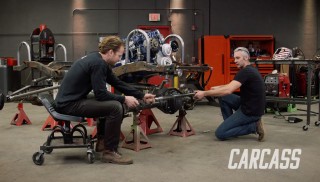
(Jimmy)>> The most important part of mounting our bump stop is to mount it close it enough to the axle housing so that it's functional. So my idea here is to take a piece of quarter inch plate, put a couple of bends in it. That way it's offset from the chassis rail. So that starts with cutting our quarter inch plate to length. [ MUSIC ] With our measurement made I can head over to the Ironworker and cut out our piece. [ MUSIC ] Then use the horizontal break to make our bends. [ mechanical humming ]
(Jimmy)>> I'll do two 45 degree bends on each side and punch some holes for a rosette weld on each end. [ MUSIC ] Back at the fab table I can drill our mounting hole. [ drill buzzing ] [ MUSIC ]
(Jimmy)>> Then head over to the chassis to prep the area for welding and install our bracket. [ welder crackling ]
(Jimmy)>> With the bracket fully welded I'll do one final check before painting and final install. [ ratchet clicking ]
(Jeremy)>> Now one last thing to go along with our bump stops are limit straps, and one thing to remember is that these things are gonna stretch out about an inch over the course of its lifetime per 12 inches of strap. So that's one thing to consider when you guys take your measurements and order these things up. Now what I've got to do is install these things and then we're gonna go hit the trails.
(Jimmy)>> We head to the trails to see if Junk Mail has first class performance.
(Jimmy)>> Alright it's finally time. We're out here at Adventure Offroad Park. We have almost 600 acres and over 120 trails to choose from.
(Jeremy)>> The trail system here at AOP ranges from anything from mild to wild. Stuff like your side by sides or your weekend warriors, all the way up to like Project Junk Mail and some rock bouncers, but today is the day we're gonna see if Junk Mail truly can deliver.
(Jimmy)>> Let's do it! I'm excited.
(Jeremy)>> This'll be fun! [ engine rumbling ]
(Jimmy)>> Alright we'll start it off a little easy.
(Jeremy)>> This shouldn't be too bad. Should be kinda fun to see how it handles really. The best part is we don't have doors. So we can just stick our heads out. This ain't nothing!
(Jimmy)>> It can do a lot more than this.
(Jeremy)>> Totally! This is George Winter trail. Let's run this one. This'll be a little tougher.
(Jimmy)>> Alright!
(Jeremy)>> This is one of my favorites up here at the top. I don't think we'll have our work cut out for us but it's gonna be a little more difficult.
(Jimmy)>> It's just rocks!
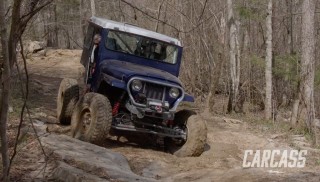
(Jeremy)>> Using the throttle a little bit bud! Just crawling! It's like we're not doing anything. This thing's doing great!
(Jimmy)>> Just let it cruise a little bit.
(Jeremy)>> I'm truly impressed right now. This thing is crazy! It's not even struggling. We're just cruising away. Delivering the mail! Alright I'm gonna spot you now. Then we'll just start placing tires in right spots and we'll get up this. Not that we need it. We're doing really good! So hard driver. Okay, like that. [ engine revving ] [ MUSIC ]
(Jeremy)>> Yep! [ MUSIC ] [ engine revving ]
(Jeremy)>> Perfect! [ engine revving ] [ MUSIC ]
(Jeremy)>> Alright I've got to know. What do you think?
(Jimmy)>> It's awesome!
(Jeremy)>> This is like your first time out.
(Jimmy)>> Yeah, first time off road. It's kinda sketchy but addicting at the same time.
(Jeremy)>> I think we should keep going. It's kinda downhill from here. We'll go play one more spot.
(Jimmy)>> Yeah you drive. You've got to get a feel for it.
(Jeremy)>> I can drive this thing! We're going!
(Jimmy)>> Check it out over here.
(Jeremy)>> Let's try it this way once. Looks like we've got a little bit of mud. Try to play around in here. How we looking on that rock?
(Jimmy)>> Yeah you've got room. [ MUSIC ]
(Jeremy)>> A little body!
(Jimmy)>> You got it. Ouch!
(Jeremy)>> That's a little deeper than it looks. [ engine rumbling ]
(Jeremy)>> Still not a problem. It just walked right through that no issues. Let's go down yonder huh? A little bit of mud on these trails. Kinda fun, something different. [ MUSIC ] Whoa!
(Jimmy)>> A little slippery!
(Jeremy)>> We better square back up on that one. [ MUSIC ] That was kinda crazy!
(Jimmy)>> A little bit yeah. [ engine rumbling ]
(Jeremy)>> How about that? That's an easier way to get around that one. Life gives you lemons make lemonade Jimmy.
(Jimmy)>> A little more mud. You know what's amazing? This is the first four link that you or I have ever built, and it's doing pretty dang good.
(Jeremy)>> I wouldn't say we're doing bad by any means. I think it's performing like it should.
(Jimmy)>> Oh another frog.
(Jeremy)>> See that frog down there?
(Jimmy)>> Get out the way!
(Jeremy)>> Watch out froggy! We're having a little bit of fun.
(Jimmy)>> And this thing's really handled everything we've thrown at it. We've got on some hard trails, some easier ones, mud, a little slick rock.
(Jeremy)>> I'm having a blast. It's a lot of fun to drive. You know the bars in the cage ended up being like perfect. Exactly where we need them.
(Jimmy)>> Nothing else to hold on to up here.
(Jeremy)>> Awesome out here, I'll take it! All day long I will take it. You know the Jeep pretty much did exactly what we wanted it to do. It took us where we needed to go but there's a couple of things we could improve on.
(Jimmy)>> I think there's room for some upgrades in certain areas, but overall this thing has really proven itself, and we've built a pretty gnarly trail rig.
(Jeremy)>> We've got a little bit of daylight left. So I think we should go have some fun. If you guys like anything you've seen on the show today why don't you go to Powernation TV dot com and Jimmy and I will see you next time.
(Jimmy)>> And we're gonna hit some more trails in the meantime.
(Jeremy)>> This will be a little bit of fun. I think we've got 5, 8 gallons of gas left. A couple hours of daylight. [ engine starting ]
Show Full Transcript
(Jimmy)>> Today on Carcass we put the finishing touches on Junk Mail. We address the last pieces of our interior on our 1978 DJ-5.
(Jeremy)>> Plus figure out how we're gonna shift the transmission and transfer case. Then we install our brake lines and head out on the trial to see if our old postal Jeep truly can deliver the goods. [ MUSIC ] [ tires screeching ] [ MUSIC ] [ engine revving ] [ MUSIC ]
(Jeremy)>> Hey everybody, welcome to Carcass. Our Jeep that we're calling Junk Mail has made a huge transformation from the two wheel drive Jeep that originally rolled into the shop into this four wheel drive off road rig.
(Jimmy)>> And it all start with a 1978 postal Jeep that originally had a four cylinder engine in it, but because we bought three Jeeps we have the option of putting a six cylinder in here along with a custom four link suspension, one ton axles, coil over shocks, a roll cage for safety, and some fresh coats of paints.
(Jeremy)>> And today is the day that we get to take this thing out but we've got a couple of things that we've got to do. We've got to wrap up the brakes, install the complete interior, add some shifters. Then we're gonna throw in the driveshafts, load this thing up, and go have some fun.
(Jimmy)>> Let's start on the interior.
(Jeremy)>> Sounds good!
(Jimmy)>> For our seat situation we're gonna be pretty resourceful. We found a matching pair of seats from the other two Jeeps that we bought. So that's what we'll use. This particular seat is looking pretty weathered and we do have a way to fix that later. As far as mounting it goes it's really simple. There are still holes in the floor for the rear part of the bracket but because we replaced the floor pans we're gonna have to drill two new holes for the front part, and that's where we'll start. [ MUSIC ] I'll line up the rear brackets with the existing holes so that I can mark the front mounting holes. [ MUSIC ] Once marked I'll remove the seat and drill the holes using a Matco hyper step drill bit. [ drill humming ]
(Jimmy)>> Now I can install the seat and snug it down. [ MUSIC ]
(Jeremy)>> Now that Jimmy has the driver's seat installed it's time for me to hop in and take care of the shifters. For the transmission we're gonna be running the stock one. For the transfer case we went to Summit Racing and picked up a KRC shifter. Now if you guys remember the original floor had a small little transmission hump in it, and now it's completely flat. So to install this shifter we've got to make a small little modification. Using a straight edge I'll mark a line across the bracket. Then I'll use a cutoff wheel to make a relief cut. I'll bend the tab up to 90 degrees. [ MUSIC ] Then finish it by welding it up. [ MUSIC ] Back over at the Jeep we need to cut a hole in the floor for the shifter arm to go through. Now I already went underneath and I found out I've got to come over 23.5 inches and forward about 16 inches. So we're gonna put a little mark on the floor, and then we'll just get to cutting. With it marked I'll draw a line to mark the slot we need to cut out, drill a few holes, and then connect the dots using a Benchmark Abrasives premium cutoff wheel. With our shifter in place we need to find a way to connect that to the transmission. Now the idea is to use a piece of solid stock but we can't do it in a straight run because the new transmission crossmember we built is in the way. So the plan here is to use a piece of tig rod, and we're gonna feed up where it needs to be and add some specific bends to it so we can get our shape. Then all I need to do is transfer this over to our piece of solid stock on the table. We'll match the bends. We'll come back and do a test fit. [ MUSIC ] Using a piece of three-eighths stock I'll use my template to mark where my bends should be. Then using a torch I'll heat up the area to cherry red, place it into the jig, and use a little bit of muscle to make the bend. [ MUSIC ] I'll use the same process on the other end. [ MUSIC ] Yeah that's pretty close. See how it fits! Alright let's see how this works, and then from here if we're right we can drill some holes, install the shifter. Yeah that'll work perfectly. [ MUSIC ] With the holes marked I'll drill them out... [ drill humming ]
(Jeremy)>> ...drop in our shifter, and tighten it down. [ MUSIC ]
(Jeremy)>> Now we can install our linkage for our transmission. [ MUSIC ] Alright let's try this. Reverse, neutral, drive, second, first, perfect! Now we'll move on to the transfer case. With the location set we can drill and cut the floor just like we did with the other shifter. [ MUSIC ] With the shifter body installed we'll slide underneath the body and bolt up our handle. [ MUSIC ] After a quick test run it's time to mount the transfer case linkage. Alright shifters are installed and it's times to button up the interior, but before we get onto that I want to throw a fresh coat of paint on this one. We'll show you a quick and easy way to update your seats.
(Jimmy)>> Plus install some stopping power for Junk Mail.
(Jeremy)>> With the shifters installed we also threw in the set of seats that we got from our donor vehicles, and like Jimmy said these things are a little worse for wear and we want to put a set of seat covers on them. The only issue was is we had no idea what they originally came out of, but as we were pulling them apart to clean up all the brackets we noticed on the back of one of these covers was a little Ford insignia and a seven digit part number. Well armed with that information we went to the internet and it turns out we have a set of seats from a 1983 Ford Mustang. We took that information and headed over to CoverCraft, and they confirmed we truly do have Mustang seats. So we ordered up a set of Carhartt style precision fit seat covers, and these things should work perfect in Junk Mail. Carhartt fabric is the perfect choice for protecting our seats from water, mud, grease, oil, and dirt. They're crafted and sewn from the highest quality duck weave water resistant material, which makes it easy to clean and will hold up against anything we can toss its way. It has a classic Carhartt styling, and they're made to perfectly fit around our seats. They also have a foam backing for added comfort. These CoverCraft precision fit Carhartt custom seat covers if you have children, pets, work in construction, or just love the outdoors. They're great in cold and hot climates as it maintains an even temperature, and it comes with a three year warranty.
(Jimmy)>>> With Jeremy wrapping up the interior we can move on to the brake system. It all starts with this master cylinder that we got from Summit Racing, and then we can move on to some lines. [ MUSIC ] With our master cylinder installed we can start bending our lines. It's a good idea to put a few coils in the brake line as this provides some straight relief. The body and chassis can shift relative to one another, which can stress the brake lines. [ MUSIC ] Alright that's looking pretty good. Just got to connect it to our other brake line. We ordered brake lines from Summit Racing for a Ford truck, which would have a six to eight inch lift. This gives us the extra length we need for our suspension to articulate. [ MUSIC ] That wraps up the front brakes. So we'll finish the rears, bleed them, we'll be ready to go.
(Jeremy)>> If you're doing repairs on late model vehicles from '08 and up reprogramming the vehicle's computer tends to be something that you have to send out to the dealership. Well Matco's Maximus Flash Plus puts those repairs right at your fingertips. This little box puts o-e level flashing back in your hands. Simply just plug it into your vehicle's o-b-d port, connect it to the battery, and then just hook it up to the internet. Then simply request service from a Matco factory certified technician. It provides o-e solutions for most major manufacturers, and will save your customers both time and money. To make a move we'll need some driveshafts. Then add a few more components so we can hit the trails.
(Jeremy)>> Alright try that Jimmy. How do the brakes feel?
(Jimmy)>> Yeah that's a good pedal.
(Jeremy)>> Well now that the brakes are taken care of we've still got a couple more things we've got to do. We've got to throw the driveshafts in it. Then we're gonna install the bump stops, and we'll move on to those limit straps. Now for our driveshafts we went to Tom Wood's custom driveshafts so they could build us a set for our Jeep. Now you guys know we have a fully custom suspension, updated powertrain, and one ton axles. We wanted to make sure we had a set of driveshafts that would hold up to our 37 inch tall tires and the abuse this thing's gonna see when it's out on the trails. Now the driveshafts that they sent us utilize a double cardon style joint on the transfer case side. What that does is allows us to reach full suspension travel and get all of our articulation out of driveshafts when we're out on the trails. For the bolts we're gonna be using ARP bolts, and we'll add a little bit of thread locker. When measuring for driveshafts you want to make sure your vehicle is at ride height. Also you'll need to know what series U-joint fits your pinion as well as the angle of the driveshaft. [ MUSIC ] Alright let's get the front one in. [ MUSIC ] Sweet! If you roll that in underneath here we'll pick this up, we'll check for flex, check for binding, and then we can check for the bump stops as well.
(Jimmy)>> Let's see how it does.
(Jeremy)>> That's good right there actually. Yeah that'll work, go ahead! I'm gonna take a look at the driveshaft. Make sure it doesn't touch anything. Keep going, keep going, stop there! Okay so that's about a finger width between the driveshaft and the upper four link mount.
(Jimmy)>> That's impressive.
(Jeremy)>> So think we're good there to probably take a measurement for the bump. It's probably safer for you to take that measurement. You're on that side. Just see what it reads from the chassis to that axle truss.
(Jimmy)>> Like five and a half.
(Jeremy)>> And our bumps are like four and three quarter. Do some math we'll figure out what we've got to do there. We'll build a bracket and we'll get setup. You go back down with this just to make it safe. Now watch! [ MUSIC ] Straighten the tire back out. There you go! Perfect, that'll work.
(Jimmy)>> The most important part of mounting our bump stop is to mount it close it enough to the axle housing so that it's functional. So my idea here is to take a piece of quarter inch plate, put a couple of bends in it. That way it's offset from the chassis rail. So that starts with cutting our quarter inch plate to length. [ MUSIC ] With our measurement made I can head over to the Ironworker and cut out our piece. [ MUSIC ] Then use the horizontal break to make our bends. [ mechanical humming ]
(Jimmy)>> I'll do two 45 degree bends on each side and punch some holes for a rosette weld on each end. [ MUSIC ] Back at the fab table I can drill our mounting hole. [ drill buzzing ] [ MUSIC ]
(Jimmy)>> Then head over to the chassis to prep the area for welding and install our bracket. [ welder crackling ]
(Jimmy)>> With the bracket fully welded I'll do one final check before painting and final install. [ ratchet clicking ]
(Jeremy)>> Now one last thing to go along with our bump stops are limit straps, and one thing to remember is that these things are gonna stretch out about an inch over the course of its lifetime per 12 inches of strap. So that's one thing to consider when you guys take your measurements and order these things up. Now what I've got to do is install these things and then we're gonna go hit the trails.
(Jimmy)>> We head to the trails to see if Junk Mail has first class performance.
(Jimmy)>> Alright it's finally time. We're out here at Adventure Offroad Park. We have almost 600 acres and over 120 trails to choose from.
(Jeremy)>> The trail system here at AOP ranges from anything from mild to wild. Stuff like your side by sides or your weekend warriors, all the way up to like Project Junk Mail and some rock bouncers, but today is the day we're gonna see if Junk Mail truly can deliver.
(Jimmy)>> Let's do it! I'm excited.
(Jeremy)>> This'll be fun! [ engine rumbling ]
(Jimmy)>> Alright we'll start it off a little easy.
(Jeremy)>> This shouldn't be too bad. Should be kinda fun to see how it handles really. The best part is we don't have doors. So we can just stick our heads out. This ain't nothing!
(Jimmy)>> It can do a lot more than this.
(Jeremy)>> Totally! This is George Winter trail. Let's run this one. This'll be a little tougher.
(Jimmy)>> Alright!
(Jeremy)>> This is one of my favorites up here at the top. I don't think we'll have our work cut out for us but it's gonna be a little more difficult.
(Jimmy)>> It's just rocks!
(Jeremy)>> Using the throttle a little bit bud! Just crawling! It's like we're not doing anything. This thing's doing great!
(Jimmy)>> Just let it cruise a little bit.
(Jeremy)>> I'm truly impressed right now. This thing is crazy! It's not even struggling. We're just cruising away. Delivering the mail! Alright I'm gonna spot you now. Then we'll just start placing tires in right spots and we'll get up this. Not that we need it. We're doing really good! So hard driver. Okay, like that. [ engine revving ] [ MUSIC ]
(Jeremy)>> Yep! [ MUSIC ] [ engine revving ]
(Jeremy)>> Perfect! [ engine revving ] [ MUSIC ]
(Jeremy)>> Alright I've got to know. What do you think?
(Jimmy)>> It's awesome!
(Jeremy)>> This is like your first time out.
(Jimmy)>> Yeah, first time off road. It's kinda sketchy but addicting at the same time.
(Jeremy)>> I think we should keep going. It's kinda downhill from here. We'll go play one more spot.
(Jimmy)>> Yeah you drive. You've got to get a feel for it.
(Jeremy)>> I can drive this thing! We're going!
(Jimmy)>> Check it out over here.
(Jeremy)>> Let's try it this way once. Looks like we've got a little bit of mud. Try to play around in here. How we looking on that rock?
(Jimmy)>> Yeah you've got room. [ MUSIC ]
(Jeremy)>> A little body!
(Jimmy)>> You got it. Ouch!
(Jeremy)>> That's a little deeper than it looks. [ engine rumbling ]
(Jeremy)>> Still not a problem. It just walked right through that no issues. Let's go down yonder huh? A little bit of mud on these trails. Kinda fun, something different. [ MUSIC ] Whoa!
(Jimmy)>> A little slippery!
(Jeremy)>> We better square back up on that one. [ MUSIC ] That was kinda crazy!
(Jimmy)>> A little bit yeah. [ engine rumbling ]
(Jeremy)>> How about that? That's an easier way to get around that one. Life gives you lemons make lemonade Jimmy.
(Jimmy)>> A little more mud. You know what's amazing? This is the first four link that you or I have ever built, and it's doing pretty dang good.
(Jeremy)>> I wouldn't say we're doing bad by any means. I think it's performing like it should.
(Jimmy)>> Oh another frog.
(Jeremy)>> See that frog down there?
(Jimmy)>> Get out the way!
(Jeremy)>> Watch out froggy! We're having a little bit of fun.
(Jimmy)>> And this thing's really handled everything we've thrown at it. We've got on some hard trails, some easier ones, mud, a little slick rock.
(Jeremy)>> I'm having a blast. It's a lot of fun to drive. You know the bars in the cage ended up being like perfect. Exactly where we need them.
(Jimmy)>> Nothing else to hold on to up here.
(Jeremy)>> Awesome out here, I'll take it! All day long I will take it. You know the Jeep pretty much did exactly what we wanted it to do. It took us where we needed to go but there's a couple of things we could improve on.
(Jimmy)>> I think there's room for some upgrades in certain areas, but overall this thing has really proven itself, and we've built a pretty gnarly trail rig.
(Jeremy)>> We've got a little bit of daylight left. So I think we should go have some fun. If you guys like anything you've seen on the show today why don't you go to Powernation TV dot com and Jimmy and I will see you next time.
(Jimmy)>> And we're gonna hit some more trails in the meantime.
(Jeremy)>> This will be a little bit of fun. I think we've got 5, 8 gallons of gas left. A couple hours of daylight. [ engine starting ]
