Carcass Featured Projects
Carcass Builds
Want more content like this?
Join the PowerNation Email NewsletterEpisode Transcript
[ Jeremy ] You're watching Powernation!
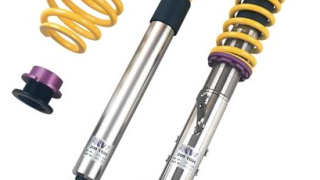
[ Jeremy ] Today on Carcass we ditch an old set of coil overs for a brand new pair. [ Jimmy ] We also upgrade our braking system for better performance on the track. [ Jeremy ] Then at the end we're gonna wrap it up with some body mods. [ Music ] [ engine revving ] [ Music ] [ Jeremy ] What's up everybody, welcome to Carcass. Well our E-46 has made quite a transformation from a clapped out daily driver into a V-8 swapped grassroots race car. Last time you guys saw this we were able to get the LS all fired up. So today we're gonna be working on the brakes and the suspension. [ Jimmy ] Before we get to the suspension and brakes we've already gone ahead and done some upgrades to the chassis itself. These E-46 chassis are notorious for having cracking issues where the sub-frame mounts into the car. To take care of this problem you can go ahead and install a reinforcement plate kit. We wanted to confirm whether we needed it or not and so we went ahead and dropped the sub-frame down. We did confirm that we had a crack, and we installed our reinforcement plate kit. It's a pretty simple process. You just have to prep the areas where you're gonna weld them in. Then once they're welded in you can go ahead and reassemble the car. This is a crucial upgrade, especially if your car is going to see the track. If you do build one of these chassis that's definitely something to look into. Now we're moving on to the suspension and brakes in order to get this stuff torn apart and then put some parts in that are really gonna make this car handle. [ Jeremy ] Now a crucial aspect into any race car are a set of coil over shocks, and our E-46 chassis has a set installed already but we do not know the age or the condition of them. So they will definitely have to be taken out of the car. To replace them we went to Summit Racing and picked up a direct bolt in KW kit for our E-46 chassis. On the grassroot side of things these will work great because they are pre-dampened. So they're basically set up for the car already, but we can do some fine tuning to them to adjust the ride height and to get the car to do what we want on the racetrack. Like I said, all the old stuff is still installed. So we're gonna start by getting rid of all that stuff. [ Music ] Now we are gonna be doing a brake upgrade. So I'm gonna go ahead and let the caliper hang here. [ Music ] [ drill humming ] [ Music ]
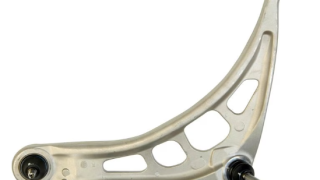
[ Jeremy ] No surprise here. From the condition of the car looks like the boot is torn for our lower control arm, or the ball joint here. So since we're this deep into the car we're just gonna go ahead and replace that whole thing. So we're gonna get this out of the way as well. [ Music ] [ hammer banging ] [ Music ] [ hammer banging ] [ ratchet clicking ] [ hammer banging ] [ Jeremy ] Now to replace our worn out lower control arm we're gonna be using a Duralast o-e replacement part. We picked this one up from AutoZone. The best part about it being an o-e replacement part it will go right into our chassis the same way that the stock one came out. This is a great choice for your daily driver but it'll also work really well on our race cause these parts are extreme tested. So we know it will withstand some of the abuse that it will see on the racetrack, and lap, after lap, after lap we will be able to expect the same results out of our suspension. [ Music ]
[ ratchet clicking ] [ Jeremy ] Now to install our new coil over we did install a brand new upper strut plate or strut bearing here. There was a little dimple on top. We did grind that off. That's gonna allow us to kinda move the top of the coil over and give us a little more camber. We also cleaned up the inside of the spindle here. Put a little bit of anti-seize on it, and hopefully this all kinda slides in there. We might have to give it a couple of love taps. Then we'll finish up the install. [ hammer banging ] [ drill humming ] [ Music ] [ drill humming ] [ Jeremy ] And that's as simple as it needs to be. So from here we'll go to the other side, take care of that, and then we'll transition and get the back done too. [ Jimmy ] Stay tuned, we upgrade our brakes for better performance on the track.
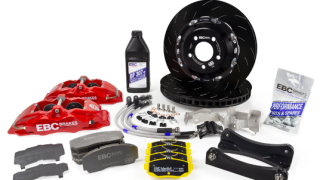
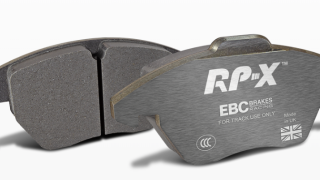
[ Jeremy ] Hey guys, welcome back. Now we're working on the suspension on the BMW E-46 and we've got the front tackled already. We actually went ahead and installed the rear as well. The kit that we got from Summit Racing came with a set of coil overs that we installed in the front but the back here's a little bit different. We have a coil spring. We have its own separate adjuster here. We also have a stand alone shock that's in the back. With all four corners done we're gonna call that a win. We're gonna move on to the brakes. [ Jimmy ] Moving on to the front brakes we went with EBC Brakes Balanced Brake Kit. It revolves around their Apollo-6 calipers, which is a six piston caliper, and includes their two piece 355mm rotors and they also sent us their RPX pads which are a race pad. That should definitely help us slow down when we're out on the track. Apollo calipers utilize a two piece bolted designed machined from heat treated low pressure castings. Low pressure casting provides improved consistency, higher strength, and higher caliper stiffness over forged parts. A high temperature polyester coating is then used to give a fade free appearance for years to come. [ Music ]
[ Music ]
[ Music ]
When upgrading a brake system for track use it's important to look at every aspect of the system. Not only do you want to look at the calipers and rotors but also the brake lines and even the brake fluid given that the system operates at extremely high pressures and temperatures, and you want to make sure that the system as a whole can handle the abuse. [ ratchet clicking ] [ Music ] [ ratchet clicking ] [ Music ]
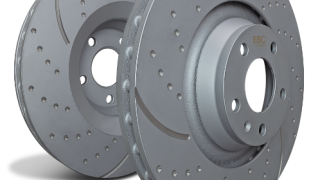
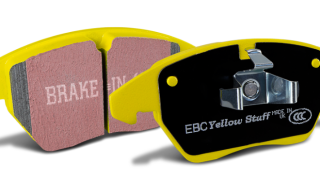
[ Music ] [ Jimmy ] Now for the rears we're gonna be going with EBC's GD Sport rotors and some Yellow Stuff pads. [ Music ] [ ratchet clicking ] [ Music ] [ Jimmy ] For the rear brakes we're just upgrading the pads and rotors while utilizing a stock replacement caliper. [ Music ]
I'm down to the last brake line that I have to install and that'll wrap up our brake system. [ Jeremy ] Coming up, we add a little flare to our car, cover up a big hole in the roof, and add some body accents from the front to the back. So stick around.
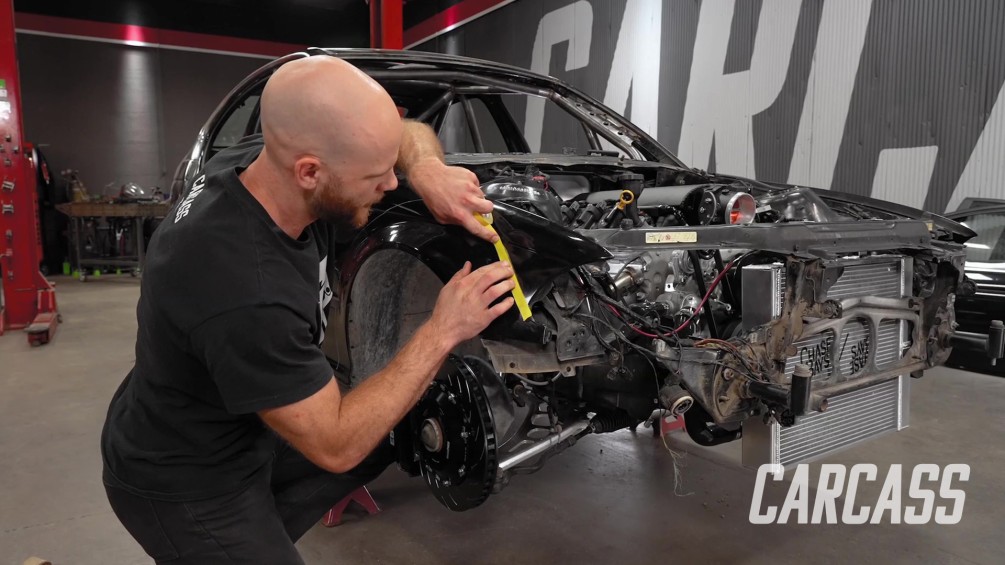
[ Jeremy ] So the next thing that we're gonna be working on are some body mods. Now we already have the brakes and the suspension installed. So now it's time to make way for some wheels and tires, and that starts with a pair of fender flares. [ Jimmy ] And to get this whole thing started we're gonna make a line around the perimeter of the flare. Once we take it off we'll make a cut line with some tape so we know where we need to trim. That way we can make some clearance for our new wheels and tires. [ Jeremy ] Cool! [ Jimmy ] I'm using some skinnier tape to define the upper limit of where we can cut. We do need to leave a little bit of material so that we can drill holes and then use rivets to attach the flares to the car. We can cut lower than this but we just want to make sure that we don't cut where we're not supposed to. [ Jeremy ] Before we do any cutting I'm gonna go ahead and get rid of this inner fender in here so we can see what we're working with and to make sure we don't cut anything vital. [ Music ] Now there are a bunch of screws that hold this in here cause it does run all the way to the back. Look at this. Found a spark plug too. That's old. Throw this away. That's not going back in. [ saw buzzing ] [ grinder buzzing ] [ Jeremy ] So with this all trimmed up what we're gonna do is hold it up here to the line that Jimmy traced earlier, and then we'll go ahead and drill one hole. Then we'll get some Clecos, hold it into place. Then we'll just keep drilling some holes. [ drill humming ] [ Jeremy ] So we'll put one Cleco on here to hold it in position and then we'll start coming down the way here. We'll kinda lay everything out, get some good spacing. Grab the corners to make those hold really well and then we'll lay some stuff out. It does cover the headlight. We'll have to trim it a little. [ Music ] About every four inches should be close. [ drill humming ] [ Music ] [ drill humming ] [ Music ] [ Jeremy ] So we have all the Clecos in and it's holding the fender flare in place. Pretty simple from here on out. Take the Clecos out and we'll replace them with some rivets. [ Music ] [ rivet gun clicking ] [ Jeremy ] Now in the back here it's basically the same as the front with one major difference. We do have two different pieces of metal we're dealing with here. We've got an outer quarter panel skin and then we have an inner skin, which is kind of the wheel well lip area. What I did is I cut the quarter panel short and I cut the inner skin long. What we've gonna do here is use this extra metal to kinda fold it up and it's gonna take care of the gap that's in between these two pieces. It's gonna keep water out from going places where it doesn't need to go. I also made a bunch of these little relief cuts. It's just gonna make it easier for me to form this metal up. Yes it's a little more welding but it's gonna save me some time in trying to form all of this to make it fit. So I've got a couple of tools I'm gonna use, the hammer and the dolly, to kinda do some forming. And just a pair of channel locks that's gonna bend these tabs up. So we'll get all this bent up, fit into place, weld it all up, and then we'll come back and rivet on the fender flare. By bending these tabs up I'm filling the gap again, but one thing when I made my relief cut here you can see that the cut goes almost up to the edge of the quarter panel here. That makes it so I can bend super close to this radius. Then obviously we'll come back, cut those tabs off, get them flush with the quarter, and then that's the gap that I'll weld up. [ saw buzzing ] [ Music ] [ grinder humming ] [ welder crackling ] [ Music ] [ Jeremy ] So we have the edge all welded up. Now we're just gonna hit it with the grinder and kinda clean it up. [ grinder buzzing ] [ Jeremy ] Now we're gonna add a little seam sealer here just in case we've got some pin holes in our welds. Plus those little relief cuts that I made there's no point in welding those up. It doesn't do much for structure here. So we're just gonna use the seam sealer to plug them up. So we've given the seam sealer ample enough time to dry. So I am gonna hit this with some spray paint. What we're gonna do here is try to stop any rust from attacking this bare metal. Then we'll get the fender flare on it. It'll be the same process as the front. Then we also have the other side of the car to do yet. [ Jimmy ] Coming up, we add some aero and smooth out the roof of our car.
[ Jimmy ] Welcome back everybody. We're making some pretty good progress on the exterior modifications of our BMW. Yet again we have partnered with Nine Lives Racing and they sent us one of their Big Wang kits. If you guys remember we did put one on our Camaro Road Race car and we had to make mounts and everything for that, but this is a really nice setup and a complete kit specifically for the E-46 chassis. So they send the Wang and also the mounts. So we just have to drill some holes in this deck lid and get this thing bolted up. [ Music ]
I'm making a couple of marks here on the deck lid just so I can find the center line. Then what I'm gonna do after is I will measure the distance between the wing mounts. Then I'll transfer those measurements onto the deck lid. That way we can put the pylons on here, get our holes drilled, and get everything mounted. [ Music ]
[ Music ]
[ Music ] [ drill humming ] [ Jimmy ] On the bottom side here I'm just gonna use a step bit to make an access hole so we can get the hardware on the other side. [ Music ]
[ ratchet clicking ] [ Music ] [ ratchet clicking ] [ Music ]
[ Music ] [ ratchet clicking ] [ Jimmy ] Well that does it for the wing installation and a pretty inexpensive way to add a lot of performance. [ Jeremy ] To stick with the performance side of things and to sleek the car out Jimmy did have to remove the sunroof mechanism, and glass, and the whole deal up here when he built the roll cage. So we have a giant hole up top. So we're gonna do something really easy and simple. Just add this fiberglass sunroof delete up and in here so we don't have a giant hole in the top and the sun won't be beating on our heads when we're racing. Kinda force this in. Close! Can you try to push yours down a little bit so we can go past. Voila! [ Jimmy ] Need some hardware. [ Jeremy ] We'll mark and drill the holes. We can grab the actual holes that held up the sunroof and we'll get it in there. [ drill humming ] [ Music ]
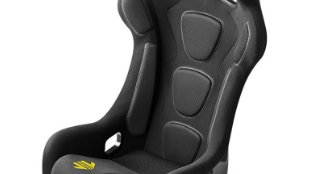
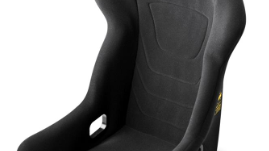
[ Jeremy ] Safety is a huge part in any race car, but once your car is finished you have to make sure that you're comfortable while you drive it and that comes down to which racing seat that you choose. It's not as simple as just jumping online, picking out what cool seat fits in your car. You have to make sure that you fit in that seat first. Now Summit Racing has a bunch of different styles and brands to choose from. So let's go over what it takes to get those measurements so you guys can order the correct seat, and that starts with grabbing a friend and taking a seat on the ground. So there's three measurements that we really want to know. First one is gonna be across your hips. We use some straight edges to do that. [ Jimmy ] About 14 and three quarter, 15. [ Jeremy ] Then you're gonna take a measurement from your bottom to your shoulder. [ Jimmy ] 25. [ Jeremy ] And then we're gonna go across the shoulders. [ Jimmy ] 20. [ Jeremy ] Now that we have those measurements we can pick out what kind of seat we want. Now there's many different styles of seats to choose from. You have a full containment seat with a halo like the one we have in our Camaro. More of a standard racing seat like the guys in Engine Power have in their Test Sled. You have a drag racing style seat like Detroit Muscle installed in Road Burner. You also have a seat that's made for comfort and has a slider like the one they put in the Mustang. Once you have those measurements you can jump online, go to Summit Racing dot com, type in racing seats, and we're gonna go down and pick out what manufacturer we want and for what seat that we like. Then within the manufacturer's listing there will be a chart with the measurements that we just took. That way we can take those measurements, figure out what seat we need to order per the measurements that we just took. So we'll click on instructions/calculators. Over here charts and guides, and this will give us a list of the measurements we took. It also gives you the measurements of the physical size of the seat so you can fit it into the car as well. Also pay attention. Some of these manufacturers do offer some brackets to help you install them in your car. Some of them you might have to make custom brackets. So from there once you get your seat figured out, find your brackets, you can get them installed in your car and be one step closer to hitting the track. The new hood looks pretty good. [ Jimmy ] Yeah we got a vent too. I'll cut a hole out and get this thing in there. Should help us keep temps down. [ Jeremy ] It just kinda goes with all of the body mods we've done. [ Jimmy ] Look nice at the end. [ Jeremy ] We've got a couple more things to do. We are gonna install this. Next time you guys see this car it will change color, but for now that'll take care of it. So we'll see you guys next time.
Show Full Transcript
[ Jeremy ] Today on Carcass we ditch an old set of coil overs for a brand new pair. [ Jimmy ] We also upgrade our braking system for better performance on the track. [ Jeremy ] Then at the end we're gonna wrap it up with some body mods. [ Music ] [ engine revving ] [ Music ] [ Jeremy ] What's up everybody, welcome to Carcass. Well our E-46 has made quite a transformation from a clapped out daily driver into a V-8 swapped grassroots race car. Last time you guys saw this we were able to get the LS all fired up. So today we're gonna be working on the brakes and the suspension. [ Jimmy ] Before we get to the suspension and brakes we've already gone ahead and done some upgrades to the chassis itself. These E-46 chassis are notorious for having cracking issues where the sub-frame mounts into the car. To take care of this problem you can go ahead and install a reinforcement plate kit. We wanted to confirm whether we needed it or not and so we went ahead and dropped the sub-frame down. We did confirm that we had a crack, and we installed our reinforcement plate kit. It's a pretty simple process. You just have to prep the areas where you're gonna weld them in. Then once they're welded in you can go ahead and reassemble the car. This is a crucial upgrade, especially if your car is going to see the track. If you do build one of these chassis that's definitely something to look into. Now we're moving on to the suspension and brakes in order to get this stuff torn apart and then put some parts in that are really gonna make this car handle. [ Jeremy ] Now a crucial aspect into any race car are a set of coil over shocks, and our E-46 chassis has a set installed already but we do not know the age or the condition of them. So they will definitely have to be taken out of the car. To replace them we went to Summit Racing and picked up a direct bolt in KW kit for our E-46 chassis. On the grassroot side of things these will work great because they are pre-dampened. So they're basically set up for the car already, but we can do some fine tuning to them to adjust the ride height and to get the car to do what we want on the racetrack. Like I said, all the old stuff is still installed. So we're gonna start by getting rid of all that stuff. [ Music ] Now we are gonna be doing a brake upgrade. So I'm gonna go ahead and let the caliper hang here. [ Music ] [ drill humming ] [ Music ]
[ Jeremy ] No surprise here. From the condition of the car looks like the boot is torn for our lower control arm, or the ball joint here. So since we're this deep into the car we're just gonna go ahead and replace that whole thing. So we're gonna get this out of the way as well. [ Music ] [ hammer banging ] [ Music ] [ hammer banging ] [ ratchet clicking ] [ hammer banging ] [ Jeremy ] Now to replace our worn out lower control arm we're gonna be using a Duralast o-e replacement part. We picked this one up from AutoZone. The best part about it being an o-e replacement part it will go right into our chassis the same way that the stock one came out. This is a great choice for your daily driver but it'll also work really well on our race cause these parts are extreme tested. So we know it will withstand some of the abuse that it will see on the racetrack, and lap, after lap, after lap we will be able to expect the same results out of our suspension. [ Music ]
[ ratchet clicking ] [ Jeremy ] Now to install our new coil over we did install a brand new upper strut plate or strut bearing here. There was a little dimple on top. We did grind that off. That's gonna allow us to kinda move the top of the coil over and give us a little more camber. We also cleaned up the inside of the spindle here. Put a little bit of anti-seize on it, and hopefully this all kinda slides in there. We might have to give it a couple of love taps. Then we'll finish up the install. [ hammer banging ] [ drill humming ] [ Music ] [ drill humming ] [ Jeremy ] And that's as simple as it needs to be. So from here we'll go to the other side, take care of that, and then we'll transition and get the back done too. [ Jimmy ] Stay tuned, we upgrade our brakes for better performance on the track.
[ Jeremy ] Hey guys, welcome back. Now we're working on the suspension on the BMW E-46 and we've got the front tackled already. We actually went ahead and installed the rear as well. The kit that we got from Summit Racing came with a set of coil overs that we installed in the front but the back here's a little bit different. We have a coil spring. We have its own separate adjuster here. We also have a stand alone shock that's in the back. With all four corners done we're gonna call that a win. We're gonna move on to the brakes. [ Jimmy ] Moving on to the front brakes we went with EBC Brakes Balanced Brake Kit. It revolves around their Apollo-6 calipers, which is a six piston caliper, and includes their two piece 355mm rotors and they also sent us their RPX pads which are a race pad. That should definitely help us slow down when we're out on the track. Apollo calipers utilize a two piece bolted designed machined from heat treated low pressure castings. Low pressure casting provides improved consistency, higher strength, and higher caliper stiffness over forged parts. A high temperature polyester coating is then used to give a fade free appearance for years to come. [ Music ]
[ Music ]
[ Music ]
When upgrading a brake system for track use it's important to look at every aspect of the system. Not only do you want to look at the calipers and rotors but also the brake lines and even the brake fluid given that the system operates at extremely high pressures and temperatures, and you want to make sure that the system as a whole can handle the abuse. [ ratchet clicking ] [ Music ] [ ratchet clicking ] [ Music ]
[ Music ] [ Jimmy ] Now for the rears we're gonna be going with EBC's GD Sport rotors and some Yellow Stuff pads. [ Music ] [ ratchet clicking ] [ Music ] [ Jimmy ] For the rear brakes we're just upgrading the pads and rotors while utilizing a stock replacement caliper. [ Music ]
I'm down to the last brake line that I have to install and that'll wrap up our brake system. [ Jeremy ] Coming up, we add a little flare to our car, cover up a big hole in the roof, and add some body accents from the front to the back. So stick around.
[ Jeremy ] So the next thing that we're gonna be working on are some body mods. Now we already have the brakes and the suspension installed. So now it's time to make way for some wheels and tires, and that starts with a pair of fender flares. [ Jimmy ] And to get this whole thing started we're gonna make a line around the perimeter of the flare. Once we take it off we'll make a cut line with some tape so we know where we need to trim. That way we can make some clearance for our new wheels and tires. [ Jeremy ] Cool! [ Jimmy ] I'm using some skinnier tape to define the upper limit of where we can cut. We do need to leave a little bit of material so that we can drill holes and then use rivets to attach the flares to the car. We can cut lower than this but we just want to make sure that we don't cut where we're not supposed to. [ Jeremy ] Before we do any cutting I'm gonna go ahead and get rid of this inner fender in here so we can see what we're working with and to make sure we don't cut anything vital. [ Music ] Now there are a bunch of screws that hold this in here cause it does run all the way to the back. Look at this. Found a spark plug too. That's old. Throw this away. That's not going back in. [ saw buzzing ] [ grinder buzzing ] [ Jeremy ] So with this all trimmed up what we're gonna do is hold it up here to the line that Jimmy traced earlier, and then we'll go ahead and drill one hole. Then we'll get some Clecos, hold it into place. Then we'll just keep drilling some holes. [ drill humming ] [ Jeremy ] So we'll put one Cleco on here to hold it in position and then we'll start coming down the way here. We'll kinda lay everything out, get some good spacing. Grab the corners to make those hold really well and then we'll lay some stuff out. It does cover the headlight. We'll have to trim it a little. [ Music ] About every four inches should be close. [ drill humming ] [ Music ] [ drill humming ] [ Music ] [ Jeremy ] So we have all the Clecos in and it's holding the fender flare in place. Pretty simple from here on out. Take the Clecos out and we'll replace them with some rivets. [ Music ] [ rivet gun clicking ] [ Jeremy ] Now in the back here it's basically the same as the front with one major difference. We do have two different pieces of metal we're dealing with here. We've got an outer quarter panel skin and then we have an inner skin, which is kind of the wheel well lip area. What I did is I cut the quarter panel short and I cut the inner skin long. What we've gonna do here is use this extra metal to kinda fold it up and it's gonna take care of the gap that's in between these two pieces. It's gonna keep water out from going places where it doesn't need to go. I also made a bunch of these little relief cuts. It's just gonna make it easier for me to form this metal up. Yes it's a little more welding but it's gonna save me some time in trying to form all of this to make it fit. So I've got a couple of tools I'm gonna use, the hammer and the dolly, to kinda do some forming. And just a pair of channel locks that's gonna bend these tabs up. So we'll get all this bent up, fit into place, weld it all up, and then we'll come back and rivet on the fender flare. By bending these tabs up I'm filling the gap again, but one thing when I made my relief cut here you can see that the cut goes almost up to the edge of the quarter panel here. That makes it so I can bend super close to this radius. Then obviously we'll come back, cut those tabs off, get them flush with the quarter, and then that's the gap that I'll weld up. [ saw buzzing ] [ Music ] [ grinder humming ] [ welder crackling ] [ Music ] [ Jeremy ] So we have the edge all welded up. Now we're just gonna hit it with the grinder and kinda clean it up. [ grinder buzzing ] [ Jeremy ] Now we're gonna add a little seam sealer here just in case we've got some pin holes in our welds. Plus those little relief cuts that I made there's no point in welding those up. It doesn't do much for structure here. So we're just gonna use the seam sealer to plug them up. So we've given the seam sealer ample enough time to dry. So I am gonna hit this with some spray paint. What we're gonna do here is try to stop any rust from attacking this bare metal. Then we'll get the fender flare on it. It'll be the same process as the front. Then we also have the other side of the car to do yet. [ Jimmy ] Coming up, we add some aero and smooth out the roof of our car.
[ Jimmy ] Welcome back everybody. We're making some pretty good progress on the exterior modifications of our BMW. Yet again we have partnered with Nine Lives Racing and they sent us one of their Big Wang kits. If you guys remember we did put one on our Camaro Road Race car and we had to make mounts and everything for that, but this is a really nice setup and a complete kit specifically for the E-46 chassis. So they send the Wang and also the mounts. So we just have to drill some holes in this deck lid and get this thing bolted up. [ Music ]
I'm making a couple of marks here on the deck lid just so I can find the center line. Then what I'm gonna do after is I will measure the distance between the wing mounts. Then I'll transfer those measurements onto the deck lid. That way we can put the pylons on here, get our holes drilled, and get everything mounted. [ Music ]
[ Music ]
[ Music ] [ drill humming ] [ Jimmy ] On the bottom side here I'm just gonna use a step bit to make an access hole so we can get the hardware on the other side. [ Music ]
[ ratchet clicking ] [ Music ] [ ratchet clicking ] [ Music ]
[ Music ] [ ratchet clicking ] [ Jimmy ] Well that does it for the wing installation and a pretty inexpensive way to add a lot of performance. [ Jeremy ] To stick with the performance side of things and to sleek the car out Jimmy did have to remove the sunroof mechanism, and glass, and the whole deal up here when he built the roll cage. So we have a giant hole up top. So we're gonna do something really easy and simple. Just add this fiberglass sunroof delete up and in here so we don't have a giant hole in the top and the sun won't be beating on our heads when we're racing. Kinda force this in. Close! Can you try to push yours down a little bit so we can go past. Voila! [ Jimmy ] Need some hardware. [ Jeremy ] We'll mark and drill the holes. We can grab the actual holes that held up the sunroof and we'll get it in there. [ drill humming ] [ Music ]
[ Jeremy ] Safety is a huge part in any race car, but once your car is finished you have to make sure that you're comfortable while you drive it and that comes down to which racing seat that you choose. It's not as simple as just jumping online, picking out what cool seat fits in your car. You have to make sure that you fit in that seat first. Now Summit Racing has a bunch of different styles and brands to choose from. So let's go over what it takes to get those measurements so you guys can order the correct seat, and that starts with grabbing a friend and taking a seat on the ground. So there's three measurements that we really want to know. First one is gonna be across your hips. We use some straight edges to do that. [ Jimmy ] About 14 and three quarter, 15. [ Jeremy ] Then you're gonna take a measurement from your bottom to your shoulder. [ Jimmy ] 25. [ Jeremy ] And then we're gonna go across the shoulders. [ Jimmy ] 20. [ Jeremy ] Now that we have those measurements we can pick out what kind of seat we want. Now there's many different styles of seats to choose from. You have a full containment seat with a halo like the one we have in our Camaro. More of a standard racing seat like the guys in Engine Power have in their Test Sled. You have a drag racing style seat like Detroit Muscle installed in Road Burner. You also have a seat that's made for comfort and has a slider like the one they put in the Mustang. Once you have those measurements you can jump online, go to Summit Racing dot com, type in racing seats, and we're gonna go down and pick out what manufacturer we want and for what seat that we like. Then within the manufacturer's listing there will be a chart with the measurements that we just took. That way we can take those measurements, figure out what seat we need to order per the measurements that we just took. So we'll click on instructions/calculators. Over here charts and guides, and this will give us a list of the measurements we took. It also gives you the measurements of the physical size of the seat so you can fit it into the car as well. Also pay attention. Some of these manufacturers do offer some brackets to help you install them in your car. Some of them you might have to make custom brackets. So from there once you get your seat figured out, find your brackets, you can get them installed in your car and be one step closer to hitting the track. The new hood looks pretty good. [ Jimmy ] Yeah we got a vent too. I'll cut a hole out and get this thing in there. Should help us keep temps down. [ Jeremy ] It just kinda goes with all of the body mods we've done. [ Jimmy ] Look nice at the end. [ Jeremy ] We've got a couple more things to do. We are gonna install this. Next time you guys see this car it will change color, but for now that'll take care of it. So we'll see you guys next time.
