More Junk Mail DJ5 Episodes
Carcass Featured Projects
Carcass Builds
Want more content like this?
Join the PowerNation Email NewsletterParts Used In This Episode
Matco Tools
MATCO Tools are the Official Tool Supplier to PowerNation
The Industrial Depot
Tools, Hardware, Shop Supplies
Episode Transcript
(Jimmy)>> You're watching Powernation!
(Jimmy)>> Today on Carcass rain, sleet, or snow Project Junk Mail gets major suspension upgrades taking our Jeep from a mail delivery vehicle to an off road machine that can handle all the elements.
(Jeremy)>> We'll show you how to set up a race inspired four link system that will conquer the trails and rocks. [ MUSIC ] [ tires squealing ] [ MUSIC ]
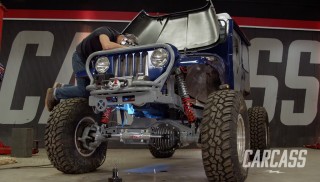
(Jeremy)>> Hey guys, welcome to Carcass. Now our 1978 Jeep DJ-5 that we're calling Project Junk Mail looks a whole lot different than the day we picked it up.
(Jimmy)>> That's right! We got the cab off the chassis, stripped all the old suspension brackets off, and we even went to a junkyard, got a set of axles, and got them all the way down to the housings.
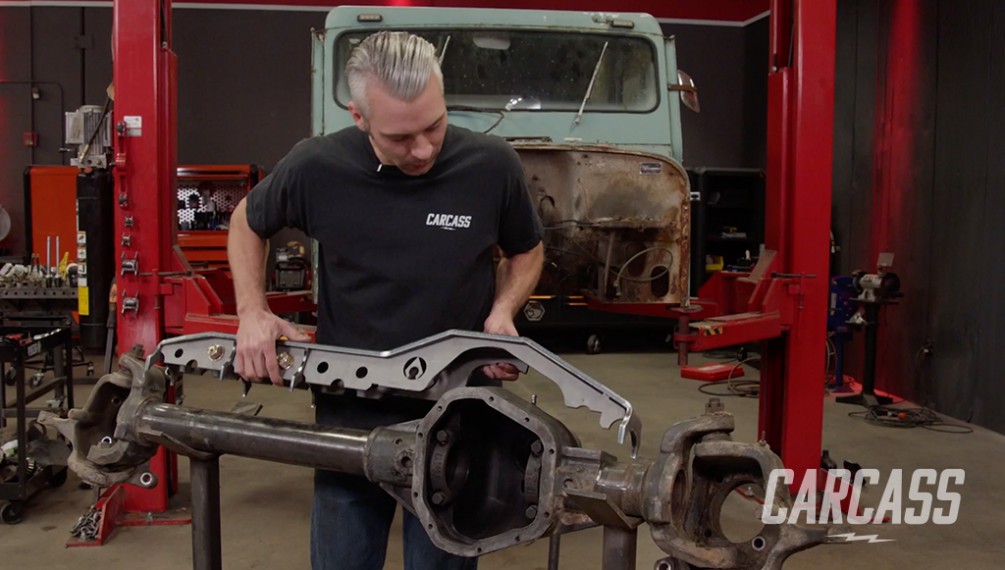
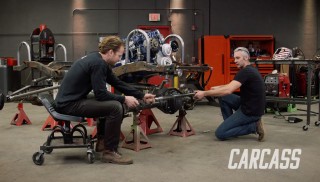
(Jeremy)>> Now we slid our axles underneath our chassis to give us an initial look at what we're dealing with, and we're gonna be prepping for our four link suspension but we're gonna add a set of axle trusses to give us a good foundation for that suspension. So we've got to slide these babies out, set them on a set of axle stands, and start prepping. [ MUSIC ]
(Jimmy)>> To clean up our axles we're using some wire wheels. We just want to knock off the rust and grime to give our trusses a good, clean surface to weld to. [ grinder buzzing ]
(Jeremy)>> With our axles all cleaned up we're gonna be adding a set of Artec Industries axle trusses that we picked up from Summit Racing dot com. We're gonna be doing this for two reasons. One, it's just gonna help strengthen our axle, and the second and more important reason is it's gonna give us a great mounting point for our upper arms and for our shocks. So what we're gonna do is just tack this into place. Then we'll set our axles back underneath the chassis, keep rolling on our suspension. [ welder crackling ]
(Jeremy)>> Alright that looks pretty good. Get her back under the chassis. Got it? It got a little heavier that's for sure. [ MUSIC ]
(Jimmy)>> We now have trusses tacked to both axle housings but there's one thing we need to do before we start designing our suspension, and that's deciding where the axles are gonna land, and in the rear it's not too critical but we do know we're gonna extend the wheel base a little bit for stability.
(Jeremy)>> But on the front end it is critical because the position of our front axle solely depends on the position of our steering gearbox because we don't want our steering to bind under heavy articulation. So the next step is to mount the gearbox on the passenger side. [ MUSIC ] We mounted our new gearbox using an existing hole from the original box. Now this is just for mock up. We're not sure if we're gonna have to move the gearbox towards the back or toward the front of the Jeep but this is just a good starting point. Now with our axle and our chassis set at ride height I'm gonna use a plumb bob and drop it down the center of our pitman arm, and then we're gonna mock up some steering and that should help us find the final resting position of our front axle. [ MUSIC ] Well now that we have the steering mocked up on our front axle we now know that the stock location we chose for the gearbox should work out just fine. We also noticed that the axle is now about three inches further forward than the stock locations, which extends our wheel base, and that just always helps out on the trail. Now this is the position of our front axle. Figuring out where our rear axle's gonna sit, well that's just a whole lot easier. Now the look that we're going for in the rear is pretty simple. We want the tire to stick out of the back of the Jeep just a little bit. Since we're running 37 inch tall tires all we did is measure in from the back of the chassis about 18 inches and we set our axle right here. Now that's 8 inches further back than the factory location further extending our wheel base. Now we're running a triangulated four link suspension and that is exactly what it sounds like. We're gonna be running a set of upper links and a set of lower links from the axle up to the chassis. Now what that's gonna do is gonna help center our axle from left to right. It's gonna give us some adjustability and it's gonna give us better articulation when we're out on the trails. Now we've got to figure out where we're gonna mount all of this stuff, and there's a couple of things that we need to know but let me show you what we're talking about. What we're trying to do with our suspension is land on a value. That value is called our anti-squat number. To figure out our anti-squat we need to project some lines on our chassis. The first line will be the center of gravity, and for us that's basically the center of the camshaft, which is about 9 inches above our motor mounts. The next vertical lines will be the center of our front and our rear tire, also known as the contact patch, and the third line will be our anti-squat line, which is run from the contact patch of the rear tire to where the center of gravity and the center of the front tire meet. Where those lines meet will help us choose where we put our mounts for our upper and our lower links. The position of those bars will create a point that's called an instant center, and where that point lands in relationship to our anti-squat line will determine how our suspension will handle. As you change the position of your mounts that will change where the instant center will land, and that will determine how your suspension reacts, and knowing these parameters will help you guys figure out where to put the mounts for your suspension, and for us and Project Junk Mail it's gonna be an all-around off road rig. It may see some rocks, it may see some mud, but it's gonna see a lot of trail riding. So we're gonna try to land as close as we can to that 100 percent anti-squat line, but if we're above or below it by 20 percent we'll be just fine. Now the next step for us is to just start laying out some lines. We have a plan. We'll show you how to build a heavy duty four link suspension that can handle anything the trail has to offer.
(Jeremy)>> Now that we have the links mocked up on our suspension we can project the lines out to find our instant center and see how close we are to that 100 percent anti-squat line that we've been shooting for. Now to mount our suspension it's gonna be pretty simple. Here on the rear axle we're just gonna use a couple of tabs, but on the frame side we're gonna have to build some mounts. So we went ahead and used a piece of cardboard to help show where we're gonna mount our lower links, and for our upper links they're gonna be pretty basic. We're just gonna weld a tab to the inside of the chassis here, but this is just half of our suspension. We're also gonna need to build the links that connect the axle to the frame, and now that we know where those mounts are we can actually start cutting some tubing and building our suspension. For our links we're gonna use two inch by quarter inch wall d-o-m that we had laying around the shop. It's super strong and should be able to take plenty of abuse. We'll cut our lowers to 43 inches and our uppers to 38. This will give us a little wiggle room when we do our final knock out. [ saw buzzing ] [ MUSIC ]
(Jeremy)>> Now that I've got some links cut out it's time to start assembly. We're gonna be using inch and a quarter by one inch rod ends. Now we're using these because of their strength and flexibility. These also come with some threaded tube inserts. Now there's a left and a right hand side to these inserts and we're gonna be using both. That way if we need to adjust our suspension when we're underneath the Jeep all we've got to do is give the tube a little twist and then we'll just lock down our jam nut, but to get this whole party started I've got to tack in some of these inserts. When welding these up you don't want to bottom out your tube insert. You'll want to leave a little space to give you a nice channel to weld to. [ welder crackling ] [ MUSIC ]
(Jeremy)>> With our tube inserts tacked in we can install our rod ends. Now to go along with our rod ends we're gonna be running some high misalignment spacers what these do is extend the radius of the ball, and they give us more flex and articulation out of our joint. They also add a little bit of width, and they step the inside bore from one inch down to three quarters of an inch. Now with all this mocked up we can take our tubes over to our Jeep and keep rolling on our suspension. [ MUSIC ] Alright let's see how this fits on the axle. [ MUSIC ] Alright that'll work right there. Let's get a couple of tacks on it to hold it in. [ welder crackling ]
(Jimmy)>> You got one corner done.
(Jeremy)>> Yeah the brackets you made down here on the axle are perfect but I'm gonna need you to do one more thing and that's make this big guy.
(Jimmy)>> See this is why I love c-n-c plasma tables.
(Jeremy)>> Right you can use the new table, and I'll go ahead and get started on the other side.
(Jimmy)>> Coming up, we design and build some custom mounting brackets for Junk Mail's off road suspension.
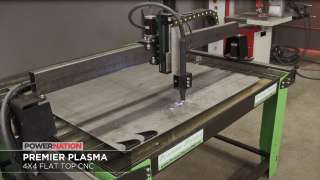
(Jimmy)>> Jeremy and I have made some pretty good progress on our four link suspension system for our Jeep but we're at the point now where we need some brackets to finish it out. He gave me this template but there's a few more things I need to do before we can cut it out on our c-n-c plasma table. I'm actually gonna take a few measurements and transfer this into our 3-D cad program, and then we can start cutting some metal. [ MUSIC ] Everything looks pretty good. So all we have to do is transfer it to a u-s-b drive and take it over to our plasma table. To cut out our brackets we'll be using our c-n-c plasma table from Premier Plasma. In a fab shop like ours it's the ultimate time saver. This table can handle a four by four sheet of steel or any other metal, which gives the potential to mass produce small brackets or build something bigger like the back half of a chassis. This table is built with heavy duty components to give smooth motion and ensure accurate cuts. Another optional feature is the torch height controller or t-h-c. By nature metal sheets are usually bowed or wavy. The t-h-c keeps the torch at the optimal height to improve accuracy. Premier Plasma can accommodate any shop. They offer tables from two by two all the way to by five by ten, and even have router attachments available for those who work with metal and wood, and it's all made here in the USA. With the outside brackets done now I adjusted the original template to accommodate the bracket that goes on the inside of the chassis rail. So I have that a few more pieces to cut out, and then our suspension mounts are done. [ hissing ]
(Jeremy)>> For our brackets we're using three-sixteenths hot rolled pickled and oiled steel. The pickled and oiled version is better than normal hot rolled steel because it doesn't have the mill scale on it, and the three-sixteenths material is gonna be plenty strong for our suspension. [ hissing ] [ MUSIC ] [ grinder buzzing ]
(Jimmy)>> I've got a puzzle for you.
(Jeremy)>> Those look just like the brackets on the axle.
(Jimmy)>> So I like the trusses and the big pieces. There's slots, and then the internal pieces have a tab on them so that it goes into the slot and it's gonna make it a little bit easier to line up and it's gonna give it some internal support.
(Jeremy)>> I think this is gonna be a whole lot easier to do this on a bench versus the chassis.
(Jimmy)>> I'm gonna work on the inner upper mounts too.
(Jeremy)>> Alright I'm gonna go put these together. [ MUSIC ] Just like the axle trusses there's a few pieces we need to put together to make these brackets. First I'll start assembly. [ welder crackling ]
(Jeremy)>> Then I'll add a couple of tacks. [ welder crackling ]
(Jeremy)>> And it's back over to the chassis for a test fit. Before attaching our mounts we'll grind away some of the rust on our chassis, giving us a good surface to weld to. Now we can clamp in our mount and tack it in. [ welder crackling ]
(Jeremy)>> Ow, that landed on my leg! [ welder crackling ]
(Jeremy)>> Because of the width of our heim joints the inside of our four link bracket extends past the chassis just a little bit. So we designed this top plate to help strengthen the mount. Now when I put the two pieces together it doesn't leave me much of a surface area to weld to. So what we're gonna do is grab a grinder and bevel the outside edges of both plates, creating kind of a trough. Now what that's gonna do is give us better penetration and a stronger weld. Nothing too drastic, just enough to give us good penetration for when we go back to finish weld it later. [ grinder buzzing ] [ welder crackling ]
(Jeremy)>> With our lower mount tacked in we can move on to the upper mount that Jimmy knocked out on the plasma table. Then from here we can cut the bars to length and finish up our rear suspension. [ welder crackling ]
(Jeremy)>> With our mounts in place we can measure our links... [ MUSIC ] ...cut them to length... [ saw buzzing ]
(Jeremy)>> ...weld in our heims, and bolt them up. [ MUSIC ] With our links installed that wraps up the bulk of our rear suspension and it's time to transition to the front, and that's pretty much rinse and repeat with the exception of one thing.
(Jimmy)>> And that one thing is a clearance issue. I've already designed and tacked in the upper mount on the axle, and pretty much wherever we put the other mounts on the chassis the four link bars are going to hit this cross member, but we do have a solution.
(Jeremy)>> We're gonna end up getting rid of this cross member completely and we'll build two separate engine mounts and just weld those directly to the chassis. Now we're not too concerned about losing the support of this cross member because when we put the bumper on the front of the Jeep we're just gonna weld it to the frame anyways.
(Jimmy)>> So the first thing we've got to do is get that cross member out of the way so we can keep rolling on our suspension. [ drill buzzing ] [ grinder buzzing ]
(Jeremy)>> Just like the rear, we'll clean up our chassis and weld in all our brackets. [ welder crackling ] [ MUSIC ] [ welder crackling ]
(Jeremy)>> Once in place we can measure for our link bars and cut them out. 28! [ saw buzzing ]
(Jeremy)>> Then we'll tack in our rod ends and set them in place. [ MUSIC ]
(Jimmy)>> Dude this thing's looking so trick, and I am so glad that we got that plasma table.
(Jeremy)>> Yeah everything turned out pretty good. All we've got left now are the shocks. Junk Mail gets a coil over suspension that will help us crush any terrain.
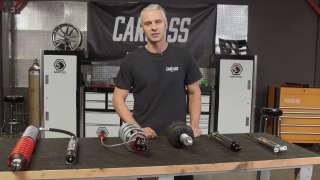
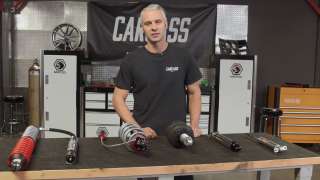
(Jeremy)>> When it comes time to picking out the shocks and struts for your next project you need to remember that they are key to ride quality and the foundation of your suspension system. Well Summit Racing has a wide variety of shocks and struts to choose from. So let's take a look at a couple of options. A gas adjust shock has performance advantages over a traditional twin tube design, like an increase in steering response and stability. The mono tube design responds instantly to driver's inputs, and delivers an increase in handling. An on the car adjustable shock makes it easy for you to dial in your desired level of comfort and performance. A quick bolt in installation can be done in minutes, and it's designed to be used with your stock style springs. An integrated air spring and shock absorber system like this one replaces your car or truck's metal springs with a pressure adjustable air bag, and these are great because you can adjust them from inside your vehicle. A direct replacement coil over shock gives you the ability to adjust and re-valve to fit your needs. They allow you to tune them to different driving styles. Plus they're a direct bolt in for a lot of vehicles, making them a popular swap, and lastly the universal coil over shock is designed to be used with dual rate springs. They come in a wide range of travel lengths, making them perfect for custom suspension setups, and for us and our four link Jeep these things are going to work perfectly.
(Jimmy)>> With the suspension linkage all done it's time to move on to that last piece.
(Jeremy)>> And to get the shocks installed it's gonna be pretty basic. What we're gonna do is weld some tabs onto the axle and then we're gonna build some shock hoops and weld those directly to the chassis, but we're not gonna use the shocks to do any of the mock up.
(Jimmy)>> And the reason for that is because the chassis is already at ride height. So with the shocks fully extended they're not gonna work for mock up. So instead we have this tube that mimics the length of the shock at ride height. That way we can accurately place the tabs and the shock hoop.
(Jeremy)>> And to get all this started first we've got to take a couple of measurements to put on the tabs.
(Jimmy)>> These measurements aren't too critical. We just want the bracket inboard enough to clear our brake components and outboard far enough so that the shock body clears the chassis. Then we'll tack in our tabs. [ welder crackling ]
(Jimmy)>> Now that we have the tabs on our axle it's time to figure out the hoop section, and basically what we're gonna do is we're gonna take a tube and bend it 180 degrees and weld it to the chassis, but we have to figure out what length of tube to cut. If I stand up this tube that represents our shock it stands up about a foot off the chassis, and a little bit shorter on this side but it's best to have some excess, and we know from experience using our bender the 180 degree section is gonna take up about 18 inches of tube. 18 plus 24 is 42 and that's the length we need to cut. [ MUSIC ] For our shock hoop we'll be using some 120 wall d-o-m. [ mechanical humming ] [ MUSIC ]
(Jimmy)>> With our shock hoop bent up now the first noticeable thing is that our simulated shock does not fall in the center of it, but the idea here is the shock hoop is gonna fall on the boxed section of the chassis to maintain strength. So the compromise is to lean the shock over a little bit and let the tabs fall right in the center, but before we get to the tabs we've got to tack this thing in. We'll give the chassis a quick grind before installing our hoop.
(Jeremy)>> Go ahead!
(Jimmy)>> We'll make sure this thing is square and drop in a couple of tacks. [ MUSIC ] Then we'll head back over to our plasma table and cut out a few tabs to mount our shocks. [ welder crackling ]
(Jeremy)>> You know that plasma table came in pretty handy building all these brackets.
(Jimmy)>> It's a great machine.
(Jeremy)>> The suspension is all tacked in underneath our Jeep, and from what we can see everything should work out pretty good. Still got a couple of things we've got to do. We've got to tie the shock hoops in front and rear but we're gonna do that after the body's on it.
(Jimmy)>> So all we really have to do now is build out the axles, put the drivetrain in the chassis, and put the body on it so we can really see how this thing sits.
(Jeremy)>> I think we'll save that for next time. If you guys like anything you've seen on the show today why don't you check out Powernation TV dot com, and we'll see you next time. Can't wait to get this thing on the trails.
(Jimmy)>> It's gonna be a good time!
Show Full Transcript
(Jimmy)>> Today on Carcass rain, sleet, or snow Project Junk Mail gets major suspension upgrades taking our Jeep from a mail delivery vehicle to an off road machine that can handle all the elements.
(Jeremy)>> We'll show you how to set up a race inspired four link system that will conquer the trails and rocks. [ MUSIC ] [ tires squealing ] [ MUSIC ]
(Jeremy)>> Hey guys, welcome to Carcass. Now our 1978 Jeep DJ-5 that we're calling Project Junk Mail looks a whole lot different than the day we picked it up.
(Jimmy)>> That's right! We got the cab off the chassis, stripped all the old suspension brackets off, and we even went to a junkyard, got a set of axles, and got them all the way down to the housings.
(Jeremy)>> Now we slid our axles underneath our chassis to give us an initial look at what we're dealing with, and we're gonna be prepping for our four link suspension but we're gonna add a set of axle trusses to give us a good foundation for that suspension. So we've got to slide these babies out, set them on a set of axle stands, and start prepping. [ MUSIC ]
(Jimmy)>> To clean up our axles we're using some wire wheels. We just want to knock off the rust and grime to give our trusses a good, clean surface to weld to. [ grinder buzzing ]
(Jeremy)>> With our axles all cleaned up we're gonna be adding a set of Artec Industries axle trusses that we picked up from Summit Racing dot com. We're gonna be doing this for two reasons. One, it's just gonna help strengthen our axle, and the second and more important reason is it's gonna give us a great mounting point for our upper arms and for our shocks. So what we're gonna do is just tack this into place. Then we'll set our axles back underneath the chassis, keep rolling on our suspension. [ welder crackling ]
(Jeremy)>> Alright that looks pretty good. Get her back under the chassis. Got it? It got a little heavier that's for sure. [ MUSIC ]
(Jimmy)>> We now have trusses tacked to both axle housings but there's one thing we need to do before we start designing our suspension, and that's deciding where the axles are gonna land, and in the rear it's not too critical but we do know we're gonna extend the wheel base a little bit for stability.
(Jeremy)>> But on the front end it is critical because the position of our front axle solely depends on the position of our steering gearbox because we don't want our steering to bind under heavy articulation. So the next step is to mount the gearbox on the passenger side. [ MUSIC ] We mounted our new gearbox using an existing hole from the original box. Now this is just for mock up. We're not sure if we're gonna have to move the gearbox towards the back or toward the front of the Jeep but this is just a good starting point. Now with our axle and our chassis set at ride height I'm gonna use a plumb bob and drop it down the center of our pitman arm, and then we're gonna mock up some steering and that should help us find the final resting position of our front axle. [ MUSIC ] Well now that we have the steering mocked up on our front axle we now know that the stock location we chose for the gearbox should work out just fine. We also noticed that the axle is now about three inches further forward than the stock locations, which extends our wheel base, and that just always helps out on the trail. Now this is the position of our front axle. Figuring out where our rear axle's gonna sit, well that's just a whole lot easier. Now the look that we're going for in the rear is pretty simple. We want the tire to stick out of the back of the Jeep just a little bit. Since we're running 37 inch tall tires all we did is measure in from the back of the chassis about 18 inches and we set our axle right here. Now that's 8 inches further back than the factory location further extending our wheel base. Now we're running a triangulated four link suspension and that is exactly what it sounds like. We're gonna be running a set of upper links and a set of lower links from the axle up to the chassis. Now what that's gonna do is gonna help center our axle from left to right. It's gonna give us some adjustability and it's gonna give us better articulation when we're out on the trails. Now we've got to figure out where we're gonna mount all of this stuff, and there's a couple of things that we need to know but let me show you what we're talking about. What we're trying to do with our suspension is land on a value. That value is called our anti-squat number. To figure out our anti-squat we need to project some lines on our chassis. The first line will be the center of gravity, and for us that's basically the center of the camshaft, which is about 9 inches above our motor mounts. The next vertical lines will be the center of our front and our rear tire, also known as the contact patch, and the third line will be our anti-squat line, which is run from the contact patch of the rear tire to where the center of gravity and the center of the front tire meet. Where those lines meet will help us choose where we put our mounts for our upper and our lower links. The position of those bars will create a point that's called an instant center, and where that point lands in relationship to our anti-squat line will determine how our suspension will handle. As you change the position of your mounts that will change where the instant center will land, and that will determine how your suspension reacts, and knowing these parameters will help you guys figure out where to put the mounts for your suspension, and for us and Project Junk Mail it's gonna be an all-around off road rig. It may see some rocks, it may see some mud, but it's gonna see a lot of trail riding. So we're gonna try to land as close as we can to that 100 percent anti-squat line, but if we're above or below it by 20 percent we'll be just fine. Now the next step for us is to just start laying out some lines. We have a plan. We'll show you how to build a heavy duty four link suspension that can handle anything the trail has to offer.
(Jeremy)>> Now that we have the links mocked up on our suspension we can project the lines out to find our instant center and see how close we are to that 100 percent anti-squat line that we've been shooting for. Now to mount our suspension it's gonna be pretty simple. Here on the rear axle we're just gonna use a couple of tabs, but on the frame side we're gonna have to build some mounts. So we went ahead and used a piece of cardboard to help show where we're gonna mount our lower links, and for our upper links they're gonna be pretty basic. We're just gonna weld a tab to the inside of the chassis here, but this is just half of our suspension. We're also gonna need to build the links that connect the axle to the frame, and now that we know where those mounts are we can actually start cutting some tubing and building our suspension. For our links we're gonna use two inch by quarter inch wall d-o-m that we had laying around the shop. It's super strong and should be able to take plenty of abuse. We'll cut our lowers to 43 inches and our uppers to 38. This will give us a little wiggle room when we do our final knock out. [ saw buzzing ] [ MUSIC ]
(Jeremy)>> Now that I've got some links cut out it's time to start assembly. We're gonna be using inch and a quarter by one inch rod ends. Now we're using these because of their strength and flexibility. These also come with some threaded tube inserts. Now there's a left and a right hand side to these inserts and we're gonna be using both. That way if we need to adjust our suspension when we're underneath the Jeep all we've got to do is give the tube a little twist and then we'll just lock down our jam nut, but to get this whole party started I've got to tack in some of these inserts. When welding these up you don't want to bottom out your tube insert. You'll want to leave a little space to give you a nice channel to weld to. [ welder crackling ] [ MUSIC ]
(Jeremy)>> With our tube inserts tacked in we can install our rod ends. Now to go along with our rod ends we're gonna be running some high misalignment spacers what these do is extend the radius of the ball, and they give us more flex and articulation out of our joint. They also add a little bit of width, and they step the inside bore from one inch down to three quarters of an inch. Now with all this mocked up we can take our tubes over to our Jeep and keep rolling on our suspension. [ MUSIC ] Alright let's see how this fits on the axle. [ MUSIC ] Alright that'll work right there. Let's get a couple of tacks on it to hold it in. [ welder crackling ]
(Jimmy)>> You got one corner done.
(Jeremy)>> Yeah the brackets you made down here on the axle are perfect but I'm gonna need you to do one more thing and that's make this big guy.
(Jimmy)>> See this is why I love c-n-c plasma tables.
(Jeremy)>> Right you can use the new table, and I'll go ahead and get started on the other side.
(Jimmy)>> Coming up, we design and build some custom mounting brackets for Junk Mail's off road suspension.
(Jimmy)>> Jeremy and I have made some pretty good progress on our four link suspension system for our Jeep but we're at the point now where we need some brackets to finish it out. He gave me this template but there's a few more things I need to do before we can cut it out on our c-n-c plasma table. I'm actually gonna take a few measurements and transfer this into our 3-D cad program, and then we can start cutting some metal. [ MUSIC ] Everything looks pretty good. So all we have to do is transfer it to a u-s-b drive and take it over to our plasma table. To cut out our brackets we'll be using our c-n-c plasma table from Premier Plasma. In a fab shop like ours it's the ultimate time saver. This table can handle a four by four sheet of steel or any other metal, which gives the potential to mass produce small brackets or build something bigger like the back half of a chassis. This table is built with heavy duty components to give smooth motion and ensure accurate cuts. Another optional feature is the torch height controller or t-h-c. By nature metal sheets are usually bowed or wavy. The t-h-c keeps the torch at the optimal height to improve accuracy. Premier Plasma can accommodate any shop. They offer tables from two by two all the way to by five by ten, and even have router attachments available for those who work with metal and wood, and it's all made here in the USA. With the outside brackets done now I adjusted the original template to accommodate the bracket that goes on the inside of the chassis rail. So I have that a few more pieces to cut out, and then our suspension mounts are done. [ hissing ]
(Jeremy)>> For our brackets we're using three-sixteenths hot rolled pickled and oiled steel. The pickled and oiled version is better than normal hot rolled steel because it doesn't have the mill scale on it, and the three-sixteenths material is gonna be plenty strong for our suspension. [ hissing ] [ MUSIC ] [ grinder buzzing ]
(Jimmy)>> I've got a puzzle for you.
(Jeremy)>> Those look just like the brackets on the axle.
(Jimmy)>> So I like the trusses and the big pieces. There's slots, and then the internal pieces have a tab on them so that it goes into the slot and it's gonna make it a little bit easier to line up and it's gonna give it some internal support.
(Jeremy)>> I think this is gonna be a whole lot easier to do this on a bench versus the chassis.
(Jimmy)>> I'm gonna work on the inner upper mounts too.
(Jeremy)>> Alright I'm gonna go put these together. [ MUSIC ] Just like the axle trusses there's a few pieces we need to put together to make these brackets. First I'll start assembly. [ welder crackling ]
(Jeremy)>> Then I'll add a couple of tacks. [ welder crackling ]
(Jeremy)>> And it's back over to the chassis for a test fit. Before attaching our mounts we'll grind away some of the rust on our chassis, giving us a good surface to weld to. Now we can clamp in our mount and tack it in. [ welder crackling ]
(Jeremy)>> Ow, that landed on my leg! [ welder crackling ]
(Jeremy)>> Because of the width of our heim joints the inside of our four link bracket extends past the chassis just a little bit. So we designed this top plate to help strengthen the mount. Now when I put the two pieces together it doesn't leave me much of a surface area to weld to. So what we're gonna do is grab a grinder and bevel the outside edges of both plates, creating kind of a trough. Now what that's gonna do is give us better penetration and a stronger weld. Nothing too drastic, just enough to give us good penetration for when we go back to finish weld it later. [ grinder buzzing ] [ welder crackling ]
(Jeremy)>> With our lower mount tacked in we can move on to the upper mount that Jimmy knocked out on the plasma table. Then from here we can cut the bars to length and finish up our rear suspension. [ welder crackling ]
(Jeremy)>> With our mounts in place we can measure our links... [ MUSIC ] ...cut them to length... [ saw buzzing ]
(Jeremy)>> ...weld in our heims, and bolt them up. [ MUSIC ] With our links installed that wraps up the bulk of our rear suspension and it's time to transition to the front, and that's pretty much rinse and repeat with the exception of one thing.
(Jimmy)>> And that one thing is a clearance issue. I've already designed and tacked in the upper mount on the axle, and pretty much wherever we put the other mounts on the chassis the four link bars are going to hit this cross member, but we do have a solution.
(Jeremy)>> We're gonna end up getting rid of this cross member completely and we'll build two separate engine mounts and just weld those directly to the chassis. Now we're not too concerned about losing the support of this cross member because when we put the bumper on the front of the Jeep we're just gonna weld it to the frame anyways.
(Jimmy)>> So the first thing we've got to do is get that cross member out of the way so we can keep rolling on our suspension. [ drill buzzing ] [ grinder buzzing ]
(Jeremy)>> Just like the rear, we'll clean up our chassis and weld in all our brackets. [ welder crackling ] [ MUSIC ] [ welder crackling ]
(Jeremy)>> Once in place we can measure for our link bars and cut them out. 28! [ saw buzzing ]
(Jeremy)>> Then we'll tack in our rod ends and set them in place. [ MUSIC ]
(Jimmy)>> Dude this thing's looking so trick, and I am so glad that we got that plasma table.
(Jeremy)>> Yeah everything turned out pretty good. All we've got left now are the shocks. Junk Mail gets a coil over suspension that will help us crush any terrain.
(Jeremy)>> When it comes time to picking out the shocks and struts for your next project you need to remember that they are key to ride quality and the foundation of your suspension system. Well Summit Racing has a wide variety of shocks and struts to choose from. So let's take a look at a couple of options. A gas adjust shock has performance advantages over a traditional twin tube design, like an increase in steering response and stability. The mono tube design responds instantly to driver's inputs, and delivers an increase in handling. An on the car adjustable shock makes it easy for you to dial in your desired level of comfort and performance. A quick bolt in installation can be done in minutes, and it's designed to be used with your stock style springs. An integrated air spring and shock absorber system like this one replaces your car or truck's metal springs with a pressure adjustable air bag, and these are great because you can adjust them from inside your vehicle. A direct replacement coil over shock gives you the ability to adjust and re-valve to fit your needs. They allow you to tune them to different driving styles. Plus they're a direct bolt in for a lot of vehicles, making them a popular swap, and lastly the universal coil over shock is designed to be used with dual rate springs. They come in a wide range of travel lengths, making them perfect for custom suspension setups, and for us and our four link Jeep these things are going to work perfectly.
(Jimmy)>> With the suspension linkage all done it's time to move on to that last piece.
(Jeremy)>> And to get the shocks installed it's gonna be pretty basic. What we're gonna do is weld some tabs onto the axle and then we're gonna build some shock hoops and weld those directly to the chassis, but we're not gonna use the shocks to do any of the mock up.
(Jimmy)>> And the reason for that is because the chassis is already at ride height. So with the shocks fully extended they're not gonna work for mock up. So instead we have this tube that mimics the length of the shock at ride height. That way we can accurately place the tabs and the shock hoop.
(Jeremy)>> And to get all this started first we've got to take a couple of measurements to put on the tabs.
(Jimmy)>> These measurements aren't too critical. We just want the bracket inboard enough to clear our brake components and outboard far enough so that the shock body clears the chassis. Then we'll tack in our tabs. [ welder crackling ]
(Jimmy)>> Now that we have the tabs on our axle it's time to figure out the hoop section, and basically what we're gonna do is we're gonna take a tube and bend it 180 degrees and weld it to the chassis, but we have to figure out what length of tube to cut. If I stand up this tube that represents our shock it stands up about a foot off the chassis, and a little bit shorter on this side but it's best to have some excess, and we know from experience using our bender the 180 degree section is gonna take up about 18 inches of tube. 18 plus 24 is 42 and that's the length we need to cut. [ MUSIC ] For our shock hoop we'll be using some 120 wall d-o-m. [ mechanical humming ] [ MUSIC ]
(Jimmy)>> With our shock hoop bent up now the first noticeable thing is that our simulated shock does not fall in the center of it, but the idea here is the shock hoop is gonna fall on the boxed section of the chassis to maintain strength. So the compromise is to lean the shock over a little bit and let the tabs fall right in the center, but before we get to the tabs we've got to tack this thing in. We'll give the chassis a quick grind before installing our hoop.
(Jeremy)>> Go ahead!
(Jimmy)>> We'll make sure this thing is square and drop in a couple of tacks. [ MUSIC ] Then we'll head back over to our plasma table and cut out a few tabs to mount our shocks. [ welder crackling ]
(Jeremy)>> You know that plasma table came in pretty handy building all these brackets.
(Jimmy)>> It's a great machine.
(Jeremy)>> The suspension is all tacked in underneath our Jeep, and from what we can see everything should work out pretty good. Still got a couple of things we've got to do. We've got to tie the shock hoops in front and rear but we're gonna do that after the body's on it.
(Jimmy)>> So all we really have to do now is build out the axles, put the drivetrain in the chassis, and put the body on it so we can really see how this thing sits.
(Jeremy)>> I think we'll save that for next time. If you guys like anything you've seen on the show today why don't you check out Powernation TV dot com, and we'll see you next time. Can't wait to get this thing on the trails.
(Jimmy)>> It's gonna be a good time!
