Carcass Featured Projects
Carcass Builds
Want more content like this?
Join the PowerNation Email NewsletterParts Used In This Episode
Gearstar Performance Transmissions
4L60E Transmission with Torque Converter - Level 4
Episode Transcript
[ Jimmy ] You're watching Powernation!
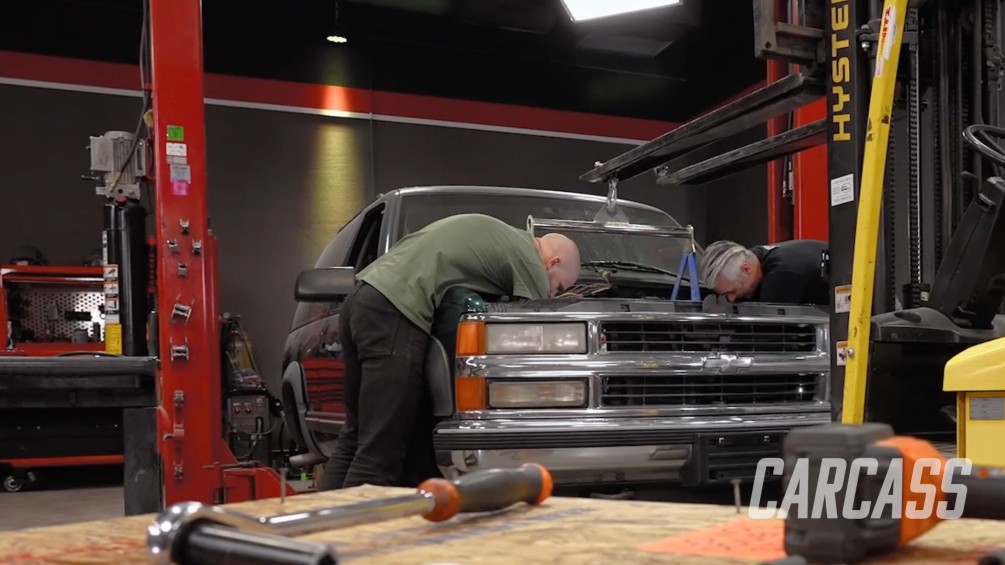
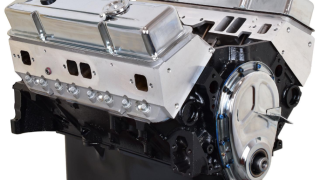
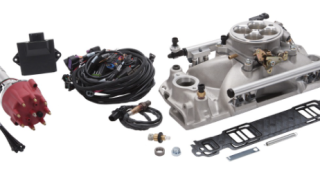
[ Jeremy ] Today on Carcass we have our two door Tahoe in the shop ready for some major upgrades. We'll install a new drive train that gives us better reliability. [ Jimmy ] We'll ditch the stock suspension and replace it with something to change the stance. We also beef up our braking system. [ Music ] [ engine revving ] [ Music ] [ Jimmy ] Hey everybody, welcome to Carcass. As you can see behind me this is the Tahoe that we have worked on before. Now we have it back in here to do some more stuff to it. While it has served its purpose we pulled out the old powertrain because it's seen a lot of miles and now it is time for an upgrade. [ Jeremy ] And that upgrade starts with a crate engine. This is a 390 horsepower 350 cubic inch small block Chevrolet that we got from ATK Performance Engines. Not only does this thing make 390 horsepower but it also boasts a whopping 420 pound feet of torque, and that's thanks to its 10 to 1 compression and its ATK high performance aluminum cylinder heads. Down inside the engine you'll find hypereutectic flattop pistons, a dual roller timing chain, and billet aluminum roller rockers with a 1.6 ratio. You can get an engine just like this from ATK fully assembled all the way from the oil pan up to the air cleaner including the carburetor. We just chose to order our engine this way because we are not gonna be putting a carbureted engine inside a vehicle that was originally fuel injected. We are gonna be running some fuel injection but it's not the stock stuff. We are gonna be doing an upgrade there as well. Now to get moving forward with that I've got to remove a couple of parts from this engine first. [ Music ] [ drill humming ] [ Music ] [ drill humming ] [ Music ] [ Jimmy ] The injection system we're going with is Edelbrock's Pro Flow-4 EFI kit which they offer in 450 and 550 horsepower versions for the small block Chevy. We have the 450 horsepower version which includes 29 pound per hour injectors installed in a 41-50 style intake manifold. Depending on whether you have Vortec heads or traditional heads they have something for your application. They also include a completely labeled plug-n-play harness with a brand new e-c-u with a faster processor and a single connection distributor to make this a very complete kit. They also include a bunch of other stuff. Spark plug wires, ignition coil, and a ton of fuel system components to make this an extremely simple and straightforward installation. What I have to do now is get some r-t-v and gaskets down, and then we can go ahead and put on this intake manifold. [ Music ]
[ Music ]
[ Music ]
[ ratchet clicking ] [ Music ]
[ Jimmy ] Let's drop it on in here. That's good right there. [ Music ]
[ Jeremy ] It's always scary with aluminum cylinder heads. Want to make sure you've got long enough bolts. [ Music ]
[ Music ] Motor mounts on it now? [ Music ]
[ drill humming ] [ Music ] [ Jeremy ] Kinda coming at this a little crooked. [ Jimmy ] We'll get it in there. [ forklift motor humming ] [ Jeremy ] Try to put the damper bolt right over the hood latch. Should be somewhat centered. Leaking coolant. [ Jimmy ] Go forward. Oh I just moved that hose. [ Jeremy ] Not like the system's completely drained. [ Jimmy ] And go forward. Go down a little more. [ Jeremy ] Scariest thing is when I can't see. [ Jimmy ] Stop, forward. [ Jeremy ] The pedal movement just a little. [ Jimmy ] Down slowly. Go ahead down. [ Jeremy ] Just a touch. [ Music ] [ drill humming ] [ Jeremy ] It's nice to put a small block in something that you took a small block out of. Just easy, easy work. [ Jimmy ] No fussing around with it. [ Jeremy ] Now that we have the engine installed in the Tahoe we get to show you what's in the box.
[ Jeremy ] Hey everybody, welcome back. We have the engine installed in between the frame rails of the Tahoe and now it's time to work on the transmission. This right here is a 4-L-60-E level four transmission that was built by Gear Star Transmissions. This thing is capable of holding up to 650 horsepower and about 600 pound feet of torque. You guys are probably noticing something a little different about this transmission but we're not gonna let the cat out of the bag yet. First we're gonna get this on the transmission jack, get it up in the truck, and then get it installed. [ Music ] This thing up there. [ Music ] Ready? [ Jimmy ] Yep. [ Music ] [ metal clanging ] [ Music ] [ mechanical humming ] [ Jeremy ] You guys are probably wondering by now why in the world do we have a two wheel drive transmission and yet the truck is four wheel drive? The cat is out of the bag. We are gonna be swapping this truck over to a two wheel drive truck. Why are we doing that? Couple of reasons here. The two door two wheel drive Tahoes are extremely hard to find. When you do find them you really have to pay up for them. We went the cheaper route here and bought a four wheel drive truck, and then we're gonna convert it to two wheel drive. For you four wheel drive guys you're probably asking why in the world would you want to do that? It's pretty simple. As far as performance goes that's what Jimmy and I are into. We like building performance stuff that hits the street, stuff that goes out on the track, and that's basically what this is going to be. By the time we get this two wheel drive 4-L-60 paired up with our spicy little small block here this thing should be a blast to drive. Get it out on the street. [ drill humming ] [ Jeremy ] Before we can get the transmission installed loosen up the bolts for the crossmember and slide it out of the way. One more thing, since this is an automatic we did pair the converter with our cam specs. So we have a Yank converter in here. It's a 2,800 stall converter and that'll pair nicely with our ATK. [ Music ]
[ Music ]
[ drill humming ] [ Music ]
[ Jeremy ] Now that we have the engine and transmission mocked up in our Tahoe let's go over something that's actually pretty important and that's engine angle. In older cars and trucks with V-8s they actually had quite a bit of angle built into the way the engine was installed in the car. The way that they compensated for that on the fuel side of things was on the intake manifold they would machine this surface with a little bit of an angle so it actually set your carburetor perfectly flat. They did that to help with fuel delivery and to keep the levels inside your carburetor even or level to the ground. Now with our setup the fact that we are going from a four wheel drive truck to a two wheel drive truck with a different transmission the crossmember in our truck is allowing our engine to tilt back entirely too far. So to compensate for that I've got this little piece of steel here and this magnetic protractor on here. The angle that this is showing is just over six degrees, which is entirely too much. Underneath here I have a jack with a block of wood on the transmission pan. We're gonna go ahead and jack that up until we reach zero, and then I'll crawl underneath the truck. I will take a measurement between the crossmember and the transmission mount. I'll end up having to build a little bit of a spacer there and we will call this thing completely installed. There's zero right there.
So it looks like we're about three and three quarter inches. So we'll whip up a couple of plates, build the mount, and we will wrap up the install. Coming up, now that the Tahoe is two wheel drive we do a little mixing and matching with some parts to get this thing sitting a little bit lower.
[ Jeremy ] Hey guys, welcome back. Well now that we have the engine and transmission installed in the Tahoe it's time to start moving on to some other things like the suspension. With this thing being two wheel drive now we want this to sit rather low to the ground. So we're gonna start working up here. To do that the first thing I do need to do is get rid of all of the tension on the torsion bar. [ drill humming ] [ Jeremy ] Now what we're gonna be using here is actually a torsion bar clamp. What this does is helps you put a little more tension on the key itself so you can get the keeper out of the way. You can pick this up at your local auto parts store. You can most of the time just rent them. [ Music ] [ drill humming ] [ Music ] [ hammer tapping ] [ Music ] [ Jeremy ] Now that we have all the tension off of everything up here we can start taking all this apart. [ drill humming ] [ Music ]
[ drill humming ] [ Music ]
[ drill humming ] [ Music ] [ Jeremy ] Nope, 19. [ drill humming ] [ Music ] [ hammer banging metal ] [ Music ] [ Jeremy ] Let's talk about what we're trying to accomplish on the front of our Tahoe. We're gonna be trying to do two things. One of those is to do a brake upgrade and the second thing is to try to get the Tahoe to sit as low as possible. The first thing we're gonna be doing is a spindle swap. This is the spindle out of our GMT-400 chassis. This is a spindle out of a GMT-800 chassis. This is the '99 to '06 trucks. You guys can see here that the hub mounting location is almost the same. This one sits a little bit higher, and that's actually going to lower the truck just a little bit. This is not a direct bolt in application. We do need to do a little bit of work to this. We have to do a little bit of machine work back here so we can get the lower ball joint to engage. We also have to ream the upper ball joint to get our stock ball joint of our Tahoe to work with this as well. Let's talk about how we're gonna lower the truck. We're gonna be replacing the original keys that we took out of this truck with a set of lowering keys, and what that does is re-clocks this hexagon that's in here and allows this to relax out a little bit more, and that will lower the truck as well. The other reason why we're gonna be going with this style of spindle is to do a brake upgrade. Now the GMT-800 trucks have a bigger set of brakes. So by going with this spindle we'll be able to bolt the stock brakes directly onto it. We'll have a performance upgrade and a brake upgrade as well. So I have to do a little bit of machine work to the spindle. So let's just get at it. [ Music ] [ grinder buzzing ] [ Music ] [ Jeremy ] Don't be afraid of machining this part of the spindle out. This is actually an aftermarket spindle that we picked up from Summit Racing. This is a two inch drop spindle, and there's plenty of meat here or plenty of steel. So by taking this little bit out of here it won't hurt it at all. [ Music ] [ drill humming ] [ Jeremy ] The reamer that we're using is from Summit Racing as well. This is a two inch per foot reamer and take your time while you're doing this. Check your work often just to make sure you don't go too far. [ Music ] One thing I did have to do on the truck side. I did have to grind a little bit on this ball joint socket. Really all I did was take this little casting rib off of it all the way round and smooth it out. This kind of falls right in here. Get the nuts on the ball joints and keep moving on. [ Music ]
[ ratchet clicking ] [ Music ]
So the last thing we're gonna do on the install. You have to take your tie rod end, flip it over, and then lock it into place. From here to do the brakes we're gonna be using a GMT-800 hub and caliper assembly. [ Jimmy ] Stick around, we add the new suspension to the rear end and upgrade our brake components.
[ Jimmy ] Now that Jeremy's got the front suspension all done it's time to move on to the back. This is gonna be quite a bit more simple. We're just gonna do a simple leaf spring change. It'll give us a little bit of a drop but we don't want too much because we don't want to get into the chassis and have to notch. So this is just a quick and easy way to finish the look of our truck. [ Music ] With the axle supported I'll loosen the U-bolts and then remove the U-bolt plate. [ drill humming ] [ Music ] [ drill humming ] [ Music ]
[ Jimmy ] I'll follow that up by removing the shackle bolts. [ ratchet clicking ] [ Music ]
[ ratchet clicking ] [ Music ]
[ Music ]
[ Music ]
[ Jimmy ] To do the lowering for us we're going with a leaf spring. This is a Belltech leaf spring that we got from Summit Racing. The drop is about three inches. So it's nothing too drastic but definitely enough to change the stance. [ Music ]
[ Music ]
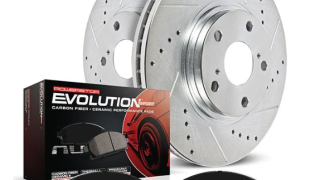
So we're just using that top plate from the original leaf springs and we will use the stock U-bolts. Just clean the rust off them a little bit, and then we'll get this thing tightened up in here. [ Music ] [ hammer banging ] [ Music ] [ drill humming ] [ Jimmy ] Not gonna go fully tight here. We'll wait until the truck is on the ground and then we'll torque everything. [ ratchet clicking ] [ Jeremy ] Since we switched over to the GMT-800 platform and hub we need to do something about the brakes. So to complete everything up here we're gonna be using a complete kit that we got from Powerstop Brakes. For the rotors we're gonna be going with their Evolution series. Now these are cross drilled and slotted. Plus they have a zinc coating all the way around them. So they'll be able to withstand anything mother nature can throw at them. We want to make sure that we put the right side on the correct side. Now the pads in the kit are their Z-23 carbon fiber ceramic performance pads. These have a low dust formula and are thermo scorched for faster break-in times. To round off the kit we will be installing the caliper that they sent as well. Again this is for the GMT-800 platform. [ Music ] [ ratchet clicking ] [ Jeremy ] Now when you take a brake job this far you definitely want to make sure you replace your hoses. So we'll get this one on here and tackle the driver's side as well. That's all the time that we have today. Thanks for watching and we'll catch you guys next time.
Show Full Transcript
[ Jeremy ] Today on Carcass we have our two door Tahoe in the shop ready for some major upgrades. We'll install a new drive train that gives us better reliability. [ Jimmy ] We'll ditch the stock suspension and replace it with something to change the stance. We also beef up our braking system. [ Music ] [ engine revving ] [ Music ] [ Jimmy ] Hey everybody, welcome to Carcass. As you can see behind me this is the Tahoe that we have worked on before. Now we have it back in here to do some more stuff to it. While it has served its purpose we pulled out the old powertrain because it's seen a lot of miles and now it is time for an upgrade. [ Jeremy ] And that upgrade starts with a crate engine. This is a 390 horsepower 350 cubic inch small block Chevrolet that we got from ATK Performance Engines. Not only does this thing make 390 horsepower but it also boasts a whopping 420 pound feet of torque, and that's thanks to its 10 to 1 compression and its ATK high performance aluminum cylinder heads. Down inside the engine you'll find hypereutectic flattop pistons, a dual roller timing chain, and billet aluminum roller rockers with a 1.6 ratio. You can get an engine just like this from ATK fully assembled all the way from the oil pan up to the air cleaner including the carburetor. We just chose to order our engine this way because we are not gonna be putting a carbureted engine inside a vehicle that was originally fuel injected. We are gonna be running some fuel injection but it's not the stock stuff. We are gonna be doing an upgrade there as well. Now to get moving forward with that I've got to remove a couple of parts from this engine first. [ Music ] [ drill humming ] [ Music ] [ drill humming ] [ Music ] [ Jimmy ] The injection system we're going with is Edelbrock's Pro Flow-4 EFI kit which they offer in 450 and 550 horsepower versions for the small block Chevy. We have the 450 horsepower version which includes 29 pound per hour injectors installed in a 41-50 style intake manifold. Depending on whether you have Vortec heads or traditional heads they have something for your application. They also include a completely labeled plug-n-play harness with a brand new e-c-u with a faster processor and a single connection distributor to make this a very complete kit. They also include a bunch of other stuff. Spark plug wires, ignition coil, and a ton of fuel system components to make this an extremely simple and straightforward installation. What I have to do now is get some r-t-v and gaskets down, and then we can go ahead and put on this intake manifold. [ Music ]
[ Music ]
[ Music ]
[ ratchet clicking ] [ Music ]
[ Jimmy ] Let's drop it on in here. That's good right there. [ Music ]
[ Jeremy ] It's always scary with aluminum cylinder heads. Want to make sure you've got long enough bolts. [ Music ]
[ Music ] Motor mounts on it now? [ Music ]
[ drill humming ] [ Music ] [ Jeremy ] Kinda coming at this a little crooked. [ Jimmy ] We'll get it in there. [ forklift motor humming ] [ Jeremy ] Try to put the damper bolt right over the hood latch. Should be somewhat centered. Leaking coolant. [ Jimmy ] Go forward. Oh I just moved that hose. [ Jeremy ] Not like the system's completely drained. [ Jimmy ] And go forward. Go down a little more. [ Jeremy ] Scariest thing is when I can't see. [ Jimmy ] Stop, forward. [ Jeremy ] The pedal movement just a little. [ Jimmy ] Down slowly. Go ahead down. [ Jeremy ] Just a touch. [ Music ] [ drill humming ] [ Jeremy ] It's nice to put a small block in something that you took a small block out of. Just easy, easy work. [ Jimmy ] No fussing around with it. [ Jeremy ] Now that we have the engine installed in the Tahoe we get to show you what's in the box.
[ Jeremy ] Hey everybody, welcome back. We have the engine installed in between the frame rails of the Tahoe and now it's time to work on the transmission. This right here is a 4-L-60-E level four transmission that was built by Gear Star Transmissions. This thing is capable of holding up to 650 horsepower and about 600 pound feet of torque. You guys are probably noticing something a little different about this transmission but we're not gonna let the cat out of the bag yet. First we're gonna get this on the transmission jack, get it up in the truck, and then get it installed. [ Music ] This thing up there. [ Music ] Ready? [ Jimmy ] Yep. [ Music ] [ metal clanging ] [ Music ] [ mechanical humming ] [ Jeremy ] You guys are probably wondering by now why in the world do we have a two wheel drive transmission and yet the truck is four wheel drive? The cat is out of the bag. We are gonna be swapping this truck over to a two wheel drive truck. Why are we doing that? Couple of reasons here. The two door two wheel drive Tahoes are extremely hard to find. When you do find them you really have to pay up for them. We went the cheaper route here and bought a four wheel drive truck, and then we're gonna convert it to two wheel drive. For you four wheel drive guys you're probably asking why in the world would you want to do that? It's pretty simple. As far as performance goes that's what Jimmy and I are into. We like building performance stuff that hits the street, stuff that goes out on the track, and that's basically what this is going to be. By the time we get this two wheel drive 4-L-60 paired up with our spicy little small block here this thing should be a blast to drive. Get it out on the street. [ drill humming ] [ Jeremy ] Before we can get the transmission installed loosen up the bolts for the crossmember and slide it out of the way. One more thing, since this is an automatic we did pair the converter with our cam specs. So we have a Yank converter in here. It's a 2,800 stall converter and that'll pair nicely with our ATK. [ Music ]
[ Music ]
[ drill humming ] [ Music ]
[ Jeremy ] Now that we have the engine and transmission mocked up in our Tahoe let's go over something that's actually pretty important and that's engine angle. In older cars and trucks with V-8s they actually had quite a bit of angle built into the way the engine was installed in the car. The way that they compensated for that on the fuel side of things was on the intake manifold they would machine this surface with a little bit of an angle so it actually set your carburetor perfectly flat. They did that to help with fuel delivery and to keep the levels inside your carburetor even or level to the ground. Now with our setup the fact that we are going from a four wheel drive truck to a two wheel drive truck with a different transmission the crossmember in our truck is allowing our engine to tilt back entirely too far. So to compensate for that I've got this little piece of steel here and this magnetic protractor on here. The angle that this is showing is just over six degrees, which is entirely too much. Underneath here I have a jack with a block of wood on the transmission pan. We're gonna go ahead and jack that up until we reach zero, and then I'll crawl underneath the truck. I will take a measurement between the crossmember and the transmission mount. I'll end up having to build a little bit of a spacer there and we will call this thing completely installed. There's zero right there.
So it looks like we're about three and three quarter inches. So we'll whip up a couple of plates, build the mount, and we will wrap up the install. Coming up, now that the Tahoe is two wheel drive we do a little mixing and matching with some parts to get this thing sitting a little bit lower.
[ Jeremy ] Hey guys, welcome back. Well now that we have the engine and transmission installed in the Tahoe it's time to start moving on to some other things like the suspension. With this thing being two wheel drive now we want this to sit rather low to the ground. So we're gonna start working up here. To do that the first thing I do need to do is get rid of all of the tension on the torsion bar. [ drill humming ] [ Jeremy ] Now what we're gonna be using here is actually a torsion bar clamp. What this does is helps you put a little more tension on the key itself so you can get the keeper out of the way. You can pick this up at your local auto parts store. You can most of the time just rent them. [ Music ] [ drill humming ] [ Music ] [ hammer tapping ] [ Music ] [ Jeremy ] Now that we have all the tension off of everything up here we can start taking all this apart. [ drill humming ] [ Music ]
[ drill humming ] [ Music ]
[ drill humming ] [ Music ] [ Jeremy ] Nope, 19. [ drill humming ] [ Music ] [ hammer banging metal ] [ Music ] [ Jeremy ] Let's talk about what we're trying to accomplish on the front of our Tahoe. We're gonna be trying to do two things. One of those is to do a brake upgrade and the second thing is to try to get the Tahoe to sit as low as possible. The first thing we're gonna be doing is a spindle swap. This is the spindle out of our GMT-400 chassis. This is a spindle out of a GMT-800 chassis. This is the '99 to '06 trucks. You guys can see here that the hub mounting location is almost the same. This one sits a little bit higher, and that's actually going to lower the truck just a little bit. This is not a direct bolt in application. We do need to do a little bit of work to this. We have to do a little bit of machine work back here so we can get the lower ball joint to engage. We also have to ream the upper ball joint to get our stock ball joint of our Tahoe to work with this as well. Let's talk about how we're gonna lower the truck. We're gonna be replacing the original keys that we took out of this truck with a set of lowering keys, and what that does is re-clocks this hexagon that's in here and allows this to relax out a little bit more, and that will lower the truck as well. The other reason why we're gonna be going with this style of spindle is to do a brake upgrade. Now the GMT-800 trucks have a bigger set of brakes. So by going with this spindle we'll be able to bolt the stock brakes directly onto it. We'll have a performance upgrade and a brake upgrade as well. So I have to do a little bit of machine work to the spindle. So let's just get at it. [ Music ] [ grinder buzzing ] [ Music ] [ Jeremy ] Don't be afraid of machining this part of the spindle out. This is actually an aftermarket spindle that we picked up from Summit Racing. This is a two inch drop spindle, and there's plenty of meat here or plenty of steel. So by taking this little bit out of here it won't hurt it at all. [ Music ] [ drill humming ] [ Jeremy ] The reamer that we're using is from Summit Racing as well. This is a two inch per foot reamer and take your time while you're doing this. Check your work often just to make sure you don't go too far. [ Music ] One thing I did have to do on the truck side. I did have to grind a little bit on this ball joint socket. Really all I did was take this little casting rib off of it all the way round and smooth it out. This kind of falls right in here. Get the nuts on the ball joints and keep moving on. [ Music ]
[ ratchet clicking ] [ Music ]
So the last thing we're gonna do on the install. You have to take your tie rod end, flip it over, and then lock it into place. From here to do the brakes we're gonna be using a GMT-800 hub and caliper assembly. [ Jimmy ] Stick around, we add the new suspension to the rear end and upgrade our brake components.
[ Jimmy ] Now that Jeremy's got the front suspension all done it's time to move on to the back. This is gonna be quite a bit more simple. We're just gonna do a simple leaf spring change. It'll give us a little bit of a drop but we don't want too much because we don't want to get into the chassis and have to notch. So this is just a quick and easy way to finish the look of our truck. [ Music ] With the axle supported I'll loosen the U-bolts and then remove the U-bolt plate. [ drill humming ] [ Music ] [ drill humming ] [ Music ]
[ Jimmy ] I'll follow that up by removing the shackle bolts. [ ratchet clicking ] [ Music ]
[ ratchet clicking ] [ Music ]
[ Music ]
[ Music ]
[ Jimmy ] To do the lowering for us we're going with a leaf spring. This is a Belltech leaf spring that we got from Summit Racing. The drop is about three inches. So it's nothing too drastic but definitely enough to change the stance. [ Music ]
[ Music ]
So we're just using that top plate from the original leaf springs and we will use the stock U-bolts. Just clean the rust off them a little bit, and then we'll get this thing tightened up in here. [ Music ] [ hammer banging ] [ Music ] [ drill humming ] [ Jimmy ] Not gonna go fully tight here. We'll wait until the truck is on the ground and then we'll torque everything. [ ratchet clicking ] [ Jeremy ] Since we switched over to the GMT-800 platform and hub we need to do something about the brakes. So to complete everything up here we're gonna be using a complete kit that we got from Powerstop Brakes. For the rotors we're gonna be going with their Evolution series. Now these are cross drilled and slotted. Plus they have a zinc coating all the way around them. So they'll be able to withstand anything mother nature can throw at them. We want to make sure that we put the right side on the correct side. Now the pads in the kit are their Z-23 carbon fiber ceramic performance pads. These have a low dust formula and are thermo scorched for faster break-in times. To round off the kit we will be installing the caliper that they sent as well. Again this is for the GMT-800 platform. [ Music ] [ ratchet clicking ] [ Jeremy ] Now when you take a brake job this far you definitely want to make sure you replace your hoses. So we'll get this one on here and tackle the driver's side as well. That's all the time that we have today. Thanks for watching and we'll catch you guys next time.
