Carcass Featured Projects
Carcass Builds
Want more content like this?
Join the PowerNation Email NewsletterParts Used In This Episode
Melling
Camshaft
Melling
Lifters
Melling
Oil Pump
Melling
Pushrods
Melling
Rocker Arms
Melling
Timing Set
Melling
Valve Spring Kit
Episode Transcript
[ Jeremy ] You're watching Powernation!
[ Jeremy ] Today on Carcass we're on the search for our new power plant for Project Unsanctioned. We'll tear it down and add a few upgrades to give us a little more power. [ Jimmy ] Then bolt up our new transmission. Plus upgrade our accessory drive. [ Music ] [ engine revving ] [ Music ] [ Jeremy ] Hey everybody, welcome to Carcass. We've got a little bit of a rain day today. So I figured what better time to go pick up the next part of our BMW build. The last time, or the first time you guy saw the BMW we went ahead and pulled it inside the shop, gave it a once over, pulled the entire interior out of it. Jimmy built a sick roll cage, and then we went ahead and plucked the engine and transmission as well. That's what I'm gonna be doing today is going on a little bit of a scavenger hunt to try to pick up the next power plant that's going to be going in between the frame rails. The original engine that was in the BMW was an inline six cylinder. We're gonna be upping the ante here a little bit. We're gonna be going with a V-8. Of course with the popularity of LS engines that's the direction we're going but we're going a little bit different on that. Since this is a race car and we're a little concerned with weight savings we're gonna be searching out an aluminum block LS. Even beyond that we're gonna find something that's a little more on the rare side. We're gonna be looking for an LC-9. That's an LS engine, aluminum block, that came in '07 plus GM trucks and s-u-vs. Now we've got a line on a couple of them. So we're off to a salvage yard right now to see if we can pick one up and get it back to the shop. [ Music ]
[ Music ]
[ Music ] A well organized salvage yard is a great place to pick up parts for your next project. Most of the time they can tell you miles and condition. As a bonus they'll even put a warranty on the parts. [ Music ]
[ Music ] [ forklift reverse beeping ] [ Music ]
[ Music ] [ engine revving ] [ Music ] [ Jeremy ] So let's talk about reusing parts or getting stuff from a salvage yard or a scrap yard. You've got two major advantages here. One, you're helping out the environment, being resourceful by going and buying used parts. You're also saving yourself quite a bit of money. Beyond that you can do what we did where we made the phone call, source the engine. It was already pulled, and all we had to do was load it in the back of the truck. The flip side of that, you guys can go to these pick and pull places and go pick your own parts. If you remember, Jimmy and I put together a green OBS Chevy truck and we did exactly that. We ran out to our local pick and pull. We pulled a 5-3 LS out of a Tahoe or Suburban I think it was, and then we brought it back to the shop and ran through it and put it in the truck, and it worked out fantastic. So there's a couple of different options you could do, or different directions you could go. Either one is just fine. Again, for us and with this engine we were able to verify that it did run before it was pulled and we know the exact miles. Somewhere around the 164,000 range. So when we get this back to the shop and tear into it should be just fine but obviously we'll look everything over and replace what we need to replace. So from here since I'm on the highway I'm just gonna start heading back to the shop. We'll get it tore apart and see what it looks like. [ Music ] [ forklift humming ] [ Music ]
[ Music ] [ drill humming ] [ Music ]
[ Jeremy ] Coming up, we start the process of tearing down our V-8 to give it a new lease on life.
[ Jeremy ] Hey guys, welcome back. We've got our LC-9 in the shop here and we're dying to see what it looks like on the inside. So we're gonna get rid of these bigger parts and pieces and take a good look at it. [ Music ] [ drill humming ] [ Music ]
[ drill humming ] [ Music ] [ drill humming ] [ Jeremy ] Won't need that anymore. [ drill humming ] [ Jeremy ] Won't be needing that either. [ Music ] [ drill humming ] [ Music ] [ drill humming ] [ Music ] [ drill humming ] [ Music ]
[ drill humming ] [ Jeremy ] Woo, hoo, hoo, messy! [ drill humming ] [ Music ] [ drill humming ] [ Music ] [ drill humming ] [ Music ] [ drill humming ] [ Music ]
[ Jeremy ] Now that we have the engine tore down here let's talk a little bit about what we have. This is an LS engine but it has one big difference from the earlier Gen-3 LS. This is Gen-4, '07 plus. They have something that's called AFM, also known as DOD or Active Fuel Management, and all of that lies underneath this cover. Once we get it off I will show you what's going on. Underneath here is going to be four different solenoids that shut oil flow off to their respective cylinders to drop this thing into a four cylinder mode to give you better fuel economy under light conditions. For us and our BMW we are not gonna be running anything like that. So what we're gonna be doing here is completely disabling this. Doing a cam swap, doing a lifter swap. That way our BMW will run on all eight cylinders all the time. [ drill humming ] [ Music ] [ drill humming ] [ Music ]
[ drill humming ] [ Music ] [ drill humming ] [ Music ] [ drill humming ] [ Music ] [ Jeremy ] So I went ahead and took the timing set out of the way. I also pulled all the lifters and the lifter trays. So now we're gonna pull the cam out. Little trick here so you don't score up your cam bearings as you're trying to walk this thing out. If you put a little extension in there it'll give you a little more leverage. Then you can use that to maneuver your cam around through the bearings and then you can walk it out. If you guys are just doing a basic cam swap where you're not gonna replace your bearings if they're in good shape this is the easiest way to do it. [ Jimmy ] While Jeremy's getting our engine cleaned up I wanted to talk about some of the parts we're gonna be putting back in it. We went to our friends at Melling Performance and they sent us quite a few things. Some of these parts are just o-e replacements including lifters, push rods, lifter trays, rocker arms, and a timing set. Some of these parts are more on the performance side to help spice up our engine a little bit. We've got their high volume oil pump. We have their beehive valve springs, which are good to 625 lift, and it also comes with retainers and seals. Then we also went with their class two cam shaft, which boasts 585 thousandths lift and 228 and 230 degrees duration at 50 thousandths cam lift. These parts are gonna give us a little bit of boost in power and it's gonna keep our engine together for a long time. We add the next component to our drivetrain with a gear banging five speed.
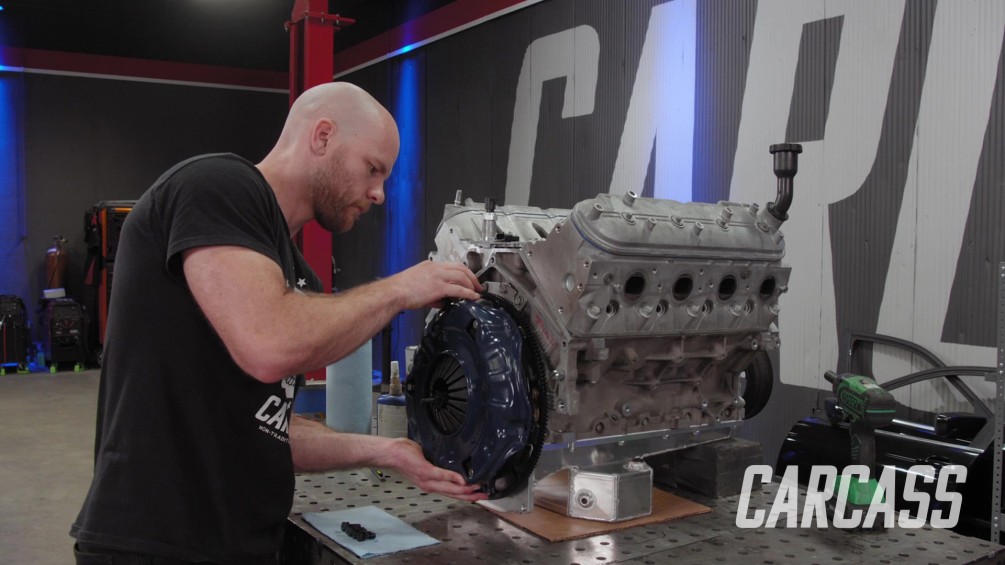
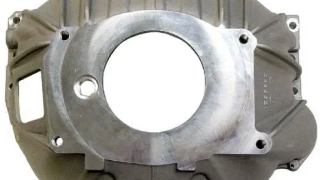
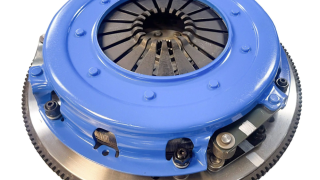
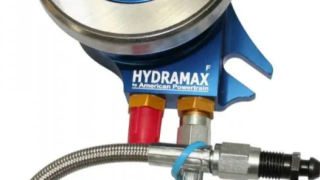
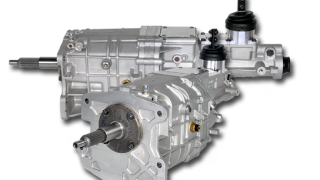
[ Jeremy ] Hey everybody, welcome back. We're moving right along on our E-46 BMW build and we have our LC-9 all put back together with all of our Melling parts. That started with installing our new DOD delete cam shaft that we slid into our freshly cleaned block. Then from there we flipped the engine over and added our Sikky swap oil pan that we got from Summit Racing so we could slide this thing in between the frame rails of the BMW. Then at the very end we installed our valley cover and our front and rear timing covers. Now it's time to move on to the transmission. So we've got to get that thing unboxed and on the table. Then figure out how this all works together. [ Jimmy ] To pair it with our LC-9 we picked up a Tremec TKX five speed from our friends at American Powertrain, and they sent us everything that we need to get this thing bolted in the car. These transmissions are really cool because they are a nice, compact package with one overdrive gear. They offer three different shifter locations. So it'll fit pretty much any application. In this kit we've got a brand new aluminum bell housing with a full clutch setup including American Powertrain's Hydromax release bearing plumbed with dash three line. We also have a pilot bearing and all the hardware included to put this stuff together. Some other cool features of this transmission is that it can handle up to 600 pound feet of torque and it can spin up to 8,000 r-p-m, which will be more than enough for what we're throwing at our BMW. First thing I'm gonna do here is get the clutch set up and we'll get this whole assembly in the car. Alright, ready to get the rest of this put together and we'll stab the engine and transmission in this thing. [ Jeremy ] Flywheel's on, torqued down. It's all set! [ Music ] [ Jimmy ] One important step to do before you assemble your clutch is to clean the bare metal surfaces. They often have oil on them from the manufacturing process. So anything from brake clean to acetone like I'm using here will do the job. Then we can get this thing assembled and get the transmission on it. [ Music ] Put on a little bit of thread locker. [ Music ]
[ Music ] [ ratchet clicking ] [ Jimmy ] And get the bell housing on here. I've already dialed this in. So we know that everything is nice and centered. [ Music ]
[ Jeremy ] I suppose you need one of these next. [ Jimmy ] Let's try it. [ Jeremy] You'll have to help me with this a little bit. [ Music ] [ Jimmy ] Sneak these in there. [ Music ]
[ Music ] [ Jeremy ] This takes forever with a wrench by the way. [ engine revving ] [ Jeremy ] Only way to do it though. [ Music ] Now before we can set the LS in between the frame rails on our E-46 there are a couple of things that we need to do, and there's actually one thing that we already did. We went ahead and replaced this rack and pinion here. It was a good time to do it. The other one was a little worn out. This is just a stock replacement. It should be perfect when we go to put the car on the track. We're also gonna be dealing with some clearance issues as we get that LS down and in here. One of the things that we do have to replace as well is this lower control arm bushing. This is quite a bit smaller than the stock one, and that's just gonna help us with some exhaust clearance. Another thing we're gonna end up replacing is the stock steering shaft itself. You can see the old one is rather big and the new one is pretty small. That's gonna have us even more clearance for when we go to set our headers in between the frame rails and attach it to the LS itself. Again this is a small car but this all works together to make everything work out. Then when we get time to setting the engine in here we are gonna be using a set of motor mounts. Now these just bolt to the crossmember. We do have to take the original bushings out of the way but these will bolt down, and that's gonna place the LS exactly where we need it as far as depth in between the frame rails of the car here. Now the best part about all of this is we didn't have to piece any of these pieces together. We went to Summit Racing. We actually bought a kit to swap in an LS into the E-46 chassis. So it's as easy as one, two, three. Replace these pieces and we're gonna have that LS sitting in here. [ Jimmy ] And for the engine we have these brackets that bolt to the original engine mount location. Then we also have a chassis side mount, and with these togethers we can shoehorn this engine and transmission combo between the frame rails. [ Jeremy ] Up next, we'll dress up our LC-9 with tunable fuel injection and new accessory drive components.
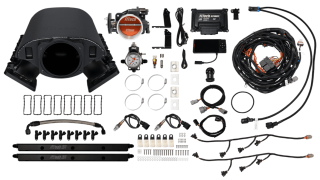
[ Jeremy ] Welcome back. While you were gone we did manage to shoehorn the LS in between the frame rails of the E-46, and the kit that we got from Summit Racing to mount all of this in here worked out perfectly except we did have to modify one thing and that's down here underneath the car. So the kit that we got is setup for a six speed transmission. Since we're running a five speed we did have to modify the transmission crossmember just a little bit. Basically all we had to do is move it forward about six inches so the pad would land on our transmission. We also went ahead and tackled some of the fuel system. This is a Corvette style fuel pressure regulator. So we have the feed and return coming in from the back side. Out of the front side we have one feet line, and that's what's gonna run our engine. And to continue on with our fuel system let's talk about the fuel injection that we're gonna be running. Now we have FiTech's Ultimate Rebel LS system that we're gonna be running on top of our LC-9, and the big advantage to the Rebel system is their intake is rather low profile and sleek and it's really quite short, which is gonna help us because we're gonna have some clearance issues underneath the hood of our BMW. This is a complete kit. So it comes with everything you need to install. You have the intake. You have the fuel rails. You also have your injectors, throttle body, and all the wiring and everything you need to install this into your next project vehicle. We're not gonna install this quite yet. I'm gonna do a little bit of work out here. So we're gonna start with the fuel rails and the injectors. [ Music ]
[ Music ]
[ Music ]
[ Music ] Then the next step here is to just set our intake in place on top of the engine, and we'll go ahead and bolt it down. [ Music ] [ torque wrench beeping ] Well that will wrap up the intake install, and then when it comes time to wiring everything up we just have this mess of wires to put into the car and it's pretty simple. It all just plugs into the sensors where it needs to go, but we're not to that point yet. Obviously you can see we have a long way to go on the rest of the car. So when it comes time to getting this all hooked up we know it's as simple as a couple of connections. We should be all set.
The next thing that we're gonna cross off the list here is the front drive assembly. This'll just get us one step closer to firing this thing up. All of this stuff came in a kit, and it's just gonna condense everything down into a neat little package here in the car. It all gets started with this Corvette style water pump. [ Music ] [ torque wrench beeping ] Jeremy ] Work on the alternator bracket next. Okay, alternator here's got a bracket and a pulley setup. [ Music ]
Power steering pump's a little tricky because they've got three spacers that space everything where it needs to be to keep the belt in line but take your time and you'll get it. [ Music ] Up next we'll put the pulley on the power steering pump here. Then we have the tensioner to put on. Then we also have to switch out the damper here. [ Music ]
[ drill humming ] [ Music ] [ drill humming ] [ ratchet clicking ] [ Music ]
[ Jeremy ] That'll pretty much button it up for now. Got the front drive on. I just have the belt to put back on it. Fuel injection is sitting in place. That's gonna wrap it up. So we'll see you guys next time.
Show Full Transcript
[ Jeremy ] Today on Carcass we're on the search for our new power plant for Project Unsanctioned. We'll tear it down and add a few upgrades to give us a little more power. [ Jimmy ] Then bolt up our new transmission. Plus upgrade our accessory drive. [ Music ] [ engine revving ] [ Music ] [ Jeremy ] Hey everybody, welcome to Carcass. We've got a little bit of a rain day today. So I figured what better time to go pick up the next part of our BMW build. The last time, or the first time you guy saw the BMW we went ahead and pulled it inside the shop, gave it a once over, pulled the entire interior out of it. Jimmy built a sick roll cage, and then we went ahead and plucked the engine and transmission as well. That's what I'm gonna be doing today is going on a little bit of a scavenger hunt to try to pick up the next power plant that's going to be going in between the frame rails. The original engine that was in the BMW was an inline six cylinder. We're gonna be upping the ante here a little bit. We're gonna be going with a V-8. Of course with the popularity of LS engines that's the direction we're going but we're going a little bit different on that. Since this is a race car and we're a little concerned with weight savings we're gonna be searching out an aluminum block LS. Even beyond that we're gonna find something that's a little more on the rare side. We're gonna be looking for an LC-9. That's an LS engine, aluminum block, that came in '07 plus GM trucks and s-u-vs. Now we've got a line on a couple of them. So we're off to a salvage yard right now to see if we can pick one up and get it back to the shop. [ Music ]
[ Music ]
[ Music ] A well organized salvage yard is a great place to pick up parts for your next project. Most of the time they can tell you miles and condition. As a bonus they'll even put a warranty on the parts. [ Music ]
[ Music ] [ forklift reverse beeping ] [ Music ]
[ Music ] [ engine revving ] [ Music ] [ Jeremy ] So let's talk about reusing parts or getting stuff from a salvage yard or a scrap yard. You've got two major advantages here. One, you're helping out the environment, being resourceful by going and buying used parts. You're also saving yourself quite a bit of money. Beyond that you can do what we did where we made the phone call, source the engine. It was already pulled, and all we had to do was load it in the back of the truck. The flip side of that, you guys can go to these pick and pull places and go pick your own parts. If you remember, Jimmy and I put together a green OBS Chevy truck and we did exactly that. We ran out to our local pick and pull. We pulled a 5-3 LS out of a Tahoe or Suburban I think it was, and then we brought it back to the shop and ran through it and put it in the truck, and it worked out fantastic. So there's a couple of different options you could do, or different directions you could go. Either one is just fine. Again, for us and with this engine we were able to verify that it did run before it was pulled and we know the exact miles. Somewhere around the 164,000 range. So when we get this back to the shop and tear into it should be just fine but obviously we'll look everything over and replace what we need to replace. So from here since I'm on the highway I'm just gonna start heading back to the shop. We'll get it tore apart and see what it looks like. [ Music ] [ forklift humming ] [ Music ]
[ Music ] [ drill humming ] [ Music ]
[ Jeremy ] Coming up, we start the process of tearing down our V-8 to give it a new lease on life.
[ Jeremy ] Hey guys, welcome back. We've got our LC-9 in the shop here and we're dying to see what it looks like on the inside. So we're gonna get rid of these bigger parts and pieces and take a good look at it. [ Music ] [ drill humming ] [ Music ]
[ drill humming ] [ Music ] [ drill humming ] [ Jeremy ] Won't need that anymore. [ drill humming ] [ Jeremy ] Won't be needing that either. [ Music ] [ drill humming ] [ Music ] [ drill humming ] [ Music ] [ drill humming ] [ Music ]
[ drill humming ] [ Jeremy ] Woo, hoo, hoo, messy! [ drill humming ] [ Music ] [ drill humming ] [ Music ] [ drill humming ] [ Music ] [ drill humming ] [ Music ]
[ Jeremy ] Now that we have the engine tore down here let's talk a little bit about what we have. This is an LS engine but it has one big difference from the earlier Gen-3 LS. This is Gen-4, '07 plus. They have something that's called AFM, also known as DOD or Active Fuel Management, and all of that lies underneath this cover. Once we get it off I will show you what's going on. Underneath here is going to be four different solenoids that shut oil flow off to their respective cylinders to drop this thing into a four cylinder mode to give you better fuel economy under light conditions. For us and our BMW we are not gonna be running anything like that. So what we're gonna be doing here is completely disabling this. Doing a cam swap, doing a lifter swap. That way our BMW will run on all eight cylinders all the time. [ drill humming ] [ Music ] [ drill humming ] [ Music ]
[ drill humming ] [ Music ] [ drill humming ] [ Music ] [ drill humming ] [ Music ] [ Jeremy ] So I went ahead and took the timing set out of the way. I also pulled all the lifters and the lifter trays. So now we're gonna pull the cam out. Little trick here so you don't score up your cam bearings as you're trying to walk this thing out. If you put a little extension in there it'll give you a little more leverage. Then you can use that to maneuver your cam around through the bearings and then you can walk it out. If you guys are just doing a basic cam swap where you're not gonna replace your bearings if they're in good shape this is the easiest way to do it. [ Jimmy ] While Jeremy's getting our engine cleaned up I wanted to talk about some of the parts we're gonna be putting back in it. We went to our friends at Melling Performance and they sent us quite a few things. Some of these parts are just o-e replacements including lifters, push rods, lifter trays, rocker arms, and a timing set. Some of these parts are more on the performance side to help spice up our engine a little bit. We've got their high volume oil pump. We have their beehive valve springs, which are good to 625 lift, and it also comes with retainers and seals. Then we also went with their class two cam shaft, which boasts 585 thousandths lift and 228 and 230 degrees duration at 50 thousandths cam lift. These parts are gonna give us a little bit of boost in power and it's gonna keep our engine together for a long time. We add the next component to our drivetrain with a gear banging five speed.
[ Jeremy ] Hey everybody, welcome back. We're moving right along on our E-46 BMW build and we have our LC-9 all put back together with all of our Melling parts. That started with installing our new DOD delete cam shaft that we slid into our freshly cleaned block. Then from there we flipped the engine over and added our Sikky swap oil pan that we got from Summit Racing so we could slide this thing in between the frame rails of the BMW. Then at the very end we installed our valley cover and our front and rear timing covers. Now it's time to move on to the transmission. So we've got to get that thing unboxed and on the table. Then figure out how this all works together. [ Jimmy ] To pair it with our LC-9 we picked up a Tremec TKX five speed from our friends at American Powertrain, and they sent us everything that we need to get this thing bolted in the car. These transmissions are really cool because they are a nice, compact package with one overdrive gear. They offer three different shifter locations. So it'll fit pretty much any application. In this kit we've got a brand new aluminum bell housing with a full clutch setup including American Powertrain's Hydromax release bearing plumbed with dash three line. We also have a pilot bearing and all the hardware included to put this stuff together. Some other cool features of this transmission is that it can handle up to 600 pound feet of torque and it can spin up to 8,000 r-p-m, which will be more than enough for what we're throwing at our BMW. First thing I'm gonna do here is get the clutch set up and we'll get this whole assembly in the car. Alright, ready to get the rest of this put together and we'll stab the engine and transmission in this thing. [ Jeremy ] Flywheel's on, torqued down. It's all set! [ Music ] [ Jimmy ] One important step to do before you assemble your clutch is to clean the bare metal surfaces. They often have oil on them from the manufacturing process. So anything from brake clean to acetone like I'm using here will do the job. Then we can get this thing assembled and get the transmission on it. [ Music ] Put on a little bit of thread locker. [ Music ]
[ Music ] [ ratchet clicking ] [ Jimmy ] And get the bell housing on here. I've already dialed this in. So we know that everything is nice and centered. [ Music ]
[ Jeremy ] I suppose you need one of these next. [ Jimmy ] Let's try it. [ Jeremy] You'll have to help me with this a little bit. [ Music ] [ Jimmy ] Sneak these in there. [ Music ]
[ Music ] [ Jeremy ] This takes forever with a wrench by the way. [ engine revving ] [ Jeremy ] Only way to do it though. [ Music ] Now before we can set the LS in between the frame rails on our E-46 there are a couple of things that we need to do, and there's actually one thing that we already did. We went ahead and replaced this rack and pinion here. It was a good time to do it. The other one was a little worn out. This is just a stock replacement. It should be perfect when we go to put the car on the track. We're also gonna be dealing with some clearance issues as we get that LS down and in here. One of the things that we do have to replace as well is this lower control arm bushing. This is quite a bit smaller than the stock one, and that's just gonna help us with some exhaust clearance. Another thing we're gonna end up replacing is the stock steering shaft itself. You can see the old one is rather big and the new one is pretty small. That's gonna have us even more clearance for when we go to set our headers in between the frame rails and attach it to the LS itself. Again this is a small car but this all works together to make everything work out. Then when we get time to setting the engine in here we are gonna be using a set of motor mounts. Now these just bolt to the crossmember. We do have to take the original bushings out of the way but these will bolt down, and that's gonna place the LS exactly where we need it as far as depth in between the frame rails of the car here. Now the best part about all of this is we didn't have to piece any of these pieces together. We went to Summit Racing. We actually bought a kit to swap in an LS into the E-46 chassis. So it's as easy as one, two, three. Replace these pieces and we're gonna have that LS sitting in here. [ Jimmy ] And for the engine we have these brackets that bolt to the original engine mount location. Then we also have a chassis side mount, and with these togethers we can shoehorn this engine and transmission combo between the frame rails. [ Jeremy ] Up next, we'll dress up our LC-9 with tunable fuel injection and new accessory drive components.
[ Jeremy ] Welcome back. While you were gone we did manage to shoehorn the LS in between the frame rails of the E-46, and the kit that we got from Summit Racing to mount all of this in here worked out perfectly except we did have to modify one thing and that's down here underneath the car. So the kit that we got is setup for a six speed transmission. Since we're running a five speed we did have to modify the transmission crossmember just a little bit. Basically all we had to do is move it forward about six inches so the pad would land on our transmission. We also went ahead and tackled some of the fuel system. This is a Corvette style fuel pressure regulator. So we have the feed and return coming in from the back side. Out of the front side we have one feet line, and that's what's gonna run our engine. And to continue on with our fuel system let's talk about the fuel injection that we're gonna be running. Now we have FiTech's Ultimate Rebel LS system that we're gonna be running on top of our LC-9, and the big advantage to the Rebel system is their intake is rather low profile and sleek and it's really quite short, which is gonna help us because we're gonna have some clearance issues underneath the hood of our BMW. This is a complete kit. So it comes with everything you need to install. You have the intake. You have the fuel rails. You also have your injectors, throttle body, and all the wiring and everything you need to install this into your next project vehicle. We're not gonna install this quite yet. I'm gonna do a little bit of work out here. So we're gonna start with the fuel rails and the injectors. [ Music ]
[ Music ]
[ Music ]
[ Music ] Then the next step here is to just set our intake in place on top of the engine, and we'll go ahead and bolt it down. [ Music ] [ torque wrench beeping ] Well that will wrap up the intake install, and then when it comes time to wiring everything up we just have this mess of wires to put into the car and it's pretty simple. It all just plugs into the sensors where it needs to go, but we're not to that point yet. Obviously you can see we have a long way to go on the rest of the car. So when it comes time to getting this all hooked up we know it's as simple as a couple of connections. We should be all set.
The next thing that we're gonna cross off the list here is the front drive assembly. This'll just get us one step closer to firing this thing up. All of this stuff came in a kit, and it's just gonna condense everything down into a neat little package here in the car. It all gets started with this Corvette style water pump. [ Music ] [ torque wrench beeping ] Jeremy ] Work on the alternator bracket next. Okay, alternator here's got a bracket and a pulley setup. [ Music ]
Power steering pump's a little tricky because they've got three spacers that space everything where it needs to be to keep the belt in line but take your time and you'll get it. [ Music ] Up next we'll put the pulley on the power steering pump here. Then we have the tensioner to put on. Then we also have to switch out the damper here. [ Music ]
[ drill humming ] [ Music ] [ drill humming ] [ ratchet clicking ] [ Music ]
[ Jeremy ] That'll pretty much button it up for now. Got the front drive on. I just have the belt to put back on it. Fuel injection is sitting in place. That's gonna wrap it up. So we'll see you guys next time.
