More Lo 'N Slow Episodes
Truck Tech Builds
Want more content like this?
Join the PowerNation Email NewsletterParts Used In This Episode
Matco Tools
MATCO Tools are the Official Tool Supplier to PowerNation
Ron Francis
Wiring Kits
Episode Transcript
(LT)>> I hope you paid
attention to where all these things plug in cause there
are a lot of connectors under this truck.
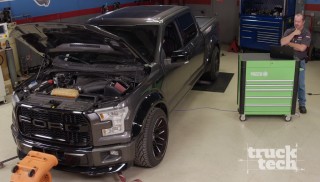
(Austin)>> It'll take a minute to figure that one out, but hey, we were successful at making a giant hole there and finally ready to build the bottom end on this thing except possibly a little premature cause we still don't even have all the parts.
(LT)>> Well hey, they overnight stuff all the time. So it's not a huge deal. Our ultimate goal for this LML Duramax is somewhere around 1,000 horsepower.
(Austin)>> Or a little more, 1,200?
(LT)>> I think you're pushing it just a little bit, but to get there we are going to have to address every single part of the fuel system, including the injectors and the injection pump, but it doesn't make any sense to throw those parts in just yet because they'd have to come right back off when we tear the motor apart. But there is one part of the fuel system that we can work on today and that's out back.
(Austin)>> For sure, and we can even kill a little time on that C-10. We've got a few things to wrap up on there. Getting super close and I might even phone a friend on this one.
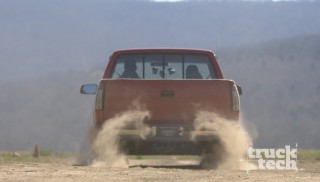
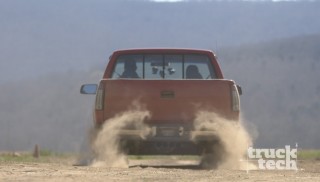
(LT)>> Hey I love having visitors cause they do the work for us. [ music ] [ engine revving ] [ tires screeching ]
(LT)>> Yeah baby! Woo hoo! [ music ] Alright you're pretty well lined up. Drop it down.
(Austin)>> Coming south, sweet! Dude this thing is dirty. I told you we should have washed it.
(LT)>> It's just a little bit of burnt rubber and dust. What's the problem?
(Austin)>> Yeah, burnouts on a black truck in the rain, gotta love it.
(LT)>> Hey it was fun. It's worth it.
(Austin)>> When you're talking Duramax what you might not know is that it wasn't until the L-5-P that they actually installed a lift pump in the fuel tank. That means from the LB-7 to the LML they had none. So that factory CP-3 and CP-4 is pulling all that fuel from the back, bringing it up front. That's good for about 500 horse but when you're talking serious horsepower like we want I mean it would be starving for fuel.
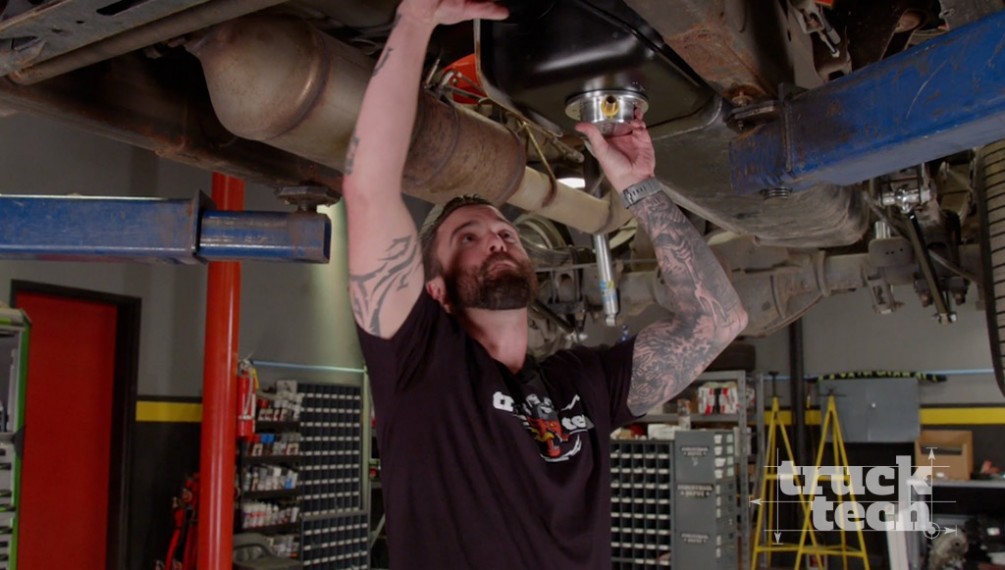
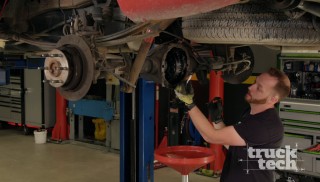
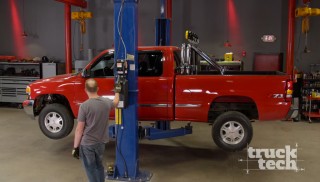
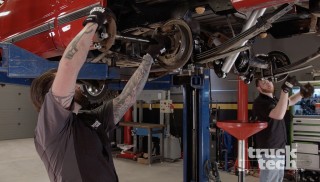
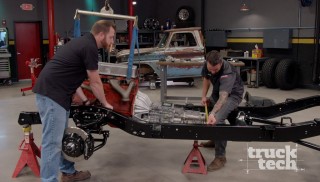
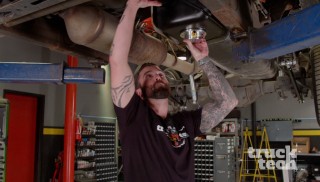
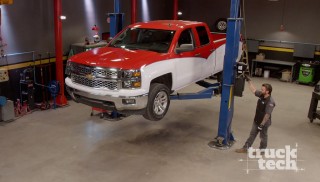
(LT)>> Absolutely, so the fix is to install a lift pump and we're gonna be running a Fast Titanium Signature Series 250. Now we picked this up from Summit Racing and it flows 250 gallons per hour of fuel at about 8 to 10 p-s-i. So it'll feed that CP-4, in our case, and keep it nice and fed, but this is more than just a pump. It's also a filtration system. It'll remove any dirt and most importantly air from the fuel to keep the injectors and the injection pump nice and happy. Now you might be wondering why we took the whole bed off the truck, and that's because of this. We're also gonna be installing a fuel tank sump and bulkhead fitting so we can have a massive five-eighths inch feed line to feed that pump. We can drill a few holes in the tank and it's just a whole lot easier to do it with the bed off rather than pulling the tank out and doing the work from underneath.
(Austin)>> For sure, well let's push this dude forward, drill a hole, and drain some fuel.
(LT)>> I like it. [ music ] [ drill spinning ]
(Austin)>> Yep, yep, every time. I'm gonna do a bucket swap. That didn't work. Got it!
(LT)>> Well look how much you got on the floor though.
(Austin)>> But look I prepared, I put pig mats down.
(LT)>> You got two pig mats but you've got five square pig mats worth of area wet.
(Austin)>> Two drops hit the pig mat. [ drill spinning ]
(Austin)>> And we're done. Seriously I have no idea why I clean anything. I mean really, look at the floor. I would definitely say there is zero turning back now cause we have a large hole at the bottom of our fuel tank. We're committed! So we definitely didn't need to run a sump with this kit for it to work properly but why not? This bowl is gonna mount at the bottom of the tank and allow you to pick up fuel from the lowest point possible. Therefore it'll minimize the chance of sucking up any air into the system. Now when it comes to choosing a mounting location there's really no right and wrong decision. In the past we mounted them in the back, and that'll ensure that if you launch the vehicle. Let's say you're low on fuel, all that fuel's gonna slosh to the back. You'll still have some in the suction bowl. Now we chose to mount it in the front for one reason. That's because our pump's gonna live somewhere in this area and that gives us a super short suction site. Probably be about a foot long. To run it in the back, well we'd be adding three or four feet to the whole system. So just note, make sure you're fueled up before you launch it. [ drill spinning ]
(Austin)>> These little dilly whackers will sneak in the back side. That way that bowl can clamp right on down. [ music ]
(LT)>> Hey man, how's the plumbing working?
(Austin)>> Dude I always find myself on the south end of some fluid elevation changes.
(LT)>> Hey we've got a raincoat in the corner. You could have put that on.
(Austin)>> I don't wear raincoats, but dude we're all done. The bolt's mounted up, ready to mount the pump, and after that we can slam it down, access the top, put our bulkhead, make some connections, wrap it up.
(LT)>> Hey that's progress. When it comes to mounting stuff like a fuel pump or anything else on our frame I kind of like to color outside the lines every now and then. This kit does come with a bracket that mounts the pump kinda right up in this vicinity here. Above the rocker panel but on the outside of the frame. Now there is one reason why we're not too fond of that location, and that's protecting the pump. Now the tire is sitting right behind it. So anytime you drive in the rain, or the snow, or maybe you're just doing burnouts there's a lot of debris that could get on the outside of this pump. Now it is sealed up and it will take it, but I just want to protect it a little bit more. Toss me those brackets would you. So there are two brackets that come with this pump kit. One that bolts onto the pump itself, and one that bolts on to the bed. This one is getting tossed. The bracket that bolts onto the pump I'm gonna chop it in half and shorten it up. I'll bolt the pump to it, and I make a few other pieces of metal that kinda look like some kinda crazy science fair contraption, and that's how we're gonna mount our pump.
(Austin)>> And you'll see LT's over engineered brackets next!
[ saw buzzing ] [ music ]
(LT)>> With the pump side of the bracket taken care of now it's time to move on to that high school science fair project I was telling you about. So I had to get a little creative. The bracket that we're gonna be attaching the pump to on the frame has a nice radius to it. So I started out with some flat stock and I made a bracket that has the same matching radius on it. Now the pump ultimately is gonna sit kinda up here, but this shape by itself isn't very strong. There's a lot of flex that's built in. So I have a gusset that's gonna go through this little slot. I'm gonna stick it in there and weld it all together. Now this might be just a little bit overkill. I'll give you that but if for any reason you maybe roll the truck over and need an extra tow point you've got one covered. [ music ] [ welder crackling ]
(LT)>> All we've got to do now is weld it to the truck and not catch ourselves on fire. [ music ] [ welder crackling ] [ music ] [ ratchet clicking ] [ music ]
(LT)>> It might look like there's a whole lot that's going on here with the fuel lines but honestly the plumbing for a lift pump is not that difficult. It all starts at the sump, and there's a nice short suction line into the pump, which means there's minimal chances of the fuel cavitating and picking up extra air. Once the fuel is in the pump it goes through the filter, and that's where your normal dirt and contaminates are trapped and prevented from going up to the engine. After the filter it goes into the water separator, and that's where the magic happens. Not only is the water removed from the fuel but any extra air is also taken out. So there's nothing but pure clean fuel going up to the engine. On top of the pump there's a small regulator, which keeps the fuel at around 8 to 10 p-s-i and it feeds into the factory hard line heading up to the LML. And then any excess fuel that the engine isn't going to use simply gets returned back to the tank, and that's the last bit of plumbing that we have to finish up.
(Austin)>> We'll have this little dude wrapped up lickety split.
(LT)>> What are you making pierogis' or something? Really the last thing that we have to do is find a hole somewhere in this tank to return the fuel back into. Now a lot of lift pump kits will actually come with a fitting that you insert into the filler neck. Now you have to cut it in half and the line just kinda "T's" in like that, but honestly I'm just not keen with cutting the filler neck because every time you fuel up there's a slight chance that it could leak and drip a little bit of fuel onto the ground, and that's just wasting money.
(Austin)>> And on this truck we actually lucked out. We could utilize the factory supply side, which we would cut this hose and that barb on the fitting will be the same diameter as our return line. We could pop it right in, fuel be returned right back in, but it's still not the best method.
(LT)>> That's because it has just a little bit of restriction. Now this fuel pump pushes 250 gallons per hour of fuel. That's like five barrels. That's a whole lot. Now when you're under wide open throttle that's not a big deal because most of that fuel is getting sent straight up to the engine to be burned and turned into horsepower and burnt rubber, but when you're driving around town, idling, or sitting in traffic most of that fuel is going to be returned from the pump back into the tank. So you need a return line with very minimal restriction.
(Austin)>> And to do it properly they supply this bulkhead fitting, which has a return side and a suction side. Now we're not using it in the sense that it was to because we're not utilizing that factory suction side. That's coming straight from our sump to our pump. So we're gonna flip them and utilize the big diameter for a return. That way we get it all down with minimal effort.
(LT)>> I'm down for getting down. Now the one last deviation that we're gonna make from this kit is using the intended suction tube as a return. That way basically there will be minimal splashing of the fuel cause if it comes out here and splashes down that's just gonna add a whole bunch of air into the fuel. Now granted the Fast pump will take all that air but why give it extra work to do?
(Austin)>> For sure, and I found the perfect spot for the bulkhead. I did forget that drill though.
(LT)>> You get the drill, I'll take a nap.
(Austin)>> That would help! Next it's dyno time baby!
(Austin)>> That's good.
(LT)>> Alright now here's the real trick. I literally cannot see how far away we are from that.
(Austin)>> Just keep going. And down! [ music ]
(LT)>> Well I guess for now that just about wraps up the fuel system on Dragonali because honestly until we get the motor back together there's no reason to do the injectors or the injection pump.
(Austin)>> Yeah for sure, and the C-10 seems to be in the same boat cause we still have no motor inside this guy.
(LT)>> Well actually I did just get a text from Pat and he said the motor's put together, it's on the dyno, and they're just about to start it up and break it in. So I say we go check that out.
(Austin)>> I knew he was getting close. Dyno day baby!
(Pat)>> Check wide open throttle there Mike.
(LT)>> I've got to say Pat this thing looks a heck of a lot different from the last time we saw it torn apart on the bench.
(Pat)>> When did you guys start dressing alike? You look like the Bobby twins.
(LT)>> You like the new duds?
(Pat)>> I actually do.
(Austin)>> Anything to not look like you.
(Pat)>> It's hard to be this sexy.
(LT)>> You know the first thing I notice is there's no turbo on it yet. So I guess you're doing a pull naturally aspirated first huh?
(Pat)>> Well the idea with that is to keep it simple. I want to make sure it has no oil leaks, no water leaks, and not that a turbo is a big factor in that. We want to keep it as simple as possible so there's nothing that's gonna make a funny noise, and it's hard to tell when there's turbo involved. Now it's been run and we're actually ready to make some power pulls.
(Austin)>> For sure, and this will give us a good base line. That way when we throw the boost to it we know what to actually expect.
(LT)>>> Well they think this looks great and I'm really excited to hear how it sounds. So what do you say we go make a couple of pulls on it?
(Pat)>> Have you ever heard one of these run before.
(LT)>> Absolutely!
(Pat)>> Not like this you haven't! [ high pitched engine revving ]
(LT)>> Yeah that's where it starts to sound good.
(Pat)>> That sounds like an airplane.
(Mike)>> Let's see what we've got.
(LT)>> You guys will hate me for saying this but that almost sounds like a Skyline motor.
(Pat)>> You shut your trap.
(LT)>> Wow, 220 horsepower. So these came from the factory with like what, 165?
(Austin)>> 160, 165 is what we looked up.
(Mike)>> This thing has way less compression. It does have a better flowing head, but other than that it's already 60 horse above what it came from the factory.
(Austin)>> Yeah not even 8:1 on the compression.
(Mike)>> Alright all the vitals, everything looks good. You guys have got to rock, paper, and scissor it for the first one to the console.
(LT)>> Darn, I'm out.
(Austin)>> Okay I've never done this before. Mike come back.
(Pat)>> This thing you don't even have to hit the gas pedal. Just hit starter, watch what happens. You've got to hold it. The most important thing on this is oil pressure. Obviously if that goes down at any point you abort the pull.
(Mike)>> When you go to full throttle and you see the r-p-m stabilize at 2,000 you would hit "D", and that starts your sweep. When it gets up to 5,000 you'll hear the break pull the engine down. Just pull out of it. That's all you've got to do.
(Pat)>> Keep going, keep going, keep going, all the way open. Okay "D"! Hold onto it. Now watch this, don't worry about anything else. [ high pitched engine revving ]
(Mike)>> Perfect, nice!
(Pat)>> This is scaring the bejesus out of me.
(Mike)>> 220, see your pull was better than mine.
(Austin)>> Dude that's awesome.
(Pat)>> This is pretty nice.
(Austin)>> That's a consistent little dude.
(Mike)>> Alright LT it's your turn to drive. Less talking more driving, let's go.
(LT)>> You know the coolest thing about this whole project is we never really set out to make a ton of horsepower. We just wanted something that was oddball and I definitely think that we got it.
(Mike)>> I think Pat's about to slap you in the back of the head.
(Pat)>> You're messing around, come on.
(LT)>> Come on dad, where's the throttle?
(Pat)>> "S".
(LT)>> "S".
(Pat)>> Activate.
(LT)>> Activate.
(Pat)>> Start.
(LT)>> Start.
(Pat)>> You're just like an old pro. Look at you go.
(Mike)>> Holding it too long like that puts a lot of heat in the combustion chamber. It'll kill power.
(Mike)>> 219, 269, man that thing is printing numbers.
(Pat)>> It's very, very consistent.
(Mike)>> So the engine's broke in. It's making awesome power for N/A with the compression before the turbo. With the valve spring change I think we're knocking on the door of over 400 easy.
(LT)>> What are you waiting for? Let's get the turbo and bolt it on, come on, boost!
(Pat)>> It's not that easy.
(LT)>> You guys make it sound complicated.
(Austin)>> Next wiring made easy, especially since we phone a friend for the job.
(LT)>> Alright I got the last of the old wiring out. So that means we have a blank slate and we're ready to start from scratch.
(Scott)>> I just got finished up on pre-prepping the taillight assembly. So we're ready to go there.
(LT)>> Well as you guys might guess today we're gonna be wiring up our C-10, and I have Scott Bowers from Ron Francis Wiring, and he's gonna make my job a whole lot easier.
(Scott)>> Boy we hear that a lot. So we do make wiring kits that are real easy to install but I'm here to help.
(LT)>> Alright well where do we get started then?
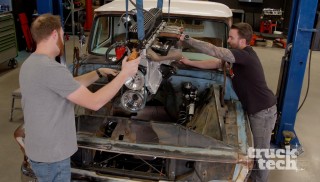
(Scott)>> Well I do see an empty engine compartment here. It'd be nice to have the motor in there, or maybe even see it to know where all the components are?
(LT)>> Yeah that's easy. We've got it next door. It's actually on the dyno. So let's go take a look at we'll get an idea of what goes where.
(Scott)>> Alright cool.
(LT)>> Well this is probably something that you haven't seen all that often, a 292 straight six on the dyno.
(Scott)>> That's pretty cool. You don't see one of these every day.
(LT)>> No you do not. Our whole goal just was to be different and kinda make something that's oddball.
(Scott)>> I think you're getting there. So can you tell me some parts and areas where we're gonna have components going, like the alternator?
(LT)>> Yeah the alternator, that's easy. That's gonna sit really low right here on the driver's side. There's plenty of room on the fender well. This straight six kinda right down the middle of the engine bay. Then the engine is huge. So plenty of room to run the wiring down the fender well and right to the alternator.
(Scott)>> Okay and what kind of alternator?
(LT)>> We're just gonna run a one wire alternator. That way we don't have to mess around with an external regulator or anything else like that.
(Scott)>> Alright that makes it real easy. Okay and how about the starter? Where's that gonna be?
(LT)>> Yeah the starter, just like on a small block Chevy, kinda sits down low on the passenger side. Now there will be a turbo that sits up here but there is plenty of room to get the wires kinda from the firewall and run them down. I left space between the down pipe and the block. So that shouldn't be an issue.
(Scott)>> Okay, and how about gauge wiring?
(LT)>> Most of the gauge wiring is actually gonna come from the e-f-i unit. I've got a little interface box that'll tie into the Dakota Digital. So we don't have to run separate sending units for things like water temperature or for an r-p-m pickup, but oil pressure I do have to get that from down here on the side of the block, but that's okay cause I still have room in that same spot where the starter wires are gonna run.
(Scott)>> Okay, that really makes it simple. That's not too many wires running up to the engine. So I think I have everything I need to get started wiring.
(LT)>> Sounds good to me! [ music ]
(Scott)>> So Scott one thing I noticed is your kit actually away with or eliminates entirely the factory firewall connector. What's the story there?
(Scott)>> Yeah that's right. So number one it's a really good source of corrosion. These firewall connectors tend to fail, and as you can see this one is all corroded up with a lot of green stuff. So we get rid of them, and number two, you've got a very limited number of circuits passing through it. So when you're adding fuel injection and the other items that you are you're just surpassing its ability. So we like to stick a grommet in there, and that reduces the problems found with these things. So if you can just stick that in there we'll keep going.
(LT)>> Alrighty!
(Scott)>> Complexity of your C-10 project, I would say it's sort of like a 4, 5. A more complex build that would be on the 9, 10 level you're talking about a lot of power accessories, actuators, remotes, remote start, remote door locks, air ride. You add that all together and you're starting to bring upon yourself a build where there's a lot of wires running in different directions. You know it's one thing to do it, it's another thing to do it and make it real clean, and I like working with my hands. I like working on cars. I'm a car guy. I have several builds of my own that I play with, and it's certainly fun to come work on a neat, clean project that has no wiring in it cause I can just start right away and get at it. If someone can't get their arms around the idea of electrical that's where we step in. We have a full suite of products that covers everything from complete wiring kits to lightbulbs and switches, and we try to make it easy for the guys who either can't or don't want to do it. Our wiring kits are so intuitive between printing on the wires, telling you where they're coming from and going to, to color coded wires right to the panel, to complete instructions in each package to tell you exactly what you need to do. It all works right? You turn the key and you try the light switch, and everything works. Yeah it's a good feeling. [ music ]
(LT)>> Alright hit that brake pedal. Let's see what we got? Two lights, they're red, and they're really bright. So that means we'll be safe driving down the road.
(Scott)>> Nice and bright?
(LT)>> Absolutely, those l-e-d's, those are bad man. I love it. So I guess we're making progress right, other than the fact that motor's not in and I've got a few things left to wire up.
(Scott)>> Yeah you've just got a couple of loose ends up there but no big deal.
(LT)>> Nothing wrong with that. We can handle it. Now if you guys have any questions about any of the parts that you've seen on the show today check us out and Powernation TV dot com, and we want to give a special thanks to Scott from Ron Francis Wiring cause without his help this truck wouldn't be going anywhere. What do you think of it though? Do you like the patina?
(Scott)>> It's excellent. I really like the finish you got going on there.
Show Full Transcript
(Austin)>> It'll take a minute to figure that one out, but hey, we were successful at making a giant hole there and finally ready to build the bottom end on this thing except possibly a little premature cause we still don't even have all the parts.
(LT)>> Well hey, they overnight stuff all the time. So it's not a huge deal. Our ultimate goal for this LML Duramax is somewhere around 1,000 horsepower.
(Austin)>> Or a little more, 1,200?
(LT)>> I think you're pushing it just a little bit, but to get there we are going to have to address every single part of the fuel system, including the injectors and the injection pump, but it doesn't make any sense to throw those parts in just yet because they'd have to come right back off when we tear the motor apart. But there is one part of the fuel system that we can work on today and that's out back.
(Austin)>> For sure, and we can even kill a little time on that C-10. We've got a few things to wrap up on there. Getting super close and I might even phone a friend on this one.
(LT)>> Hey I love having visitors cause they do the work for us. [ music ] [ engine revving ] [ tires screeching ]
(LT)>> Yeah baby! Woo hoo! [ music ] Alright you're pretty well lined up. Drop it down.
(Austin)>> Coming south, sweet! Dude this thing is dirty. I told you we should have washed it.
(LT)>> It's just a little bit of burnt rubber and dust. What's the problem?
(Austin)>> Yeah, burnouts on a black truck in the rain, gotta love it.
(LT)>> Hey it was fun. It's worth it.
(Austin)>> When you're talking Duramax what you might not know is that it wasn't until the L-5-P that they actually installed a lift pump in the fuel tank. That means from the LB-7 to the LML they had none. So that factory CP-3 and CP-4 is pulling all that fuel from the back, bringing it up front. That's good for about 500 horse but when you're talking serious horsepower like we want I mean it would be starving for fuel.
(LT)>> Absolutely, so the fix is to install a lift pump and we're gonna be running a Fast Titanium Signature Series 250. Now we picked this up from Summit Racing and it flows 250 gallons per hour of fuel at about 8 to 10 p-s-i. So it'll feed that CP-4, in our case, and keep it nice and fed, but this is more than just a pump. It's also a filtration system. It'll remove any dirt and most importantly air from the fuel to keep the injectors and the injection pump nice and happy. Now you might be wondering why we took the whole bed off the truck, and that's because of this. We're also gonna be installing a fuel tank sump and bulkhead fitting so we can have a massive five-eighths inch feed line to feed that pump. We can drill a few holes in the tank and it's just a whole lot easier to do it with the bed off rather than pulling the tank out and doing the work from underneath.
(Austin)>> For sure, well let's push this dude forward, drill a hole, and drain some fuel.
(LT)>> I like it. [ music ] [ drill spinning ]
(Austin)>> Yep, yep, every time. I'm gonna do a bucket swap. That didn't work. Got it!
(LT)>> Well look how much you got on the floor though.
(Austin)>> But look I prepared, I put pig mats down.
(LT)>> You got two pig mats but you've got five square pig mats worth of area wet.
(Austin)>> Two drops hit the pig mat. [ drill spinning ]
(Austin)>> And we're done. Seriously I have no idea why I clean anything. I mean really, look at the floor. I would definitely say there is zero turning back now cause we have a large hole at the bottom of our fuel tank. We're committed! So we definitely didn't need to run a sump with this kit for it to work properly but why not? This bowl is gonna mount at the bottom of the tank and allow you to pick up fuel from the lowest point possible. Therefore it'll minimize the chance of sucking up any air into the system. Now when it comes to choosing a mounting location there's really no right and wrong decision. In the past we mounted them in the back, and that'll ensure that if you launch the vehicle. Let's say you're low on fuel, all that fuel's gonna slosh to the back. You'll still have some in the suction bowl. Now we chose to mount it in the front for one reason. That's because our pump's gonna live somewhere in this area and that gives us a super short suction site. Probably be about a foot long. To run it in the back, well we'd be adding three or four feet to the whole system. So just note, make sure you're fueled up before you launch it. [ drill spinning ]
(Austin)>> These little dilly whackers will sneak in the back side. That way that bowl can clamp right on down. [ music ]
(LT)>> Hey man, how's the plumbing working?
(Austin)>> Dude I always find myself on the south end of some fluid elevation changes.
(LT)>> Hey we've got a raincoat in the corner. You could have put that on.
(Austin)>> I don't wear raincoats, but dude we're all done. The bolt's mounted up, ready to mount the pump, and after that we can slam it down, access the top, put our bulkhead, make some connections, wrap it up.
(LT)>> Hey that's progress. When it comes to mounting stuff like a fuel pump or anything else on our frame I kind of like to color outside the lines every now and then. This kit does come with a bracket that mounts the pump kinda right up in this vicinity here. Above the rocker panel but on the outside of the frame. Now there is one reason why we're not too fond of that location, and that's protecting the pump. Now the tire is sitting right behind it. So anytime you drive in the rain, or the snow, or maybe you're just doing burnouts there's a lot of debris that could get on the outside of this pump. Now it is sealed up and it will take it, but I just want to protect it a little bit more. Toss me those brackets would you. So there are two brackets that come with this pump kit. One that bolts onto the pump itself, and one that bolts on to the bed. This one is getting tossed. The bracket that bolts onto the pump I'm gonna chop it in half and shorten it up. I'll bolt the pump to it, and I make a few other pieces of metal that kinda look like some kinda crazy science fair contraption, and that's how we're gonna mount our pump.
(Austin)>> And you'll see LT's over engineered brackets next!
[ saw buzzing ] [ music ]
(LT)>> With the pump side of the bracket taken care of now it's time to move on to that high school science fair project I was telling you about. So I had to get a little creative. The bracket that we're gonna be attaching the pump to on the frame has a nice radius to it. So I started out with some flat stock and I made a bracket that has the same matching radius on it. Now the pump ultimately is gonna sit kinda up here, but this shape by itself isn't very strong. There's a lot of flex that's built in. So I have a gusset that's gonna go through this little slot. I'm gonna stick it in there and weld it all together. Now this might be just a little bit overkill. I'll give you that but if for any reason you maybe roll the truck over and need an extra tow point you've got one covered. [ music ] [ welder crackling ]
(LT)>> All we've got to do now is weld it to the truck and not catch ourselves on fire. [ music ] [ welder crackling ] [ music ] [ ratchet clicking ] [ music ]
(LT)>> It might look like there's a whole lot that's going on here with the fuel lines but honestly the plumbing for a lift pump is not that difficult. It all starts at the sump, and there's a nice short suction line into the pump, which means there's minimal chances of the fuel cavitating and picking up extra air. Once the fuel is in the pump it goes through the filter, and that's where your normal dirt and contaminates are trapped and prevented from going up to the engine. After the filter it goes into the water separator, and that's where the magic happens. Not only is the water removed from the fuel but any extra air is also taken out. So there's nothing but pure clean fuel going up to the engine. On top of the pump there's a small regulator, which keeps the fuel at around 8 to 10 p-s-i and it feeds into the factory hard line heading up to the LML. And then any excess fuel that the engine isn't going to use simply gets returned back to the tank, and that's the last bit of plumbing that we have to finish up.
(Austin)>> We'll have this little dude wrapped up lickety split.
(LT)>> What are you making pierogis' or something? Really the last thing that we have to do is find a hole somewhere in this tank to return the fuel back into. Now a lot of lift pump kits will actually come with a fitting that you insert into the filler neck. Now you have to cut it in half and the line just kinda "T's" in like that, but honestly I'm just not keen with cutting the filler neck because every time you fuel up there's a slight chance that it could leak and drip a little bit of fuel onto the ground, and that's just wasting money.
(Austin)>> And on this truck we actually lucked out. We could utilize the factory supply side, which we would cut this hose and that barb on the fitting will be the same diameter as our return line. We could pop it right in, fuel be returned right back in, but it's still not the best method.
(LT)>> That's because it has just a little bit of restriction. Now this fuel pump pushes 250 gallons per hour of fuel. That's like five barrels. That's a whole lot. Now when you're under wide open throttle that's not a big deal because most of that fuel is getting sent straight up to the engine to be burned and turned into horsepower and burnt rubber, but when you're driving around town, idling, or sitting in traffic most of that fuel is going to be returned from the pump back into the tank. So you need a return line with very minimal restriction.
(Austin)>> And to do it properly they supply this bulkhead fitting, which has a return side and a suction side. Now we're not using it in the sense that it was to because we're not utilizing that factory suction side. That's coming straight from our sump to our pump. So we're gonna flip them and utilize the big diameter for a return. That way we get it all down with minimal effort.
(LT)>> I'm down for getting down. Now the one last deviation that we're gonna make from this kit is using the intended suction tube as a return. That way basically there will be minimal splashing of the fuel cause if it comes out here and splashes down that's just gonna add a whole bunch of air into the fuel. Now granted the Fast pump will take all that air but why give it extra work to do?
(Austin)>> For sure, and I found the perfect spot for the bulkhead. I did forget that drill though.
(LT)>> You get the drill, I'll take a nap.
(Austin)>> That would help! Next it's dyno time baby!
(Austin)>> That's good.
(LT)>> Alright now here's the real trick. I literally cannot see how far away we are from that.
(Austin)>> Just keep going. And down! [ music ]
(LT)>> Well I guess for now that just about wraps up the fuel system on Dragonali because honestly until we get the motor back together there's no reason to do the injectors or the injection pump.
(Austin)>> Yeah for sure, and the C-10 seems to be in the same boat cause we still have no motor inside this guy.
(LT)>> Well actually I did just get a text from Pat and he said the motor's put together, it's on the dyno, and they're just about to start it up and break it in. So I say we go check that out.
(Austin)>> I knew he was getting close. Dyno day baby!
(Pat)>> Check wide open throttle there Mike.
(LT)>> I've got to say Pat this thing looks a heck of a lot different from the last time we saw it torn apart on the bench.
(Pat)>> When did you guys start dressing alike? You look like the Bobby twins.
(LT)>> You like the new duds?
(Pat)>> I actually do.
(Austin)>> Anything to not look like you.
(Pat)>> It's hard to be this sexy.
(LT)>> You know the first thing I notice is there's no turbo on it yet. So I guess you're doing a pull naturally aspirated first huh?
(Pat)>> Well the idea with that is to keep it simple. I want to make sure it has no oil leaks, no water leaks, and not that a turbo is a big factor in that. We want to keep it as simple as possible so there's nothing that's gonna make a funny noise, and it's hard to tell when there's turbo involved. Now it's been run and we're actually ready to make some power pulls.
(Austin)>> For sure, and this will give us a good base line. That way when we throw the boost to it we know what to actually expect.
(LT)>>> Well they think this looks great and I'm really excited to hear how it sounds. So what do you say we go make a couple of pulls on it?
(Pat)>> Have you ever heard one of these run before.
(LT)>> Absolutely!
(Pat)>> Not like this you haven't! [ high pitched engine revving ]
(LT)>> Yeah that's where it starts to sound good.
(Pat)>> That sounds like an airplane.
(Mike)>> Let's see what we've got.
(LT)>> You guys will hate me for saying this but that almost sounds like a Skyline motor.
(Pat)>> You shut your trap.
(LT)>> Wow, 220 horsepower. So these came from the factory with like what, 165?
(Austin)>> 160, 165 is what we looked up.
(Mike)>> This thing has way less compression. It does have a better flowing head, but other than that it's already 60 horse above what it came from the factory.
(Austin)>> Yeah not even 8:1 on the compression.
(Mike)>> Alright all the vitals, everything looks good. You guys have got to rock, paper, and scissor it for the first one to the console.
(LT)>> Darn, I'm out.
(Austin)>> Okay I've never done this before. Mike come back.
(Pat)>> This thing you don't even have to hit the gas pedal. Just hit starter, watch what happens. You've got to hold it. The most important thing on this is oil pressure. Obviously if that goes down at any point you abort the pull.
(Mike)>> When you go to full throttle and you see the r-p-m stabilize at 2,000 you would hit "D", and that starts your sweep. When it gets up to 5,000 you'll hear the break pull the engine down. Just pull out of it. That's all you've got to do.
(Pat)>> Keep going, keep going, keep going, all the way open. Okay "D"! Hold onto it. Now watch this, don't worry about anything else. [ high pitched engine revving ]
(Mike)>> Perfect, nice!
(Pat)>> This is scaring the bejesus out of me.
(Mike)>> 220, see your pull was better than mine.
(Austin)>> Dude that's awesome.
(Pat)>> This is pretty nice.
(Austin)>> That's a consistent little dude.
(Mike)>> Alright LT it's your turn to drive. Less talking more driving, let's go.
(LT)>> You know the coolest thing about this whole project is we never really set out to make a ton of horsepower. We just wanted something that was oddball and I definitely think that we got it.
(Mike)>> I think Pat's about to slap you in the back of the head.
(Pat)>> You're messing around, come on.
(LT)>> Come on dad, where's the throttle?
(Pat)>> "S".
(LT)>> "S".
(Pat)>> Activate.
(LT)>> Activate.
(Pat)>> Start.
(LT)>> Start.
(Pat)>> You're just like an old pro. Look at you go.
(Mike)>> Holding it too long like that puts a lot of heat in the combustion chamber. It'll kill power.
(Mike)>> 219, 269, man that thing is printing numbers.
(Pat)>> It's very, very consistent.
(Mike)>> So the engine's broke in. It's making awesome power for N/A with the compression before the turbo. With the valve spring change I think we're knocking on the door of over 400 easy.
(LT)>> What are you waiting for? Let's get the turbo and bolt it on, come on, boost!
(Pat)>> It's not that easy.
(LT)>> You guys make it sound complicated.
(Austin)>> Next wiring made easy, especially since we phone a friend for the job.
(LT)>> Alright I got the last of the old wiring out. So that means we have a blank slate and we're ready to start from scratch.
(Scott)>> I just got finished up on pre-prepping the taillight assembly. So we're ready to go there.
(LT)>> Well as you guys might guess today we're gonna be wiring up our C-10, and I have Scott Bowers from Ron Francis Wiring, and he's gonna make my job a whole lot easier.
(Scott)>> Boy we hear that a lot. So we do make wiring kits that are real easy to install but I'm here to help.
(LT)>> Alright well where do we get started then?
(Scott)>> Well I do see an empty engine compartment here. It'd be nice to have the motor in there, or maybe even see it to know where all the components are?
(LT)>> Yeah that's easy. We've got it next door. It's actually on the dyno. So let's go take a look at we'll get an idea of what goes where.
(Scott)>> Alright cool.
(LT)>> Well this is probably something that you haven't seen all that often, a 292 straight six on the dyno.
(Scott)>> That's pretty cool. You don't see one of these every day.
(LT)>> No you do not. Our whole goal just was to be different and kinda make something that's oddball.
(Scott)>> I think you're getting there. So can you tell me some parts and areas where we're gonna have components going, like the alternator?
(LT)>> Yeah the alternator, that's easy. That's gonna sit really low right here on the driver's side. There's plenty of room on the fender well. This straight six kinda right down the middle of the engine bay. Then the engine is huge. So plenty of room to run the wiring down the fender well and right to the alternator.
(Scott)>> Okay and what kind of alternator?
(LT)>> We're just gonna run a one wire alternator. That way we don't have to mess around with an external regulator or anything else like that.
(Scott)>> Alright that makes it real easy. Okay and how about the starter? Where's that gonna be?
(LT)>> Yeah the starter, just like on a small block Chevy, kinda sits down low on the passenger side. Now there will be a turbo that sits up here but there is plenty of room to get the wires kinda from the firewall and run them down. I left space between the down pipe and the block. So that shouldn't be an issue.
(Scott)>> Okay, and how about gauge wiring?
(LT)>> Most of the gauge wiring is actually gonna come from the e-f-i unit. I've got a little interface box that'll tie into the Dakota Digital. So we don't have to run separate sending units for things like water temperature or for an r-p-m pickup, but oil pressure I do have to get that from down here on the side of the block, but that's okay cause I still have room in that same spot where the starter wires are gonna run.
(Scott)>> Okay, that really makes it simple. That's not too many wires running up to the engine. So I think I have everything I need to get started wiring.
(LT)>> Sounds good to me! [ music ]
(Scott)>> So Scott one thing I noticed is your kit actually away with or eliminates entirely the factory firewall connector. What's the story there?
(Scott)>> Yeah that's right. So number one it's a really good source of corrosion. These firewall connectors tend to fail, and as you can see this one is all corroded up with a lot of green stuff. So we get rid of them, and number two, you've got a very limited number of circuits passing through it. So when you're adding fuel injection and the other items that you are you're just surpassing its ability. So we like to stick a grommet in there, and that reduces the problems found with these things. So if you can just stick that in there we'll keep going.
(LT)>> Alrighty!
(Scott)>> Complexity of your C-10 project, I would say it's sort of like a 4, 5. A more complex build that would be on the 9, 10 level you're talking about a lot of power accessories, actuators, remotes, remote start, remote door locks, air ride. You add that all together and you're starting to bring upon yourself a build where there's a lot of wires running in different directions. You know it's one thing to do it, it's another thing to do it and make it real clean, and I like working with my hands. I like working on cars. I'm a car guy. I have several builds of my own that I play with, and it's certainly fun to come work on a neat, clean project that has no wiring in it cause I can just start right away and get at it. If someone can't get their arms around the idea of electrical that's where we step in. We have a full suite of products that covers everything from complete wiring kits to lightbulbs and switches, and we try to make it easy for the guys who either can't or don't want to do it. Our wiring kits are so intuitive between printing on the wires, telling you where they're coming from and going to, to color coded wires right to the panel, to complete instructions in each package to tell you exactly what you need to do. It all works right? You turn the key and you try the light switch, and everything works. Yeah it's a good feeling. [ music ]
(LT)>> Alright hit that brake pedal. Let's see what we got? Two lights, they're red, and they're really bright. So that means we'll be safe driving down the road.
(Scott)>> Nice and bright?
(LT)>> Absolutely, those l-e-d's, those are bad man. I love it. So I guess we're making progress right, other than the fact that motor's not in and I've got a few things left to wire up.
(Scott)>> Yeah you've just got a couple of loose ends up there but no big deal.
(LT)>> Nothing wrong with that. We can handle it. Now if you guys have any questions about any of the parts that you've seen on the show today check us out and Powernation TV dot com, and we want to give a special thanks to Scott from Ron Francis Wiring cause without his help this truck wouldn't be going anywhere. What do you think of it though? Do you like the patina?
(Scott)>> It's excellent. I really like the finish you got going on there.
