More Lo 'N Slow Episodes
Truck Tech Builds
Want more content like this?
Join the PowerNation Email NewsletterEpisode Transcript
(Narrator)>> Today Lo 'n Slo's cab hits the frame but not before we put power to both wheels. Plus...
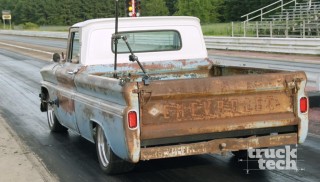
(Austin)>> Now I know what you're thinking painting this beautiful patina truck. Don't call me crazy just yet. Wait until you see what we've got planned.
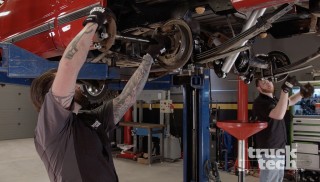
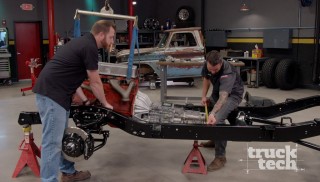
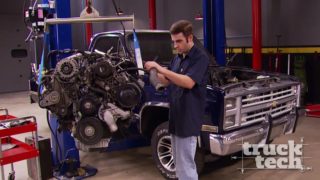
(Austin)>> As you can tell we have the C-10 chassis sitting on a lift here and we are ready to dive back into this project and start making some progress.
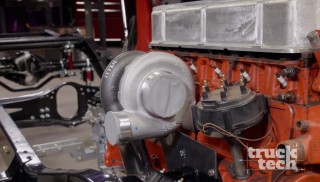
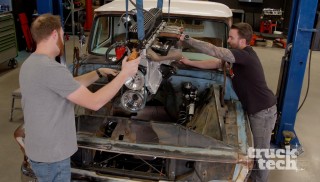
(LT)>> Now we have a great head start. The frame is powder coated satin black. We got the suspension assembled. A turbocharged 292 sitting up front and a Treme five speed that backs it up. Our goal by the end of the day is to have that cab bolted back on to this frame for good.
(Austin)>> Now before we jump the gun and get ahead of ourselves I still have to shoot some proper paint on that, and I might as well do it while it's off the frame so I'm not masking all this up and we get overspray everywhere, but I also am excited to see this thing rolling on its own four wheels.
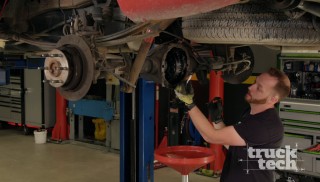
(LT)>> Alright well to make that happen though we've got to finish building out this rear axle cause right now it's just an empty housing, but the parts are here and I have a deal for you. I'll get my hands greasy and I'll handle this rear end, all the grunt work right, and to help you out I'll keep my greasy hands as far away from that cab as possible.
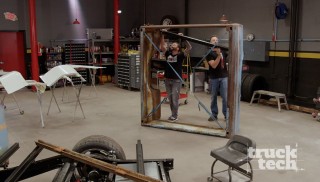
(Austin)>> That's a deal I'll take. Help me push this out before you jump into that though.
(LT)>> Alright man.
(Austin)>> Serious horsepower behind this thing.
(LT)>> I had to point the camera at the guys on the wall.
A little bit to the left, a little bit to the right, a little bit to the right. Yep she's lined up perfect.
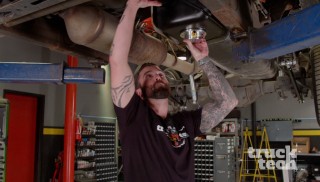
As power makes its way from the engine to the rear tires it first has to pass through a differential. Now this is kind of basic information but the reason we need a differential is because when you go around corners the inside wheel always spins at a slower speed than the outside. Now if you didn't have a differential the inside wheel would just be skidding along. From the factory our truck was equipped with an open differential. Now this is the most basic style that there is and it does nothing for high performance driving. Now if you ever encounter a loss of traction when you're on the power only one wheel is going to spin and you're not going anywhere. So we're gonna be replacing it along with everything else that inside our rear axle with parts that we got from Summit Racing dot com. Now for the differential we started out with a Detroit True Track. Now this is a helical gear style limited slip differential, and it's great for high performance driving because it applies nice even split torque between both rear wheels, but it still allows for that differential of speed while you're cornering. Now for the gear set we chose a 4.11 to one ratio, which is going to provide a nice blend between acceleration and a lower r-p-m when you're cruising down the highway. We picked up a forged pinion yoke, some new axle shafts with a five on five bolt pattern that'll match the front, a master install kit which comes with all the bearings, shims, seals, and hardware that we'll need to complete the installation, along with a new TA Performance diff cover that has these reinforcement caps that'll go on to the bearings and help keep everything in place. Our first order of business is to get the ring gear onto the new carrier.
Since it's a tight fit I'll use the 12 bolts to evenly pull the ring gear onto the carrier. Tighten them all up and it's off to the press where the carrier bearings are installed. Back at the axle the outer pinion race is driven in with a soft aluminum tool, followed by the inner. [ hammer tapping metal ]
(LT)>> One of the most critical steps to setting up a rear end is getting your pinion depth spot on. Now that's actually controlled by a small shim that's stuck to the table that sits right in between the head of the pinion and the bearing. Now it's gonna take you several different tries to get the exact thickness since there's really no easy way to calculate the thickness right off the bat unless you have a bunch of really specialized and really expensive tools. So trial and error is sort of the preferred method. Now that means you have to have the bearing that goes on and off several times, and if you have your final bearing and you move it with a press on and off and on and off you could possibly damage it. So they sell setup bearings, which are basically the same thing as a regular bearing except the inside has been ground out just enough to make it easily slide on so we can check our measurements and make another adjustment. The pinion and setup bearing are slid into place, and since they don't have a mockup bearing for the outer it gets gently tapped in place with a hammer and metal sleeve. The yoke goes on, and the nut is temporarily tightened down until there's slight rotational drag. Next the carrier slides into place with some shims and the caps are tightened down. Just by feel and sound I can tell that the backlash is almost right where it needs to be, but I'm gonna focus on that later. First I need to get pinion depth squared away. Now they do make some really expensive pinion depth tools, which are kind of complicated to use. So unless you have one of those you're not going to nail it the first time around. Well instead of an expensive tool we're gonna use a really cheap one. Some gear marking compound and a brush. All we do is apply it to a couple of different teeth and rotate the ring and pinion with just a little bit of drag on it, and the pattern where those two gears are actually touching and rubbing against one another will tell us whether we need to add or subtract from the pinion depth.
(Narrator)>> Mother of pearl, Lo 'n Slo in the paint booth, that's next.
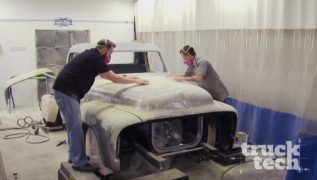
(Austin)>> Welcome back to Truck Tech. I'm doing a final wipe down on this cab in preparation to shoot some primer. Now if you look close you can tell time has definitely taken its toll on this panel and pitted it in pretty well, but there's a few ways we could address that. We could skim coat this whole thing with filler. Then go ahead and sand it back down to that metal and the filler will only be filling in those tiny little holes. Some guys actually prefer this method because you're not really building thickness. However it's very labor intensive. I'm gonna chose to shoot some DTM high build primer on this and it will achieve the same results.
The high build is pretty thick. So we're not gonna use a strainer. It pours directly in the cup. The primer mixes two parts to one part catalyst, and a half part reducer.
It's always good practice to shoot a test pattern even though it's just primer. I do this every time for consistency and repetition. It's the basis of good fundamentals. This is the time to figure out your movements. Distance from the panel, speed of the gun, when and how you're gonna move the ladder. This way when you come back with paint all the issues are worked out and you can focus on the paint hitting the panel. [ spray gun hissing ]
(Austin)>> After letting this high build primer cure overnight we pushed the cab over into the prep booth where I can get a good head start on blocking out these panels.
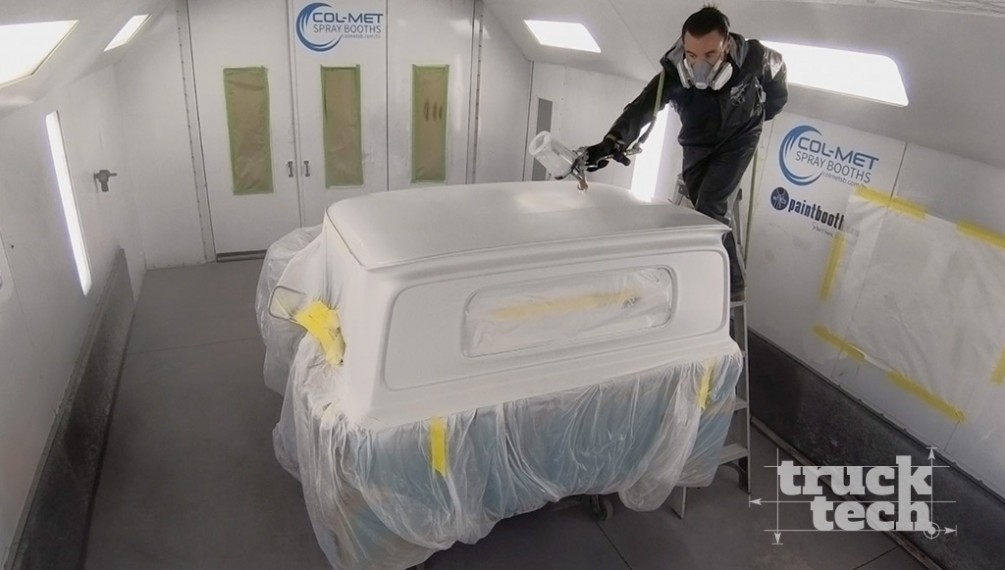
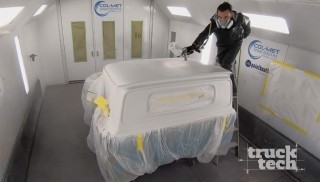
Woo baby, after about 16 hours of blocking all the pits are gone. These panels are laser straight with nice, soft edges. I think she'll clean up nice. Keeping the masking on during blocking promotes a cleaner environment and a better paint job. It's now off to the booth to shoot the cab with sealer. This gives the paint a solid foundation for adhesion and helps promote a uniform color. The base coat begins with mixing up this also color called Ermine White. It was a factory GM color back in the early '60's. It's a solid off white that is just the right shade we're looking for. The base coat is applied with 25 p-s-i at the gun totaling three coats. Now I just got finish spraying that base coat but it doesn't stop there. This is where that custom touch comes in, and it all starts right here with this pearl. A lot of guys like mixing this directly into their clear coat but the issue you can have with that is if you have a run it's lot harder to correct and blend in. I prefer to use a high quality color blender, which is essentially a clear base coat. Now this is custom paint. There's no rules. Throw that out the window. However there's a few simple things to keep in mind. The first is the size of your pearl to the size of the tip in your gun. You want to make sure your tip's big enough so it doesn't clog up the gun, and lastly if you're running cup filters or screen filters well rip those out too. The most accurate way to measure pearl or flake is with a scale. We're using one gram per 28 ounces.
I'm going to apply two coats of the pearl while keeping the gun set at 25 p-s-i. The third is a control coat allowing for uniformity for the desired effect. I lower the pressure of the gun from 25 to 17 p-s-i. The fan pattern remains wide open. This is where the distance from the gun to the panel is extended and the motion of spraying slows down. You're not going for coverage here. You're only trying to get the pearl lay down nice and even on the panel, no blotching and no striping. I've got one last step before we lay down some clear, and this technique is called back masking. What I'll do is roll down this edge and it'll allow that clear coat to flow seamlessly right down on the edge of that panel without leaving a hard edge if we were just gonna do a regular tape line. Tape her back just like that. It's now time for my favorite part of all, and that's smashing on the clear. The gun gets setup with 32 p-s-i. It's sprayed with a pattern overlap of about 50 percent, maintaining about a 10 distance to the panel. We're gonna finish this bad boy off with a total of five coats of clear and let it cure overnight.
(Narrator)>> Next rear axle re-done.
(LT)>> We finalized the gear pattern on our 12 bolt, and if you're unsure of which adjustments need to be made just study the manual, which comes with the gears. For us it's time for final assembly. While it might be a bit confusing just about every new ring and pinion gear set comes with instructions to help you read the wear pattern. The pinion nut comes off and the pinion gear is driven out of the housing. We're gonna add 10 thousandths to the pinion depth and press on the final bearing. A heavy chunk of metal helps keep the pinion in place while the outer bearing is being pushed on. The new oil seal is now installed. The threads on the pinion are lubed up, and the yoke splines onto the pinion shaft. The nut and washer are installed, and the nut is tightened until the crush collar starts to deform. There's no actual torque value specified for the pinion nut. Instead it just gets tightened until there's about 20 inch pounds of rotational drag. Now the carrier goes into place. [ drill spinning ]
(LT)>> The back lash is verified, and now all the hard work is done. Zero-seven, right on the money. To finish up this 12 bolt we'll apply a little lube into the end of the axle tube and drive the wheel bearing into place, followed by the oil seal.
Then the brake backing plate goes on. [ drill spinning ]
(LT)>> The very next step is to install the axle shafts into the housing but first we need to put some wheel studs into the flange cause. As always there's two different ways to do it.
The first method involves using a shop press and a socket, and it effortlessly pushes the knurled wheel studs into the axle.
The second way to install wheel studs is also pretty simple and it involves basic tools that you'll already have kicking around the shop. All you're gonna need is the stud, a lug nut, a washer, and either an impact gun or a ratchet. Apply a little lube onto the threads and knurling and simply slide the stud through the hole. Put on a washer and the lug nut on backwards, and just crank her down until the wheel stud fully bottoms out in the flange.
The completed axle shaft is slid into the housing and engages with the True Track. The C-clips will hold the axles form pulling out...
...and the center pin and cap secures everything inside the carrier with a snap ring. Finally the diff cover can be installed. [ drill spinning ]
(LT)>> And a slight amount of pressure is applied to the cap support screws finishing up this 12 bolt rear end.
(Narrator)>> Next removing the nasty.
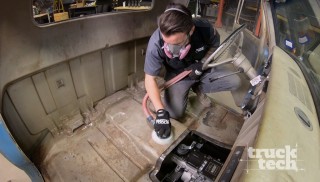
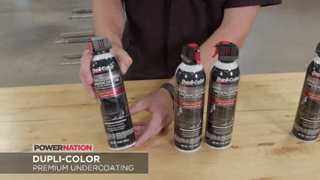
(LT)>> The very last thing we're gonna do before we stick this body back on the frame is clean up the underside. The floors are in okay shape but they just won't make a nice visual contrast against the new frame and suspension. To spruce up the bottom of our cab we're gonna be using some of Dupli-color's new premium undercoating since its high build formula will hide some of the imperfections on our cab floor. Now this stuff will prevent corrosion, you can paint over it if you want, and it'll even dampen sound and road noise, and the best part is the high output delivery system will quickly and effortlessly cover a large surface. Now you can use this stuff on just about anything. Cab floors, fuel tanks, doors, quarter panels, and a whole lot more, but the first thing we've got to do is just a little bit of clean up. We're using a combination of scrapers and wire brushes to remove 50 years of buildup. Once the surface is prepped we'll mask the surrounding areas of the cab floor. Since this is an aerosol and doesn't make a ton of overspray we're just using some six inch paper. We're gonna apply two light coats and let it dry for an hour.
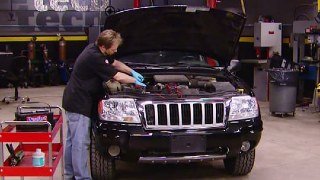
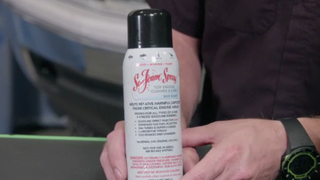
Routine maintenance of keeping any vehicle operating at its peak whether it's new or 20 years old. However it's especially important with modern engines that have been manufactured with precise tolerance and strict emissions controls. Now gasoline direct injected engines have been used in American pickup trucks for about six years now, and the technology gives an improvement in fuel mileage and horsepower. However it does give you one drawback that requires an additional maintenance step to remedy. The fuel is injected directly into the combustion chamber. So only air is passed through the intake runner along with some e-g-r and p-c-v gases. Since there is no fuel spray on the back side of the valve a buildup of carbon deposits can occur, which can cause rough running, hesitation, and reduction of air flow into the engine. This is Sea Foam spray top engine cleaner and lube, and it's an important part on the maintenance schedule on any g-d-i engine. It's made with a blend of petroleum based ingredients, which are safe to use on any two or four stroke gasoline engine, and it'll clean and lubricate the entire intake system, especially areas where a fuel additive just won't reach. And it'll clean out those carbon deposits that have built up on the runners, back side of the valve, and even in the combustion chamber, and it's super simple to use because it sprays directly into the intake. First loosen the intake boot and place the hood guide around the lip of the throttle body so the cleaning tube is about a quarter inch from the throttle blade. Connect the straw to the can. Alright fire it up and raise the idle. [ engine starting and revving ]
(LT)>> And spray the entire contents into the engine. Get comfy since it'll take about seven minutes. Once the can is empty. Alright kill it. Remove the hook guide and re-install the intake tube. Allow the Sea Foam to hot soak for 10 minutes. What are you doing looking at me? Check out the beautiful trees. Then follow the last step on the can and apply some spirited acceleration to burn off the hydrocarbon residues.
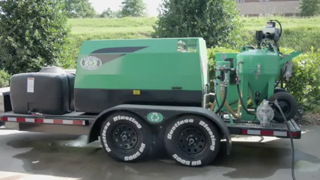
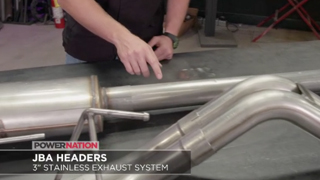
This is by far one of the easiest maintenance items that you'll ever perform. The only tool you need is a screw driver, you won't get your hands dirty, and you don't have to crawl underneath the truck. Now it's especially important on a direct injected engine but you can also use the spray on carbureted or even port injected engines. For best results use it every 7,000 to 10,000 miles. Now one more cool use of Sea Foam spray is if you're putting an engine into storage you can fog the intake beforehand and it'll prevent rust and corrosion from building up. For more info check out Sea Foam sales dot com. When it comes to upgrading your exhaust most people look for three things. Power, sound, and quality, and this JBA Performance exhaust system for the F-150 comes with all three. Now it replaces the restrictive factory exhaust with a fully mandrel bent system. Now that starts with this three inch pipe that leads into a stainless steel free flow muffler, and it winds up behind the right rear tire with these three and a half inch angle cut rolled exhaust tips, and of course it comes with all the hardware that you'll need for an easy bolt on installation. Visit Shop dot JBA Headers dot com. Now there is a way to strip body filler, rust, and paint easily that's quicker and much less time consuming. Dustless Blasting introduced us to their DB-500 mobile blasting system. It uses a mixture of water and crushed glass abrasive with a rust inhibitor to get your project quickly down to bare metal, stripping through paint, primer, and filler in one easy step without heating up or warping the panel. The roof and rear window section of our C-10 cab only took 20 minutes to strip. To find out more or to start your own blasting business check out Dustless Blasting dot com.
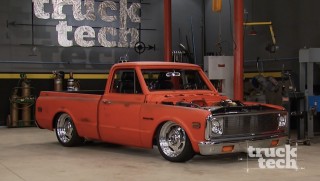
(Austin)>> Now if you noticed we bolted a new set of sneakers on ole boy. We went to Summit Racing and picked up this awesome set of Nitto 555's paired with these American Racing salt flat style wheels, and if I must say so myself I couldn't have came up with a better combo even if I tried.
(LT)>> Yeah I'll give it to you. I think you nailed it this time around. You know the vintage look of the wheel absolutely sets off the patina look of the rest of the truck. Now I will admit though I was a little bit nervous when you first said you wanted to put a shiny pearl paint job on the roof of a patina truck, but seeing it in person I do have to admit I think it actually works. The paint laid down nice and slick. We got rid of all that rust, and the pearl just makes the light kinda sparkle and dance around. It's really just the icing on the cake.
(Austin)>> Was that a compliment?
(LT)>> I'll give you one every now and then.
(Austin)>> Well hey love it or hate that's what custom truck building's all about. Add a touch here or there, put your own new innovative ideas, make it happen. If you guys want to see a parts list for anything you've seen on today's episode visit Powernation TV dot com.
(LT)>> Thanks for watching Truck Tech and we'll catch you guys next time. So what are we going to do about this interior though?
Show Full Transcript
(Austin)>> Now I know what you're thinking painting this beautiful patina truck. Don't call me crazy just yet. Wait until you see what we've got planned.
(Austin)>> As you can tell we have the C-10 chassis sitting on a lift here and we are ready to dive back into this project and start making some progress.
(LT)>> Now we have a great head start. The frame is powder coated satin black. We got the suspension assembled. A turbocharged 292 sitting up front and a Treme five speed that backs it up. Our goal by the end of the day is to have that cab bolted back on to this frame for good.
(Austin)>> Now before we jump the gun and get ahead of ourselves I still have to shoot some proper paint on that, and I might as well do it while it's off the frame so I'm not masking all this up and we get overspray everywhere, but I also am excited to see this thing rolling on its own four wheels.
(LT)>> Alright well to make that happen though we've got to finish building out this rear axle cause right now it's just an empty housing, but the parts are here and I have a deal for you. I'll get my hands greasy and I'll handle this rear end, all the grunt work right, and to help you out I'll keep my greasy hands as far away from that cab as possible.
(Austin)>> That's a deal I'll take. Help me push this out before you jump into that though.
(LT)>> Alright man.
(Austin)>> Serious horsepower behind this thing.
(LT)>> I had to point the camera at the guys on the wall.
A little bit to the left, a little bit to the right, a little bit to the right. Yep she's lined up perfect.
As power makes its way from the engine to the rear tires it first has to pass through a differential. Now this is kind of basic information but the reason we need a differential is because when you go around corners the inside wheel always spins at a slower speed than the outside. Now if you didn't have a differential the inside wheel would just be skidding along. From the factory our truck was equipped with an open differential. Now this is the most basic style that there is and it does nothing for high performance driving. Now if you ever encounter a loss of traction when you're on the power only one wheel is going to spin and you're not going anywhere. So we're gonna be replacing it along with everything else that inside our rear axle with parts that we got from Summit Racing dot com. Now for the differential we started out with a Detroit True Track. Now this is a helical gear style limited slip differential, and it's great for high performance driving because it applies nice even split torque between both rear wheels, but it still allows for that differential of speed while you're cornering. Now for the gear set we chose a 4.11 to one ratio, which is going to provide a nice blend between acceleration and a lower r-p-m when you're cruising down the highway. We picked up a forged pinion yoke, some new axle shafts with a five on five bolt pattern that'll match the front, a master install kit which comes with all the bearings, shims, seals, and hardware that we'll need to complete the installation, along with a new TA Performance diff cover that has these reinforcement caps that'll go on to the bearings and help keep everything in place. Our first order of business is to get the ring gear onto the new carrier.
Since it's a tight fit I'll use the 12 bolts to evenly pull the ring gear onto the carrier. Tighten them all up and it's off to the press where the carrier bearings are installed. Back at the axle the outer pinion race is driven in with a soft aluminum tool, followed by the inner. [ hammer tapping metal ]
(LT)>> One of the most critical steps to setting up a rear end is getting your pinion depth spot on. Now that's actually controlled by a small shim that's stuck to the table that sits right in between the head of the pinion and the bearing. Now it's gonna take you several different tries to get the exact thickness since there's really no easy way to calculate the thickness right off the bat unless you have a bunch of really specialized and really expensive tools. So trial and error is sort of the preferred method. Now that means you have to have the bearing that goes on and off several times, and if you have your final bearing and you move it with a press on and off and on and off you could possibly damage it. So they sell setup bearings, which are basically the same thing as a regular bearing except the inside has been ground out just enough to make it easily slide on so we can check our measurements and make another adjustment. The pinion and setup bearing are slid into place, and since they don't have a mockup bearing for the outer it gets gently tapped in place with a hammer and metal sleeve. The yoke goes on, and the nut is temporarily tightened down until there's slight rotational drag. Next the carrier slides into place with some shims and the caps are tightened down. Just by feel and sound I can tell that the backlash is almost right where it needs to be, but I'm gonna focus on that later. First I need to get pinion depth squared away. Now they do make some really expensive pinion depth tools, which are kind of complicated to use. So unless you have one of those you're not going to nail it the first time around. Well instead of an expensive tool we're gonna use a really cheap one. Some gear marking compound and a brush. All we do is apply it to a couple of different teeth and rotate the ring and pinion with just a little bit of drag on it, and the pattern where those two gears are actually touching and rubbing against one another will tell us whether we need to add or subtract from the pinion depth.
(Narrator)>> Mother of pearl, Lo 'n Slo in the paint booth, that's next.
(Austin)>> Welcome back to Truck Tech. I'm doing a final wipe down on this cab in preparation to shoot some primer. Now if you look close you can tell time has definitely taken its toll on this panel and pitted it in pretty well, but there's a few ways we could address that. We could skim coat this whole thing with filler. Then go ahead and sand it back down to that metal and the filler will only be filling in those tiny little holes. Some guys actually prefer this method because you're not really building thickness. However it's very labor intensive. I'm gonna chose to shoot some DTM high build primer on this and it will achieve the same results.
The high build is pretty thick. So we're not gonna use a strainer. It pours directly in the cup. The primer mixes two parts to one part catalyst, and a half part reducer.
It's always good practice to shoot a test pattern even though it's just primer. I do this every time for consistency and repetition. It's the basis of good fundamentals. This is the time to figure out your movements. Distance from the panel, speed of the gun, when and how you're gonna move the ladder. This way when you come back with paint all the issues are worked out and you can focus on the paint hitting the panel. [ spray gun hissing ]
(Austin)>> After letting this high build primer cure overnight we pushed the cab over into the prep booth where I can get a good head start on blocking out these panels.
Woo baby, after about 16 hours of blocking all the pits are gone. These panels are laser straight with nice, soft edges. I think she'll clean up nice. Keeping the masking on during blocking promotes a cleaner environment and a better paint job. It's now off to the booth to shoot the cab with sealer. This gives the paint a solid foundation for adhesion and helps promote a uniform color. The base coat begins with mixing up this also color called Ermine White. It was a factory GM color back in the early '60's. It's a solid off white that is just the right shade we're looking for. The base coat is applied with 25 p-s-i at the gun totaling three coats. Now I just got finish spraying that base coat but it doesn't stop there. This is where that custom touch comes in, and it all starts right here with this pearl. A lot of guys like mixing this directly into their clear coat but the issue you can have with that is if you have a run it's lot harder to correct and blend in. I prefer to use a high quality color blender, which is essentially a clear base coat. Now this is custom paint. There's no rules. Throw that out the window. However there's a few simple things to keep in mind. The first is the size of your pearl to the size of the tip in your gun. You want to make sure your tip's big enough so it doesn't clog up the gun, and lastly if you're running cup filters or screen filters well rip those out too. The most accurate way to measure pearl or flake is with a scale. We're using one gram per 28 ounces.
I'm going to apply two coats of the pearl while keeping the gun set at 25 p-s-i. The third is a control coat allowing for uniformity for the desired effect. I lower the pressure of the gun from 25 to 17 p-s-i. The fan pattern remains wide open. This is where the distance from the gun to the panel is extended and the motion of spraying slows down. You're not going for coverage here. You're only trying to get the pearl lay down nice and even on the panel, no blotching and no striping. I've got one last step before we lay down some clear, and this technique is called back masking. What I'll do is roll down this edge and it'll allow that clear coat to flow seamlessly right down on the edge of that panel without leaving a hard edge if we were just gonna do a regular tape line. Tape her back just like that. It's now time for my favorite part of all, and that's smashing on the clear. The gun gets setup with 32 p-s-i. It's sprayed with a pattern overlap of about 50 percent, maintaining about a 10 distance to the panel. We're gonna finish this bad boy off with a total of five coats of clear and let it cure overnight.
(Narrator)>> Next rear axle re-done.
(LT)>> We finalized the gear pattern on our 12 bolt, and if you're unsure of which adjustments need to be made just study the manual, which comes with the gears. For us it's time for final assembly. While it might be a bit confusing just about every new ring and pinion gear set comes with instructions to help you read the wear pattern. The pinion nut comes off and the pinion gear is driven out of the housing. We're gonna add 10 thousandths to the pinion depth and press on the final bearing. A heavy chunk of metal helps keep the pinion in place while the outer bearing is being pushed on. The new oil seal is now installed. The threads on the pinion are lubed up, and the yoke splines onto the pinion shaft. The nut and washer are installed, and the nut is tightened until the crush collar starts to deform. There's no actual torque value specified for the pinion nut. Instead it just gets tightened until there's about 20 inch pounds of rotational drag. Now the carrier goes into place. [ drill spinning ]
(LT)>> The back lash is verified, and now all the hard work is done. Zero-seven, right on the money. To finish up this 12 bolt we'll apply a little lube into the end of the axle tube and drive the wheel bearing into place, followed by the oil seal.
Then the brake backing plate goes on. [ drill spinning ]
(LT)>> The very next step is to install the axle shafts into the housing but first we need to put some wheel studs into the flange cause. As always there's two different ways to do it.
The first method involves using a shop press and a socket, and it effortlessly pushes the knurled wheel studs into the axle.
The second way to install wheel studs is also pretty simple and it involves basic tools that you'll already have kicking around the shop. All you're gonna need is the stud, a lug nut, a washer, and either an impact gun or a ratchet. Apply a little lube onto the threads and knurling and simply slide the stud through the hole. Put on a washer and the lug nut on backwards, and just crank her down until the wheel stud fully bottoms out in the flange.
The completed axle shaft is slid into the housing and engages with the True Track. The C-clips will hold the axles form pulling out...
...and the center pin and cap secures everything inside the carrier with a snap ring. Finally the diff cover can be installed. [ drill spinning ]
(LT)>> And a slight amount of pressure is applied to the cap support screws finishing up this 12 bolt rear end.
(Narrator)>> Next removing the nasty.
(LT)>> The very last thing we're gonna do before we stick this body back on the frame is clean up the underside. The floors are in okay shape but they just won't make a nice visual contrast against the new frame and suspension. To spruce up the bottom of our cab we're gonna be using some of Dupli-color's new premium undercoating since its high build formula will hide some of the imperfections on our cab floor. Now this stuff will prevent corrosion, you can paint over it if you want, and it'll even dampen sound and road noise, and the best part is the high output delivery system will quickly and effortlessly cover a large surface. Now you can use this stuff on just about anything. Cab floors, fuel tanks, doors, quarter panels, and a whole lot more, but the first thing we've got to do is just a little bit of clean up. We're using a combination of scrapers and wire brushes to remove 50 years of buildup. Once the surface is prepped we'll mask the surrounding areas of the cab floor. Since this is an aerosol and doesn't make a ton of overspray we're just using some six inch paper. We're gonna apply two light coats and let it dry for an hour.
Routine maintenance of keeping any vehicle operating at its peak whether it's new or 20 years old. However it's especially important with modern engines that have been manufactured with precise tolerance and strict emissions controls. Now gasoline direct injected engines have been used in American pickup trucks for about six years now, and the technology gives an improvement in fuel mileage and horsepower. However it does give you one drawback that requires an additional maintenance step to remedy. The fuel is injected directly into the combustion chamber. So only air is passed through the intake runner along with some e-g-r and p-c-v gases. Since there is no fuel spray on the back side of the valve a buildup of carbon deposits can occur, which can cause rough running, hesitation, and reduction of air flow into the engine. This is Sea Foam spray top engine cleaner and lube, and it's an important part on the maintenance schedule on any g-d-i engine. It's made with a blend of petroleum based ingredients, which are safe to use on any two or four stroke gasoline engine, and it'll clean and lubricate the entire intake system, especially areas where a fuel additive just won't reach. And it'll clean out those carbon deposits that have built up on the runners, back side of the valve, and even in the combustion chamber, and it's super simple to use because it sprays directly into the intake. First loosen the intake boot and place the hood guide around the lip of the throttle body so the cleaning tube is about a quarter inch from the throttle blade. Connect the straw to the can. Alright fire it up and raise the idle. [ engine starting and revving ]
(LT)>> And spray the entire contents into the engine. Get comfy since it'll take about seven minutes. Once the can is empty. Alright kill it. Remove the hook guide and re-install the intake tube. Allow the Sea Foam to hot soak for 10 minutes. What are you doing looking at me? Check out the beautiful trees. Then follow the last step on the can and apply some spirited acceleration to burn off the hydrocarbon residues.
This is by far one of the easiest maintenance items that you'll ever perform. The only tool you need is a screw driver, you won't get your hands dirty, and you don't have to crawl underneath the truck. Now it's especially important on a direct injected engine but you can also use the spray on carbureted or even port injected engines. For best results use it every 7,000 to 10,000 miles. Now one more cool use of Sea Foam spray is if you're putting an engine into storage you can fog the intake beforehand and it'll prevent rust and corrosion from building up. For more info check out Sea Foam sales dot com. When it comes to upgrading your exhaust most people look for three things. Power, sound, and quality, and this JBA Performance exhaust system for the F-150 comes with all three. Now it replaces the restrictive factory exhaust with a fully mandrel bent system. Now that starts with this three inch pipe that leads into a stainless steel free flow muffler, and it winds up behind the right rear tire with these three and a half inch angle cut rolled exhaust tips, and of course it comes with all the hardware that you'll need for an easy bolt on installation. Visit Shop dot JBA Headers dot com. Now there is a way to strip body filler, rust, and paint easily that's quicker and much less time consuming. Dustless Blasting introduced us to their DB-500 mobile blasting system. It uses a mixture of water and crushed glass abrasive with a rust inhibitor to get your project quickly down to bare metal, stripping through paint, primer, and filler in one easy step without heating up or warping the panel. The roof and rear window section of our C-10 cab only took 20 minutes to strip. To find out more or to start your own blasting business check out Dustless Blasting dot com.
(Austin)>> Now if you noticed we bolted a new set of sneakers on ole boy. We went to Summit Racing and picked up this awesome set of Nitto 555's paired with these American Racing salt flat style wheels, and if I must say so myself I couldn't have came up with a better combo even if I tried.
(LT)>> Yeah I'll give it to you. I think you nailed it this time around. You know the vintage look of the wheel absolutely sets off the patina look of the rest of the truck. Now I will admit though I was a little bit nervous when you first said you wanted to put a shiny pearl paint job on the roof of a patina truck, but seeing it in person I do have to admit I think it actually works. The paint laid down nice and slick. We got rid of all that rust, and the pearl just makes the light kinda sparkle and dance around. It's really just the icing on the cake.
(Austin)>> Was that a compliment?
(LT)>> I'll give you one every now and then.
(Austin)>> Well hey love it or hate that's what custom truck building's all about. Add a touch here or there, put your own new innovative ideas, make it happen. If you guys want to see a parts list for anything you've seen on today's episode visit Powernation TV dot com.
(LT)>> Thanks for watching Truck Tech and we'll catch you guys next time. So what are we going to do about this interior though?
