Truck Tech Builds
Want more content like this?
Join the PowerNation Email NewsletterParts Used In This Episode
Matco Tools
MATCO Tools are the Official Tool Supplier to PowerNation
The Industrial Depot
Tools, Hardware, Shop Supplies
Episode Transcript
(Jimmy)>> You're watching Powernation!
(LT)>> This time on Truck Tech we wrap up a few odds and ends on our retro GMC build, and we couldn't call it a day without getting it out into the dirt to see what she's made of. [ MUSIC ] [ engine revving ]
(LT)>> Yeah baby! Woo, hoo! [ MUSIC ]
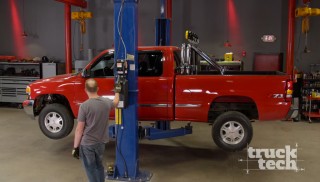
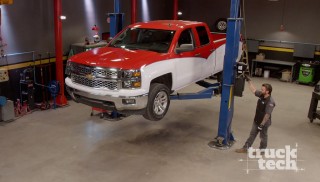
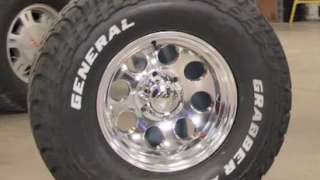
(LT)>> The wheel and tire that you choose for your truck is gonna set the vibe for the entire build, and for the project that we're working on today we're going old school. I've got a 33 inch all-terrain tire on a 16 inch polished aluminum 8 hole wheel, and this just screams mid-'90's, which is perfect for our retro or throw back '02 GMC build. Now I can't wait to get these things on and see how it's gonna look but they're just a little bit too tall. So before we do that we've got to raise up the front suspension. The simplest way to get a few extra inches of lift to clear larger tires on a pickup truck like this is gonna be a leveling kit, and they're quite easy to install. Up front the lift is going to be achieved with new torsion bar keys, and all they do is reposition the indexing of the torsion bar. Now because we're gonna be raising the front end up we will need a little bit longer shock. So most kits come with longer shocks as well. Now you could just lift up the front with a leveling kit and the front and rear of the truck would be, as the name suggests, level but to me a raked truck is a little bit cooler. So we're also gonna be installing slightly taller than stock lift blocks. Now the stock blocks are about an inch tall. So this will raise the rear one additional inch, and also to go along with that new shocks. So let's get this truck up in the air and get to it. [ mechanical humming ] [ drill buzzing ]
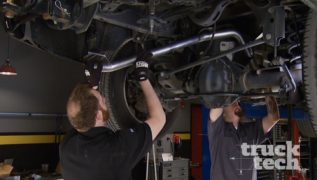
(LT)>> With the back tires out of the way I'll support the rear axle with a pole jack so I can loosen the U-bolts. [ drill buzzing ]
(LT)>> I'll lower the axle away from the leaf spring and swap the stock block for the new lift block. [ MUSIC ] The longer U-bolts go in securing the whole thing together. The new rear shocks will finish up the rear end. [ MUSIC ] The stock adjuster bolt comes out but to remove the block nut you'll either have to use a heavy duty two jaw puller or a torsion bar unloading tool like this. With the stock height key removed I'll now swap to the longer shock since there's no tension on the suspension. [ drill buzzing ]
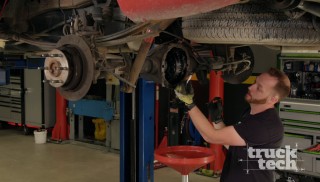
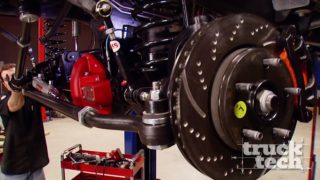
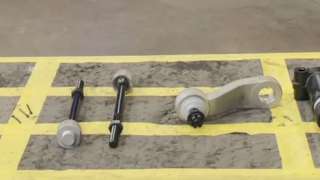
(LT)>> Well with the hex lined up on the new and the old key you can see how there's just a slight difference at the end of the arm, but that slight difference is enough to lift the truck. [ MUSIC ] I'll install the new key way and screw the adjuster bolt in about half way, but I'll have to fine tune the ride height once the truck is back on the ground. Our red GMC has traveled a quarter of a million miles. So needless to say there are gonna be some worn out parts. Now last time I took care of everything in the front suspension. We got new upper and lower control arms, c/v axles, wheel bearings, and brakes, but I didn't touch anything in the steering. So that's the next chore that we're gonna tackle today. I selected some Duralast Gold chassis parts to refresh the front end, and I picked up an idler arm and support bracket, a pitman arm, some inner and outer tie rod ends, which together should restore the factory steering feel of our GMC. These Duralast Gold chassis parts are engineered and designed with quality in mind, and they're gonna last long even in a heavy duty application. Now the balls in the joints have a larger surface area than stock for improved load distribution, and the studs are made from hardened steel. So needless to say these are some durable parts, and I know that front end work isn't the most fun thing to do but as I'm about to show you it's really not all that bad. In order to remove the tapered seats, which hold most of these parts together, there are a few specific tools you'll need. Most of the basics you'll likely already have, like sockets and wrenches, but to remove the pitman arm from the center link you'll need some kind of pickle fork, and then a specialized puller to get the pitman arm off the steering gear. Depending on what kind of truck you have you also may need to remove other components out of the way to gain access to what you're working on. It's a breeze to re-install the new parts because they are direct replacements from the old. [ MUSIC ] [ drill humming ]
(LT)>> To get the wheels relatively straight I set the length of the new tie rods as close as I could to the old ones. [ MUSIC ] Now as much as you may dislike doing basic maintenance work like steering and suspension there's nothing that's going to improve how a 20 year old truck drives more than a freshly rebuilt front suspension aligned to factory specs. Now speaking of which I still need to get the GMC dropped off at the alignment shop but other than that we're ready for the big tires.
(LT)>> Next a little trim for new rubber.
(LT)>> We've got both the steering and the suspension systems taken care of on our retro GMC build. So we're almost ready to throw on the larger wheels and tires, but I know with this mild lift that we've installed they're not gonna fit right away without just a little bit of modification of the fenders. Now the stock wheels have a very high positive offset and they have a narrow tire, which means they're kinda sucked up in underneath the fender wheels. Our new wheels have a high negative offset, which means they're pushed further out, and on top of that they have a tall and wide tire. So there's two areas that are gonna interfere. Number one here is the back of the fender kinda at the lower rocker, and number two is up front on the lower splash guard and a little bit of this bumper. Now trimming is kind of a standard practice when it comes to fitting larger wheels and tires onto an older truck. So let's get to it and throw some sparks. On Chevy and GMC trucks from '99 to '07 the lower rear edge of the front fender and front pinch weld on the rocker are the main areas Which will interfere with taller and wider tires but all we need is about an extra inch and a half of clearance. Rather than just chopping the metal away I like to fold down the front fender and trim away just a little bit. Then fold the pinch weld flat with the rocker to retain most of its strength. Then I can add another fold in the sheet metal part of the fender for a clean look that doesn't have any sharp edges. On the front bumper I'll trim it back about an inch at a slight angle, and then give it a test fit. Alright this is the moment of truth. Let's see if all this effort was worth it. [ MUSIC ] If I could get it to line up that'd be helpful. [ drill buzzing ]
(LT)>> Now it might seem a little bit drastic at first to have to cut into the sheet metal of your pickup just to fit a larger set of wheels and tires but like I said earlier it is fairly common practice, especially on a GM truck because the wheel wells are just pretty tight to the tire. Now one thing to keep in mind. You don't want to cut into the actual frame work of your truck. Depending on what model you have there might be some important structure back here, but on these GM trucks it's just sheet metal. So there's no safety factor that we're taking away. Now obviously the suspension is still drooped out but when we turn the wheel you can there is plenty of clearance on both the front as well as the back. Crunched our light back there, but when the wheels are turned there should be no rubbing at all. So the next thing to do is get that back tire on, get the truck on the ground, and see how our old school cool Sierra is gonna look. [ MUSIC ] With the weight of the truck finally back on the suspension at first glance it appears that the front end is sitting just a little bit too high, and according to the tape measure it's about an inch higher than it is in the rear, which isn't gonna fly. We don't have enough up travel of the suspension. So all I've got to do is de-crank the adjuster bolt for the torsion bars a few turns. We'll lower this thing down so it's level or maybe about three quarters of an inch lower in the front. I really like how that looks. I'm digging the stance with the new wheels and tires. So now it's time to do some work under the hood to give this truck a little more scoot.
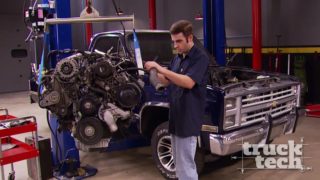
You can sorta think of our GMC as a bit of a budget build. You haven't see us throw on any mega dollar forged 22 inch wheels, coil over suspension conversions, or anything like that. Most of the parts that we have are reasonably affordable, and the same is gonna hold true for the parts that increase the performance. Now there are three main ways which you can increase the horsepower of your truck without spending a ton of money, and the first we've already taken care of. We did long tube headers and a free flowing exhaust a couple of weeks back. So today we're gonna take care of the remaining two, intake and calibration. I went to Summit Racing and I picked up a Banks ram air cold air intake. This air box is gonna flow substantially more air than the stock setup, but most importantly it's a true cold air intake, which means the filter is isolated in this box from the heat of the engine bay. So it's only gonna draw in cool outside air. Now the majority of our power gains today are gonna come from this SCT X-4 programmer. Now this will come with some preloaded tunes but I have a custom tune on here that's been designed to accommodate the larger than stock tires so our speedometer and shift points will be corrected as well as the long tube headers. And finally I've got some ignition tune-up parts from MSD. Now these aren't necessarily gonna increase the performance but new plugs and wires are gonna make sure that the fuel that's being introduced into our engine is gonna properly be combusted. So we'll get started by taking out the old stock parts. The stock intake tube and air box is easily removed from the Sierra, which gives us a little extra room to pull out the stock plug wires and the spark plugs. The new MSD plugs bolt right in and the super conductor wires finish up the ignition upgrade. The Banks intake box bolts onto the fender, and with the lid in place the mass air flow sensor slides in, and the intake tube connects the engine to the air box.
(LT)>> Later on some old school wheeling.
(LT)>> There are many ways to get your career started in the automotive industry, and for many that pathway begins with an education that offers hands on training, and for nearly 20 years we've partnered with Wyotech where students can get certifications in various automotive disciplines. Covid-19 and the social distancing requirements that come along with it have certainly affected us all, especially educational institutions. So here to discuss how Wyotech is handling the new requirements we have Troy Chaney, vice president of emissions and marketing. Hey Troy, how's it going?
(Troy)>> I'm doing well, how are you guys?
(LT)>> We're doing great. How is Wyotech handling all these new changes because like we said it's a whole new frontier out there?
(Troy)>> We talked as a team for a little while about moving our training online but we just didn't think that was in line with our hands on heritage in learning. So we decided we would just close down for six weeks and kinda let things play out. We re-opened in early May and we're clicking along as usual. We've got 220,000 square feet under roof of shop and classroom space. So we've got enough space to socially distance and make sure students are safe, and that's what we've been doing. So we're thrilled to be back to hands on learning in live classes.
(LT)>> Yeah we've certainly got to adapt to overcome some of these new challenges. We actually had a chance to stop by Wyotech last year. We shot a whole bunch of footage before the whole Covid restrictions came into play, but for some of those people who might not be familiar with Wyotech and some of the courses that you have to offer give us a brief overview of what a student can expect when they enroll.
(Troy)>> Sure, we specialize in automotive and diesel industry training. So we have three core programs, automotive technology, diesel technology, and then the third one is collision and refinishing technology. Then we also have what we call specialty courses. Those are street rod and fabrication, custom chassis fabrication, trim and upholstery, high performance powertrains, which is basically all about speed and engines, applied service management. So what makes us unique is our format. We got to school 8 hours and 20 minutes a day five days a week, and first and foremost we're preparing young men and women for the work place. So you know you're already going to school 8 hours and 20 minutes a day. So once you graduate, make that jump into the work place it's not a huge adjustment for you, but basically students pick one of those core programs and then they pick one of the three month specialty programs, and that's what makes up their initial program. It's a 9 month program and they can graduate in as little as 9 months with an associate of occupational science. We're pretty proud of it and our format's unique, and it allows students to come here, learn in a hands on environment, and get out and get into the work force earlier, and we're proud of that heritage and proud to be doing it here in Laramie, Wyoming.
(LT)>> Well thank you so much Troy. We appreciate your time and we look forward to the possibility of coming out to check out your campus again.
(Troy)>> My pleasure, you guys are welcome here anytime. We'd love to see you.
(LT)>> It's no secret that you can increase the performance of your fuel injected engine simply by changing around the calibration inside the computer, but how excactly does a device like the SCT X-4 increase performance? The best comparison I could make is to an old school carbureted engine. You see back in the day if you wanted more power you could simply turn the distributor to advance the timing, or you could mess around with the carburetor to change the air/fuel ratio, and the same exact thing is happening here except electronically. We're changing around ignition timing. We're changing the fuel mixture, r-p-m at which the transmission shifts, how it goes into power enrichment mode, and a whole bunch of parameters, which will work perfectly together with the mechanical parts that we've changed like the cold air, long tube headers, and free flowing exhaust. So all together we should have nice upgrade in horsepower to our 5.3. So the only thing left to do is get this thing out on the road and see how it all works togther.
(LT)>> Next we put our tires to the test.
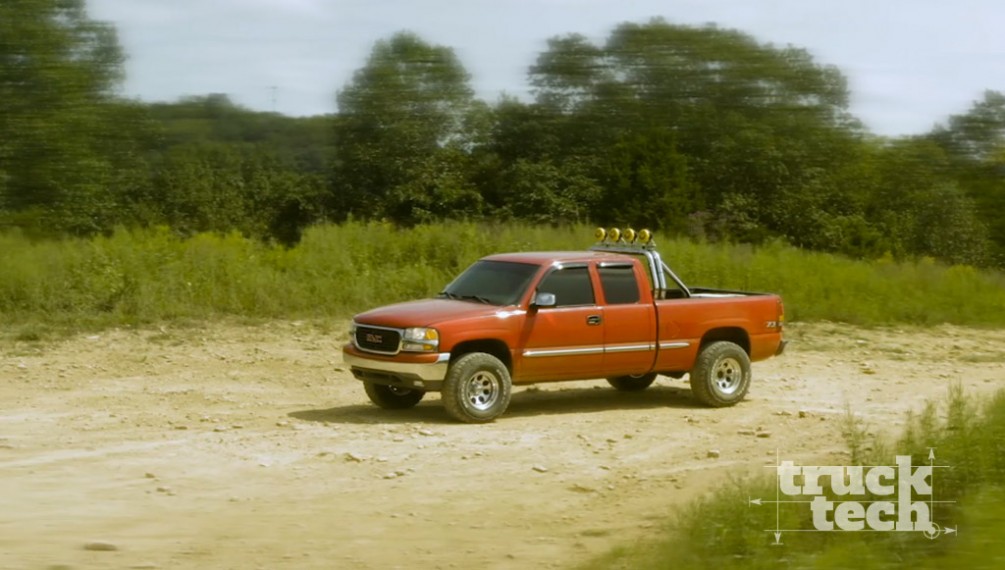
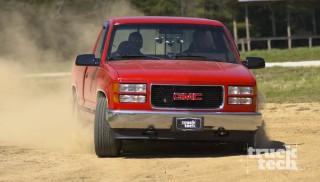
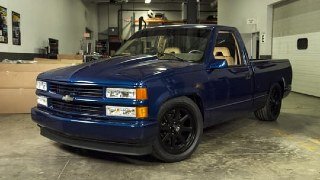
(LT)>> Now obviously the first thing that you're gonna notice about this truck from the outside is the changes that we made to its visual appearance. We wanted to give it a retro look. I think we nailed it. We've got the chrome roll bar in the bed with the four KC Hi-lites on top and the 16 inch wheels with the 33 inch tires. It just really, really nails that look. Speaking of the tires I am very impressed with how these General Grabber ATX's are performing on the road. When we get these things off road in the dirt that's where they'll really begin to shine. [ MUSIC ] Just because a pickup like this is probably gonna spend most of its life driving down the highway there's no reason we can't get it off the road, and that's the only place I could think of to properly test it. So we came out to Wooly's Off Road Park in Lynnville, Tennessee. Now we come here for a lot of our payoffs honestly because it has such a nice variety of terrain. It has some extreme stuff but it also has some more mild trails and open fields for a truck just like this. So we're gonna put it to the test. [ MUSIC ] We knew that we wanted to run General Grabber off road tires on our retro GMC build, but when you boil it down there are really two tires that we had to choose from. On Klassy K-5 we ran Grabber X-3's, which are a mud terrain tire because we knew we were gonna be getting into some nasty conditions. On the other hand the ATX is General's all-terrain offering. I spoke with Travis Roffler, director of marketing, and helped us decide on the right tire for our application.
(Travis)>> Well any time the conditions get severe the X-3 is for rock, sand, and mud. So when we talk about conditions that are very intense, whether it's deep mud, deep sand, hard rock, big rock, if you're looking for a tire that's gonna give you good off road conditions in milder conditions of off road, whether it's rock, whether it's sand, or whether it's mud, but your still looking for on road manners, quiet comfortable ride because the ATX is built with a two ply casing versus the X-3 with the three ply casing. So durability wise the X-3's gonna give you a little bit more durability than the ATX would. One of the other things that we did with both tires is you can see if you look at the tire we extended the actual pattern down into the shoulder of the tire. So in those air down conditions when the tire's twisted on its side it gives you not only extra grip and traction to pull up those rocks, pull through that mud in those air down conditions, but also allows you robustness and puncture resistance in that off shoulder with that thicker off shoulder to protect the tire in severe conditions. [ MUSIC ]
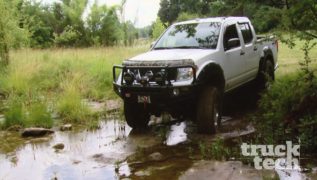
(LT)>> The '99 to '07 full size Chevy is probably one of the most popular used trucks right now, and I think this is why. Because you can do so many different things with it, whether that's daily driving, off roading, weekend warrior, or what have you. You can go racing or drive it to the mall. [ MUSIC ] Now I know I've said this before but I'm gonna say it again. I love how this truck sounds. You've got a 5-3 V-8, long tube headers, Flowmaster exhaust. It just has an unmistakable rumble that you can't beat, you can't go wrong with it. When it's coming up the trail it just has a really cool sound. There we go, come on! Effortless, effortless! A little bumpy, don't mind the scratches on the paint! Walking right up, oh yeah! So when I'm sitting at the bottom of the hill kinda staring up and I see that big rut at the bottom it's pretty intimidating, but honestly this truck crawled right up it. It's probably got a couple of scratches on the roof from those branches but not a big deal. That's off roading. [ MUSIC ] So far I am impressed with how these ATX all-terrain tires are doing, and honestly this is exactly the terrain that they're designed for. You've got loose dirt, some rocks, a little bit of mud. I've never broken traction once. I mean I'm really not trying to go nuts here but the tires, they clean themselves out. The mud spins out so the treads stay open, and they've done everything I've asked them to. Now obviously we are going to put it to the test and try to find a little bit more extreme terrain. So far so good. And the one thing that I was worried about, rubbing, I haven't heard a single bit yet, especially when you turn, you kinda go over a bump, and the wheels get stuffed up in. That's where you're gonna rub and that's where you're gonna have problems, but right now we didn't have to trim a whole lot, there's no rubbing. So I think we're golden. If you guys liked what you saw today or you have any more questions about this build be sure to check us out at Powernation TV dot com.
Show Full Transcript
(LT)>> This time on Truck Tech we wrap up a few odds and ends on our retro GMC build, and we couldn't call it a day without getting it out into the dirt to see what she's made of. [ MUSIC ] [ engine revving ]
(LT)>> Yeah baby! Woo, hoo! [ MUSIC ]
(LT)>> The wheel and tire that you choose for your truck is gonna set the vibe for the entire build, and for the project that we're working on today we're going old school. I've got a 33 inch all-terrain tire on a 16 inch polished aluminum 8 hole wheel, and this just screams mid-'90's, which is perfect for our retro or throw back '02 GMC build. Now I can't wait to get these things on and see how it's gonna look but they're just a little bit too tall. So before we do that we've got to raise up the front suspension. The simplest way to get a few extra inches of lift to clear larger tires on a pickup truck like this is gonna be a leveling kit, and they're quite easy to install. Up front the lift is going to be achieved with new torsion bar keys, and all they do is reposition the indexing of the torsion bar. Now because we're gonna be raising the front end up we will need a little bit longer shock. So most kits come with longer shocks as well. Now you could just lift up the front with a leveling kit and the front and rear of the truck would be, as the name suggests, level but to me a raked truck is a little bit cooler. So we're also gonna be installing slightly taller than stock lift blocks. Now the stock blocks are about an inch tall. So this will raise the rear one additional inch, and also to go along with that new shocks. So let's get this truck up in the air and get to it. [ mechanical humming ] [ drill buzzing ]
(LT)>> With the back tires out of the way I'll support the rear axle with a pole jack so I can loosen the U-bolts. [ drill buzzing ]
(LT)>> I'll lower the axle away from the leaf spring and swap the stock block for the new lift block. [ MUSIC ] The longer U-bolts go in securing the whole thing together. The new rear shocks will finish up the rear end. [ MUSIC ] The stock adjuster bolt comes out but to remove the block nut you'll either have to use a heavy duty two jaw puller or a torsion bar unloading tool like this. With the stock height key removed I'll now swap to the longer shock since there's no tension on the suspension. [ drill buzzing ]
(LT)>> Well with the hex lined up on the new and the old key you can see how there's just a slight difference at the end of the arm, but that slight difference is enough to lift the truck. [ MUSIC ] I'll install the new key way and screw the adjuster bolt in about half way, but I'll have to fine tune the ride height once the truck is back on the ground. Our red GMC has traveled a quarter of a million miles. So needless to say there are gonna be some worn out parts. Now last time I took care of everything in the front suspension. We got new upper and lower control arms, c/v axles, wheel bearings, and brakes, but I didn't touch anything in the steering. So that's the next chore that we're gonna tackle today. I selected some Duralast Gold chassis parts to refresh the front end, and I picked up an idler arm and support bracket, a pitman arm, some inner and outer tie rod ends, which together should restore the factory steering feel of our GMC. These Duralast Gold chassis parts are engineered and designed with quality in mind, and they're gonna last long even in a heavy duty application. Now the balls in the joints have a larger surface area than stock for improved load distribution, and the studs are made from hardened steel. So needless to say these are some durable parts, and I know that front end work isn't the most fun thing to do but as I'm about to show you it's really not all that bad. In order to remove the tapered seats, which hold most of these parts together, there are a few specific tools you'll need. Most of the basics you'll likely already have, like sockets and wrenches, but to remove the pitman arm from the center link you'll need some kind of pickle fork, and then a specialized puller to get the pitman arm off the steering gear. Depending on what kind of truck you have you also may need to remove other components out of the way to gain access to what you're working on. It's a breeze to re-install the new parts because they are direct replacements from the old. [ MUSIC ] [ drill humming ]
(LT)>> To get the wheels relatively straight I set the length of the new tie rods as close as I could to the old ones. [ MUSIC ] Now as much as you may dislike doing basic maintenance work like steering and suspension there's nothing that's going to improve how a 20 year old truck drives more than a freshly rebuilt front suspension aligned to factory specs. Now speaking of which I still need to get the GMC dropped off at the alignment shop but other than that we're ready for the big tires.
(LT)>> Next a little trim for new rubber.
(LT)>> We've got both the steering and the suspension systems taken care of on our retro GMC build. So we're almost ready to throw on the larger wheels and tires, but I know with this mild lift that we've installed they're not gonna fit right away without just a little bit of modification of the fenders. Now the stock wheels have a very high positive offset and they have a narrow tire, which means they're kinda sucked up in underneath the fender wheels. Our new wheels have a high negative offset, which means they're pushed further out, and on top of that they have a tall and wide tire. So there's two areas that are gonna interfere. Number one here is the back of the fender kinda at the lower rocker, and number two is up front on the lower splash guard and a little bit of this bumper. Now trimming is kind of a standard practice when it comes to fitting larger wheels and tires onto an older truck. So let's get to it and throw some sparks. On Chevy and GMC trucks from '99 to '07 the lower rear edge of the front fender and front pinch weld on the rocker are the main areas Which will interfere with taller and wider tires but all we need is about an extra inch and a half of clearance. Rather than just chopping the metal away I like to fold down the front fender and trim away just a little bit. Then fold the pinch weld flat with the rocker to retain most of its strength. Then I can add another fold in the sheet metal part of the fender for a clean look that doesn't have any sharp edges. On the front bumper I'll trim it back about an inch at a slight angle, and then give it a test fit. Alright this is the moment of truth. Let's see if all this effort was worth it. [ MUSIC ] If I could get it to line up that'd be helpful. [ drill buzzing ]
(LT)>> Now it might seem a little bit drastic at first to have to cut into the sheet metal of your pickup just to fit a larger set of wheels and tires but like I said earlier it is fairly common practice, especially on a GM truck because the wheel wells are just pretty tight to the tire. Now one thing to keep in mind. You don't want to cut into the actual frame work of your truck. Depending on what model you have there might be some important structure back here, but on these GM trucks it's just sheet metal. So there's no safety factor that we're taking away. Now obviously the suspension is still drooped out but when we turn the wheel you can there is plenty of clearance on both the front as well as the back. Crunched our light back there, but when the wheels are turned there should be no rubbing at all. So the next thing to do is get that back tire on, get the truck on the ground, and see how our old school cool Sierra is gonna look. [ MUSIC ] With the weight of the truck finally back on the suspension at first glance it appears that the front end is sitting just a little bit too high, and according to the tape measure it's about an inch higher than it is in the rear, which isn't gonna fly. We don't have enough up travel of the suspension. So all I've got to do is de-crank the adjuster bolt for the torsion bars a few turns. We'll lower this thing down so it's level or maybe about three quarters of an inch lower in the front. I really like how that looks. I'm digging the stance with the new wheels and tires. So now it's time to do some work under the hood to give this truck a little more scoot.
You can sorta think of our GMC as a bit of a budget build. You haven't see us throw on any mega dollar forged 22 inch wheels, coil over suspension conversions, or anything like that. Most of the parts that we have are reasonably affordable, and the same is gonna hold true for the parts that increase the performance. Now there are three main ways which you can increase the horsepower of your truck without spending a ton of money, and the first we've already taken care of. We did long tube headers and a free flowing exhaust a couple of weeks back. So today we're gonna take care of the remaining two, intake and calibration. I went to Summit Racing and I picked up a Banks ram air cold air intake. This air box is gonna flow substantially more air than the stock setup, but most importantly it's a true cold air intake, which means the filter is isolated in this box from the heat of the engine bay. So it's only gonna draw in cool outside air. Now the majority of our power gains today are gonna come from this SCT X-4 programmer. Now this will come with some preloaded tunes but I have a custom tune on here that's been designed to accommodate the larger than stock tires so our speedometer and shift points will be corrected as well as the long tube headers. And finally I've got some ignition tune-up parts from MSD. Now these aren't necessarily gonna increase the performance but new plugs and wires are gonna make sure that the fuel that's being introduced into our engine is gonna properly be combusted. So we'll get started by taking out the old stock parts. The stock intake tube and air box is easily removed from the Sierra, which gives us a little extra room to pull out the stock plug wires and the spark plugs. The new MSD plugs bolt right in and the super conductor wires finish up the ignition upgrade. The Banks intake box bolts onto the fender, and with the lid in place the mass air flow sensor slides in, and the intake tube connects the engine to the air box.
(LT)>> Later on some old school wheeling.
(LT)>> There are many ways to get your career started in the automotive industry, and for many that pathway begins with an education that offers hands on training, and for nearly 20 years we've partnered with Wyotech where students can get certifications in various automotive disciplines. Covid-19 and the social distancing requirements that come along with it have certainly affected us all, especially educational institutions. So here to discuss how Wyotech is handling the new requirements we have Troy Chaney, vice president of emissions and marketing. Hey Troy, how's it going?
(Troy)>> I'm doing well, how are you guys?
(LT)>> We're doing great. How is Wyotech handling all these new changes because like we said it's a whole new frontier out there?
(Troy)>> We talked as a team for a little while about moving our training online but we just didn't think that was in line with our hands on heritage in learning. So we decided we would just close down for six weeks and kinda let things play out. We re-opened in early May and we're clicking along as usual. We've got 220,000 square feet under roof of shop and classroom space. So we've got enough space to socially distance and make sure students are safe, and that's what we've been doing. So we're thrilled to be back to hands on learning in live classes.
(LT)>> Yeah we've certainly got to adapt to overcome some of these new challenges. We actually had a chance to stop by Wyotech last year. We shot a whole bunch of footage before the whole Covid restrictions came into play, but for some of those people who might not be familiar with Wyotech and some of the courses that you have to offer give us a brief overview of what a student can expect when they enroll.
(Troy)>> Sure, we specialize in automotive and diesel industry training. So we have three core programs, automotive technology, diesel technology, and then the third one is collision and refinishing technology. Then we also have what we call specialty courses. Those are street rod and fabrication, custom chassis fabrication, trim and upholstery, high performance powertrains, which is basically all about speed and engines, applied service management. So what makes us unique is our format. We got to school 8 hours and 20 minutes a day five days a week, and first and foremost we're preparing young men and women for the work place. So you know you're already going to school 8 hours and 20 minutes a day. So once you graduate, make that jump into the work place it's not a huge adjustment for you, but basically students pick one of those core programs and then they pick one of the three month specialty programs, and that's what makes up their initial program. It's a 9 month program and they can graduate in as little as 9 months with an associate of occupational science. We're pretty proud of it and our format's unique, and it allows students to come here, learn in a hands on environment, and get out and get into the work force earlier, and we're proud of that heritage and proud to be doing it here in Laramie, Wyoming.
(LT)>> Well thank you so much Troy. We appreciate your time and we look forward to the possibility of coming out to check out your campus again.
(Troy)>> My pleasure, you guys are welcome here anytime. We'd love to see you.
(LT)>> It's no secret that you can increase the performance of your fuel injected engine simply by changing around the calibration inside the computer, but how excactly does a device like the SCT X-4 increase performance? The best comparison I could make is to an old school carbureted engine. You see back in the day if you wanted more power you could simply turn the distributor to advance the timing, or you could mess around with the carburetor to change the air/fuel ratio, and the same exact thing is happening here except electronically. We're changing around ignition timing. We're changing the fuel mixture, r-p-m at which the transmission shifts, how it goes into power enrichment mode, and a whole bunch of parameters, which will work perfectly together with the mechanical parts that we've changed like the cold air, long tube headers, and free flowing exhaust. So all together we should have nice upgrade in horsepower to our 5.3. So the only thing left to do is get this thing out on the road and see how it all works togther.
(LT)>> Next we put our tires to the test.
(LT)>> Now obviously the first thing that you're gonna notice about this truck from the outside is the changes that we made to its visual appearance. We wanted to give it a retro look. I think we nailed it. We've got the chrome roll bar in the bed with the four KC Hi-lites on top and the 16 inch wheels with the 33 inch tires. It just really, really nails that look. Speaking of the tires I am very impressed with how these General Grabber ATX's are performing on the road. When we get these things off road in the dirt that's where they'll really begin to shine. [ MUSIC ] Just because a pickup like this is probably gonna spend most of its life driving down the highway there's no reason we can't get it off the road, and that's the only place I could think of to properly test it. So we came out to Wooly's Off Road Park in Lynnville, Tennessee. Now we come here for a lot of our payoffs honestly because it has such a nice variety of terrain. It has some extreme stuff but it also has some more mild trails and open fields for a truck just like this. So we're gonna put it to the test. [ MUSIC ] We knew that we wanted to run General Grabber off road tires on our retro GMC build, but when you boil it down there are really two tires that we had to choose from. On Klassy K-5 we ran Grabber X-3's, which are a mud terrain tire because we knew we were gonna be getting into some nasty conditions. On the other hand the ATX is General's all-terrain offering. I spoke with Travis Roffler, director of marketing, and helped us decide on the right tire for our application.
(Travis)>> Well any time the conditions get severe the X-3 is for rock, sand, and mud. So when we talk about conditions that are very intense, whether it's deep mud, deep sand, hard rock, big rock, if you're looking for a tire that's gonna give you good off road conditions in milder conditions of off road, whether it's rock, whether it's sand, or whether it's mud, but your still looking for on road manners, quiet comfortable ride because the ATX is built with a two ply casing versus the X-3 with the three ply casing. So durability wise the X-3's gonna give you a little bit more durability than the ATX would. One of the other things that we did with both tires is you can see if you look at the tire we extended the actual pattern down into the shoulder of the tire. So in those air down conditions when the tire's twisted on its side it gives you not only extra grip and traction to pull up those rocks, pull through that mud in those air down conditions, but also allows you robustness and puncture resistance in that off shoulder with that thicker off shoulder to protect the tire in severe conditions. [ MUSIC ]
(LT)>> The '99 to '07 full size Chevy is probably one of the most popular used trucks right now, and I think this is why. Because you can do so many different things with it, whether that's daily driving, off roading, weekend warrior, or what have you. You can go racing or drive it to the mall. [ MUSIC ] Now I know I've said this before but I'm gonna say it again. I love how this truck sounds. You've got a 5-3 V-8, long tube headers, Flowmaster exhaust. It just has an unmistakable rumble that you can't beat, you can't go wrong with it. When it's coming up the trail it just has a really cool sound. There we go, come on! Effortless, effortless! A little bumpy, don't mind the scratches on the paint! Walking right up, oh yeah! So when I'm sitting at the bottom of the hill kinda staring up and I see that big rut at the bottom it's pretty intimidating, but honestly this truck crawled right up it. It's probably got a couple of scratches on the roof from those branches but not a big deal. That's off roading. [ MUSIC ] So far I am impressed with how these ATX all-terrain tires are doing, and honestly this is exactly the terrain that they're designed for. You've got loose dirt, some rocks, a little bit of mud. I've never broken traction once. I mean I'm really not trying to go nuts here but the tires, they clean themselves out. The mud spins out so the treads stay open, and they've done everything I've asked them to. Now obviously we are going to put it to the test and try to find a little bit more extreme terrain. So far so good. And the one thing that I was worried about, rubbing, I haven't heard a single bit yet, especially when you turn, you kinda go over a bump, and the wheels get stuffed up in. That's where you're gonna rub and that's where you're gonna have problems, but right now we didn't have to trim a whole lot, there's no rubbing. So I think we're golden. If you guys liked what you saw today or you have any more questions about this build be sure to check us out at Powernation TV dot com.
