Parts Used In This Episode
Dustless Blasting
Dustless Blasting DB500 Mobile S
Matco Tools
Matco Tools are the Official Tool Supplier to Truck Tech
The Industrial Depot
Tools, Hardware, and Shop Supplies
Episode Transcript
(Narrator)>> We came, we saw, we cut a deal. Then cut some trails. Now it's time to come up with a plan for "Project Redtide" and what LT has in mind just might make you four wheel drive guys run for the hills. ♪ ♪
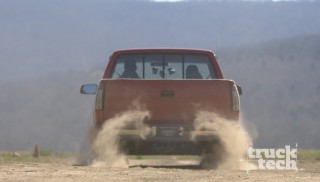
(LT)>> Today we're gonna be kicking off a brand new project, this 1988 Chevy, and we're gonna nickname it "Project Redtide". It's a K-1500, which means it's a half ton four wheel drive. I've always had a love affair with the single cab short box truck. They look great, they're agile, and they're just sporty. Now you'll notice this truck is a little bit dirty and that's because immediately after we bought it we took it out on the trail alongside our K-five, which we just finished up. We wanted to get a baseline and see how this K-1500 would perform. ♪ ♪ We really wanted to get a better idea of how this truck would handle the rough stuff, and it did pretty well for a mostly stock truck. The suspension soaked up the bumps and it had no problem tackling the mild mud holes that we pointed it at. All in it was a fun trail machine, but there's always room for improvement. So the question is what are we gonna change first on the truck, and exactly what direction are we gonna take with this build as a whole? We could get the suspension up in the air and cut out all the i-f-s parts. Throw some solid axles underneath on leaf springs getting the truck another six to eight inches up in the air so we can run a massive 42 inch tall tire, making the K-1500 the ultimate off roader. Our first modification to the suspension is gonna require that we remove the bed. ♪ ♪ [ drill spinning ]
(LT)>> The bed is held to the frame with a couple of bolts, and an impact gun makes quick work of them. After that it's just a few wires for the tail lights, the fuel filler neck, and the bed is loose. ♪ ♪ We're going to move the truck outside and lift off the bed. Luckily we have a fork lift and a bunch of ratchet straps, which make easy work of it. Alright let's see if we can drop something. If you don't happen to have a fork lift sitting around a couple of buddies and a case of beer will do the job. Let's do some washing. It only takes a few minutes, and anytime the bed comes off it's totally worth the extra effort to clean things up. The truck'll look nicer and your washing machine will thank you. ♪ ♪
(Jeremy)>> LT I heard somebody down here is doing a solid axle swap. I think a project like that deserves to be down in XOR.
(LT)>> Well you're right. If I were gonna solid axle swap this truck I'd probably be stepping on your toes. So don't worry, I'm not gonna do that. In fact I'm not even gonna lift this truck.
(Jeremy)>> There's no way you're just gonna keep it stock.
(LT)>> No, you're right, I'm not gonna do that. In fact we're going in the complete opposite direction. Do you remember the early '90's GMC Cyclones and Typhoons?
(Jeremy)>> Yeah.
(LT)>> So those were actually based on a four wheel drive S-10 chassis that had been lowered down to the ground and converted to all wheel drive. Well we're gonna replicate that in this full size K-1500. We're gonna lower a four wheel drive truck.
(Jeremy)>> You are gonna catch so much flack for doing that.
(LT)>> Well you know what, that's alright because I've done it before and I've heard it all. You know what the number one complaint is? You're gonna ruin that truck by lowering it down to the ground. A four wheel drive truck belongs lifted in the air with big mud tires on it. Well here's the facts. We're not gonna ruin anything because the four wheel drive system is still gonna function perfectly. We're not gonna take anything out. You can still use it as a pickup truck. You can haul a trailer. You can put cargo in the bed, but you know what? I guess the only thing you can't do is go through those, like what do you guys drive through mud puddles or something down there? You can't do that.
(Jeremy)>> Yeah but why wouldn't you just start with a two wheel truck?
(LT)>> A two wheel drive truck, yeah, it would be a lot easier to lower and everyone does. That's part of the problem is that I don't want to do what everyone else does. One of the major reasons actually has to do with traction. You know we want to make this an all-wheel drive all weather vehicle. So whether it's snowing or raining we can still put a fair amount of power down to the ground and not just be spinning out. And if we ever want to go to the drag strip it'll be much easier to launch it off the line without spinning.
(Jeremy)>> Well hey, this is not my cup of tea. You really don't have me sold on the whole thing but I'm assuming it's gonna take some parts to pull it off.
(LT)>> Yeah I've got a few laid out. Let me show you what we're gonna do. It actually only takes a handful of parts and everything we got here we picked up from Summit Racing. We'll start out in the rear with a flip kit. These brackets are basically gonna relocate the rear axle on top of the spring pack for a total of six inches of drop. Then we'll have to come in and install a C-notch. This is gonna cut out a spot of the frame to allow more axle travel without bottoming out, and the front is even simpler yet. All we have to do is install a pair of torsion bar keys to lower the front four inches, and we'll top it all off with a pair of shorter shocks.
(Jeremy)>> Well you're right, that definitely is simple.
(LT)>> Alright well let's get to work then. Where you going?
(Jeremy)>> This is all you buddy.
(Narrator)>> Next "Redtide" gets laid out.
(LT)>> We're getting ready to lower the rear end of "Redtide", our '88 K-1500, and the first step is to make some room for the axle. A template is provided with the kit, which shows us where to cut with no measuring or guess work needed. We have to get the bump stops out of the way first, and a cutoff wheel and air chisel make quick work of the rivets. [ hammer banging metal ]
(LT)>> Then it's just a matter of following the lines to slice the frame. [ hammer banging metal ]
(LT)>> Since the flip kit is gonna place the axle so much higher towards the frame we needed to make the notch so the axle won't bottom out. This is plenty of clearance now but we can't leave it like this because it's just not strong enough. So we will be installing this reinforcement plate over the frame. You'll notice that the notch isn't centered perfectly over the rear axle. That's because the saddles that the axle will sit in actually locate the axle just a little bit further towards the rear. This is because you won't have to change the length of your driveshaft. Now you can bolt these in but I always prefer to weld them in because it's just a little bit stronger. Since we need clean metal to weld to I'll trace the outline of the reinforcement. Then I'll use a flap wheel to remove the fresh powder coat on the bracket everywhere I plan to weld. The same process is repeated on the frame, cleaning up years of rust, undercoat, and paint. Then the bracket is clamped onto the frame. Machine setup is critical to ensure proper weld penetration and strength. So a frame modification like this might not be a welding project for the novice. Because this quarter inch thick brace does take some power to burn into the frame I'm jumping around from side to side to control heat input. Alright we got the frame all tied back together and it's strong as ever. Now we don't always get to show you guys both sides of an operation like this but I can't do the flip kit until both notches are in. So I've got a little bit more work to do but I have a feeling the other side will go just a little bit quicker. [ welder crackling ]
(LT)>> For a project like this a mig machine is the easiest and quickest method of welding. We could have done it with a tig but that takes a ton of time, and if all you have is a stick welder that'll get the job done just the same. Now that we have some extra room in the frame we'll start the actual lowering process by first supporting the rear axle on stands. The shocks are the first part to come off, followed by the original U-bolts on both the passenger and driver's side. Now here's something kind of scary that you can find on an older vehicle or one that's a little bit rusted. This rear U-bolt has corroded almost all the way through, and this is a very important faster that holds the rear axle to the leaf springs. If this were to fail you'd be in a world of trouble. Now the problem is this lower spring perch kind of acts like a cup. It collects all the dirt, mud, and water and just let's it sit right around the U-bolt causing rust. So if you lived in a rust belt area or you just have an older vehicle be sure to keep an eye out for this kind of problem. A quick hit with a cutoff disc removes the rest of the hardware. Then the leaf spring bolts can come out with of course a little persuasion from our friend the hammer. Then the leaf springs can be removed from the truck and set aside. The last part to go is the tail pipe, which we'll be upgrading later on.
(Narrator)>> Drop and give me six.
(LT)>> The next step is to lower the whole truck closer to the rear axle so we can install the leaf springs underneath the axle this time. The only problem is we've removed a lot of weight from the rear end of this frame and the truck isn't very well balanced. In fact I have a screw jack up front and that's supporting a lot of the weight. So we need to add some ballast back here so that whenever I raise the lift the truck doesn't do a nose dive. So nothing works better than a couple of old mud tires.
Usually that's done with a keg but a couple of tires work too. The truck frame is lowered down towards the axle, and the leaf springs go right back into place, and the hardware get snugged but we'll torque it later on with the truck on the ground. The axle saddles install over the spring center bolt with a hole towards the front. The truck is raised back up, and the axle slides right into its new home six inches lower than before. The provided U-bolts slide on along with a lower spring mount, and nuts and washers hold everything together. Because the truck is going to sit so much lower the kit includes these shock extensions. They require the original large shock bolt, a five-sixteenths hole to be drilled, and two small bolts will keep it from twisting. Now the new shocks can be installed, which are optimized for a lowered street truck. Now it's just a matter of making things look nice and pretty. I'll knock down the plug welds with a 40 grit flap wheel. Then switch to 80 grit, and finally some cleanup work with 80 grit on a DA sander. We're not looking for perfection here, just a smooth and low key appearance. I'll hit it with some wax and grease remover, etch prime the bare metal spots. Then hit it with a few coats of Dupli-Color semi-gloss black. Lastly the new shorter bump stops go into a pre-drilled hole in the notch. I think this is kind of cool because half the people who watch this are gonna hate it but secretly like it, and the other half of the people who watch this are gonna go home and they're gonna want to do it. That's why a lowered four wheel drive is awesome. ♪ ♪ I like how you don't mess around Pat.
(Pat)>> I don't mess around with stuff like this.
(LT)>> Full throttle!
(Pat)>> You get where you need to be on that filler neck and you tell me when.
(LT)>> Okay, I'm around it. So you can come on down.
(Pat)>> I'm in the wrong business.
(LT)>> I guess so. It's perfect. ♪ ♪ [ drill spinning ]
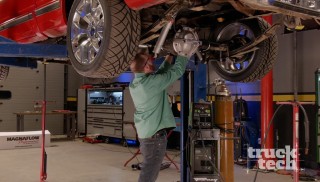
(LT)>> A flip kit will lower the rear of any truck, whether it's two or four wheel drive. The front is where things get just a little bit different. Normally all I'd have to do is install these dropped torsion bar keys and it would bring the front end down. However this truck's actually been leveled up. So there are a few parts that we're gonna have to replace. Number one is the upper control. It has a modified ball joint angle that will work well with a truck that's been leveled. So we'll swap these out for a stock set. Number two is the front differential. It's actually been dropped two inches down in the frame for an improved C/V angle, again on a lifted truck. So we'll have to take those spacers out. When all that stuff is done then I can install the torsion bar keys and we'll have ourselves a dropped four wheel drive truck.
(Narrator)>> Next, with six done in the rear we go for four in the front.
(LT)>> We're nearly done dropping "Redtide", our '88 K-1500, and we'll get started on the front by pulling off the original shocks. Then loosen the nut that holds the ball joint to the spindle and loosen the taper with a hammer. Underneath the truck we'll use a special tool to loosen the tension on the torsion bar key. Then we can safely remove the stock adjustors and back off the tension on the tool. [ air hammer vibrating ]
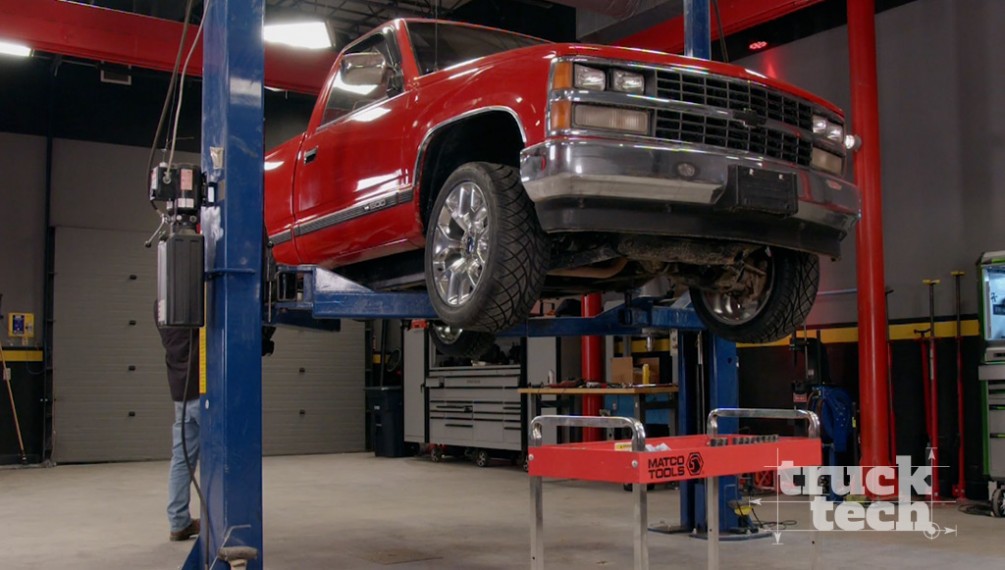
(LT)>> An air hammer knocks out the torsion bar, and the lift keys are removed. Now the lifted upper control arms are removed from the truck. ♪ ♪ And we can replace them with a new stock set with a proper ball joint angle. Plus the new bushings will be an added bonus. I'll put the camber bolts in the middle of their travel, but the alignment shop will have to do the final adjustment. ♪ ♪ Now we can tackle the front diff. We'll remove the passenger side drop bracket. Oh man, look at that! And replace it with a stock one we got from a junkyard. On the driver's side simply remove the aftermarket parts. Then the diff can be raised back up into its original home, lined up, and tightened back down. Now the dropped torsion bar keys can go into place. The bars are wiggled in and the adjustors are installed. Lastly the new shorter shocks can go in up front to finish lowering this four wheel drive sport truck. Since our truck is sitting so much closer to the ground now there's no way these 33 inch mud terrains are gonna fit back on. They're much too tall and they stick out way too far. So we need a wheel that has a high positive offset to keep the tires sucked inside the fenders so nothing will rub. I ordered these from OE Wheels. An industry leader in manufacturing and designing replica wheels. They have over 500 styles to choose from, and these are actually designed from a late model GMC truck. ♪ ♪ They're a 20 by nine wheel with a positive 27 offset, but you can get this style in sizes up to 24 inches and we chose the polished finish. They're wrapped in some Nitto 420's, which we picked up from Summit Racing. Their sized at a 285 40/20, and they'll give our sport truck great traction in the wet or dry. ♪ ♪ [ LT laughing ]
(LT)>> You can tell if you've been successful lowering your truck if you get it on the ground and you can't get the lift arms out from underneath. Luckily we've got a floor jack. ♪ ♪ You've seen us use a mig welder many times before on the show, and as you can probably guess you weld metal it's going to get hot, but what you might not know is that if you put too much heat into a metal part it can actually cause it to distort and bend. Now in the real world if you're working on something thick like a frame or a roll cage you're really gonna have a hard time to put that much heat into it where it's gonna warp, but it's still good practice to manage heat input. Sheet metal on the other hand is a totally different story. It is very easy to cause something to warp, especially if it's large and flat like this scrap hood that I picked up. So today I'm gonna show you a couple of tips and tricks when it comes to welding sheet metal, and I'm gonna start by showing you exactly what not to do. ♪ ♪ I'll start this patch like normal, by tack welding one edge and working my way around, keeping the patch even with the hood. But when I start to weld things go wrong. I'm working in one direction stitch welding my way along the seam, taking no breaks for anything to cool down. And while the welds do look neat and smooth this method is going to give us trouble. I'm just a little more than half way around this patch panel and it is already completely messed up. Check it out. If you put a straight edge along the weld seams there's about three-sixteenths of inch of deviation between the high and the low spots, and it's not just isolated to the areas that I've directly welded on. Even out here a few inches away there's a really massive dip in the panel. Now if you tried to repair this with body filler you'd have a panel about the size of the entire hood just to get enough filler on there so you could smooth out the high and the low spots. Now luckily there is a better way to weld in a patch panel. I'm going to start the same way as I did before. Tacking in the patch on one edge and working my way around until it's held evenly in place, and I'm not even going to change the heat settings on the welder, but when I do start welding I'm going to do several quick tacks spaced in between the first welds. After I've done about half a dozen or so I'll stop and used some compressed air to cool down the area. When I can place my hand on it I'll move around and do one more round of tacks. Again spaced in between the existing welds. ♪ ♪ You're gonna want to repeat this same process of welding and cooling down until the entire patch panel is burned in, but you can already tell that this panel is much straighter than the other simply by practicing a little bit of heat control and patience. Now this same thing applies when you are grinding down these welds to do body work because if you grind in one spot for too long you'll heat up the panel and warp it just as bad. So have patience, control heat, have a nice flat sheet metal.
New from Matco Tools is this 16 volt Infinium quarter inch high speed ratchet kit. Its slim head design will help you get into those really hard to reach places, and the fully enclosed variable speed trigger is now larger, giving you more options for hand placement. It has 35 pound feet of maximum torque and it spins at 330 r-p-m. The kit comes with two lithium ion batteries, the charger, and this nifty carrying case, and it's available at your local Matco Tools distributor. [ grinder spinning ]
(LT)>> Stripping body filler and paint the old fashioned way can be very time consuming. Sand blasting is quicker but you can actually damage the very sheet metal that you're trying to save, but there is a better alternative and it can actually lead to a new career. The Dustless Blaster uses a mixture of water and crushed glass abrasive with a rust inhibitor to get your project quickly down to bare metal, stripping through paint, primer, and filler in one easy step without heating up or warping the panel. This whole bed side only took 20 minutes to strip. To find out more or to start your own blasting and stripping business check out Dustless Blasting dot com. Well here it is Jeremy. It looks a lot different than it did before but tell me honestly, what do you think?
(Jeremy)>> Okay, well if I have to be completely honest with you for a four wheel drive truck it looks pretty good sitting on the ground.
(LT)>> It looks a heck of a lot different for sure but my favorite part is the wheels. It really brings it into the 21st century, and the cool thing is the only way that the average guy would be able to tell that this is a four wheel drive truck just by looking at it is seeing the wheels and counting the six lugs.
(Jeremy)>> You did a great job picking them out, and obviously with the width it's probably gonna make it drive like it's on rails.
(LT)>> Oh man this thing will be great. I'll tell you what. The first time we bring it out I'll come and get you and we'll go for a spin.
(Jeremy)>> That's sound awesome.
(LT)>> Check out the inside.
Show Full Transcript
(LT)>> Today we're gonna be kicking off a brand new project, this 1988 Chevy, and we're gonna nickname it "Project Redtide". It's a K-1500, which means it's a half ton four wheel drive. I've always had a love affair with the single cab short box truck. They look great, they're agile, and they're just sporty. Now you'll notice this truck is a little bit dirty and that's because immediately after we bought it we took it out on the trail alongside our K-five, which we just finished up. We wanted to get a baseline and see how this K-1500 would perform. ♪ ♪ We really wanted to get a better idea of how this truck would handle the rough stuff, and it did pretty well for a mostly stock truck. The suspension soaked up the bumps and it had no problem tackling the mild mud holes that we pointed it at. All in it was a fun trail machine, but there's always room for improvement. So the question is what are we gonna change first on the truck, and exactly what direction are we gonna take with this build as a whole? We could get the suspension up in the air and cut out all the i-f-s parts. Throw some solid axles underneath on leaf springs getting the truck another six to eight inches up in the air so we can run a massive 42 inch tall tire, making the K-1500 the ultimate off roader. Our first modification to the suspension is gonna require that we remove the bed. ♪ ♪ [ drill spinning ]
(LT)>> The bed is held to the frame with a couple of bolts, and an impact gun makes quick work of them. After that it's just a few wires for the tail lights, the fuel filler neck, and the bed is loose. ♪ ♪ We're going to move the truck outside and lift off the bed. Luckily we have a fork lift and a bunch of ratchet straps, which make easy work of it. Alright let's see if we can drop something. If you don't happen to have a fork lift sitting around a couple of buddies and a case of beer will do the job. Let's do some washing. It only takes a few minutes, and anytime the bed comes off it's totally worth the extra effort to clean things up. The truck'll look nicer and your washing machine will thank you. ♪ ♪
(Jeremy)>> LT I heard somebody down here is doing a solid axle swap. I think a project like that deserves to be down in XOR.
(LT)>> Well you're right. If I were gonna solid axle swap this truck I'd probably be stepping on your toes. So don't worry, I'm not gonna do that. In fact I'm not even gonna lift this truck.
(Jeremy)>> There's no way you're just gonna keep it stock.
(LT)>> No, you're right, I'm not gonna do that. In fact we're going in the complete opposite direction. Do you remember the early '90's GMC Cyclones and Typhoons?
(Jeremy)>> Yeah.
(LT)>> So those were actually based on a four wheel drive S-10 chassis that had been lowered down to the ground and converted to all wheel drive. Well we're gonna replicate that in this full size K-1500. We're gonna lower a four wheel drive truck.
(Jeremy)>> You are gonna catch so much flack for doing that.
(LT)>> Well you know what, that's alright because I've done it before and I've heard it all. You know what the number one complaint is? You're gonna ruin that truck by lowering it down to the ground. A four wheel drive truck belongs lifted in the air with big mud tires on it. Well here's the facts. We're not gonna ruin anything because the four wheel drive system is still gonna function perfectly. We're not gonna take anything out. You can still use it as a pickup truck. You can haul a trailer. You can put cargo in the bed, but you know what? I guess the only thing you can't do is go through those, like what do you guys drive through mud puddles or something down there? You can't do that.
(Jeremy)>> Yeah but why wouldn't you just start with a two wheel truck?
(LT)>> A two wheel drive truck, yeah, it would be a lot easier to lower and everyone does. That's part of the problem is that I don't want to do what everyone else does. One of the major reasons actually has to do with traction. You know we want to make this an all-wheel drive all weather vehicle. So whether it's snowing or raining we can still put a fair amount of power down to the ground and not just be spinning out. And if we ever want to go to the drag strip it'll be much easier to launch it off the line without spinning.
(Jeremy)>> Well hey, this is not my cup of tea. You really don't have me sold on the whole thing but I'm assuming it's gonna take some parts to pull it off.
(LT)>> Yeah I've got a few laid out. Let me show you what we're gonna do. It actually only takes a handful of parts and everything we got here we picked up from Summit Racing. We'll start out in the rear with a flip kit. These brackets are basically gonna relocate the rear axle on top of the spring pack for a total of six inches of drop. Then we'll have to come in and install a C-notch. This is gonna cut out a spot of the frame to allow more axle travel without bottoming out, and the front is even simpler yet. All we have to do is install a pair of torsion bar keys to lower the front four inches, and we'll top it all off with a pair of shorter shocks.
(Jeremy)>> Well you're right, that definitely is simple.
(LT)>> Alright well let's get to work then. Where you going?
(Jeremy)>> This is all you buddy.
(Narrator)>> Next "Redtide" gets laid out.
(LT)>> We're getting ready to lower the rear end of "Redtide", our '88 K-1500, and the first step is to make some room for the axle. A template is provided with the kit, which shows us where to cut with no measuring or guess work needed. We have to get the bump stops out of the way first, and a cutoff wheel and air chisel make quick work of the rivets. [ hammer banging metal ]
(LT)>> Then it's just a matter of following the lines to slice the frame. [ hammer banging metal ]
(LT)>> Since the flip kit is gonna place the axle so much higher towards the frame we needed to make the notch so the axle won't bottom out. This is plenty of clearance now but we can't leave it like this because it's just not strong enough. So we will be installing this reinforcement plate over the frame. You'll notice that the notch isn't centered perfectly over the rear axle. That's because the saddles that the axle will sit in actually locate the axle just a little bit further towards the rear. This is because you won't have to change the length of your driveshaft. Now you can bolt these in but I always prefer to weld them in because it's just a little bit stronger. Since we need clean metal to weld to I'll trace the outline of the reinforcement. Then I'll use a flap wheel to remove the fresh powder coat on the bracket everywhere I plan to weld. The same process is repeated on the frame, cleaning up years of rust, undercoat, and paint. Then the bracket is clamped onto the frame. Machine setup is critical to ensure proper weld penetration and strength. So a frame modification like this might not be a welding project for the novice. Because this quarter inch thick brace does take some power to burn into the frame I'm jumping around from side to side to control heat input. Alright we got the frame all tied back together and it's strong as ever. Now we don't always get to show you guys both sides of an operation like this but I can't do the flip kit until both notches are in. So I've got a little bit more work to do but I have a feeling the other side will go just a little bit quicker. [ welder crackling ]
(LT)>> For a project like this a mig machine is the easiest and quickest method of welding. We could have done it with a tig but that takes a ton of time, and if all you have is a stick welder that'll get the job done just the same. Now that we have some extra room in the frame we'll start the actual lowering process by first supporting the rear axle on stands. The shocks are the first part to come off, followed by the original U-bolts on both the passenger and driver's side. Now here's something kind of scary that you can find on an older vehicle or one that's a little bit rusted. This rear U-bolt has corroded almost all the way through, and this is a very important faster that holds the rear axle to the leaf springs. If this were to fail you'd be in a world of trouble. Now the problem is this lower spring perch kind of acts like a cup. It collects all the dirt, mud, and water and just let's it sit right around the U-bolt causing rust. So if you lived in a rust belt area or you just have an older vehicle be sure to keep an eye out for this kind of problem. A quick hit with a cutoff disc removes the rest of the hardware. Then the leaf spring bolts can come out with of course a little persuasion from our friend the hammer. Then the leaf springs can be removed from the truck and set aside. The last part to go is the tail pipe, which we'll be upgrading later on.
(Narrator)>> Drop and give me six.
(LT)>> The next step is to lower the whole truck closer to the rear axle so we can install the leaf springs underneath the axle this time. The only problem is we've removed a lot of weight from the rear end of this frame and the truck isn't very well balanced. In fact I have a screw jack up front and that's supporting a lot of the weight. So we need to add some ballast back here so that whenever I raise the lift the truck doesn't do a nose dive. So nothing works better than a couple of old mud tires.
Usually that's done with a keg but a couple of tires work too. The truck frame is lowered down towards the axle, and the leaf springs go right back into place, and the hardware get snugged but we'll torque it later on with the truck on the ground. The axle saddles install over the spring center bolt with a hole towards the front. The truck is raised back up, and the axle slides right into its new home six inches lower than before. The provided U-bolts slide on along with a lower spring mount, and nuts and washers hold everything together. Because the truck is going to sit so much lower the kit includes these shock extensions. They require the original large shock bolt, a five-sixteenths hole to be drilled, and two small bolts will keep it from twisting. Now the new shocks can be installed, which are optimized for a lowered street truck. Now it's just a matter of making things look nice and pretty. I'll knock down the plug welds with a 40 grit flap wheel. Then switch to 80 grit, and finally some cleanup work with 80 grit on a DA sander. We're not looking for perfection here, just a smooth and low key appearance. I'll hit it with some wax and grease remover, etch prime the bare metal spots. Then hit it with a few coats of Dupli-Color semi-gloss black. Lastly the new shorter bump stops go into a pre-drilled hole in the notch. I think this is kind of cool because half the people who watch this are gonna hate it but secretly like it, and the other half of the people who watch this are gonna go home and they're gonna want to do it. That's why a lowered four wheel drive is awesome. ♪ ♪ I like how you don't mess around Pat.
(Pat)>> I don't mess around with stuff like this.
(LT)>> Full throttle!
(Pat)>> You get where you need to be on that filler neck and you tell me when.
(LT)>> Okay, I'm around it. So you can come on down.
(Pat)>> I'm in the wrong business.
(LT)>> I guess so. It's perfect. ♪ ♪ [ drill spinning ]
(LT)>> A flip kit will lower the rear of any truck, whether it's two or four wheel drive. The front is where things get just a little bit different. Normally all I'd have to do is install these dropped torsion bar keys and it would bring the front end down. However this truck's actually been leveled up. So there are a few parts that we're gonna have to replace. Number one is the upper control. It has a modified ball joint angle that will work well with a truck that's been leveled. So we'll swap these out for a stock set. Number two is the front differential. It's actually been dropped two inches down in the frame for an improved C/V angle, again on a lifted truck. So we'll have to take those spacers out. When all that stuff is done then I can install the torsion bar keys and we'll have ourselves a dropped four wheel drive truck.
(Narrator)>> Next, with six done in the rear we go for four in the front.
(LT)>> We're nearly done dropping "Redtide", our '88 K-1500, and we'll get started on the front by pulling off the original shocks. Then loosen the nut that holds the ball joint to the spindle and loosen the taper with a hammer. Underneath the truck we'll use a special tool to loosen the tension on the torsion bar key. Then we can safely remove the stock adjustors and back off the tension on the tool. [ air hammer vibrating ]
(LT)>> An air hammer knocks out the torsion bar, and the lift keys are removed. Now the lifted upper control arms are removed from the truck. ♪ ♪ And we can replace them with a new stock set with a proper ball joint angle. Plus the new bushings will be an added bonus. I'll put the camber bolts in the middle of their travel, but the alignment shop will have to do the final adjustment. ♪ ♪ Now we can tackle the front diff. We'll remove the passenger side drop bracket. Oh man, look at that! And replace it with a stock one we got from a junkyard. On the driver's side simply remove the aftermarket parts. Then the diff can be raised back up into its original home, lined up, and tightened back down. Now the dropped torsion bar keys can go into place. The bars are wiggled in and the adjustors are installed. Lastly the new shorter shocks can go in up front to finish lowering this four wheel drive sport truck. Since our truck is sitting so much closer to the ground now there's no way these 33 inch mud terrains are gonna fit back on. They're much too tall and they stick out way too far. So we need a wheel that has a high positive offset to keep the tires sucked inside the fenders so nothing will rub. I ordered these from OE Wheels. An industry leader in manufacturing and designing replica wheels. They have over 500 styles to choose from, and these are actually designed from a late model GMC truck. ♪ ♪ They're a 20 by nine wheel with a positive 27 offset, but you can get this style in sizes up to 24 inches and we chose the polished finish. They're wrapped in some Nitto 420's, which we picked up from Summit Racing. Their sized at a 285 40/20, and they'll give our sport truck great traction in the wet or dry. ♪ ♪ [ LT laughing ]
(LT)>> You can tell if you've been successful lowering your truck if you get it on the ground and you can't get the lift arms out from underneath. Luckily we've got a floor jack. ♪ ♪ You've seen us use a mig welder many times before on the show, and as you can probably guess you weld metal it's going to get hot, but what you might not know is that if you put too much heat into a metal part it can actually cause it to distort and bend. Now in the real world if you're working on something thick like a frame or a roll cage you're really gonna have a hard time to put that much heat into it where it's gonna warp, but it's still good practice to manage heat input. Sheet metal on the other hand is a totally different story. It is very easy to cause something to warp, especially if it's large and flat like this scrap hood that I picked up. So today I'm gonna show you a couple of tips and tricks when it comes to welding sheet metal, and I'm gonna start by showing you exactly what not to do. ♪ ♪ I'll start this patch like normal, by tack welding one edge and working my way around, keeping the patch even with the hood. But when I start to weld things go wrong. I'm working in one direction stitch welding my way along the seam, taking no breaks for anything to cool down. And while the welds do look neat and smooth this method is going to give us trouble. I'm just a little more than half way around this patch panel and it is already completely messed up. Check it out. If you put a straight edge along the weld seams there's about three-sixteenths of inch of deviation between the high and the low spots, and it's not just isolated to the areas that I've directly welded on. Even out here a few inches away there's a really massive dip in the panel. Now if you tried to repair this with body filler you'd have a panel about the size of the entire hood just to get enough filler on there so you could smooth out the high and the low spots. Now luckily there is a better way to weld in a patch panel. I'm going to start the same way as I did before. Tacking in the patch on one edge and working my way around until it's held evenly in place, and I'm not even going to change the heat settings on the welder, but when I do start welding I'm going to do several quick tacks spaced in between the first welds. After I've done about half a dozen or so I'll stop and used some compressed air to cool down the area. When I can place my hand on it I'll move around and do one more round of tacks. Again spaced in between the existing welds. ♪ ♪ You're gonna want to repeat this same process of welding and cooling down until the entire patch panel is burned in, but you can already tell that this panel is much straighter than the other simply by practicing a little bit of heat control and patience. Now this same thing applies when you are grinding down these welds to do body work because if you grind in one spot for too long you'll heat up the panel and warp it just as bad. So have patience, control heat, have a nice flat sheet metal.
New from Matco Tools is this 16 volt Infinium quarter inch high speed ratchet kit. Its slim head design will help you get into those really hard to reach places, and the fully enclosed variable speed trigger is now larger, giving you more options for hand placement. It has 35 pound feet of maximum torque and it spins at 330 r-p-m. The kit comes with two lithium ion batteries, the charger, and this nifty carrying case, and it's available at your local Matco Tools distributor. [ grinder spinning ]
(LT)>> Stripping body filler and paint the old fashioned way can be very time consuming. Sand blasting is quicker but you can actually damage the very sheet metal that you're trying to save, but there is a better alternative and it can actually lead to a new career. The Dustless Blaster uses a mixture of water and crushed glass abrasive with a rust inhibitor to get your project quickly down to bare metal, stripping through paint, primer, and filler in one easy step without heating up or warping the panel. This whole bed side only took 20 minutes to strip. To find out more or to start your own blasting and stripping business check out Dustless Blasting dot com. Well here it is Jeremy. It looks a lot different than it did before but tell me honestly, what do you think?
(Jeremy)>> Okay, well if I have to be completely honest with you for a four wheel drive truck it looks pretty good sitting on the ground.
(LT)>> It looks a heck of a lot different for sure but my favorite part is the wheels. It really brings it into the 21st century, and the cool thing is the only way that the average guy would be able to tell that this is a four wheel drive truck just by looking at it is seeing the wheels and counting the six lugs.
(Jeremy)>> You did a great job picking them out, and obviously with the width it's probably gonna make it drive like it's on rails.
(LT)>> Oh man this thing will be great. I'll tell you what. The first time we bring it out I'll come and get you and we'll go for a spin.
(Jeremy)>> That's sound awesome.
(LT)>> Check out the inside.
