More Lo 'N Slow Episodes
Truck Tech Builds
Want more content like this?
Join the PowerNation Email NewsletterParts Used In This Episode
Matco Tools
Matco Tools are the Official Tool Supplier to Truck Tech
The Industrial Depot
Tools, Hardware, and Shop Supplies
Episode Transcript
(Narrator)>> Today Lo 'n Slo is back for some much needed interior prep, and we'll hit the road to rescue a viewer's ride. This guy loves his Ram second gen almost as much as his grey hound. That's all right now on Truck Tech.
(LT)>> We're on the road again. This time heading out to rescue a viewer's truck who actually does a bit of rescuing of his own. He's got an old Dodge Ram one ton dually that's pivotal to his volunteer work. So today we're gonna help him so he can continue to give back to a cause that we all can relate to, man's best friend. As always we've partnered with Rock Auto dot com. So we hopped online and ordered a bunch of replacement parts. Now his truck is over 20 years old but it is in really good condition for its age. However there are a couple of things that we can do to help him keep this Ram rolling down the road for many years to come. Guys this is Harley Hazzard and his beautiful and unique 1996 Dodge Ram 3500. Now right off the bat I have to say this is probably one of the cleanest second gen Dodges that I've seen like ever. So tell me real quick where'd you get the truck, how long have you had it, and how is it in such nice condition?
(Harley)>> Well I ordered it in 1996 from a dealer I worked at in Sarasota, Florida. Drove it as a daily driver, and it's been a great truck. I've taken care of it. I've got a few issues but not major. It's just been a great vehicle.
(LT)>> Explain to us a little bit about some of the stuff on the side of the truck and what you do with it now.
(Harley)>> Well when I came to Tennessee I got involved with grey hounds. I had some bad flaky paint on my truck. I decided if I'm gonna paint my truck I'm gonna dedicate it to grey hound adoption, and I painted it John Deere yellow and had my decals all done in John Deere green.
(LT)>> It's a very recognizable truck that their grey hound Heart, Harley, and his wife Judy use to travel to grey hound events around the country pulling their fifth wheel camper. The biggest issue Harley has is under the hood. While under a load the Cummins won't idle. So that's what we're gonna tackle first. Now this is a five point nine liter 12 valve, and bolted to the side is a Bosch P-7,100 mechanical injection pump. Now you can's plug in your computer scan tool and raise the idle like you can on a newer vehicle. It's a mechanical pump. So what that means is there's gonna be some adjustments on the side. So with a screw driver and a small wrench we can get this idle sorted out. Harley can you pop the hood for me? We'll get started.
Can you put the foot down? Harley's temporary fix actually worked. A rubber hose with a zip tie and a little epoxy. We'll just get rid of all this. The linkage on the side of the P-pump might look a little bit intimidating because there's so much going on but it's actually quite simple. The throttle cable starts at the fire wall like normal and it runs all the way up to this bell crank that sits on the front of the injection pump. There's a cable on the other side and that's simply for the cruise control. Now opposite of the bell crank there's a long rod that runs all the way to the rear of the injection pump, and that's where the fuel lever actually sits. And on the other side there's a small set screw, and that adjustment is what's gonna raise our idle. We probably need to go in maybe a half or three quarters of a turn and our problem will be solved. Alright Harley if you would please just put your foot straight to the floor on the accelerator and please hold it there because my fingers are going to be very close.
All we've got to do, loosen up this jam nut. There we go! Once the jam nut is loose all we've really gotta do is wind this adjustor up. It goes actually pretty easily just by hand.
And Harley this adjustment was actually backed all the way out, and the top of the little adjustor here is actually worn down a tad. So I'm really not surprised at all that you had some idle problems. Hey Harley if you would please start it up, put it in gear, turn the a/c on, and please don't run me over.
(Harley)>> I won't I promise.
(LT)>> Alright let's test it out. [ engine starts and idles ]
(LT)>> Okay, there's a/c, I hear the fans kicking on. Okay I can hear it's a little bit low. Put your foot on the accelerator just a little bit.
Okay let off. Perfect, shut her down. Job one done.
(Narrator)>> Next more on this second gen Ram.
(LT)>> We're back on Truck Tech helping rescue this '96 one ton Dodge Cummins. I fixed the mechanical idle issue and now it's on to a few other items that'll keep this 3500 rolling strong. While under the hood I decided to swap out the old alternator. The owner has added electric fans, and combine that with a trailer brake and air conditioning this'll ease his mind going on long trips supporting the cause that's so dear to his heart.
(Harley)>> Spreading the word for grey hound adoption. I love it because it's serving a purpose.
(LT)>> This is Harley Hazzard and his dog Heart, a racing champion. His living room is a shrine for the pups he's rescued over the years, and these days they travel together to grey hound reunions, meet and greets, and return to the tracks that the hounds once raced, all while helping find adoptive owners for these hollowed hounds.
(Harley)>> Anybody that wants a grey hound for a watch dog is looking at the wrong breed. They love everybody. There are not barkers. They're quiet. They're great for people who live in apartments. They can calm you, comfort you. When they look at you and stare at you, you know they're reading your mind. They touch your heart in a way. You'd have to have one to understand.
(LT)>> Some time ago Harley replaced the shocks on the front end of this truck but he's still rocking the original 200,000 plus mile shocks on the back. Now this truck spends a lot of time carrying a lot of weight on its back. That fifth wheel runs in at about 1,900 pounds of pin weight. So there's a lot of momentum to control. Now one of the great things about Rock Auto dot com is there are so many different options. For the rear shocks alone there's about a dozen different choices. So rather than replacing it with another stock shock we're upgrading to these premium Bilstein's that'll control all that weight and momentum.
Ah ha, got you. [ drill spinning ]
(LT)>> Harley can you grab this tire for me?
(Harley)>> I got it.
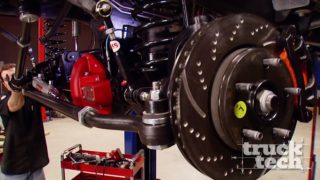
(LT)>> So when I came to inspect the truck last week I noticed a problem with the upper control arm that definitely needs addressing if this truck is gonna stay on the road. The rubber on the upper control arm bushings and the ball joint are severely dry rotted. Now this is just something that happens with age. It's just normal wear and tear. So we're gonna replace them. Now we could start out with a handful of bushings and a new ball joint but it is a complete pain in the butt to remove the control arm, go to a press, and push on and off all the new parts. Instead we went to Rock Auto and picked up a new Moog Problem Solver control arm assembly, and all the hard work is done for you. It has new bushings and a new ball joint pressed in, and the whole part is painted and ready to rock. So all we've got to do is swapped this out.
On this particular model of truck, if you remove the upper control arm you will have to get an alignment cause the chance of you putting it back where you found it are pretty slim.
Now you'll notice that the mounts for the upper control arm are actually slotted, and that's how you adjust the alignment. Now I'm just gonna center this thing up so Harley can take it down to the local alignment shop and get it dialed in perfectly, but a soon as I get these nuts tightened up this truck is pretty much done. And hopefully the minor repairs we did on the dually will keep the Hazzards and their hound on the road for many years to come.
(Narrator)>> Next Austin works fast on Lo 'n Slo.
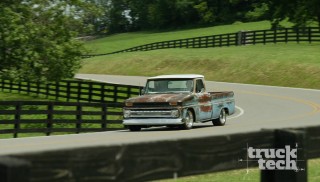
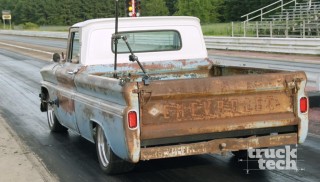
(LT)>> We're back in the shop and it's time to make some more progress on our 1965 Chevy C-10 Lo 'n Slo.
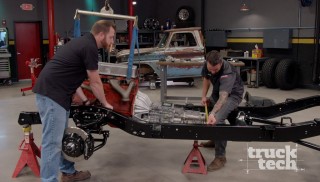
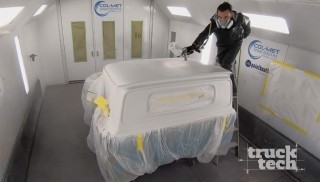
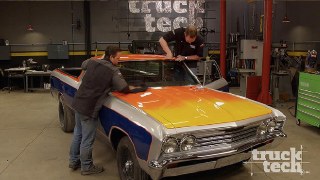
(Austin)>> The entire concept of this build was to keep this old patina look, that rough and rugged vibe, but yet still add a little custom and new touch of bling here and there. Now we got started with that freshly powder coated frame, new suspension components, and then these new kicks. Now the last thing you guys saw us do was to dress the roof of this truck, and that's because there really wasn't any patina left on it. It was mostly just rust anyway. So we decided to slap some nice shiny new paint on it, and that's just the start. There's a still a few things left to do.
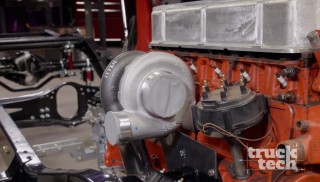
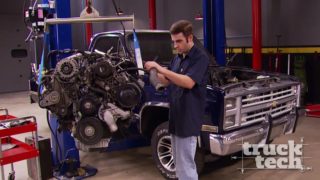
(LT)>> We're gonna continue that same theme underneath the hood. Now we've already got the 292 in place and all the heavy fab work is taken care of on the hot side of the turbo, but right now this is just a mock up engine. We still have to take it out, disassemble it, rebuild it, and we'll throw in a few performance parts while it's taken apart. Then we'll paint up the engine and getting it looking real slick and put it back in so there's a nice contrast between it and the engine bay that's around it, but all that has to wait until another day.
(Austin)>> But we can get started on the interior. Our plan for this is to make it inviting. Clean and classy, and that involves repainting. We use the same color we used on the exterior roof except no pearl effect and no shine, and then add in those custom leather seats, nice saddle brown, something to contrast the light color. Round it out with some dash components, new and shiny. Now as you can tell we already got to cutting on this floor pan and that's to make room for that five speed transmission that American Powertrain sent us. Let's get started on prepping the floor.
The earlier C-10's came with the fuel tank located inside the cab right behind the seat. Not necessarily the best idea. The brackets aren't in the way but we decided to cut them flush and grind the edges for a clean look since the fuel tank will be relocated under the truck.
The door seal trim is removed from both sides.
And the old rubber is yanked off.
You've got to love this adhesive backed weather stripping. They've definitely made improvements in today's age where it just press fit. [ grinder buzzing ]
(Austin)>> I'll go over the mating flange on the trans tunnel with a wire wheel to take care of the rust.
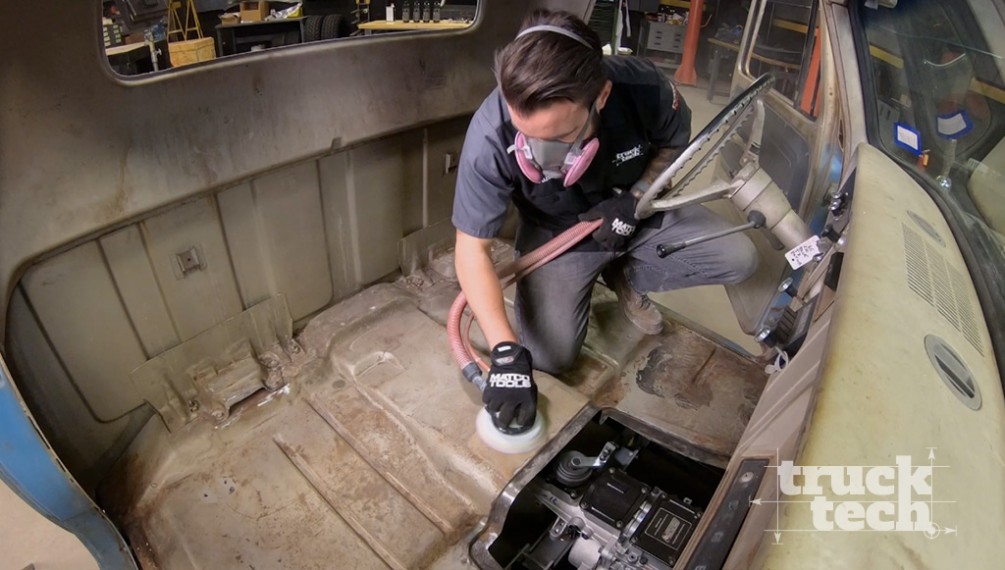
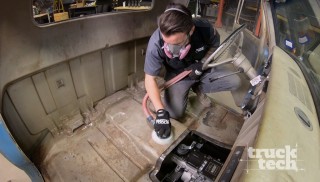
Now I'm not gonna get too crazy with this wire wheel. I'm really only hitting the lip where that high hump panel is gonna adhere to the floor and the other more rusted areas. The rest of the floor is actually in pretty good shape. Now we don't need something quite so aggressive to tackle it. So a d/a with some 400 grit and a scotchbrite by hand to get in those hard to reach places will get the job done, and for the more rusted areas we'll treat that later before we top coat it.
The d/a makes quick work of scuffing the rest of the floor since there's no need to strip it down to bare metal. To properly treat the rusted areas we're using a rust converter. This application will stop the rust in its tracks by chemically changing it to a neutral surface that's ready to be top coated. I've got to say applying this rust converter is pretty neat. It goes on this beige cream color and then within a few minutes it turns purple. I'm no scientist or nothing but changing colors, to me, that means it's working. Just like Picasso.
(Narrator)>> Next d-i-y coating!
(Austin)>> Just rolled Lo 'n Slo over in the prep booth and we're gonna test fit that high hump, and that'll bring us one step closer to spraying. I'll drop it in and double check the fitment. A few marks are made in the areas that require trimming.
And a body saw makes quick work to get it to the right size without producing a ton of dust. [ saw buzzing ]
(Austin)>> A pilot hole is located and drilled for the stick shift.
Final cuts are then made to accommodate full range of the shifter. Surface prep and a good wipe is done on both mating surfaces, and the two part panel adhesion and epoxy is applied generously around the perimeter. The high hump is carefully lowered into place and allowed to cure overnight. Once masked off the bare area metal areas are dusted with a self-etching primer and a final prep wipe is done on the entire floor, leaving us with only the fun part left. We're gonna lay down this Raptor liner not only because it's great for the bed of a truck but can also be used in any application you can come up with, such as the floor of a C-10. It'll help with sound deadening and also be a durable top coat that'll last for years. We're mixing in about four ounces of black base coat since we only have the tintable version of Raptor liner.
Two heavy wet coats will be applied to the entire floor, rear panel, and firewall. And after a few minutes it's already looking like a million bucks.
(LT)>> If you're into automotive fabrication, customization, or repair there's no doubt you have interest in owning a welder at some point in your career, but when it comes to purchasing your first well the options can be a little bit overwhelming since the prices range from a couple hundred bucks all the way up to a couple thousand. Now these higher end machines are great but they have a lot of capability. Almost a little bit too much where it might overwhelm the novice welder. So something like a big multi-process or tig machine may not be the appropriate machine for a beginner, but something like the Forney Easy Weld 140 MP. This is a great starter machine that you can use to grow throughout your career. Now it'll plug in to any standard 110 volt outlet but it will output 140 amps of power, which will work great for light and medium duty fabrication project. Also it's a multi-process machine, which means it'll run mig, flux core, and d/c tig, which works great for mild and stainless steel. Now we've show you a lot of times the basics of running a welding machine but one thing we haven't shown you is how to set one up from the get go. If this is your first time opening up a brand new welder I have to say it's pretty exciting. Everything's packaged neat and tidy. It's all brand new and clean, and ready to weld. Now in the package you'll find everything that you need to set this machine up in either a flux core or a stick welding configuration. You get the welder itself with a control panel on the front, power switch and gas port on the back, and then you have the cord. This'll connect to any standard US outlet, but if you happen to have a 30 amp outlet it'll plug into that as well. The package also includes instructions, the mig welding gun, a ground clamp and lead, and of course an electrode holder for stick welding. Now if you want to run this in a mig configuration, that's metal inert gas, well you need to have a few extras as well, like a regulator and gas hose, the filler wire, safety equipment, gloves and a helmet, and if you want to run tig you need to provide your own torch for that as well. For mig welding attach the electrode to the positive post and the ground lead to the negative. Finally connect the mig gun to the machine with a threaded collar. Next open the cover and flip the drive wheel to the smooth groove for solid wire. Then place the spool into the machine. Feed the wire into the guide, close the drive gear, and apply some tension to the roller. Next plug in the machine and turn it on, remove the shield and contact tip from the gun, and feed the wire all the way through. And the last step is to connect the gas hose to the welder. The very last step is to put on some safety equipment and you're all set to start welding.
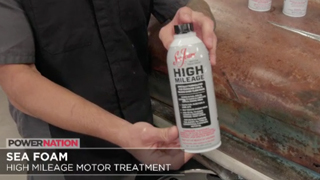
(Austin)>> Regularly scheduled maintenance is key to your car or truck's longevity, and Sea Foam products are part of that equation. This is Sea Foam's High Mileage Motor Treatment. It's specifically for vehicles with over 75,000 miles. When added to the fuel it cleans the tank and lubricates the entire fuel system. When added to the oil it removes those harmful residues that can restrict oil flow or even engine lubrication. Sea Foam High Mileage can be found at your local automotive retailer.
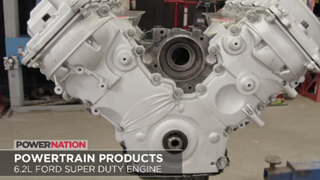
(LT)>> There are tons of Super Duty's on the road today powered by the six point two gas V-eight. Now it's a very good engine and they're mostly used in fleet applications, but you may find yourself in a situation where you need to replace one and Powertrain Products is one of the first to offer the six point two. And as always they build to exceed o-e-m specs. This features an improved high volume oil pump, coated pistons, improved oiling on the cam shaft, and updated timing chain tensioners and guides. Now it comes with a four year warranty but you can extend it to five, and it's suitable for fleet applications. Find out more at Powertrain Products dot net.
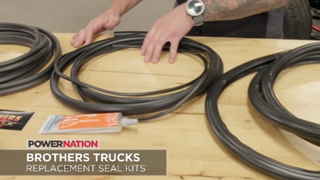
(Austin)>> When it comes to sourcing high quality o-e-m replacements parts Brothers Trucks comes through for the '60 to '66 Chevy C-10. We recently picked up one of their deluxe window seal kits and it includes everything from front windshield to rear window rubber, door seals, window channel sets, and even vent and hood to cowl seals. Their kits also include a tube of Permatex weather strip adhesive. Log onto Brothers Trucks dot com and find your Chevy application.
(LT)>> Well Austin I've got to say just that little bit of bed liner makes a pretty big difference in how this cab looks and hey, it improves the durability as well.
(Austin)>> You know it's really all those tiny little details that come together and make a great build. Even though that'll be covered by fresh new carpet it'll still dampen that road noise quite a bit.
(LT)>> I do have to say this project is off to a great start, and if you guys have any questions about any of the parts that we've used be sure to check us out at Powernation TV dot com.
Show Full Transcript
(LT)>> We're on the road again. This time heading out to rescue a viewer's truck who actually does a bit of rescuing of his own. He's got an old Dodge Ram one ton dually that's pivotal to his volunteer work. So today we're gonna help him so he can continue to give back to a cause that we all can relate to, man's best friend. As always we've partnered with Rock Auto dot com. So we hopped online and ordered a bunch of replacement parts. Now his truck is over 20 years old but it is in really good condition for its age. However there are a couple of things that we can do to help him keep this Ram rolling down the road for many years to come. Guys this is Harley Hazzard and his beautiful and unique 1996 Dodge Ram 3500. Now right off the bat I have to say this is probably one of the cleanest second gen Dodges that I've seen like ever. So tell me real quick where'd you get the truck, how long have you had it, and how is it in such nice condition?
(Harley)>> Well I ordered it in 1996 from a dealer I worked at in Sarasota, Florida. Drove it as a daily driver, and it's been a great truck. I've taken care of it. I've got a few issues but not major. It's just been a great vehicle.
(LT)>> Explain to us a little bit about some of the stuff on the side of the truck and what you do with it now.
(Harley)>> Well when I came to Tennessee I got involved with grey hounds. I had some bad flaky paint on my truck. I decided if I'm gonna paint my truck I'm gonna dedicate it to grey hound adoption, and I painted it John Deere yellow and had my decals all done in John Deere green.
(LT)>> It's a very recognizable truck that their grey hound Heart, Harley, and his wife Judy use to travel to grey hound events around the country pulling their fifth wheel camper. The biggest issue Harley has is under the hood. While under a load the Cummins won't idle. So that's what we're gonna tackle first. Now this is a five point nine liter 12 valve, and bolted to the side is a Bosch P-7,100 mechanical injection pump. Now you can's plug in your computer scan tool and raise the idle like you can on a newer vehicle. It's a mechanical pump. So what that means is there's gonna be some adjustments on the side. So with a screw driver and a small wrench we can get this idle sorted out. Harley can you pop the hood for me? We'll get started.
Can you put the foot down? Harley's temporary fix actually worked. A rubber hose with a zip tie and a little epoxy. We'll just get rid of all this. The linkage on the side of the P-pump might look a little bit intimidating because there's so much going on but it's actually quite simple. The throttle cable starts at the fire wall like normal and it runs all the way up to this bell crank that sits on the front of the injection pump. There's a cable on the other side and that's simply for the cruise control. Now opposite of the bell crank there's a long rod that runs all the way to the rear of the injection pump, and that's where the fuel lever actually sits. And on the other side there's a small set screw, and that adjustment is what's gonna raise our idle. We probably need to go in maybe a half or three quarters of a turn and our problem will be solved. Alright Harley if you would please just put your foot straight to the floor on the accelerator and please hold it there because my fingers are going to be very close.
All we've got to do, loosen up this jam nut. There we go! Once the jam nut is loose all we've really gotta do is wind this adjustor up. It goes actually pretty easily just by hand.
And Harley this adjustment was actually backed all the way out, and the top of the little adjustor here is actually worn down a tad. So I'm really not surprised at all that you had some idle problems. Hey Harley if you would please start it up, put it in gear, turn the a/c on, and please don't run me over.
(Harley)>> I won't I promise.
(LT)>> Alright let's test it out. [ engine starts and idles ]
(LT)>> Okay, there's a/c, I hear the fans kicking on. Okay I can hear it's a little bit low. Put your foot on the accelerator just a little bit.
Okay let off. Perfect, shut her down. Job one done.
(Narrator)>> Next more on this second gen Ram.
(LT)>> We're back on Truck Tech helping rescue this '96 one ton Dodge Cummins. I fixed the mechanical idle issue and now it's on to a few other items that'll keep this 3500 rolling strong. While under the hood I decided to swap out the old alternator. The owner has added electric fans, and combine that with a trailer brake and air conditioning this'll ease his mind going on long trips supporting the cause that's so dear to his heart.
(Harley)>> Spreading the word for grey hound adoption. I love it because it's serving a purpose.
(LT)>> This is Harley Hazzard and his dog Heart, a racing champion. His living room is a shrine for the pups he's rescued over the years, and these days they travel together to grey hound reunions, meet and greets, and return to the tracks that the hounds once raced, all while helping find adoptive owners for these hollowed hounds.
(Harley)>> Anybody that wants a grey hound for a watch dog is looking at the wrong breed. They love everybody. There are not barkers. They're quiet. They're great for people who live in apartments. They can calm you, comfort you. When they look at you and stare at you, you know they're reading your mind. They touch your heart in a way. You'd have to have one to understand.
(LT)>> Some time ago Harley replaced the shocks on the front end of this truck but he's still rocking the original 200,000 plus mile shocks on the back. Now this truck spends a lot of time carrying a lot of weight on its back. That fifth wheel runs in at about 1,900 pounds of pin weight. So there's a lot of momentum to control. Now one of the great things about Rock Auto dot com is there are so many different options. For the rear shocks alone there's about a dozen different choices. So rather than replacing it with another stock shock we're upgrading to these premium Bilstein's that'll control all that weight and momentum.
Ah ha, got you. [ drill spinning ]
(LT)>> Harley can you grab this tire for me?
(Harley)>> I got it.
(LT)>> So when I came to inspect the truck last week I noticed a problem with the upper control arm that definitely needs addressing if this truck is gonna stay on the road. The rubber on the upper control arm bushings and the ball joint are severely dry rotted. Now this is just something that happens with age. It's just normal wear and tear. So we're gonna replace them. Now we could start out with a handful of bushings and a new ball joint but it is a complete pain in the butt to remove the control arm, go to a press, and push on and off all the new parts. Instead we went to Rock Auto and picked up a new Moog Problem Solver control arm assembly, and all the hard work is done for you. It has new bushings and a new ball joint pressed in, and the whole part is painted and ready to rock. So all we've got to do is swapped this out.
On this particular model of truck, if you remove the upper control arm you will have to get an alignment cause the chance of you putting it back where you found it are pretty slim.
Now you'll notice that the mounts for the upper control arm are actually slotted, and that's how you adjust the alignment. Now I'm just gonna center this thing up so Harley can take it down to the local alignment shop and get it dialed in perfectly, but a soon as I get these nuts tightened up this truck is pretty much done. And hopefully the minor repairs we did on the dually will keep the Hazzards and their hound on the road for many years to come.
(Narrator)>> Next Austin works fast on Lo 'n Slo.
(LT)>> We're back in the shop and it's time to make some more progress on our 1965 Chevy C-10 Lo 'n Slo.
(Austin)>> The entire concept of this build was to keep this old patina look, that rough and rugged vibe, but yet still add a little custom and new touch of bling here and there. Now we got started with that freshly powder coated frame, new suspension components, and then these new kicks. Now the last thing you guys saw us do was to dress the roof of this truck, and that's because there really wasn't any patina left on it. It was mostly just rust anyway. So we decided to slap some nice shiny new paint on it, and that's just the start. There's a still a few things left to do.
(LT)>> We're gonna continue that same theme underneath the hood. Now we've already got the 292 in place and all the heavy fab work is taken care of on the hot side of the turbo, but right now this is just a mock up engine. We still have to take it out, disassemble it, rebuild it, and we'll throw in a few performance parts while it's taken apart. Then we'll paint up the engine and getting it looking real slick and put it back in so there's a nice contrast between it and the engine bay that's around it, but all that has to wait until another day.
(Austin)>> But we can get started on the interior. Our plan for this is to make it inviting. Clean and classy, and that involves repainting. We use the same color we used on the exterior roof except no pearl effect and no shine, and then add in those custom leather seats, nice saddle brown, something to contrast the light color. Round it out with some dash components, new and shiny. Now as you can tell we already got to cutting on this floor pan and that's to make room for that five speed transmission that American Powertrain sent us. Let's get started on prepping the floor.
The earlier C-10's came with the fuel tank located inside the cab right behind the seat. Not necessarily the best idea. The brackets aren't in the way but we decided to cut them flush and grind the edges for a clean look since the fuel tank will be relocated under the truck.
The door seal trim is removed from both sides.
And the old rubber is yanked off.
You've got to love this adhesive backed weather stripping. They've definitely made improvements in today's age where it just press fit. [ grinder buzzing ]
(Austin)>> I'll go over the mating flange on the trans tunnel with a wire wheel to take care of the rust.
Now I'm not gonna get too crazy with this wire wheel. I'm really only hitting the lip where that high hump panel is gonna adhere to the floor and the other more rusted areas. The rest of the floor is actually in pretty good shape. Now we don't need something quite so aggressive to tackle it. So a d/a with some 400 grit and a scotchbrite by hand to get in those hard to reach places will get the job done, and for the more rusted areas we'll treat that later before we top coat it.
The d/a makes quick work of scuffing the rest of the floor since there's no need to strip it down to bare metal. To properly treat the rusted areas we're using a rust converter. This application will stop the rust in its tracks by chemically changing it to a neutral surface that's ready to be top coated. I've got to say applying this rust converter is pretty neat. It goes on this beige cream color and then within a few minutes it turns purple. I'm no scientist or nothing but changing colors, to me, that means it's working. Just like Picasso.
(Narrator)>> Next d-i-y coating!
(Austin)>> Just rolled Lo 'n Slo over in the prep booth and we're gonna test fit that high hump, and that'll bring us one step closer to spraying. I'll drop it in and double check the fitment. A few marks are made in the areas that require trimming.
And a body saw makes quick work to get it to the right size without producing a ton of dust. [ saw buzzing ]
(Austin)>> A pilot hole is located and drilled for the stick shift.
Final cuts are then made to accommodate full range of the shifter. Surface prep and a good wipe is done on both mating surfaces, and the two part panel adhesion and epoxy is applied generously around the perimeter. The high hump is carefully lowered into place and allowed to cure overnight. Once masked off the bare area metal areas are dusted with a self-etching primer and a final prep wipe is done on the entire floor, leaving us with only the fun part left. We're gonna lay down this Raptor liner not only because it's great for the bed of a truck but can also be used in any application you can come up with, such as the floor of a C-10. It'll help with sound deadening and also be a durable top coat that'll last for years. We're mixing in about four ounces of black base coat since we only have the tintable version of Raptor liner.
Two heavy wet coats will be applied to the entire floor, rear panel, and firewall. And after a few minutes it's already looking like a million bucks.
(LT)>> If you're into automotive fabrication, customization, or repair there's no doubt you have interest in owning a welder at some point in your career, but when it comes to purchasing your first well the options can be a little bit overwhelming since the prices range from a couple hundred bucks all the way up to a couple thousand. Now these higher end machines are great but they have a lot of capability. Almost a little bit too much where it might overwhelm the novice welder. So something like a big multi-process or tig machine may not be the appropriate machine for a beginner, but something like the Forney Easy Weld 140 MP. This is a great starter machine that you can use to grow throughout your career. Now it'll plug in to any standard 110 volt outlet but it will output 140 amps of power, which will work great for light and medium duty fabrication project. Also it's a multi-process machine, which means it'll run mig, flux core, and d/c tig, which works great for mild and stainless steel. Now we've show you a lot of times the basics of running a welding machine but one thing we haven't shown you is how to set one up from the get go. If this is your first time opening up a brand new welder I have to say it's pretty exciting. Everything's packaged neat and tidy. It's all brand new and clean, and ready to weld. Now in the package you'll find everything that you need to set this machine up in either a flux core or a stick welding configuration. You get the welder itself with a control panel on the front, power switch and gas port on the back, and then you have the cord. This'll connect to any standard US outlet, but if you happen to have a 30 amp outlet it'll plug into that as well. The package also includes instructions, the mig welding gun, a ground clamp and lead, and of course an electrode holder for stick welding. Now if you want to run this in a mig configuration, that's metal inert gas, well you need to have a few extras as well, like a regulator and gas hose, the filler wire, safety equipment, gloves and a helmet, and if you want to run tig you need to provide your own torch for that as well. For mig welding attach the electrode to the positive post and the ground lead to the negative. Finally connect the mig gun to the machine with a threaded collar. Next open the cover and flip the drive wheel to the smooth groove for solid wire. Then place the spool into the machine. Feed the wire into the guide, close the drive gear, and apply some tension to the roller. Next plug in the machine and turn it on, remove the shield and contact tip from the gun, and feed the wire all the way through. And the last step is to connect the gas hose to the welder. The very last step is to put on some safety equipment and you're all set to start welding.
(Austin)>> Regularly scheduled maintenance is key to your car or truck's longevity, and Sea Foam products are part of that equation. This is Sea Foam's High Mileage Motor Treatment. It's specifically for vehicles with over 75,000 miles. When added to the fuel it cleans the tank and lubricates the entire fuel system. When added to the oil it removes those harmful residues that can restrict oil flow or even engine lubrication. Sea Foam High Mileage can be found at your local automotive retailer.
(LT)>> There are tons of Super Duty's on the road today powered by the six point two gas V-eight. Now it's a very good engine and they're mostly used in fleet applications, but you may find yourself in a situation where you need to replace one and Powertrain Products is one of the first to offer the six point two. And as always they build to exceed o-e-m specs. This features an improved high volume oil pump, coated pistons, improved oiling on the cam shaft, and updated timing chain tensioners and guides. Now it comes with a four year warranty but you can extend it to five, and it's suitable for fleet applications. Find out more at Powertrain Products dot net.
(Austin)>> When it comes to sourcing high quality o-e-m replacements parts Brothers Trucks comes through for the '60 to '66 Chevy C-10. We recently picked up one of their deluxe window seal kits and it includes everything from front windshield to rear window rubber, door seals, window channel sets, and even vent and hood to cowl seals. Their kits also include a tube of Permatex weather strip adhesive. Log onto Brothers Trucks dot com and find your Chevy application.
(LT)>> Well Austin I've got to say just that little bit of bed liner makes a pretty big difference in how this cab looks and hey, it improves the durability as well.
(Austin)>> You know it's really all those tiny little details that come together and make a great build. Even though that'll be covered by fresh new carpet it'll still dampen that road noise quite a bit.
(LT)>> I do have to say this project is off to a great start, and if you guys have any questions about any of the parts that we've used be sure to check us out at Powernation TV dot com.
