More Unbreakable Suburban Episodes
Music City Trucks Featured Projects
Music City Trucks Builds
Want more content like this?
Join the PowerNation Email NewsletterParts Used In This Episode
Forney Industries
Forney Welders
Matco Tools
MATCO Tools are the Official Tool Supplier to PowerNation
Off Road Design
4-Link Coilover Conversion Kit
The Industrial Depot
Tools, Hardware, Shop Supplies
Episode Transcript
(Marc)>> You're watching Powernation!
(Marc)>> Today on Music City Trucks!
(Brandon)>> A little paint.
(Marc)>> I have no idea what I'm doing. A few welds.
(Brandon)>> Ow, and Unbreakable turns into a monster.
(Marc)>> Looking like something.
(Brandon)>> I lost the plumb bob.
(Marc)>> I would say it's time for a refreshing adult beverage.
(Brandon)>> With some lime?
(Marc)>> And salt! [ MUSIC ] [ engine revving ] [ MUSIC ]
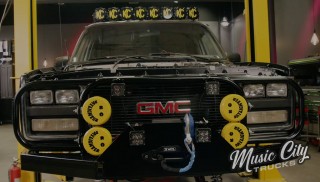
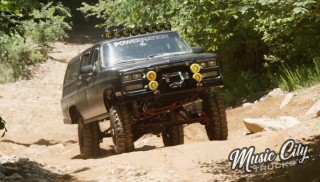
(Marc)>> Hey folks, welcome to Music City Trucks. We've got a great show planned for you today. We're getting back on our 1991 Suburban project that we're calling Unbreakable. It's getting four link suspension, coil overs, and axles all up underneath it later on but for now it's time to focus on the paint and body.
(Brandon)>> Now remember this truck's gonna spend most of its life in the mountains, on the trail, pretty much anywhere off road. So the paint job's got to be one, durable, and two, still look good. I'm gonna tackle this a little bit differently than say a street truck. A little bit less involved but the finished product's still gonna be really nice. This is a lot of real estate. So let's get started.
(Marc)>> No this is all you. I really do appreciate it though but remember I had that thing. I've got to get my eyes poked out with an ice pick or something.
(Brandon)>> Let's start sanding this big behemoth. [ grinder buzzing ]
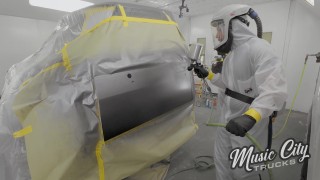
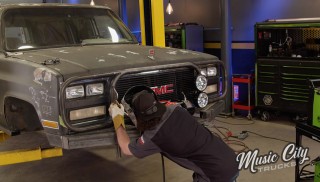
(Brandon)>> So what I'm doing to prep this truck for primer is 180 on a d/a and that's gonna get all the orange peel off this old paint, and then I'm just feather edging all these spots where the metal is showing through and getting all that paint even. A little bit of problems with getting the undercoating off but it's just gonna take a little bit of elbow grease. [ MUSIC ] This is gonna be a simple mask up job. So it's not gonna take too long. So what I said at the beginning was I'm not gonna do a paint job like a street truck, and what I meant by that is not taking the windows out, not taking door seals off, door handles. These ones are loose but they're still on the truck. So I'm really simplifying the process of actually getting this truck ready for paint, and doing it this way is not the most high end but it's still gonna be perfect for what we're doing.
(Marc)>> In the can is Vintage Flats direct to metal primer. Now I don't like doing body work or sanding... [ MUSIC ] ...but I don't mind mixing paint. What are you doing up there?
(Brandon)>> Just a little monkeying around. We're using a direct to metal 2-K primer. It's got really nice high build qualities and we're using a 2.0 tip so we get good material coverage. [ spray gun hissing ]
(Brandon)>> Alright now that the primer's all cured up we're gonna be putting some dry guide coat on it to tell us when to stop sanding so we don't take all this beautiful material away form this truck. [ MUSIC ] We're gonna be using 320 on a d/a for all the flat spots and all the round spots. All the contoured spots we're gonna be using a hand block. [ grinder buzzing ]
(Brandon)>> For somebody who's spent hours sanding this stuff cuts like butter, and it fills in pretty nice too.
(Marc)>> Look at that! It's like it wants to go in here.
(Brandon)>> She wants some color.
(Marc)>> Paint me please. I'll go mix you some color. If you'll remember Brandon sprayed that primer on a little while ago. We got it from Vintage Flats, and the reason we did that is because we knew we were gonna be using their top coat and this is actually kinda what they specialize in. It's flat finishes, actually single stage flat finishes. We're going with their satin black but we also have red oxide as our secondary color, but we're gonna save that for later on. For now it's all about the black. What's cool about it is it being a single stage it's got the base coat and clear coat all together. You don't have to spray both. It's got the u/v protection all built in. It's really for durable finishes. So if we're building something specifically for off road, or if you've got a rat rod truck, or a hot rod classic truck and you want that look they've got several colors you can choose from and it's really easy to spray on. We just need to mix the color 4 to 1 with the activator, get it in the gun, and Brandon can get some color down. [ MUSIC ] I have no idea what I'm doing. [ MUSIC ]
(Brandon)>> We're gonna apply two coats of paint with a 1.3 tip. The first is a full wet coat and the second is a medium with a 5 to 10 minute flash time in between each coat. [ MUSIC ] Coming up, you won't believe what we're putting on Unbreakable.
(Marc)>> Well Brandon really knocked it out of the park with the paint job on our Suburban here, and I'm not a paint and body buy but I do love a freshly painted vehicle, especially what it's satin black like this. Now it's probably a little overboard for as much abuse as we're gonna give this rig but hey, that's part of it. We've made some good headway but we still have a long ways to go as you can see by all the parts here on the floor but it's gonna be worth it right?
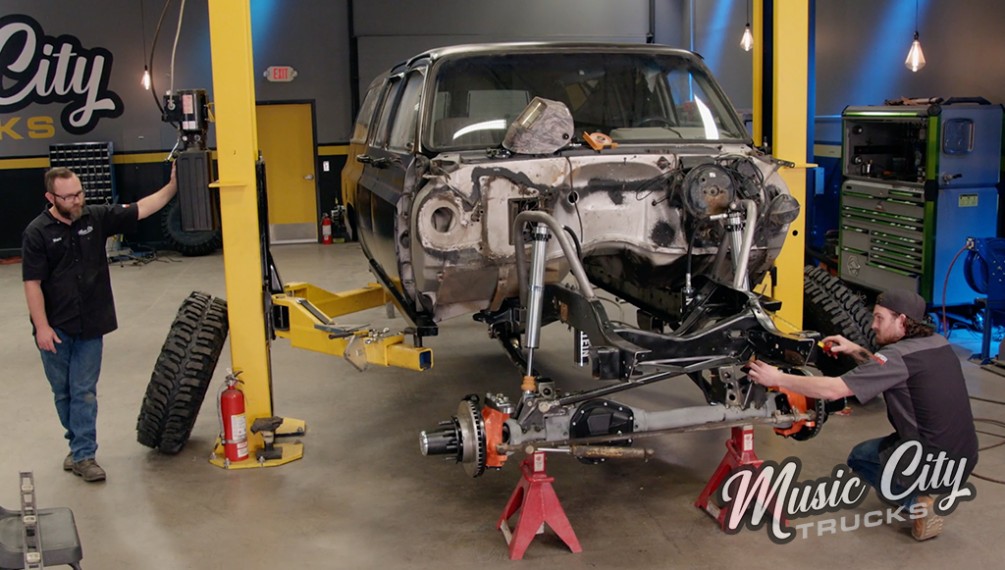
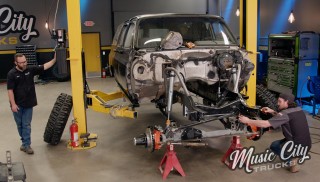
(Brandon)>> Every bit of blood, sweat, and tears. It's one thing to do one ton swaps but we're taking it to the next level with a four link coil over kit, and that's coming from Off Road Design. This kit's gonna articulate your suspension better, super strong, and it comes pre-cut and pre-measured. All you've got to do is tack it into the truck, make sure it's squared up, weld it in, you're ready to go. Now talk about beefy components two and half inch spherical joints, all the control arms, they're 250 walled tubing. You're gonna have a hard time bending these suckers. All the other brackets are a quarter inch fully welded. Now the rear's a little bit different. It's a triangulated configuration, but we're gonna be starting with the front with these first brackets. [ MUSIC ] These are the front four link brackets that attach the links to the frame. We're not exactly sure where we want them yet. So we're just throwing them up there to get a starting point. [ MUSIC ]
(Marc)>> It's getting real. [ MUSIC ] Well now it's time to get our brackets attached to the axle, and these brackets are really intricate here, but what's cool about this side is it's got the center section casting here, and that bracket sits right on that. The problem is it does hit a little bit here. So I just need to trim it to fit, and that's okay. That's because of different tolerances in the axle. So mark it there, get it cut, get it fit, and tacked in.
(Brandon)>> The driver's side's a little bit different. It doesn't have those two alignment holes to align it onto the axle itself. So once Marc gets his cut and welded in we're gonna find the angle of that side, match it to the angle of this side, but first I want to make sure this axle is square underneath the truck. I'm gonna but it up against the body mount. Then I'll take a measurement. Yeah, that's nine and a quarter. 43 and a quarter. 43 and a quarter! That's square! [ grinder buzzing ] [ welder crackling ]
(Marc)>> I guess we can put the links in.
(Brandon)>> Let's check distance from the bottom hole to the bottom hole.
(Marc)>> On both sides? Okay! 36 and a half. 37 and an eighth.
(Brandon)>> I say we try to run these and we'll adjust our wheel base.
(Marc)>> There it is. [ drill humming ]
(Brandon)>> Sent!
(Marc)>> Awesome. Let's see what this is. Zero!
(Brandon)>> Alright let's tack this side in and then do the other.
(Marc)>> With the passenger bracket bolted and tacked in we'll match the angle on the driver's side and tack it in as well. [ welder crackling ] [ MUSIC ]
(Marc)>> Oh yeah! [ MUSIC ] Now we can start getting the links installed and check our wheel base. Oh yeah! [ MUSIC ] Good choice.
(Brandon)>> Put a steering arm in there.
(Marc)>> That helps. Well it looks really cool but we need to take a measurement here to see. This is where the bump stop was. So it's pretty far off from where the original axle would have been.
(Brandon)>> So our wheel base is off by five and a quarter inches. It's a little bit more far forward than I want it to be. We already have the bumper and the fender cut. I say like kick it five inches back. I don't mind it a little bit more forward but not that much wheel base.
(Marc)>> Let's do it, now's the time. [ MUSIC ]
(Brandon)>> Tight fit. [ MUSIC ]
(Marc)>> Looking like something.
(Brandon)>> I lost the plumb bob. Probably about a half inch. That's not bad.
(Marc)>> Close enough.
(Brandon)>> Well we've got our lower links cut to fit. Got those tacked in place and installed, and we checked our wheel base. Basically this front axle is where it would have been from the factory, which we're okay with. And then we've got our caster set at five degrees, measured for our uppers, and went ahead and trimmed those to fit and got those tacked, and we're just about ready to bolt these in.
(Brandon)>> But before we can put the uppers in we actually have some clearance issues. Now since we went with a lift bigger than four inches our rear bracketry's behind the body mount, which causes some interference between the body mount and the upper control arm on its compression stroke of the cycle.
(Marc)>> So we just need to trim those out. We can get the uppers installed. Then we can run through all of our articulation. That's gonna be fun.
(Brandon)>> Oh it's always fun to articulate stuff. [ torch hissing ] [ grinder buzzing ]
(Marc)>> Centered?
(Brandon)>> Centered!
(Marc)>> Alright that's 42 and seven-eighths. [ MUSIC ]
(Brandon)>> Now with the axle where we want it to live front to back we can measure for the length the track bar needs to be to keep the axle centered side to side. With the tube cut we can install it with the provided hardware.
(Brandon)>> I just realized something.
(Marc)>> What's that?
(Brandon)>> Steering knuckle's on the wrong side.
(Marc)>> That's the way it was from the factory.
(Brandon)>> We got crossover steering remember?
(Marc)>> Ugh, ready?
(Brandon)>> Alright this is ride height?
(Marc)>> Yep.
(Brandon)>> Alright.
(Marc)>> Close enough.
(Brandon)>> Full compression.
(Marc)>> Tell me when.
(Brandon)>> Five, four, three and a half, right there.
(Marc)>> I'm just hitting the jack stand.
Oh yeah! Articulating this front suspension is very important. The reason we're running it through such a wide variety of scenarios is because not only will the front axle travel up and down through its full range of motion, but one side could be a full bump while the other side is at full extension. Add in it being a steer axle we need to ensure that no components will touch in any scenario.
(Brandon)>> Plus it's just fun.
(Marc)>> This makes it easy to see the amount of potential this thing is gonna have when it's done. Up next, our front suspension is coming to life.
(Marc)>> We're making some great headway with the suspension install on our Suburban here, Project Unbreakable. We finally got the Dana 60 bolted to the vehicle. With the four link it's looking really cool. We've got it located side to side with the track bar. We've articulated it up and down. We like the way it lives in there, and we don't have any contact issues but we're not done yet.
(Brandon)>> No the next thing we've got to do to this truck is actually get it on its own weight, and we're gonna be doing that with these coil overs from Bilstein that we got from Summit Racing. This is a two and a half inch body with 14 inch travel shock. This is adding to the massive stuff we're putting in this rig.
(Marc)>> It's also adding to the parts list of money we spent. So it kinda blew our budget out of the water.
(Brandon)>> Sometimes that happens.
(Marc)>> But anyway we went ahead and got the driver's side installed. We got the hoop in here, got it welded into place, and we've got the coil over bolted in without the springs. That way we can articulate it up and down, and we're happy with how that turned out and we're ready to do that on the other side.
(Brandon)>> Now the passenger side we knew there was gonna be some interfering stuff. So we went and ahead and took out the air conditioning box and a couple of these brackets. The next thing we've got to do is get that shock in the lower mount.
(Marc)>> Let's do it. [ MUSIC ]
(Brandon)>> The kit comes with spacers to make sure that the shock is centered inside the mount. [ mechanical humming ]
(Marc)>> There it is. [ MUSIC ]
(Brandon)>> The shocks are so tall the kit comes with hoops to mount our upper eyelets, and we're gonna start with the truck at full droop. [ MUSIC ]
(Marc)>> Oh yeah!
(Brandon)>> That's about two degrees right there. You holding it?
(Marc)>> Yep best I can.
(Brandon)>> With the shock where we want it we're marking the hoop where it needs to be cut to mount to the frame. Because we're angling our hoops outboard on the rear we made these pedestals to attach the tubing to the frame. [ welder crackling ]
(Marc)>> Alright let's try again. We're pretty close right?
(Brandon)>> We're close!
(Marc)>> And so my cut was good?
(Brandon)>> No your cut's good.
(Marc)>> Nice! [ MUSIC ]
(Brandon)>> And then, you like that?
(Marc)>> Yeah! [ MUSIC ]
(Brandon)>> Now with the hoop in we can go ahead and put the coil over where we want it and tack in the upper mounts. [ welder crackling ] [ MUSIC ]
(Marc)>> There went your spacers. [ MUSIC ] Now we can pull the coils off the shocks so we can run the suspension through its full range of motion and check for clearance.
(Brandon)>> There we go. [ MUSIC ]
(Marc)>> Alright, that's ride height right there. Measure your gap on your shock there. You got your tape on you? [ MUSIC ]
(Brandon)>> Come down a little more.
(Marc)>> Right there.
(Brandon)>> Seven and a half.
(Marc)>> Okay! [ MUSIC ]
(Brandon)>> Seven and a half, that's ride height.
(Marc)>> Okay ready?
(Brandon)>> Yeah go on down full bump. [ MUSIC ]
(Marc)>> That's it.
(Brandon)>> Well that's bump. You may notice that we flipped the shocks around 180. That's because the reservoirs were actually hitting the hoops. It's not the look we were going for but it gets the job done.
(Marc)>> We can declare victory. Another thing we've got to get is the steering arms in, steering box, and then bumps and straps and the front end's done. I think I'm gonna go ahead and start on the rear.
(Brandon)>> I'm gonna make all this permanent. [ welder crackling ]
(Marc)>> Coming up!
(Brandon)>> You know what this thing looks like? A monster trophy truck.
(Marc)>> Well we moved on to the rear axle and suspension install on our Suburban here, and you'll notice our 14 bolt is back. It's been out at True Blue Truck over in Murfreesboro, Tennessee. Those guys did a great job rebuilding this thing for us. They put an air locker in here for us, some really strong chro-moly axles, and they even upgraded our brakes to discs. Now we'll get to the caliper and pad installation later, but for now it's all about getting the suspension. We went ahead and got the truss installed, and we've got our entire four link tacked into place. On thing to keep in mind is our front suspension is a parallel four link with a pan hard rod or a track bar that's used as a centering device. On a triangulated four link like we're using here in the rear the triangulation of the control arms works as the centering device. Not only that but it also helps with articulation once you get off road and start moving the axle up and down. So that's really nice. We got our lower control arm set at 10 degrees, which is actually what we were shooting for, and we measured our wheel base length and it's one inch longer than stock. That actually means the front axle is pushed forward about a half inch and the rear axle is back about a half an inch as well. So adding a little bit of wheel base coupled with rocker panels being a little higher, the quarter panels and the rear bumper being a little higher, and the front bumper as well. That's gonna help with our approach and departure angles when we're off roading, and that's really what this thing was built for. So now all we really need to do is get our coil overs installed and then we can burn all this in, get it down on the ground. [ welder crackling ]
(Marc)>> For our rear coil overs we're using shorter 12 inch travel shocks along with ORD's under bed upper shock mounts. [ MUSIC ] With the uppers tacked in the lowers get tacked to the axle. [ welder crackling ] [ MUSIC ]
(Marc)>> Now we're in business in the rear. All we need to do is use our Forney 220 MP to burn it all in. [ welder crackling ]
(Marc)>> Yep! Alright it's ready to go down on the ground finally with our new axles, suspension, wheels and tires on it. Brandon you look excited, you ready?
(Brandon)>> This is a lot of anticipation.
(Marc)>> Making some weird noises. I think it's fine.
(Brandon)>> It's settling. [ MUSIC ]
(Marc)>> Didn't go as far as I thought it would.
(Brandon)>> You know what this thing looks like? A monster trophy truck.
(Marc)>> It's monster alright. It's about four inches higher than we said it was gonna be. So it's painted, all the suspension's under it front and rear. I would say it's time for a refreshing adult beverage.
(Brandon)>> With some lime?
(Marc)>> And salt. Make mine a double.
(Brandon)>> Speaking of doubles we need to put that doubler on that transfer case.
(Marc)>> This will help us get our mind right for that.
Show Full Transcript
(Marc)>> Today on Music City Trucks!
(Brandon)>> A little paint.
(Marc)>> I have no idea what I'm doing. A few welds.
(Brandon)>> Ow, and Unbreakable turns into a monster.
(Marc)>> Looking like something.
(Brandon)>> I lost the plumb bob.
(Marc)>> I would say it's time for a refreshing adult beverage.
(Brandon)>> With some lime?
(Marc)>> And salt! [ MUSIC ] [ engine revving ] [ MUSIC ]
(Marc)>> Hey folks, welcome to Music City Trucks. We've got a great show planned for you today. We're getting back on our 1991 Suburban project that we're calling Unbreakable. It's getting four link suspension, coil overs, and axles all up underneath it later on but for now it's time to focus on the paint and body.
(Brandon)>> Now remember this truck's gonna spend most of its life in the mountains, on the trail, pretty much anywhere off road. So the paint job's got to be one, durable, and two, still look good. I'm gonna tackle this a little bit differently than say a street truck. A little bit less involved but the finished product's still gonna be really nice. This is a lot of real estate. So let's get started.
(Marc)>> No this is all you. I really do appreciate it though but remember I had that thing. I've got to get my eyes poked out with an ice pick or something.
(Brandon)>> Let's start sanding this big behemoth. [ grinder buzzing ]
(Brandon)>> So what I'm doing to prep this truck for primer is 180 on a d/a and that's gonna get all the orange peel off this old paint, and then I'm just feather edging all these spots where the metal is showing through and getting all that paint even. A little bit of problems with getting the undercoating off but it's just gonna take a little bit of elbow grease. [ MUSIC ] This is gonna be a simple mask up job. So it's not gonna take too long. So what I said at the beginning was I'm not gonna do a paint job like a street truck, and what I meant by that is not taking the windows out, not taking door seals off, door handles. These ones are loose but they're still on the truck. So I'm really simplifying the process of actually getting this truck ready for paint, and doing it this way is not the most high end but it's still gonna be perfect for what we're doing.
(Marc)>> In the can is Vintage Flats direct to metal primer. Now I don't like doing body work or sanding... [ MUSIC ] ...but I don't mind mixing paint. What are you doing up there?
(Brandon)>> Just a little monkeying around. We're using a direct to metal 2-K primer. It's got really nice high build qualities and we're using a 2.0 tip so we get good material coverage. [ spray gun hissing ]
(Brandon)>> Alright now that the primer's all cured up we're gonna be putting some dry guide coat on it to tell us when to stop sanding so we don't take all this beautiful material away form this truck. [ MUSIC ] We're gonna be using 320 on a d/a for all the flat spots and all the round spots. All the contoured spots we're gonna be using a hand block. [ grinder buzzing ]
(Brandon)>> For somebody who's spent hours sanding this stuff cuts like butter, and it fills in pretty nice too.
(Marc)>> Look at that! It's like it wants to go in here.
(Brandon)>> She wants some color.
(Marc)>> Paint me please. I'll go mix you some color. If you'll remember Brandon sprayed that primer on a little while ago. We got it from Vintage Flats, and the reason we did that is because we knew we were gonna be using their top coat and this is actually kinda what they specialize in. It's flat finishes, actually single stage flat finishes. We're going with their satin black but we also have red oxide as our secondary color, but we're gonna save that for later on. For now it's all about the black. What's cool about it is it being a single stage it's got the base coat and clear coat all together. You don't have to spray both. It's got the u/v protection all built in. It's really for durable finishes. So if we're building something specifically for off road, or if you've got a rat rod truck, or a hot rod classic truck and you want that look they've got several colors you can choose from and it's really easy to spray on. We just need to mix the color 4 to 1 with the activator, get it in the gun, and Brandon can get some color down. [ MUSIC ] I have no idea what I'm doing. [ MUSIC ]
(Brandon)>> We're gonna apply two coats of paint with a 1.3 tip. The first is a full wet coat and the second is a medium with a 5 to 10 minute flash time in between each coat. [ MUSIC ] Coming up, you won't believe what we're putting on Unbreakable.
(Marc)>> Well Brandon really knocked it out of the park with the paint job on our Suburban here, and I'm not a paint and body buy but I do love a freshly painted vehicle, especially what it's satin black like this. Now it's probably a little overboard for as much abuse as we're gonna give this rig but hey, that's part of it. We've made some good headway but we still have a long ways to go as you can see by all the parts here on the floor but it's gonna be worth it right?
(Brandon)>> Every bit of blood, sweat, and tears. It's one thing to do one ton swaps but we're taking it to the next level with a four link coil over kit, and that's coming from Off Road Design. This kit's gonna articulate your suspension better, super strong, and it comes pre-cut and pre-measured. All you've got to do is tack it into the truck, make sure it's squared up, weld it in, you're ready to go. Now talk about beefy components two and half inch spherical joints, all the control arms, they're 250 walled tubing. You're gonna have a hard time bending these suckers. All the other brackets are a quarter inch fully welded. Now the rear's a little bit different. It's a triangulated configuration, but we're gonna be starting with the front with these first brackets. [ MUSIC ] These are the front four link brackets that attach the links to the frame. We're not exactly sure where we want them yet. So we're just throwing them up there to get a starting point. [ MUSIC ]
(Marc)>> It's getting real. [ MUSIC ] Well now it's time to get our brackets attached to the axle, and these brackets are really intricate here, but what's cool about this side is it's got the center section casting here, and that bracket sits right on that. The problem is it does hit a little bit here. So I just need to trim it to fit, and that's okay. That's because of different tolerances in the axle. So mark it there, get it cut, get it fit, and tacked in.
(Brandon)>> The driver's side's a little bit different. It doesn't have those two alignment holes to align it onto the axle itself. So once Marc gets his cut and welded in we're gonna find the angle of that side, match it to the angle of this side, but first I want to make sure this axle is square underneath the truck. I'm gonna but it up against the body mount. Then I'll take a measurement. Yeah, that's nine and a quarter. 43 and a quarter. 43 and a quarter! That's square! [ grinder buzzing ] [ welder crackling ]
(Marc)>> I guess we can put the links in.
(Brandon)>> Let's check distance from the bottom hole to the bottom hole.
(Marc)>> On both sides? Okay! 36 and a half. 37 and an eighth.
(Brandon)>> I say we try to run these and we'll adjust our wheel base.
(Marc)>> There it is. [ drill humming ]
(Brandon)>> Sent!
(Marc)>> Awesome. Let's see what this is. Zero!
(Brandon)>> Alright let's tack this side in and then do the other.
(Marc)>> With the passenger bracket bolted and tacked in we'll match the angle on the driver's side and tack it in as well. [ welder crackling ] [ MUSIC ]
(Marc)>> Oh yeah! [ MUSIC ] Now we can start getting the links installed and check our wheel base. Oh yeah! [ MUSIC ] Good choice.
(Brandon)>> Put a steering arm in there.
(Marc)>> That helps. Well it looks really cool but we need to take a measurement here to see. This is where the bump stop was. So it's pretty far off from where the original axle would have been.
(Brandon)>> So our wheel base is off by five and a quarter inches. It's a little bit more far forward than I want it to be. We already have the bumper and the fender cut. I say like kick it five inches back. I don't mind it a little bit more forward but not that much wheel base.
(Marc)>> Let's do it, now's the time. [ MUSIC ]
(Brandon)>> Tight fit. [ MUSIC ]
(Marc)>> Looking like something.
(Brandon)>> I lost the plumb bob. Probably about a half inch. That's not bad.
(Marc)>> Close enough.
(Brandon)>> Well we've got our lower links cut to fit. Got those tacked in place and installed, and we checked our wheel base. Basically this front axle is where it would have been from the factory, which we're okay with. And then we've got our caster set at five degrees, measured for our uppers, and went ahead and trimmed those to fit and got those tacked, and we're just about ready to bolt these in.
(Brandon)>> But before we can put the uppers in we actually have some clearance issues. Now since we went with a lift bigger than four inches our rear bracketry's behind the body mount, which causes some interference between the body mount and the upper control arm on its compression stroke of the cycle.
(Marc)>> So we just need to trim those out. We can get the uppers installed. Then we can run through all of our articulation. That's gonna be fun.
(Brandon)>> Oh it's always fun to articulate stuff. [ torch hissing ] [ grinder buzzing ]
(Marc)>> Centered?
(Brandon)>> Centered!
(Marc)>> Alright that's 42 and seven-eighths. [ MUSIC ]
(Brandon)>> Now with the axle where we want it to live front to back we can measure for the length the track bar needs to be to keep the axle centered side to side. With the tube cut we can install it with the provided hardware.
(Brandon)>> I just realized something.
(Marc)>> What's that?
(Brandon)>> Steering knuckle's on the wrong side.
(Marc)>> That's the way it was from the factory.
(Brandon)>> We got crossover steering remember?
(Marc)>> Ugh, ready?
(Brandon)>> Alright this is ride height?
(Marc)>> Yep.
(Brandon)>> Alright.
(Marc)>> Close enough.
(Brandon)>> Full compression.
(Marc)>> Tell me when.
(Brandon)>> Five, four, three and a half, right there.
(Marc)>> I'm just hitting the jack stand.
Oh yeah! Articulating this front suspension is very important. The reason we're running it through such a wide variety of scenarios is because not only will the front axle travel up and down through its full range of motion, but one side could be a full bump while the other side is at full extension. Add in it being a steer axle we need to ensure that no components will touch in any scenario.
(Brandon)>> Plus it's just fun.
(Marc)>> This makes it easy to see the amount of potential this thing is gonna have when it's done. Up next, our front suspension is coming to life.
(Marc)>> We're making some great headway with the suspension install on our Suburban here, Project Unbreakable. We finally got the Dana 60 bolted to the vehicle. With the four link it's looking really cool. We've got it located side to side with the track bar. We've articulated it up and down. We like the way it lives in there, and we don't have any contact issues but we're not done yet.
(Brandon)>> No the next thing we've got to do to this truck is actually get it on its own weight, and we're gonna be doing that with these coil overs from Bilstein that we got from Summit Racing. This is a two and a half inch body with 14 inch travel shock. This is adding to the massive stuff we're putting in this rig.
(Marc)>> It's also adding to the parts list of money we spent. So it kinda blew our budget out of the water.
(Brandon)>> Sometimes that happens.
(Marc)>> But anyway we went ahead and got the driver's side installed. We got the hoop in here, got it welded into place, and we've got the coil over bolted in without the springs. That way we can articulate it up and down, and we're happy with how that turned out and we're ready to do that on the other side.
(Brandon)>> Now the passenger side we knew there was gonna be some interfering stuff. So we went and ahead and took out the air conditioning box and a couple of these brackets. The next thing we've got to do is get that shock in the lower mount.
(Marc)>> Let's do it. [ MUSIC ]
(Brandon)>> The kit comes with spacers to make sure that the shock is centered inside the mount. [ mechanical humming ]
(Marc)>> There it is. [ MUSIC ]
(Brandon)>> The shocks are so tall the kit comes with hoops to mount our upper eyelets, and we're gonna start with the truck at full droop. [ MUSIC ]
(Marc)>> Oh yeah!
(Brandon)>> That's about two degrees right there. You holding it?
(Marc)>> Yep best I can.
(Brandon)>> With the shock where we want it we're marking the hoop where it needs to be cut to mount to the frame. Because we're angling our hoops outboard on the rear we made these pedestals to attach the tubing to the frame. [ welder crackling ]
(Marc)>> Alright let's try again. We're pretty close right?
(Brandon)>> We're close!
(Marc)>> And so my cut was good?
(Brandon)>> No your cut's good.
(Marc)>> Nice! [ MUSIC ]
(Brandon)>> And then, you like that?
(Marc)>> Yeah! [ MUSIC ]
(Brandon)>> Now with the hoop in we can go ahead and put the coil over where we want it and tack in the upper mounts. [ welder crackling ] [ MUSIC ]
(Marc)>> There went your spacers. [ MUSIC ] Now we can pull the coils off the shocks so we can run the suspension through its full range of motion and check for clearance.
(Brandon)>> There we go. [ MUSIC ]
(Marc)>> Alright, that's ride height right there. Measure your gap on your shock there. You got your tape on you? [ MUSIC ]
(Brandon)>> Come down a little more.
(Marc)>> Right there.
(Brandon)>> Seven and a half.
(Marc)>> Okay! [ MUSIC ]
(Brandon)>> Seven and a half, that's ride height.
(Marc)>> Okay ready?
(Brandon)>> Yeah go on down full bump. [ MUSIC ]
(Marc)>> That's it.
(Brandon)>> Well that's bump. You may notice that we flipped the shocks around 180. That's because the reservoirs were actually hitting the hoops. It's not the look we were going for but it gets the job done.
(Marc)>> We can declare victory. Another thing we've got to get is the steering arms in, steering box, and then bumps and straps and the front end's done. I think I'm gonna go ahead and start on the rear.
(Brandon)>> I'm gonna make all this permanent. [ welder crackling ]
(Marc)>> Coming up!
(Brandon)>> You know what this thing looks like? A monster trophy truck.
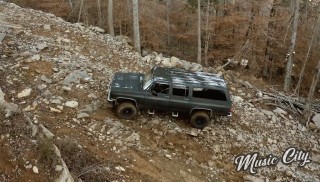
(Marc)>> Well we moved on to the rear axle and suspension install on our Suburban here, and you'll notice our 14 bolt is back. It's been out at True Blue Truck over in Murfreesboro, Tennessee. Those guys did a great job rebuilding this thing for us. They put an air locker in here for us, some really strong chro-moly axles, and they even upgraded our brakes to discs. Now we'll get to the caliper and pad installation later, but for now it's all about getting the suspension. We went ahead and got the truss installed, and we've got our entire four link tacked into place. On thing to keep in mind is our front suspension is a parallel four link with a pan hard rod or a track bar that's used as a centering device. On a triangulated four link like we're using here in the rear the triangulation of the control arms works as the centering device. Not only that but it also helps with articulation once you get off road and start moving the axle up and down. So that's really nice. We got our lower control arm set at 10 degrees, which is actually what we were shooting for, and we measured our wheel base length and it's one inch longer than stock. That actually means the front axle is pushed forward about a half inch and the rear axle is back about a half an inch as well. So adding a little bit of wheel base coupled with rocker panels being a little higher, the quarter panels and the rear bumper being a little higher, and the front bumper as well. That's gonna help with our approach and departure angles when we're off roading, and that's really what this thing was built for. So now all we really need to do is get our coil overs installed and then we can burn all this in, get it down on the ground. [ welder crackling ]
(Marc)>> For our rear coil overs we're using shorter 12 inch travel shocks along with ORD's under bed upper shock mounts. [ MUSIC ] With the uppers tacked in the lowers get tacked to the axle. [ welder crackling ] [ MUSIC ]
(Marc)>> Now we're in business in the rear. All we need to do is use our Forney 220 MP to burn it all in. [ welder crackling ]
(Marc)>> Yep! Alright it's ready to go down on the ground finally with our new axles, suspension, wheels and tires on it. Brandon you look excited, you ready?
(Brandon)>> This is a lot of anticipation.
(Marc)>> Making some weird noises. I think it's fine.
(Brandon)>> It's settling. [ MUSIC ]
(Marc)>> Didn't go as far as I thought it would.
(Brandon)>> You know what this thing looks like? A monster trophy truck.
(Marc)>> It's monster alright. It's about four inches higher than we said it was gonna be. So it's painted, all the suspension's under it front and rear. I would say it's time for a refreshing adult beverage.
(Brandon)>> With some lime?
(Marc)>> And salt. Make mine a double.
(Brandon)>> Speaking of doubles we need to put that doubler on that transfer case.
(Marc)>> This will help us get our mind right for that.
