More '73 Buick Century "Blue Collar Buick" Episodes
MuscleCar Builds
Want more content like this?
Join the PowerNation Email NewsletterParts Used In This Episode
Beech Bend
Host Track for Buick GS Nationals
Matco Tools
Complete Hydraulic Flaring Kit
Powerblocktv
GM Rear End Assembly Video<a href="http://www.mypowerblock.com/group/musclecartv"><img src="http://www.powerblocktv.com/img/musclecar/MCTV_icon.png" alt="Musclecar Clip" height="50" width="50"/></a>
Episode Transcript
Today on muscle car blue collar buick gets a rear end swap and disc brake conversion to go with its beefed up 455. Check out the post upgrade dyno numbers and see how a hook tech is installed. Then Tommy shows off the buick at the GS Nationals.
Hey, welcome to Muscle car. We love a challenge around here and when you buick guys out there threw down the gauntlet and suggested we was wasting this 455 with our original budget build.
Well, we decided to kick it up a notch.
Last time we upgraded this dude to stage one performance with a more aggressive cam better heads intake and ignition, a bigger car, long tube hitters and a new training.
Now it's always nice to have some numbers to brag about. So coming up later in the show, we got a date with the
dyno, but first we got a few more upgrades to do.
We're expecting a whole lot more torque out of that motor. So rear end upgrade. Well, that's a given and we're gonna be swapping out these rear drums for new discs.
Now, technically, there's nothing wrong with this 8.5, but it's a one leger and that means all the power goes to one wheel while the other wheel just sits there looking dumb by adding a posse
in it. We're going to send the same amount of power to each of the two wheels that'll make for better traction and better acceleration.
And while we're in there, we're gonna throw in a set of shorter gears because that'll help get the engine into its power band a lot quicker.
And here's something interesting about this
and it doesn't have
clips on the axles. They are actually bolted and not a lot of guys know about them, but GM did make them
Bolton
ales are better for performance applications. If an axle breaks, the wheel will stay attached to the car with
clips, the broken axle with the wheel entire attack
can exit the housing and turn your day at the drag strip into a real drag.
Ary bar stuck between the ring and pinion gears with jam them up so you can get the pin that loose.
The caps come off next. They need to go back on the same side that came off of. So make sure not to mix them up.
A little gentle persuasion and the stock open dip will pop right out.
Knock the P in to get the yoke off and the rest of the assembly will slide out
if you're looking at buying a used rear end out of a wrecking yard and maybe out of a swap meet. You wanna double check what gears are in that rear end before you lay down your cash. It's pretty simple. Just pop the rear diff cover off and look for the number stamped in the ring gear. Look for the last sequence of numbers in here and then divide the second number into the first number. In this case, it'd be 15 into 41. So we know that this is a 273 gear set.
Now, the lower the number, the taller the gear ratio and that can mean a lot slower acceleration. Now, these gears combined with an overdrive transmission, they'd be way too tall. So we're going to swap out to a set of 370 threes. Now, these will give us better acceleration, but combined with the overdrive transmission, we can still cruise down the freeway at a decent RPM.
But before we can put anything back in the housing, I need to do some pre assembly, the press will get the new bearings installed on the pinion and locker. But you can also carry them down to your local machine shop and they can take care of them in a jiffy
when assembling the ring gear to the center section, make sure to use lock tight thread locker on the bolts because you don't want these guys coming loose ever.
I'll run them down with the impact first, then talk them to final specs
the old seal and barring come out pretty easy. But the races are pressed in and require a little more convincing
if your housing is out of the car, the best way to install a new race is with a press. But since ours is still bolted in the car, a hammer and brass punch will do the job. Just be careful not to damage or distort the race in any way
with the new bearing set and a seal in place. The pinion crush leave and yolk are up next.
Yeah,
next drop in the carrier and tap in your shins followed by the main caps.
If you're looking for step by step, instructions on how to set up a GM axle, visit the muscle car section of power block tv.com. Click on this episode and you'll find a video showing you exactly how it's done.
Mhm.
Once it's all together, do a final check on the tooth pattern before bolting on the covers.
Yeah,
up next blue collar has got a lot more go power now, Rick's gonna give it some who power and later the event of the year for Buick fans.
Hey guys, welcome back when you're doing performance upgrades on a vehicle. Bolting on all those high performance go fast. Goodies is the fun part, but don't forget, stopping is pretty important too. Uh, drum brakes are prone to fading and overheating. Added bigger wheels and tires and more speed. The problem is just gonna get worse. Now, disc brakes run cooler and they're a lot more efficient so they can handle the pressure, bringing that nearly two ton beast to a halt. A summit racing sent us this conversion kit for a GM 10 bolt, but they're available for just about anything.
Drum brakes aren't horrible and they've safely stopped vehicles for over a century. But the fact is disc brakes are simpler, lighter and safer.
The only thing we're reusing here is the E brake cable. Everything else is out of here.
Now, pre assembling some of the parts on the table makes this process a lot easier. This way, you don't have to try to hold everything together with your third arm while tightening the bolts.
The brake mount plate that came with A K is also the new axle retaining plate, bolt it on and tighten it down just like the stock piece. Next set the rotors on, load the brake pads into the caliper and bolt them into the bracket.
Since these are floating calipers, we need to add a section of flex line to allow for some movement.
The original hard lines can be used but they need to be shortened.
I'll mark them trim back the sheath and cut the line to its new length.
The end of the trimmed line needs to be flared but don't forget to put the new fitting on. First
Mao's flare tool kit is one of those items that no shop should be without it's really versatile and gives a perfect seal every time
the Flex line and all the fittings came in. Summitt's brake kit, which means you don't have to shop around for odds and ends to finish your install
and that's about it. Now, we don't have to worry about scrubbing off in the excess speed. Now, we just have to bleed these out installer short and drive shaft. Then it's back to the
dyno to see if this big block lives up to the name Buick
coming up, hoods
aren't just for Pontiacs. Find out how easy it is to install one in your ride. Then blue collar takes a trip to Buick heaven.
Before we started our upgrades, we made a baseline dyno
run. So we'd have some but-for numbers for comparison.
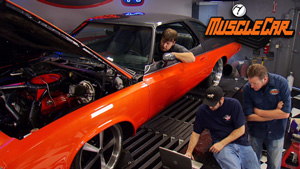
100 and 94 horsepower, 271 ft pounds of torque
from the minute we fired her up, we could tell she had a deeper growl,
but we're after more than just sound.
The
dyno numbers are going to tell us if we've reached our goal of a 40% horsepower increase.
Picked up a few 290
or picked up the 352 your peaks right at five grand
and it starts to roll off. That's a good game.
That is almost 100 horsepower difference to 50% gain.
That's fantastic. Yeah, it's not bad.
Now that we got some respectable power under the hood, it's gonna be kind of hard to keep my foot off the gas. So to make sure I don't overdo it, we're gonna add a hood tech
right now. I know what you guys are thinking. Hood techs are for Pontiacs. Well, it's true that they were more common on the GT Os and the Firebirds. You could special order them on the Buick Gss
and they were basically the same thing just with the faces changed a little bit. Now,
this kind of creative part swapping was pretty common with GM back then and we're gonna do the same thing.
Now. They do make Buick hood tax, but the 5200 red line on this Pontiac model. Well, it's pretty much dead on to where we need it to be. And we took a cue from GM and just modified the face to fit our project. Pretty cool. Huh?
All right, dude, these things weren't exactly available in 73 so we can put it wherever we want.
Well, I was looking over here at the underside of the hood
right here. It wouldn't interfere with all the bracing and all.
I don't drop the hood real quick.
Give or take about there.
Yeah, it don't look bad up here.
Looks like it should work. Right.
That's perfect because it's not your line of sight to see the road either. Good deal
first. I'll mark the bottom side to make sure we'll clear all the braces after drilling the pilot hole, the whole saw comes out. You can actually smell the fresh paint as it chews its way through. Poor Rick had to leave the room while I did this.
But you gotta break some eggs to make an omelet. And this one's looking pretty good. A
paper template will help mark where the mounting holes need to be drilled.
Step drill bits are designed for drilling through sheet metal and they share a perfectly round hole.
After smoothing off the rough edges, I'll mask up the hole and shoot on some stupid color edge primer and semi gloss black.
One problem with the first hood tax was moisture getting into the housing and fogging up the lens. Modern re pops, they're sealed up. But if you're restoring an original, you can use the same fix as the 69 up models did.
It's as easy as running a tube from the heater box to the housing and that's why I drilled that extra hole. Since ours is a modern version, we don't need to do this, but we wanted to show you guys just how easy it is.
After screwing in a hose bar, the tag can be dropped into place. Rubber vacuum line works fine for the feet, run it through any available hole in the firewall and pull the excess through to the inside.
Drill a hole in the heater box being careful not to rupture the heater core flaps or anything else important.
A 90 degree hose bar completes the defrost option on our attack. All that's left now is the wiring. It's just a few simple connections that run from the pig tail to the ground distributor and fuse block.
As usual, painless wine lives up to their name with the right connectors on hand. Extending the wiring really is painless
A E I distributors all have a tac
terminal making this part of the install a breeze
to make the light functional, Just tap into a switch to on the fuse block
with all the connections completed. I can c it down and test it out.
Dude. That is cool. Now she's ready to roll. I take it out for a quick road test, man. I was thinking more like a road trip. You game. I can brother, I have to go pick up her next project, gonna have to go on without me. Well, I try to keep it on two wheels most of the time we'll see you back.
All right, man.
After the break, take a trip to the ultimate buick event.
You're watching muscle car for a DVD copy of this episode. Just go to Power Block tv.com and order your copy for just 595 plus shipping and handling. Start your own muscle car collection delivered right to your door from the power block.
Blue collar is running like a champ. So I pointed her toward Bowling Green, Kentucky where the Buick Gs Nationals are in full swing.
This is the place to go if you have a buick or if you just love looking at them, man, there's some nice looking Buicks here.
There's guys and gals from all over the country here. See how many people are here showing off their buick pride.
Thank you, sir. Appreciate
you watching.
Why did I choose Buick happen to see a full set of tail lights go past? It was a 1965 G si said when I get out of the service, I'm gonna have a GS. We all do our cars just to make them, you know what we want. It's a lot of fun.
Buicks in every style color and era are on display here. Plus some unexpected surprises. It's a herb
charge. Cadillac got the Grand National uh motor in it and speaking of grand nationals, these turbo V6 muscle cars that took the eighties by storm are here in force.
I'm feeling like a kid in a candy shop with all these be
beauties on display. But there's one that's caught my eye. Hm. This one seems kind of familiar.
Oh, blue color is definitely at home here. It's a beautiful paint job. That's a beautiful paint job. Well, it's a beauty boy that is, is beautiful. I like the wheels. The wheels are sharp.
This crowd really seems to like what we've done to our 73 century,
but this event is about more than just looking good. It's about going fast. The drag strip is calling these guys name.
You're not gonna see any Mustangs or Camaros on this track. It's all Buick power today.
This is a perfect chance to put our new performance upgrades to the test.
Let's see what this girl will do.
I
13.8. It's not bad for a two ton car with no hook
oh blue collar has done everything we've asked her to do and more, she may not be everybody's idea of a muscle car, but we hope it's inspired you to think outside of the box and redefine what a muscle car can be. I wanna thank the GS Club of America for putting on a great show. I'm headed back to the track for one more run. So until next week y'all keep it between the ditches.
Show Full Transcript
Hey, welcome to Muscle car. We love a challenge around here and when you buick guys out there threw down the gauntlet and suggested we was wasting this 455 with our original budget build.
Well, we decided to kick it up a notch.
Last time we upgraded this dude to stage one performance with a more aggressive cam better heads intake and ignition, a bigger car, long tube hitters and a new training.
Now it's always nice to have some numbers to brag about. So coming up later in the show, we got a date with the
dyno, but first we got a few more upgrades to do.
We're expecting a whole lot more torque out of that motor. So rear end upgrade. Well, that's a given and we're gonna be swapping out these rear drums for new discs.
Now, technically, there's nothing wrong with this 8.5, but it's a one leger and that means all the power goes to one wheel while the other wheel just sits there looking dumb by adding a posse
in it. We're going to send the same amount of power to each of the two wheels that'll make for better traction and better acceleration.
And while we're in there, we're gonna throw in a set of shorter gears because that'll help get the engine into its power band a lot quicker.
And here's something interesting about this
and it doesn't have
clips on the axles. They are actually bolted and not a lot of guys know about them, but GM did make them
Bolton
ales are better for performance applications. If an axle breaks, the wheel will stay attached to the car with
clips, the broken axle with the wheel entire attack
can exit the housing and turn your day at the drag strip into a real drag.
Ary bar stuck between the ring and pinion gears with jam them up so you can get the pin that loose.
The caps come off next. They need to go back on the same side that came off of. So make sure not to mix them up.
A little gentle persuasion and the stock open dip will pop right out.
Knock the P in to get the yoke off and the rest of the assembly will slide out
if you're looking at buying a used rear end out of a wrecking yard and maybe out of a swap meet. You wanna double check what gears are in that rear end before you lay down your cash. It's pretty simple. Just pop the rear diff cover off and look for the number stamped in the ring gear. Look for the last sequence of numbers in here and then divide the second number into the first number. In this case, it'd be 15 into 41. So we know that this is a 273 gear set.
Now, the lower the number, the taller the gear ratio and that can mean a lot slower acceleration. Now, these gears combined with an overdrive transmission, they'd be way too tall. So we're going to swap out to a set of 370 threes. Now, these will give us better acceleration, but combined with the overdrive transmission, we can still cruise down the freeway at a decent RPM.
But before we can put anything back in the housing, I need to do some pre assembly, the press will get the new bearings installed on the pinion and locker. But you can also carry them down to your local machine shop and they can take care of them in a jiffy
when assembling the ring gear to the center section, make sure to use lock tight thread locker on the bolts because you don't want these guys coming loose ever.
I'll run them down with the impact first, then talk them to final specs
the old seal and barring come out pretty easy. But the races are pressed in and require a little more convincing
if your housing is out of the car, the best way to install a new race is with a press. But since ours is still bolted in the car, a hammer and brass punch will do the job. Just be careful not to damage or distort the race in any way
with the new bearing set and a seal in place. The pinion crush leave and yolk are up next.
Yeah,
next drop in the carrier and tap in your shins followed by the main caps.
If you're looking for step by step, instructions on how to set up a GM axle, visit the muscle car section of power block tv.com. Click on this episode and you'll find a video showing you exactly how it's done.
Mhm.
Once it's all together, do a final check on the tooth pattern before bolting on the covers.
Yeah,
up next blue collar has got a lot more go power now, Rick's gonna give it some who power and later the event of the year for Buick fans.
Hey guys, welcome back when you're doing performance upgrades on a vehicle. Bolting on all those high performance go fast. Goodies is the fun part, but don't forget, stopping is pretty important too. Uh, drum brakes are prone to fading and overheating. Added bigger wheels and tires and more speed. The problem is just gonna get worse. Now, disc brakes run cooler and they're a lot more efficient so they can handle the pressure, bringing that nearly two ton beast to a halt. A summit racing sent us this conversion kit for a GM 10 bolt, but they're available for just about anything.
Drum brakes aren't horrible and they've safely stopped vehicles for over a century. But the fact is disc brakes are simpler, lighter and safer.
The only thing we're reusing here is the E brake cable. Everything else is out of here.
Now, pre assembling some of the parts on the table makes this process a lot easier. This way, you don't have to try to hold everything together with your third arm while tightening the bolts.
The brake mount plate that came with A K is also the new axle retaining plate, bolt it on and tighten it down just like the stock piece. Next set the rotors on, load the brake pads into the caliper and bolt them into the bracket.
Since these are floating calipers, we need to add a section of flex line to allow for some movement.
The original hard lines can be used but they need to be shortened.
I'll mark them trim back the sheath and cut the line to its new length.
The end of the trimmed line needs to be flared but don't forget to put the new fitting on. First
Mao's flare tool kit is one of those items that no shop should be without it's really versatile and gives a perfect seal every time
the Flex line and all the fittings came in. Summitt's brake kit, which means you don't have to shop around for odds and ends to finish your install
and that's about it. Now, we don't have to worry about scrubbing off in the excess speed. Now, we just have to bleed these out installer short and drive shaft. Then it's back to the
dyno to see if this big block lives up to the name Buick
coming up, hoods
aren't just for Pontiacs. Find out how easy it is to install one in your ride. Then blue collar takes a trip to Buick heaven.
Before we started our upgrades, we made a baseline dyno
run. So we'd have some but-for numbers for comparison.
100 and 94 horsepower, 271 ft pounds of torque
from the minute we fired her up, we could tell she had a deeper growl,
but we're after more than just sound.
The
dyno numbers are going to tell us if we've reached our goal of a 40% horsepower increase.
Picked up a few 290
or picked up the 352 your peaks right at five grand
and it starts to roll off. That's a good game.
That is almost 100 horsepower difference to 50% gain.
That's fantastic. Yeah, it's not bad.
Now that we got some respectable power under the hood, it's gonna be kind of hard to keep my foot off the gas. So to make sure I don't overdo it, we're gonna add a hood tech
right now. I know what you guys are thinking. Hood techs are for Pontiacs. Well, it's true that they were more common on the GT Os and the Firebirds. You could special order them on the Buick Gss
and they were basically the same thing just with the faces changed a little bit. Now,
this kind of creative part swapping was pretty common with GM back then and we're gonna do the same thing.
Now. They do make Buick hood tax, but the 5200 red line on this Pontiac model. Well, it's pretty much dead on to where we need it to be. And we took a cue from GM and just modified the face to fit our project. Pretty cool. Huh?
All right, dude, these things weren't exactly available in 73 so we can put it wherever we want.
Well, I was looking over here at the underside of the hood
right here. It wouldn't interfere with all the bracing and all.
I don't drop the hood real quick.
Give or take about there.
Yeah, it don't look bad up here.
Looks like it should work. Right.
That's perfect because it's not your line of sight to see the road either. Good deal
first. I'll mark the bottom side to make sure we'll clear all the braces after drilling the pilot hole, the whole saw comes out. You can actually smell the fresh paint as it chews its way through. Poor Rick had to leave the room while I did this.
But you gotta break some eggs to make an omelet. And this one's looking pretty good. A
paper template will help mark where the mounting holes need to be drilled.
Step drill bits are designed for drilling through sheet metal and they share a perfectly round hole.
After smoothing off the rough edges, I'll mask up the hole and shoot on some stupid color edge primer and semi gloss black.
One problem with the first hood tax was moisture getting into the housing and fogging up the lens. Modern re pops, they're sealed up. But if you're restoring an original, you can use the same fix as the 69 up models did.
It's as easy as running a tube from the heater box to the housing and that's why I drilled that extra hole. Since ours is a modern version, we don't need to do this, but we wanted to show you guys just how easy it is.
After screwing in a hose bar, the tag can be dropped into place. Rubber vacuum line works fine for the feet, run it through any available hole in the firewall and pull the excess through to the inside.
Drill a hole in the heater box being careful not to rupture the heater core flaps or anything else important.
A 90 degree hose bar completes the defrost option on our attack. All that's left now is the wiring. It's just a few simple connections that run from the pig tail to the ground distributor and fuse block.
As usual, painless wine lives up to their name with the right connectors on hand. Extending the wiring really is painless
A E I distributors all have a tac
terminal making this part of the install a breeze
to make the light functional, Just tap into a switch to on the fuse block
with all the connections completed. I can c it down and test it out.
Dude. That is cool. Now she's ready to roll. I take it out for a quick road test, man. I was thinking more like a road trip. You game. I can brother, I have to go pick up her next project, gonna have to go on without me. Well, I try to keep it on two wheels most of the time we'll see you back.
All right, man.
After the break, take a trip to the ultimate buick event.
You're watching muscle car for a DVD copy of this episode. Just go to Power Block tv.com and order your copy for just 595 plus shipping and handling. Start your own muscle car collection delivered right to your door from the power block.
Blue collar is running like a champ. So I pointed her toward Bowling Green, Kentucky where the Buick Gs Nationals are in full swing.
This is the place to go if you have a buick or if you just love looking at them, man, there's some nice looking Buicks here.
There's guys and gals from all over the country here. See how many people are here showing off their buick pride.
Thank you, sir. Appreciate
you watching.
Why did I choose Buick happen to see a full set of tail lights go past? It was a 1965 G si said when I get out of the service, I'm gonna have a GS. We all do our cars just to make them, you know what we want. It's a lot of fun.
Buicks in every style color and era are on display here. Plus some unexpected surprises. It's a herb
charge. Cadillac got the Grand National uh motor in it and speaking of grand nationals, these turbo V6 muscle cars that took the eighties by storm are here in force.
I'm feeling like a kid in a candy shop with all these be
beauties on display. But there's one that's caught my eye. Hm. This one seems kind of familiar.
Oh, blue color is definitely at home here. It's a beautiful paint job. That's a beautiful paint job. Well, it's a beauty boy that is, is beautiful. I like the wheels. The wheels are sharp.
This crowd really seems to like what we've done to our 73 century,
but this event is about more than just looking good. It's about going fast. The drag strip is calling these guys name.
You're not gonna see any Mustangs or Camaros on this track. It's all Buick power today.
This is a perfect chance to put our new performance upgrades to the test.
Let's see what this girl will do.
I
13.8. It's not bad for a two ton car with no hook
oh blue collar has done everything we've asked her to do and more, she may not be everybody's idea of a muscle car, but we hope it's inspired you to think outside of the box and redefine what a muscle car can be. I wanna thank the GS Club of America for putting on a great show. I'm headed back to the track for one more run. So until next week y'all keep it between the ditches.
