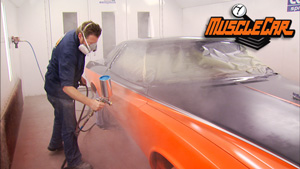
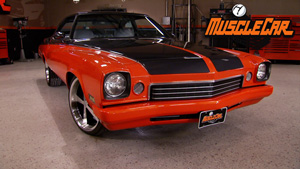
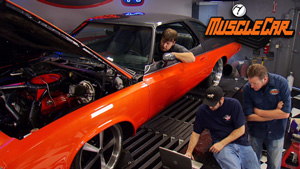
More '73 Buick Century "Blue Collar Buick" Episodes
MuscleCar Builds
Want more content like this?
Join the PowerNation Email NewsletterEpisode Transcript
Today on muscle car, it's time for some cutting and welding.
Tommy gives the buick bumpers some nip tuck. Then Rick gets a handle on things. Plus Dodge finds a new home for the 65
hemi.
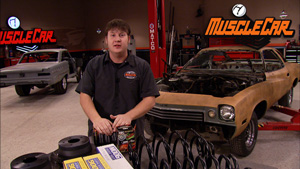
Hey guys, welcome to muscle car. Today. We're back on blue collar buick. We're gonna do some custom body mods that won't cost you much more than your time.
The Buick is a low buck project. So we've got to get creative when it comes to jazzing it up. So it's time to break out the grinders and welders.
After picking up our 73 century from a salvage yard, we replaced the roof and fix some rust spots.
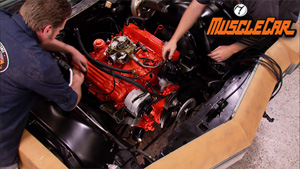
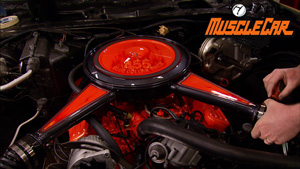
Once the buick 455 came back from the machine shop, I assembled it while Rick put a shift git and the turbo 350
with the drive train. Well, on its way, we can turn our attention to appearance. Part of the problem with mid seventies, cars were changes brought on by new government safety regulations and big ugly bumpers are one example of this. Now, prior to the urethane bumpers coming out in the late seventies, these monstrosities were the norm and they're not cool
at all, but we're gonna fix that by shaving it, narrowing it and tucking it tighter to the body for a cleaner, more modern look.
But before we do anything, we'll knock those rusty nuts loose and get the specimen up on the table.
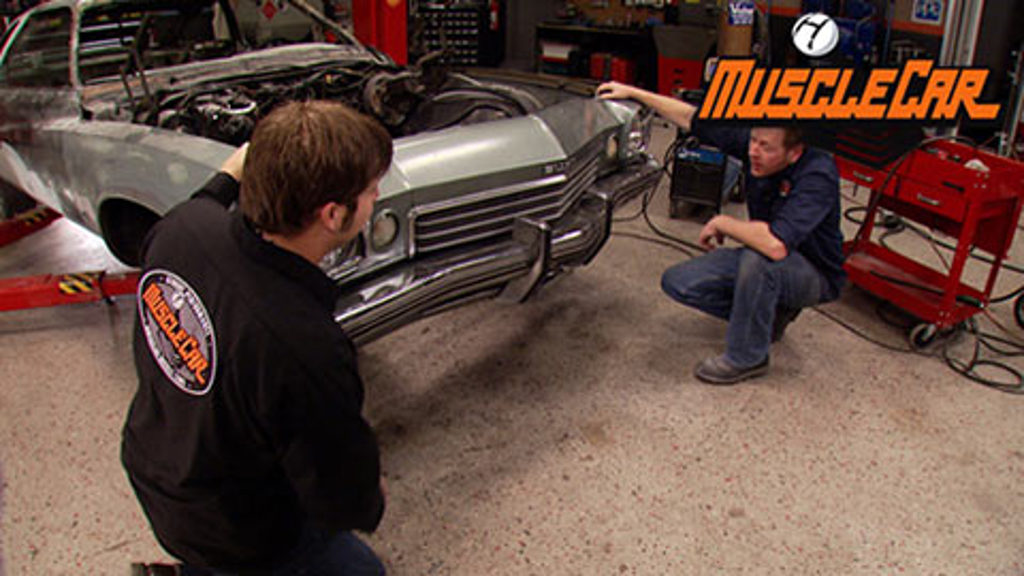
Now, we figure tucking the bumper in a total of four inches is gonna give us a look that we're after. Now four inches may seem like a lot until you start looking at how this bumper is actually mounted
because we can achieve two inches right there just by drilling a hole in the bottom of that shock collapse in the back and rel in it, an additional two inches can easily be had right in here just by chopping out some of these guts taking this mounting plate, rewilding it to the back, hanging our bumper back on it. No problem.
We're reusing bits and pieces of this assembly. So I gotta be careful taking it all apart
when drilling through the shock wear, eye protection because they are pressurized
with really smelly gas.
This is gonna get welded later. So I'm gonna clean it up now while it's still easy to get to
with the pressure released out of the shocks. The plasma makes short work of the brackets.
Next comes the bumper side of the brackets by chopping the excess off of these. We're moving that bumper back over an inch and a half in one swipe
after cleaning the slag off both sides with the grinder. I can line the brackets back up, tack them in and then we'll set the bumper back in place to see how many problems we've created.
Uh, we got problems, dude.
It's hit, ain't it?
Yeah,
it's sitting right here. Set it down for a second
that's hitting these brackets right here, dude. I ain't drop them off.
You want me to cut it? No, I'm gonna cut it.
I won't cut it.
Why I've been cutting everything else. Ok? You cut it.
Hey, guys, welcome back. Got all that metal chopped out of the way and the bumper should slide right on. We'll give it a shot anyway.
Cool. That's good. Let's drop it. Check it out.
Well, it does look a whole lot better. But dude, these, I gotta go, man, that's an old lie and this rubber impact strips gotta go too. You know, I know there's bolts behind there to hold this whole mess together, but we can shave those. That's not too big of a deal. And while we're at it, we can shorten the side of the bumper up and move it in some. That'll help a bunch that works for me. Let's snatch this dude off of here and chop it up. Good deal.
After pulling off the trim, we realized these mounting bolts also hold the bumper to the inner structure.
No big deal, clean them and plug all the back up. So we don't lose any strength,
man. We've been wanting to get rid of these bumper reds since the first time we saw this car in Good Riddance.
A
few licks of the grinder and my welds are clean. We're ready for more chopping.
If you're planning on having your bumpers, re chrome. Take a piece of advice from our friends over at advanced plating. Don't grind down your own welds. Let them do it. It'll save you some work and save you some money in the long run. But for budget reasons, we're gonna paint ours. So it's no big deal. Rick's got the bumper looking a whole lot better, but by no means are we done? We still got a trim three quarters of an inch,
both ends to tighten up the gap
that may not seem like a whole lot, but it's the little details like that that add up to make a big attitude change.
I wanna tuck in each end three quarters of an inch. So I'm using, you guessed it three quarter inch masking tape as a guide
using a combination of different width tape. You can easily measure out consistent sections of whatever it is you're hacking on.
I've swapped from the cutting disk to a flap wheel to be
the edges for better well penetration.
Well, that brought it in three quarters of an inch, but we still wanna clip its wings and also shorten up the side about four inches. But that requires a little more cutting.
I'm reusing the back part of this piece, but I'll get the excess first.
This is part of the piece I just cut off trim to fit. I'm filling in the gap with an eight inch plate. I already shake.
Next comes the big piece over four inches is coming out of here.
Just like before I'm caping it with a piece. I just cut off the end.
Now, that's a real change. This is a big chunk of metal that I cut out of there, but anything less just wouldn't have got the job done.
The front end is definitely looking a lot better, but the car still got some areas that could use some improvement. So while I finish up the front bumper, Rick's gonna show you what we've got planned for the door.
Now, when you look down the length of the car, what do you see?
Well, I see some pretty stylish body lines and some pretty dated door handles. Now, GMU the same ones through the seventies and most of the eighties. So they're pretty much a dime, a dozen, a blue collar. Well, this thing's got to stand out from a crowd. So those have got to go.
Now, you'd think that we would just shave them off and be done with it. But for you guys that have had shaved door handles before you already know what a pain they can be besides you're gonna be in at a good 200 bucks or more for solenoids and the hardware to get them to work.
So, we're just gonna swap ours out for a little more aesthetically pleasing ones. And thanks to a trip to a self service wrecking yard, these rent us less than 50 bucks.
The first step is to strip both sets of handles. I didn't get keys with the new handles, but on the bright side, the lock cylinders are cheap and easy to replace.
Now, with that out of the way we can set the new piece in. I cut that out that these tabs here can drop into place because you have to be real careful where your edges are to make sure they're not gonna interfere with anything on the back of the door. Namely your jam, just pay attention to how this thing is clocked on the door. Make sure that it lines up nice with your body lines and also don't forget about any extra holes in there. Make sure you cut your panel out low enough to allow for that to get eliminated.
When I cut these out at the wrecking yard, I made sure to give myself plenty of extra sheet metal. It's always better to have too much than to come up short and have to scab something together
using the new sheet metal as a template. I can scribe out the section of the buick that needs to go.
I'm using a combination of tools to get this job done body. So grinder, cut off, disk, carbide bits, whatever it takes, just make sure to do plenty of test fitting as you go.
Once you're happy with the fit, strip the paint out of the way and weld it in.
Well, the handle in and looking pretty cool, but you still have to get the thing to work. And that's where it's real important when you choose which handles you're gonna install in your car. Make sure that the handle that you have. See how this one here has a lever that pushes down and make sure that's compatible with your latch. Now, these latches here have another lever which needs to go down
to get the door open. So it's gonna be pretty simple to hook up.
I'm starting by putting the original rod into the new handle. Once it's set in place, I'll mark the length that needs to be to engage the original latch.
The rod needs a stop to push on the lever and I've got a low tech solution.
A washer welded in place should do the trick.
I'll trim it to my mark
and cross my fingers. That parts from two cars made over 25 years apart will actually work together.
All right, see if it works.
Uh like butter. Now, when the loss show up, I can build the linkage, you get those working too. I know they look a little bit funky right now, but that's only because they're white. The game plan is to shoot them body color and make them blend right in.
By the time blue color is done, you'll hardly even see
coming up
the hemi
that ruled the strip in 65.
Today's flashback. A 1965 Dodge Coronet Superstock.
That thing got a
hemi.
Well, yes, it does. The year was 1965. Chrysler offered its infamous engine to the public for the very first time
to get one though. You had to fork over an extra 1800 bucks
and sign away your warranty. That's because this engine was in full race tune built to Power Dodges, factory modified Superstock cornet, a
car design with one thing in mind to win at the strip.
Well, that's exactly what Harmon friend was looking for back in 65 and he was one of the lucky few to get his hands on one. The Sergio Power.
This thing feels like you're getting shot of a cannon.
He raced Harmon's way all over the Midwest drawing a lot of attention with his roller skate wheelie bars. His goal was to break a record and he promised his wife he'd sell the car as soon as he did.
The
hemi found its way into the coronet when NASCAR banned the engine after Dodge used it to completely annihilate the competition in the 64 season.
Chrysler packed up its things and poured all its resources into drag racing.
The cornet was Dodge's new mid size model and a perfect fit for a 426. Only 100 and one units were built to meet the N hr A quota.
Dodge did everything they could to lighten up the car while sticking to the new Superstock rules that meant no aluminum bodies or plexiglass windows. Dodge had a few tricks up at sleep to get around that like acid dipping, the
vendor and hood and using thinner glass for the windows. Even the race hemi
got the weight loss treatment with cast aluminum cylinder heads and a magnesium intake. Then they went to work hitting the delete button,
inner headlights and right hand wiper, delete
rear seat, delete radio and heater, delete visors dome light code hook, delete.
They even got rid of the
gear. Yeah, and noticed a funky shift pattern,
reverse neutral, 1st, 2nd draft. That's so you can manually upshift to draft without accidentally throwing it into reverse. Plus the Trey
had a high style torque converter to feed that RPM hungry
hemi.
The setup was nicknamed Dial a win because it was so dang dependable on the track. Dodge dominated the strip
that year with Bob Harris
Coronet winning the N Hr A Nationals
Harm raced his car for four years until he set an A hr a class record of 100 and 19 miles an hour at Norwalk Dragway. He kept his word and sold the car never thinking he'd see it again. But history had something else in store over a year ago, I got a phone call
and he says, you don't know us.
We know a little bit about you. We have your old race car
and I, I thought to myself what
the car had been found in a barn and bought by Danny Proctor who had it restored by the guys at Pro Classics. We started with a really big bucket of bolts and just really think we transformed into something really nice. After a year and a half of hard work, Matt made sure it was returned to exact oe specs before he showed it to harm. I had tears in my eyes
the first time I walked up to
II, I had tears in my eyes.
The car that cost him about 4400 bucks brand new. Yeah. Well, now this sucker is worth almost 200 grand.
See, I tell you she sold this thing
up next. Rick finds out what the buick has hidden under its hump.
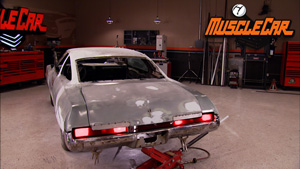
Hey guys, welcome back and we got the front and sides looking pretty cool, but the back end will definitely still need some help. And these taillights I think are the ugliest I've ever seen. So they gotta go.
We've given it a lot of thought and the design we came up with is gonna give it some style, but it's gonna require removing some metal here and adding some there.
The first things to go, the bumper rats.
Yeah, we really hate these things
next to go. This huge hump. Now humps can be good but this ain't one of them
that Hump was hiding a secret. What the heck is all this stuff? I don't know, but it's gonna go in the round file
with that, out of the way. I can see what metal needs to be trimmed to match the new profile we have planned for the bumper
and from the time we bought this car, we knew that the rear bumper had some fitment issues. Well, now you can see why
sucker's been rear rented at some point. Pretty good. That's a lot of movement
when that happened. It bent the rear bumper out of shape. Now, we don't have any fancy pants tools around here to get the sucker pushed back out. So we're gonna do it the same way you guys would do it at home, take it off, chop it apart and make it fit.
We got the bumper stripped down to just the chrome skin, mark the center. So now we're ready to cut this dude in half.
Hey, Tommy, got the brackets on us. Who will r with this thing?
Yeah.
How does it look down there?
Much better, man.
I like this one right here
here
on the nice here on the corner. It looks good too. So
cool. Let's put a little piece in there and tack it in place. Work on the other side.
Ok.
We're welding some temporary brackets in to hold the left side still while we get the right side lined up,
it lined up pretty easy. So it's time to tack it all together, pull it off and fill it in.
Cutting off that hump left a pretty mean hole that needs to be filled. I formed some eight inch plate to do the job
while I was finishing the bumper, Tommy's been extending the trunk lid.
Our plan is to give the taillights a whole new outline and these will give him a much sleeker look
time for a test fit and a little preview of what the new back end is going to look like
the changes we made today sure have improved the fit and finish and style of this old car. Not to mention, it only cost us about 50 bucks for some door handles, some welding wire and some cut off wheels. Now, we do still need some lenses to fill in our newly restyled back end and I have a couple of ideas on how to build them, but for this week, we're all out of time. So until next time, we're out of here.
Show Full Transcript
Tommy gives the buick bumpers some nip tuck. Then Rick gets a handle on things. Plus Dodge finds a new home for the 65
hemi.
Hey guys, welcome to muscle car. Today. We're back on blue collar buick. We're gonna do some custom body mods that won't cost you much more than your time.
The Buick is a low buck project. So we've got to get creative when it comes to jazzing it up. So it's time to break out the grinders and welders.
After picking up our 73 century from a salvage yard, we replaced the roof and fix some rust spots.
Once the buick 455 came back from the machine shop, I assembled it while Rick put a shift git and the turbo 350
with the drive train. Well, on its way, we can turn our attention to appearance. Part of the problem with mid seventies, cars were changes brought on by new government safety regulations and big ugly bumpers are one example of this. Now, prior to the urethane bumpers coming out in the late seventies, these monstrosities were the norm and they're not cool
at all, but we're gonna fix that by shaving it, narrowing it and tucking it tighter to the body for a cleaner, more modern look.
But before we do anything, we'll knock those rusty nuts loose and get the specimen up on the table.
Now, we figure tucking the bumper in a total of four inches is gonna give us a look that we're after. Now four inches may seem like a lot until you start looking at how this bumper is actually mounted
because we can achieve two inches right there just by drilling a hole in the bottom of that shock collapse in the back and rel in it, an additional two inches can easily be had right in here just by chopping out some of these guts taking this mounting plate, rewilding it to the back, hanging our bumper back on it. No problem.
We're reusing bits and pieces of this assembly. So I gotta be careful taking it all apart
when drilling through the shock wear, eye protection because they are pressurized
with really smelly gas.
This is gonna get welded later. So I'm gonna clean it up now while it's still easy to get to
with the pressure released out of the shocks. The plasma makes short work of the brackets.
Next comes the bumper side of the brackets by chopping the excess off of these. We're moving that bumper back over an inch and a half in one swipe
after cleaning the slag off both sides with the grinder. I can line the brackets back up, tack them in and then we'll set the bumper back in place to see how many problems we've created.
Uh, we got problems, dude.
It's hit, ain't it?
Yeah,
it's sitting right here. Set it down for a second
that's hitting these brackets right here, dude. I ain't drop them off.
You want me to cut it? No, I'm gonna cut it.
I won't cut it.
Why I've been cutting everything else. Ok? You cut it.
Hey, guys, welcome back. Got all that metal chopped out of the way and the bumper should slide right on. We'll give it a shot anyway.
Cool. That's good. Let's drop it. Check it out.
Well, it does look a whole lot better. But dude, these, I gotta go, man, that's an old lie and this rubber impact strips gotta go too. You know, I know there's bolts behind there to hold this whole mess together, but we can shave those. That's not too big of a deal. And while we're at it, we can shorten the side of the bumper up and move it in some. That'll help a bunch that works for me. Let's snatch this dude off of here and chop it up. Good deal.
After pulling off the trim, we realized these mounting bolts also hold the bumper to the inner structure.
No big deal, clean them and plug all the back up. So we don't lose any strength,
man. We've been wanting to get rid of these bumper reds since the first time we saw this car in Good Riddance.
A
few licks of the grinder and my welds are clean. We're ready for more chopping.
If you're planning on having your bumpers, re chrome. Take a piece of advice from our friends over at advanced plating. Don't grind down your own welds. Let them do it. It'll save you some work and save you some money in the long run. But for budget reasons, we're gonna paint ours. So it's no big deal. Rick's got the bumper looking a whole lot better, but by no means are we done? We still got a trim three quarters of an inch,
both ends to tighten up the gap
that may not seem like a whole lot, but it's the little details like that that add up to make a big attitude change.
I wanna tuck in each end three quarters of an inch. So I'm using, you guessed it three quarter inch masking tape as a guide
using a combination of different width tape. You can easily measure out consistent sections of whatever it is you're hacking on.
I've swapped from the cutting disk to a flap wheel to be
the edges for better well penetration.
Well, that brought it in three quarters of an inch, but we still wanna clip its wings and also shorten up the side about four inches. But that requires a little more cutting.
I'm reusing the back part of this piece, but I'll get the excess first.
This is part of the piece I just cut off trim to fit. I'm filling in the gap with an eight inch plate. I already shake.
Next comes the big piece over four inches is coming out of here.
Just like before I'm caping it with a piece. I just cut off the end.
Now, that's a real change. This is a big chunk of metal that I cut out of there, but anything less just wouldn't have got the job done.
The front end is definitely looking a lot better, but the car still got some areas that could use some improvement. So while I finish up the front bumper, Rick's gonna show you what we've got planned for the door.
Now, when you look down the length of the car, what do you see?
Well, I see some pretty stylish body lines and some pretty dated door handles. Now, GMU the same ones through the seventies and most of the eighties. So they're pretty much a dime, a dozen, a blue collar. Well, this thing's got to stand out from a crowd. So those have got to go.
Now, you'd think that we would just shave them off and be done with it. But for you guys that have had shaved door handles before you already know what a pain they can be besides you're gonna be in at a good 200 bucks or more for solenoids and the hardware to get them to work.
So, we're just gonna swap ours out for a little more aesthetically pleasing ones. And thanks to a trip to a self service wrecking yard, these rent us less than 50 bucks.
The first step is to strip both sets of handles. I didn't get keys with the new handles, but on the bright side, the lock cylinders are cheap and easy to replace.
Now, with that out of the way we can set the new piece in. I cut that out that these tabs here can drop into place because you have to be real careful where your edges are to make sure they're not gonna interfere with anything on the back of the door. Namely your jam, just pay attention to how this thing is clocked on the door. Make sure that it lines up nice with your body lines and also don't forget about any extra holes in there. Make sure you cut your panel out low enough to allow for that to get eliminated.
When I cut these out at the wrecking yard, I made sure to give myself plenty of extra sheet metal. It's always better to have too much than to come up short and have to scab something together
using the new sheet metal as a template. I can scribe out the section of the buick that needs to go.
I'm using a combination of tools to get this job done body. So grinder, cut off, disk, carbide bits, whatever it takes, just make sure to do plenty of test fitting as you go.
Once you're happy with the fit, strip the paint out of the way and weld it in.
Well, the handle in and looking pretty cool, but you still have to get the thing to work. And that's where it's real important when you choose which handles you're gonna install in your car. Make sure that the handle that you have. See how this one here has a lever that pushes down and make sure that's compatible with your latch. Now, these latches here have another lever which needs to go down
to get the door open. So it's gonna be pretty simple to hook up.
I'm starting by putting the original rod into the new handle. Once it's set in place, I'll mark the length that needs to be to engage the original latch.
The rod needs a stop to push on the lever and I've got a low tech solution.
A washer welded in place should do the trick.
I'll trim it to my mark
and cross my fingers. That parts from two cars made over 25 years apart will actually work together.
All right, see if it works.
Uh like butter. Now, when the loss show up, I can build the linkage, you get those working too. I know they look a little bit funky right now, but that's only because they're white. The game plan is to shoot them body color and make them blend right in.
By the time blue color is done, you'll hardly even see
coming up
the hemi
that ruled the strip in 65.
Today's flashback. A 1965 Dodge Coronet Superstock.
That thing got a
hemi.
Well, yes, it does. The year was 1965. Chrysler offered its infamous engine to the public for the very first time
to get one though. You had to fork over an extra 1800 bucks
and sign away your warranty. That's because this engine was in full race tune built to Power Dodges, factory modified Superstock cornet, a
car design with one thing in mind to win at the strip.
Well, that's exactly what Harmon friend was looking for back in 65 and he was one of the lucky few to get his hands on one. The Sergio Power.
This thing feels like you're getting shot of a cannon.
He raced Harmon's way all over the Midwest drawing a lot of attention with his roller skate wheelie bars. His goal was to break a record and he promised his wife he'd sell the car as soon as he did.
The
hemi found its way into the coronet when NASCAR banned the engine after Dodge used it to completely annihilate the competition in the 64 season.
Chrysler packed up its things and poured all its resources into drag racing.
The cornet was Dodge's new mid size model and a perfect fit for a 426. Only 100 and one units were built to meet the N hr A quota.
Dodge did everything they could to lighten up the car while sticking to the new Superstock rules that meant no aluminum bodies or plexiglass windows. Dodge had a few tricks up at sleep to get around that like acid dipping, the
vendor and hood and using thinner glass for the windows. Even the race hemi
got the weight loss treatment with cast aluminum cylinder heads and a magnesium intake. Then they went to work hitting the delete button,
inner headlights and right hand wiper, delete
rear seat, delete radio and heater, delete visors dome light code hook, delete.
They even got rid of the
gear. Yeah, and noticed a funky shift pattern,
reverse neutral, 1st, 2nd draft. That's so you can manually upshift to draft without accidentally throwing it into reverse. Plus the Trey
had a high style torque converter to feed that RPM hungry
hemi.
The setup was nicknamed Dial a win because it was so dang dependable on the track. Dodge dominated the strip
that year with Bob Harris
Coronet winning the N Hr A Nationals
Harm raced his car for four years until he set an A hr a class record of 100 and 19 miles an hour at Norwalk Dragway. He kept his word and sold the car never thinking he'd see it again. But history had something else in store over a year ago, I got a phone call
and he says, you don't know us.
We know a little bit about you. We have your old race car
and I, I thought to myself what
the car had been found in a barn and bought by Danny Proctor who had it restored by the guys at Pro Classics. We started with a really big bucket of bolts and just really think we transformed into something really nice. After a year and a half of hard work, Matt made sure it was returned to exact oe specs before he showed it to harm. I had tears in my eyes
the first time I walked up to
II, I had tears in my eyes.
The car that cost him about 4400 bucks brand new. Yeah. Well, now this sucker is worth almost 200 grand.
See, I tell you she sold this thing
up next. Rick finds out what the buick has hidden under its hump.
Hey guys, welcome back and we got the front and sides looking pretty cool, but the back end will definitely still need some help. And these taillights I think are the ugliest I've ever seen. So they gotta go.
We've given it a lot of thought and the design we came up with is gonna give it some style, but it's gonna require removing some metal here and adding some there.
The first things to go, the bumper rats.
Yeah, we really hate these things
next to go. This huge hump. Now humps can be good but this ain't one of them
that Hump was hiding a secret. What the heck is all this stuff? I don't know, but it's gonna go in the round file
with that, out of the way. I can see what metal needs to be trimmed to match the new profile we have planned for the bumper
and from the time we bought this car, we knew that the rear bumper had some fitment issues. Well, now you can see why
sucker's been rear rented at some point. Pretty good. That's a lot of movement
when that happened. It bent the rear bumper out of shape. Now, we don't have any fancy pants tools around here to get the sucker pushed back out. So we're gonna do it the same way you guys would do it at home, take it off, chop it apart and make it fit.
We got the bumper stripped down to just the chrome skin, mark the center. So now we're ready to cut this dude in half.
Hey, Tommy, got the brackets on us. Who will r with this thing?
Yeah.
How does it look down there?
Much better, man.
I like this one right here
here
on the nice here on the corner. It looks good too. So
cool. Let's put a little piece in there and tack it in place. Work on the other side.
Ok.
We're welding some temporary brackets in to hold the left side still while we get the right side lined up,
it lined up pretty easy. So it's time to tack it all together, pull it off and fill it in.
Cutting off that hump left a pretty mean hole that needs to be filled. I formed some eight inch plate to do the job
while I was finishing the bumper, Tommy's been extending the trunk lid.
Our plan is to give the taillights a whole new outline and these will give him a much sleeker look
time for a test fit and a little preview of what the new back end is going to look like
the changes we made today sure have improved the fit and finish and style of this old car. Not to mention, it only cost us about 50 bucks for some door handles, some welding wire and some cut off wheels. Now, we do still need some lenses to fill in our newly restyled back end and I have a couple of ideas on how to build them, but for this week, we're all out of time. So until next time, we're out of here.
