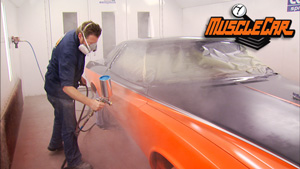
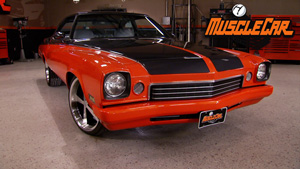
More '73 Buick Century "Blue Collar Buick" Episodes
MuscleCar Builds
Want more content like this?
Join the PowerNation Email NewsletterParts Used In This Episode
Matco Tools
Spot Weld Drill Kit.
The Eastwood Company
The Pro Glass Polishing Kit includes 1 lb. Rhodite polish, glass polishing wheel and instructions.
Episode Transcript
Today on muscle car blue collar Buick's backside is getting some attention. Rick gets creative with a hot office item and Tommy warms up his buffer for some glass rehab. Plus an Elco that hauls a lot more than lumber.
Hey, welcome to muscle car. Red sled will be leaving to go to the upholstery shop soon. So we've got to get it wired up and the glass installed. I've already started laying out the harness, but old Rick just won't stay away from the buick. I'd love to give you a hand of the wiring.
No, I wouldn't.
So we got a buick over here that needs some taillight lenses. So I'm gonna build these before I go give Tommy a hand
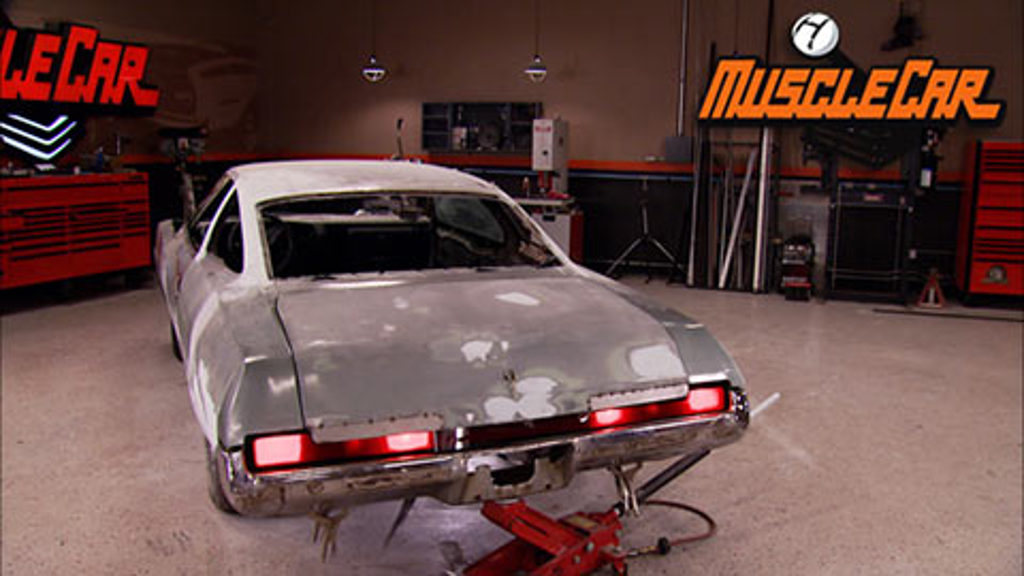
last time. Project. Blue collar Buick got its first body mods when we updated the door handles and chopped a ton of steel out of the front bumper. Next, we started giving the back end its new profile
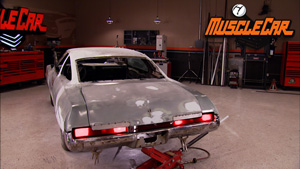
and we were hoping to straighten out this bent rear panel and start building some tail light lenses, but we got to looking at it and it's bent a little worse than we thought add in the rust damage and it's just too far gone. It's gonna be faster and easier to just chop it off and build a new one. Besides, we have some brand new sheet metal to play with.
Step one is to find the edge of the sheet metal that needs to be replaced, which means getting all those years of crud out of the way.
Macos spot weld cutter will take care of the pinch weld, but a drill bit would work here too.
Next, I'm marking off a quarter inch inside the factory bin. This will leave a lip to weld. The new panel to
the pen mark is just a backup in case the tape gets pulled off. As I'm cutting
after I get the straight cuts with the disk, I'll hit the corners with the air soft, then finish it all off with the air chisel
with the old panel out of the way I can smooth off the bumps with a flap wheel.
All right, we got the old sheet metal chopped out of the way. I got some new pieces here that I'm building. They're pretty basic.
It's a flat piece with a 90 degree break trying to keep this simple.
And this will give us a nice fresh sheet metal and then we can start finally building our tail lights.
These panels are pretty flat with the exception of the centerpiece, which is why I had to make it in three sections,
the bend on the bottom edge was made with a brake, but the rest will have to be hand formed.
The pliers are clamped where I need the body line to be and the hammer forces the rest into shape.
A dolly helps out with the final curves,
some gentle positioning and it's almost there.
Just need to trim that a little bit.
That's good.
Looks bitching
to prep the new metal for welding. A hole punch is the quickest way to go. Don't have one. No problem. Just break out the drill, clico fasteners will hold it in place while I tack it.
The old tail panel has one last purpose in life and that's to help me position the new tail light openings.
I want the new openings to be slightly smaller than the originals. So I'm shrinking the top and sides using three quarter inch tape as a guide.
I know an aerosol may be slow and noisy, but it's the best way to get the precise cut that I need here.
I
built these frames here at a half inch square tubing. It's gonna serve three different purposes. One, it gives me a mounting surface for the new lenses. Two, it's gonna space that lens out so it doesn't look as sunk in as the original taillights did. I hated that. And three, it's gonna give me a way
to hold my buckets in place.
I prebuilt the outer frames, but I saved the center one to show you guys how it was done.
It's very important to make sure the frame is square as you will check and recheck as you go. Or you may end up with a frame that won't fit your panel.
Once it's all melted together, time to drill some holes for the mountain studs drilling completely through the frame, instead of just one side will help the studs mount straight and give a hole on the backside to plug weld into
before the studs get welded in place. Use the frame and a center punch to mark where the mounting holes in the panel will need to go.
I made these studs by cutting the heads off some bolts we had laying around the shop, make sure the studs are slightly recessed to give a pocket for the welds to fill.
I'll drill the holes in my Primark panel and see how it fits.
Here we go. I got my frames looking pretty nice.
I know we're placing that rear panel, took us on a little bit of a detour, but we're finally ready to put some lenses on the back end of this thing.
Hey, Tommy, you wanna give me a hand uh acquiring some materials and I don't like the way that sounds, but I definitely could use a break from wiring up a red sled. What exactly do you have in mind? Uh Trust me.
Uh
oh,
coming up, the guys put their sticky fingers to use for a good cause. And later a muscle truck that owns the road
sometimes building on a budget. That means you have to use all your available resources.
No, this is an automotive lens prism, but the price is right and it'll basically do the exact same thing. Diffuse the light, cover it up with some colored plexiglass
and you'll end up with a taillight lens in any shape you'd ever want.
The frames are a little smaller than the actual lenses are going to be. I did this because it's a lot easier to get the final shape right with a piece of plastic than with a piece of metal
with the overall size marked out. It's time to start cutting the actual lens. Now this stuff breaks really easy. So make sure to support the entire piece
I'm describing, not cutting all the way through. So I don't have to worry about damaging the table.
Beautiful
a dye grinder will tweak it into final shape
and with the textured plastic trimmed to fit, I came back and made duplicates out of flat plexiglass. Now, this will be a lot easier to paint. Plus it's gonna help protect the delicate prison plastic behind it.
Now, since this is gonna be the top layer of our tail lights,
I'm gonna use it to mask the parts off that I don't wanna see. Namely the frames by painting a black edge all the way around
using the trunk lid and frames as a guide. I could lay out the shape
and there you have the shape of the new red area in the lens.
Right. If it's gonna be all black
before I headed into the booth, I masked off the area that'll be red, leaving the rest exposed and ready for some black base coats.
After several coats and 20 minutes of drying time, the tape comes off and I'm ready for the red.
I'm coating the entire lens black and all with red candy. Now, true candy is invisible over black. But if you're using over reduced opaque red to do this, you're gonna need to mask off the black first spray. As many coats as you need to make them as dark as you want. Then follow up with three coats of clear.
Once the last coat of clear set up, I use some windshield urethane to glue the two halves the lenses together and stick them on to the frames. Now, these, along with the modifications we did to the trunk lid and the bumper. It's got this thing looking more like a custom and a lot less like
Kojak old ride. Now, the center panel is dark now, but trust me, I did not go through all that trouble just to leave it looking like that.
But Tommy needs my hand on red sled, so I'll have to wait for another day
after the break. There's no mistake in this big block beast for just any old Elco.
Today's flashback. A 1968 El Camino ss.
It's the age old question. A car or truck.
Well, we just call it a cru
make that a muscle crust.
The S S3 96 turned this 68 El Camino into one Hairy Hauler.
The name means the road
and this baby owns it.
Yeah. And if you saw it coming up in your rearview mirror, you might think a Malibu was on your tail.
That's because they've got the exact same front end. Chevy took its Malibu wagon and ripped off the back roof section.
This one's in primo condition which is hard to find since only about 5000 were made to begin with.
So getting behind the wheel of one is truly taking the road less travel.
The
El Camino debuted way back in 1959 on the full size Impala platform. A Chevy's answer to the Ranchero Ford responded in 1960 with a shrunk down Falcon Ranchero and it literally knocked the El Camino off the market for three years.
In 64 it returned as part of a brand new mid size
cheve
line.
It was a huge hit out selling the ranch arrow nearly 2 to 1.
It got the super sport treatment for the first time in 68 the performance hood
blacked out grill and tailgate and badges all over the place signaled it could do a lot more than just haul lumber.
Plus you had your choice of three versions of the 396 big block
that went all the way up to 375 horsepower.
He could say adios to the fairlane or roadrunner any day.
It also came with a 12 volt rear end. But for some reason, you couldn't get heavy duty suspension like on the Malibu Ss,
this was the only year the El Camino S S3 96 with its own model. So you can easily identify a true one by its VIN.
The third number should be an eight
68. Also brought some Coke bottle style curves to the car with more rounded side panels and a raked front overhang. It was longer too by about 10 inches. Most of which showed up in the truck bed
inside. It's a cozy fit with just enough room behind the seats for a spare tire and a hiding spot for your gear.
This one doesn't have the four speed, but that's actually a good thing. The shift linkage was pretty lousy that year. A rare option was the unusual roller tack, which is just as hard to read. Now as it was back then,
the super sport package continued on the El Camino for almost 20 years until the road finally came to an end in 1987.
Today, the SSL Camino is often overlooked in the history books,
whatever you call it, car,
truck or C truck. This is one serious piece of muscle
coming up, got scratches in your glass.
Tommy shows you the right way to rub one out.
You're watching Muscle Car for a DVD copy of this episode. Just go to Power Block tv.com and order your copy for just 595 plus shipping and handling. Start your own muscle car collection delivered right to your door from the power block.
Hey, welcome back while Rick's been chopping away at the tail lights on the buick. I've just about got the wiring installed on red sled. I've done all I can do for now. So I thought I'd get the glass installed before the interior goes in it. We're planning on putting new glass in, but no one makes this huge black glass. So we're gonna have to reuse it.
The problem is it doesn't look so great. It's a 50 year old piece. So it's well worn and has a few scratches, but we can fix it with the right materials
build on a budget muscle car projects that save you time and money.
Many imperfections can be sanded and polished out like wiper scrapes, scratches and Haze. Eastwood's glass polishing kit can save you some serious dough if you're trying to decide whether to replace or refurbish. A rare piece of glass like ours.
I've got the glass nice and clean. So I'm ready to
tackle the scratch. If your fingernail catches on it, it's too deep for the polish and will need sanding. I'm marking the scratch on the underside of the glass so I can keep track of where it is
starting with the courses of Eastwood's three disc spray on some water and use AD A to start smoothing out the area of the scratch.
Once you can't fill it more with your fingernail, move on to the medium disk, then finish it with the fine dis,
make sure to keep the area nice and wet with a spray bottle as you work or you could damage the glass
once the scratch is completely gone, use the road
out compound and buffing attachment to polish out the surface of the entire window.
Fine scratches and haze don't need to be sanded at all. They can be buffed out along with the rest of the glass
that should do it. Let's see what we got.
Get this compound off.
Boy, I don't think it's bad at all.
Shoot now,
man, that looks good.
Once all the scratches are sanded out, go back over the whole thing with the road out compound and polish it till it looks well like glass. This is a huge black glass. So I've got a lot more polishing to do, but we're all out of time. So until next week, y'all keep it between the ditches.
Show Full Transcript
Hey, welcome to muscle car. Red sled will be leaving to go to the upholstery shop soon. So we've got to get it wired up and the glass installed. I've already started laying out the harness, but old Rick just won't stay away from the buick. I'd love to give you a hand of the wiring.
No, I wouldn't.
So we got a buick over here that needs some taillight lenses. So I'm gonna build these before I go give Tommy a hand
last time. Project. Blue collar Buick got its first body mods when we updated the door handles and chopped a ton of steel out of the front bumper. Next, we started giving the back end its new profile
and we were hoping to straighten out this bent rear panel and start building some tail light lenses, but we got to looking at it and it's bent a little worse than we thought add in the rust damage and it's just too far gone. It's gonna be faster and easier to just chop it off and build a new one. Besides, we have some brand new sheet metal to play with.
Step one is to find the edge of the sheet metal that needs to be replaced, which means getting all those years of crud out of the way.
Macos spot weld cutter will take care of the pinch weld, but a drill bit would work here too.
Next, I'm marking off a quarter inch inside the factory bin. This will leave a lip to weld. The new panel to
the pen mark is just a backup in case the tape gets pulled off. As I'm cutting
after I get the straight cuts with the disk, I'll hit the corners with the air soft, then finish it all off with the air chisel
with the old panel out of the way I can smooth off the bumps with a flap wheel.
All right, we got the old sheet metal chopped out of the way. I got some new pieces here that I'm building. They're pretty basic.
It's a flat piece with a 90 degree break trying to keep this simple.
And this will give us a nice fresh sheet metal and then we can start finally building our tail lights.
These panels are pretty flat with the exception of the centerpiece, which is why I had to make it in three sections,
the bend on the bottom edge was made with a brake, but the rest will have to be hand formed.
The pliers are clamped where I need the body line to be and the hammer forces the rest into shape.
A dolly helps out with the final curves,
some gentle positioning and it's almost there.
Just need to trim that a little bit.
That's good.
Looks bitching
to prep the new metal for welding. A hole punch is the quickest way to go. Don't have one. No problem. Just break out the drill, clico fasteners will hold it in place while I tack it.
The old tail panel has one last purpose in life and that's to help me position the new tail light openings.
I want the new openings to be slightly smaller than the originals. So I'm shrinking the top and sides using three quarter inch tape as a guide.
I know an aerosol may be slow and noisy, but it's the best way to get the precise cut that I need here.
I
built these frames here at a half inch square tubing. It's gonna serve three different purposes. One, it gives me a mounting surface for the new lenses. Two, it's gonna space that lens out so it doesn't look as sunk in as the original taillights did. I hated that. And three, it's gonna give me a way
to hold my buckets in place.
I prebuilt the outer frames, but I saved the center one to show you guys how it was done.
It's very important to make sure the frame is square as you will check and recheck as you go. Or you may end up with a frame that won't fit your panel.
Once it's all melted together, time to drill some holes for the mountain studs drilling completely through the frame, instead of just one side will help the studs mount straight and give a hole on the backside to plug weld into
before the studs get welded in place. Use the frame and a center punch to mark where the mounting holes in the panel will need to go.
I made these studs by cutting the heads off some bolts we had laying around the shop, make sure the studs are slightly recessed to give a pocket for the welds to fill.
I'll drill the holes in my Primark panel and see how it fits.
Here we go. I got my frames looking pretty nice.
I know we're placing that rear panel, took us on a little bit of a detour, but we're finally ready to put some lenses on the back end of this thing.
Hey, Tommy, you wanna give me a hand uh acquiring some materials and I don't like the way that sounds, but I definitely could use a break from wiring up a red sled. What exactly do you have in mind? Uh Trust me.
Uh
oh,
coming up, the guys put their sticky fingers to use for a good cause. And later a muscle truck that owns the road
sometimes building on a budget. That means you have to use all your available resources.
No, this is an automotive lens prism, but the price is right and it'll basically do the exact same thing. Diffuse the light, cover it up with some colored plexiglass
and you'll end up with a taillight lens in any shape you'd ever want.
The frames are a little smaller than the actual lenses are going to be. I did this because it's a lot easier to get the final shape right with a piece of plastic than with a piece of metal
with the overall size marked out. It's time to start cutting the actual lens. Now this stuff breaks really easy. So make sure to support the entire piece
I'm describing, not cutting all the way through. So I don't have to worry about damaging the table.
Beautiful
a dye grinder will tweak it into final shape
and with the textured plastic trimmed to fit, I came back and made duplicates out of flat plexiglass. Now, this will be a lot easier to paint. Plus it's gonna help protect the delicate prison plastic behind it.
Now, since this is gonna be the top layer of our tail lights,
I'm gonna use it to mask the parts off that I don't wanna see. Namely the frames by painting a black edge all the way around
using the trunk lid and frames as a guide. I could lay out the shape
and there you have the shape of the new red area in the lens.
Right. If it's gonna be all black
before I headed into the booth, I masked off the area that'll be red, leaving the rest exposed and ready for some black base coats.
After several coats and 20 minutes of drying time, the tape comes off and I'm ready for the red.
I'm coating the entire lens black and all with red candy. Now, true candy is invisible over black. But if you're using over reduced opaque red to do this, you're gonna need to mask off the black first spray. As many coats as you need to make them as dark as you want. Then follow up with three coats of clear.
Once the last coat of clear set up, I use some windshield urethane to glue the two halves the lenses together and stick them on to the frames. Now, these, along with the modifications we did to the trunk lid and the bumper. It's got this thing looking more like a custom and a lot less like
Kojak old ride. Now, the center panel is dark now, but trust me, I did not go through all that trouble just to leave it looking like that.
But Tommy needs my hand on red sled, so I'll have to wait for another day
after the break. There's no mistake in this big block beast for just any old Elco.
Today's flashback. A 1968 El Camino ss.
It's the age old question. A car or truck.
Well, we just call it a cru
make that a muscle crust.
The S S3 96 turned this 68 El Camino into one Hairy Hauler.
The name means the road
and this baby owns it.
Yeah. And if you saw it coming up in your rearview mirror, you might think a Malibu was on your tail.
That's because they've got the exact same front end. Chevy took its Malibu wagon and ripped off the back roof section.
This one's in primo condition which is hard to find since only about 5000 were made to begin with.
So getting behind the wheel of one is truly taking the road less travel.
The
El Camino debuted way back in 1959 on the full size Impala platform. A Chevy's answer to the Ranchero Ford responded in 1960 with a shrunk down Falcon Ranchero and it literally knocked the El Camino off the market for three years.
In 64 it returned as part of a brand new mid size
cheve
line.
It was a huge hit out selling the ranch arrow nearly 2 to 1.
It got the super sport treatment for the first time in 68 the performance hood
blacked out grill and tailgate and badges all over the place signaled it could do a lot more than just haul lumber.
Plus you had your choice of three versions of the 396 big block
that went all the way up to 375 horsepower.
He could say adios to the fairlane or roadrunner any day.
It also came with a 12 volt rear end. But for some reason, you couldn't get heavy duty suspension like on the Malibu Ss,
this was the only year the El Camino S S3 96 with its own model. So you can easily identify a true one by its VIN.
The third number should be an eight
68. Also brought some Coke bottle style curves to the car with more rounded side panels and a raked front overhang. It was longer too by about 10 inches. Most of which showed up in the truck bed
inside. It's a cozy fit with just enough room behind the seats for a spare tire and a hiding spot for your gear.
This one doesn't have the four speed, but that's actually a good thing. The shift linkage was pretty lousy that year. A rare option was the unusual roller tack, which is just as hard to read. Now as it was back then,
the super sport package continued on the El Camino for almost 20 years until the road finally came to an end in 1987.
Today, the SSL Camino is often overlooked in the history books,
whatever you call it, car,
truck or C truck. This is one serious piece of muscle
coming up, got scratches in your glass.
Tommy shows you the right way to rub one out.
You're watching Muscle Car for a DVD copy of this episode. Just go to Power Block tv.com and order your copy for just 595 plus shipping and handling. Start your own muscle car collection delivered right to your door from the power block.
Hey, welcome back while Rick's been chopping away at the tail lights on the buick. I've just about got the wiring installed on red sled. I've done all I can do for now. So I thought I'd get the glass installed before the interior goes in it. We're planning on putting new glass in, but no one makes this huge black glass. So we're gonna have to reuse it.
The problem is it doesn't look so great. It's a 50 year old piece. So it's well worn and has a few scratches, but we can fix it with the right materials
build on a budget muscle car projects that save you time and money.
Many imperfections can be sanded and polished out like wiper scrapes, scratches and Haze. Eastwood's glass polishing kit can save you some serious dough if you're trying to decide whether to replace or refurbish. A rare piece of glass like ours.
I've got the glass nice and clean. So I'm ready to
tackle the scratch. If your fingernail catches on it, it's too deep for the polish and will need sanding. I'm marking the scratch on the underside of the glass so I can keep track of where it is
starting with the courses of Eastwood's three disc spray on some water and use AD A to start smoothing out the area of the scratch.
Once you can't fill it more with your fingernail, move on to the medium disk, then finish it with the fine dis,
make sure to keep the area nice and wet with a spray bottle as you work or you could damage the glass
once the scratch is completely gone, use the road
out compound and buffing attachment to polish out the surface of the entire window.
Fine scratches and haze don't need to be sanded at all. They can be buffed out along with the rest of the glass
that should do it. Let's see what we got.
Get this compound off.
Boy, I don't think it's bad at all.
Shoot now,
man, that looks good.
Once all the scratches are sanded out, go back over the whole thing with the road out compound and polish it till it looks well like glass. This is a huge black glass. So I've got a lot more polishing to do, but we're all out of time. So until next week, y'all keep it between the ditches.
