More '73 Buick Century "Blue Collar Buick" Episodes
MuscleCar Builds
Want more content like this?
Join the PowerNation Email NewsletterEpisode Transcript
Today on muscle car, the lowdown on how to inspect and update your front end parts. Get a lesson on points distributors and how to convert one to electronic. And we're making a beeline back in time with a honey of a dodge.
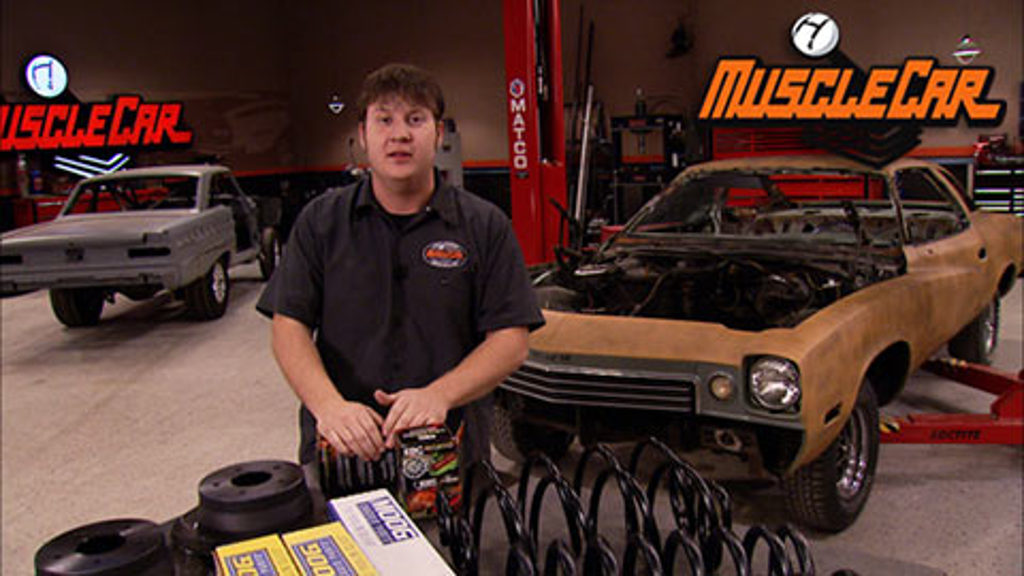
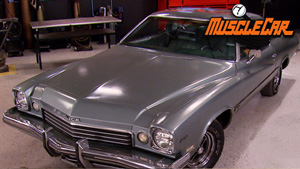
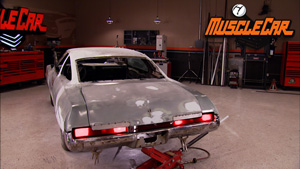
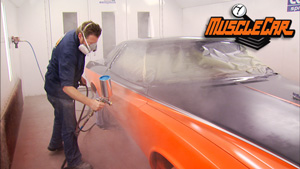
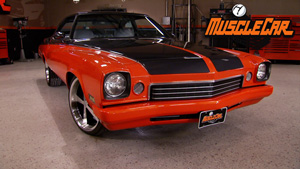
Hey guys, welcome to muscle car. We got blue collar buick out of the booth with the first coat of primer laid down and now it's time to get it up on the rack, do some suspension work. Yeah, this thing has come a long way from that underpowered oversized land barge that we started with.
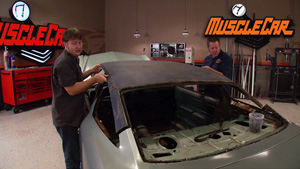
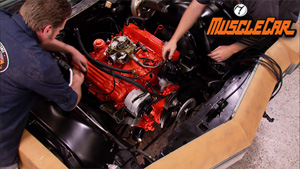
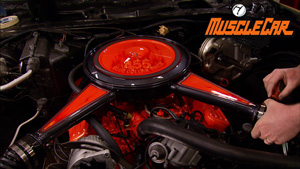
After we plucked our budget beauty from the salvage yard, we replaced the roof, found a buick 455 and rebuilt it with a few upgrades.
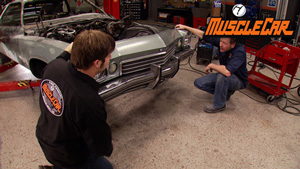
Installed a shift kit into the turbo 350 updated the door handles, put the bumpers on a diet and came up with some red tail lights.
And when we first picked up our buick, it actually drove pretty good for a car its age, but after inspecting the suspension,
yeah, I definitely need some bushings. But when we got the thing apart, we're gonna replace all the suspension components. And that's because we want a good solid foundation for future upgrades. It's important to inspect your car suspension, not just to figure out what parts you need,
but for safety, if you've got a project that you're tinkering on during the weekends, but driving it during the week, you need to make sure it's safe.
You can get around to rebuild the front end.
You can check the ball sockets on your center link and your tie rod ends by gently rocking the steering wheel back and forth.
The tie rod looks like it's hanging in there. But the pitman arm is definitely moving more than a center link. So this socket is bad. It might be all right for a little while, but it could get real bad real quick. So if your plan is not to replace it, be sure to keep an eye on it.
If you raise the car up, you can check the ball joints too. Just get a nice long pry bar, stick it in between the frame and your spindle
and check for any kind of movement. Ideally, there shouldn't be any play in there at all. If you just have a little bit of movement, then that means that it needs to be replaced. This is a perfect example. But if you have a lot of movement, then that could mean that it's gonna blow apart and that's a bad thing. Another thing that needs to be checked is the idler arm.
It can have a little bit of play, but that's a little excessive. So it needs to be replaced.
And while you're inspecting your suspension, don't forget to check out your a ambushings if they're cracking and coming apart, especially something this bad, be sure to replace them.
Knocking the front end apart is pretty straightforward. Find a nut and remove it.
The steering linkage comes off all in one piece. We'll explain why later.
I knew it hasn't been off in a while.
The down and dirty, but safe way to get your springs off. If you don't have a spring compressor is to break out the torch. There's a lot of tension in these springs.
So the trick is to release that energy a little bit at a time.
Once they're relaxed, you can cut them out.
I've got the control arms all cleaned up and ready to swap out the bushings. I'm gonna be using a hydraulic press because I got so many of them and I don't wanna be here all day
now. You could do this with a hammer, but you can save yourself a lot of time and frustration by carrying them to your local line of shop and having them do it.
A press is one of the simplest tools in the shop, but also one of the most dangerous with 25 tons of pressure on tap. If something goes wrong, it will already be too late.
Make sure you have the item properly situated. On the base and everything is perfectly aligned. If not, you could have something ricocheting off your nugget before you even realize it
with stubborn bushings. Be sure not to distort the A R or getting the new ones in could be nearly impossible and could even affect your alignment
when pressing the new bushing in. Be sure to reinstall the shaft in the right direction
to be safe. It's a good idea to label them before you pull them out.
Since Tom, he's got the bush and swapped out in his upper arms. I'm going to go ahead and take care of the upper ball joints while he does the lower A arms. They can tell by these rivets. These are still the original ball joints. No big deal. That's what we have grinders for.
You can use a grinder, but I'm using a flat wheel for this. Just be sure not to take any chunks out of the A R.
Once the ground flat, I can push the rivets out with an air chisel,
all new A ball joints. Bolton.
That's how I knew the old ones were the originals.
Well, they go in a whole lot easier than they come out. That's for sure.
I'm gonna go ahead and swap out the rest of these ball joints, put some black paint on them and start putting the front end together on the buick, but don't go anywhere because after the break, we're gonna be taking blue color one step closer to the street
coming up, Rick ties up some loose ends and Tommy packs it in.
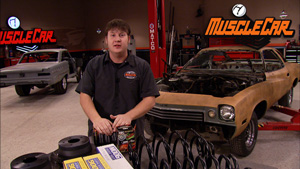
Hey, welcome back. We've got the A arms and the spindles reinstalled. We've also upgraded to a set of Detroit Eaton lowering springs that are big block specific and at 100 and 60 bucks a set that's some money well spent because they're gonna give our buick a whole new attitude. Well, now we can go ahead and start assembling our new
fire rods. I want the alignment to be as close as possible. That way we can safely drive it down to the alignment shop when our buick gets back on the road. Now, if I was only replacing one end,
all you'd have to do is count the threads and screw the new one in the match, that'll get you close enough to drive it. But since I'm replacing the entire thing, I'll go ahead and measure the overall length.
This is why we dropped the entire steering linkage off in one piece. Now, it's just a matter of assembling the new parts to match the old,
try to keep the adjustment sleeves centered between the two tie rod ends. This will give the most room for adjustment at the alignment shop
with the tire rods assembled. They can be attached to the center link
and don't forget the cotter pins.
Duh.
Last on is the idler
arm.
I'll cinch it down
in it
and it's ready to get tucked up under the buick's chin.
We're upgrading to E BC brake rotors up front. They're slotted and drilled for better stopping power and they're economical to fit into our budget. We're installing new bearings while we got everything apart, but they've got to be packed. You could use a bearing packer, but I'm gonna show you guys how to do it the old fashioned way
time to grease your palm.
There is some bearing grease that is
the process is really very simple. Just press the bearing cage into your palm until the grease squishes up through the top. Just make sure they're packed solid. The larger bearing goes on the backside of the rotor followed by a new seal. Be careful not to deform it as you tap it in a quick wipe with some grease and we're on to the front
pack some more grease inside the rotor before dropping in the outer bearing.
And we replace the brake lines too because it's pretty hard to tell if these things are bad just by looking at them and always replace them in pairs. That way you don't end up with a weak link in the system.
One more upgrade that will improve the overall performance of the brake system are these E BC brake pads. We're gonna get these installed and button up the rest of the front end. Don't y'all go anywhere. We got a lot more most car coming up
after the break. A rare, stripped down hemi
charger that had the test track buzzard
restore your classic pick up SUV or suburban at shop, classic truck, parts.com. We stock anything and everything for Ford. Chevy GM and Dodge trucks, complete bodies, complete interiors, fuel systems, hard parts, chrome trim accessories and more log on now and save
the ultimate gearhead deal. American muscle cars volume 12 and three, the ultimate muscle car DVD collection only 1995 each or save and buy all three for 4995 log on today at Power Block store.com.
Today's flashback, a 1971 Dodge Charger Super B.
Ever wonder what happened to those test cars you saw in magazines years ago?
Well, a lot of them ended up on the scrap heap but not this one.
It survived. Thanks to one persistent fan who kept bugging his local Dodge dealer until he got the exact car that he saw in the magazine.
It's a 71 Charger super
Vat and was featured as part of the Dodge for gate
in the December 1970 issue of Motor Trend
armed with a 426 hemi
and a super track pack 410 gears and a day in a rear end. This Super Bee was turned into a killer Bee.
Only 22 have got the hemi
option that year.
It would cost you an extra 883 bucks but was well worth it. Pounding out 425 horses at five grand. It could hit 60 in 5.8 seconds a full second faster than the full 46 pack for full on the salt mode. The Ram Charger hood scoop could be triggered a first time option on the car.
It boosted the top speed by about 2.5 miles an hour.
According to original test, 71 was the first and only year the Super B appeared on the Charger platform
since it debuted in 68. It had always been a coronet but Dodge was streamlining its muscle car lines for 71 cornets got saddled with family car duty while Chargers got all the goodies.
The Super B ended up as a budget muscle option right under the RT
for the guy who wanted raw power with
out luxury, you could save about 400 bucks and still get all the performance of an RT.
Third. Gen Chargers had an aggressive new fuselage look with more muscular rear fenders, a split grill and a dramatic sea pillar arch. Super Bees came standard with racing stripes. A swarm of badges and some sweet looking exhaust tips,
rally suspension and poly glass rubber were also no cost extras
inside. It's just plain James bent seat, rally gauges and a column shifter. Original test drive showed it got the best performance when shifting by hand at 5800 RPM.
The car is now in the hands of collector Tim Wen
and the car hasn't changed a bit.
In fact, it's even wearing its original factory paint,
a high impact color called butterscotch that would cost you get this an extra 13 bucks.
The car just runs like it was when it's new, the, the, the, the 426 hemi,
when you, when you put your foot in it, it's instant power. It's almost a scary car to drive. Tim's got a high full of BS with just about every option you can think of from hideaway headlights to a cassette player, complete with a microphone. I don't believe any two chargers are like you took an order pad back then
and you built your car, you individualized your car. Only about 5000 Super Bees were ordered that year though the lowest number in its short lifespan, 1971 would signal the end of an era. Not only was it the last year for the Super Bee, but the
hemi
well,
it said goodbye to
now, don't you buzz
off? There's still more muscle car ahead
up next. Don't know much about muscle car distributors.
Ah, you'll get the point.
You're watching muscle car for a DVD copy of this episode. Just go to Power Block tv.com and order your copy for just 595 plus shipping and handling. Start your own muscle car collection delivered right to your door from the power block,
the
all new power block directory.com, your source for everything. Automotive, find all the parts and brands. Thousands of racetracks from Daytona to Long Beach, plus events, clubs and more. Find the stuff you're looking for. The
all new power block directory.com. Your source for everything. Automotive.
My power block is a 40,000 member community where you can meet new friends or connect with old ones. Share your pictures and videos. Join over 400 groups to get help with project advice. Find your people at my power block.com.
Hey, welcome back to the shop. The car's ignition system is critical to how it runs a key part of that system is the distributor. If your car is a pre 74 it came with the point style distributor instead of the HE I or electronic style that came on all American cars since the mid seventies, HEIS are a common upgrade since they have more accurate spark, higher RPM range and more reliable. But if you're doing an original restoration, you'll probably want a period. Correct points distributor.
Some of you younger crowd out there may have never even seen one of these. If you're used to the user friendly A T I,
it may seem like a lot of trouble. You can't just drop them in and go, you've got to set the points and tune them, but it's really not that hard.
If you're reusing an old distributor, you'll need to check the condition of the points first, remove the rotor. Now you can get to the screws that hold the points in.
When checking points, you wanna look at two areas, the contact should have no corrosion and they shouldn't look burned or pitted.
Also, make sure this plastic tab that actuates points not worn down.
This one pretty good shape.
If the tab is worn, you have to replace the points. But that's no big deal because these things run about 15 bucks. If your only problem is dirty contacts, you can clean them up and reuse them.
You can use a points file but emery cloth or fine grit, sandpaper work too.
Just rub gently until both sides are clean and flat, then reinstall them the same way they came out
whether you're using new or used points, you need to set the gap using a feeler gauge. Most points set in between 18 and 22,000. I like to set mine at a loose 18 tight 19 that way as the points where it gives you some leeway and you don't have to tune them nearly as often.
First step is to bring the points
up on the distributor came lobe.
You see the context way too loose, tighten it up some
two times.
Back it up
a
little loose,
perfect
little white lithium grease
to lubricate the cam.
It does, it
reattach the wires and it's ready to install. Once it's in the engine, start the car, then turn the adjuster to the engine, just starts to misfire, then back it up 100 and 80 degrees and this will put you dwell well with inspect for most applications. Yeah, that's great, dude. If you wanna burn your weekend
me
points
now if you wanna keep the stock look to your engine or if you just don't have room for this big old he I then you might wanna consider a points eliminator kit. A kit like this will take any points type distributor converted over to an electronic one.
There's only a couple of parts that need to be swapped out in this conversion.
Their electoral wheel, it replaces the cam lobes,
the sensor
that replaces the points and the wiring ties everything together. Now, before we take all this old technology out, it's a good idea to understand how an ignition actually works because no matter what kind you have, they all work off the same basic principle
in a points ignition. The timing of the spark is dictated by the opening and closing of the points which is controlled by a cam lobe that spins with a cam shaft
with the points Eliminator kit. The timing of the spark is controlled by a sensor that reads the gaps in the shutter wheel which also spins along with the cam shaft. Since there's no actual contact inside the distributor, there's nothing to wear out.
Another advantage of electronic ignitions is that they don't bounce at high RPM like points do because that can cause a misfire first, get those arcade points out of the way.
Next, pull the vacuum advanced canister, it's gonna go back on, but it's easier to route the wires with it. Out of the way.
Next comes the mounting plate for the sensor, followed by the sensor itself. And don't forget the coating of dielectric grease or it will burn out.
The shutter wheel comes next. It's made in two parts. So you don't have to remove the shaft to put it on top it off with the rotor
reinstall, the vacuum canister and you're ready to hide it all under a factory cab.
And with the cap on, no one will know that it's electronic. Only difference is you won't be having to adjust points every 7 to 10,000 miles and don't forget to replace your coil at the same time. That'll help you get the most out of your upgrade.
But I got a 72 rally sport at home that could really use one of these and we're out of time. So, until next time we're out of here.
Show Full Transcript
Hey guys, welcome to muscle car. We got blue collar buick out of the booth with the first coat of primer laid down and now it's time to get it up on the rack, do some suspension work. Yeah, this thing has come a long way from that underpowered oversized land barge that we started with.
After we plucked our budget beauty from the salvage yard, we replaced the roof, found a buick 455 and rebuilt it with a few upgrades.
Installed a shift kit into the turbo 350 updated the door handles, put the bumpers on a diet and came up with some red tail lights.
And when we first picked up our buick, it actually drove pretty good for a car its age, but after inspecting the suspension,
yeah, I definitely need some bushings. But when we got the thing apart, we're gonna replace all the suspension components. And that's because we want a good solid foundation for future upgrades. It's important to inspect your car suspension, not just to figure out what parts you need,
but for safety, if you've got a project that you're tinkering on during the weekends, but driving it during the week, you need to make sure it's safe.
You can get around to rebuild the front end.
You can check the ball sockets on your center link and your tie rod ends by gently rocking the steering wheel back and forth.
The tie rod looks like it's hanging in there. But the pitman arm is definitely moving more than a center link. So this socket is bad. It might be all right for a little while, but it could get real bad real quick. So if your plan is not to replace it, be sure to keep an eye on it.
If you raise the car up, you can check the ball joints too. Just get a nice long pry bar, stick it in between the frame and your spindle
and check for any kind of movement. Ideally, there shouldn't be any play in there at all. If you just have a little bit of movement, then that means that it needs to be replaced. This is a perfect example. But if you have a lot of movement, then that could mean that it's gonna blow apart and that's a bad thing. Another thing that needs to be checked is the idler arm.
It can have a little bit of play, but that's a little excessive. So it needs to be replaced.
And while you're inspecting your suspension, don't forget to check out your a ambushings if they're cracking and coming apart, especially something this bad, be sure to replace them.
Knocking the front end apart is pretty straightforward. Find a nut and remove it.
The steering linkage comes off all in one piece. We'll explain why later.
I knew it hasn't been off in a while.
The down and dirty, but safe way to get your springs off. If you don't have a spring compressor is to break out the torch. There's a lot of tension in these springs.
So the trick is to release that energy a little bit at a time.
Once they're relaxed, you can cut them out.
I've got the control arms all cleaned up and ready to swap out the bushings. I'm gonna be using a hydraulic press because I got so many of them and I don't wanna be here all day
now. You could do this with a hammer, but you can save yourself a lot of time and frustration by carrying them to your local line of shop and having them do it.
A press is one of the simplest tools in the shop, but also one of the most dangerous with 25 tons of pressure on tap. If something goes wrong, it will already be too late.
Make sure you have the item properly situated. On the base and everything is perfectly aligned. If not, you could have something ricocheting off your nugget before you even realize it
with stubborn bushings. Be sure not to distort the A R or getting the new ones in could be nearly impossible and could even affect your alignment
when pressing the new bushing in. Be sure to reinstall the shaft in the right direction
to be safe. It's a good idea to label them before you pull them out.
Since Tom, he's got the bush and swapped out in his upper arms. I'm going to go ahead and take care of the upper ball joints while he does the lower A arms. They can tell by these rivets. These are still the original ball joints. No big deal. That's what we have grinders for.
You can use a grinder, but I'm using a flat wheel for this. Just be sure not to take any chunks out of the A R.
Once the ground flat, I can push the rivets out with an air chisel,
all new A ball joints. Bolton.
That's how I knew the old ones were the originals.
Well, they go in a whole lot easier than they come out. That's for sure.
I'm gonna go ahead and swap out the rest of these ball joints, put some black paint on them and start putting the front end together on the buick, but don't go anywhere because after the break, we're gonna be taking blue color one step closer to the street
coming up, Rick ties up some loose ends and Tommy packs it in.
Hey, welcome back. We've got the A arms and the spindles reinstalled. We've also upgraded to a set of Detroit Eaton lowering springs that are big block specific and at 100 and 60 bucks a set that's some money well spent because they're gonna give our buick a whole new attitude. Well, now we can go ahead and start assembling our new
fire rods. I want the alignment to be as close as possible. That way we can safely drive it down to the alignment shop when our buick gets back on the road. Now, if I was only replacing one end,
all you'd have to do is count the threads and screw the new one in the match, that'll get you close enough to drive it. But since I'm replacing the entire thing, I'll go ahead and measure the overall length.
This is why we dropped the entire steering linkage off in one piece. Now, it's just a matter of assembling the new parts to match the old,
try to keep the adjustment sleeves centered between the two tie rod ends. This will give the most room for adjustment at the alignment shop
with the tire rods assembled. They can be attached to the center link
and don't forget the cotter pins.
Duh.
Last on is the idler
arm.
I'll cinch it down
in it
and it's ready to get tucked up under the buick's chin.
We're upgrading to E BC brake rotors up front. They're slotted and drilled for better stopping power and they're economical to fit into our budget. We're installing new bearings while we got everything apart, but they've got to be packed. You could use a bearing packer, but I'm gonna show you guys how to do it the old fashioned way
time to grease your palm.
There is some bearing grease that is
the process is really very simple. Just press the bearing cage into your palm until the grease squishes up through the top. Just make sure they're packed solid. The larger bearing goes on the backside of the rotor followed by a new seal. Be careful not to deform it as you tap it in a quick wipe with some grease and we're on to the front
pack some more grease inside the rotor before dropping in the outer bearing.
And we replace the brake lines too because it's pretty hard to tell if these things are bad just by looking at them and always replace them in pairs. That way you don't end up with a weak link in the system.
One more upgrade that will improve the overall performance of the brake system are these E BC brake pads. We're gonna get these installed and button up the rest of the front end. Don't y'all go anywhere. We got a lot more most car coming up
after the break. A rare, stripped down hemi
charger that had the test track buzzard
restore your classic pick up SUV or suburban at shop, classic truck, parts.com. We stock anything and everything for Ford. Chevy GM and Dodge trucks, complete bodies, complete interiors, fuel systems, hard parts, chrome trim accessories and more log on now and save
the ultimate gearhead deal. American muscle cars volume 12 and three, the ultimate muscle car DVD collection only 1995 each or save and buy all three for 4995 log on today at Power Block store.com.
Today's flashback, a 1971 Dodge Charger Super B.
Ever wonder what happened to those test cars you saw in magazines years ago?
Well, a lot of them ended up on the scrap heap but not this one.
It survived. Thanks to one persistent fan who kept bugging his local Dodge dealer until he got the exact car that he saw in the magazine.
It's a 71 Charger super
Vat and was featured as part of the Dodge for gate
in the December 1970 issue of Motor Trend
armed with a 426 hemi
and a super track pack 410 gears and a day in a rear end. This Super Bee was turned into a killer Bee.
Only 22 have got the hemi
option that year.
It would cost you an extra 883 bucks but was well worth it. Pounding out 425 horses at five grand. It could hit 60 in 5.8 seconds a full second faster than the full 46 pack for full on the salt mode. The Ram Charger hood scoop could be triggered a first time option on the car.
It boosted the top speed by about 2.5 miles an hour.
According to original test, 71 was the first and only year the Super B appeared on the Charger platform
since it debuted in 68. It had always been a coronet but Dodge was streamlining its muscle car lines for 71 cornets got saddled with family car duty while Chargers got all the goodies.
The Super B ended up as a budget muscle option right under the RT
for the guy who wanted raw power with
out luxury, you could save about 400 bucks and still get all the performance of an RT.
Third. Gen Chargers had an aggressive new fuselage look with more muscular rear fenders, a split grill and a dramatic sea pillar arch. Super Bees came standard with racing stripes. A swarm of badges and some sweet looking exhaust tips,
rally suspension and poly glass rubber were also no cost extras
inside. It's just plain James bent seat, rally gauges and a column shifter. Original test drive showed it got the best performance when shifting by hand at 5800 RPM.
The car is now in the hands of collector Tim Wen
and the car hasn't changed a bit.
In fact, it's even wearing its original factory paint,
a high impact color called butterscotch that would cost you get this an extra 13 bucks.
The car just runs like it was when it's new, the, the, the, the 426 hemi,
when you, when you put your foot in it, it's instant power. It's almost a scary car to drive. Tim's got a high full of BS with just about every option you can think of from hideaway headlights to a cassette player, complete with a microphone. I don't believe any two chargers are like you took an order pad back then
and you built your car, you individualized your car. Only about 5000 Super Bees were ordered that year though the lowest number in its short lifespan, 1971 would signal the end of an era. Not only was it the last year for the Super Bee, but the
hemi
well,
it said goodbye to
now, don't you buzz
off? There's still more muscle car ahead
up next. Don't know much about muscle car distributors.
Ah, you'll get the point.
You're watching muscle car for a DVD copy of this episode. Just go to Power Block tv.com and order your copy for just 595 plus shipping and handling. Start your own muscle car collection delivered right to your door from the power block,
the
all new power block directory.com, your source for everything. Automotive, find all the parts and brands. Thousands of racetracks from Daytona to Long Beach, plus events, clubs and more. Find the stuff you're looking for. The
all new power block directory.com. Your source for everything. Automotive.
My power block is a 40,000 member community where you can meet new friends or connect with old ones. Share your pictures and videos. Join over 400 groups to get help with project advice. Find your people at my power block.com.
Hey, welcome back to the shop. The car's ignition system is critical to how it runs a key part of that system is the distributor. If your car is a pre 74 it came with the point style distributor instead of the HE I or electronic style that came on all American cars since the mid seventies, HEIS are a common upgrade since they have more accurate spark, higher RPM range and more reliable. But if you're doing an original restoration, you'll probably want a period. Correct points distributor.
Some of you younger crowd out there may have never even seen one of these. If you're used to the user friendly A T I,
it may seem like a lot of trouble. You can't just drop them in and go, you've got to set the points and tune them, but it's really not that hard.
If you're reusing an old distributor, you'll need to check the condition of the points first, remove the rotor. Now you can get to the screws that hold the points in.
When checking points, you wanna look at two areas, the contact should have no corrosion and they shouldn't look burned or pitted.
Also, make sure this plastic tab that actuates points not worn down.
This one pretty good shape.
If the tab is worn, you have to replace the points. But that's no big deal because these things run about 15 bucks. If your only problem is dirty contacts, you can clean them up and reuse them.
You can use a points file but emery cloth or fine grit, sandpaper work too.
Just rub gently until both sides are clean and flat, then reinstall them the same way they came out
whether you're using new or used points, you need to set the gap using a feeler gauge. Most points set in between 18 and 22,000. I like to set mine at a loose 18 tight 19 that way as the points where it gives you some leeway and you don't have to tune them nearly as often.
First step is to bring the points
up on the distributor came lobe.
You see the context way too loose, tighten it up some
two times.
Back it up
a
little loose,
perfect
little white lithium grease
to lubricate the cam.
It does, it
reattach the wires and it's ready to install. Once it's in the engine, start the car, then turn the adjuster to the engine, just starts to misfire, then back it up 100 and 80 degrees and this will put you dwell well with inspect for most applications. Yeah, that's great, dude. If you wanna burn your weekend
me
points
now if you wanna keep the stock look to your engine or if you just don't have room for this big old he I then you might wanna consider a points eliminator kit. A kit like this will take any points type distributor converted over to an electronic one.
There's only a couple of parts that need to be swapped out in this conversion.
Their electoral wheel, it replaces the cam lobes,
the sensor
that replaces the points and the wiring ties everything together. Now, before we take all this old technology out, it's a good idea to understand how an ignition actually works because no matter what kind you have, they all work off the same basic principle
in a points ignition. The timing of the spark is dictated by the opening and closing of the points which is controlled by a cam lobe that spins with a cam shaft
with the points Eliminator kit. The timing of the spark is controlled by a sensor that reads the gaps in the shutter wheel which also spins along with the cam shaft. Since there's no actual contact inside the distributor, there's nothing to wear out.
Another advantage of electronic ignitions is that they don't bounce at high RPM like points do because that can cause a misfire first, get those arcade points out of the way.
Next, pull the vacuum advanced canister, it's gonna go back on, but it's easier to route the wires with it. Out of the way.
Next comes the mounting plate for the sensor, followed by the sensor itself. And don't forget the coating of dielectric grease or it will burn out.
The shutter wheel comes next. It's made in two parts. So you don't have to remove the shaft to put it on top it off with the rotor
reinstall, the vacuum canister and you're ready to hide it all under a factory cab.
And with the cap on, no one will know that it's electronic. Only difference is you won't be having to adjust points every 7 to 10,000 miles and don't forget to replace your coil at the same time. That'll help you get the most out of your upgrade.
But I got a 72 rally sport at home that could really use one of these and we're out of time. So, until next time we're out of here.
