More '73 Buick Century "Blue Collar Buick" Episodes
MuscleCar Builds
Want more content like this?
Join the PowerNation Email NewsletterEpisode Transcript
Today on Muscle Car, we're flipping our lids. Project Blue collar buick gets its top chopped and its channel hacked plus an A MC that failed to make a big splash and a glimpse at a top secret project.
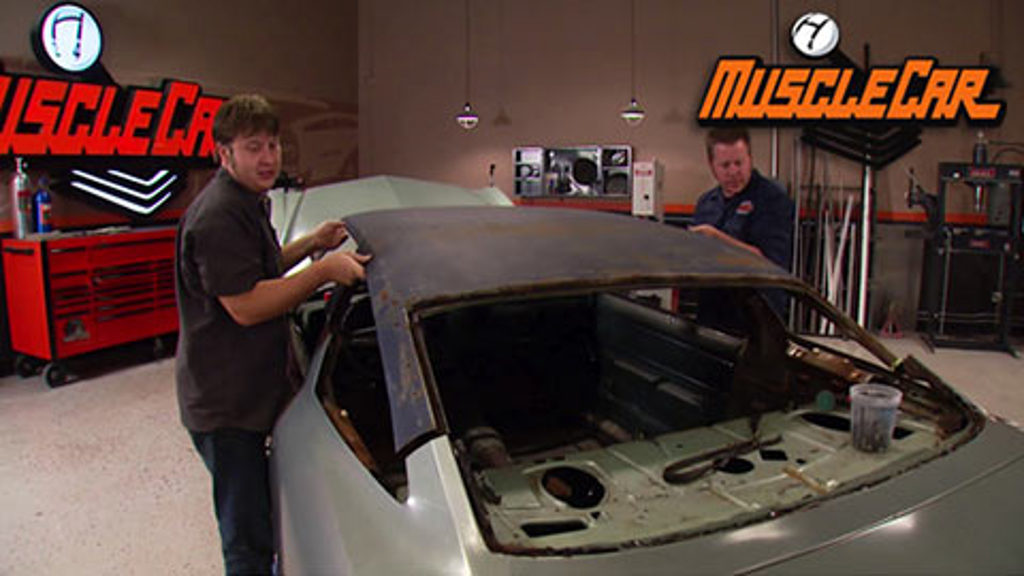
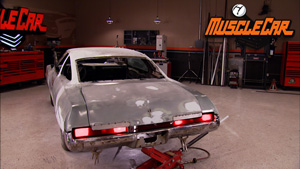
Hey, guys, welcome to Muscle Car. It's time to start ripping into project Blue collar Buick. We're gonna tackle the panel that needs the most work. First. The roof. A
previous owner probably had good intentions when they try to fix this massive rust hole in the roof, but good intentions really don't cut it when it comes to restoring
a car and neither did the fiberglass plastic filler and duct tape they used.
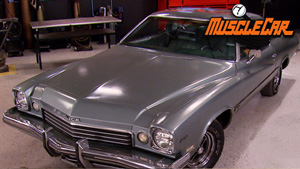
Now we're not just gonna skin this one for one thing. Nobody makes a roof skin for a 1973 buick. And even if they did the rust on this goes way too deep. So we're gonna be replacing the entire roof.
We just need to expose the pillar so we're only pulling the trim we need to for now.
Now this homemade tool here works pretty good.
It doesn't work that good when the molding is glued into place.
This is awesome.
Judging by the three layers of different types of sealant. I'd say this car's been messed with a few times before.
Now, this bench seat is definitely not going back in.
I hate bench seats.
They suck and they're ugly, stupid bench seat
and it's not going to go back in the car.
The windshield isn't cracked. So we're hanging on to it for now.
If our budget allows, we might replace it later, the back glass is going in the keeper pile too.
Ours
all stripped out and ready to get decapitated. But what are we going to replace that roof with? Well, that brings us to today's special guest. 1975 Pontiac Lemon.
It may not look pretty, but it's got the same roof as our 73 buick and it's plenty solid enough. It's something we can work with.
Now, a little research and a couple of phone calls and you should be able to track down a roof for just about any vehicle. Now, the cheapest route is gonna be a self service wrecking yard. So if you chop it off yourself, the price goes down. If you want the yard to slice it off for you, just be real clear where you need this thing cut. We gave 100 and 50 bucks for the roof. We borrowed the whole
to show you guys how it's done. But the rest of it goes back to the parts guy. We got it from now before we break out that saw, we gotta take some measurements because pretty soon here we're gonna have two cars sitting around with the tops cut off. And at that point, it's pretty hard to reference how long these posts are supposed to be. So, step one is measure the height of the roof.
I've measured the damage on the buick to see how much roof we need. I'll transfer those measurements to the lemons and add a little. So we have some metal to work with.
After triple checking our measurements and marks, it's time to break out the saws and have
at it
and try to keep your cuts at an angle that can be easily duplicated because you're going to have to copy them on the other car.
I guess it's a drop top
that's convertible.
We marked the buick earlier when we took the measurement. So it's ready to have its top chop stick around when we come back. We'll be flipping our lids
after the break. The buick comes back together
or does it?
Yeah, it don't fit.
Hey, welcome back. It's a little late to turn back. Now, we got two cars with the tops cut off. Like I said earlier, we trimmed the top a little long so it's gonna be riding a little high. But now it's just a matter of trimming this dude to fit and welding it on.
Yeah, it don't fit
if you plan on keeping the dash and we do you better throw a welding blanket over it or a new dash might chew up a chunk of your budget
and don't go crazy here. Just take a little bit at a time. It's a whole lot easier to take it off than it is to put it back on.
And you can see after I trimmed the front pillar a little bit, we're still way out of alignment here. You can tell by this, this whole roof still needs to come forward. That means we still gotta cut some more out of the front.
Here we go. Now, that's getting better.
You can see here where the lines are coming together pretty nice on this post here. But on the back, you can see where it's still stepped up quite a bit and that tells me that the next step is gonna be trimming this one off.
Now, I need a measurement of 26 inches here and we're already at 26. So I can't lose any more length out of this. But as you can see, it's still sitting a little bit high. Well, what's holding this up is a little bit of metal on that edge. Well, if I trim that off, it's gonna allow that to drop in with this whole top. Relax, we'll be ready to weld it.
These are 26 inches right there. Perfect. Consider it trimmed and fit when welding on the top, we wanna use a procedure called slee
since we're using butt welds. All the pillars need to be reinforced to make them as strong as they were from the factory. So we're adding the small place to all the weld joints.
The sleeves are going on the inside of the post. They'll actually end up stronger than they were from the factory.
Small squares of sheet metal will form the sleeves and some plug wells will hold them in place.
A punch will keep the drill from wandering and make sure the holes are right where you want them.
Once the first leave is welded up. A second one goes on for extra strength.
We're hoping by placing the rear sleeves in the roof section, it should be easier to drop in.
But when you're designing on the fly, you've got to expect some challenges.
Front, first, front, first,
it's not gonna work.
No, let's try just dropping it in the back first.
So if you drop it in the back, let this slide in,
cut these off short or I'll bet we can get this to pop over the top of it.
Just make sure this will drop in. We may have to bend this in a little bit
and we can use a zip screwer and to pull it back out tight.
Can you do that? You're gonna bend that, that post out. No, it's just a wrap around is all it is. It ain't plug whe
do there
is your bull. I'm just holding, holding horns. He's just holding the horns.
I's just cut that off really short
and still not gonna work
because it has to be dropped in
pretty much from where we're at right now.
I think either we need to use this one
and cut one of them off or cut one of them off and use this.
Ok. What we finally came up with for our issue with the front blade
is actually pretty simple. We trimmed off the excess made a relief cut and bend the tabs flush with the top of the post allowing the roof to fall into place. Then using some prior tools, we bent the tabs back up so we can weld them in. So now all we're ready to do is measure this guy out and then burn it in.
This is where all that careful measuring we did earlier pays off 14,
we're good.
We want a slight gap between the two panels here. So the well goes all the way through to the sleeves. It doesn't get much stronger than that.
It's hot.
It's like me smoking.
Once all six pillars are welded solid, we'll grind them off and prep them for body work.
Now, I know replacing an entire roof can be pretty intimidating. But hey, that's why you learn on a $1500 car, not a $15,000 car with a low b
project like this. You can afford to take a few chances. The worst thing you end up doing is costing yourself a little extra time. So don't be afraid to step out of your comfort zone and challenge yourself
up next. We're testing the waters in AM C's First muscle car
restore your classic pick up SUV or suburban at shop, classic truck parts.com. We stock anything and everything for Ford Chevy GM and Dodge trucks, complete bodies, complete interiors, fuel systems, hard parts, chrome trim accessories and more. Log on now and save
the all new power block directory.com. Your source for everything. Automotive, find all the parts and brands. Thousands of racetracks from Daytona to Long Beach, plus events, clubs and more. Find the stuff you're looking for the all new power block directory.com. Your source for everything. Automotive.
Today's flashback. A 1966 A MC Marlin,
I
drive it, I enjoy it.
Um If you ever see my car on a trailer, there's something wrong somewhere.
That's Bill Heitman talking about AM C's first muscle car. You may think the 68 Javelin holds that title but three years before A MC tried reeling in the supercar crowd and ended up with a tale about the one that got away.
The Marlin.
The story begins back in 64 when AM C's head, Honcho George Romney was replaced by Roy Abernathy who was determined to erase the company's family car image.
He imagined a whole lineup of powerful rides that could take on the big three. The Marlin would be the first to test the waters.
It started out as a sporty concept called the Tarpon built on the compact American chassis, a sleek fast back roof turned it into a two plus two with a Mustang and Barracuda in its sights.
Abernathy knew it needed a V8 to take him on. But the engine bay of the American was just too small.
He also wanted to be able to sit in the back seat
and he was over 6 ft tall. So the designer stretched the fast back roof and grafted it onto the mid-sized classic frame, ballooning the car to a three plus three. The classics front end was kept but the rear was all original to impress those cars. You'd soon be passing by
some say it inspired the design of the Chrysler crossfire. 40 years later
when it debuted in 65 A MC sunk millions of dollars into promoting it, but the car failed to make a splash. Things might have been different. Had they stuck with the original concept. Pony cars were the hot thing, not big, old fastbacks and in the end,
they only hooked about 10,000 buyers.
The car's signature look has divided folks since its debut and it's gotten its fair share of insults. In fact, George Romney's own son, Mitt Romney, he was embarrassed to pick up his date. One
Phils driving a 66 which is pretty much a carbon copy of the 65.
All that really changed was the grill and the Rambler badges were tossed to make the car a distinct model
interiors got the same deluxe
treatment as before with two tone upholstery
bucket seats, chrome trim and high end gauges,
you've got four engine choices. But the real fish fryer was a 3 27 4 barrel which could whip out 270 horse and 360 ft pounds of torque throw in dual exhaust attack four speed and it was muscle car material.
Unfortunately, though, the car didn't fare any better in 66 with sales cut in half. It stuck around for one more year and then it and Abernathy were tossed overboard.
Bill is busy these days building a custom Marlin called the MX using models to test out his,
the car is going to be stiffer beefier kind of like a race version,
whether it's a restored original or a custom job. He's making sure that the Marlin name lives on
once people get into it and, and see what it's all about.
Uh, it earns respect
coming up. What do the muscle car guys do for fun? Find out in a rare behind the scenes. Look,
you're watching muscle car for a DVD copy of this episode. Just go to Power Block tv.com and order your copy for just 595 plus shipping and handling. Start your own muscle car collection delivered right to your door from the power block,
restore your classic pickup SUV or suburban at shop, classic truck, parts.com. We stock anything and everything for Ford, Chevy GM and Dodge trucks, complete bodies, complete interiors, fuel systems, hard parts, chrome trim accessories and more log on now and save.
My power block is fueled by you. Join groups, post build pics
and share videos.
You are the star
at
my power block.com.
Hey guys, welcome back and we won the first battle but the war on rust is still raging. And the next battlefield is this rear window channel. Now, if you don't fix this correctly, water is gonna leak through there, get in your trunk and cause more rust. So don't be tempted, take any shortcuts.
The first thing I need to do is get the rest of the window sealer out of the way.
A little trick is to heat up the end of a pride tool and melt it out.
All the clips need to go, then I can attack it with a wire brush to get all the rust and junk out of the way. So I can see how bad it really is.
If this was a small area, I just freehand it. But a patch, this large calls for a template,
I'll make it a little larger than needed. So I have some wiggle room later
and once the templates cut out and transferred to a chunk of steel, it's on to the band saw.
Now, this shape could easily be cut out with a pair of tin snips or an AA
to make the second side of the channel. I've taken a flat piece of steel, formed it to the first piece. Now I'm taking it together.
Now it's time to take out the garbage or chop it out in this case.
After a little trimming, the patch falls right into place. A few tacks and we can move on to the rest of the channel.
There's still one more little spot here that needs to be patched in. But what I'm trying to show you is that you can do this repair using nothing more than a pair of tin snips and a basic welder. I'm going to move on to the back here and show you another way to do a patch using a brake and a shear.
And you could also use tin sniffs, a hammer and a vice for this method. But I'll tell you what, sure and a break. Sure are nice.
I made this piece way longer than I need here, but the rest of it will be used in other places.
Now, shrink or stretcher does exactly what the name implies. It either stretches it or in this case shrinks it. Now this is gonna help you get the radius that you need
to match the original contour this window channel whole lot easier to weld in that way.
Hey, I got a whole lot more holes to patch in this thing. But for this week, we're out of time. So until next time we're out of here.
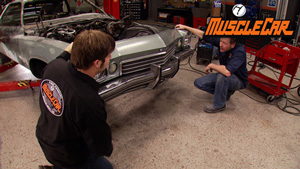
Hey, guys, you know, a lot of cool stuff happens around here when the cameras aren't rolling. I, me and Tommy, we've been messing around with the project hidden out here in the warehouse for the last couple of days. Figured you might dig on scene. What a couple of sick, twisted gearheads do for fun.
I got the show closed out, man. We got brakes yet. Yeah, we got front brakes so that ought to stop us sometimes front brakes is fine. Yeah, I think this is gonna be a pretty good investment of time for the, you know, head turner that we're making
pretty good considering this is the car we use for parts. Yeah, let's make this dude out of here and take it for a tr
sweet.
We like to call it project dead goat.
Now, she may be a little rough around the edges, but at least she ain't pretty.
Is it street legal? Hell no. Is it fun?
Hell, yeah,
it is.
Get it, get it, get
it, get
it
good.
There's no way we can crush this thing. It's way too much fun. I hope that parts guy let me donate him 100 bucks for it. We'll just have to see what we can do. See guys just goes to show you you don't have to have the pockets to have fun with the cars. All you need is a little imagination. An old parts car.
That's it. See y'all.
Show Full Transcript
Hey, guys, welcome to Muscle Car. It's time to start ripping into project Blue collar Buick. We're gonna tackle the panel that needs the most work. First. The roof. A
previous owner probably had good intentions when they try to fix this massive rust hole in the roof, but good intentions really don't cut it when it comes to restoring
a car and neither did the fiberglass plastic filler and duct tape they used.
Now we're not just gonna skin this one for one thing. Nobody makes a roof skin for a 1973 buick. And even if they did the rust on this goes way too deep. So we're gonna be replacing the entire roof.
We just need to expose the pillar so we're only pulling the trim we need to for now.
Now this homemade tool here works pretty good.
It doesn't work that good when the molding is glued into place.
This is awesome.
Judging by the three layers of different types of sealant. I'd say this car's been messed with a few times before.
Now, this bench seat is definitely not going back in.
I hate bench seats.
They suck and they're ugly, stupid bench seat
and it's not going to go back in the car.
The windshield isn't cracked. So we're hanging on to it for now.
If our budget allows, we might replace it later, the back glass is going in the keeper pile too.
Ours
all stripped out and ready to get decapitated. But what are we going to replace that roof with? Well, that brings us to today's special guest. 1975 Pontiac Lemon.
It may not look pretty, but it's got the same roof as our 73 buick and it's plenty solid enough. It's something we can work with.
Now, a little research and a couple of phone calls and you should be able to track down a roof for just about any vehicle. Now, the cheapest route is gonna be a self service wrecking yard. So if you chop it off yourself, the price goes down. If you want the yard to slice it off for you, just be real clear where you need this thing cut. We gave 100 and 50 bucks for the roof. We borrowed the whole
to show you guys how it's done. But the rest of it goes back to the parts guy. We got it from now before we break out that saw, we gotta take some measurements because pretty soon here we're gonna have two cars sitting around with the tops cut off. And at that point, it's pretty hard to reference how long these posts are supposed to be. So, step one is measure the height of the roof.
I've measured the damage on the buick to see how much roof we need. I'll transfer those measurements to the lemons and add a little. So we have some metal to work with.
After triple checking our measurements and marks, it's time to break out the saws and have
at it
and try to keep your cuts at an angle that can be easily duplicated because you're going to have to copy them on the other car.
I guess it's a drop top
that's convertible.
We marked the buick earlier when we took the measurement. So it's ready to have its top chop stick around when we come back. We'll be flipping our lids
after the break. The buick comes back together
or does it?
Yeah, it don't fit.
Hey, welcome back. It's a little late to turn back. Now, we got two cars with the tops cut off. Like I said earlier, we trimmed the top a little long so it's gonna be riding a little high. But now it's just a matter of trimming this dude to fit and welding it on.
Yeah, it don't fit
if you plan on keeping the dash and we do you better throw a welding blanket over it or a new dash might chew up a chunk of your budget
and don't go crazy here. Just take a little bit at a time. It's a whole lot easier to take it off than it is to put it back on.
And you can see after I trimmed the front pillar a little bit, we're still way out of alignment here. You can tell by this, this whole roof still needs to come forward. That means we still gotta cut some more out of the front.
Here we go. Now, that's getting better.
You can see here where the lines are coming together pretty nice on this post here. But on the back, you can see where it's still stepped up quite a bit and that tells me that the next step is gonna be trimming this one off.
Now, I need a measurement of 26 inches here and we're already at 26. So I can't lose any more length out of this. But as you can see, it's still sitting a little bit high. Well, what's holding this up is a little bit of metal on that edge. Well, if I trim that off, it's gonna allow that to drop in with this whole top. Relax, we'll be ready to weld it.
These are 26 inches right there. Perfect. Consider it trimmed and fit when welding on the top, we wanna use a procedure called slee
since we're using butt welds. All the pillars need to be reinforced to make them as strong as they were from the factory. So we're adding the small place to all the weld joints.
The sleeves are going on the inside of the post. They'll actually end up stronger than they were from the factory.
Small squares of sheet metal will form the sleeves and some plug wells will hold them in place.
A punch will keep the drill from wandering and make sure the holes are right where you want them.
Once the first leave is welded up. A second one goes on for extra strength.
We're hoping by placing the rear sleeves in the roof section, it should be easier to drop in.
But when you're designing on the fly, you've got to expect some challenges.
Front, first, front, first,
it's not gonna work.
No, let's try just dropping it in the back first.
So if you drop it in the back, let this slide in,
cut these off short or I'll bet we can get this to pop over the top of it.
Just make sure this will drop in. We may have to bend this in a little bit
and we can use a zip screwer and to pull it back out tight.
Can you do that? You're gonna bend that, that post out. No, it's just a wrap around is all it is. It ain't plug whe
do there
is your bull. I'm just holding, holding horns. He's just holding the horns.
I's just cut that off really short
and still not gonna work
because it has to be dropped in
pretty much from where we're at right now.
I think either we need to use this one
and cut one of them off or cut one of them off and use this.
Ok. What we finally came up with for our issue with the front blade
is actually pretty simple. We trimmed off the excess made a relief cut and bend the tabs flush with the top of the post allowing the roof to fall into place. Then using some prior tools, we bent the tabs back up so we can weld them in. So now all we're ready to do is measure this guy out and then burn it in.
This is where all that careful measuring we did earlier pays off 14,
we're good.
We want a slight gap between the two panels here. So the well goes all the way through to the sleeves. It doesn't get much stronger than that.
It's hot.
It's like me smoking.
Once all six pillars are welded solid, we'll grind them off and prep them for body work.
Now, I know replacing an entire roof can be pretty intimidating. But hey, that's why you learn on a $1500 car, not a $15,000 car with a low b
project like this. You can afford to take a few chances. The worst thing you end up doing is costing yourself a little extra time. So don't be afraid to step out of your comfort zone and challenge yourself
up next. We're testing the waters in AM C's First muscle car
restore your classic pick up SUV or suburban at shop, classic truck parts.com. We stock anything and everything for Ford Chevy GM and Dodge trucks, complete bodies, complete interiors, fuel systems, hard parts, chrome trim accessories and more. Log on now and save
the all new power block directory.com. Your source for everything. Automotive, find all the parts and brands. Thousands of racetracks from Daytona to Long Beach, plus events, clubs and more. Find the stuff you're looking for the all new power block directory.com. Your source for everything. Automotive.
Today's flashback. A 1966 A MC Marlin,
I
drive it, I enjoy it.
Um If you ever see my car on a trailer, there's something wrong somewhere.
That's Bill Heitman talking about AM C's first muscle car. You may think the 68 Javelin holds that title but three years before A MC tried reeling in the supercar crowd and ended up with a tale about the one that got away.
The Marlin.
The story begins back in 64 when AM C's head, Honcho George Romney was replaced by Roy Abernathy who was determined to erase the company's family car image.
He imagined a whole lineup of powerful rides that could take on the big three. The Marlin would be the first to test the waters.
It started out as a sporty concept called the Tarpon built on the compact American chassis, a sleek fast back roof turned it into a two plus two with a Mustang and Barracuda in its sights.
Abernathy knew it needed a V8 to take him on. But the engine bay of the American was just too small.
He also wanted to be able to sit in the back seat
and he was over 6 ft tall. So the designer stretched the fast back roof and grafted it onto the mid-sized classic frame, ballooning the car to a three plus three. The classics front end was kept but the rear was all original to impress those cars. You'd soon be passing by
some say it inspired the design of the Chrysler crossfire. 40 years later
when it debuted in 65 A MC sunk millions of dollars into promoting it, but the car failed to make a splash. Things might have been different. Had they stuck with the original concept. Pony cars were the hot thing, not big, old fastbacks and in the end,
they only hooked about 10,000 buyers.
The car's signature look has divided folks since its debut and it's gotten its fair share of insults. In fact, George Romney's own son, Mitt Romney, he was embarrassed to pick up his date. One
Phils driving a 66 which is pretty much a carbon copy of the 65.
All that really changed was the grill and the Rambler badges were tossed to make the car a distinct model
interiors got the same deluxe
treatment as before with two tone upholstery
bucket seats, chrome trim and high end gauges,
you've got four engine choices. But the real fish fryer was a 3 27 4 barrel which could whip out 270 horse and 360 ft pounds of torque throw in dual exhaust attack four speed and it was muscle car material.
Unfortunately, though, the car didn't fare any better in 66 with sales cut in half. It stuck around for one more year and then it and Abernathy were tossed overboard.
Bill is busy these days building a custom Marlin called the MX using models to test out his,
the car is going to be stiffer beefier kind of like a race version,
whether it's a restored original or a custom job. He's making sure that the Marlin name lives on
once people get into it and, and see what it's all about.
Uh, it earns respect
coming up. What do the muscle car guys do for fun? Find out in a rare behind the scenes. Look,
you're watching muscle car for a DVD copy of this episode. Just go to Power Block tv.com and order your copy for just 595 plus shipping and handling. Start your own muscle car collection delivered right to your door from the power block,
restore your classic pickup SUV or suburban at shop, classic truck, parts.com. We stock anything and everything for Ford, Chevy GM and Dodge trucks, complete bodies, complete interiors, fuel systems, hard parts, chrome trim accessories and more log on now and save.
My power block is fueled by you. Join groups, post build pics
and share videos.
You are the star
at
my power block.com.
Hey guys, welcome back and we won the first battle but the war on rust is still raging. And the next battlefield is this rear window channel. Now, if you don't fix this correctly, water is gonna leak through there, get in your trunk and cause more rust. So don't be tempted, take any shortcuts.
The first thing I need to do is get the rest of the window sealer out of the way.
A little trick is to heat up the end of a pride tool and melt it out.
All the clips need to go, then I can attack it with a wire brush to get all the rust and junk out of the way. So I can see how bad it really is.
If this was a small area, I just freehand it. But a patch, this large calls for a template,
I'll make it a little larger than needed. So I have some wiggle room later
and once the templates cut out and transferred to a chunk of steel, it's on to the band saw.
Now, this shape could easily be cut out with a pair of tin snips or an AA
to make the second side of the channel. I've taken a flat piece of steel, formed it to the first piece. Now I'm taking it together.
Now it's time to take out the garbage or chop it out in this case.
After a little trimming, the patch falls right into place. A few tacks and we can move on to the rest of the channel.
There's still one more little spot here that needs to be patched in. But what I'm trying to show you is that you can do this repair using nothing more than a pair of tin snips and a basic welder. I'm going to move on to the back here and show you another way to do a patch using a brake and a shear.
And you could also use tin sniffs, a hammer and a vice for this method. But I'll tell you what, sure and a break. Sure are nice.
I made this piece way longer than I need here, but the rest of it will be used in other places.
Now, shrink or stretcher does exactly what the name implies. It either stretches it or in this case shrinks it. Now this is gonna help you get the radius that you need
to match the original contour this window channel whole lot easier to weld in that way.
Hey, I got a whole lot more holes to patch in this thing. But for this week, we're out of time. So until next time we're out of here.
Hey, guys, you know, a lot of cool stuff happens around here when the cameras aren't rolling. I, me and Tommy, we've been messing around with the project hidden out here in the warehouse for the last couple of days. Figured you might dig on scene. What a couple of sick, twisted gearheads do for fun.
I got the show closed out, man. We got brakes yet. Yeah, we got front brakes so that ought to stop us sometimes front brakes is fine. Yeah, I think this is gonna be a pretty good investment of time for the, you know, head turner that we're making
pretty good considering this is the car we use for parts. Yeah, let's make this dude out of here and take it for a tr
sweet.
We like to call it project dead goat.
Now, she may be a little rough around the edges, but at least she ain't pretty.
Is it street legal? Hell no. Is it fun?
Hell, yeah,
it is.
Get it, get it, get
it, get
it
good.
There's no way we can crush this thing. It's way too much fun. I hope that parts guy let me donate him 100 bucks for it. We'll just have to see what we can do. See guys just goes to show you you don't have to have the pockets to have fun with the cars. All you need is a little imagination. An old parts car.
That's it. See y'all.
