More Pro Touring OBS Episodes
Carcass Featured Projects
Carcass Builds
Want more content like this?
Join the PowerNation Email NewsletterParts Used In This Episode
Matco Tools
MATCO Tools are the Official Tool Supplier to Carcass
The Industrial Depot
Tools, Hardware, Shop Supplies
Episode Transcript
(Jeremy)>> You're watching Powernation.
(Jimmy)>> Today on Carcass, we make some serious modifications to our Chey's truck bed, making room for the fabricated three link suspension. Then it's time to give it a color change with an o-e style paint scheme. ♪ ♪ [tires squealing] ♪ ♪
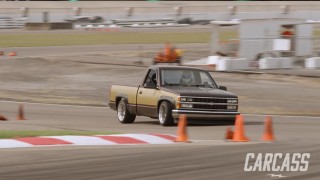
(Jeremy)>> Hey Guys! Welcome to Carcass. Our nineteen eighty-nine Chevy pro touring truck has really made a giant transformation, from the day that it originally rolled into the shop. We got rid of the entire drivetrain and swapped it out with a six liter and a six speed. We bolted on some really trick suspension in the front and Jimmy even designed his own custom rear suspension, to give a little bit of a different look and to make this thing really handle when it's on the course.
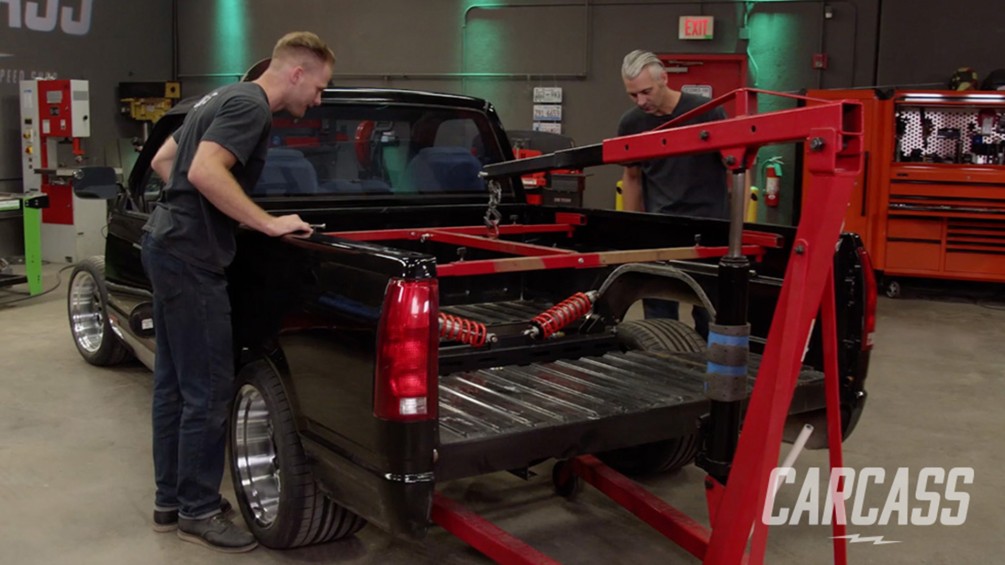
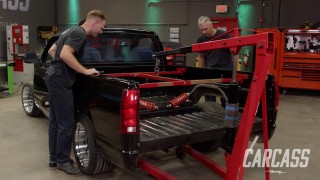
(Jimmy)>> And now we're at the point where we're going to paint the truck and this thing was painted at one point in its' lifetime, but it doesn't look so great anymore. So, we're going to do a color change and lay out some lines for a nice two tone. But to do that, we have to hang everything back on the truck including the bed, and you might be wondering... how are we going to clear the rear suspension? Well, we're just going to take some measurements, lay out some lines and cut a hole. ♪ ♪ All right! Thirty-three should do it. ♪ ♪ Thirty-three.
(Jeremy)>> Thirty-three. Ok! So, that's where we'll cut. We'll cut clear across here. We'll cut clear across the bottom down here. Then we'll come up, cut the inner tubs out of it on both sides. Then we'll just take the whole center section right out of the bed.
(Jimmy)>> Yeah! Let's get some tools. [saw cutting]
(Jeremy)>> We'll start cutting along the pinch weld in the center of the wheel tub. [saw cutting] Then we'll work our way across the top and the bottom. And get everything free. [saw cutting] [metal banging] There you go.
(Jimmy)>> Cool! [disc grinding] We'll clean up the edges with a flat disc and contour the corners. [disc grinding]
(Jeremy)>> You're steering the box. I'm steering the lift. Are we high enough?
(Jimmy)>> Yes!
(Jeremy)>> This is not easy to do. Can't see how straight I am or off or how crooked I am here.
(Jimmy)>> Stop right there.
(Jeremy)>> Stopish?
(Jimmy)>> I think we're... off to the passenger side a little. ♪ ♪
(Jeremy)>> I'll try to go slow. Won't scare you this time. ♪ ♪ Touchdown! What do you think of that?
(Jimmy)>> That's a nice piece is what it is.
(Jeremy)>> Look at that! You can see everything.
(Jimmy)>> That's cool!
(Jeremy)>> Yeah! That looks really cool. You going to get it bolted down now? Want to do a little shimmy shaking here? Come my way a little bit. [drill popping] Alright! That wraps up the back of the bed, now we'll go hang the front of the truck together. ♪ ♪ Up front we'll start with the core support. ♪ ♪ And then we'll hang our fenders. ♪ ♪ [drill popping] Alright! That takes care of the fenders. Now we'll just slap the hood on it. ♪ ♪ [drill popping]
(Jimmy)>> We got the front clip hung on our truck and we got the bed on it. And now's the time to prep for paint. The one thing we've got to do is take these taillights out and as you can see, these are all really faded. And we could try to polish these up, but instead, we went to Rock Auto dot com and picked up some new taillights. Along with some marker lamps and some turn signal lenses. These are all really easy to find because once you go to Rock Autos' web site, you just search by year, make and model and even trim level of your vehicle and you can find any part that you need. And obviously, we're not going to put these on before we paint it, but once we prep and paint, we'll put all these new parts back on it. So, now we just go to get this to the prep booth and get started. ♪ ♪
(Jeremy)>> Coming up... before we can paint... we need to prep it first.
(Jimmy)>> We got the truck in the prep booth and it's now time to start sanding on this thing. We want it to look really good. So, it's going to be a time consuming and tedious process. But as the painter would say it is...
(Jeremy)>> Ninety percent prep.
(Jimmy)>> Yep! So, let's do it.
(Jeremy)>> Before we got this thing down here, we took care of a couple things like we've got this big cutout in the fender now. But don't worry. We had to do that for tire clearance. And we're going to cover that up a little bit later. But to get started right now, we're going get down here and take off this rocker panel and this trim. So, let's get started. ♪ ♪ Use a heat gun to heat up the molding and the rocker covers. The heat releases the glue that hold these on the truck. And then with a little help from a vise grip, so we don't' burn our hands, we'll grab the corner and just start tugging. [heat gun blowing] ♪ ♪ From there, we'll just start working our way down the truck. ♪ ♪ [heat gun blowing] ♪ ♪ So now that we have this chrome trim off and this molding off, it leaves behind this like sticky tape on both sides. So, we have an eraser wheel. This is just hooked to a drill. We'll just spin this up and it pretty much melts this stuff off and takes care of all the residue too. [drill humming] You can pick up these eraser wheels at any local parts store. And they make quick work of a tough job. [drill humming] ♪ ♪ Well, we got all the moldings off and we even took the vent shades off and now we're going to start prepping this thing. We're not going to get too carried away, we're just going to hit it with three-twenty grit on a d-a. [sander humming] We're using three-twenty grit to start. Eventually, we'll work our way up to four hundred and finish sanding the truck with six hundred. [sander humming] Alright! So, as we're sanding, we actually noticed something. Our sandpaper is turning black. Obviously, that's the color of the truck. That means we're working with a single stage paint. Now, if this was a base clear, this would be like a white, chalky film. But it's actually working in our favor, because right now, the single stage is actually working as a little bit of a filler. And that's allowing us to make the truck a little straighter. [sanders humming] To get in the nooks and crannies, we'll put down the d-a, pick up a piece of sandpaper and use good old fashion muscle. ♪ ♪ [sanders humming] ♪ ♪ Now when we're sanding on the truck, what we're actually doing is putting small, sand scratches into the body panels and that's going to allow our new paint to adhere to the truck. Now, what we don't want to do is put deep gouges into the panels. Like if we're leaning over the side, or we're working on the hood. And that can happen if you're wearing a regular belt or a big belt buckle. Well Jimmy and I actually wear a pretty unique belt to prevent that from happening.
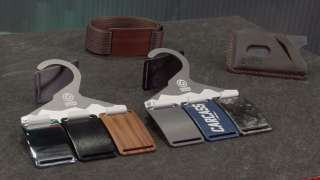
(Jimmy)>> And Grip6 has a solution. The belts themselves, are made of a rigid, high tensional strength nylon weave. And the sleek design of the buckle, sit flat and tight against your body so they don't protrude out and dig into your skin. And because there's now moving parts, there's nothing wear out. And the best part, they're one hundred percent made in America.
(Jeremy)>> And they're got a bunch of different designs of belt and buckles that you guys can choose from. And like Jimmy and I, we've got some special belts that say Carcass on them.
(Jimmy)>> So if you want a belt that will last a lifetime, be sure to check out Grip6.
(Jeremy)>> We got a bunch of stuff that we still got to do to the truck. But the next time you guys see this thing, it's going to be in the booth, getting ready for some color.
(Jimmy)>> With all the prep work done now... it's time to lay down some color.
(Jeremy)>> Alright! Well, our truck is all prepped and masked off. We're in our Mobile Environmental Solutions portable spray booth and we're ready to lay down some color.
(Jimmy)>> But before we do that, we have to lay down some primer sealer and even before that, we have to wipe down the whole truck with wax and grease remover. And then we'll be ready to go. ♪ ♪
(Jeremy)>> Wax and grease remover does exactly what the name implies. It gives us a clean surface, so we can lay down our sealer. ♪ ♪
(Jimmy)>> Once we have the truck wiped down, I'll lay down a couple coats of primer sealer that we got from Summit. [gun spraying]
(Jeremy)>> So now that Jimmy has two coats of our primer sealer down, we're going to lay down some colors. Now, all the stuff we're using came from Summit Racing. And we're going to paint this truck in a two-tone paint style. Now the first color we're laying down is a cappuccino. And we just mix this to the ratios that they called for. We'll throw it in the gun. And then we'll head back into the booth. ♪ ♪ There! Look at that color. ♪ ♪ [gun spraying] For our first coat of color, we're not trying to change the color. All we're doing is stacking up our paint. And after a couple coats, it will end up looking great. [gun spraying] We'll be spraying this, using a fifty percent overlap. Making sure we get the metallics, in the color, to lay down correctly. [gun spraying] We chose this color because we thought it would really compliment the second color of our two-tone. [gun spraying] Alright! So, we have the first color laid down and now it's time to tape off for our two-tone color. We're going to using some eighth inch fine line tape and then we'll mask this thing off, spray the second color, then we'll move on to clear. ♪ ♪ After our fine line is laid down, we'll finish off with some paper. ♪ ♪
(Jimmy)>> For our two-tone color, we're going with Summits' Golf Rush Metallic and then we're actually going to add some of this mocha into it to make it a little bit darker. And how we're going to do that is... put these two quarts in this bigger container. Then, add the mocha in. Because it's better to have extra paint than to go back, try to recreate a color if you run out. And that's the beauty of Summit Racings' paint. Is that they're all compatible so you can mix and match and make your own color. ♪ ♪ I haven't paint too much, so I was a little bit nervous. But anytime I can practice some skills, it's always exciting. Just like Jeremy, I'll lay down three coats of gold and then we'll move on to clear. ♪ ♪ The Mobile Environmental Solutions paint booth is a great fit for any industry. The three hundred sixty-degree ambient lighting, allows you to see the true color you're laying down on your body panels. Their spray booths can be used for painting, window tinting, doing wraps, spraying in bedliners and even in the carpentry industry. Their paint booths are compliant with all environmental and governmental regulations. The have booth sizes ranging from small, standard booths, like the one we're using, and even x-l series that are made for heavy duty commercial uses.
(Jeremy)>> Ok! So, this is the first time you've ever actually laid color right?
(Jimmy)>> Yeah!
(Jeremy)>> Were you scared? How'd it go?
(Jimmy)>> Well with metallics, you got to be careful about laying it on too heavy, because then you'll get streaked metallics. That's what you told me. So, just trying to be as consistent as possible with distance to the panel and my overlap and everything. So, I can get a good finish.
(Jeremy)>> It looked good from the outside. You did a pretty good job.
(Jimmy)>> Technique's there?
(Jeremy)>> Technique's there.
(Jimmy)>> It needs some polishing, but I'll get there.
(Jeremy)>> Yeah! Looks pretty good. [gun spraying] After we let it flash, we'll do a quick unmask, and then we'll start mixing our clear. ♪ ♪ Unlike our Honda rally car, for clear coat, we're doing something a little different in using Summit Racings' Satin Clear to give our o-b-s a modern look. ♪ ♪ We'll lay down two coats of clear, allowing it to flash for five or ten minutes between each coat. [gun spraying] After prepping and painting, we need to do some cleaning. And then get one step closer to finishing this thing up.
(Jimmy)>> We got the truck out of the booth and back into the shop. It's been sitting for a little while and now it's time to hang everything back on it to make it really look complete.
(Jeremy)>> And with the outside all nice and clean, the interior could use a little bit of a spruce up. Because, no matter how when we tape and mask off, when we're in the prep booth and in the paint booth, some stuff just gets inside of here. So, I'm going to grab a couple products and we'll clean up the inside as well.
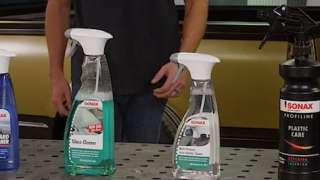
(Jeremy)>> Now Sonax is known for their line of exterior detailing products but they also have a full line of interior cleaning products. What we're going to using to clean our o-b-s is stuff like their dashboard cleaner. We've got their glass cleaner, their multi-purpose interior cleaner & their profiline plastic care. Now, all of this stuff is really going to help to clean and protect the inside of our truck. Where we're going to start is right here with the dashboard and glass cleaner. So, we'll grab a rag and we'll get started. ♪ ♪ To clean our dash, I'll apply our Sonax dashboard cleaner directly to the rag. Then, we'll give it a good wipe down. ♪ ♪ Man! That's disgusting! ♪ ♪ For our door panels, we had to remove these when we originally painted the truck, because we had to get rid of the door handles. And they've got a little bit of body shop dust on them. So, we're going to hit them with the interior cleaning and then we'll come back, follow that up with the plastic care. ♪ ♪ Sonaxs' Profiline plastic care can be used on interior and exterior plastics. Giving it a nice shine and a coat of protection. ♪ ♪
(Jimmy)>> Alright! So Jeremy's got the interior all cleaned up. I put on the bumper and getting the grill on here. Got this stuff from Rock Auto and the truck is really looking nice. ♪ ♪
(Jeremy)>> Oof! Man this truck is looking so slick right now.
(Jimmy)>> Yeah! With the front end on it man, it's looks perfect. And, this is a great example of why you should not paint bumpers and grills. Just leave them chrome.
(Jeremy)>> Right! Cause chrome adds a couple horsepower here and there. So, we got like five horsepower here and there's five horsepower there too right?
(Jimmy)>> Well, it just looks good. Painted stuff looks terrible.
(Jeremy)>> You know, we have a couple more things that we do have to button up. We have to get back underneath the hood. We still do have the mirrors and the door handles to put on. But we're getting really close to getting this thing out on the road. But that pretty much wraps it up for us today. So, if you guys are interested in anything you've seen on the show, why don't you check out powernation t-v dot com.
(Jimmy)>> And be sure to check out our build pages, where you can see the rally civic, project Junk Mail and the o-b-s Chevy.
(Jeremy)>> Alright! Let's bolt on a couple more things?
(Jimmy)>> Yeah! ♪ ♪
(Jimmy)>> Yep! It's looking good man.
(Jeremy)>> It is looking really good here.
Show Full Transcript
(Jimmy)>> Today on Carcass, we make some serious modifications to our Chey's truck bed, making room for the fabricated three link suspension. Then it's time to give it a color change with an o-e style paint scheme. ♪ ♪ [tires squealing] ♪ ♪
(Jeremy)>> Hey Guys! Welcome to Carcass. Our nineteen eighty-nine Chevy pro touring truck has really made a giant transformation, from the day that it originally rolled into the shop. We got rid of the entire drivetrain and swapped it out with a six liter and a six speed. We bolted on some really trick suspension in the front and Jimmy even designed his own custom rear suspension, to give a little bit of a different look and to make this thing really handle when it's on the course.
(Jimmy)>> And now we're at the point where we're going to paint the truck and this thing was painted at one point in its' lifetime, but it doesn't look so great anymore. So, we're going to do a color change and lay out some lines for a nice two tone. But to do that, we have to hang everything back on the truck including the bed, and you might be wondering... how are we going to clear the rear suspension? Well, we're just going to take some measurements, lay out some lines and cut a hole. ♪ ♪ All right! Thirty-three should do it. ♪ ♪ Thirty-three.
(Jeremy)>> Thirty-three. Ok! So, that's where we'll cut. We'll cut clear across here. We'll cut clear across the bottom down here. Then we'll come up, cut the inner tubs out of it on both sides. Then we'll just take the whole center section right out of the bed.
(Jimmy)>> Yeah! Let's get some tools. [saw cutting]
(Jeremy)>> We'll start cutting along the pinch weld in the center of the wheel tub. [saw cutting] Then we'll work our way across the top and the bottom. And get everything free. [saw cutting] [metal banging] There you go.
(Jimmy)>> Cool! [disc grinding] We'll clean up the edges with a flat disc and contour the corners. [disc grinding]
(Jeremy)>> You're steering the box. I'm steering the lift. Are we high enough?
(Jimmy)>> Yes!
(Jeremy)>> This is not easy to do. Can't see how straight I am or off or how crooked I am here.
(Jimmy)>> Stop right there.
(Jeremy)>> Stopish?
(Jimmy)>> I think we're... off to the passenger side a little. ♪ ♪
(Jeremy)>> I'll try to go slow. Won't scare you this time. ♪ ♪ Touchdown! What do you think of that?
(Jimmy)>> That's a nice piece is what it is.
(Jeremy)>> Look at that! You can see everything.
(Jimmy)>> That's cool!
(Jeremy)>> Yeah! That looks really cool. You going to get it bolted down now? Want to do a little shimmy shaking here? Come my way a little bit. [drill popping] Alright! That wraps up the back of the bed, now we'll go hang the front of the truck together. ♪ ♪ Up front we'll start with the core support. ♪ ♪ And then we'll hang our fenders. ♪ ♪ [drill popping] Alright! That takes care of the fenders. Now we'll just slap the hood on it. ♪ ♪ [drill popping]
(Jimmy)>> We got the front clip hung on our truck and we got the bed on it. And now's the time to prep for paint. The one thing we've got to do is take these taillights out and as you can see, these are all really faded. And we could try to polish these up, but instead, we went to Rock Auto dot com and picked up some new taillights. Along with some marker lamps and some turn signal lenses. These are all really easy to find because once you go to Rock Autos' web site, you just search by year, make and model and even trim level of your vehicle and you can find any part that you need. And obviously, we're not going to put these on before we paint it, but once we prep and paint, we'll put all these new parts back on it. So, now we just go to get this to the prep booth and get started. ♪ ♪
(Jeremy)>> Coming up... before we can paint... we need to prep it first.
(Jimmy)>> We got the truck in the prep booth and it's now time to start sanding on this thing. We want it to look really good. So, it's going to be a time consuming and tedious process. But as the painter would say it is...
(Jeremy)>> Ninety percent prep.
(Jimmy)>> Yep! So, let's do it.
(Jeremy)>> Before we got this thing down here, we took care of a couple things like we've got this big cutout in the fender now. But don't worry. We had to do that for tire clearance. And we're going to cover that up a little bit later. But to get started right now, we're going get down here and take off this rocker panel and this trim. So, let's get started. ♪ ♪ Use a heat gun to heat up the molding and the rocker covers. The heat releases the glue that hold these on the truck. And then with a little help from a vise grip, so we don't' burn our hands, we'll grab the corner and just start tugging. [heat gun blowing] ♪ ♪ From there, we'll just start working our way down the truck. ♪ ♪ [heat gun blowing] ♪ ♪ So now that we have this chrome trim off and this molding off, it leaves behind this like sticky tape on both sides. So, we have an eraser wheel. This is just hooked to a drill. We'll just spin this up and it pretty much melts this stuff off and takes care of all the residue too. [drill humming] You can pick up these eraser wheels at any local parts store. And they make quick work of a tough job. [drill humming] ♪ ♪ Well, we got all the moldings off and we even took the vent shades off and now we're going to start prepping this thing. We're not going to get too carried away, we're just going to hit it with three-twenty grit on a d-a. [sander humming] We're using three-twenty grit to start. Eventually, we'll work our way up to four hundred and finish sanding the truck with six hundred. [sander humming] Alright! So, as we're sanding, we actually noticed something. Our sandpaper is turning black. Obviously, that's the color of the truck. That means we're working with a single stage paint. Now, if this was a base clear, this would be like a white, chalky film. But it's actually working in our favor, because right now, the single stage is actually working as a little bit of a filler. And that's allowing us to make the truck a little straighter. [sanders humming] To get in the nooks and crannies, we'll put down the d-a, pick up a piece of sandpaper and use good old fashion muscle. ♪ ♪ [sanders humming] ♪ ♪ Now when we're sanding on the truck, what we're actually doing is putting small, sand scratches into the body panels and that's going to allow our new paint to adhere to the truck. Now, what we don't want to do is put deep gouges into the panels. Like if we're leaning over the side, or we're working on the hood. And that can happen if you're wearing a regular belt or a big belt buckle. Well Jimmy and I actually wear a pretty unique belt to prevent that from happening.
(Jimmy)>> And Grip6 has a solution. The belts themselves, are made of a rigid, high tensional strength nylon weave. And the sleek design of the buckle, sit flat and tight against your body so they don't protrude out and dig into your skin. And because there's now moving parts, there's nothing wear out. And the best part, they're one hundred percent made in America.
(Jeremy)>> And they're got a bunch of different designs of belt and buckles that you guys can choose from. And like Jimmy and I, we've got some special belts that say Carcass on them.
(Jimmy)>> So if you want a belt that will last a lifetime, be sure to check out Grip6.
(Jeremy)>> We got a bunch of stuff that we still got to do to the truck. But the next time you guys see this thing, it's going to be in the booth, getting ready for some color.
(Jimmy)>> With all the prep work done now... it's time to lay down some color.
(Jeremy)>> Alright! Well, our truck is all prepped and masked off. We're in our Mobile Environmental Solutions portable spray booth and we're ready to lay down some color.
(Jimmy)>> But before we do that, we have to lay down some primer sealer and even before that, we have to wipe down the whole truck with wax and grease remover. And then we'll be ready to go. ♪ ♪
(Jeremy)>> Wax and grease remover does exactly what the name implies. It gives us a clean surface, so we can lay down our sealer. ♪ ♪
(Jimmy)>> Once we have the truck wiped down, I'll lay down a couple coats of primer sealer that we got from Summit. [gun spraying]
(Jeremy)>> So now that Jimmy has two coats of our primer sealer down, we're going to lay down some colors. Now, all the stuff we're using came from Summit Racing. And we're going to paint this truck in a two-tone paint style. Now the first color we're laying down is a cappuccino. And we just mix this to the ratios that they called for. We'll throw it in the gun. And then we'll head back into the booth. ♪ ♪ There! Look at that color. ♪ ♪ [gun spraying] For our first coat of color, we're not trying to change the color. All we're doing is stacking up our paint. And after a couple coats, it will end up looking great. [gun spraying] We'll be spraying this, using a fifty percent overlap. Making sure we get the metallics, in the color, to lay down correctly. [gun spraying] We chose this color because we thought it would really compliment the second color of our two-tone. [gun spraying] Alright! So, we have the first color laid down and now it's time to tape off for our two-tone color. We're going to using some eighth inch fine line tape and then we'll mask this thing off, spray the second color, then we'll move on to clear. ♪ ♪ After our fine line is laid down, we'll finish off with some paper. ♪ ♪
(Jimmy)>> For our two-tone color, we're going with Summits' Golf Rush Metallic and then we're actually going to add some of this mocha into it to make it a little bit darker. And how we're going to do that is... put these two quarts in this bigger container. Then, add the mocha in. Because it's better to have extra paint than to go back, try to recreate a color if you run out. And that's the beauty of Summit Racings' paint. Is that they're all compatible so you can mix and match and make your own color. ♪ ♪ I haven't paint too much, so I was a little bit nervous. But anytime I can practice some skills, it's always exciting. Just like Jeremy, I'll lay down three coats of gold and then we'll move on to clear. ♪ ♪ The Mobile Environmental Solutions paint booth is a great fit for any industry. The three hundred sixty-degree ambient lighting, allows you to see the true color you're laying down on your body panels. Their spray booths can be used for painting, window tinting, doing wraps, spraying in bedliners and even in the carpentry industry. Their paint booths are compliant with all environmental and governmental regulations. The have booth sizes ranging from small, standard booths, like the one we're using, and even x-l series that are made for heavy duty commercial uses.
(Jeremy)>> Ok! So, this is the first time you've ever actually laid color right?
(Jimmy)>> Yeah!
(Jeremy)>> Were you scared? How'd it go?
(Jimmy)>> Well with metallics, you got to be careful about laying it on too heavy, because then you'll get streaked metallics. That's what you told me. So, just trying to be as consistent as possible with distance to the panel and my overlap and everything. So, I can get a good finish.
(Jeremy)>> It looked good from the outside. You did a pretty good job.
(Jimmy)>> Technique's there?
(Jeremy)>> Technique's there.
(Jimmy)>> It needs some polishing, but I'll get there.
(Jeremy)>> Yeah! Looks pretty good. [gun spraying] After we let it flash, we'll do a quick unmask, and then we'll start mixing our clear. ♪ ♪ Unlike our Honda rally car, for clear coat, we're doing something a little different in using Summit Racings' Satin Clear to give our o-b-s a modern look. ♪ ♪ We'll lay down two coats of clear, allowing it to flash for five or ten minutes between each coat. [gun spraying] After prepping and painting, we need to do some cleaning. And then get one step closer to finishing this thing up.
(Jimmy)>> We got the truck out of the booth and back into the shop. It's been sitting for a little while and now it's time to hang everything back on it to make it really look complete.
(Jeremy)>> And with the outside all nice and clean, the interior could use a little bit of a spruce up. Because, no matter how when we tape and mask off, when we're in the prep booth and in the paint booth, some stuff just gets inside of here. So, I'm going to grab a couple products and we'll clean up the inside as well.
(Jeremy)>> Now Sonax is known for their line of exterior detailing products but they also have a full line of interior cleaning products. What we're going to using to clean our o-b-s is stuff like their dashboard cleaner. We've got their glass cleaner, their multi-purpose interior cleaner & their profiline plastic care. Now, all of this stuff is really going to help to clean and protect the inside of our truck. Where we're going to start is right here with the dashboard and glass cleaner. So, we'll grab a rag and we'll get started. ♪ ♪ To clean our dash, I'll apply our Sonax dashboard cleaner directly to the rag. Then, we'll give it a good wipe down. ♪ ♪ Man! That's disgusting! ♪ ♪ For our door panels, we had to remove these when we originally painted the truck, because we had to get rid of the door handles. And they've got a little bit of body shop dust on them. So, we're going to hit them with the interior cleaning and then we'll come back, follow that up with the plastic care. ♪ ♪ Sonaxs' Profiline plastic care can be used on interior and exterior plastics. Giving it a nice shine and a coat of protection. ♪ ♪
(Jimmy)>> Alright! So Jeremy's got the interior all cleaned up. I put on the bumper and getting the grill on here. Got this stuff from Rock Auto and the truck is really looking nice. ♪ ♪
(Jeremy)>> Oof! Man this truck is looking so slick right now.
(Jimmy)>> Yeah! With the front end on it man, it's looks perfect. And, this is a great example of why you should not paint bumpers and grills. Just leave them chrome.
(Jeremy)>> Right! Cause chrome adds a couple horsepower here and there. So, we got like five horsepower here and there's five horsepower there too right?
(Jimmy)>> Well, it just looks good. Painted stuff looks terrible.
(Jeremy)>> You know, we have a couple more things that we do have to button up. We have to get back underneath the hood. We still do have the mirrors and the door handles to put on. But we're getting really close to getting this thing out on the road. But that pretty much wraps it up for us today. So, if you guys are interested in anything you've seen on the show, why don't you check out powernation t-v dot com.
(Jimmy)>> And be sure to check out our build pages, where you can see the rally civic, project Junk Mail and the o-b-s Chevy.
(Jeremy)>> Alright! Let's bolt on a couple more things?
(Jimmy)>> Yeah! ♪ ♪
(Jimmy)>> Yep! It's looking good man.
(Jeremy)>> It is looking really good here.
