More Pro Touring OBS Episodes
Carcass Featured Projects
Carcass Builds
Want more content like this?
Join the PowerNation Email NewsletterParts Used In This Episode
American Powertrain Systems
Bell Housing, Pressure Plate, Clutch, Reverse Light Harness
FiTech
Fiteh Retro Fit Fuel Pump Kit
Holley
Fuel Line Adapters
Matco Tools
MATCO Tools are the Official Tool Supplier to Carcass
The Industrial Depot
Tools, Hardware, Shop Supplies
Episode Transcript
(Jeremy)>> You're watching Powernation.
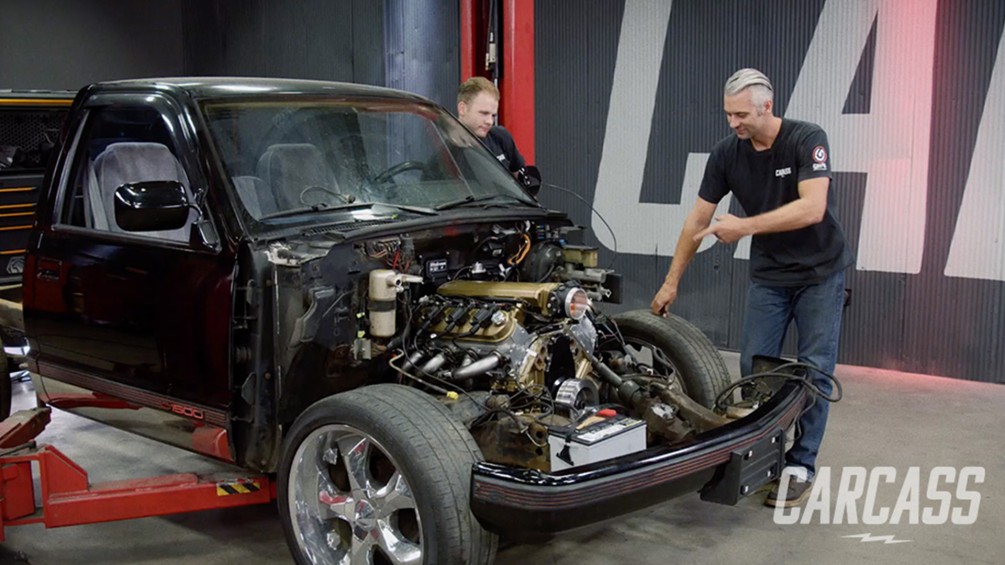
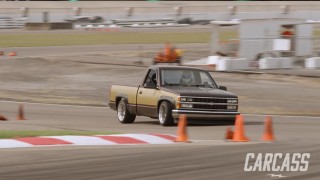
(Jimmy)>> Today on Carcass, we start rebuilding our OBS Chevy into a pro touring powerhouse. We'll drop in a five hundred plus horsepower engine that we got from engine power and slap on a performance six speed to get it around the track.
(Jeremy)>> Plus, we'll add custom exhaust and a fuel system, then fire up our LS. ♪ [Tires Squeeling] ♪
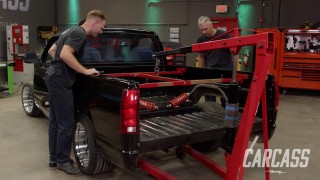
(Jimmy)>> Hey, guys, welcome to Carcass. Jeremy and I have made a lot of headway on our obs Chevy, taking off the entire front clip, removing the bed and removing the stock power train. So now all the fun work can begin.
(Jeremy)>> And that begins right here with this Four hundred and six cubic inch, stroked LS that was built by our sister show down in Engine Power. Now, this thing laid down almost 600 horsepower and made an impressive five hundred and eleven pound feet of torque. But this isn't the only upgrade we're doing to the OBS. We got to add something to the back in this to get all that power down to the ground.
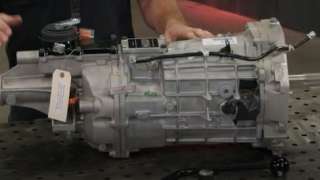
(Jimmy)>> And to do that, we're going with this tremec t fifty six Magnum six speed transmission that was provided for us by American Powertrain, along with this kit that they put together specifically for our truck. And obviously, that includes the transmission itself. Bell housing, pressure plate, clutch, reverse light harness, the throw out bearing and all the hardware needed to do this job right. And the beauty of this kit is that we don't have to cut the floor to put this thing in. We can reuse the stock cross member and this transmission can handle 700 pound feet of torque, which is beyond what our engine makes. So this is really the best option that we have. And we're going to have so much fun putting this thing in and absolutely roasting the tires off the truck. But before we put this thing in, we've got to set the clutch on the engine, so that's where we're going to start.
(Jeremy)>> Well, hey, good timing, man. Get this flywheel on here. Then we'll set the clutch up.
(Jimmy)>> Let me get some degreaser and we'll wipe these things down.
(Jeremy)>> Sounds good.
(Jimmy)>> With The flywheel bolted on with the supplied hardware, we'll torque it down to spec. Then we'll clean the pressure plate and the flywheel to get rid of any oils from the manufacturing process. ♪
(Jimmy)>> When we're done with that, we'll torque down the pressure plate and install the bell housing. ♪ [ratchet humming]
(Jeremy)>> To put our engine in between the frame rails of our truck, we went to Summit Racing and picked up these ICT LS swap mounts specifically to put an LS in an OBS Chevy truck. They also came with new clamshell mounts. Now these just replace the stock ones on the frame rails right now. So that's where we're going to start. ♪ [ratchet humming]
(Jeremy)>> It's a good idea when doing any engine swap, to replace the engine and the transmission mounts. ♪ [ratchet humming] ♪
(Jeremy)>> We're all set up. Let's get this thing in there.
(Jimmy)>> Yeah, let's see it. ♪
(Jeremy)>> Close-ish. Yeah looks pretty center to me.
(Jimmy)>> Yeah start dropping it down. STOP! Holy jeez! Well, yeah, you almost dropped on the oil filter.
(Jeremy)>> Want to make sure you're still on your toes.
(Jimmy)>> No you just got to open the freakin valve slower. Stop doing that.
(Jeremy)>> No, it's a really really touchy. Watch that coil pack on that.
(Jimmy)>> Stop.
(Jeremy)>> Now we got to just kind of weasel I think.
(Jimmy)>> I think you could almost came this way, just a little more but we'll be okay. You drop it down. I'll try to get the...try to tilt it so the bell housing clears. Go down a little more. Oh, maybe not. Here I'll go down. May have to tilt back just a little bit to line it up. ♪
(Jimmy)>> All right, let's get this thing out of here and then we'll get the transmission in it.
(Jeremy)>> Yeah, that sounds good to me. ♪
(Jeremy)>> Well now that we have the LS installed in between the frame rails of the OBS, it's time to install the transmission. But not before we set up the throw out bearing. What we need to do is take a specific measurement to figure out how many shims we need to add to get the right air gap. So I got to take a measurement here on the transmission and I'll also take a measurement up underneath the truck. ♪
(Jeremy)>> That's about one point nine-o, and up under the truck here, we'll measure from the bell housing face to one of the ears of the clutch. We get about two point four, four. ♪ So if we take our two measurements, the first one being two point four four. We subtract our first measurement of one point nine o, that gives us five hundred and forty thousandths. Now we also need to subtract one hundred and fifty thousandths for an air gap, and that gives us three hundred and ninety thousandths. So knowing that, we can take our shims, which are each ninety thousandths a piece, and we'll stack four of them up. That gives us three hundred and sixty thousandths and that's right in the ballpark of where we need to be. ♪
(Jimmy)>> As I said before, we don't have to massage the trans tunnel to get this thing to fit, but we do have to drill a hole in the tunnel to get the shifter up through there and this truck was originally a manual, but the hole in it is way too far forward, so I'm just going to drill this new one, and that'll be it. ♪ [drill humming]
(Jeremy)>> All right Jimmy, you ready for this thing?
(Jimmy)>> Yeah, let's try her out.
(Jeremy)>> You can camp on the lap and get her in position, I'll help.
(Jimmy)>> Yeah, OK. All right, ready? One, two, three. ♪
(Jeremy)>> Alright how's that?
(Jimmy)>> I mean, we've got only not even an eighth of an inch, so I think we can put some bolts in it. I mean, I'm sure the pilot bearing is engaged so. ♪
(Jeremy)>> We're not really pulling this together with these bolts. We're just using them to snug this down.
(Jimmy)>> Yeah, and we've done enough of these that, you know, the dials fit pretty tight so, You can't, it's hard to get it all the way in without...
(Jeremy)>> Just by pushing. Here's the stand. Help you with it and you don't need me. You got this. You don't even need the stand. I'm going to get me a glass of milk and some cookies.
(Jimmy)>> All right. Let me get the cross member.
(Jeremy)>> All right. Let's get this trans mount on first. We should be able to use the stock cross member too. They should all just work together. Perfect.
(Jimmy)>> OK, so now we can put the trans cross member in it, and the nice thing is, is that on these chassis, there's another series of holes, just a little farther back that the cross member will bolt into, so we don't have to do any drilling and this transmission will be mounted. ♪
(Jeremy)>> It started life as a manual, so we're going to return our Chevy back to its roots.
(Jeremy)>> Now that we have the transmission installed in the truck, we got to find a way to control the clutch. Now when this truck originally rolled into the studio here, it had an automatic transmission in it. But after doing a little bit of research, we found out this truck came stock with a five speed. We know that because there's a giant hole in the trans tunnel here and there's a little bit of a clutch bracket left underneath the dash here. So, we went out and shoved it out on the Internet, looking for a clutch pedal set up and we actually had a viewer send us one that fits this truck perfectly. And this will be super simple to install it's just one bolt and then once we get it up underneath here, we'll also replace the clutch master cylinder. ♪ [ratchet clicking]
(Jeremy)>> This is all loose underneath here which is kind of helpful. [ratchet clicking]
(Jeremy)>> Bracket's not tight. At least I'll be able to get this long bolt out of here. What did people do before ratcheting wrenches? These things are just awesome. ♪ We haul this out of here. There you go. Even left a little, spacer thing in it. This should slide in here. Perfect. Now the tough part. Weasel this in here. Get a bolt in it. Gotta hold you. Perfect. Oh I think. ♪ [ratchet clicking] No, that's almost tight. I Gotta find some bolts and bolt this bracket. Back up to the underside of dash here. There, even swaying some of that. Stuff over here. Find some bolts quick. We've got a clutch pedal. ♪ [drill humming] ♪ The traders sitting on part of the wiring harness. There we go, installed. Now outside the truck, we're going to be replacing the clutch master cylinder with a stock replacement piece. We picked this one up from Summit Racing. ♪ [drill humming] All right, so the last thing we'll do on the clutch side of things is connect this hard line, which will go down to the stainless steel line that goes to a hydraulic throw out bearing. And then we are one step closer to firing this thing up. This should work.
(Jimmy)>> Coming up, we tackle the exhaust system, adding some trick components for race day.
(Jeremy)>> All right, so we have the engine and the train sitting up in the OBS truck and now it's time to start moving towards the back. So, we're going to work on some exhaust. We went to Summit Racing and picked up these headers. These are specific to do an LS swap in an OBS truck. They'll fit right in there. So, what we have to do is grab some gaskets, get our headers in. ♪ Weasel these up there. And then we'll let him rest here and we'll go up to put the gasket in and tighten down some bolts. Feed this in here once. ♪ Get a bolt started too. ♪ Super simple to do this and you don't have fenders or inner fenders in your way. ♪ [ratchet clicking]
(Jimmy)>> To go along with our headers, we got this exhaust builder kit from Summit Racing. This is the three inch stainless and polished version. And what you see here is actually only about half of what they include. And on our truck, we're only going to be able to build out about seventy five percent of the exhaust right now, because with the custom rear suspension, we're putting under it. We're not sure where the axle and the other control arms and everything are going to land. So, let's try to figure out how we can get over the transmission cross member. The first piece I have here is just a forty five degree bend. I will end up cutting the header itself just to shorten it a little bit. And then on this bend, I'm just going to cut it here. I'll get another forty five, flip it over so we can just go over the cross member. ♪ [saw cutting] We're using v-bands for the exhaust because they're so easy to use and we'll just tack them in place. ♪ [drill humming] The next piece of our exhaust is this catalytic converter that we got from Flowmaster. This is going to make sure our truck is legal and we can drive it up to the track. This is a slip fit, but we will just tack it on and then keep moving back. ♪ Something really neat that we're going to be adding into our exhaust system is a pair of exhaust cutouts that we got from Patriot Exhaust. What these are going to do for us is when we get to the track or the autocross course, we can open up the cutouts and dump the exhaust in front of the muffler so we can really hear how our engine sings. And this comes in a complete kit, comes with clamps, gaskets, little tailpipe for each one and all the hardware and wiring that you need to make this a very simple installation. And in our case, it's already a custom exhaust set up. So we're going to go ahead and weld it on. And also, because we have a cat, we want to make sure that the motor of the cutout is at least 12 inches away from the cat, so it's not too bothered by the heat. ♪ Just like that. ♪ All right, the last piece of our exhaust for the time being is going to be this Flowmaster muffler. So I said before, we can't get too far ahead of ourselves because we're not sure where the rear suspension and everything is going to land. So for right now, I'm just going to get this thing tacked in. ♪ All right, mufflers, tacked in and everything looks really good. I'm going to keep working on the driver's side, try to get it to come over across the chassis land next to the passenger side exhaust. The next thing Jeremy is going to be doing is work on the wiring, so he can get it fired up.
(Jeremy)>> It's time to light the fires, but first we have to add the fuel.
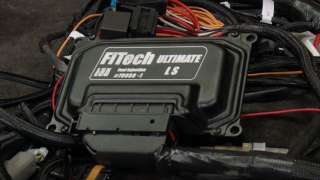
(Jeremy)>> With Jimmy working on the exhaust and pretty much buttoning that up, we get to start the daunting task of getting our engine running inside of our truck. Now, when Engine Power dropped off the engine, it was a running engine because they ran it on the dyno. And the way that they controlled the fuel injection was with a FiTech Ultimate LS ECU and Wiring Harness. This is extremely simple to set up. All you got to do is plug in a couple of wires and then supply power to the ecu. But there's many other pieces that we need to hang on top of our LS just to get it running. so we went to Rock Auto dot com and picked up some of the essentials. We've got stuff like the battery. We've got an alternator, starter, You've even got the AC compressor and the power steering pump. Now, when it came time to pick out the battery, all we did was plug in the year, make and model of our obs and that's how we found this out. But for you guys that are working on project vehicles, you may not have the original powertrain sitting in between your frame rails. And for us, the ls did not come in the obs at all. But we did know the parts and pieces that we needed came from a mid 2000s Chevy Silverado. So we just went on to their website, plug that in, and we came up with some of the essentials. Now, what I have to do is get the battery installed. So we're going to grab this and We'll head over to the truck. So over at the truck, we're actually just going to put the battery here for right now because we're not going to put the front clip on this thing, we have entirely too much work to do and we're going to be working on quite a bit of suspension. So from here, we'll put the starter in it, We'll hook up a couple of cables and then we'll start making some connections. ♪ All right. Up next, we'll toss in the starter. ♪ All right, so I got the starter installed and I even hooked up the positive and the negative battery cable and I ran power up here to the bus bar. So now we're going to move on to the standalone ecu and the wiring for the fuel injection. ♪ That pretty much wraps up the wiring on the EFI side of things. Now, what I have to do is jump into the stock harness because we're going to need things like the crank signal. I got to come up with Key on Hot to run the ecu and I'm going to be looking for the oil pressure wires and for the coolant temp wires. But I'm going to dove into that. But coming up next, we're going to work on the fuel system.
(Jimmy)>> To go along with our Fi Tech fuel injection system, we need a way to get that fuel to the injection system itself. So what I have with me is Fi Tech's retrofit fuel pump kit. And what this does is it takes your carbureted fuel tank and converts it to something you can use with EFI. So take this bronco for example. We have this pick up here that we need to do is drill a hole, drop it in, have a way to seal it to the tank, fuel sock and pump, and you can bring your old car into the modern age. Luckily for us, our truck was already equipped with fuel injection, so we only need the pump. And what I have here is a brand new fuel sending unit that we got from our local parts store and I just threw on the three hundred forty liter power pump that we got from Fi Tech. So all I have to do is take the old fuel sending it out, put this one in and then we're on to the fuel lines. ♪ Take this hose off real quick and get the new sending unit in. ♪ So we've got the sending unit installed and the last thing to do to it here. So we're going to use these two adapters that we got from Holley and these will adapt to the lines coming off the sending unit and allow us to run AN lines all the way to the front. ♪ All right, that wraps it up on the tank side. Jeremy, how you doing up here?
(Jeremy)>> Well, this is the last connection for the plumbing and all the wiring in it. So let's see if this thing fires up.
(Jimmy)>> Let's Try it.
(Jeremy)>> Fuel pump on, hear that. [engine cranking] Hey there you go. And that's pretty easy.
(Jimmy)>> Yeah, well, the guys at Engine Power, they kind of did the hard work and our job was easy.
(Jeremy)>> Right! And it just kind of slid right in here. So I think that pretty much takes care of it for now though. If you guys like anything you've seen on the show today, why don't you go to Power Nation TV.com.
(Jimmy)>> And be sure to check out our project pages where you can see the Honda rally car, the junk mail jeep and more of this obs chevy.
(Jeremy)>> And keep buttoning up a couple of things.
(Jimmy)>> Yeah.
(Jeremy)>> And move on to suspension.
Show Full Transcript
(Jimmy)>> Today on Carcass, we start rebuilding our OBS Chevy into a pro touring powerhouse. We'll drop in a five hundred plus horsepower engine that we got from engine power and slap on a performance six speed to get it around the track.
(Jeremy)>> Plus, we'll add custom exhaust and a fuel system, then fire up our LS. ♪ [Tires Squeeling] ♪
(Jimmy)>> Hey, guys, welcome to Carcass. Jeremy and I have made a lot of headway on our obs Chevy, taking off the entire front clip, removing the bed and removing the stock power train. So now all the fun work can begin.
(Jeremy)>> And that begins right here with this Four hundred and six cubic inch, stroked LS that was built by our sister show down in Engine Power. Now, this thing laid down almost 600 horsepower and made an impressive five hundred and eleven pound feet of torque. But this isn't the only upgrade we're doing to the OBS. We got to add something to the back in this to get all that power down to the ground.
(Jimmy)>> And to do that, we're going with this tremec t fifty six Magnum six speed transmission that was provided for us by American Powertrain, along with this kit that they put together specifically for our truck. And obviously, that includes the transmission itself. Bell housing, pressure plate, clutch, reverse light harness, the throw out bearing and all the hardware needed to do this job right. And the beauty of this kit is that we don't have to cut the floor to put this thing in. We can reuse the stock cross member and this transmission can handle 700 pound feet of torque, which is beyond what our engine makes. So this is really the best option that we have. And we're going to have so much fun putting this thing in and absolutely roasting the tires off the truck. But before we put this thing in, we've got to set the clutch on the engine, so that's where we're going to start.
(Jeremy)>> Well, hey, good timing, man. Get this flywheel on here. Then we'll set the clutch up.
(Jimmy)>> Let me get some degreaser and we'll wipe these things down.
(Jeremy)>> Sounds good.
(Jimmy)>> With The flywheel bolted on with the supplied hardware, we'll torque it down to spec. Then we'll clean the pressure plate and the flywheel to get rid of any oils from the manufacturing process. ♪
(Jimmy)>> When we're done with that, we'll torque down the pressure plate and install the bell housing. ♪ [ratchet humming]
(Jeremy)>> To put our engine in between the frame rails of our truck, we went to Summit Racing and picked up these ICT LS swap mounts specifically to put an LS in an OBS Chevy truck. They also came with new clamshell mounts. Now these just replace the stock ones on the frame rails right now. So that's where we're going to start. ♪ [ratchet humming]
(Jeremy)>> It's a good idea when doing any engine swap, to replace the engine and the transmission mounts. ♪ [ratchet humming] ♪
(Jeremy)>> We're all set up. Let's get this thing in there.
(Jimmy)>> Yeah, let's see it. ♪
(Jeremy)>> Close-ish. Yeah looks pretty center to me.
(Jimmy)>> Yeah start dropping it down. STOP! Holy jeez! Well, yeah, you almost dropped on the oil filter.
(Jeremy)>> Want to make sure you're still on your toes.
(Jimmy)>> No you just got to open the freakin valve slower. Stop doing that.
(Jeremy)>> No, it's a really really touchy. Watch that coil pack on that.
(Jimmy)>> Stop.
(Jeremy)>> Now we got to just kind of weasel I think.
(Jimmy)>> I think you could almost came this way, just a little more but we'll be okay. You drop it down. I'll try to get the...try to tilt it so the bell housing clears. Go down a little more. Oh, maybe not. Here I'll go down. May have to tilt back just a little bit to line it up. ♪
(Jimmy)>> All right, let's get this thing out of here and then we'll get the transmission in it.
(Jeremy)>> Yeah, that sounds good to me. ♪
(Jeremy)>> Well now that we have the LS installed in between the frame rails of the OBS, it's time to install the transmission. But not before we set up the throw out bearing. What we need to do is take a specific measurement to figure out how many shims we need to add to get the right air gap. So I got to take a measurement here on the transmission and I'll also take a measurement up underneath the truck. ♪
(Jeremy)>> That's about one point nine-o, and up under the truck here, we'll measure from the bell housing face to one of the ears of the clutch. We get about two point four, four. ♪ So if we take our two measurements, the first one being two point four four. We subtract our first measurement of one point nine o, that gives us five hundred and forty thousandths. Now we also need to subtract one hundred and fifty thousandths for an air gap, and that gives us three hundred and ninety thousandths. So knowing that, we can take our shims, which are each ninety thousandths a piece, and we'll stack four of them up. That gives us three hundred and sixty thousandths and that's right in the ballpark of where we need to be. ♪
(Jimmy)>> As I said before, we don't have to massage the trans tunnel to get this thing to fit, but we do have to drill a hole in the tunnel to get the shifter up through there and this truck was originally a manual, but the hole in it is way too far forward, so I'm just going to drill this new one, and that'll be it. ♪ [drill humming]
(Jeremy)>> All right Jimmy, you ready for this thing?
(Jimmy)>> Yeah, let's try her out.
(Jeremy)>> You can camp on the lap and get her in position, I'll help.
(Jimmy)>> Yeah, OK. All right, ready? One, two, three. ♪
(Jeremy)>> Alright how's that?
(Jimmy)>> I mean, we've got only not even an eighth of an inch, so I think we can put some bolts in it. I mean, I'm sure the pilot bearing is engaged so. ♪
(Jeremy)>> We're not really pulling this together with these bolts. We're just using them to snug this down.
(Jimmy)>> Yeah, and we've done enough of these that, you know, the dials fit pretty tight so, You can't, it's hard to get it all the way in without...
(Jeremy)>> Just by pushing. Here's the stand. Help you with it and you don't need me. You got this. You don't even need the stand. I'm going to get me a glass of milk and some cookies.
(Jimmy)>> All right. Let me get the cross member.
(Jeremy)>> All right. Let's get this trans mount on first. We should be able to use the stock cross member too. They should all just work together. Perfect.
(Jimmy)>> OK, so now we can put the trans cross member in it, and the nice thing is, is that on these chassis, there's another series of holes, just a little farther back that the cross member will bolt into, so we don't have to do any drilling and this transmission will be mounted. ♪
(Jeremy)>> It started life as a manual, so we're going to return our Chevy back to its roots.
(Jeremy)>> Now that we have the transmission installed in the truck, we got to find a way to control the clutch. Now when this truck originally rolled into the studio here, it had an automatic transmission in it. But after doing a little bit of research, we found out this truck came stock with a five speed. We know that because there's a giant hole in the trans tunnel here and there's a little bit of a clutch bracket left underneath the dash here. So, we went out and shoved it out on the Internet, looking for a clutch pedal set up and we actually had a viewer send us one that fits this truck perfectly. And this will be super simple to install it's just one bolt and then once we get it up underneath here, we'll also replace the clutch master cylinder. ♪ [ratchet clicking]
(Jeremy)>> This is all loose underneath here which is kind of helpful. [ratchet clicking]
(Jeremy)>> Bracket's not tight. At least I'll be able to get this long bolt out of here. What did people do before ratcheting wrenches? These things are just awesome. ♪ We haul this out of here. There you go. Even left a little, spacer thing in it. This should slide in here. Perfect. Now the tough part. Weasel this in here. Get a bolt in it. Gotta hold you. Perfect. Oh I think. ♪ [ratchet clicking] No, that's almost tight. I Gotta find some bolts and bolt this bracket. Back up to the underside of dash here. There, even swaying some of that. Stuff over here. Find some bolts quick. We've got a clutch pedal. ♪ [drill humming] ♪ The traders sitting on part of the wiring harness. There we go, installed. Now outside the truck, we're going to be replacing the clutch master cylinder with a stock replacement piece. We picked this one up from Summit Racing. ♪ [drill humming] All right, so the last thing we'll do on the clutch side of things is connect this hard line, which will go down to the stainless steel line that goes to a hydraulic throw out bearing. And then we are one step closer to firing this thing up. This should work.
(Jimmy)>> Coming up, we tackle the exhaust system, adding some trick components for race day.
(Jeremy)>> All right, so we have the engine and the train sitting up in the OBS truck and now it's time to start moving towards the back. So, we're going to work on some exhaust. We went to Summit Racing and picked up these headers. These are specific to do an LS swap in an OBS truck. They'll fit right in there. So, what we have to do is grab some gaskets, get our headers in. ♪ Weasel these up there. And then we'll let him rest here and we'll go up to put the gasket in and tighten down some bolts. Feed this in here once. ♪ Get a bolt started too. ♪ Super simple to do this and you don't have fenders or inner fenders in your way. ♪ [ratchet clicking]
(Jimmy)>> To go along with our headers, we got this exhaust builder kit from Summit Racing. This is the three inch stainless and polished version. And what you see here is actually only about half of what they include. And on our truck, we're only going to be able to build out about seventy five percent of the exhaust right now, because with the custom rear suspension, we're putting under it. We're not sure where the axle and the other control arms and everything are going to land. So, let's try to figure out how we can get over the transmission cross member. The first piece I have here is just a forty five degree bend. I will end up cutting the header itself just to shorten it a little bit. And then on this bend, I'm just going to cut it here. I'll get another forty five, flip it over so we can just go over the cross member. ♪ [saw cutting] We're using v-bands for the exhaust because they're so easy to use and we'll just tack them in place. ♪ [drill humming] The next piece of our exhaust is this catalytic converter that we got from Flowmaster. This is going to make sure our truck is legal and we can drive it up to the track. This is a slip fit, but we will just tack it on and then keep moving back. ♪ Something really neat that we're going to be adding into our exhaust system is a pair of exhaust cutouts that we got from Patriot Exhaust. What these are going to do for us is when we get to the track or the autocross course, we can open up the cutouts and dump the exhaust in front of the muffler so we can really hear how our engine sings. And this comes in a complete kit, comes with clamps, gaskets, little tailpipe for each one and all the hardware and wiring that you need to make this a very simple installation. And in our case, it's already a custom exhaust set up. So we're going to go ahead and weld it on. And also, because we have a cat, we want to make sure that the motor of the cutout is at least 12 inches away from the cat, so it's not too bothered by the heat. ♪ Just like that. ♪ All right, the last piece of our exhaust for the time being is going to be this Flowmaster muffler. So I said before, we can't get too far ahead of ourselves because we're not sure where the rear suspension and everything is going to land. So for right now, I'm just going to get this thing tacked in. ♪ All right, mufflers, tacked in and everything looks really good. I'm going to keep working on the driver's side, try to get it to come over across the chassis land next to the passenger side exhaust. The next thing Jeremy is going to be doing is work on the wiring, so he can get it fired up.
(Jeremy)>> It's time to light the fires, but first we have to add the fuel.
(Jeremy)>> With Jimmy working on the exhaust and pretty much buttoning that up, we get to start the daunting task of getting our engine running inside of our truck. Now, when Engine Power dropped off the engine, it was a running engine because they ran it on the dyno. And the way that they controlled the fuel injection was with a FiTech Ultimate LS ECU and Wiring Harness. This is extremely simple to set up. All you got to do is plug in a couple of wires and then supply power to the ecu. But there's many other pieces that we need to hang on top of our LS just to get it running. so we went to Rock Auto dot com and picked up some of the essentials. We've got stuff like the battery. We've got an alternator, starter, You've even got the AC compressor and the power steering pump. Now, when it came time to pick out the battery, all we did was plug in the year, make and model of our obs and that's how we found this out. But for you guys that are working on project vehicles, you may not have the original powertrain sitting in between your frame rails. And for us, the ls did not come in the obs at all. But we did know the parts and pieces that we needed came from a mid 2000s Chevy Silverado. So we just went on to their website, plug that in, and we came up with some of the essentials. Now, what I have to do is get the battery installed. So we're going to grab this and We'll head over to the truck. So over at the truck, we're actually just going to put the battery here for right now because we're not going to put the front clip on this thing, we have entirely too much work to do and we're going to be working on quite a bit of suspension. So from here, we'll put the starter in it, We'll hook up a couple of cables and then we'll start making some connections. ♪ All right. Up next, we'll toss in the starter. ♪ All right, so I got the starter installed and I even hooked up the positive and the negative battery cable and I ran power up here to the bus bar. So now we're going to move on to the standalone ecu and the wiring for the fuel injection. ♪ That pretty much wraps up the wiring on the EFI side of things. Now, what I have to do is jump into the stock harness because we're going to need things like the crank signal. I got to come up with Key on Hot to run the ecu and I'm going to be looking for the oil pressure wires and for the coolant temp wires. But I'm going to dove into that. But coming up next, we're going to work on the fuel system.
(Jimmy)>> To go along with our Fi Tech fuel injection system, we need a way to get that fuel to the injection system itself. So what I have with me is Fi Tech's retrofit fuel pump kit. And what this does is it takes your carbureted fuel tank and converts it to something you can use with EFI. So take this bronco for example. We have this pick up here that we need to do is drill a hole, drop it in, have a way to seal it to the tank, fuel sock and pump, and you can bring your old car into the modern age. Luckily for us, our truck was already equipped with fuel injection, so we only need the pump. And what I have here is a brand new fuel sending unit that we got from our local parts store and I just threw on the three hundred forty liter power pump that we got from Fi Tech. So all I have to do is take the old fuel sending it out, put this one in and then we're on to the fuel lines. ♪ Take this hose off real quick and get the new sending unit in. ♪ So we've got the sending unit installed and the last thing to do to it here. So we're going to use these two adapters that we got from Holley and these will adapt to the lines coming off the sending unit and allow us to run AN lines all the way to the front. ♪ All right, that wraps it up on the tank side. Jeremy, how you doing up here?
(Jeremy)>> Well, this is the last connection for the plumbing and all the wiring in it. So let's see if this thing fires up.
(Jimmy)>> Let's Try it.
(Jeremy)>> Fuel pump on, hear that. [engine cranking] Hey there you go. And that's pretty easy.
(Jimmy)>> Yeah, well, the guys at Engine Power, they kind of did the hard work and our job was easy.
(Jeremy)>> Right! And it just kind of slid right in here. So I think that pretty much takes care of it for now though. If you guys like anything you've seen on the show today, why don't you go to Power Nation TV.com.
(Jimmy)>> And be sure to check out our project pages where you can see the Honda rally car, the junk mail jeep and more of this obs chevy.
(Jeremy)>> And keep buttoning up a couple of things.
(Jimmy)>> Yeah.
(Jeremy)>> And move on to suspension.
